
Chapter 3. How You Run Programs
OK, it’s time to start running some code. Now that you have a handle on program execution, you’re finally ready to start some real Python programming. At this point, I’ll assume that you have Python installed on your computer; if not, see the prior chapter and Appendix A for installation and configuration hints.
There are a variety of ways to tell Python to execute the code
you type. This chapter discusses all the program launching techniques in
common use today. Along the way, you’ll learn how to type code
interactively and how to save it in
files to be run with system command lines, icon
clicks, module imports and reloads, exec calls, menu options in GUIs such as IDLE,
and more.
If you just want to find out how to run a Python program quickly, you may be tempted to read the parts of this chapter that pertain only to your platform and move on to Chapter 4. But don’t skip the material on module imports, as that’s essential to understanding Python’s program architecture. I also encourage you to at least skim the sections on IDLE and other IDEs, so you’ll know what tools are available for when you start developing more sophisticated Python programs.
The Interactive Prompt
Perhaps the simplest way to run Python programs is to type them
at Python’s interactive command line, sometimes called the interactive prompt. There are a variety of
ways to start this command line: in an IDE, from a system console, and
so on. Assuming the interpreter is installed as an executable program
on your system, the most platform-neutral way to start an interactive
interpreter session is usually just to type python at your operating system’s prompt,
without any arguments. For example:
% python
Python 3.0.1 (r301:69561, Feb 13 2009, 20:04:18) [MSC v.1500 32 bit (Intel)] ...
Type "help", "copyright", "credits" or "license" for more information.
>>>
Typing the word “python” at your system shell prompt like this begins an interactive Python session; the “%” character at the start of this listing stands for a generic system prompt in this book—it’s not input that you type yourself. The notion of a system shell prompt is generic, but exactly how you access it varies by platform:
On Windows, you can type
pythonin a DOS console window (a.k.a. the Command Prompt, usually found in the Accessories section of the Start→Programs menu) or in the Start→Run... dialog box.On Unix, Linux, and Mac OS X, you might type this command in a shell or terminal window (e.g., in an xterm or console running a shell such as ksh or csh).
Other systems may use similar or platform-specific devices. On handheld devices, for example, you generally click the Python icon in the home or application window to launch an interactive session.
If you have not set your shell’s PATH environment variable to include Python’s
install directory, you may need to replace the word “python” with the
full path to the Python executable on your machine. On Unix, Linux,
and similar, /usr/local/bin/python or /usr/bin/python will often suffice. On
Windows, try typing C:Python30python (for version
3.0):
C:misc> c:python30python
Python 3.0.1 (r301:69561, Feb 13 2009, 20:04:18) [MSC v.1500 32 bit (Intel)] ...
Type "help", "copyright", "credits" or "license" for more information.
>>>
Alternatively, you can run a change-directory command to go to
Python’s install directory before typing “python”—try the cd c:python30 command on Windows, for
example:
C:misc>cd C:Python30C:Python30>pythonPython 3.0.1 (r301:69561, Feb 13 2009, 20:04:18) [MSC v.1500 32 bit (Intel)] ... Type "help", "copyright", "credits" or "license" for more information. >>>
On Windows, besides typing python in a shell window, you can also
begin similar interactive sessions by starting IDLE’s main window
(discussed later) or by selecting the “Python (command line)” menu
option from the Start button menu for Python, as shown in Figure 2-1 back in Chapter 2. Both spawn a Python interactive
prompt with equivalent functionality; typing a shell command isn’t
necessary.
Running Code Interactively
However it’s started, the Python interactive session begins by
printing two lines of informational text (which I’ll omit from most
of this book’s examples to save space), then prompts for input with
>>> when it’s waiting
for you to type a new Python statement or expression. When working
interactively, the results of your code are displayed after the
>>> lines after you
press the Enter key.
For instance, here are the results of two Python print statements (print is really a function call in Python
3.0, but not in 2.6, so the parentheses here are required in 3.0
only):
%python>>>print('Hello world!')Hello world! >>>print(2 ** 8)256
Again, you don’t need to worry about the details of the
print statements shown here yet;
we’ll start digging into syntax in the next chapter. In short, they
print a Python string and an integer, as shown by the output lines
that appear after each >>> input line (2 ** 8 means 2 raised to the power 8 in
Python).
When coding interactively like this, you can type as many Python commands as you like; each is run immediately after it’s entered. Moreover, because the interactive session automatically prints the results of expressions you type, you don’t usually need to say “print” explicitly at this prompt:
>>>lumberjack = 'okay'>>>lumberjack'okay' >>>2 ** 8256 >>> <== Use Ctrl-D (on Unix) or Ctrl-Z (on Windows) to exit %
Here, the first line saves a value by assigning it to a
variable, and the last two lines typed are expressions (lumberjack and 2
** 8)—their results are displayed automatically. To exit
an interactive session like this one and return to your system shell
prompt, type Ctrl-D on Unix-like machines; on MS-DOS and Windows
systems, type Ctrl-Z to exit. In the IDLE GUI discussed later,
either type Ctrl-D or simply close the window.
Now, we didn’t do much in this session’s code—just typed some
Python print and assignment
statements, along with a few expressions, which we’ll study in
detail later. The main thing to notice is that the interpreter
executes the code entered on each line immediately, when the Enter
key is pressed.
For example, when we typed the first
print statement at the >>> prompt, the output (a Python
string) was echoed back right away. There was no need to create a
source-code file, and no need to run the code through a compiler and
linker first, as you’d normally do when using a language such as C
or C++. As you’ll see in later chapters, you can also run multiline
statements at the interactive prompt; such a statement runs
immediately after you’ve entered all of its lines and pressed Enter
twice to add a blank line.
Why the Interactive Prompt?
The interactive prompt runs code and echoes results as you go, but it doesn’t save your code in a file. Although this means you won’t do the bulk of your coding in interactive sessions, the interactive prompt turns out to be a great place to both experiment with the language and test program files on the fly.
Experimenting
Because code is executed immediately, the interactive prompt is a perfect place to experiment with the language and will be used often in this book to demonstrate smaller examples. In fact, this is the first rule of thumb to remember: if you’re ever in doubt about how a piece of Python code works, fire up the interactive command line and try it out to see what happens.
For instance, suppose you’re reading a Python program’s code
and you come across an expression like 'Spam!' * 8 whose meaning you don’t
understand. At this point, you can spend 10 minutes wading through
manuals and books to try to figure out what the code does, or you
can simply run it interactively:
>>> 'Spam!' * 8                                  <== Learning by trying
'Spam!Spam!Spam!Spam!Spam!Spam!Spam!Spam!'
The immediate feedback you receive at the interactive prompt
is often the quickest way to deduce what a piece of code does.
Here, it’s clear that it does string repetition: in Python
* means multiply for numbers,
but repeat for strings—it’s like concatenating a string to itself
repeatedly (more on strings in Chapter 4).
Chances are good that you won’t break anything by experimenting this way—at least, not yet. To do real damage, like deleting files and running shell commands, you must really try, by importing modules explicitly (you also need to know more about Python’s system interfaces in general before you will become that dangerous!). Straight Python code is almost always safe to run.
For instance, watch what happens when you make a mistake at the interactive prompt:
>>> X                                            <== Making mistakes
Traceback (most recent call last):
  File "<stdin>", line 1, in <module>
NameError: name 'X' is not defined
In Python, using a variable before it has been assigned a value is always an error (otherwise, if names were filled in with defaults, some errors might go undetected). We’ll learn more about that later; the important point here is that you don’t crash Python or your computer when you make a mistake this way. Instead, you get a meaningful error message pointing out the mistake and the line of code that made it, and you can continue on in your session or script. In fact, once you get comfortable with Python, its error messages may often provide as much debugging support as you’ll need (you’ll read more on debugging in the sidebar Debugging Python Code).
Testing
Besides serving as a tool for experimenting while you’re learning the language, the interactive interpreter is also an ideal place to test code you’ve written in files. You can import your module files interactively and run tests on the tools they define by typing calls at the interactive prompt.
For instance, the following tests a function in a precoded module that ships with Python in its standard library (it prints the name of the directory you’re currently working in), but you can do the same once you start writing module files of your own:
>>>import os>>>os.getcwd()<== Testing on the fly 'c:\Python30'
More generally, the interactive prompt is a place to test program components, regardless of their source—you can import and test functions and classes in your Python files, type calls to linked-in C functions, exercise Java classes under Jython, and more. Partly because of its interactive nature, Python supports an experimental and exploratory programming style you’ll find convenient when getting started.
Using the Interactive Prompt
Although the interactive prompt is simple to use, there are a few tips that beginners should keep in mind. I’m including lists of common mistakes like this in this chapter for reference, but they might also spare you from a few headaches if you read them up front:
Type Python commands only. First of all, remember that you can only type Python code at the Python prompt, not system commands. There are ways to run system commands from within Python code (e.g., with
os.system), but they are not as direct as simply typing the commands themselves.printstatements are required only in files. Because the interactive interpreter automatically prints the results of expressions, you do not need to type completeprintstatements interactively. This is a nice feature, but it tends to confuse users when they move on to writing code in files: within a code file, you must useprintstatements to see your output because expression results are not automatically echoed. Remember, you must sayprintin files, but not interactively.Don’t indent at the interactive prompt (yet). When typing Python programs, either interactively or into a text file, be sure to start all your unnested statements in column 1 (that is, all the way to the left). If you don’t, Python may print a “SyntaxError” message, because blank space to the left of your code is taken to be indentation that groups nested statements. Until Chapter 10, all statements you write will be unnested, so this includes everything for now. This seems to be a recurring confusion in introductory Python classes. Remember, a leading space generates an error message.
Watch out for prompt changes for compound statements. We won’t meet compound (multiline) statements until Chapter 4, and not in earnest until Chapter 10, but as a preview, you should know that when typing lines 2 and beyond of a compound statement interactively, the prompt may change. In the simple shell window interface, the interactive prompt changes to
...instead of>>>for lines 2 and beyond; in the IDLE interface, lines after the first are automatically indented.You’ll see why this matters in Chapter 10. For now, if you happen to come across a
...prompt or a blank line when entering your code, it probably means that you’ve somehow confused interactive Python into thinking you’re typing a multiline statement. Try hitting the Enter key or a Ctrl-C combination to get back to the main prompt. The>>>and...prompt strings can also be changed (they are available in the built-in modulesys), but I’ll assume they have not been in the book’s example listings.Terminate compound statements at the interactive prompt with a blank line. At the interactive prompt, inserting a blank line (by hitting the Enter key at the start of a line) is necessary to tell interactive Python that you’re done typing the multiline statement. That is, you must press Enter twice to make a compound statement run. By contrast, blank lines are not required in files and are simply ignored if present. If you don’t press Enter twice at the end of a compound statement when working interactively, you’ll appear to be stuck in a limbo state, because the interactive interpreter will do nothing at all—it’s waiting for you to press Enter again!
The interactive prompt runs one statement at a time. At the interactive prompt, you must run one statement to completion before typing another. This is natural for simple statements, because pressing the Enter key runs the statement entered. For compound statements, though, remember that you must submit a blank line to terminate the statement and make it run before you can type the next statement.
Entering multiline statements
At the risk of repeating myself, I received emails from readers who’d gotten burned by the last two points as I was updating this chapter, so it probably merits emphasis. I’ll introduce multiline (a.k.a. compound) statements in the next chapter, and we’ll explore their syntax more formally later in this book. Because their behavior differs slightly in files and at the interactive prompt, though, two cautions are in order here.
First, be sure to terminate multiline compound statements
like for loops and if tests at the interactive prompt with
a blank line. You must press the Enter key
twice, to terminate the whole multiline statement and
then make it run. For example (pun not intended...):
>>>for x in 'spam':...print(x)<== Press Enter twice here to make this loop run ...
You don’t need the blank line after compound statements in a script file, though; this is required only at the interactive prompt. In a file, blank lines are not required and are simply ignored when present; at the interactive prompt, they terminate multiline statements.
Also bear in mind that the interactive prompt runs just one statement at a time: you must press Enter twice to run a loop or other multiline statement before you can type the next statement:
>>>for x in 'spam':...print(x)<== Need to press Enter twice before a new statement ...print('done')File "<stdin>", line 3 print('done') ^ SyntaxError: invalid syntax
This means you can’t cut and paste multiple lines of code into the interactive prompt, unless the code includes blank lines after each compound statement. Such code is better run in a file—the next section’s topic.
System Command Lines and Files
Although the interactive prompt is great for experimenting and testing, it has one big disadvantage: programs you type there go away as soon as the Python interpreter executes them. Because the code you type interactively is never stored in a file, you can’t run it again without retyping it from scratch. Cut-and-paste and command recall can help some here, but not much, especially when you start writing larger programs. To cut and paste code from an interactive session, you would have to edit out Python prompts, program outputs, and so on—not exactly a modern software development methodology!
To save programs permanently, you need to write your code in files, which are usually known as modules. Modules are simply text files containing Python statements. Once coded, you can ask the Python interpreter to execute the statements in such a file any number of times, and in a variety of ways—by system command lines, by file icon clicks, by options in the IDLE user interface, and more. Regardless of how it is run, Python executes all the code in a module file from top to bottom each time you run the file.
Terminology in this domain can vary somewhat. For instance, module files are often referred to as programs in Python—that is, a program is considered to be a series of precoded statements stored in a file for repeated execution. Module files that are run directly are also sometimes called scripts—an informal term usually meaning a top-level program file. Some reserve the term “module” for a file imported from another file. (More on the meaning of “top-level” and imports in a few moments.)
Whatever you call them, the next few sections explore ways to
run code typed into module files. In this section, you’ll learn how to
run files in the most basic way: by listing their names in a python command line entered at your
computer’s system prompt. Though it might seem primitive to some, for
many programmers a system shell command-line window, together with a
text editor window, constitutes as much of an integrated development
environment as they will ever need.
A First Script
Let’s get started. Open your favorite text editor (e.g., vi, Notepad, or the IDLE editor), and type the following statements into a new text file named script1.py:
# A first Python script
import sys                  # Load a library module
print(sys.platform)
print(2 ** 100)             # Raise 2 to a power
x = 'Spam!'
print(x * 8)                # String repetition
This file is our first official Python script (not counting the two-liner in Chapter 2). You shouldn’t worry too much about this file’s code, but as a brief description, this file:
Imports a Python module (libraries of additional tools), to fetch the name of the platform
Runs three
printfunction calls, to display the script’s resultsUses a variable named
x, created when it’s assigned, to hold onto a string objectApplies various object operations that we’ll begin studying in the next chapter
The sys.platform here is
just a string that identifies the kind of computer you’re working
on; it lives in a standard Python module called sys, which you must import to load (again,
more on imports later).
For color, I’ve also added some
formal Python comments here—the text after the # characters.
Comments can show up on lines by themselves, or to the
right of code on a line. The text after a # is simply ignored as a human-readable
comment and is not considered part of the statement’s syntax. If
you’re copying this code, you can ignore the comments as well. In
this book, we usually use a different formatting style to make
comments more visually distinctive, but they’ll appear as normal
text in your code.
Again, don’t focus on the syntax of the code in this file for now; we’ll learn about all of it later. The main point to notice is that you’ve typed this code into a file, rather than at the interactive prompt. In the process, you’ve coded a fully functional Python script.
Notice that the module file is called script1.py. As for all top-level files, it could also be called simply script, but files of code you want to import into a client have to end with a .py suffix. We’ll study imports later in this chapter. Because you may want to import them in the future, it’s a good idea to use .py suffixes for most Python files that you code. Also, some text editors detect Python files by their .py suffix; if the suffix is not present, you may not get features like syntax colorization and automatic indentation.
Running Files with Command Lines
Once you’ve saved this text file, you can ask Python to run it by listing its full
filename as the first argument to a python command, typed at the system shell
prompt:
% python script1.py
win32
1267650600228229401496703205376
Spam!Spam!Spam!Spam!Spam!Spam!Spam!Spam!
Again, you can type such a system shell command in whatever
your system provides for command-line entry—a Windows Command Prompt
window, an xterm window, or similar. Remember to replace “python”
with a full directory path, as before, if your PATH setting is not configured.
If all works as planned, this shell command makes Python run
the code in this file line by line, and you will see the output of
the script’s three print
statements—the name of the underlying platform, 2 raised to the
power 100, and the result of the same string repetition expression
we saw earlier (again, more on the last two of these in Chapter 4).
If all didn’t work as planned, you’ll get an error message—make sure you’ve entered the code in your file exactly as shown, and try again. We’ll talk about debugging options in the sidebar Debugging Python Code, but at this point in the book your best bet is probably rote imitation.
Because this scheme uses shell command lines to start Python programs, all the usual shell syntax applies. For instance, you can route the output of a Python script to a file to save it for later use or inspection by using special shell syntax:
% python script1.py > saveit.txtIn this case, the three output lines shown in the prior run are stored in the file saveit.txt instead of being printed. This is generally known as stream redirection; it works for input and output text and is available on Windows and Unix-like systems. It also has little to do with Python (Python simply supports it), so we will skip further details on shell redirection syntax here.
If you are working on a Windows platform, this example works the same, but the system prompt is normally different:
C:Python30> python script1.py
win32
1267650600228229401496703205376
Spam!Spam!Spam!Spam!Spam!Spam!Spam!Spam!
As usual, be sure to type the full path to Python if you
haven’t set your PATH environment
variable to include this path or run a change-directory command to
go to the path:
D:	emp> C:python30python script1.py
win32
1267650600228229401496703205376
Spam!Spam!Spam!Spam!Spam!Spam!Spam!Spam!
On all recent versions of Windows, you can also type just the name of your script, and omit the name of Python itself. Because newer Windows systems use the Windows Registry to find a program with which to run a file, you don’t need to name “python” on the command line explicitly to run a .py file. The prior command, for example, could be simplified to this on most Windows machines:
D: emp> script1.pyFinally, remember to give the full path to your script file if it lives in a different directory from the one in which you are working. For example, the following system command line, run from D:other, assumes Python is in your system path but runs a file located elsewhere:
D:other> python c:codeotherscript.pyIf your PATH doesn’t
include Python’s directory, and neither Python nor your script file
is in the directory you’re working in, use full paths for
both:
D:other> C:Python30python c:codeotherscript.pyUsing Command Lines and Files
Running program files from system command lines is also a fairly straightforward launch option, especially if you are familiar with command lines in general from prior work. For newcomers, though, here are a few pointers about common beginner traps that might help you avoid some frustration:
Beware of automatic extensions on Windows. If you use the Notepad program to code program files on Windows, be careful to pick the type All Files when it comes time to save your file, and give the file a .py suffix explicitly. Otherwise, Notepad will save your file with a .txt extension (e.g., as script1.py.txt), making it difficult to run in some launching schemes.
Worse, Windows hides file extensions by default, so unless you have changed your view options you may not even notice that you’ve coded a text file and not a Python file. The file’s icon may give this away—if it doesn’t have a snake on it, you may have trouble. Uncolored code in IDLE and files that open to edit instead of run when clicked are other symptoms of this problem.
Microsoft Word similarly adds a .doc extension by default; much worse, it adds formatting characters that are not legal Python syntax. As a rule of thumb, always pick All Files when saving under Windows, or use a more programmer-friendly text editor such as IDLE. IDLE does not even add a .py suffix automatically—a feature programmers tend to like, but users do not.
Use file extensions and directory paths at system prompts, but not for imports. Don’t forget to type the full name of your file in system command lines—that is, use
python
              script1.py
rather thanpython script1. By contrast, Python’simportstatements, which we’ll meet later in this chapter, omit both the .py file suffix and the directory path (e.g.,import script1). This may seem trivial, but confusing these two is a common mistake.At the system prompt, you are in a system shell, not Python, so Python’s module file search rules do not apply. Because of that, you must include both the .py extension and, if necessary, the full directory path leading to the file you wish to run. For instance, to run a file that resides in a different directory from the one in which you are working, you would typically list its full path (e.g.,
python d: estsspam.py). Within Python code, however, you can just sayimport spamand rely on the Python module search path to locate your file, as described later.Use
printstatements in files. Yes, we’ve already been over this, but it is such a common mistake that it’s worth repeating at least once here. Unlike in interactive coding, you generally must useprintstatements to see output from program files. If you don’t see any output, make sure you’ve said “print” in your file. Again, though,printstatements are not required in an interactive session, since Python automatically echoes expression results;prints don’t hurt here, but are superfluous extra typing.
Unix Executable Scripts (#!)
If you are going to use Python on a Unix, Linux, or Unix-like system, you can also turn files of Python code into executable programs, much as you would for programs coded in a shell language such as csh or ksh. Such files are usually called executable scripts. In simple terms, Unix-style executable scripts are just normal text files containing Python statements, but with two special properties:
Their first line is special. Scripts usually start with a line that begins with the characters
#!(often called “hash bang”), followed by the path to the Python interpreter on your machine.They usually have executable privileges. Script files are usually marked as executable to tell the operating system that they may be run as top-level programs. On Unix systems, a command such as
chmod +xfile.pyusually does the trick.
Let’s look at an example for Unix-like systems. Use your text editor again to create a file of Python code called brian:
#!/usr/local/bin/python
print('The Bright Side ' + 'of Life...')        # + means concatenate for strings
The special line at the top of the file tells the system where
the Python interpreter lives. Technically, the first line is a
Python comment. As mentioned earlier, all comments in Python
programs start with a # and span
to the end of the line; they are a place to insert extra information
for human readers of your code. But when a comment such as the first
line in this file appears, it’s special because the operating system
uses it to find an interpreter for running the program code in the
rest of the file.
Also, note that this file is called simply brian, without the .py suffix used for the module file
earlier. Adding a .py to the
name wouldn’t hurt (and might help you remember that this is a
Python program file), but because you don’t plan on letting other
modules import the code in this file, the name of the file is
irrelevant. If you give the file executable privileges with a
chmod +x brian shell command, you
can run it from the operating system shell as though it were a
binary program:
% brian
The Bright Side of Life...
A note for Windows users: the method described here is a Unix
trick, and it may not work on your platform. Not to worry; just use
the basic command-line technique explored earlier. List the file’s
name on an explicit python
command line:[5]
C:misc> python brian
The Bright Side of Life...
In this case, you don’t need the special #! comment at the top (although Python
just ignores it if it’s present), and the file doesn’t need to be
given executable privileges. In fact, if you want to run files
portably between Unix and Microsoft Windows, your life will probably
be simpler if you always use the basic command-line approach, not
Unix-style scripts, to launch programs.
Clicking File Icons
On Windows, the Registry makes opening files with icon clicks easy. Python automatically registers itself to be the program that opens Python program files when they are clicked. Because of that, it is possible to launch the Python programs you write by simply clicking (or double-clicking) on their file icons with your mouse cursor.
On non-Windows systems, you will probably be able to perform a
similar trick, but the icons, file explorer, navigation schemes, and
more may differ slightly. On some Unix systems, for instance, you may
need to register the .py
extension with your file explorer GUI, make your script executable
using the #! trick discussed in the
previous section, or associate the file MIME type with an application
or command by editing files, installing programs, or using other
tools. See your file explorer’s documentation for more details if
clicks do not work correctly right off the bat.
Clicking Icons on Windows
To illustrate, let’s keep using the script we wrote earlier, script1.py, repeated here to minimize page flipping:
# A first Python script
import sys                  # Load a library module
print(sys.platform)
print(2 ** 100)             # Raise 2 to a power
x = 'Spam!'
print(x * 8)                # String repetition
As we’ve seen, you can always run this file from a system command line:
C:misc> c:python30python script1.py
win32
1267650600228229401496703205376
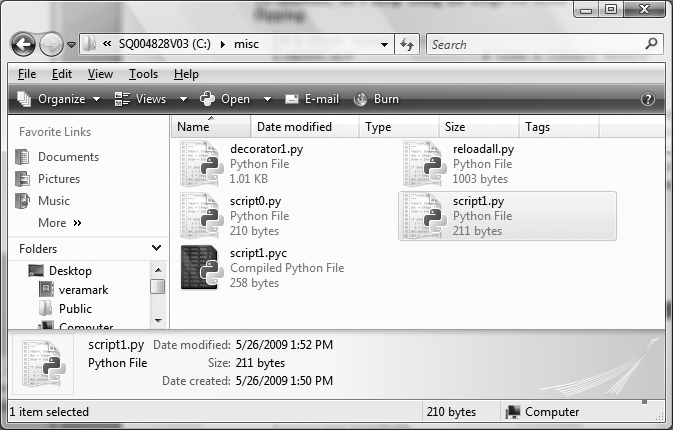
Spam!Spam!Spam!Spam!Spam!Spam!Spam!Spam!However, icon clicks allow you to run the file without any typing at all. If you find this file’s icon—for instance, by selecting Computer (or My Computer in XP) in your Start menu and working your way down on the C drive on Windows—you will get the file explorer picture captured in Figure 3-1 (Windows Vista is being used here). Python source files show up with white backgrounds on Windows, and byte code files show up with black backgrounds. You will normally want to click (or otherwise run) the source code file, in order to pick up your most recent changes. To launch the file here, simply click on the icon for script1.py.
The input Trick
Unfortunately, on Windows, the result of clicking on a file icon may not be incredibly satisfying. In fact, as it is, this example script generates a perplexing “flash” when clicked—not exactly the sort of feedback that budding Python programmers usually hope for! This is not a bug, but has to do with the way the Windows version of Python handles printed output.
By default, Python generates a pop-up black DOS console window to serve as a clicked file’s input and output. If a script just prints and exits, well, it just prints and exits—the console window appears, and text is printed there, but the console window closes and disappears on program exit. Unless you are very fast, or your machine is very slow, you won’t get to see your output at all. Although this is normal behavior, it’s probably not what you had in mind.
Luckily, it’s easy to work around this. If you need your
script’s output to stick around when you launch it with an icon
click, simply put a call to the built-in input function at the very bottom of the
script (raw_input in 2.6: see the
note ahead). For example:
# A first Python script
import sys                  # Load a library module
print(sys.platform)
print(2 ** 100)             # Raise 2 to a power
x = 'Spam!'
print(x * 8)                # String repetition
input()                     # <== ADDED
In general, input reads the
next line of standard input, waiting if there is none yet available.
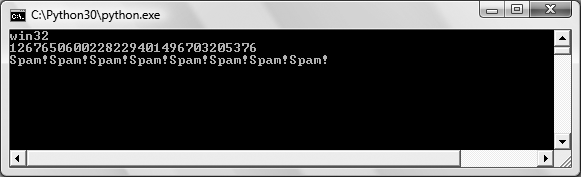
The net effect in this context will be to pause the script, thereby
keeping the output window shown in Figure 3-2 open until you
press the Enter key.
Now that I’ve shown you this trick, keep in mind that it is usually only required for Windows, and then only if your script prints text and exits and only if you will launch the script by clicking its file icon. You should add this call to the bottom of your top-level files if and only if all of these three conditions apply. There is no reason to add this call in any other contexts (unless you’re unreasonably fond of pressing your computer’s Enter key!).[6] That may sound obvious, but it’s another common mistake in live classes.
Before we move ahead, note that the input call applied here is the input
counterpart of using the print
statement for outputs. It is the simplest way to read user input,
and it is more general than this example implies. For instance,
input:
Optionally accepts a string that will be printed as a prompt (e.g.,
input('Press Enter to exit'))Returns to your script a line of text read as a string (e.g.,
nextinput = input())Supports input stream redirections at the system shell level (e.g.,
python spam.py <
              input.txt
), just as theprintstatement does for output
We’ll use input in more
advanced ways later in this text; for instance, Chapter 10 will apply it in an
interactive loop.
Note
Version skew note: If you are working
in Python 2.6 or earlier, use raw_input() instead of input() in this code. The former was renamed to the latter in Python 3.0. Technically, 2.6 has an input too, but it also
evaluates strings as though they are program
code typed into a script, and so will not work in this context (an
empty string is an error). Python 3.0’s input (and 2.6’s raw_input) simply returns the entered
text as a string, unevaluated. To simulate 2.6’s input in 3.0, use eval(input()).
Other Icon-Click Limitations
Even with the input trick,
clicking file icons is not without its perils. You also may not
get to see Python error messages. If your script generates an error,
the error message text is written to the pop-up console window—which
then immediately disappears! Worse, adding an input call to your file will not help this
time because your script will likely abort long before it reaches
this call. In other words, you won’t be able to tell what went
wrong.
Because of these limitations, it is
probably best to view icon clicks as a way to launch programs after
they have been debugged or have been instrumented to write their
output to a file. Especially when starting out, use other
techniques—such as system command lines and IDLE (discussed
further in the section The IDLE User Interface)—so that you can see generated
error messages and view your normal output without resorting to
coding tricks. When we discuss exceptions later in this book, you’ll
also learn that it is possible to intercept and recover from errors
so that they do not terminate your programs. Watch for the
discussion of the try statement
later in this book for an alternative way to keep the console window
from closing on errors.
Module Imports and Reloads
So far, I’ve been talking about “importing modules” without really explaining what this term means. We’ll study modules and larger program architecture in depth in Part V, but because imports are also a way to launch programs, this section will introduce enough module basics to get you started.
In simple terms, every file of Python source code whose name
ends in a .py extension is a
module. Other files can access the items a module
defines by importing that module; import operations essentially load another
file and grant access to that file’s contents. The contents of a
module are made available to the outside world through its attributes
(a term I’ll define in the next section).
This module-based services model turns out to be the core idea behind program architecture in Python. Larger programs usually take the form of multiple module files, which import tools from other module files. One of the modules is designated as the main or top-level file, and this is the one launched to start the entire program.
We’ll delve into such architectural issues in more detail later in this book. This chapter is mostly interested in the fact that import operations run the code in a file that is being loaded as a final step. Because of this, importing a file is yet another way to launch it.
For instance, if you start an interactive session (from a system
command line, from the Start menu, from IDLE, or otherwise), you can
run the script1.py file you created earlier with a
simple import (be sure to delete the input line you added in the prior section
first, or you’ll need to press Enter for no reason):
C:misc>c:python30python>>>import script1win32 1267650600228229401496703205376 Spam!Spam!Spam!Spam!Spam!Spam!Spam!Spam!
This works, but only once per session (really, process) by default. After the first import, later imports do nothing, even if you change and save the module’s source file again in another window:
>>>import script1>>>import script1
This is by design; imports are too expensive an operation to repeat more than once per file, per program run. As you’ll learn in Chapter 21, imports must find files, compile them to byte code, and run the code.
If you really want to force Python to run the file again in the
same session without stopping and restarting the session, you need to
instead call the reload function available in the imp standard library module (this function
is also a simple built-in in Python 2.6, but not in 3.0):
>>>from imp import reload# Must load from module in 3.0 >>>reload(script1)win32 65536 Spam!Spam!Spam!Spam!Spam!Spam!Spam!Spam! <module 'script1' from 'script1.py'> >>>
The from statement here simply copies a name out
of a module (more on this soon). The reload function itself loads and runs the
current version of your file’s code, picking up changes if you’ve
changed and saved it in another window.
This allows you to edit and pick up new code on the fly within
the current Python interactive session. In this session, for example,
the second print statement in
script1.py was changed in another
window to print 2 ** 16 between the
time of the first import and the
reload call.
The reload function expects
the name of an already loaded module object, so you have to have
successfully imported a module once before you reload it. Notice that
reload also expects parentheses
around the module object name, whereas import does not. reload is a function that is
called, and import is a statement.
That’s why you must pass the module name to reload as an argument in parentheses, and
that’s why you get back an extra output line when reloading. The last
output line is just the display representation of the reload call’s return value, a Python module
object. We’ll learn more about using functions in general in Chapter 16.
Note
Version skew note: Python 3.0 moved the
reload built-in function to the imp standard library module. It still
reloads files as before, but you must import it in order to use it.
In 3.0, run an import imp and use
imp.reload(M), or run a from imp import reload and use reload(M), as shown here. We’ll discuss
import and from statements in the next section, and
more formally later in this book.
If you are working in Python 2.6 (or 2.X in general), reload is available as a built-in
function, so no import is required. In Python 2.6, reload is available in
both forms—built-in and module function—to aid
the transition to 3.0. In other words, reloading is still available
in 3.0, but an extra line of code is required to fetch the reload call.
The move in 3.0 was likely motivated in part by some
well-known issues involving reload and from statements that we’ll encounter in
the next section. In short, names loaded with a from are not directly updated by a
reload, but names accessed with
an import statement are. If your
names don’t seem to change after a reload, try using import and module.attribute
name references instead.
The Grander Module Story: Attributes
Imports and reloads provide a natural program launch option because import operations execute files as a last step. In the broader scheme of things, though, modules serve the role of libraries of tools, as you’ll learn in Part V. More generally, a module is mostly just a package of variable names, known as a namespace. The names within that package are called attributes—an attribute is simply a variable name that is attached to a specific object (like a module).
In typical use, importers gain access to all the names
assigned at the top level of a module’s file. These names are
usually assigned to tools exported by the module—functions, classes,
variables, and so on—that are intended to be used in other files and
other programs. Externally, a module file’s names can be fetched
with two Python statements, import and from, as well as the reload call.
To illustrate, use a text editor to create a one-line Python module file called myfile.py with the following contents:
title = "The Meaning of Life"
This may be one of the world’s simplest Python modules (it
contains a single assignment statement), but it’s enough to
illustrate the point. When this file is imported, its code is run to
generate the module’s attribute. The assignment statement creates a
module attribute named title.
You can access this module’s
title attribute in other
components in two different ways. First, you can load the module as
a whole with an import statement,
and then qualify the module name with the
attribute name to fetch it:
%python# Start Python >>>import myfile# Run file; load module as a whole >>>print(myfile.title)# Use its attribute names: '.' to qualify The Meaning of Life
In general, the dot expression syntax
object.attribute lets
you fetch any attribute attached to any object, and this is a very
common operation in Python code. Here, we’ve used it to access the
string variable title inside the
module myfile—in other words,
myfile.title.
Alternatively, you can fetch (really, copy) names out of a
module with from
statements:
%python# Start Python >>>from myfile import title# Run file; copy its names >>>print(title)# Use name directly: no need to qualify The Meaning of Life
As you’ll see in more detail later, from is just like an import, with an extra assignment to names
in the importing component. Technically, from copies a module’s
attributes, such that they become simple
variables in the recipient—thus, you can simply
refer to the imported string this time as title (a variable) instead of myfile.title (an attribute
reference).[7]
Whether you use import or
from to invoke an import
operation, the statements in the module file myfile.py are executed, and the importing
component (here, the interactive prompt) gains access to names
assigned at the top level of the file. There’s only one such name in
this simple example—the variable title, assigned to a string—but the
concept will be more useful when you start defining objects such as
functions and classes in your modules: such objects become reusable
software components that can be accessed by name from one or more
client modules.
In practice, module files usually define more than one name to be used in and outside the files. Here’s an example that defines three:
a = 'dead'                      # Define three attributes
b = 'parrot'                    # Exported to other files
c = 'sketch'
print(a, b, c)                  # Also used in this file
This file, threenames.py,
assigns three variables, and so generates three
attributes for the outside world. It also uses its own three
variables in a print statement,
as we see when we run this as a top-level file:
% python threenames.py
dead parrot sketch
All of this file’s code runs as usual the first time it is
imported elsewhere (by either an import or from). Clients of this file that use
import get a module with
attributes, while clients that use from get copies of the file’s
names:
%python>>>import threenames# Grab the whole module dead parrot sketch >>> >>>threenames.b, threenames.c('parrot', 'sketch') >>> >>>from threenames import a, b, c# Copy multiple names >>>b, c('parrot', 'sketch')
The results here are printed in parentheses because they are really tuples (a kind of object covered in the next part of this book); you can safely ignore them for now.
Once you start coding modules with multiple names like this,
the built-in dir function starts
to come in handy—you can use it to fetch a list of the names
available inside a module. The following returns a Python list of
strings (we’ll start studying lists in the next chapter):
>>> dir(threenames)
['__builtins__', '__doc__', '__file__', '__name__', '__package__', 'a', 'b', 'c']
I ran this on Python 3.0 and 2.6; older Pythons may return
fewer names. When the dir
function is called with the name of an imported module passed in
parentheses like this, it returns all the attributes inside that
module. Some of the names it returns are names you get “for free”:
names with leading and trailing double underscores are built-in
names that are always predefined by Python and that have special
meaning to the interpreter. The variables our code defined by
assignment—a, b, and c—show up last in the dir result.
Modules and namespaces
Module imports are a way to run files of code, but, as we’ll discuss later in the book, modules are also the largest program structure in Python programs.
In general, Python programs are composed of multiple module
files, linked together by import statements. Each module file is a
self-contained package of variables—that is, a namespace. One
module file cannot see the names defined in another file unless it
explicitly imports that other file, so modules serve to minimize
name collisions in your code—because each file is a self-contained
namespace, the names in one file cannot clash with those in
another, even if they are spelled the same way.
In fact, as you’ll see, modules are one of a handful of ways that Python goes to great lengths to package your variables into compartments to avoid name clashes. We’ll discuss modules and other namespace constructs (including classes and function scopes) further later in the book. For now, modules will come in handy as a way to run your code many times without having to retype it.
Note
import versus from: I should point out that
the from statement in a sense
defeats the namespace partitioning purpose of modules—because
the from copies variables
from one file to another, it can cause same-named variables in
the importing file to be overwritten (and won’t warn you if it
does). This essentially collapses namespaces together, at least
in terms of the copied variables.
Because of this, some recommend using import instead of from. I won’t go that far, though; not
only does from involve less
typing, but its purported problem is rarely an issue in
practice. Besides, this is something you
control by listing the variables you want in the from; as long as you understand that
they’ll be assigned values, this is no more dangerous than
coding assignment statements—another feature you’ll probably
want to use!
import and reload Usage Notes
For some reason, once people find out about running files using
import and reload, many tend to focus on this alone
and forget about other launch options that always run the current
version of the code (e.g., icon clicks, IDLE menu options, and
system command lines). This approach can quickly lead to confusion,
though—you need to remember when you’ve imported to know if you can
reload, you need to remember to use parentheses when you call
reload (only), and you need to
remember to use reload in the
first place to get the current version of your code to run.
Moreover, reloads aren’t transitive—reloading a module reloads that
module only, not any modules it may import—so you sometimes have to
reload multiple files.
Because of these complications (and others we’ll explore
later, including the reload/from issue mentioned in a prior note in
this chapter), it’s generally a good idea to avoid the temptation to
launch by imports and reloads for now. The IDLE Run→Run Module menu
option described in the next section, for example, provides a
simpler and less error-prone way to run your files, and always runs
the current version of your code. System shell command lines offer
similar benefits. You don’t need to use reload if you use these techniques.
In addition, you may run into trouble if you use modules in unusual ways at this point in the book. For instance, if you want to import a module file that is stored in a directory other than the one you’re working in, you’ll have to skip ahead to Chapter 21 and learn about the module search path.
For now, if you must import, try to keep all your files in the directory you are working in to avoid complications.[8]
That said, imports and reloads have proven to be a popular testing technique in Python classes, and you may prefer using this approach too. As usual, though, if you find yourself running into a wall, stop running into a wall!
Using exec to Run Module Files
In fact, there are more ways to run code stored in module files
than have yet been exposed here. For instance, the exec(open('module.py').read()) built-in
function call is another way to launch files from the interactive
prompt without having to import and later reload. Each exec runs the current version of the file,
without requiring later reloads (script1.py is as we left it after a reload
in the prior section):
C:misc>c:python30python>>>exec(open('script1.py').read())win32 65536 Spam!Spam!Spam!Spam!Spam!Spam!Spam!Spam!...change script1.py in a text edit window...>>>exec(open('script1.py').read())win32 4294967296 Spam!Spam!Spam!Spam!Spam!Spam!Spam!Spam!
The exec call has an effect
similar to an import, but it doesn’t technically import the module—by
default, each time you call exec
this way it runs the file anew, as though you had pasted it in at the
place where exec is called. Because
of that, exec does not require
module reloads after file changes—it skips the normal module import
logic.
On the downside, because it works as if pasting code into the
place where it is called, exec,
like the from statement mentioned
earlier, has the potential to silently overwrite variables you may
currently be using. For example, our script1.py assigns to a variable named
x. If that name is also being used
in the place where exec is called,
the name’s value is replaced:
>>>x = 999>>>exec(open('script1.py').read())# Code run in this namespace by default...same output...>>>x# Its assignments can overwrite names here 'Spam!'
By contrast, the basic import
statement runs the file only once per process, and it makes the file a
separate module namespace so that its assignments will not change
variables in your scope. The price you pay for the namespace
partitioning of modules is the need to reload after changes.
Note
Version skew note: Python 2.6 also
includes an execfile('module.py')
built-in function, in addition to allowing the form exec(open('module.py')), which
both automatically read the file’s content. Both of these are equivalent
to the exec(open('module.py').read()) form,
which is more complex but runs
in both 2.6 and 3.0.
Unfortunately, neither of these two simpler 2.6 forms is
available in 3.0, which means you must understand both files and
their read methods to fully understand this technique today (alas,
this seems to be a case of aesthetics trouncing practicality in
3.0). In fact, the exec form in
3.0 involves so much typing that the best advice may simply be not
to do it—it’s usually best to
launch files by typing system shell command lines or by using the
IDLE menu options described in the next section. For more on the
file interfaces used by the 3.0 exec form, see Chapter 9.
The IDLE User Interface
So far, we’ve seen how to run Python code with the interactive
prompt, system command lines, icon clicks, and module imports and
exec calls. If you’re looking for something a bit more visual, IDLE
provides a graphical user interface for doing Python development, and it’s a standard and
free part of the Python system. It is usually referred to as an
integrated development environment (IDE), because
it binds together various development tasks into a single
view.[9]
In short, IDLE is a GUI that lets you edit, run, browse, and debug Python programs, all from a single interface. Moreover, because IDLE is a Python program that uses the tkinter GUI toolkit (known as Tkinter in 2.6), it runs portably on most Python platforms, including Microsoft Windows, X Windows (for Linux, Unix, and Unix-like platforms), and the Mac OS (both Classic and OS X). For many, IDLE represents an easy-to-use alternative to typing command lines, and a less problem-prone alternative to clicking on icons.
IDLE Basics
Let’s jump right into an example. IDLE is easy to start under Windows—it has an entry in the Start button menu for Python (see Figure 2-1, shown previously), and it can also be selected by right-clicking on a Python program icon. On some Unix-like systems, you may need to launch IDLE’s top-level script from a command line, or by clicking on the icon for the idle.pyw or idle.py file located in the idlelib subdirectory of Python’s Lib directory. On Windows, IDLE is a Python script that currently lives in C:Python30Libidlelib (or C:Python26Libidlelib in Python 2.6).[10]
Figure 3-3
shows the scene after starting IDLE on Windows. The Python shell
window that opens initially is the main window, which runs an
interactive session (notice the >>> prompt). This works like all
interactive sessions—code you type here is run immediately after you
type it—and serves as a testing tool.

IDLE uses familiar menus with keyboard shortcuts for most of its operations. To make (or edit) a source code file under IDLE, open a text edit window: in the main window, select the File pull-down menu, and pick New Window (or Open... to open a text edit window displaying an existing file for editing).
Although it may not show up fully in this book’s graphics, IDLE uses syntax-directed colorization for the code typed in both the main window and all text edit windows—keywords are one color, literals are another, and so on. This helps give you a better picture of the components in your code (and can even help you spot mistakes—run-on strings are all one color, for example).
To run a file of code that you are editing in IDLE, select the file’s text edit window, open that window’s Run pull-down menu, and choose the Run Module option listed there (or use the equivalent keyboard shortcut, given in the menu). Python will let you know that you need to save your file first if you’ve changed it since it was opened or last saved and forgot to save your changes—a common mistake when you’re knee deep in coding.
When run this way, the output of your script and any error messages it may generate show up back in the main interactive window (the Python shell window). In Figure 3-3, for example, the three lines after the “RESTART” line near the middle of the window reflect an execution of our script1.py file opened in a separate edit window. The “RESTART” message tells us that the user-code process was restarted to run the edited script and serves to separate script output (it does not appear if IDLE is started without a user-code subprocess—more on this mode in a moment).
Note
IDLE hint of the day: If you want to repeat prior commands in IDLE’s main interactive window, you can use the Alt-P key combination to scroll backward through the command history, and Alt-N to scroll forward (on some Macs, try Ctrl-P and Ctrl-N instead). Your prior commands will be recalled and displayed, and may be edited and rerun. You can also recall commands by positioning the cursor on them, or use cut-and-paste operations, but these techniques tend to involve more work. Outside IDLE, you may be able to recall commands in an interactive session with the arrow keys on Windows.
Using IDLE
IDLE is free, easy to use, portable, and automatically available on most platforms. I generally recommend it to Python newcomers because it sugarcoats some of the details and does not assume prior experience with system command lines. However, it is somewhat limited compared to more advanced commercial IDEs. To help you avoid some common pitfalls, here is a list of issues that IDLE beginners should bear in mind:
You must add “.py” explicitly when saving your files. I mentioned this when talking about files in general, but it’s a common IDLE stumbling block, especially for Windows users. IDLE does not automatically add a .py extension to filenames when files are saved. Be careful to type the .py extension yourself when saving a file for the first time. If you don’t, while you will be able to run your file from IDLE (and system command lines), you will not be able to import it either interactively or from other modules.
Run scripts by selecting Run→Run Module in text edit windows, not by interactive imports and reloads. Earlier in this chapter, we saw that it’s possible to run a file by importing it interactively. However, this scheme can grow complex because it requires you to manually reload files after changes. By contrast, using the Run→Run Module menu option in IDLE always runs the most current version of your file, just like running it using a system shell command line. IDLE also prompts you to save your file first, if needed (another common mistake outside IDLE).
You need to reload only modules being tested interactively. Like system shell command lines, IDLE’s Run→Run Module menu option always runs the current version of both the top-level file and any modules it imports. Because of this, Run→Run Module eliminates common confusions surrounding imports. You only need to reload modules that you are importing and testing interactively in IDLE. If you choose to use the import and reload technique instead of Run→Run Module, remember that you can use the Alt-P/Alt-N key combinations to recall prior commands.
You can customize IDLE. To change the text fonts and colors in IDLE, select the Configure option in the Options menu of any IDLE window. You can also customize key combination actions, indentation settings, and more; see IDLE’s Help pull-down menu for more hints.
There is currently no clear-screen option in IDLE. This seems to be a frequent request (perhaps because it’s an option available in similar IDEs), and it might be added eventually. Today, though, there is no way to clear the interactive window’s text. If you want the window’s text to go away, you can either press and hold the Enter key, or type a Python loop to print a series of blank lines (nobody really uses the latter technique, of course, but it sounds more high-tech than pressing the Enter key!).
tkinter GUI and threaded programs may not work well with IDLE. Because IDLE is a Python/tkinter program, it can hang if you use it to run certain types of advanced Python/tkinter programs. This has become less of an issue in more recent versions of IDLE that run user code in one process and the IDLE GUI itself in another, but some programs (especially those that use multithreading) might still hang the GUI. Your code may not exhibit such problems, but as a rule of thumb, it’s always safe to use IDLE to edit GUI programs but launch them using other options, such as icon clicks or system command lines. When in doubt, if your code fails in IDLE, try it outside the GUI.
If connection errors arise, try starting IDLE in single-process mode. Because IDLE requires communication between its separate user and GUI processes, it can sometimes have trouble starting up on certain platforms (notably, it fails to start occasionally on some Windows machines, due to firewall software that blocks connections). If you run into such connection errors, it’s always possible to start IDLE with a system command line that forces it to run in single-process mode without a user-code subprocess and therefore avoids communication issues: its
-ncommand-line flag forces this mode. On Windows, for example, start a Command Prompt window and run the system command lineidle.py -nfrom within the directory C:Python30Libidlelib (cdthere first if needed).Beware of some IDLE usability features. IDLE does much to make life easier for beginners, but some of its tricks won’t apply outside the IDLE GUI. For instance, IDLE runs your scripts in its own interactive namespace, so variables in your code show up automatically in the IDLE interactive session—you don’t always need to run
importcommands to access names at the top level of files you’ve already run. This can be handy, but it can also be confusing, because outside the IDLE environment names must always be imported from files to be used.IDLE also automatically changes both to the directory of a file just run and adds its directory to the module import search path—a handy feature that allows you to import files there without search path settings, but also something that won’t work the same when you run files outside IDLE. It’s OK to use such features, but don’t forget that they are IDLE behavior, not Python behavior.
Advanced IDLE Tools
Besides the basic edit and run functions, IDLE provides more advanced features, including a point-and-click program debugger and an object browser. The IDLE debugger is enabled via the Debug menu and the object browser via the File menu. The browser allows you to navigate through the module search path to files and objects in files; clicking on a file or object opens the corresponding source in a text edit window.
IDLE debugging is initiated by selecting the Debug→Debugger menu option in the main window and then starting your script by selecting the Run→Run Module option in the text edit window; once the debugger is enabled, you can set breakpoints in your code that stop its execution by right-clicking on lines in the text edit windows, show variable values, and so on. You can also watch program execution when debugging—the current line of code is noted as you step through your code.
For simpler debugging operations, you can also right-click with your mouse on the text of an error message to quickly jump to the line of code where the error occurred—a trick that makes it simple and fast to repair and run again. In addition, IDLE’s text editor offers a large collection of programmer-friendly tools, including automatic indentation, advanced text and file search operations, and more. Because IDLE uses intuitive GUI interactions, you should experiment with the system live to get a feel for its other tools.
Other IDEs
Because IDLE is free, portable, and a standard part of Python, it’s a nice first development tool to become familiar with if you want to use an IDE at all. Again, I recommend that you use IDLE for this book’s exercises if you’re just starting out, unless you are already familiar with and prefer a command-line-based development mode. There are, however, a handful of alternative IDEs for Python developers, some of which are substantially more powerful and robust than IDLE. Here are some of the most commonly used IDEs:
- Eclipse and PyDev
Eclipse is an advanced open source IDE GUI. Originally developed as a Java IDE, Eclipse also supports Python development when you install the PyDev (or a similar) plug-in. Eclipse is a popular and powerful option for Python development, and it goes well beyond IDLE’s feature set. It includes support for code completion, syntax highlighting, syntax analysis, refactoring, debugging, and more. Its downsides are that it is a large system to install and may require shareware extensions for some features (this may vary over time). Still, when you are ready to graduate from IDLE, the Eclipse/PyDev combination is worth your attention.
- Komodo
A full-featured development environment GUI for Python (and other languages), Komodo includes standard syntax-coloring, text-editing, debugging, and other features. In addition, Komodo offers many advanced features that IDLE does not, including project files, source-control integration, regular-expression debugging, and a drag-and-drop GUI builder that generates Python/tkinter code to implement the GUIs you design interactively. At this writing, Komodo is not free; it is available at http://www.activestate.com.
- NetBeans IDE for Python
NetBeans is a powerful open-source development environment GUI with support for many advanced features for Python developers: code completion, automatic indentation and code colorization, editor hints, code folding, refactoring, debugging, code coverage and testing, projects, and more. It may be used to develop both CPython and Jython code. Like Eclipse, NetBeans requires installation steps beyond those of the included IDLE GUI, but it is seen by many as more than worth the effort. Search the Web for the latest information and links.
- PythonWin
PythonWin is a free Windows-only IDE for Python that ships as part of ActiveState’s ActivePython distribution (and may also be fetched separately from http://www.python.org resources). It is roughly like IDLE, with a handful of useful Windows-specific extensions added; for example, PythonWin has support for COM objects. Today, IDLE is probably more advanced than PythonWin (for instance, IDLE’s dual-process architecture often prevents it from hanging). However, PythonWin still offers tools for Windows developers that IDLE does not. See http://www.activestate.com for more information.
- Others
There are roughly half a dozen other widely used IDEs that I’m aware of (including the commercial Wing IDE and PythonCard) but do not have space to do justice to here, and more will probably appear over time. In fact, almost every programmer-friendly text editor has some sort of support for Python development these days, whether it be preinstalled or fetched separately. Emacs and Vim, for instance, have substantial Python support.
I won’t try to document all such options here; for more information, see the resources available at http://www.python.org or search the Web for “Python IDE.” You might also try running a web search for “Python editors”—today, this leads you to a wiki page that maintains information about many IDE and text-editor options for Python programming.
Other Launch Options
At this point, we’ve seen how to run code typed interactively, and how to launch code saved in files in a variety of ways—system command lines, imports and execs, GUIs like IDLE, and more. That covers most of the cases you’ll see in this book. There are additional ways to run Python code, though, most of which have special or narrow roles. The next few sections take a quick look at some of these.
Embedding Calls
In some specialized domains, Python code may be run automatically by an enclosing system. In such cases, we say that the Python programs are embedded in (i.e., run by) another program. The Python code itself may be entered into a text file, stored in a database, fetched from an HTML page, parsed from an XML document, and so on. But from an operational perspective, another system—not you—may tell Python to run the code you’ve created.
Such an embedded execution mode is commonly used to support end-user customization—a game program, for instance, might allow for play modifications by running user-accessible embedded Python code at strategic points in time. Users can modify this type of system by providing or changing Python code. Because Python code is interpreted, there is no need to recompile the entire system to incorporate the change (see Chapter 2 for more on how Python code is run).
In this mode, the enclosing system that runs your code might be written in C, C++, or even Java when the Jython system is used. As an example, it’s possible to create and run strings of Python code from a C program by calling functions in the Python runtime API (a set of services exported by the libraries created when Python is compiled on your machine):
#include <Python.h>
...
Py_Initialize();                                     // This is C, not Python
PyRun_SimpleString("x = 'brave ' + 'sir robin'");    // But it runs Python code
In this C code snippet, a program coded in the C language embeds the Python interpreter by linking in its libraries, and passes it a Python assignment statement string to run. C programs may also gain access to Python modules and objects and process or execute them using other Python API tools.
This book isn’t about Python/C integration, but you should be aware that, depending on how your organization plans to use Python, you may or may not be the one who actually starts the Python programs you create. Regardless, you can usually still use the interactive and file-based launching techniques described here to test code in isolation from those enclosing systems that may eventually use it.[11]
Frozen Binary Executables
Frozen binary executables, described in Chapter 2, are packages that combine your program’s byte code and the Python interpreter into a single executable program. This approach enables Python programs to be launched in the same ways that you would launch any other executable program (icon clicks, command lines, etc.). While this option works well for delivery of products, it is not really intended for use during program development; you normally freeze just before shipping (after development is finished). See the prior chapter for more on this option.
Text Editor Launch Options
As mentioned previously, although they’re not full-blown IDE GUIs, most programmer-friendly text editors have support for editing, and possibly running, Python programs. Such support may be built in or fetchable on the Web. For instance, if you are familiar with the Emacs text editor, you can do all your Python editing and launching from inside that text editor. See the text editor resources page at http://www.python.org/editors for more details, or search the Web for the phrase “Python editors.”
Still Other Launch Options
Depending on your platform, there may be additional ways that
you can start Python programs. For instance, on some Macintosh
systems you may be able to drag Python program file icons onto the
Python interpreter icon to make them execute, and on Windows you can
always start Python scripts with the Run... option in the Start
menu. Additionally, the Python standard library has utilities that
allow Python programs to be started by other Python programs in
separate processes (e.g., os.popen, os.system), and Python scripts might also
be spawned in larger contexts like the Web (for instance, a web page
might invoke a script on a server); however, these are beyond the
scope of the present chapter.
Future Possibilities?
This chapter reflects current practice, but much of the material is both platform- and time-specific. Indeed, many of the execution and launch details presented arose during the shelf life of this book’s various editions. As with program execution options, it’s not impossible that new program launch options may arise over time.
New operating systems, and new versions of existing systems, may also provide execution techniques beyond those outlined here. In general, because Python keeps pace with such changes, you should be able to launch Python programs in whatever way makes sense for the machines you use, both now and in the future—be that by drawing on tablet PCs or PDAs, grabbing icons in a virtual reality, or shouting a script’s name over your coworkers’ conversations.
Implementation changes may also impact launch schemes somewhat (e.g., a full compiler could produce normal executables that are launched much like frozen binaries today). If I knew what the future truly held, though, I would probably be talking to a stockbroker instead of writing these words!
Which Option Should I Use?
With all these options, one question naturally arises: which one is best for me? In general, you should give the IDLE interface a try if you are just getting started with Python. It provides a user-friendly GUI environment and hides some of the underlying configuration details. It also comes with a platform-neutral text editor for coding your scripts, and it’s a standard and free part of the Python system.
If, on the other hand, you are an experienced programmer, you might be more comfortable with simply the text editor of your choice in one window, and another window for launching the programs you edit via system command lines and icon clicks (in fact, this is how I develop Python programs, but I have a Unix-biased past). Because the choice of development environments is very subjective, I can’t offer much more in the way of universal guidelines; in general, whatever environment you like to use will be the best for you to use.
Chapter Summary
In this chapter, we’ve looked at common ways to launch Python
programs: by running code typed interactively, and by running code
stored in files with system command lines, file-icon clicks, module
imports, exec calls, and IDE GUIs
such as IDLE. We’ve covered a lot of pragmatic startup territory here.
This chapter’s goal was to equip you with enough information to enable
you to start writing some code, which you’ll do in the next part of
the book. There, we will start exploring the Python language itself,
beginning with its core data types.
First, though, take the usual chapter quiz to exercise what you’ve learned here. Because this is the last chapter in this part of the book, it’s followed with a set of more complete exercises that test your mastery of this entire part’s topics. For help with the latter set of problems, or just for a refresher, be sure to turn to Appendix B after you’ve given the exercises a try.
Test Your Knowledge: Quiz
How can you start an interactive interpreter session?
Where do you type a system command line to launch a script file?
Name four or more ways to run the code saved in a script file.
Name two pitfalls related to clicking file icons on Windows.
Why might you need to reload a module?
How do you run a script from within IDLE?
Name two pitfalls related to using IDLE.
What is a namespace, and how does it relate to module files?
Test Your Knowledge: Answers
You can start an interactive session on Windows by clicking your Start button, picking the All Programs option, clicking the Python entry, and selecting the “Python (command line)” menu option. You can also achieve the same effect on Windows and other platforms by typing
pythonas a system command line in your system’s console window (a Command Prompt window on Windows). Another alternative is to launch IDLE, as its main Python shell window is an interactive session. If you have not set your system’sPATHvariable to find Python, you may need tocdto where Python is installed, or type its full directory path instead of justpython(e.g.,C:Python30pythonon Windows).You type system command lines in whatever your platform provides as a system console: a Command Prompt window on Windows; an xterm or terminal window on Unix, Linux, and Mac OS X; and so on.
Code in a script (really, module) file can be run with system command lines, file icon clicks, imports and reloads, the
execbuilt-in function, and IDE GUI selections such as IDLE’s Run→Run Module menu option. On Unix, they can also be run as executables with the#!trick, and some platforms support more specialized launching techniques (e.g., drag-and-drop). In addition, some text editors have unique ways to run Python code, some Python programs are provided as standalone “frozen binary” executables, and some systems use Python code in embedded mode, where it is run automatically by an enclosing program written in a language like C, C++, or Java. The latter technique is usually done to provide a user customization layer.Scripts that print and then exit cause the output file to disappear immediately, before you can view the output (which is why the
inputtrick comes in handy); error messages generated by your script also appear in an output window that closes before you can examine its contents (which is one reason that system command lines and IDEs such as IDLE are better for most development).Python only imports (loads) a module once per process, by default, so if you’ve changed its source code and want to run the new version without stopping and restarting Python, you’ll have to reload it. You must import a module at least once before you can reload it. Running files of code from a system shell command line, via an icon click, or via an IDE such as IDLE generally makes this a nonissue, as those launch schemes usually run the current version of the source code file each time.
Within the text edit window of the file you wish to run, select the window’s Run→Run Module menu option. This runs the window’s source code as a top-level script file and displays its output back in the interactive Python shell window.
IDLE can still be hung by some types of programs—especially GUI programs that perform multithreading (an advanced technique beyond this book’s scope). Also, IDLE has some usability features that can burn you once you leave the IDLE GUI: a script’s variables are automatically imported to the interactive scope in IDLE, for instance, but not by Python in general.
A namespace is just a package of variables (i.e., names). It takes the form of an object with attributes in Python. Each module file is automatically a namespace—that is, a package of variables reflecting the assignments made at the top level of the file. Namespaces help avoid name collisions in Python programs: because each module file is a self-contained namespace, files must explicitly import other files in order to use their names.
Test Your Knowledge: Part I Exercises
It’s time to start doing a little coding on your own. This first exercise session is fairly simple, but a few of these questions hint at topics to come in later chapters. Be sure to check Part I, Getting Started in the solutions appendix (Appendix B) for the answers; the exercises and their solutions sometimes contain supplemental information not discussed in the main text, so you should take a peek at the solutions even if you manage to answer all the questions on your own.
Interaction. Using a system command line, IDLE, or another method, start the Python interactive command line (
>>>prompt), and type the expression"Hello World!"(including the quotes). The string should be echoed back to you. The purpose of this exercise is to get your environment configured to run Python. In some scenarios, you may need to first run acdshell command, type the full path to the Python executable, or add its path to yourPATHenvironment variable. If desired, you can setPATHin your .cshrc or .kshrc file to make Python permanently available on Unix systems; on Windows, use a setup.bat, autoexec.bat, or the environment variable GUI. See Appendix A for help with environment variable settings.Programs. With the text editor of your choice, write a simple module file containing the single statement
print('Hello module world!')and store it as module1.py. Now, run this file by using any launch option you like: running it in IDLE, clicking on its file icon, passing it to the Python interpreter on the system shell’s command line (e.g.,python module1.py), built-inexeccalls, imports and reloads, and so on. In fact, experiment by running your file with as many of the launch techniques discussed in this chapter as you can. Which technique seems easiest? (There is no right answer to this, of course.)Modules. Start the Python interactive command line (
>>>prompt) and import the module you wrote in exercise 2. Try moving the file to a different directory and importing it again from its original directory (i.e., run Python in the original directory when you import). What happens? (Hint: is there still a module1.pyc byte code file in the original directory?)Scripts. If your platform supports it, add the
#!line to the top of your module1.py module file, give the file executable privileges, and run it directly as an executable. What does the first line need to contain?#!usually only has meaning on Unix, Linux, and Unix-like platforms such as Mac OS X; if you’re working on Windows, instead try running your file by listing just its name in a DOS console window without the word “python” before it (this works on recent versions of Windows), or via the Start→Run... dialog box.Errors and debugging. Experiment with typing mathematical expressions and assignments at the Python interactive command line. Along the way, type the expressions
2 ** 500and1 / 0, and reference an undefined variable name as we did in this chapter. What happens?You may not know it yet, but when you make a mistake, you’re doing exception processing (a topic we’ll explore in depth in Part VII). As you’ll learn there, you are technically triggering what’s known as the default exception handler—logic that prints a standard error message. If you do not catch an error, the default handler does and prints the standard error message in response.
Exceptions are also bound up with the notion of debugging in Python. When you’re first starting out, Python’s default error messages on exceptions will probably provide as much error-handling support as you need—they give the cause of the error, as well as showing the lines in your code that were active when the error occurred. For more about debugging, see the sidebar Debugging Python Code.
Breaks and cycles. At the Python command line, type:
L = [1, 2]              # Make a 2-item list
L.append(L)             # Append L as a single item to itself
L                       # Print L
What happens? In all recent versions of Python, you’ll see a strange output that we’ll describe in the solutions appendix, and which will make more sense when we study references in the next part of the book. If you’re using a Python version older than 1.5.1, a Ctrl-C key combination will probably help on most platforms. Why do you think your version of Python responds the way it does for this code?
Warning
If you do have a Python older than Release 1.5.1 (a hopefully rare scenario today!), make sure your machine can stop a program with a Ctrl-C key combination of some sort before running this test, or you may be waiting a long time.
Documentation. Spend at least 17 minutes browsing the Python library and language manuals before moving on to get a feel for the available tools in the standard library and the structure of the documentation set. It takes at least this long to become familiar with the locations of major topics in the manual set; once you’ve done this, it’s easy to find what you need. You can find this manual via the Python Start button entry on Windows, in the Python Docs option on the Help pull-down menu in IDLE, or online at http://www.python.org/doc. I’ll also have a few more words to say about the manuals and other documentation sources available (including PyDoc and the
helpfunction) in Chapter 15. If you still have time, go explore the Python website, as well as its PyPI third-party extension repository. Especially check out the Python.org documentation and search pages; they can be crucial resources.
[5] As we discussed when exploring command lines, modern
Windows versions also let you type just the name of a .py file at the system command
line—they use the Registry to determine that the file should be
opened with Python (e.g., typing brian.py is equivalent to typing
python brian.py). This
command-line mode is similar in spirit to the Unix #!, though it is system-wide on
Windows, not per-file. Note that some
programs may actually interpret and use a
first #! line on Windows much
like on Unix, but the DOS system shell on Windows simply ignores
it.
[6] It is also possible to completely suppress the pop-up DOS console window for clicked files on Windows. Files whose names end in a .pyw extension will display only windows constructed by your script, not the default DOS console window. .pyw files are simply .py source files that have this special operational behavior on Windows. They are mostly used for Python-coded user interfaces that build windows of their own, often in conjunction with various techniques for saving printed output and errors to files.
[7] Notice that import and
from both list the name of
the module file as simply myfile without its .py suffix. As you’ll learn in Part V, when Python looks for the actual file, it
knows to include the suffix in its search procedure. Again, you
must include the .py suffix
in system shell command lines, but not in import statements.
[8] If you’re burning with curiosity, the short story is that
Python searches for imported modules in every directory listed
in sys.path—a Python list of
directory name strings in the sys module, which is initialized from
a PYTHONPATH environment
variable, plus a set of standard directories. If you want to
import from a directory other than the one you are working in,
that directory must generally be listed in your PYTHONPATH setting. For more details,
see Chapter 21.
[9] IDLE is officially a corruption of IDE, but it’s really named in honor of Monty Python member Eric Idle.
[10] IDLE is a Python program that uses the standard library’s
tkinter GUI toolkit (a.k.a. Tkinter in Python 2.6)
to build the IDLE GUI. This makes IDLE portable, but it also
means that you’ll need to have tkinter support in your Python to
use IDLE. The Windows version of Python has this by default, but
some Linux and Unix users may need to install the appropriate
tkinter support (a yum
tkinter command may suffice on some Linux
distributions, but see the installation hints in Appendix A for details). Mac OS
X may have everything you need preinstalled, too; look for an
idle command or script on
your machine.
[11] See Programming Python (O’Reilly) for more details on embedding Python in C/C++. The embedding API can call Python functions directly, load modules, and more. Also, note that the Jython system allows Java programs to invoke Python code using a Java-based API (a Python interpreter class).