The best way to learn WPF is to start off with a traditional Hello World application. From within C# Express or Visual Studio, create a new project. When the New Project dialog box appears, select WPF Application as the project type, and name the project "Hello WPF”.
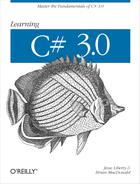
Visual Studio will create the project and open a WPF editing window for you, as you can see in Figure 19-1.
Notice the split window in the middle of the IDE. It shows a visual representation of your form on the top, called the Design view, and the XAML markup on the bottom.
Before you do anything else, take a look at the code that’s automatically created for you in the XAML window. It looks something like this:
<Window x:Class="Hello_WPF.Window1"
    xmlns="http://schemas.microsoft.com/winfx/2006/xaml/presentation"
    xmlns:x="http://schemas.microsoft.com/winfx/2006/xaml"
    Title="Window1" Height="300" Width="300">
    <Grid>

    </Grid>
</Window>
The first thing you see is the opening tag for the Window element itself. That element contains a reference to the Class for the application, created by default. The x refers to the default namespace for this application. (You can change the namespace if you like, but x is the default.) The xmlns properties define the namespace for the application, by referring to the XML schema for WPF, as defined by Microsoft. In short, this is where you’ll find the specification of the elements that you can use in this file. You don’t really need to worry much about this for the moment, although later, you’ll see how to add your own elements to the namespace.
Figure 19-1. When you create a WPF project, the IDE opens with the XAML window in two views: the Design view on top, and the XAML markup below.
Next, you’ll find three attributes for the Window itself: Title, Height, and Width. All three of these attributes are pretty self-explanatory, and they’re reflected in the Design view as shown in Figure 19-1. Go ahead and change the Width property from 300 to 100 and you’ll see the window immediately shrink in the Design view. Change it back when you’re done. You can also click on the window in the Design view, and all those properties will be available for you to change in the Properties window, just as you did with Windows Forms.
The final thing to notice in this XAML is the Grid element. The Grid is a subelement of the Window element, used for laying out the controls. For now, you’ll just put the controls inside the Grid; we’ll worry about positioning later.
Next, find the Label control in the Common section of the Toolbox. Drag the Label onto the window, anywhere you like. Notice that the guide lines don’t appear when you’re placing the control, like they did in Windows Forms. Instead, they appear after you’ve placed the Label. Once you’ve dropped the Label, the guide lines appear, and you can drag the Label around to an aesthetically pleasing spot.
As with the Window element, you can change the properties of the Label element in the Properties window, but it is easier to change them in the XAML window. When you added the Label, a line appeared in the XAML that looks something like this, depending on where you placed the Label:
<Label Height="28" Margin="77,28,81,0" Name="label1" VerticalAlignment="Top">Label</Label>
You can see the Name attribute in the middle of the line there. You won’t find it in the Properties window, though. Edit the XAML window, and change the Name to lblHello. The other elements are for positioning; leave them the way they are for right now.
Now drag a Button control from the Toolbox onto the window, underneath the Label. In the XAML, change the Name to btnHello. Instead of having a Text property, as buttons did in Windows Forms, there’s a Content property for the Button. You won’t see the Content property directly in the XAML window; that’s because the content of the button is between the <Button> and </Button> tags, where it currently says “Button”. Change that text to “Say Hello”, either in the XAML window or in the Properties window. Your IDE should look something like Figure 19-2 at this point.

Figure 19-2. When you place controls onto the Window element in the Design view, the appropriate XAML is automatically added to the XAML window. Changes you make to the XAML are also reflected in the Design view.
So far, so good. Double-click btnHello, and you’ll be taken to the code file, just as you were in Windows Forms, except this is called the code-behind file. The event handler is created for you, just like before. Add the following highlighted code to change the text of the label when the button is clicked:
private void btnHello_Click(object sender, RoutedEventArgs e)
{
    lblHello.Content = "Hello WPF!";
}
Notice here that instead of setting the value of lblHello.Text, as you would have done in Windows Forms, you’re changing the Content property of lblHello. That’s all you need to do. Now run the application, and click the button. The content of the Label changes, just as you’d expect, as shown in Figure 19-3.
