
Now that your development environment is established, your next task is to create an initial app.
In the following steps, we're going to create an app that operates like a traditional Windows Forms app. It will contain a UI and code-behind files just like those apps used to. Follow these steps:
- Open Visual Studio 2015.
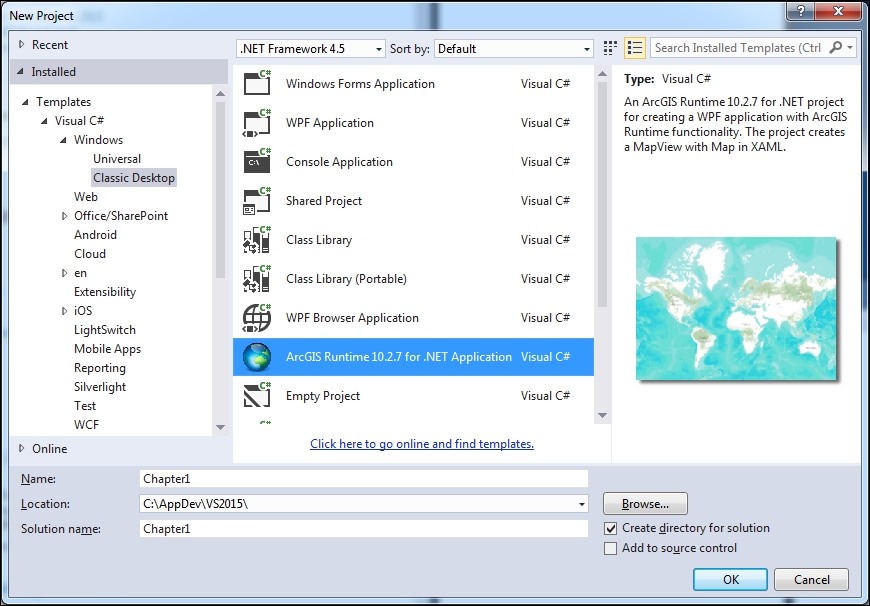
- On the Start Page, click on New Project…. Refer to the following screenshot.
- Under Templates on the left-hand side of the dialog, navigate to Templates | Visual C# | Windows | Classic Desktop.
- Scroll to ArcGIS Runtime 10.2.7 for .NET Application.
- In the Name: field, change the name to anything you want.
- Click on Browse… beside the Location: field and specify the place where you want to place the project. You'll note that I've specified
C:AppDevVS2015. - Click on OK:
- You now have an app. Click on Start on the main toolbar. Depending on your Internet connection speed, you should see a map as shown here:
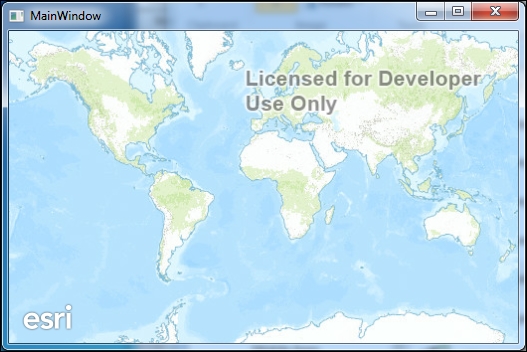
View of map after the functioning of Start
- Move your mouse over the map and scroll forward to zoom in. As you zoom in, the map will become more detailed. Scroll backwards with your mouse to zoom out. Also, left-click on your mouse to pan around the map. You can also make the window larger or click on Maximize to make it fill the screen. You should spend some time getting used to how to navigate this map.
- Another thing that you can do if you want to zoom to a specific area is hold down the Shift key and with your left mouse button drag a box around an area on the world map. We'll cover more of this subject later when we go over the map in more detail.
- Click on the X button in the upper-right corner of the window to close the app.
Now that you've created a map and interacted with it, let's look under the hood at the code so that we can see how exactly this works. Follow these steps:
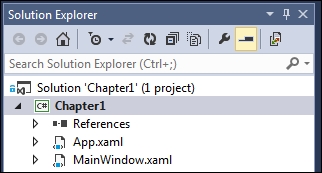
- In the Solution Explorer pane, you will see that your current code looks like this screenshot:
- Double-click on
MainWindow.xaml. From there, you will be shown the XAML and the design canvas for the XAML.
See the following code sample. In this XAML code, you will note that there is a Window element, typical XAML namespaces, title, height, and width. You will also note that there is an extra namespace called xmlns:esri, which is the default namespace for ArcGIS Runtime. This namespace is required to create the map. Every app you make throughout the rest of the book will contain this namespace:
<Window x:Class="Chapter1.MainWindow"
  xmlns="http://schemas.microsoft.com/winfx/2006/xaml/presentation"
  xmlns:x="http://schemas.microsoft.com/winfx/2006/xaml"
  xmlns:esri="http://schemas.esri.com/arcgis/runtime/2013"
    Title="MainWindow"
    Height="350"
    Width="525">
  <Grid>
    <esri:MapView x:Name="MyMapView"
      LayerLoaded="MyMapView_LayerLoaded">
    <esri:Map>
      <esri:ArcGISTiledMapServiceLayer ID="Basemap"

      ServiceUri="http://services.arcgisonline.com/ArcGIS/rest/services/World_Topo_Map/MapServer"/>
      </esri:Map>
    </esri:MapView>
  </Grid>
</Window>
The next thing you will note is that there is a Grid tag that contains a MapView class. This MapView class is a container for a map and it is a control. Note that the MapView class is prefixed with the esri prefix. This prefix tells Visual Studio where to find the object in the API. Next, note that in the MapView class, there is a map that is also prefixed with the esri namespace. Like any other XAML element, you will note that each element has the beginning <esri:Map> and the ending </esri:Map>. Between these tags, you will note that there is a layer that has been defined. It's a tiled Basemap layer, which has an ID, and there is a service Uniform Resource Identifier (URI) that defines where the map is coming from. As you can see from the URI, this layer is coming from AGOL, which is in the cloud. We'll discuss layers in more detail in the later chapters.
Now that you've seen the XAML, let's look at the code-behind file. Go back to the Solution Explorer pane, right-click on MainWindow.xaml, and click on View Code:
using Esri.ArcGISRuntime.Controls;
using System;
using System.Diagnostics;
using System.Linq;
using System.Windows;

namespace ArcGISApp1
{
    public partial class MainWindow : Window
    {
        public MainWindow()
        {
            InitializeComponent();
        }

        private void MyMapView_LayerLoaded(object sender,
            LayerLoadedEventArgs e)
        {
            if (e.LoadError == null)
                return;

            Debug.WriteLine(string.Format("Error while loading layer
                : {0} - {1}",
                e.Layer.ID, e.LoadError.Message));
        }
    }
}
Just like in a typical C# code, there are the using statements, a namespace declaration, a class for the Window element, a constructor, and an event handler. Most of this is pretty standard C# code, but the one thing worth mentioning is that in the XAML, note that there was an event named LayerLoaded, which is called when the basemap finished loading. All this code does is check whether e.LoadError equals null. If it does equal null, the event is returned. If it is not equal to null, an error message will be written in the Output window in Visual Studio.
The interesting thing about this code is that it is quite similar to the days of Windows Forms apps, which has a UI and code-behind file.
Let's add a couple of features to this app. First of all, let's add the scale to the map. After all, this is a mapping app and scale is important in any map. Perform the following steps:
- Add the following lines shown in the code sample after the closing
</esri:MapView>tag:<TextBlock Background="#77000000" HorizontalAlignment="Center" VerticalAlignment="Bottom" Padding="5" Foreground="White"> <Run>Map Scale 1:</Run> <TextBlock Text="{Binding ElementName=MyMapView, StringFormat={}{0:0}, Path=Scale}" FontSize="12" FontWeight="Bold" Foreground="White"/> </TextBlock> - Run the app. You will see the scale shown at the bottom of the page, as shown in the following screenshot:
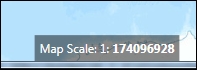
The way these steps work is actually just like any other Windows Presentation Framework (WPF) app. In this case, we're making a TextBlock tag bind to the MapView class. Check out the Text property of the inner TextBlock tag. It is being bound to the element called MyMapView. The MyMapView element is the identifier of the MapView class. It is also using the Scale property with Path from the MyMapView element.
In other words, the MapView class has a property called Scale, and the TextBlock tag is simply binding to it just like it's possible to bind to any other WPF FrameworkElement type. All other properties of the TextBlock tags are standard properties. There is also a Run element in the code just to hold the text, Map Scale 1. Another interesting thing you can glean from this is that if you want to place FrameworkElement types on top of the map, all you have to do is to place your XAML after the closing MapView element.
Of course, just showing a basemap with a scale isn't very interesting, so let's add some more layers that will allow us to actually do something, such as search for a state or a city. In order to do that, you will need to take a look at some of the publicly available map services on AGOL. Perform the following steps:
- Navigate to http://sampleserver6.arcgisonline.com/arcgis/rest/services/USA/MapServer.
- The name of the service is
USA. Click on ArcGIS JavaScript beside View In. You should be able to see a map of the United States. - Read the Service Description option. It's short in this case but tells you exactly what the service is all about.
- Under Layers, you will note that there are four layers listed—Cities, Highways, States, and Counties.
- Go back to Visual Studio and add the following lines of code to your XAML after the first layer. Make sure it is after the first layer and before the closing
</esri:Map>tag:<esri:ArcGISDynamicMapServiceLayer ID="USA" ServiceUri="http://sampleserver6.arcgisonline.com/arcgis/rest/services/USA/MapServer"/>
- As you can see, a dynamic map service has been added using
ArcGISDynamicMapServiceLayer. It was given a name,USA. A dynamic map service contains any number of layers. They return the geometry and attributes in the layer across the Internet in the form of an image. - Run the app and you will see a map with all the layers over
USA. Feel free to zoom in so that you can see more details. - Close the app. The next thing that would make the app more interesting is to add the ability to search for a city, county, or state name; so let's do that.
- Enter the XAML code, as shown here, after the closing
MapViewelement:<TextBlock Name="Search" Background="#77000000" HorizontalAlignment="Center" VerticalAlignment="Top" Padding="5" Foreground="White" > <Run>Search for </Run> <TextBox Name="SearchTextBox" Text="Lancaster"> </TextBox> <Run> in the Cities, Counties or States layer. </Run> <Button Content="Find" Width="30"></Button> </TextBlock> - As you can see, a new
TextBlocktag has been added after the closingMapViewelement with some text using<Run>, and aButtontag has been added. - Run your app. You will see the new XAML at the top of your map, as shown in the following screenshot. You can also see what it looks like in the XAML Designer workspace:

- If you run this app and click on Find, nothing will happen because we haven't wired up the button to an event handler.
- If you haven't done this before, read carefully. In the button's XAML after
Width="30", start typing the wordClick, and then press the Tab key twice. You will note that as with other WPF apps, this action prompts the creation of an event handler, as shown here:
- After you've done this step, an event handler will be created in
MainWindow.xaml.cs. We will return to this event handler after the next step. - Let's make a few more changes to this code. First, in the
Windowelement's properties, change theHeightattribute to600and theWidthattribute to800. Then, add someGridrow definitions, as shown in following code sample. Lastly, below theTextBlocktag, add aDataGridtag and name itMyDataGrid. Make sure you've entered exactly what is shown in the code sample. Also, note that the scale related to XAML has been removed:<Window x:Class="ArcGISApp1.MainWindow" xmlns="http://schemas.microsoft.com/winfx/2006/xaml/presentation" xmlns:x="http://schemas.microsoft.com/winfx/2006/xaml" xmlns:esri="http://schemas.esri.com/arcgis/runtime/2013" Title="MainWindow" Height="600" Width="800" > <Grid> <Grid.RowDefinitions> <RowDefinition Height="400" /> <RowDefinition Height="200" /> </Grid.RowDefinitions> <esri:MapView x:Name="MyMapView" Grid.Row="0" LayerLoaded="MyMapView_LayerLoaded" > <esri:Map> <esri:ArcGISTiledMapServiceLayer ID="Basemap" ServiceUri="http://services.arcgisonline.com/ArcGIS/rest/services/World_Topo_Map/MapServer"/> <esri:ArcGISDynamicMapServiceLayer ID="USA" ServiceUri="http://sampleserver6.arcgisonline.com/arcgis/rest/services/USA/MapServer"/> </esri:Map> </esri:MapView> <TextBlock Grid.Row="0" Name="Search" Background="#77000000" HorizontalAlignment="Center" VerticalAlignment="Top" Padding="5" Foreground="White" > <Run>Search for </Run> <TextBox Name="SearchTextBox" Text="Lancaster"></TextBox> <Run> in the Cities, Counties or States layer: </Run> <Button Content="Find" Width="30" Click="Button_Click"></Button> </TextBlock> <DataGrid Name="MyDataGrid" Grid.Row="2" Height="200"></DataGrid> </Grid> </Window> - Right-click on
MainWindow.xamland click on View Code, or just double-click on it. - Add the following
usingstatements at the top of the source file:using Esri.ArcGISRuntime.Controls; using Esri.ArcGISRuntime.Data; using Esri.ArcGISRuntime.Geometry; using Esri.ArcGISRuntime.Layers; using Esri.ArcGISRuntime.Tasks; using Esri.ArcGISRuntime.Tasks.Query;
- Also, note that in the source code file, there is a new
privatemethod calledButton_Click. It currently has no code in it. We will now populate it with some code so that we can search for a city, county, or state. Enter the following code in the event handler (Button_Click). Also note that theasynckeyword has been added to the event's signature:private async void Button_Click(object sender, RoutedEventArgs e) { var url = "http://sampleserver6.arcgisonline.com/arcgis/rest/services/USA/MapServer"; var findTask = new FindTask(new Uri(url)); var findParameters = new FindParameters(); findParameters.LayerIDs.Add(0); // Cities findParameters.LayerIDs.Add(3); // Counties findParameters.LayerIDs.Add(2); // States findParameters.SearchFields.Add("name"); findParameters.SearchFields.Add("areaname"); findParameters.SearchFields.Add("state_name"); findParameters.ReturnGeometry = true; findParameters.SpatialReference = MyMapView.SpatialReference; findParameters.SearchText = SearchTextBox.Text; findParameters.Contains = true; FindResult findResult = await findTask.ExecuteAsync(findParameters); var foundCities = 0; var foundCounties = 0; var foundStates = 0; // Loop through results; count the matches found in each layer foreach (FindItem findItem in findResult.Results) { switch (findItem.LayerID) { case 0: // Cities foundCities++; break; case 3: // Counties foundCounties++; break; case 2: // States foundStates++; break; } } // Report the number of matches for each layer var msg = string.Format("Found {0} cities, {1} counties, and {2} states containing '" + SearchTextBox.Text + "' in a Name attribute", foundCities, foundCounties, foundStates); MessageBox.Show(msg); // Bind the results to a DataGrid control on the page MyDataGrid.ItemsSource = findResult.Results; } - Once you've completed entering the code, run the app. You should note that the window is larger and that there is a data grid at the bottom of the window. You will also see all the layers in the dynamic map service. You can now click on the Find button. A message box will appear, indicating the number of cities, counties, and states that have the name
Lancasterin them. Refer to the included sample project code with this book, namedChapter1, if you need any help:
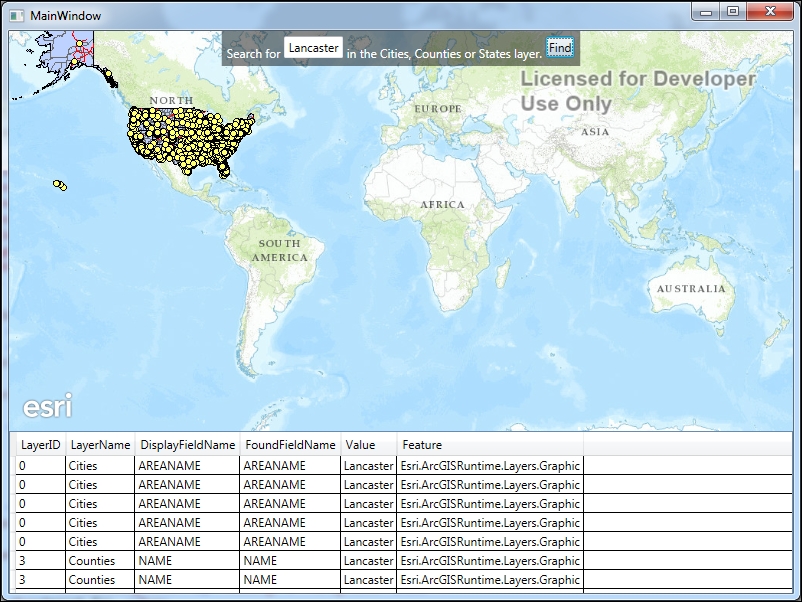
That was the name of my home town. Try yours. Note that not all cities in the USA are in the Cities layers.
There were several things in the code-behind file. First, the URL of the map service was set, a FindTask constructor was created, a FindParameters argument was added, search fields were set, a parameter was set to return the geometry, the spatial reference was set, the search text was set, a parameter was set as to whether to use the exact text entered, FindResult was executed asynchronously, the results were looped over to find the counts in each layer, a message was created with the counts, and finally, and most importantly, the results were passed into the DataGrid tag's ItemsSource so that it can be viewed. In the next chapters, we will go over these objects in more detail.