
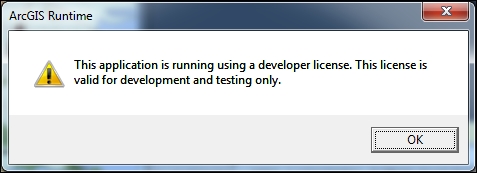
One of the great features of developing with ArcGIS Runtime is that you can download it and start developing as soon as you create a developer account. Of course, you will also see this watermark on your map until it is licensed:

You will also see a debug message in the Output window of Visual Studio. To have these messages removed from your app, you need to license it so that it meets Esri's license agreement terms. Let's discuss what kind of licensing options we have first, however. You have three licensing options:
- Developer
- Basic
- Standard
You can develop and test using a Developer license at no cost. This is the kind of license you have once you download the SDK. A Developer license is not for deployment. A Basic license won't cost you anything, except that it has limited functionality. You can deploy with a Basic license. The Standard version of ArcGIS Runtime has a cost associated with it and it exposes all of the functionality of the API. You can also deploy with a Standard license. To determine this cost, you need to talk with your Esri representative. Otherwise, you can develop and test using a Developer license, without having to do anything else.
Let's look at the differences between the three license levels:
|
License level |
Functionality |
|---|---|
|
Developer |
With this level of license, all functionality is available to you, except that you get the watermark, the debug statement, and the message you've seen with the San Francisco app we've built. |
|
Basic |
With this level of license, you get everything except the following functionalities:
|
|
Standard |
You get everything. |
Refer to the following screenshot for the message that you get in the Developer license:
So which license do you need? Well, if your app will only consume online services, or just view local content, you can get away with the Basic license. If your app, on the other hand, will do anything with local routing, address geocoding, editing, or syncing with a feature service, you'll need a Standard license.
As mentioned in the preceding section, you have two options that license the deployment of your app, so in this section, we'll go through the steps for each.
To license at the Basic level, you need to go back to the ArcGIS for Developers site:
- Go to https://developers.arcgis.com/ and sign in with the account you created at the beginning of this book.
- Click on Register New Application. Complete the fields you see on the form. Then, click on Register New Application. You will be taken to the new application's page, where you will see a Client ID field, such as this one:
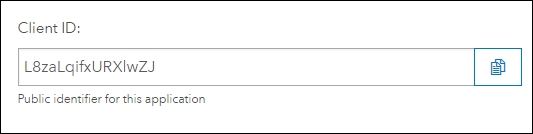
- Copy the Client ID value.
- In every project file we've created in this book, there has been an
App.xaml.csfile that contains the start-up code for your app. It looks similar to this:public partial class App : Application { private void Application_Startup(object sender, StartupEventArgs e) { try { ArcGISRuntimeEnvironment.Initialize(); //ArcGISRuntimeEnvironment.ClientId = "<Your Client ID>"; } catch (Exception ex) { MessageBox.Show(ex.ToString(), "ArcGIS Runtime initialization failed."); // Exit application this.Shutdown(); } } } - Uncomment the line where
ClientIDis set and past in your client ID fromdevelopers.arcgis.com. Consider the following example:ArcGISRuntimeEnvironment.ClientId = "Wa7qYHoBb3FFYOzk";
- Run your app and you'll note that Licensed for Developer Use Only has been removed. Your app is now licensed for the Basic level licensing.
For Standard-level licensing, you have two options:
- You can use ArcGIS Online or Portal for ArcGIS to license your app. However, this will only work if your app will connect to Portal for AGOL at least every 30 days. This option is a good option for Enterprise Mobility apps.
- If your app won't be connected at all, or will be disconnected for 30 days or more, you will need to contact Esri for the license code. You can purchase licenses in packs.
To license your app using Portal or ArcGIS Online, you will need to follow these steps:
- As we did earlier, obtain the client ID for the Basic licensing.
- You will now need to write some code to have it check ArcGIS Online or Portal. To accomplish this, you'll need to use the
IdentityManagerclass fromEsri.ArcGISRuntime.Security. This class allows you to pass in your organizational username/password and it will determine whether your account is authorized. You will also need to add a reference toEsri.ArcGISRuntime.Portal:// Connect to ArcGIS Online or Portal for ArcGIS using organization // account try { // exception will be thrown here if bad credential ... var cred = await IdentityManager.Current.GenerateCredentialAsync( this.portalURL, this.username, this.password); // add the credential if it was generated successfully IdentityManager.Current.AddCredential(cred); // identity manager will automatically include an available credential when connecting (based on the server URL) portal = await ArcGISPortal.CreateAsync(new Uri(this.portalURL)); } catch (ArcGISWebException webExp) { var msg = "Could not log in. Please check credentials. Error code: " + webExp.Code; } // once connected, get the license info from the portal for the current user var licenseInfo = portal.ArcGISPortalInfo.LicenseInfo; // set the license using the static ArcGISRuntimeEnvironment class Esri.ArcGISRuntime.ArcGISRuntimeEnvironment.License.SetLicense(licenseInfo); // get a JSON representation of the license info var licenseJSON = licenseInfo.ToJson(); // ... code here to save JSON license string locally ...
This code first uses the IdentityManager class to generate a credential based on the URL to a Portal, username, and password. The Portal URL would be as follows if using ArcGIS Online:
https://www.arcgis.com/sharing/rest
Otherwise, you will need to specify the location of your on-premises Portal for ArcGIS. This will produce a JSON representation of your license.
Now that you have a JSON representation of the license, you need to provide that to your app, as shown here:
try
{
    // set the client ID and initialize the ArcGIS Runtime
    Esri.ArcGISRuntime.ArcGISRuntimeEnvironment.ClientId = " Wa7qYHoBb3FFYOzk ";
    Esri.ArcGISRuntime.ArcGISRuntimeEnvironment.Initialize();
}
catch (Exception ex)
{
    Console.WriteLine("Unable to initialize the ArcGIS Runtime with the provided client ID: " + ex.Message);
}

try
{
    // use the static FromJson method on LicenseInfo to create the
   // license
    var localLicenseInfo = LicenseInfo.FromJson(this.licenseJSON);

    // set the license
    Esri.ArcGISRuntime.ArcGISRuntimeEnvironment.License.SetLicense(
            localLicenseInfo);
}
catch (Esri.ArcGISRuntime.LicenseException ex)
{
    Console.WriteLine("Unable to license the ArcGIS Runtime with the
            license string provided: " + ex.Message);
}
With this saved license code, you can now use the app offline for 30 days before you need to reconnect to Portal or ArcGIS Online. If the app is used beyond 30 days, it will only have the Basic license's functionality, which may cause an error if your app has the Standard license's functionality. As such, you will want to not call functionality where the Standard license's functionality is being used. With WPF, you could bind to a property that checks whether the license is valid or not.
To use an extension for a local server, such as 3D Analyst, you will now need to license your app for that extension using the following steps:
- Add the following code to your app start-up code:
try { // set the client ID and initialize the ArcGIS Runtime Esri.ArcGISRuntime.ArcGISRuntimeEnvironment.ClientId = "Wa7qYHoBb3FFYOzk"; Esri.ArcGISRuntime.ArcGISRuntimeEnvironment.Initialize(); } catch (Exception ex) { Console.WriteLine("Unable to initialize the ArcGIS Runtime with the provided client ID: " + ex.Message); } try { // use the license code to enable standard level functionality Esri.ArcGISRuntime.ArcGISRuntimeEnvironment.License.SetLicense("runtimestandard,101,rux00000,none,XXXXXXX"); } catch (Esri.ArcGISRuntime.LicenseException ex) { Console.WriteLine("Unable to license the ArcGIS Runtime with the license string provided: " + ex.Message); } - To specify that the license will use an extension, you need to change the string to something like the following code:
Esri.ArcGISRuntime.ArcGISRuntimeEnvironment.License.SetLicense(
    "runtimestandard,101,rux00000,none, XXXXXXX",
    "runtimespatial,101,rux00000,none, XXXXXXX",
    "runtimenetwork,101,rux00000,none, XXXXXXX",
    "runtime3d,101,rux00000,none, XXXXXXX");
Esri will provide the correct string to replace the X instances. Your app will now run with a Standard license and include the ArcGIS extensions required for the local services.
As part of the license agreement with Esri, you need to perform the following steps:
- Add an About screen/dialog and Credits screen/dialog, which includes the text
Mapping API provided by Esri ArcGIS Runtime SDK for .NET. - All map data used in the app must be attributed in the About screen/dialog and Credits screen/dialog using the Copyright Text section of the REST endpoint(s). For example, open the
Esri_StreetMap_World_2Dmap service located at http://server.arcgisonline.com/arcgis/rest/services/ESRI_StreetMap_World_2D/MapServer. - You will then need to find Copyright Text, which looks like this:

This text must appear in About or Credits in your app.
- Finally, you also need to include Esri's logo if your app uses data from ArcGIS Online.
To meet the requirements for the Esri logo, the app must meet the following guidelines:
- The minimum size of the logo is 43x25 pixels
- The logo must be directly on the map, with no background
- The logo should be located at the lower-left corner of the map or scene
- The logo can't have any transparency applied to it
- Lastly, you can't add another logo, such as your company logo, or any other visual element, on the map or scene, which overlaps Esri's logo
We have an app now. We're ready to deploy it to the targeted hardware. We've tested it and we've made sure it performs well. The next thing we need to do is figure out how to deploy it to the targeted device(s). Well, one of the great features of ArcGIS Runtime is that it can simply be copied from one device to another and it will just run, without having to create an installation program where you'd have to modify the registry. This of course doesn't include any data your app will need. Also, this doesn't include the fact that developing on Windows Desktop, Windows Store, or Windows Phone requires a different set of concepts and steps that account for the differences in these platforms.
Another great feature of ArcGIS Runtime is that you can pick and choose the options you need to deploy. As a result, if you don't need local services, you don't need to include them. This reduces the size of the deployment, which can be very important with devices such as Raspberry Pi, where disk space will be at a premium.
In the following sections, we'll address the steps you'll need to take to deploy your app.
You can create your deployment using the Visual Studio IDE. Let's take the Chapter1 project that you built in Chapter 1, Introduction to ArcGIS Runtime, and modify it so that you can deploy it:
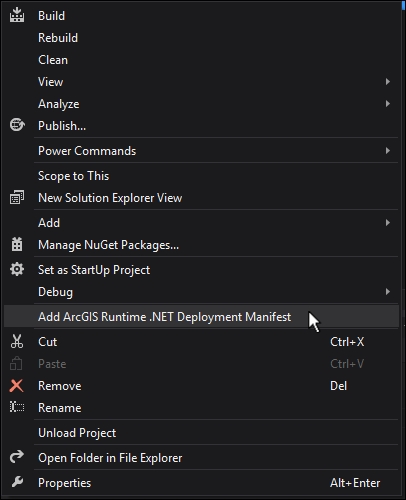
- Right-click on the project file and click on Add ArcGIS Runtime Deployment Manifest, as shown here:
- Double-click on the resulting file called
Deployment.arcgisruntimemanifest. It will look like this: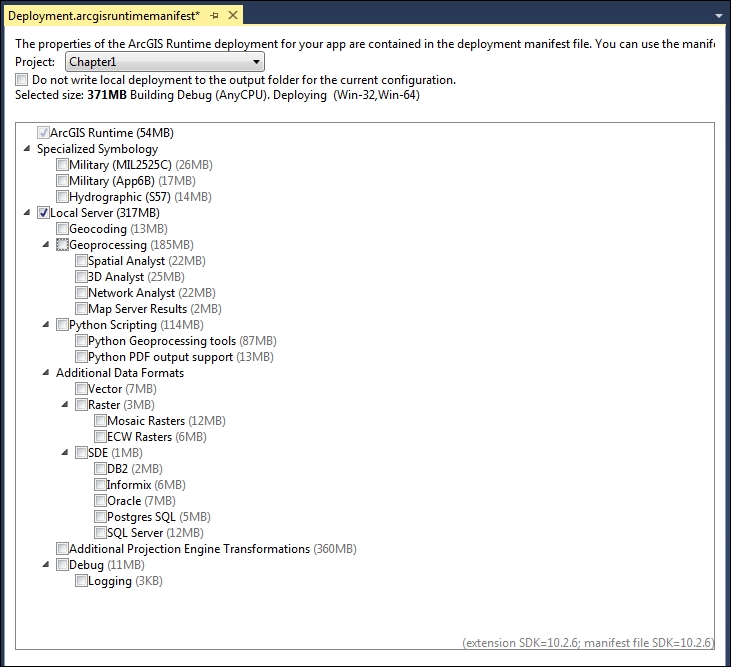
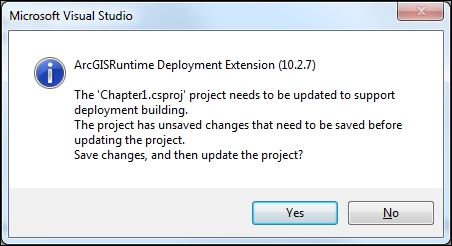
- You will be prompted to save changes and update your project, as shown here:
- You will now be prompted to reload your project, as shown here:
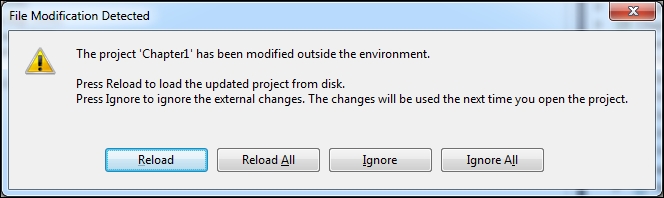
- Click on Reload.
As you can see from this screenshot, you can select the components to include in your deployment. The more options you include, the larger your deployment. A very nice feature with the manifest is that it will total up the size of your deployment for you and it provides the size of each item. If you don't need Specialized Symbology, don't include it. The ArcGIS Runtime checkbox is also checked; but as you can see in the preceding screenshot, it's only 54 MB. That's incredibly small! You will also note beside Selected size that this project is currently in debug mode and it's ready to be deployed as a 32-bit and 64-bit app. If you don't want to include a 32-bit option, change your project's Build settings to 64-bit. This will greatly reduce the size of the deployment. If you select Any CPU, a deployment for 32-bit, 64-bit, and ARM will be created.
Let's finalize this deployment with a few more steps:
- Select the option you want to include. If you plan to use local services, you'll need to select Local Server and any of the options below it. If you don't select the necessary options for your project, they won't be included.
- Change your project to run on Any CPU, and then build it.
- Open Windows Explorer and open the directory under
C:ArcGISRuntimeBook, and you'll note the following directory structure:
This directory structure shows you that the 32-bit (
client32) and 64-bit deployments were created. You will also see many other two-letter folder names, such ascs, that contain a single file calledEsri.ArcGISRuntime.resources.dll. These files contain the strings to support ArcGIS Runtime in a specific language. - As we are in the debug mode in this app, go to the
Debugdirectory and double-click on the app. It's calledChapter1.exe. The app will run as it did in Visual Studio.
It's also possible to deploy without a manifest file by manually performing the following steps:
- Create a folder where you want the deployment to be located. Make sure your folder has a descriptive name.
- Copy the
.exefile and any required supporting files (the data, 3D models, configuration files, and so on). - Copy the ArcGIS Runtime for .NET assembly and the
Esri.ArcGISRuntime.dllfile to the deployment folder. This will be the same location as your.exefile. - Copy the entire
ArcGISRuntime10.2.7folder from thebuilddirectory to the deployment folder. - Under the
ArcGISRuntime10.2.7folder, remove any unnecessary platform folders, such asClient64. - Verify that your app starts and works properly.