
Chapter 9
Particle Effects
To create special visual effects, game programmers often make use of particlesystems. Particle systems work by emitting vast numbers of tiny particles and rendering them efficiently, much more efficiently than if they were sprites. This allows you to simulate effects such as rain, fire, snow, explosions, vapor trails, and many more.
Particle systems are driven by a great number of properties. By great I mean about 30 properties, which all influence not only the appearance and behavior of individual particles but the whole particle effect. The particle effect is the totality of all particles working together to create a particular visual outcome. One particle alone does not make a fire effect; ten still don’t get close enough. You would want several dozens, if not hundreds, of particles to work together in just the right way to create the fire effect.
Creating convincing particle effects is a trial-and-error process. Trying all the various properties in source code and tweaking a particle system by compiling the game, seeing what it looks like, and then making changes and repeating this process is cumbersome to say the least. That's where a particle design tool comes in handy, and I know just the right one: it's called Particle Designer, and I'll explain how it works in this chapter.
Example Particle Effects
Cocos2d comes with a number of built-in particle effects that give you a good idea of the kinds of effects they'll produce. You can use them as placeholders in your game or subclass and modify the examples defined in the CCParticleExamples.m file if you just want to apply some minor tweaks. The good thing about them is that you don't need any outside help; you create the example particle effects as if they were simple CCNode objects. As a matter of fact, they are actually derived from CCNode.
I created a project called ParticleEffects01 that shows all the cocos2d example particle effects. You can cycle through the examples by quickly tapping the screen, and you can also drag and move them with your finger. Many particle effects look totally different as soon as they start moving, as you can see in Figure 9–1, so what seems like just a huge blob of particles may well work as an engine exhaust effect if the particle effect is moving.
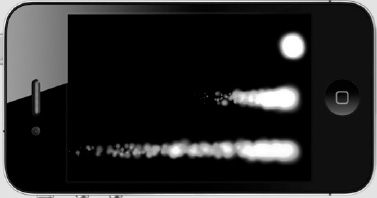
Figure 9–1. The same particle effect from top to bottom: motionless, moving slowly, moving fast
There's only one type of effect that can't be moved once started, and these are one-time effects like the CCParticleExplosion shown in Figure 9–2. What's special about this effect is that it emits all its particles at once and stops emitting new particles instantly. All other particle effects run continuously, always creating new particles while those that have exceeded their lifetime are removed. The challenge in that situation is to balance the total number of particles that are on the screen.
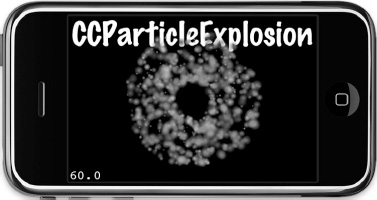
Figure 9–2. The CCParticleExplosion is an example effect provided by cocos2d.
Listing 9–1 shows the relevant methods used in the ParticleEffects01 example project. By using the current particleType variable in the switch statement, the corresponding built-in particle effect is created. Note that a CCParticleSystem pointer is used to store the particles, so I need to use the addChild code only once at the end of the runEffect method. Every example particle effect is derived from CCParticleSystem.
Listing 9–1. Using the Built-in Effects
-(void) runEffect

{

    // remove any previous particle FX

    [self removeChildByTag:1 cleanup:YES];


    CCParticleSystem* system;


    switch (particleType)

    {
case ParticleTypeExplosion:
system = [CCParticleExplosion node];
break;
case ParticleTypeFire:
system = [CCParticleFire node];
break;
case ParticleTypeFireworks:
system = [CCParticleFireworks node];
break;
case ParticleTypeFlower:
system = [CCParticleFlower node];
break;
case ParticleTypeGalaxy:
system = [CCParticleGalaxy node];
break;
case ParticleTypeMeteor:
system = [CCParticleMeteor node];
break;
case ParticleTypeRain:
system = [CCParticleRain node];
break;
case ParticleTypeSmoke:
system = [CCParticleSmoke node];
break;
case ParticleTypeSnow:
system = [CCParticleSnow node];
break;
case ParticleTypeSpiral:
system = [CCParticleSpiral node];
break;
case ParticleTypeSun:
system = [CCParticleSun node];
break;
default:
// do nothing
break;
}
[self addChild: system z:1 tag:1];
[label setString:NSStringFromClass([system class])];
}
-(void) setNextParticleType
{
particleType++;
if (particleType == ParticleTypes_MAX)
{
particleType = 0;
}
}
NOTE: The NSStringFromClass method is very helpful in this example for printing out the name of the class without having to enter dozens of matching strings. It's one of the cool runtime features of the Objective-C language that you're able to get a class's name as a string. Try to do that in C++, and you'll be biting your toenails. The Objective-C Runtime Programming Guide is a good starting point if you like to dive into this advanced topic or if you just want to learn how Objective-C works on a lower level: http://developer.apple.com/library/mac/#documentation/Cocoa/Conceptual/ObjCRuntimeGuide/Introduction/Introduction.html.
For game-play code, the NSStringFromClass and related methods hardly play any role, but they're very helpful debugging and logging tools. You can find a complete list and description of these methods in Apple's Foundation Function Reference: http://developer.apple.com/mac/library/documentation/Cocoa/Reference/Foundation/Miscellaneous/Foundation_Functions/Reference/reference.html.
If you use one of these example effects in your own project, you might be shocked to see ugly, square pixels. Figure 9–3 shows this effect very clearly. This occurs because all of thebuilt-in particle effects try to load a specific texture named fire.png, which is distributed with cocos2d-iphone in the Resources/Images folder. You can still create very good particle effects even without a texture, provided that the particle sizes remain fairly small. But to see the built-in particle effects as they were intended, you need to add the fire.png image to your Xcode project.
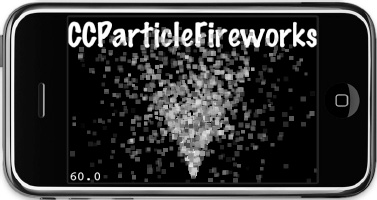
Figure 9–3. If your example particle effects, like this CCParticleFireworks, display huge, square particles, you forgot to add the fire.png image to your Xcode project.
Creating a Particle Effect the Hard Way
You can easily create your own subclass of the CCParticleSystem class. What's not so easy is creating a convincing particle effect with it, let alone one that comes close to what you originally envisioned. The following is the list of properties grouped by function that determine the particle system's look and behavior:
emitterMode = gravitysourcePositiongravityradialAccel,radialAccelVarspeed,speedVartangentialAccel,tangentialAccelVar
emitterMode = radiusstartRadius,startRadiusVar,endRadius,endRadiusVarrotatePerSecond,rotatePerSecondVar
durationposVarpositionTypestartSize,startSizeVar,endSize,endSizeVarangle,angleVarlife,lifeVaremissionRatestartColor,startColorVar,endColor,endColorVarblendFunc,blendAdditivetexture
As you can imagine, there's a lot to tweak here, and that is the main problem of achieving what you want: you don't see the effect of your changes until you rebuild and run your project. You'll learn that when we get to Particle Designer later in this chapter how much it streamlines the creation of new particle effects.
For now let's do it the hard way first and start at the beginning to gain an understanding about how the cocos2d particle system works. To program a particle effect from scratch, you'll first learn how to subclass the CCParticleSystem class and how to initialize it. A detailed description of the particle system's properties follows.
Subclassing CCParticleSystem: Point or Quad?
To create your own particle effect without Particle Designer, you should subclass either from CCParticleSystemPoint or from CCParticleSystemQuad. Point particles are a bit faster on first- and second-generation iOS devices but don't perform well on third- and fourth-generation devices like the iPhone 3GS, iPad, and iPhone 4. This is because of the change in CPU architecture. The ARMv7 CPU architecture used in third- and fourth-generation devices introduced optimizations and new features, such as a vector floating-point processor and the SIMD instruction set (NEON).The CCParticleSystemQuad class benefits fromboth.
If in doubt, Iprefer touse the CCParticleSystemQuad since it performs reasonably well across all devices and creates exactly the same visual effects. Or let cocos2d make that decision for you based on the build target. You'll see how you can do so in the ParticleEffectSelfMade class I've added to the ParticleEffects02 project, which you can see in Listing 9–2.
Listing 9–2. Subclassing from the Optimal Particle System Class
#import <Foundation/Foundation.h>

#import "cocos2d.h"


// Depending on the targeted device the ParticleEffectSelfMade class will either derive

// from CCParticleSystemPoint or CCParticleSystemQuad

@interface ParticleEffectSelfMade : ARCH_OPTIMAL_PARTICLE_SYSTEM

{

}

@end
The preprocessor definition ARCH_OPTIMAL_PARTICLE_SYSTEM, instead of an actual class name, is used to determine during compilation which of the two particle systems this class should subclass from. The definition in cocos2d is based on the processor architecture and results either in a CCParticleSystemQuad or in a CCParticleSystemPoint:
// build each architecture with the optimal particle system

#ifdef __ARM_NEON__

    // armv7

    #define ARCH_OPTIMAL_PARTICLE_SYSTEM CCParticleSystemQuad

#elif __arm__ || TARGET_IPHONE_SIMULATOR

    // armv6 or simulator

    #define ARCH_OPTIMAL_PARTICLE_SYSTEM CCParticleSystemPoint

#else

    #error(unknown architecture)

#endif
Now let's look at the implementation of the self-made particle effect, which uses all available properties. I'll attempt to explain each of them, but it's much better to see it for yourself and experiment with the parameters, so I encourage you to tweak the properties in this project. In the ParticleEffects02 project (Listing 9–3), you'll also find comments describing each parameter in brief.
Listing 9–3. Manually Setting a Particle System's Properties
#import "ParticleEffectSelfMade.h"


@implementation ParticleEffectSelfMade

-(id) init

{

    return [self initWithTotalParticles:250];

}


-(id) initWithTotalParticles:(int)numParticles

{

    if ((self = [super initWithTotalParticles:numParticles]))

    {

        self.duration = kCCParticleDurationInfinity;

        self.emitterMode = kCCParticleModeGravity;


        // some properties must only be used with a specific emitterMode!

        if (self.emitterMode == kCCParticleModeGravity)

        {

            self.sourcePosition = CGPointMake(-15, 0);

            self.gravity = CGPointMake(-50, -90);

            self.radialAccel = -90;

            self.radialAccelVar = 20;

            self.tangentialAccel = 120;

            self.tangentialAccelVar = 10;

            self.speed = 15;

            self.speedVar = 4;

        }

        else if (self.emitterMode == kCCParticleModeRadius)

        {

            self.startRadius = 100;

            self.startRadiusVar = 0;

            self.endRadius = 10;

            self.endRadiusVar = 0;

            self.rotatePerSecond = -180;

            self.rotatePerSecondVar = 0;

        }


        self.position = CGPointZero;

        self.posVar = CGPointZero;

        self.positionType = kCCPositionTypeFree;


        self.startSize = 40.0f;

        self.startSizeVar = 0.0f;

        self.endSize = kCCParticleStartSizeEqualToEndSize;

        self.endSizeVar = 0;


        self.angle = 0;

        self.angleVar = 0;


        self.life = 5.0f;

        self.lifeVar = 1.0f;


        self.emissionRate = 30;

        self.totalParticles = 250;


        startColor.r = 1.0f;
startColor.g = 0.25f;
startColor.b = 0.12f;
startColor.a = 1.0f;
startColorVar.r = 0.0f;
startColorVar.g = 0.0f;
startColorVar.b = 0.0f;
startColorVar.a = 0.0f;
endColor.r = 0.0f;
endColor.g = 0.0f;
endColor.b = 0.0f;
endColor.a = 1.0f;
endColorVar.r = 0.0f;
endColorVar.g = 0.0f;
endColorVar.b = 1.0f;
endColorVar.a = 0.0f;
self.blendFunc = (ccBlendFunc){GL_SRC_ALPHA, GL_DST_ALPHA};
// or use this shortcut to set the blend func to: GL_SRC_ALPHA, GL_ONE
//self.blendAdditive = YES;
self.texture = [[CCTextureCache sharedTextureCache] addImage:@"fire.png"];
}
return self;
}
@end
CCParticleSystem Properties
In Listing 9–3 you will have noticed how verbose the code is simply because so many particle system properties can be initialized. And most of them need to be set to acceptable values in order to get a reasonably meaningful particle effect displayed on the screen. Some properties are even mutually exclusive and can't be used together. It's time to take a close look t what these particle system properties actually do.
Variance Properties
You'll notice that many properties have companion properties suffixed with Var. These are variance properties, and they determine the range of fuzzyness that is allowed for the corresponding property. Take, for example, the properties life = 5 and lifeVar = 1. These values mean that on average each particle will live for five seconds. The variance allows a range of 5-1 to 5+1. So, each particle will get a random lifetime between four to six seconds.
If you don't want any variation, set the Var variable to 0. Variation is what gives particle effects their organic, fuzzy behavior and appearance. But variation can also be confusing when you design a new effect, so unless you have some experience, I recommend starting with a particle effect that has little or no variance.
Number of Particles
Let's get acquainted with particles by starting with the total number of particles in the particle effect, controlled by the totalParticles property. The totalParticles variable is usually set by the initWithTotalParticles method but can be changed later. The number of particles has a direct impact both on the look of the effect and on performance.
-(id) init

{

    return [self initWithTotalParticles:250];

}
Use too few particles and you won't get a nice glow, but it may be sufficient to sprinkle a few stars around the player's head when he runs into a wall. Use too many particles and it might not be what you want either, because many particles are rendered on top of one another and possibly blended so you basically end up with a white blob. Furthermore, using too many particles easily kills your framerate. There's a reason why the Particle Designer tool won't let you create effects with more than 2,000 particles.
TIP: In general, you should aim to achieve the desired effect with the smallest number of particles. Particle size also plays an important role—the smaller the size of individual particles, the better the performance will be. Especially with Particle Effects, it is important to test them on first- and second-generation devices because they can have a severe and negative impact on performance on the older devices.
Emitter Duration
The duration property determines how long particles will be emitted. If set to 2, it will create new particles for two seconds and then stop. It's that simple:
self.duration = 2.0f;
If you'd like the particle effect node to be automatically removed from its parent node once the particle system has stopped emitting particles and the last particles have vanished, set the autoRemoveOnFinish property to YES:
self.autoRemoveOnFinish = YES;
The autoRemoveOnFinish property is a convenience feature that is meaningful only if used in conjunction with particle systems that don't run infinitely, like one-time explosion effects. Cocos2d defines a constant kCCParticleDurationInfinity (equals: -1) for infinitely running particle effects.
self.duration = kCCParticleDurationInfinity;
The majority of particle effects are infinitely running and can be stopped only by removing them from the node hierarchy. Infinitely running particle effects ignore the autoRemoveOnFinish property.
Emitter Modes
There are two emitter modes: gravity and radius, controlled by the emitterMode property. These two modes create fundamentally different effects even if most of the parameters are the same, as you can see when you compare Figure 9–4 with Figure 9–5. Both modes use several exclusive properties (see Listing 9–3)that must not be set if they are not supported by the current mode; otherwise, you'll receive a runtime exception from cocos2d like this:
ParticleEffects[6332:207] *** Terminating app due to uncaught exception

            'NSInternalInconsistencyException', reason: 'Particle Mode should be Radius'
Emitter Mode: Gravity
Gravity mode lets particles fly toward or away from a center point. Its strength is that it allows very dynamic, organic effects. You can set gravity mode with this line:
self.emitterMode = kCCParticleModeGravity;
Gravity mode uses the following exclusive properties, which can be used only when emitterMode is set to kCCParticleModeGravity:
self.sourcePosition = CGPointMake(-15, 0);

self.gravity = CGPointMake(-50, -90);

self.radialAccel = -90;

self.radialAccelVar = 20;

self.tangentialAccel = 120;

self.tangentialAccelVar = 10;

self.speed = 15;

self.speedVar = 4;
The sourcePosition determines the offset as a CGPoint from the node's position where new particles appear. The name is a bit misleading in that the actual center of gravity is the node's position, and sourcePosition is an offset to that center of gravity. The gravity property then determines the speed with which particles accelerate in the x and y directions. In this case, the negative values indicate that the gravitational force will accelerate particles toward the left (-50) and downward (-90). But this acceleration is relative to the particle node's position. Since particles start out at a sourcePosition offset of -15 (slightly offset to the left), they will perform a counterclockwise movement around the particle node's position. You can see this effect in Figure 9–4, and tweaking the values in the ParticleEffects02 project helps to understand how sourcePosition and gravity affect the movement of particles.
For the center of gravity to have any impact, the gravity of the particles shouldn't be too high, and the sourcePosition should not be offset too far. The previous values give you a good working example that you can tweak.
The radialAccel property defines how fast particles accelerate the further they move away from the emitter. This parameter can also be negative, which makes particles slow down as they move away. The tangentialAccel property is similar in that it lets particles rotate around the emitter and speed up as they move away. Negative values let the particles spin clockwise, and positive values spin them counterclockwise.
The speed property should be fairly obvious—it's simply the speed of the particles. It has no particular unit of measurement. Figure 9–4 shows an example particle effect using gravity mode. Particles are attracted by the particle node's position and start out slightly to the left of the particle node's position, so they perform a counterclockwise radial movement.
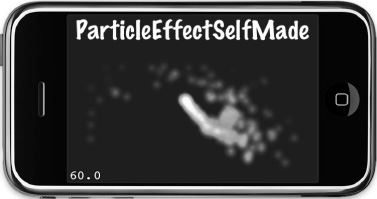
Figure 9–4. The ParticleEffectSelfMade from the ParticleEffects02 project in gravity mode
Emitter Mode: Radius
Radius mode causes particles to rotate in a circle. It also allows you to create spiral effects with particles either rushing inward or rotating outward. You set radius mode with this line:
self.emitterMode = kCCParticleModeRadius;
Like gravity mode, radius mode hasexclusive properties. The following propertiescan be used only when emitterMode is set to kCCParticleModeRadius:
self.startRadius = 100;

self.startRadiusVar = 0;

self.endRadius = 10;

self.endRadiusVar = 0;

self.rotatePerSecond = -180;

self.rotatePerSecondVar = 0;
The startRadius property determines how far away from the particle effect node's position the particles will be emitted. Likewise, the endRadius determines the distance from the node's position the particles will rotate toward. If you want to achieve a perfect circle effect, you can set endRadius to the same as the startRadius using this constant:
self.endRadius = kCCParticleStartRadiusEqualToEndRadius;
Using the rotatePerSecond property, you can influence the direction the particles move and the speed with which they move, and thus the number of times they rotate around if startRadius and endRadius are different.
The same particle effect that was shown in Figure 9–4 using gravity mode is shown in Figure 9–5 using radius mode, and you'll notice how different it looks, despite all other properties—except for the exclusive ones—being the same. To test this, uncomment the following line in the ParticleEffects02 project:
//self.emitterMode = kCCParticleModeRadius;
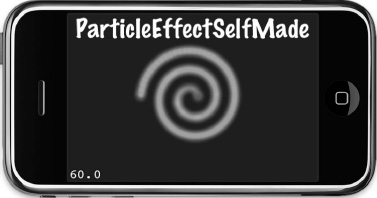
Figure 9–5. The very same effect using radius mode looks completely different.
Particle Position
By moving the node, you also move the effect. But the effect also has a posVar property that determines the variance in the position where new particles will be created. By default, both are at the center of the node:
self.position = CGPointZero;

self.posVar = CGPointZero;
A very important aspect of particle positions is whether existing particles should move relative to the node's movement or whether they should not be influenced at all by the node's position. For example, if you have a particle effect that creates stars around your player-character's head, you would want the stars to follow the player as he moves around. You can achieve this effect by setting this property:
self.positionType = kCCPositionTypeGrouped;
On the other hand, if you want to set your player on fire and you want the particles to create a trail-like effect as the player moves around, you should set the positionType property like this:
self.positionType = kCCPositionTypeFree;
The free movement is best used with effects like steam, fire, engine exhaust smoke, and similar effects that move around with the object they are attached to and should give the impression of not being connected to the object that emits these particles.
Particle Size
The size of particles is given in pixels using the startSize and endSize properties, which determine the size of the particles when they are emitted and how big they are when they are removed. The size of the particle gradually scales from startSize to endSize.
self.startSize = 40.0f;

self.startSizeVar = 0.0f;

self.endSize = kCCParticleStartSizeEqualToEndSize;

self.endSizeVar = 0;
The constant kCCParticleStartSizeEqualToEndSize can be used to ensure that the particle size does not change during a particle's lifetime.
Particle Direction
The direction in which particles are initially emitted is set with the angle property and measured in degrees from 0 to 360. A value of 0 means that particles will be emitted upward, but this is trueonly for thegravity emitterMode. In radius emitterMode the angle property determines where on the startRadius the particles will be emitted; higher values will move the emission point counterclockwise along the radius.
self.angle = 0;

self.angleVar = 0;
Particle Lifetime
A particle's lifetime determines how many seconds it will take to transition from start to end, where the particle will simply fade out and disappear. The life property sets the lifetime of individual particles. Keep in mind that the longer particles live, the more particles will be on-screen at any given time. If the total number of particles is reached, no new particles will be spawned until some existing particles have died.
self.life = 5.0f;

self.lifeVar = 1.0f;
The emissionRate property directly influences how many particles are created per second. Together with the totalParticles property, it has a big impact on what the particle effect looks like.
self.emissionRate = 30;

self.totalParticles = 250;
In general, you will want to balance the emissionRate so that it matches the particle lifetime with the totalParticles allowed in the particle effect. You can do so by dividing totalParticles by life and set the result as the emissionRate:
self.emissionRate = self.totalParticles / self.life;
TIP: By tweaking particle lifetime, the total number of particles allowed in the system, and the emissionRate, you can create burst effects by allowing the stream of particles to be frequently interrupted just because the number of particles on-screen is limited and new particles are emitted relatively quickly. On the other hand, if you notice undesirable gaps in your particle stream, you need to either increase the number of allowed particles or preferably reduce the lifetime and/or emission rate. In that case, you should use emissionRate = totalParticles / life.
Particle Color
Each particle can transition from a starting color to an end color, creating the vibrant colors particle effects are known for. You should at least set the startColor in a particle effect; otherwise, the particles may not be visible at all since the default color is black. The colors are of type ccColor4F, a struct with four floating-point members: r, g, b, and a, corresponding to the colors red, green, and blue, as well as the alpha channel, which determines the color's opacity. The value range for each of these members goes from 0 to 1, with 1 being the full color.
If you want a completely white particle color, you'd set all four r, g, b, and a members to 1.If you want a red color, you only need to set the r and a values to1.0f. If you want blue and then set b and a to 1.0f.Note that the a value is the alpha transparency of the color. If you leave it at the default value of 0.0f, the color will be completely translucent and thus not visible.
// startColor is mostly red and fully opaque

startColor.r = 1.0f;

startColor.g = 0.25f;

startColor.b = 0.12f;

startColor.a = 1.0f;

// startColor has no variance (plus/minus 0.0f)

startColorVar.r = 0.0f;

startColorVar.g = 0.0f;

startColorVar.b = 0.0f;

startColorVar.a = 0.0f;

// endColor is a fully opaque black color

endColor.r = 0.0f;

endColor.g = 0.0f;

endColor.b = 0.0f;

endColor.a = 1.0f;

// endColorVar specifies a full variance range for color blue

// the end of lifetime color of a particle will be randomly between black and blue

endColorVar.r = 0.0f;

endColorVar.g = 0.0f;

endColorVar.b = 1.0f;

endColorVar.a = 0.0f;
Particle Blend Mode
Blending refers to the computation a particle's pixels go through before being displayed on-screen. The property blendFunc takes a ccBlendFuncstruct as input, which provides the source and destination blend modes:
self.blendFunc = (ccBlendFunc){GL_SRC_ALPHA, GL_DST_ALPHA};
Blending works by taking the red, green, blue, and alpha of the source image (the particle) and mixing it with the colors of any images that are already on-screen when the particle is rendered. In effect, the particle blends in a certain way with its background, and blendFunc determines how much and what colors of the source image are blended how much and with which colors of the background.
The formula to determine the final pixel color on-screen is as follows:
(source color * source blend function) + (destination color * destination blend function)
Let's assume our example source pixel has the RGB values (0.1, 0.2, 0.3) and the destination pixel has the RGB values (0.4, 0.5, 0.6). Both color values are multiplied by the blend function, the simplest being GL_ONE, which equals 1.0. That means the resulting pixel's color will be as follows:
(0.1 * 1 + 0.4 * 1, 0.2 * 1 + 0.5 * 1, 0.3 * 1 + 0.6 * 1) = (0.5, 0.7, 0.9)
The blendFunc property has a very profound effect on how particles are displayed. By using a combination of the following blend modes for both source and target, you can create rather bizarre effects or simply cause the effect to render as black squares. There's lots of room for experimentation.
GL_ZEROGL_ONEGL_SRC_COLORGL_ONE_MINUS_SRC_COLORGL_SRC_ALPHAGL_ONE_MINUS_SRC_ALPHAGL_DST_ALPHAGL_ONE_MINUS_DST_ALPHA
You'll find more information on the OpenGL blend modes and details about the blend calculations in the OpenGL ES documentation at www.khronos.org/opengles/documentation/opengles1_0/html/glBlendFunc.html.
TIP: Since it's hard to imagine which blend functions will create which results with varying images, I'd like to point you to an article that describes the most common blend operations with example images: www.machwerx.com/2009/02/11/glblendfunc/.
Even more interesting is the Visual glBlendFunc tool developed by Anders Riggelsen: www.andersriggelsen.dk/OpenGL/. With any HTML5-compatible browser you can play with various images and blend functions to see the results instantly.
Note that you can also modify the blendFunc property of other cocos2d nodes, namely, all nodes that conform to the CCBlendProtocol such as the classes CCSprite, CCSpriteBatchNode, CCLabelTTF, CCLayerColor, and CCLayerGradient.
The source and target blend modes GL_SRC_ALPHA and GL_ONE are frequently combined to create additive blending, resulting in very bright or even white colors where many particles are drawn on top of each other:
self.blendFunc = (ccBlendFunc){GL_SRC_ALPHA, GL_ONE};
Alternatively, you can simply set the blendAdditive property to YES, which is the same as setting blendFunc to GL_SRC_ALPHA and GL_ONE:
self.blendAdditive = YES;
The normal blend mode is set using GL_SRC_ALPHA and GL_ONE_MINUS_SRC_ALPHA, which creates transparent particles:
self.blendFunc = (ccBlendFunc){GL_SRC_ALPHA, GL_ONE_MINUS_SRC_ALPHA};
Particle Texture
Without a texture, all particles would be flat, colored squares, as in Figure 9–3. To use a texture for a particle effect, provide one using the CCTextureCache method addImage, which returns the CCTexture2D for the given image file:
self.texture = [[CCTextureCache sharedTextureCache] addImage:@"fire.png"];
Particle textures look best if they are cloudlike and roughly spherical. It's often detrimental to the particle effect if the texture has high-contrast areas, resembling a particular shape or form, like the redcross.png from the shoot-'em-up game. This makes it easier to see individual particles because they don't blend too well with each other. Some effects can use this to their advantage, like the aforementioned stars circling the player's head. In addition, cartoonlike images or gradients work best, whereas photorealistic images tend to create an undefinable pixel mess. To demonstrate this, you'll see three different textures applied to the same particle effect in Figure 9–6.
The most important aspect of particle textures is that the image must be at most 64x64 pixels in size. The smaller the texture size, the better it is for the performance of the particle effect.
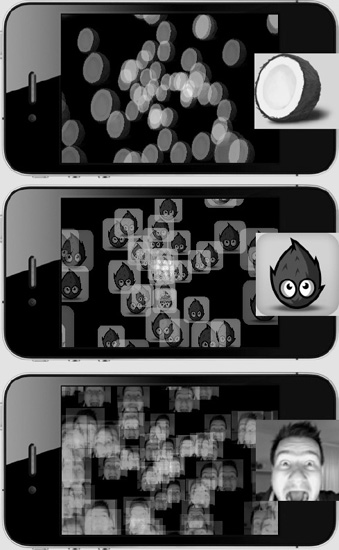
Figure 9–6. The same particle effect using different textures. Photorealistic images don't work well.
Particle Designer
The Particle Designer is an interactive tool for creating particle effects for cocos2d and iOS OpenGL applications. You can download the trial version at http://particledesigner.71squared.com.
This is an invaluable tool that will save you a lot of time creating particle effects. Its power is that you can immediately see what happens on-screen when you change a particle effect's properties, and you can share your creations with others and get inspiration from other developers' particle effects.
Introducing the Particle Designer
By default, the Particle Designer's user interface shows a visual list of particle effects. To edit a particular effect, select it and switch to the Emitter Config view (Figure 9–7) by either double-clicking it or clicking the Emitter Config button in the upper-right corner.
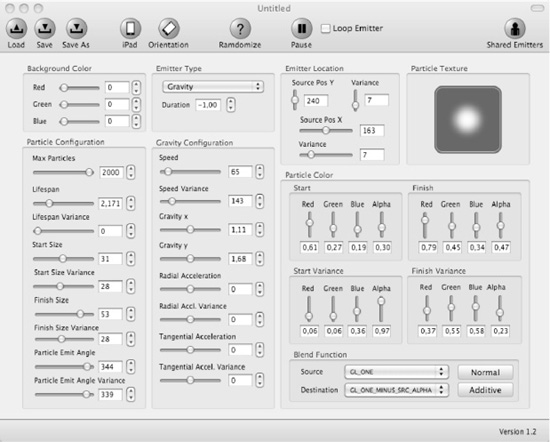
Figure 9–7. Particle Designer is full of properties you can tweak interactively. A separate window (Figure 9–8) shows the effect as you edit it.
You should recognize these parameters from the description of the self-made particle effect properties. There are only a few properties that are not available and can't be edited in Particle Designer. One is the positionType, and another is the endRadiusVar property for the radius emitter mode. The latter means you can't create particle effects that rotate outward in radius mode. But you can always load a Particle Designer effect and then tweak it in code by overriding certain properties, like setting the positionType to kCCPositionTypeFree, as you'll do later in Listing 9–4. This is just a minor nuisance compared to actually seeing on-screen how your effect changes as you move the sliders.
NOTE: The Particle Designer developers are currently working on Particle Designer 2.0, which will feature a redesigned and less crowded user interface. They also plan to create specialized controls to allow you to change both value and variance using a single gauge-like control. So if your Particle Designer looks quite different from the one in Figure 9–7, you're using version 2.0. If version 2.0 is not available as you read this, you should know that the upgrade to version 2.0 will be free for existing customers.
The only unusual control is the Particle Texture. There is no button to load an image, and double-clicking the field doesn't do anything either. The trick here is that the Particle Texture box only accepts images that are dragged and dropped onto it. Just drag any image from Finder over to this box, and the box will turn green, signaling that it will accept that image. Once you drop the image, it will be used by the particle effect.
CAUTION: Particle Designer will warn you if you drop an image that is larger than 512x512 pixels. It will use the image anyway but will scale the image down to 512x512 pixels, regardless of its original aspect ratio. Also, note that the previous limitation of 64x64 pixel textures has been removed with Particle Designer 1.3.
The Particle Designer preview window in Figure 9–8 looks just like the iPhone Simulator. It can also be set to the iPad screen size, and the orientation can be changed by clicking the iPad/iPhone and Orientation buttons in Particle Designer's menu bar, to the right of the Load, Save, and Save As buttons. By clicking and dragging inside the preview window, you can move the particle effect around, which helps you see how the effect might look on moving objects.
Notice that the Background Color settings are not part of the actual effect. They will change the background color of the preview window. This is useful if your game has bright colors and you want to design a dark or dim effect and still be able to see what you're doing.
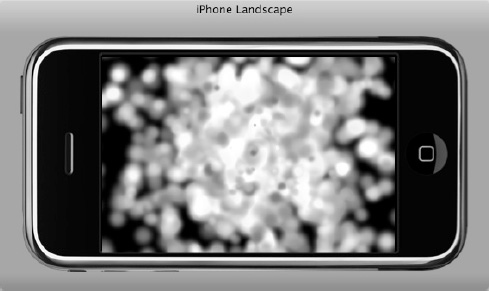
Figure 9–8. The Particle Designer has a preview window that looks like the iPhone Simulator. You can also set it to the iPad screen size and change its orientation. If you click and drag inside the screen, you can even move the particle effect around to see what it might look like on moving objects.
If you lack inspiration, you can always make use of the Ramdomize button. You can also ponder about the meaning of the word ramdomize, which is how it's spelled in the Particle Designer. The Urban Dictionary tells me that ramdom is a cooler form of random. So, I'm guessing the developers just thought their randomizer to be extra cool. Well, it's definitely inspiring even though it doesn't randomize all of the available properties. For example, Ramdomize will never change the emitter type, the emitter location, and many emitter type–specific parameters.
Once you found your inspiration, you'll want to slide the sliders and watch what happens in the preview window. Take your time and tweak an effect until you like it. Careful, though, because it's a very captivating, even mesmerizing, activity, and you'll easily find yourself making new particle effects just for the fun of it.
CAUTION: Be careful when designing particle effects! First, keep in mind that your game has to calculate and render a lot of other things, too. If the effect you're currently designing runs at 60 FPS in Particle Designer's preview window, that doesn't mean it won't kill your framerate when you use it in your game. Always test new particle effects in your game and keep an eye on the framerate. Also, make sure to run these tests on a device, in particular on older devices! Your game's performance in the iPhone/iPad Simulator is often misleading and thus must be regarded as completely irrelevant. The same goes for the Particle Designer preview window.
Using Particle Designer Effects
I'm assuming that, hours later, you've made the perfect particle effect and now you'd like to use that in cocos2d. I made mine, and the first step is to save the particle effect. When you click the Save or Save As button in Particle Designer, you'll be presented with a dialog as shown in Figure 9–9.
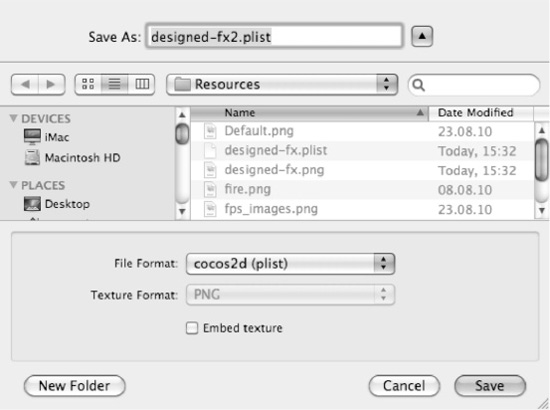
Figure 9–9. Saving a particle effect from Particle Designer requires you set the file format to cocos2d. Embedding the texture into the plist file is optional.
For the saved particle effect to be usable by cocos2d, you must set the File Format setting to cocos2d (plist). You can also check the Embed texture box, which will save the texture into the plist file. The benefit is that you only have to add the plist file to your Xcode project; the downside is that you then can't change the effect's texture without loading the particle effect back into Particle Designer.
After saving the effect, you have to add the effect plist and, if you didn't embed the texture, the effect's PNG file to your Xcode project's Resources group. In the ParticleEffects03 project, I've added both variants, one effect with a separate PNG texture and another effect that has the texture embedded in the plist file.
Listing 9–4 shows how I modified the runEffect method to load the Particle Designer effects.
Listing 9–4. Using a Particle Effect Created with Particle Designer
-(void) runEffect

{

    // remove any previous particle FX

    [self removeChildByTag:1 cleanup:YES];


    CCParticleSystem* system;


    switch (particleType)

    {

        case ParticleTypeDesignedFX:

            system = [CCParticleSystemQuad particleWithFile:@"fx1.plist"];

            break;

        case ParticleTypeDesignedFX2:

            system = [CCParticleSystemQuad particleWithFile:@"fx2.plist"];

            system.positionType = kCCPositionTypeFree;

            break;

        case ParticleTypeSelfMade:

            system = [ParticleEffectSelfMade node];

            break;


        default:

            // do nothing

            break;

    }


    CGSize winSize = [[CCDirector sharedDirector] winSize];

    system.position = CGPointMake(winSize.width / 2, winSize.height / 2);

    [self addChild:system z:1 tag:1];


    [label setString:NSStringFromClass([system class])];

}
You initialize a CCParticleSystem with a Particle Designer effect by using the particleWithFile method and providing the particle effect's plist file as parameter. In this case, I chose a CCParticleSystemQuad since it performs well on all iOS devices. You can also leave this decision to cocos2d by using the ARCH_OPTIMAL_PARTICLE_SYSTEM keyword in place of an actual class name:
system = [ARCH_OPTIMAL_PARTICLE_SYSTEM particleWithFile:@"fx1.plist"];
CAUTION: Particle Designer effects must be initialized with either CCParticleSystemQuad or CCParticleSystemPoint. Even though CCParticleSystem, the parent class for the aforementioned subclasses, implements the particleWithFile method, it won't display anything unless you use one of the subclasses, either Quad or Point particle systems, when loading Particle Designer effects.
As a side note, I moved the two lines that position the particle system node at the center of the screen outside of the switch case to avoid duplicating that code. As I mentioned before, it's always good practice to minimize the amount of code duplication, and this is one area where I've seen developers simply copying and pasting what's already there.
Sharing Particle Effects
What's very cool about Particle Designer is that you can share your creations with other Particle Designer users. From the Particle Designer menu, simply choose Share and then Share Emitter to open a dialog that lets you enter a title and description for your particle effect, as shown in Figure 9–10.
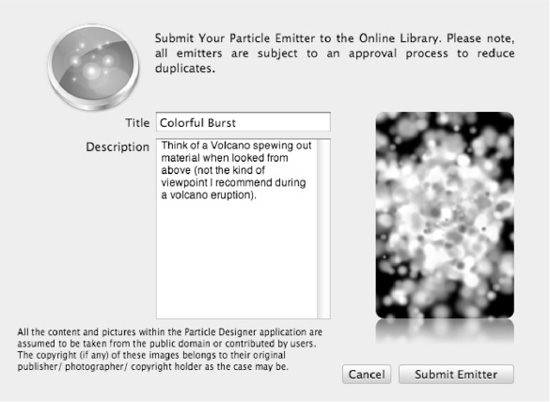
Figure 9–10. By submitting a Particle Effect to the Online Library, you can share your creations with other users.
CAUTION: As the message in Figure 9–8 indicates, you should be careful to only upload artwork for which you have the rights to share and distribute or for which you are the copyright holder. Otherwise, you risk violating someone's copyright or may be violating a nondisclosure or other agreement if you work under contract.
In Figure 9–11, you can see the effect I just submitted in the lower-right corner.
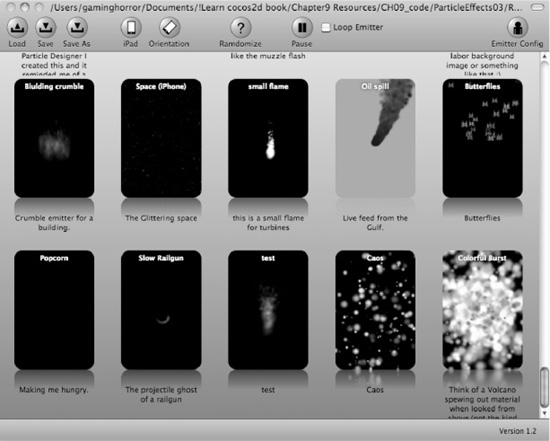
Figure 9–11. The submitted effect quickly appears in the Online Library. The effect I just submitted is the one in the bottom-right corner. Apparently my description was too long to fit in the display area.
Shared particle effects may not always be perfect for your requirements, but they often provide good starting points for your own effects. They help you achieve the desired effect much faster, and, at the very least, they can be an inspiration. I encourage you to scroll through the list of effects and try as many as you can to gain a good sense of what's possible, what looks good, and what just doesn't work.
Shoot 'em Up with Particle Effects
I'd love to see some of these effects in the game! Let's take the shoot-'em-up game to a new level. You'll find the results in this chapter's ShootEmUp04 project along with added sound effects, as well as in Figure 9–12.
In the EnemyEntity class, the gotHit method is the perfect place to add destructive particle explosions, as Listing 9–5 shows. I decided the boss monster should have its own particle effect, mostly because it's so big. And purple.
Listing 9–5. Adding an Explosion Effect to the Shoot 'em Up Game
-(void) gotHit

{

    hitPoints--;

    if (hitPoints <= 0)

    {

        self.visible = NO;


        // Play a particle effect when the enemy was destroyed

        CCParticleSystem* system;


        if (type == EnemyTypeBoss)

        {

            system = [ARCH_OPTIMAL_PARTICLE_SYSTEM

                particleWithFile:@"fx-explosion2.plist"];

        }

        else

        {

            system = [ARCH_OPTIMAL_PARTICLE_SYSTEM

                particleWithFile:@"fx-explosion.plist"];

        }


        // Set some parameters that can't be set in Particle Designer

        system.positionType = kCCPositionTypeFree;

        system.autoRemoveOnFinish = YES;

        system.position = self.position;


        [[GameScene sharedGameScene] addChild:system];

    }

}
The particle effects fx-explosion.plist andfx-explosion2.plistmust be added as resources to the Xcode project. The particle system is initialized as before. Since the particle effect should and must be independent from the enemy that creates it, a few preparations are necessary. First, the autoRemoveOnFinish flag is set to YES so that the effect automatically removes itself. This works because both explosions run only for a short time. The effect also needs the current position of the enemy so that it's displayed at the correct position.
I add the particle effect to the GameScene because the enemy itself can't display the particle effect. To start, it's invisible. It also might be respawned very soon, which would interfere with the particle effect. But most importantly, all EnemyEntity objects are added to a CCSpriteBatchNode, which does not allow you to add anything but CCSprite objects. If the particle effect were added to the EnemyEntity object, a runtime exception would be inevitable.
As you play the game with the new particle effects, you may notice that the first time one of these effects displays, the game play stops for a short moment. That's because cocos2d is loading the particle effect's texture—a rather slow process, whether the texture is embedded into the plist, as in this case, or provided as a separate texture. To avoid that, I've added a preloading mechanism to the GameScene: the init method now calls the preloadParticleEffect method for each particle effect used during gameplay:
// To preload the textures, play each effect once off-screen[self preloadParticleEffects:@"fx-explosion.plist"];
[self preloadParticleEffects:@"fx-explosion2.plist"];
The preloadParticleEffects method simply creates the particle effect. Because the returned object is an autorelease object, its memory will be freed automatically. But the texture it loads will still be in the CCTextureCache.
-(void) preloadParticleEffects:(NSString*)particleFile

{

    [ARCH_OPTIMAL_PARTICLE_SYSTEM particleWithFile:particleFile];

}
If you chose not to embed the texture inside the particle effect plist file, you can preload the particle effect textures simply by calling the CCTextureCacheaddImage method:
[[CCTextureCache sharedTextureCache] addImage:particleFile];
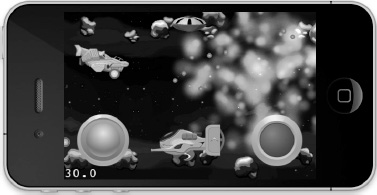
Figure 9–12. I killed the boss, and I can't see a darn thing. But those particles are so beautiful!
Summary
This chapter was truly a visual joyride! The stock effects provided by cocos2d give a good indication of what the particle effect is able to deliver. They're quick and easy to use.
But it was also excruciating to create a particle effect in source code. There are so many properties to tweak; some are exclusive to specific emitter modes; some have misleading names, and they aren't exactly straightforward to figure out. With the explanation for each property, however, you should now have a good understanding how a particle effect is put together and what the most important parameters are.
We then saw how particle effects can shine with Particle Designer. This tool is extremely helpful—and lots of fun—to work with it. Suddenly, when you can move sliders and see the results immediately on-screen, it changes your whole view on particle effects, and even more so since you can share your creations with others and experiment with other designers' effects.
Finally the Shoot ‘em Up game got a makeover and now plays particle explosions when enemies are destroyed. This makes for a much more lively game.
In the next chapter I'll set the Shoot 'em Up game aside for a bit to tell you all you need to know about tilemaps.