
Chapter 8: Mastering Best Practices with Presentations
The strength of a PowerPoint presentation does not only rely on your ability to utilize powerful tools that are housed within the application when creating presentations. It also depends on your ability to design and communicate well. This part of this book focuses on useful design and presentation principles to consider when creating professional presentations.
The following topics will be covered in this chapter:
- Principles of presentation design
- Using clear messages and persuading the audience
- Visual impact and useful techniques
Technical requirements
To complete this chapter, you must be proficient in creating PowerPoint 2021 presentations and have a general overview of the tools available to modify presentations. You must have also worked through Part 2 of this book. The examples for this chapter can be found in this book's GitHub repository: https://github.com/PacktPublishing/Learn-Microsoft-Office-2021-Second-Edition.
Principles of presentation design
In this section, we will learn about the importance of design and presentation skills when creating presentations and identifying tools for quick design. Being able to understand the presentation process when designing slides and recognize that the role of the presenter is important. You will also learn about some design principles that will help your message remain with the audience.
Importance of design and presentation skills
When delivering a presentation to an audience, it is always anticipated to be engaging and impactful and wants to be revisited. As a PowerPoint 2021 user, you can create slides and use the tools that are available along the ribbon, but unless you have acquired a few extra skills, your presentations will not capture an audience effectively during, or after, the presentation has taken place.
We always want to ensure that an audience can remember facts that have been relayed well after we have presented. So, what skills do we, as presenters, need to acquire to produce effective presentations?
Artistic creativity, design, and communication, collectively named technical creativity, are very important skills for presenters, and using any technology should not detract from the examples and facts imparted while presenting the slides to the audience. Depending on the nature of the presentation, without technical creativity, it is easy for the presentation to be deficient in perspective.
Content needs to be presented effectively too; otherwise, the result could lack function. The effectiveness from start to end of a presentation is also dependent on the following four elements:
- Preparation
- Rehearsal
- Timing
- Delivery
You also need to be consistent when adding elements such as font, style, color, and images and always take into account any corporate branding when compiling presentations. When using visual support for content on slides, you need to remember that there must be a reason to use certain elements.
Such reasons could be to add clarification, support facts, or add humor, but always remember the saying "less is more" and apply this rule to every presentation you create. Not every human is great at creative flair when it comes to presentations, but following these simple points will hopefully get you thinking before creating any slides.
Identifying tools to enhance presentation design
Let's have a look at some presentation add-ins to help you enhance your design.
We have discussed tools such as Stock Images, Cutout People, Stickers, Illustrations, Icons, 3D Models, Zoom, Templates, Picture Editing, Photo Album, and Custom Shows, as well as using video functionality in PowerPoint 2021, already, but other tools can make an impact as well. In addition to the PowerPoint that are tools available today, we can also make use of different methods to present and enhance the audience's experience.
We'll look at a few of these in this section.
Accessing the Pickit for PowerPoint add-in
The first add-in that I find extremely useful is the Pickit app. This app is free to use (part-owned by Microsoft) and all the images are legal without license or cost involved. Although it has been around for a few years, it is often not accessed within the PowerPoint environment. It allows for brand designs and custom images to be inserted into slide backgrounds in PowerPoint 2021. Follow these steps:
- To add Pickit, click on Insert | Get Add-ins:
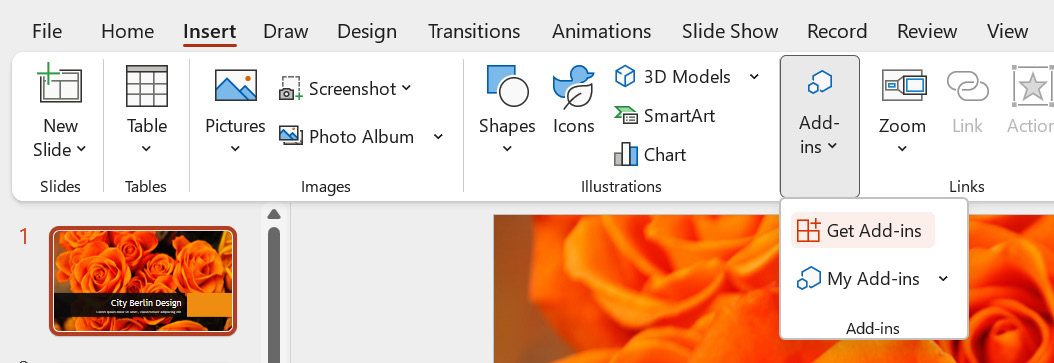
Figure 8.1 – Insert | Get Add-ins
- You should see the Pickit app in the Office Add-ins suggestion dialog box. If not, type Pickit into the Search box provided, then press Enter on your keyboard to locate it.
- Click on the Add icon to insert the Pickit app into PowerPoint:

Figure 8.2 – Using Office Add-ins to locate the Pickit app
- Another screen will populate, asking you to agree to the terms. Click Continue.
- The app, once installed, will appear as a new group named Pickit that contains the Pickit Images button at the end of the Home tab ribbon. When you click on the Pickit button, the options will load to the right-hand side of the PowerPoint environment:
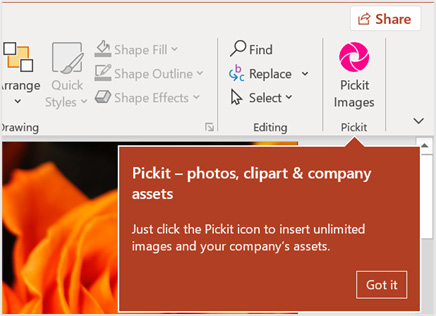
Figure 8.3 – The Pickit Images button on the Home tab
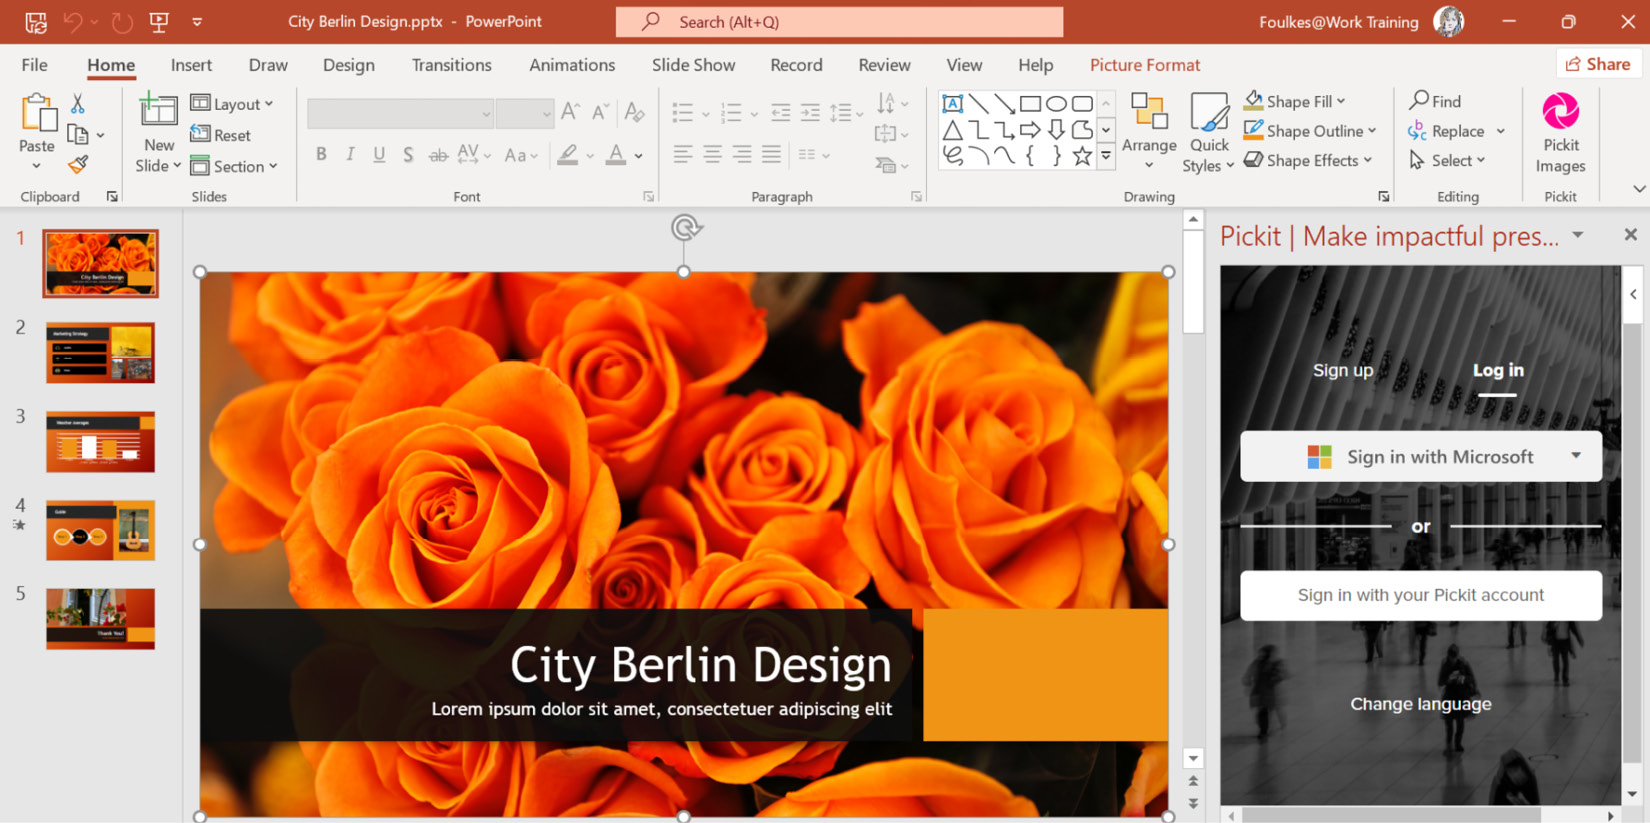
Figure 8.4 – Using the Pickit pane to sign in using your Microsoft or Pickit account details
- The next step would be to confirm permission for the app to access your information. Select Yes to grant permission.
- Use the Search box to locate Illustrations or photos or select a category at the top of the pane. Click on an image to add the item to the selected slide.
This tool will help you create quick, professional images and background designs to suit your presentation using royalty-free elements. Access to this image bank will avoid any copyright issues and wasted time searching for images on the internet. Follow the same process to add the app to OneNote and Word. In the next section, we will learn how to use PowerPoint Designer.
PowerPoint Designer
If you are using PowerPoint 2021 through an Office 365 subscription, then you will have access to PowerPoint Designer. PowerPoint offers the user pre-designed slides based on an image that's been inserted as a slide's background. Follow these steps:
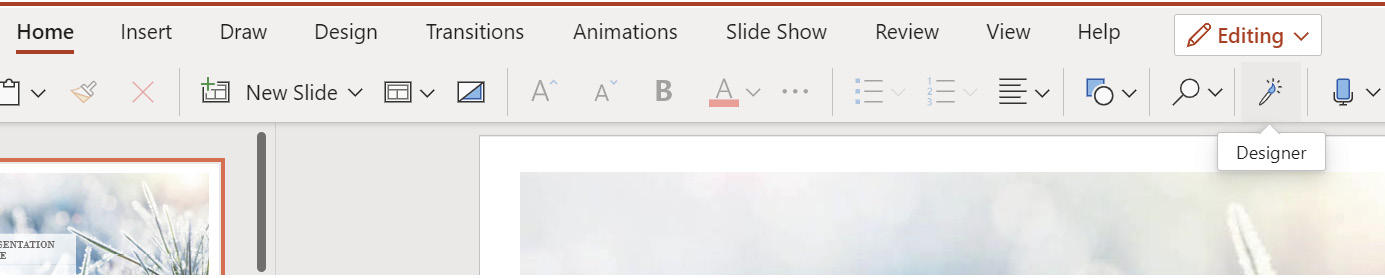
Figure 8.5 – The Designer tool on the Home tab
The Designer tool is perfect for those who do not have design skills as it helps users create stunning presentations with a click of a button. Don't forget about using the remove background, artistic, and color tools, which are other features within PowerPoint that can be used to enhance images to produce stunning visuals. Washout and transparency options provide for contrasting colors over images using shapes and text too.
- After clicking on the Designer button, a pane will appear to the right of the slide:

Figure 8.6 – Using the Designer pane to select designs
- Use the scroll bar to the right of the Designer pane to choose a design. Once a design has been selected for the first slide, click on the second slide in your presentation. Notice to the right that the Designer pane suggests similar designs to compliment the first choice of design. Continue to move through the presentation by applying layouts using the Designer pane.
What we will cover in the next section is useful in situations such as presenting at a conference, for instance, as you can navigate a web page directly within a presentation. Let's investigate how we can achieve this.
Displaying web content
Often, you will need to display a link to a web page within a PowerPoint presentation. On clicking a link on a slide, the relevant website will open in a separate browser. The Web Viewer app provides does this within the PowerPoint application so that you don't have to leave the PowerPoint interface to display web page content within a separate browser. Follow these steps to learn how to use it:
- Select a slide in the presentation where you would like to insert the Web Viewer app.
- Click on Insert | Get Add-ins.
- Click on Add to insert the Web Viewer app.
- Next, confirm that Microsoft has permission to access your information. Select Yes to grant permission.
- The app will be inserted into the selected slide.
- To display a searchable web page directly on a PowerPoint slide, simply type the web address into the URL space provided on the inserted image. Note that some websites can't be viewed in this manner due to security concerns. Remember that you will require an active internet connection when presenting the PowerPoint slides to an audience for this feature to work. The default website is included in the search area, namely www.wikipedia.org. For this example, we will use this website to search for content.
- Press Preview to the bottom right-hand side of the Web Viewer app:

Figure 8.7 – The Preview button on the Web Viewer app
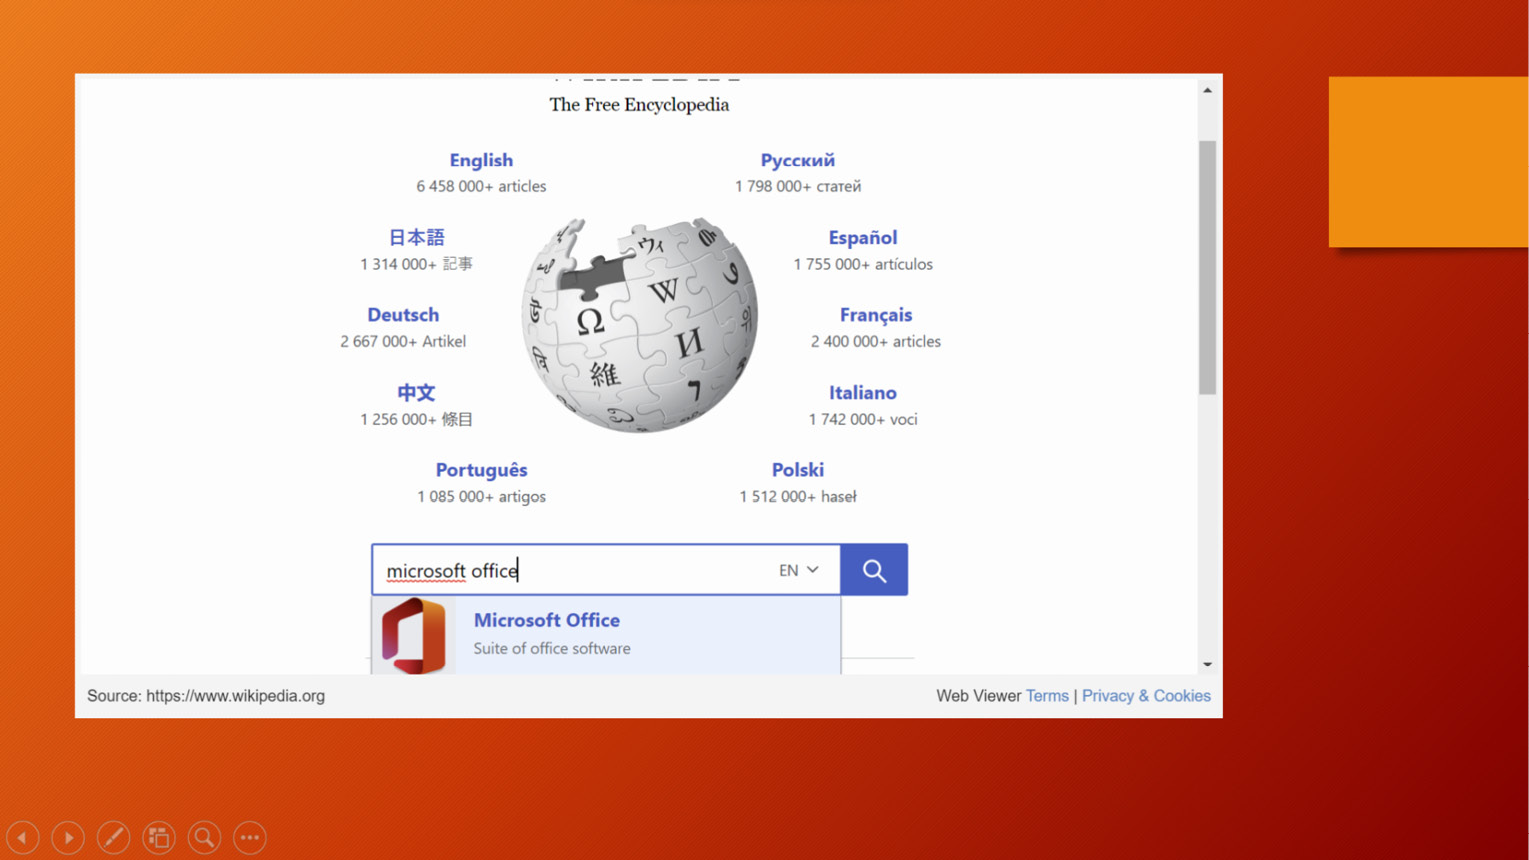
Figure 8.8 – Searching within the Web Viewer app
- Enter a search term in the search area provided. For this example, we will search for Microsoft Office.
- Press Enter or click on the Search button to navigate to the website. When you are done, click on the next slide in the presentation to continue.
Note
We can also use the Link to slide option here. The preceding sections covered just a few additional tools you could apply when creating a presentation. We hope that you absorb the PowerPoint chapters of this book to grab even more value-adding tools in the application. New and existing tools are located on every tab within the PowerPoint 2021 environment.
Now, let's look at the planning aspect of presentation design.
Presentation planning
Planning is crucial to creating a stunning presentation. You should brainstorm by using mind maps (SmartArt or Visio could be useful here), or plan by jotting down points to create an outline of ideas as an introduction, the main body, and the concluding content. After creating the outline, you can think about adding content, then images, captions, and formatting the content. Think about the first slide of the presentation and how you could capture the audience by adding an entertaining image.
The following table shows factors to consider when planning content:

Table 8.1
There are also several things to avoid when creating slide content:
- Create no more than 10 slides in a presentation.
- Your presentation should be no longer than 20 minutes.
- Font size should be no less than 30 pts in size – this is dependent on the design and, of course, sub-points.
- Only add the main points to a slide – this is just the visual aid; the narrative is the important bit. A comprehensive handout can be distributed via an online link after the presentation has been delivered.
Basic design principles
There are several design principles to take into consideration that contribute greatly to the audience's retention of the information you convey to them. The five most important design principles for presentation design are Balance, Movement, Emphasis, Unity, and White Space:

Table 8.2
Symmetrical, which is referred to in the previous table under the Balance section, means that the objects or compilation on a slide are the same on both sides if you draw a line through the middle of the object or design. Asymmetrical is when a design lacks symmetry when its objects do not correspond to each other (in the arrangement of objects, size, or shape) but still maintain balance.
It is important to adjust the visual weight of objects in terms of three elements, as follows:
- Color
- Contrast
- Scale
Taking note of these principles when designing slides will have the benefit of providing an eye-catching, fascinating, and peppy impact. Use tools such as SmartArt to create a flow in the content on a slide.
White space and the rule of thirds
Always take white space on a presentation slide into consideration, and design according to the rule of thirds. Use guides on a slide to create a grid where you can place design elements. White space utilization refers to provisioning minimalism and removing poorly placed objects on slides:
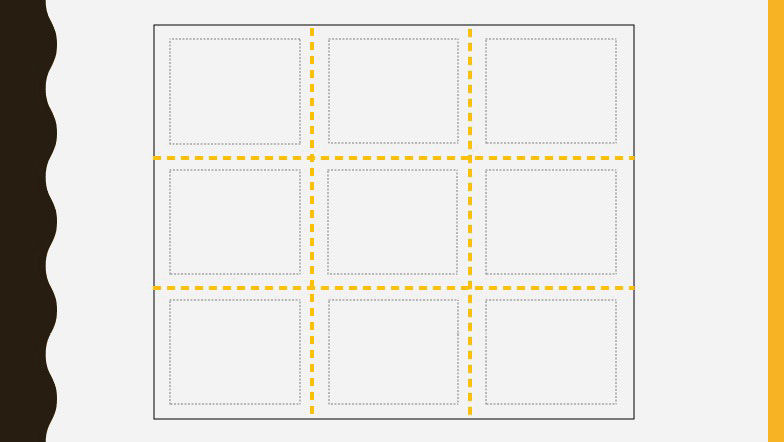
Figure 8.9 – Slide separated by guides using the rule of thirds
Two equally spaced horizontal, and two equally spaced vertical, lines on a slide will divide the slide into nine equal parts where elements can be arranged – this is called the rule of thirds. This photography visual design principle is applied when you're applying images to slides and learning to maximize the use of white space on the slides. Adding an image or text to the center of a slide does not meet the rule of thirds principle:
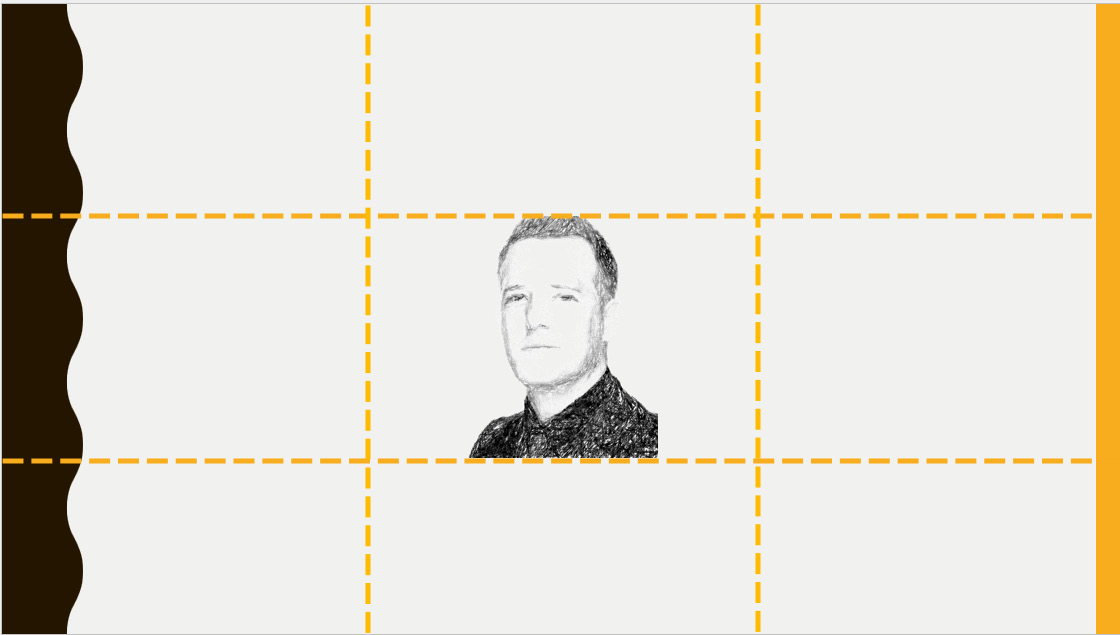
Figure 8.10 – Placing an image in the center of a slide does not meet the rule of thirds
The principle is used in many different disciplines, not only in visual design. A power point (not PowerPoint, the application) involves positioning an element at the intersection between a horizontal and vertical guideline point:

Figure 8.11 – Image positioning using the rule of thirds
Now, let's learn more about communicating to engage audiences.
Using clear messages and persuading audiences
In this section, you will learn how to communicate a pure message by persuading your audience to engage with the content.
It is crucial to establish credibility with an audience when imparting knowledge through slides. To achieve this, you need to be cautious about the number of characters you have on slides within the presentation. Knowledge is key and is portrayed as content on slides, so make sure that complex content is relayed as simple visual statements. Using contrasting colors on slide backgrounds should be limited to two colors. Spacing your text on slides is an important consideration.
In PowerPoint 2021, you can use the Handouts (or Notes) feature so that the audience can refer to the presentation, thereby reinforcing knowledge and retaining content. These are great to make available after the presentation has ended via a link for delegates to access. As a refresher, to print handouts or notes, go to File | Print | Full Page Slides, then choose either Notes Pages or a Handouts option:
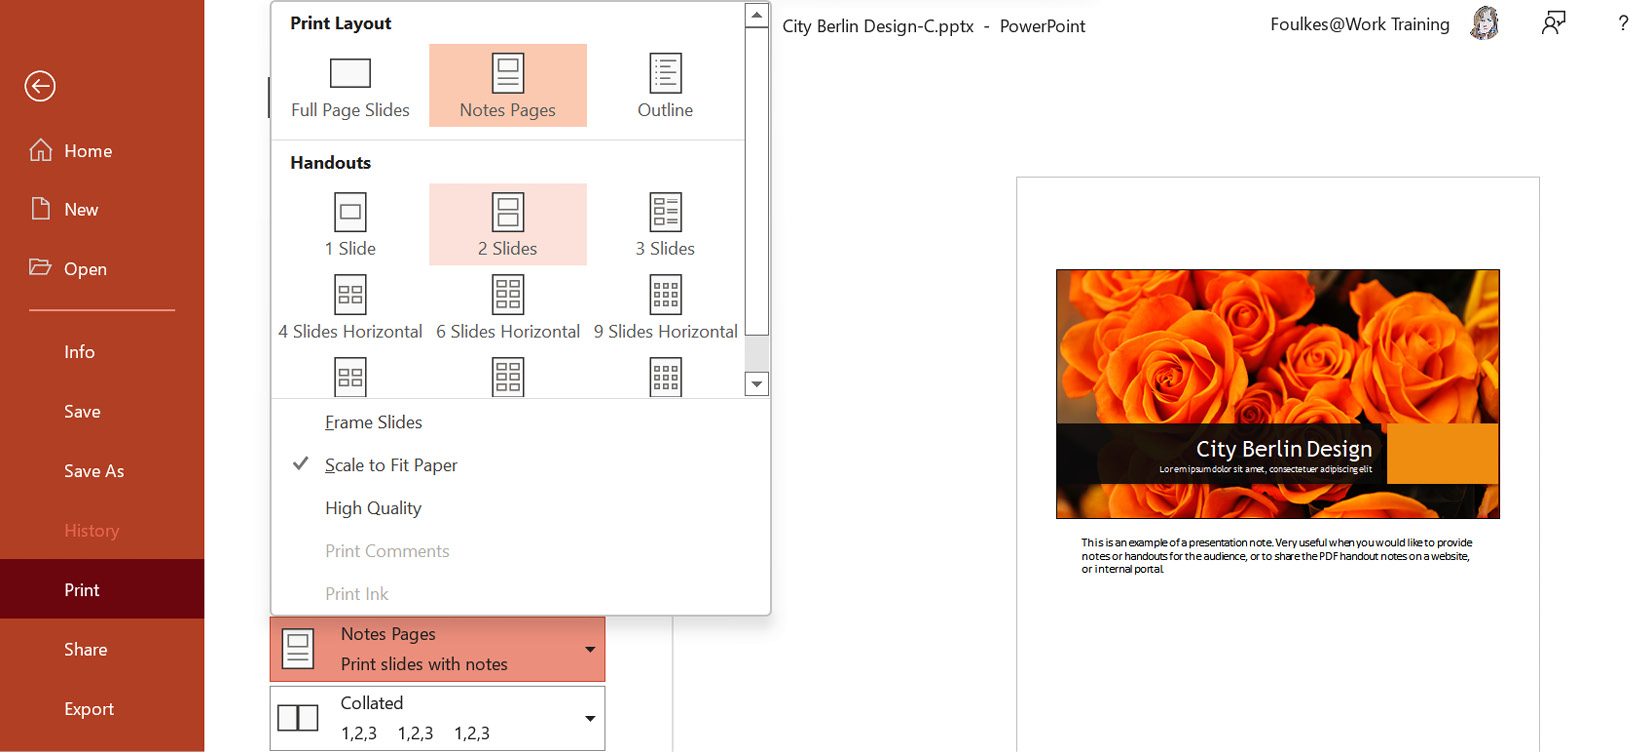
Figure 8.12 – Using the Print | Full Page Slides option to print notes or handouts
Remember that you can also use the Record feature in PowerPoint 2021 to record yourself presenting. Click on Record | Record | From Beginning…, after which you can Export to Video to distribute to the audience.
These tools, and more, will be discussed in Part 2 of this book:
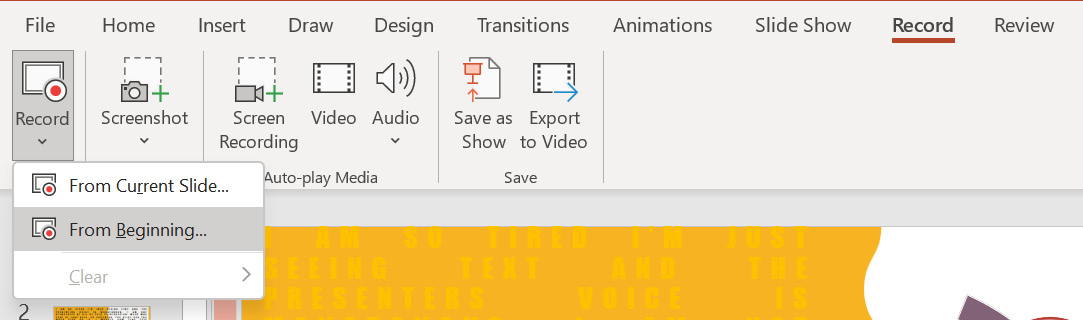
Figure 8.13 – The Record feature in PowerPoint to record narration
When designing presentation slides, it is easy to go off-topic or try to put too much information onto the slide, so try to keep to one point when storytelling. It must be said that if you cannot convey content to an audience in simple terms, then you do not know your content well enough to impart.
The start and end slides of the presentation should be as impactful as possible as this is the time when your audience's attention span is most engaged. Also, note that it is known that an individual will not be able to take in more than four points from a presentation – so, keep it simple.
Don't forget about the Custom Shows… and Sections features in PowerPoint to tailor the presentation to suit your audience.
We all love stories and how expressive they can be told. Use this tactic when presenting your content to an audience as it helps them retain the message. In the next section, you will learn more about this aspect.
Conveying content to an audience
Practicing (or rehearsing) your presentation before delivering it is important to keep an eye on your pitch and tone when projecting your voice to your audience, as this will surely hold the attention and interest of your audience. This is relevant in face-to-face as well as remote presentations through online meeting tools. This is even more relevant through Zoom and Teams – you are less in control as usual as you can't use body language to keep engagement.
Using your voice during online meetings is extremely important, as well as features such as Spotlight in Teams. Visit Chapter 16, Creating and Managing Online Meetings to learn more about these features in detail.
Factors such as nervousness and stress before delivering a presentation often lead to monotony and a fast-paced presentation. So, make sure that you run through the presentation a few times so that you learn to speak slowly. When presenting, you could leave out important words due to nervousness and not even realize it. Practice makes a good presenter. These factors can also affect your body language. Always try to imagine that you are in the audience watching yourself, and if you do not like what you see, change it before presenting! Rehearse with Coach and Presenter Coach in PowerPoint are useful here as you can concentrate on and get real-time feedback on distance, eye contact, and clear view. These are explained fully in Part 2 of this book.
We often present through online platforms, such as Teams and Zoom. There are many methods to aid you, as the presenter, through both Teams and Zoom, and these will be discussed in Chapter 16, Creating and Managing Online Meetings.
PowerPoint Live is one such tool that we will explore that allows presenters to share content with an audience but also create a manageable, comfortable space to present in.
You, as the presenter, need to make sincere connections with the audience that will distract them from reading slides as you are presenting and take away the need for you to be there. Your role is to connect and interact! This can be rectified by connecting with people across the room and moving around using natural body language and hand gestures. Try to think of yourself as the facilitator rather than the presenter taking people on a journey. Don't overload slides with text, animations, or color, and never add all the content so that you are just reading the slides out to the audience. Use verbs on a slide where possible.
Color has a physiological and psychological bearing of 73% on audience engagement and instills learning and understanding. Always be enthusiastic and smile when sharing your presentation content and try and use emotive words to capture engagement. Use a prop or headline or photo that grabs the audience's attention, a quote, or even ask the audience a thought-provoking question regarding the first slide in your presentation.
As Plato said, "The beginning is the most important part of the work."
Another important reason to do a run-through of the presentation is to ensure that the colors that are used on the presentation's text and background can be seen by the audience. It's best to do the run-through at the venue you will be presenting at for this purpose or, if presenting online, ask a colleague to run through the presentation with you as it is always useful to see the audience's experience, as well as for you to have an opportunity to become familiar, and comfortable with, the environment.
Knowing your audience is an extremely important aspect of slide design, as well as its content. Let's navigate through a series of questions you should take into consideration before presenting. Hopefully, they will help you prepare more thoroughly.
Getting to know an audience
You should consider the following factors before creating your presentation slides as it is a vital route to preparing, planning, and presenting:
- Who is my audience and do they already have some expertise with the subject matter?
- What will the audience know about me before presenting?
- What will the audience be expecting to gain?
- How large is the audience?
- Where will I deliver the presentation (location or remote), and what technique will I need to use?
- Will I need to visit the venue or remote location beforehand to eliminate any potential problems or obstacles to become familiar with the technology, or view my presentation on screen? If remote, do I know how to screen share within the meeting or webinar app?
- Do I require any additional equipment (for example, a microphone or headset) and where will I be presenting from in the venue?
- Will there be a time limit to present, or do I have some leeway?
- Incorporate a backup plan if things go wrong technically during the presentation's delivery.
- When presenting online, we can also make use of Breakout Rooms to cement audience participation, or extend the session by adding challenges or time to practice. This feature will be explained fully in Chapter 16, Creating and Managing Online Meetings.
Let's look at a few other elements to be mindful of.
Visual impact and useful techniques
In this section, you'll learn about the impact of sound and images, how the brain processes visual input, and how this impacts a presentation. In addition, you will be taught how to use guides, alignments, and grouping before learning how to apply consistent slide styles and color psychology.
Considering the brain
When using a combination of text and visual elements on slides within a presentation, it is good to understand how the brain processes these elements differently.
Learning about visual and verbal passages
There are two passages in which the brain functions in terms of text and visual elements. For text, the verbal passage is used by the brain. It is used when you add any visual elements to slides in a presentation. If you overload the slide with text, then the verbal narrative will become overloaded, causing the audience to lose focus! The visual passage will look for visually pleasing elements and this, of course, helps retain focus since the presenter is the narrator of the elements on the slide:

Figure 8.14 – Visual passage versus verbal narrative
So, again, there are a few things to consider when adding, for instance, bullet points to a slide as the points will end up competing with the narrative by the presenter. Shift the concentration of the audience from the bullet points on a slide to a visual element that you are narrating, thereby keeping the audience focused on you.
Law of proximity
The visual cortex in the brain processes visual images and is the largest system near the rear of your brain. Hoaxing the mind visually by using the law of proximity is another way to ensure that any elements that are placed on a slide near each other are connected in some way. The retina is a thin tissue located around the back inside layer of the eye. After visual input is received by the retina, it is passed to the brain, which then processes the information in terms of shape, color, and orientation:

Figure 8.15 – Law of proximity
Now that you have learned about the law of proximity, let's learn how images and sound impact engagement.
Investigating the impact of images and sound
As we mentioned previously, visual impact is key when designing presentations. Always use high-resolution photographs and try to avoid stickers and emoji-type images. It is especially important to mention that having a sticker or emoji image on one slide and then a high-resolution photograph on the next will interrupt the presentation's flow, so consistency cannot be achieved by mixing the two types of visual aids. An audience will respond positively to content-appropriate, high-resolution images that have been placed on a background that makes good use of white space.
It's worth mentioning that you should always Compress Pictures before sending out a presentation to an audience. Use the Delete cropped areas of pictures option to get rid of any previously cropped-out areas of images within your slide presentations. This will reduce the presentation's size considerably. Click on an image in the presentation, then go to Picture Format | Compress Pictures to navigate the options:
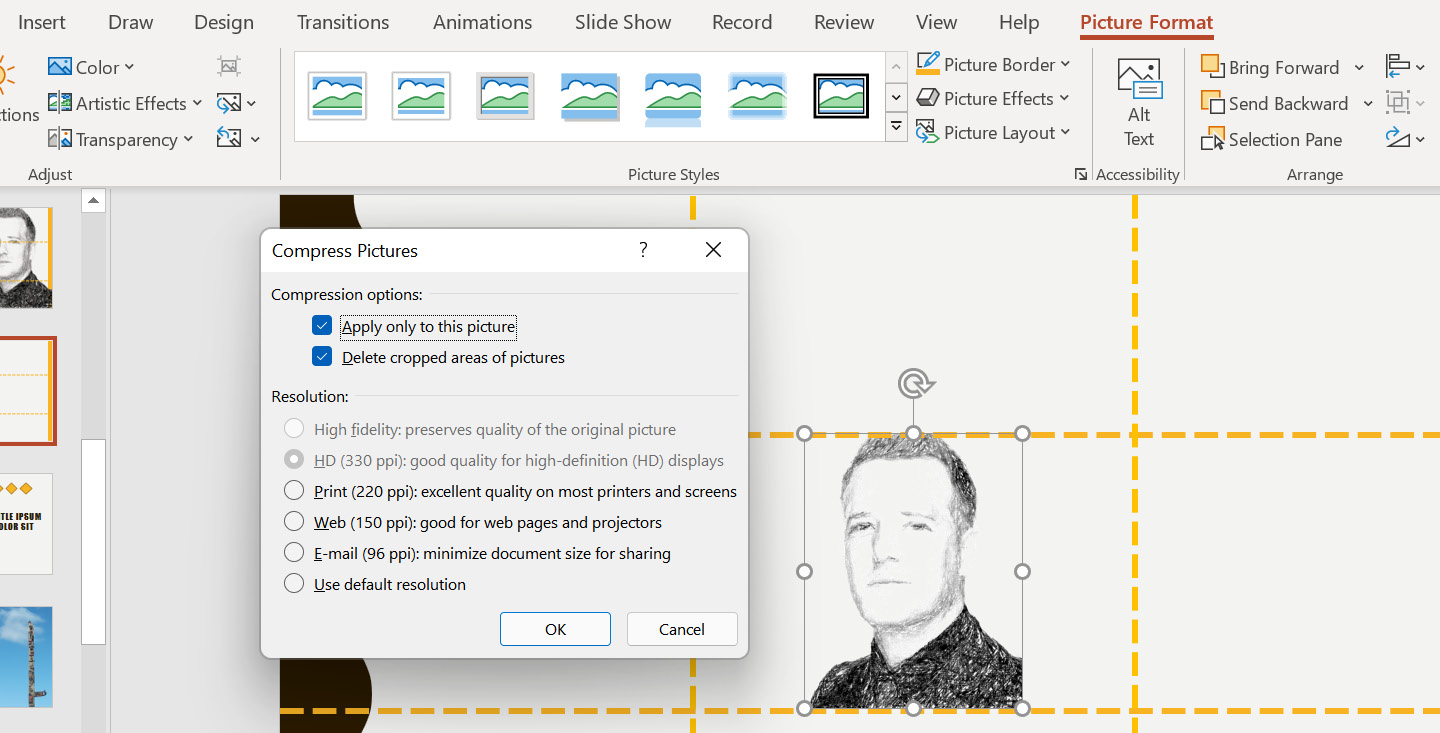
Figure 8.16 – Compress Pictures
Now, let's discuss sound. Recording yourself presenting is always a daunting task. Often, you do not like the way your voice sounds, or you find that you repeatedly say "um, ok, so...," or your tone is monotonous. Don't worry about this, though – everyone is unique and voice pitch and tone vary greatly. You can always fix this with a voiceover, either downloaded or by using a colleague. The new and existing features in Office 2021, Rehearse with Coach and Presenter Coach, allow you to check sound, movement, speech, and so much more. We learned about these amazing features in the PowerPoint chapters of this book.
Sound can change the mood of the audience quickly and needs to be considered necessary, especially when using animations and transitions. Ask yourself the following questions before adding sound to a presentation:
- Is there a piece of music that would help set the mood and tone of my presentation? Would it contribute to me winning the audience over with a particular piece of music that's relevant to my topic?
- How will adding sound to this particular presentation captivate the audience?
- What about the age, gender, and nature of the presentation concerning sound?
- If I add music to my presentation, how would I keep the brand and content connected?
These are just some of the points to run through when deciding to add sound to your presentation – remember, less is more!
Applying guides to slides
In a previous section, we discussed the theory around white space and the rule of thirds. To physically use the rule of thirds principle on a presentation slide, you must carry out some steps.
The first step is to split your presentation slide, using horizontal and vertical guides, into three equal parts. Follow these steps:
- Open a new presentation and insert a new blank slide.
- Click on View | Guides, after which guidelines will appear on the slide.
- To insert your own vertical and horizontal guides, right-click on one of the existing guidelines, then select Add Horizontal Guide or Add Vertical Guide from the shortcut menu provided:

Figure 8.17 – Adding guides to slides
Drag the guides to a position on the slide so that the slide is split into two equal horizontal and two equal vertical parts.
Now, use the grid to align your presentation content so that you can optimize the visual experience for your audience. You can stimulate an audience's response by using the rule of thirds to increase curiosity, or create tension, to name a few examples. See the slide examples in the White space and the rule of thirds section.
When referring to the images, the first image displays that the rule of thirds has not been met, while the second displays an example of the rule of thirds. Adding a photograph with the eyes of the person in the upper horizontal third of a slide will make a huge difference, and so will adding an image to the right or left of the vertical rule of thirds – never place an image or object in the center of a slide. Not only is this an important principle when designing slides, but something you can take into consideration when taking photographs with your mobile phone or camera going forward.
Now, let's learn how to align and group objects.
Aligning and grouping objects
The alignment and grouping tools are valuable skills to master in PowerPoint 2021 as they will objects to be arranged proportionately and duplicated quickly on slides. These skills were covered in detail in the first edition of this book, Learn Microsoft Office 2019. See the Arranging and manipulating objects section in the Chapter 6, Formatting Slides, Charts, and Graphics Elements chapter for more details. In addition to these skills, PowerPoint also has built-in snap features, which will be evident to you when you're dragging objects around the slide. Lines will appear to indicate whether the object is lining up with the slide or other objects on the slide.
To access the alignment options, select the objects to align, then go to Shape Format | Align Middle:

Figure 8.18 – Aligning shapes on a slide
The elements will be lined up neatly on the slide.
Look at the objects we just aligned. The spacing between the objects isn't equal, especially the difference between the last object and the three before that. To fix this, simply select the objects and click on the Align drop-down list. Then, choose Distribute Horizontally. Now, the objects are all equally spaced on the slide.
Next, we will revisit grouping. Working with grouped objects on a slide saves you an enormous amount of time as you can drag the objects as one unit to another location on the slide. This also allows you to resize the elements as a group and not individually. To use the Group feature, click to select objects on a slide, then right-click and choose the Group option, then Group again:
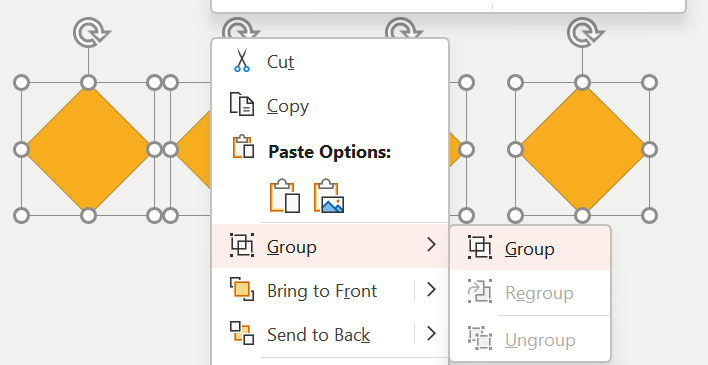
Figure 8.19 – The Group option
Color is a powerful tool and can influence a person's decision to purchase a product, as well as change a person's view about an item. It can also evoke emotion – this is how the brain responds to color. We'll investigate this in the next section.
Color psychology and the brain
When you are working on something creative, you will either have the natural ability to create stunning designs or you could be terrible at those skills. We are all blessed with a different skill set in the brain. Adding color to a presentation can have a negative or positive influence on the audience and can either connect or disconnect content. Let's look at some examples.
Color sense
A neutral, low-contrast background fill that's been applied to objects on slides is best for slide elements. Try not to use gradients and make sure the text's color stands out clearly. Adding bright colors to slide elements with a light text font applied could negatively impact the audience:

Figure 8.20 – Using color
Take into consideration the color that's displayed when projecting to an audience – always do a run-through at the venue you will be presenting at, as text and objects could appear differently on the screen. Try not to use low contrast colors, such as pastel colors, when formatting slide text as the audience will see a washed-out effect:

Figure 8.21 – Low-contrast colors versus good use of color
Applying too many accent colors to text could be detrimental. Use no more than two colors and two accent colors:

Figure 8.22 – Working with accent colors
Black and white contrasts can be striking, but you would need to add some depth in color for it to not come across as boring or effortless. Depth can be created by applying a shadow.
Let's learn about how colors affect our brain to evoke emotion:

Figure 8.23 – What emotion does this invoke in you?
Now, let's look at how colors evoke emotion:

Table 8.3 – How do colors evoke emotion?
Using exclamation points after text should be done with caution in a presentation as this leads to possibly winning over the audience (a form of propaganda). This will change the audience's perspective by insinuating how words should make them respond by using an exclamation point to create emotion.
Using the color wheel and other tools
Color wheels are a great way to add correct color blends to your slides and objects. Often, you won't be sure which colors will blend with others or won't have the natural flair to pick the correct colors to evoke an audience's emotion. This is also important for corporate branding within presentations. An extremely useful site for this is https://color.adobe.com/create/color-wheel:

Figure 8.24 – Adobe Color wheel
This tool is fantastic and can help you generate a color wheel based on the main color you select. All you need to do is drag the balloons around the palette in the color wheel to find a color set you prefer. If you do not have a subscription to adobe.com, you won't be able to save the generated themes, but it will still generate a palette for you to use.
There are several color contrast calculators available on the web that you can use to generate specific color sets but do not underestimate the power of PowerPoint 2021 when it comes to built-in models for hue, saturation, and luminosity, as well as red, green, and blue color models. Coupled with this, you have the Design tab within PowerPoint 2021, which houses numerous design themes with individual color wheels, color sets, and variants. Even if you do not have an eye for design, you can still balance color choices using those offered within the application. Follow these steps:
- Open a new, blank presentation, or use an existing presentation.
- Click on the Design tab to access the various themes. In this example, I have chosen the Feathered theme.
- Select a variant type from the Variant group, if applicable. I have chosen the second variant type listed.
- Use the More drop-down list to select or customize the color palette to apply to the design. Once you choose a theme to apply to a presentation, you will notice that the color palette and objects that are inserted into the presentation from that point will take on the colors of the presentation design theme chosen. This is perfect as you won't need to put a lot of extra thought or design into your elements:

Figure 8.25 – Design colors in PowerPoint 2021
You can find the color models on any design element you choose by visiting the Format options. The option that's presented will depend on the object you are right-clicking on.
Once you have located the More Fill Colors… option, the Colors dialog box will open. You can choose from the Standard color wheel to suit your presentation design. Alternatively, visit the Custom tab to choose even more color selections, or enter specific RGB and HSL color model variations.
These color models are used for branding corporate identity. You will find that the marketing department will distribute the various color model-specific blends to staff to use in promotional material. Company presentations will already be set up with these branded elements:

Figure 8.26 – Using More Fill Colors… to select custom colors
The next aspect we will look at is style.
Considering style in PowerPoint design
Style is important for consistency and flows from slide to slide throughout a presentation. The way to ensure this consistent flow is to set up the slide master in PowerPoint 2021. This is normally set up for you if you work for a company that takes its branding very seriously. Ask your marketing department if they have a branded presentation design for you to use before trying to create your own.
You will find sections on Photo Albums, Sections, and Show Tools in the Part 2 of this book, as well as a section on Master Slides.
A slide master, once edited, will help you design slides to produce an effective presentation as you can set up all your font styles, corporate logo designs, and placement. Thereafter, all these elements will ripple throughout the presentation automatically.
Be careful of copyright when working with logos and web content.
A blank slide can be used as a pause when presenting so that the audience's attention moves from the slide to the presenter for a moment, and then back to the presentation as a visual aid when the presenter continues.
In the next section, we will look at some design principles, as well as an explanation of each.
Using the Gestalt principles when designing slides
It is important to understand how we receive visual input by visiting the Gestalt principles. Gestalt stands for shape or form.
The following are things to avoid when designing presentations:
- Using bullet lists
- Lots of text on slides
- Graphs that contain complex analysis
- Clipart, sounds, and animations that detract
Let's look at some of the Gestalt principles. We have already learned about symmetry, the law of proximity, and the rule of thirds, which are all part of the Gestalt principles.
Figure and ground
This principle is where the figure is the focal point on a background on a slide. The mind will subconsciously determine what symbolizes the figure's focus and what is in the background that the mind can ignore.
The foreground will capture the audience's eye first:

Figure 8.27 – Figure and ground
Area
When overlapping large and dark areas contained on a slide, the mind will assume that the darker areas are larger:

Figure 8.28 – Area
Similarity
This is how shapes, size, color, or orientation are perceived to be similar and are grouped by the brain when they are seen as connected. The principle is when you would use an object more than once on a slide to structure the experience of the audience, as follows:

Figure 8.29 – Similarity
Repetition of color
The brain navigates to the difference in color immediately and the shape that is formed because of the color change, although the objects are all the same:

Figure 8.30 – Repetition of color
Isomorphism
Isomorphism is where the audience perceives objects to either be visually connected or not visually connected:
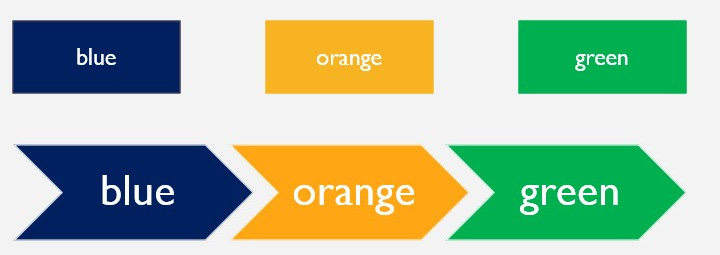
Figure 8.31 – Isomorphism
Continuation
The continuation principle is where the eye follows the lines or curves on a slide. An example would be two shapes with an arrow between them showing the movement from point a to b:

Figure 8.32 – Continuation
Closure
The brain fills in any missing information on a slide by routinely skipping over any gaps and viewing the slide as a whole:

Figure 8.33 – Closure
Proximity
When elements are positioned close together, they appear connected as a group:

Figure 8.34 – Proximity
Synchrony
Here, elements that are moving in the same direction together appear connected or related:

Figure 8.35 – Synchrony
Common region
This is perceived as a group by the audience when the element is surrounded by a border:

Figure 8.36 – Common region
Simplicity
Complex elements are perceived as one unless they are defined by color:

Figure 8.37 – Simplicity
Focal point
This principle holds the audience's attention by emphasis, similar to the rule of thirds.
These principles will help you create a professional, engaging presentation. Be sure to consider these when designing content for your slides – working through this list will prompt thought and application ideas for your content:

Figure 8.38 – Focal point
Summary
This chapter has imparted plentiful design skills to aid your presentation transformations and create engaging content. You should now have theoretical knowledge since you have been taught about everything you should consider when designing, such as the principles of design and the importance of presentation and design skills. We have identified tools to aid and enhance presentation design and tackled the important subject of presentation planning. You learned how to deliver clear messages to persuade audience participation, as well as how the brain tackles visual elements. In addition, you understood how sound and images impact a presentation and learned about the brain and color psychology. We ended this chapter with some useful color wheel tools and the theory behind the Gestalt principles to aid with slide design.
In the next chapter, you will be taken on a journey through the essential updates and new features of Excel 2021. You will learn all about the Advanced Filter feature and the new FILTER function, as well as learn more about conditional formatting rules. We will focus on cleaning data and learning how to import, clean, join, and separate data while learning about some new features along the way, such as the UNIQUE function. We will also look at common challenges when working with Office 2021 applications as a whole and how to troubleshoot the stumbling blocks.