
Chapter 14: Managing Mail and Contacts
This chapter will introduce you to the best practices while working with message attachments, to keep your mailbox clean and streamlined. You will learn how to set up rules and manage junk mail options, as well as how to create or modify signatures within the Outlook application. This chapter will also teach you how to be proficient at creating business cards for contacts, as well as how to set up and manage contacts and contact groups.
The following topics will be covered in this chapter:
- Cleaning up your mailbox and managing rules
- Managing junk mail and automatic message content
- Creating contact information and groups
Technical requirements
To work through this chapter, you need to have prior knowledge of navigating the Outlook 2021 interface and setting options. In addition, you will need to be confident in creating, sending, and managing your mail environment. You should be able to insert and attach item content to elements within the interface, as well as format email content, just as you have learned in the previous chapters of this book. The examples in this chapter can be found on GitHub at https://github.com/PacktPublishing/Learn-Microsoft-Office-2021-Second-Edition.
Cleaning up your mailbox and managing rules
Keeping your mailbox clean is a task you should do regularly. With the amount of digital correspondence and attachments that come into your mailbox daily, you must manage your workflow. In this section, we will learn how to clean up our mailbox and where to locate our mailbox's size. We will also learn how to work with message attachments and save a message in an external format. Finally, we will learn how to ignore conversations and use the cleanup tools available in Outlook 2021.
Many solutions are implemented in the workplace to reduce the size of employee mailboxes, including additional software such as Mimecast, which enables employees to utilize large file send features. It also acts as a mailbox backup online.
Here, we will learn how to access the rule options in Outlook and create a basic rule, then apply the rule to a selected email message. We will also cover deleting, modifying, and running a rule on a specific folder.
Cleaning up the mailbox
Our mailboxes often get extremely cluttered with messages from subscriptions to sites, which are delivered daily, weekly, and monthly. This can get out of control very easily, and we normally only start to worry about this once we are reaching our full mailbox capacity. Let's learn how to view the mailbox size in Outlook 2021.
Viewing the mailbox size
- Click on File | Tools.
- Locate the Mailbox Settings heading, just to the right of Tools, as shown in the following screenshot:

Figure 14.1 – Mailbox Cleanup… settings
Here, you will see the mailbox capacity and the amount of free space available. The slider shown in the preceding screenshot will depict this graphically.
Another way to keep your mailbox's size at a reasonable size is to delete email attachments since these take up a huge amount of space in your mailbox. We'll learn how to tackle this in the next subsection.
Saving message attachments
It is important to keep your mailbox's size down by saving email message attachments to your computer, instead of leaving them attached to email messages in your inbox. This will reduce your mailbox's size considerably.
- Open an email that contains an attachment to download, then click on the attachment to open it.
- The Attachment Tools contextual menu will open. Click on Save As to save the file to a location on your computer.
- To return to the message, simply click on Back to message or use the Show Message icon at the end of the ribbon, as shown in the following screenshot:

Figure 14.2 – The Save As feature and the Attachments tab
- A Remove Attachment option is also available, and the Save All Attachments option allows you to save attachments to a specific location if the message contains more than one attachment. Note that, if connected, you can also use the Upload icon in the Save to Cloud group to save attachments to an online location (such as OneDrive).
Saving a message in an external format
- Open a message you wish to save to an external format, then click on File | Save As. In the Save As dialog box, select the drive and folder where you wish to save the message, then enter a filename in the relevant text area. The default save option in Outlook is Outlook Message Format - Unicode (*.msg), as shown in the following screenshot:
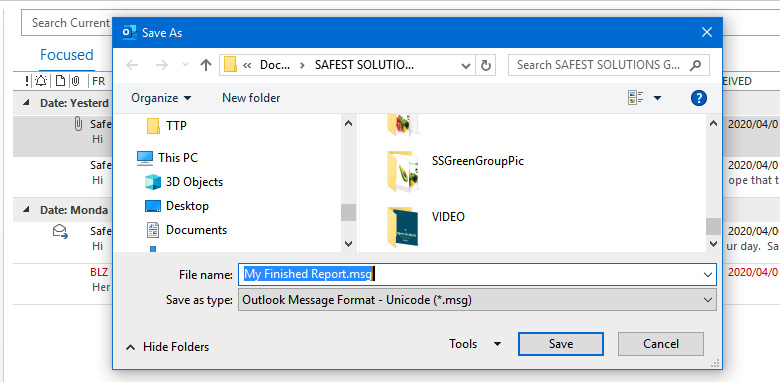
Figure 14.3 – The Save As dialog box to save an email message
- Click on Save. Saving in this message-type format will open the email message in Outlook when the user double-clicks on the My Finished Report.msg file after saving it.
- Other options are available under the Save as type: drop-down list, such as Text Only, which saves the message as a .txt file and removes any pictures, graphics, and formatting from the message. The Outlook Template (*.oft) option works the same as a Word template in that it allows you to save the formatting of a message. This allows you to apply this message template to a new email at a later stage. The HTML (*.htm; *.html) option saves the message in web format (with the code, images, and text in a separate file to accompany the message) and opens in a browser once it's been saved and opened. Finally, the MHT files (*.mht) option is a web page archive file format that also opens in a web browser.
All these options can be seen in the following screenshot:
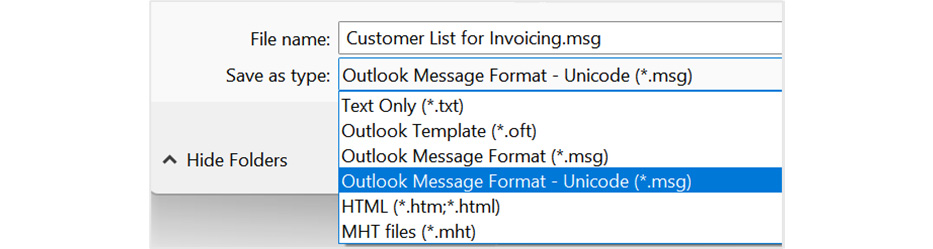
Figure 14.4 – The Save as type: formats when saving email messages
- If you prefer, you can save your email in .pdf format for safekeeping on your computer.
With that, you have learned how to save messages in external formats for safekeeping. This is purely a personal choice, and many companies will have policies on how your inbox is stored. Alternatively, they will have additional software that you can integrate with your Outlook mail application.
Ignoring a conversation
The Ignore Conversation feature can be used to remove unwanted conversations in your inbox. Please note that an ignored conversation will end up in the Deleted Items folder, and if you delete it from that location, you won't be able to recover it. Be careful to select the correct message before clicking on the Ignore Conversation feature:
- Click on the message's header (but do not open the message). Click on the Home tab, then choose the Ignore Conversation option from the Delete group.
- A dialog box will appear on your screen with the following warning:
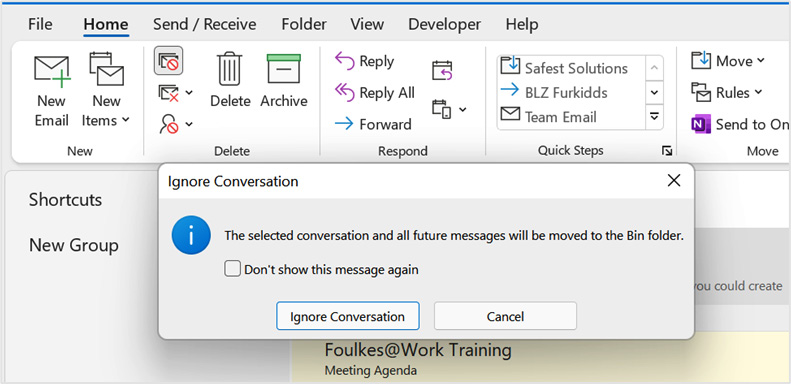
Figure 14.5 – Ignore Conversation
- Click on Ignore Conversation to confirm. This feature is also available for open emails but is located via the Message group instead.
If you decide to stop ignoring a conversation, do the following:
- Locate the email in the Deleted Items folder, then double-click to open the email.
- Click on the Ignore Conversation icon on the Message tab, after which a dialog box will appear on your screen.
- Click on Stop Ignoring Conversation, as shown in the following screenshot:

Figure 14.6 – Stop Ignoring Conversation.
The email will return to your inbox.
Using cleanup tools
Mailbox cleanup tools are located on the Backstage view. You can use this option to find out the size of your mailbox and the folders within it. Other features under this heading enable you to empty the Deleted Items folder and archive old items to the Outlook Data File (*.pst) archive.
- Click on File | Tools | Mailbox Cleanup… to view your mailbox's size.
- The Mailbox Cleanup... dialog box will launch with a range of options, as shown in the following screenshot:
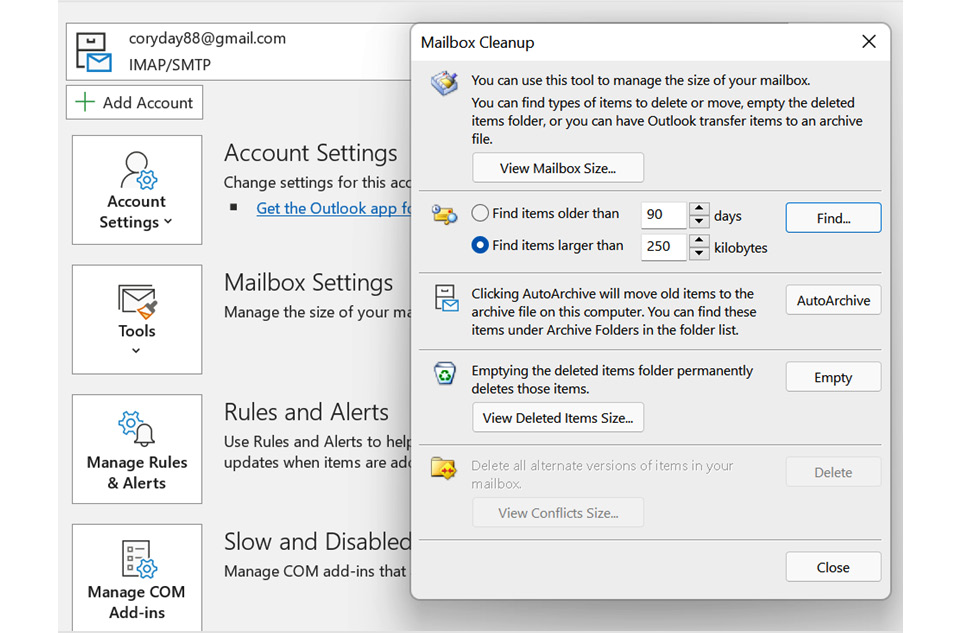
Figure 14.7 – Mailbox Cleanup options
- In this dialog box, you can view your mailbox's size, categorized by Outlook item, and find items based on the number of days and size. AutoArchive will move all old items to the Outlook Data File, which is normally located in the DocumentsOutlook Files folder on your hard drive. You can also empty the Deleted Items folder and delete versions of items from this dialog box.
Creating and managing rules
Messages can be managed by creating rules for them automatically, every time an email is received or sent. When creating a rule, it can be based on your own rules, templates, or an existing message.
- On the Home tab, locate the Move group, then click on Rules.
- Choose Create Rule… or Manage Rules & Alerts... to edit an existing rule, as shown in the following screenshot:
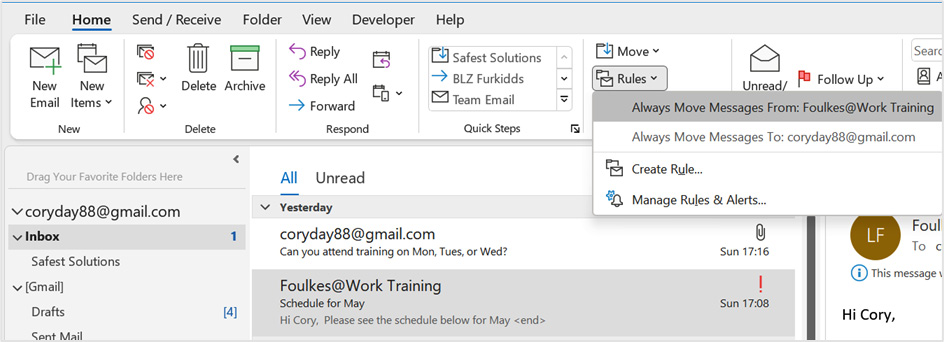
Figure 14.8 – Rules drop-down list
- In the Create Rule dialog box, set the conditions for the message. For this exercise, we will set up a rule that sends all emails that are received from Foulkes@Work to a folder named Safest Solutions in my inbox. You can click on Advanced Options… to set further conditions if required. To create a folder for all the Safest Solutions emails, click on the Select Folder... option at the bottom of the dialog box, then click on New... to create a new folder called Safest Solutions in your inbox, as shown in the following screenshot:
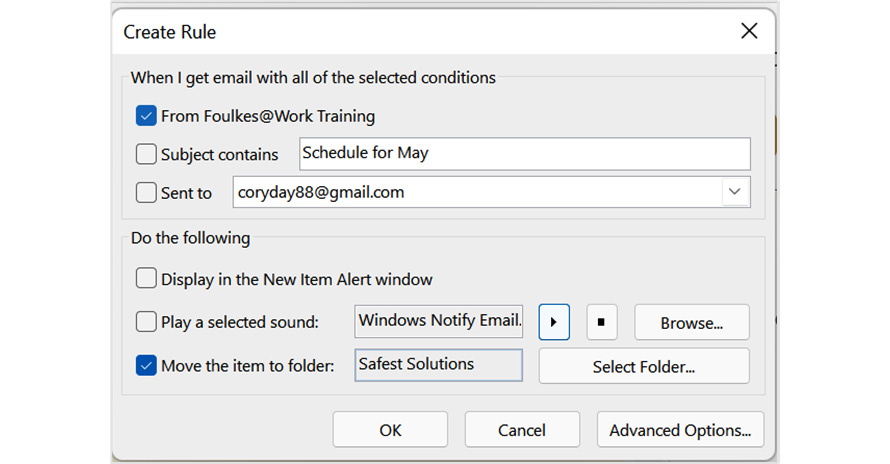
Figure 14.9 – The Create Rule dialog box
- Click OK to set up the rule.
- You will see a message on your screen, indicating that the rule has been created. The Run this rule now on messages already in the current folder option is also visible in this information box, as shown in the following screenshot:
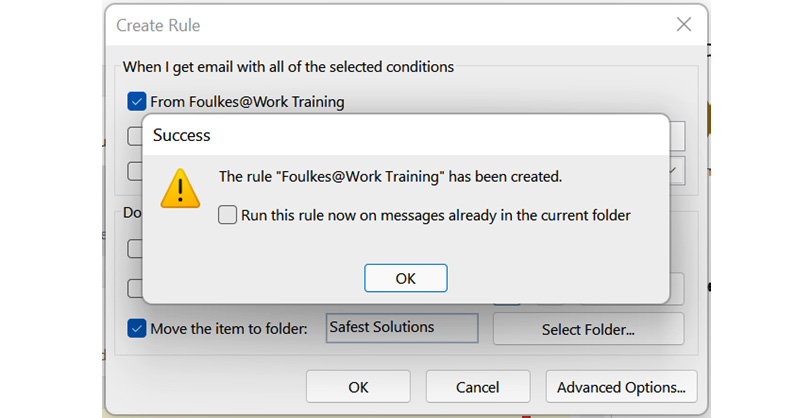
Figure 14.10 – Run this rule now on messages already in the current folder
- Click on the Run this rule now on messages already in this current folder checkbox, then click on the OK button to see the results.
Note
When a rule is applied, all delivery receipts, read receipts, voting responses, and automatic replies are also based on the criteria upon which the email message is sent. When they're received, they are acted upon automatically by that applied rule. Tracking is affected by voting responses and tally responses if the email is moved automatically to another folder.
Modifying rules
There are many rules to choose from under the Edit Rules option. Remember that setting too many rules on incoming messages in your inbox could lead to confusion, and you may miss very important emails that need attention! Only create rules when they are necessary and can help you with your productivity or workflow.
- Go to Home | Rules | Manage Rules & Alerts and click on Change Rule at the top of the dialog box.
- Choose Edit Rule Settings.
- From the Rules Wizard dialog box, adjust the settings by selecting a new condition, or click on the blue highlighted underlined words to change the criteria to suit your requirements. In this case, we will choose with specific words in the body for Step 1: Select condition(s), and with Report in the body for Step 2: Edit the rule description (click an underlined value).
- Click on Next, then OK, as shown in the following screenshot:
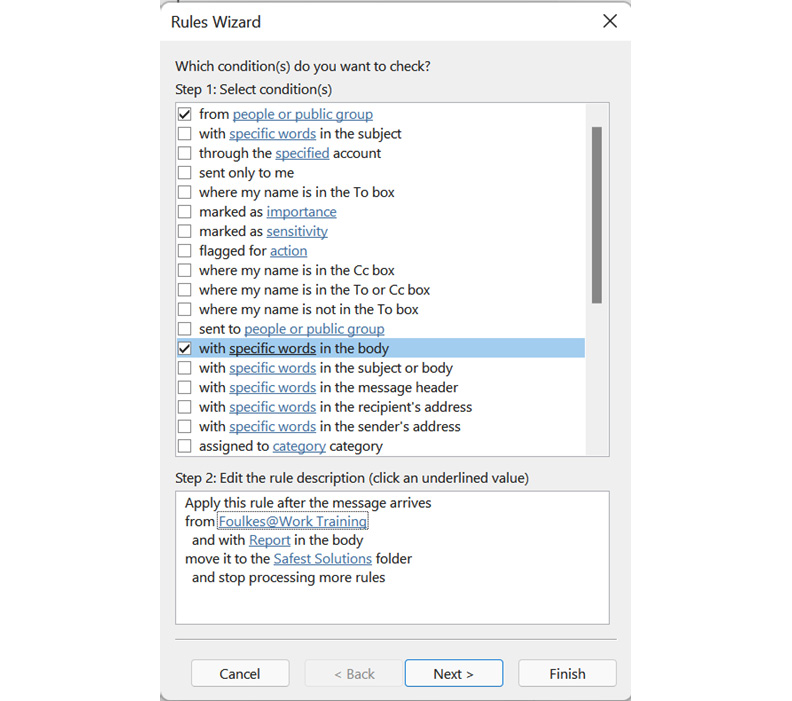
Figure 14.11 – The Rules Wizard dialog box
Deleting rules
- Click on Home | Rules | Manage Rules & Alerts.
- Select the rule you wish to remove, as shown in the following screenshot:

Figure 14.12 – Using the Delete button to remove rules from Outlook
- Click the Delete button to remove the rule.
Changing rule order
Rules are run on incoming messages in your inbox according to how they were set in the list when they were created. We can change the priority of which rules will run first by reordering their position in the Rules area. Follow these steps:
- To reorder rules, go to Rules | Manage Rules & Alerts….
- Simply click on a rule you wish to move from the Rules and Alerts dialog box, then click on the Move Up or Move Down arrow to reorder it.
Note that you can also Stop processing more rules by selecting this option via the Rules Wizard dialog when creating a rule. This will allow rules to be stopped if more than one rule is applied to the same email.
Managing junk mail and automatic message content
In this section, you will learn about the junk mail options, such as allowing a specific message to not be junk; filtering junk mail with an option that never blocks the sender; viewing a list of safe senders; and learning how to block a sender.
You'll learn how to create and manage signatures; assign a signature to an email message manually; specify font options for new HTML messages; set options for replying to and forwarding mail messages; and, lastly, set a default theme for all HTML messages.
Allowing a specific message (not junk)
Sometimes, email messages are sent to the Junk Email folder by mistake. To mark the message as not junk, do the following:
- From the Navigation Pane, click on the Junk Email [1] folder, as shown in the following screenshot:

Figure 14.3 – The Junk Email folder in Outlook
- From the Message pane to the right, click a message that you want to mark as not junk. Then, click on Home | Junk | Not Junk.
- A dialog box will notify you that the message will be moved back to the Inbox folder and that messages from that recipient will always be trusted, as shown in the following screenshot:

Figure 14.14 – Specifying messages as Not Junk
An email message that is sent to the Junk Email folder is saved as plain text, and all the links contained in it are removed. Moving a message out of the Junk Email folder restores the message to its format and links.
Filtering junk mail with Never Block Sender
It is possible to mark a recipient in your inbox as a safe sender. If you do not want to allow just a single email address from a large company and would prefer to allow receipt of all user addresses from a company, then use the Never Block Sender's Domain option (for example, @packt.com). In addition, if you belong to a mailing list, you can add this to the safe senders' list too. The steps are the same for each of these options, and are illustrated here:
- From the Message pane, click on a message that's been received from a recipient you trust. Click on Home | Junk | Never Block Sender, as shown in the following screenshot:

Figure 14.15 – The Never Block Sender feature
- A dialog box will appear, informing you that the sender of the chosen message has been added to the Safe Senders list.
- Click on OK to confirm.
Viewing the Safe Senders list
- Click on Home | Junk Email Options….
- In the dialog box that appears, select the Safe Senders tab, as shown in the following screenshot:

Figure 14.16 – The Safe Senders tab
Blocking senders
If you receive messages in your inbox that look suspicious or are spam, you can ensure that you don't receive such messages in the future by marking the recipient as blocked. Follow these steps:
- From the Navigation Pane, click on a message from a recipient you trust. Then, click on the Home | Junk | Block Sender option
- A dialog box will appear, informing you that the sender of the selected message has been added to the blocked senders' list and moved to the Junk Email folder.
- Click on OK to continue.
Managing signatures
A personal business card can be added automatically to every email message you send, or manually to the messages you choose. This is called a signature. It contains contact information that will appear in the body of each new email message you create in Outlook 2021.
Creating a signature
- Open a new email message, then click on Signature. You will see any existing signatures.
- To create a new signature, choose Signatures… from the drop-down list, as shown in the following screenshot:
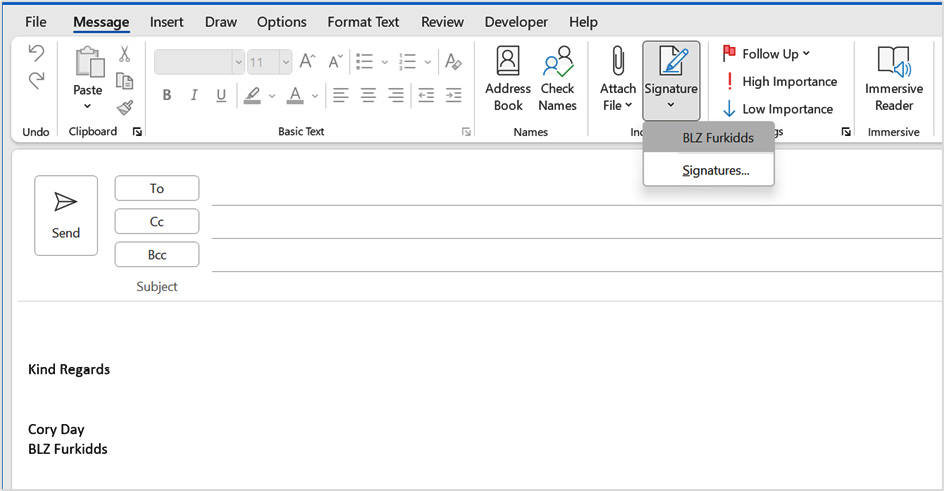
Figure 14.17 – The Signature feature in Outlook
- Click on the New icon to create a new signature. In the textbox that appears, enter a name for the signature. The name of the signature is not going to appear in the email; it is just a name that's given to the signature to identify it.
- Click on OK when you're done.
- In the Edit signature text body area, type in the relevant contact details and format the text using the options provided. Note that you can also insert a picture and a hyperlink, as well as a business card. These options can be seen in the following screenshot:

Figure 14.18 – The Signatures and Stationery dialog box
- To the right of the dialog box, you will see the Choose default signature heading. If you do not want to add the signature you have just created to every new email message you compose, then you will need to change the option in the drop-down list next to New messages: to (none). This can also be changed by going to File | Options | Mail | Signatures. You can set a separate signature for the Replies/forwards: option as well.
- Click on OK to confirm.
Specifying the font for new HTML messages
You can specify the fonts for traditional-style documents – namely, the HTML-type message as a default in Outlook 2019. By traditional-style documents, we mean those that contain bullet points, fonts, colors, and images. Plain text messages are also available but, of course, will not support bold, italics, or any formatting.
- Click on File | Options. Then, in the Outlook Options dialog box, make sure you are on the Mail category to the left to access the available options.
- Under the Compose messages heading, click the Stationery and Fonts… button.
- Click on the Font… icon under the New mail messages heading to specify the font for new HTML messages.
- In the Font dialog box, choose the formats you would like to apply to every new mail message by default. In this example, the font face and font color have been changed. For reference, font face refers to the font type that you choose from the Font: drop-down list.
The following screenshot shows the preceding information:

Figure 14.19 – The Font… button for New mail messages
- Click on OK to confirm, then OK again, and once again to exit the dialog box. The sample text will be updated in the preview window, and, when typing in a new mail message, the changes will be noted.
Specifying options for replies and forwards
You can set a different font and attributes for replying to and forwarding messages as follows:
- Click on File | Options. Then, in the Outlook Options dialog box, make sure you are on the Mail category to the left to access the available options.
- Under the Compose messages heading, select the Stationery and Fonts… button.
- In the Signatures and Stationery dialog box, locate the Replying or forwarding messages heading.
- Click on the Font… button to change the attributes. Then, click on OK when you're done. Note that two other options in the dialog box are related to replying to and forwarding messages.
Setting a default theme for all HTML messages, stationery, and fonts
- Click on File | Options | Mail | Signatures and Stationery.
- In the Signatures and Stationery dialog box, locate the Theme... icon on the Personal Stationery tab.
- In the Theme or Stationery dialog box, select a theme to apply to all messages by default. Choose whether you wish to display background graphics at the bottom left-hand corner of the dialog box. Click on OK to confirm your choices. This is shown in the following screenshot:

Figure 14.20 – Theme or Stationery options
Creating contact information and groups
In this section, you will learn how to create a contact business card and modify it. You will also learn how to forward and update a contact in the Outlook address book. We will look at creating contact groups and how to manage the contact group's membership, show notes about a contact group, and delete a contact group. In addition, we will look at the search features that are available to search for a specific contact or group to send a meeting to that contact or group.
Modifying a default business card
A business card provides contact information for a contact within Outlook. Follow these steps to learn how to modify a default business card:
- From the Navigation pane, select the People icon located on the Peek bar.
- Double-click on an existing business card to edit it. Edit the business card by clicking in the relevant text area to type new information or edit existing information.
- Click on Save & Close when you're finished.
Note
Once an email has been opened, you can right-click on the sender's email address to save the contact to your address book, or drag the message from your inbox to the People icon on the Peek bar at the bottom of the Navigation pane to create a new contact.
Forwarding a contact
- Click the People icon on the Peek bar at the bottom of the Navigation pane.
- Locate the Share group on the Home tab, then select Forward Contact, as shown in the following screenshot:

Figure 14.21 – Forwarding a contact as a business card
- Choose the relevant option from the drop-down list, as follows:
- The As a Business Card forwarding option will insert the business card into a new mail message and attach a *.vcf file to the email.
- The As an Outlook Contact forwarding option will attach the business card to the message.
- You can also Share Contacts using the icon on the Share group. This option grants other users access to your contact list in Outlook and/or permission to access other people's contact lists.
Creating and manipulating contact groups
When emailing contacts regularly for a specific purpose – such as conference attendees, a list of parents, or a list of meeting attendees – it is much simpler when you have a group of contacts set up. That way, when you're emailing all of the contacts, you can just use the group name as the recipient, and each contact listed in the group will receive the email message that's been sent.
Creating a contact group
Let's create a contact group using the People icon, as follows:
- At the bottom of the Navigation pane, locate the People icon.
- Click on New Contact Group from the Home tab, as shown in the following screenshot:

Figure 14.22 –New Contact Group
- In the dialog box, name your new contact group in the Name text area. For this example, let's create an SSG group.
- To add the email addresses of all the members of the group, click on the Add Members icon.
- Choose New E-mail Contact, From Address Book, or From Outlook Contacts
- For this example, we will use New E-mail Contact. In the dialog box, enter a display name in the text area, and type the contact's email address in the space provided. Click on OK.
- Keep on adding contacts in this way until all the required members are in the group. Click on Save & Close when you're done.
- In the Contacts window, the new group called SSG (in the case of this exercise) should be visible.
Managing contact group membership
You can manage a group with ease by using the ribbon. All the relevant icons are displayed for ease of use. Using these ribbon options, you can do the following:
- Add new members using the Add Members icon (members can be added from emails, the address book, or the Outlook contact list).
- Remove any member from the list by clicking on their display name and then choosing Remove Member from the ribbon.
- Update the group by clicking on Update Now, if you have made changes.
- Add Notes about the distribution list.
- Categorize your group according to a specific category and color.
- Use the Private lock at the end of the ribbon to mark the group as private so that no one else can see the details thereof.
- Set a Follow Up reminder to remember to do something related to the contact group.
Now, let's learn how to work with the Notes feature.
Showing notes about a contact group
- In the People contacts window, locate the contact group that you want to create a note for.
- Double-click on the group's name to open it. We will open SSG, which we created earlier in this chapter, for this example.
- On the Contact Group tab, click inside the Notes area of the contact. Add a note for the current group by typing text into the notes area. We will add a note that states This client is one of our acquisitions for September, as shown in the following screenshot:
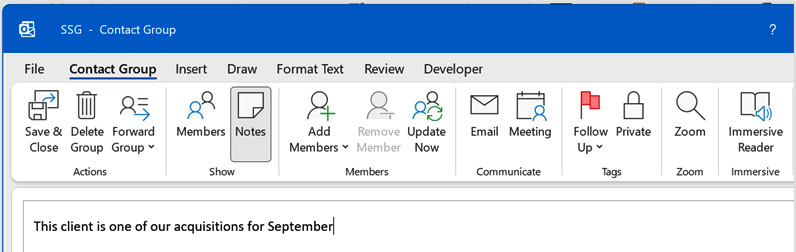
Figure 14.23 – The Notes button on the Contact Group tab
- Click on Members to return to the contact group email list. To view the notes for the group, click on the Notes icon again.
- Click on Save & Close when you're finished.
Deleting a contact group
- Open the contact group, as shown in the preceding subsection. From the Contact Group tab, click on the Delete Group icon to move it from the list.
- A dialog box will ask if you are sure you want to delete the group.
- Click on Yes to confirm this.
Sending a meeting to a contact group
- At the bottom of the Navigation pane, click People.
- Locate the contact group you would like to invite to a meeting. Open the contact group by double-clicking on it.
- Locate the Meeting icon on the Contact Group tab
- A new meeting request will be opened, where you can confirm the date(s) and time of the meeting request, as shown in the following screenshot:

Figure 14.24 – Creating a meeting
- Fill in the details, then click on Send.
Note
You can also check your calendar, copy the meeting to your calendar, use the Scheduling Assist feature to check for availability, send your meeting to OneNote, or add an online meeting location to the appointment. We will discuss these options later in this book.
Searching for a contact
- Navigate to People from the bottom of the Navigation pane.
- Locate the search box at the top of the contacts list. Type the name of the contact you wish to find in the search text area:
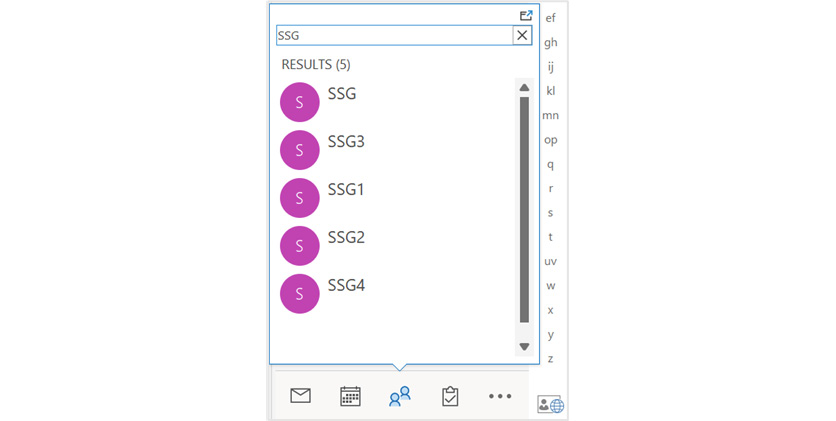
Figure 14.25 – Search facility on the People pane
- Note that you can also click on the People peek to navigate directly to the Contacts area, then select the search facility at the top of the screen to open the Search tab and view the relevant options.
- Click on All Outlook Items to view the drop-down list of search destinations, as shown in the following screenshot:
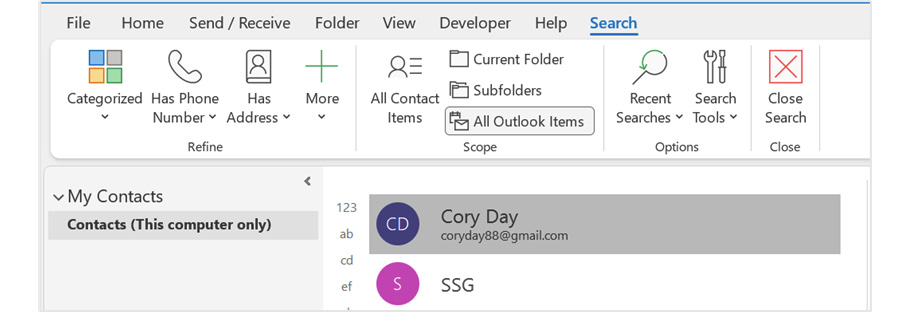
Figure 14.26 – The Search tab showing All Outlook Items on the Scope group
- The search will return the results from the criteria you entered. Note that the ribbon contains several search options, including a list of Recent Searches, as well as Search Tools to investigate. When you have finished searching, click on Close Search at the end of the ribbon, or click on the X button located at the end of the search entry text area.
Summary
In this chapter, you learned how to keep your mailbox clean, where to check your mailbox's size, and how to add messages to the safe senders or blocked senders list. You can now set and manage rules on your mailbox and folders and work with the various junk mail options. You have also mastered how to set up signatures when sending new email messages, as well as when replying to and forwarding emails. Specifying font options for new HTML messages, as well as setting up fonts when replying to and forwarding emails, are also skills you have acquired. In addition, you can set up a theme for all HTML messages and work with contact groups in Outlook 2021.
In the next chapter, we will work with calendars, appointments, and events. We'll learn how to set meeting response options and arrange calendars and calendar groups. We will also learn how to create tasks and assign them to other Outlook users, as well as track them via the Status Report tool. We will also cover Journal, where we will learn how to create items such as telephone calls and use this method to record the time particular tasks took to complete using Outlook 2021.