
The preceding example shows only one IP address, because we have been setup only one Pod. What happens if you increase an instance using the kubectl scale command?
Let's increase the Apache instances on chap8-domain1 from 1 to 3, then see how the headless service DNS works:
//specify --replicas=3
$ kubectl scale deploy my-apache --namespace=chap8-domain1 --replicas=3
deployment "my-apache" scaled


//Now there are 3 Apache Pods
$ kubectl get pods --namespace=chap8-domain1 -o wide
NAME                         READY     STATUS    RESTARTS   AGE       IP           NODE
my-apache-55fb679f49-c8wg7   1/1       Running   0          1m        172.17.0.7   minikube
my-apache-55fb679f49-cgnj8   1/1       Running   0          1m        172.17.0.8   minikube
my-apache-55fb679f49-qw58f   1/1       Running   0          8h       172.17.0.4   minikube


//launch busybox to run nslookup command
$ kubectl run -it busybox --restart=Never --image=busybox


//query Headless service name
# nslookup my-apache-svc-hl.chap8-domain1.svc.cluster.local
Server: 10.96.0.10

Address 1: 10.96.0.10 kube-dns.kube-system.svc.cluster.local
Name: my-apache-svc-hl.chap8-domain1.svc.cluster.local
Address 1: 172.17.0.4
Address 2: 172.17.0.7
Address 3: 172.17.0.8


//quit busybox and release it
# exit
$ kubectl delete pod busybox
pod "busybox" deleted
The result is straightforward: one DNS entry, my-apache-svc-hl.chap8-domain1.svc.cluster.local returns 3 IP addresses. Therefore, when your HTTP client tries to access the Kubernetes Service my-apache-svc-hl.chap8-domain1.svc.cluster.local, it gets these 3 IP addresses from kube-dns, then accesses one of them directly, as shown in the following diagram:
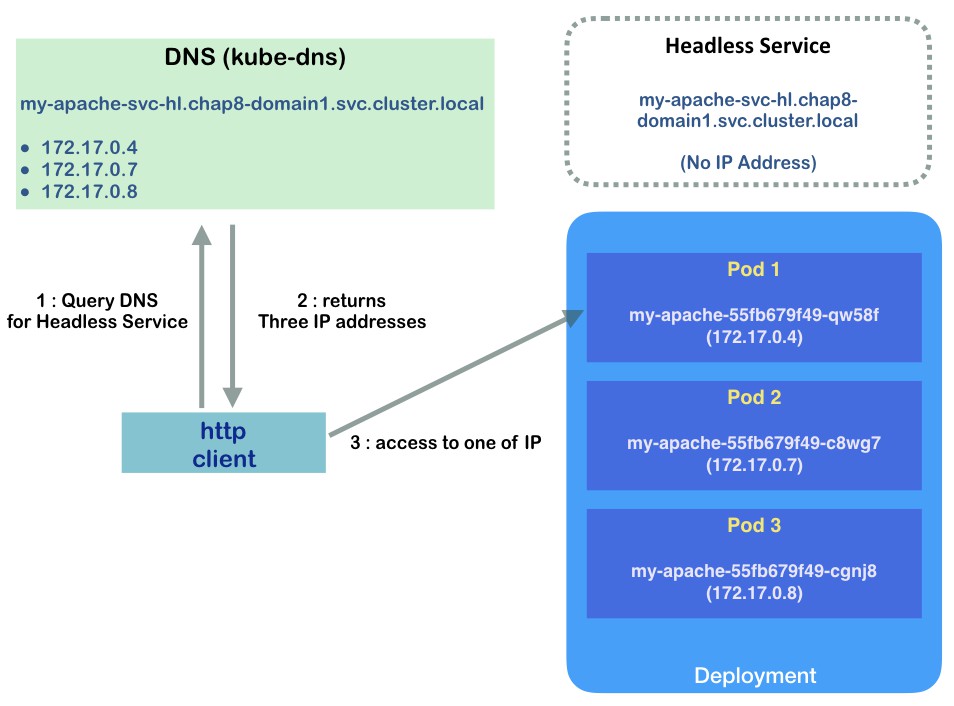
Sequence of accessing to Headless Service and pod
Therefore, Kubernetes headless service doesn't do any traffic dispatches. This is why it is called headless.