Chapter 17
What’s This Loop For?
for loops are useful for when you know in advance how many times you need to do something. You can use a for loop to count to 10, or to count to 1,000,000. It’s all the same to JavaScript!
In this chapter, we look at one of the most popular types of loops in JavaScript: the for loop. We use for loops to create our own weather forecasting app.

Introducing the for Loop
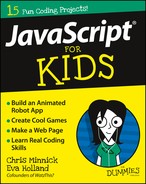
The for loop is the most commonly used type of loop in JavaScript. Here’s a sample for loop that prints out the words Hello, JavaScript! 500 times to the JavaScript console.
for (var counter = 0; counter < 500; counter++) {
console.log(counter + ": Hello, JavaScript!");
}
Figure 17-1 shows what this code looks like when it’s run in the JavaScript console.

Figure 17-1: Saying “Hello, JavaScript!” 500 times.
This isn’t the most exciting use for a loop, but you can certainly see that it’s easier to use a loop than it would be to type out 500 console.log statements!
Let’s take a closer look at how to write for loops.
The three parts of the for loop
The for loop is made up of three different statements:
- Initialization: The initialization statement declares a variable that the loop will use to keep track of how long it has been looping.
- Condition: A Boolean expression to be evaluated with each iteration of the loop.
- Final expression: An expression to be evaluated after each loop iteration.
Here’s how our Hello, JavaScript loop works:
- A new variable — in this case, counter — is initiated with the value of 0.
-
A test is done to check whether counter is less than 500.
If it is, then the statements inside the loop are run. In this case, the console.log statement will print out Hello, JavaScript!
- The final expression increments (adds 1 to) the counter variable.
-
The condition statement is evaluated again to determine whether counter is still less than 500.
If so, the statements inside the loop are executed again.
- The final expression increments the counter again.
- Steps 2 and 3 keep running until the condition (counter < 500) is no longer true.
Writing and using for loops
One very useful thing about for loops is that you can use the counter inside the for loop to change the output of the statements inside the loop.
The most basic example of this technique is to use the for loop to count. Listing 17-1 shows an app that displays a countdown in alert statements.
Listing 17-1 JavaScript Countdown
for (var i = 10; i > 0; i--) {
alert (i);
}
alert ("Blast Off!");
Follow these steps to test out this program:
- Go to
http://jsfiddle.netand log in if you’re not already. - Open a new program by clicking the JSFiddle logo.
- Type the code in Listing 17-1 into the JavaScript pane.
-
Click the Run button to run the program.
An alert box appears with the number 10 in it. When you click OK in the alert box, a new alert with the number 9 in it appears. The alerts appear like this until the value of the counter variable (i) is no longer greater than 0. At that point, the loop will exit and a final alert will appear, containing the phrase “Blast Off!”
Counting is a great use for for loops, but there’s an even better and more useful thing that you can do with for loops: looping through arrays.
Listing 17-2 shows a program that creates an array containing names of people. The for loop outputs the same sentence with each of the names inserted into it.
Listing 17-2 Outputting Array Values with for
var myFriends = ["Agatha", "Agnes", "Jermaine", "Jack"];
for (var i = 0; i < myFriends.length; i++){
alert(myFriends[i] + " is my friend.");
}
To use a for loop to output all the values in an array, you just use the length property of the array to find out how many elements are in the array and you use that to perform the loop that same number of times.
Then, inside the loop, you use the counter variable (i, in this case) to output the corresponding array element.
When you know how to output array elements, you can do all sorts of cool things with for loops. For example, in the next section, we use a for loop to provide a randomized five-day weather forecast!
Random Weather Forecasting
Welcome to Anytown, USA! We have a saying here: “If you don’t like the weather, wait five minutes!” And we mean it! It seems like the weather here is completely random. One day it snows, the next day it’s hot and humid. There’s really no predicting — which is why we’ve hired you.
Your job as our new meteorologist is to come up with totally random weather forecasts so that we can print them in the newspaper and talk about them on the TV.
Ready to get started? Okay, let’s forecast!
The first thing we need to do is understand how to get random values in JavaScript. Move on to the next section to find out!
Using Math.random()
JavaScript has a built-in function that’s used for creating random numbers. This function is called Math.random().
Every time you run the Math.random() function, it creates a random decimal number between 0 and 1. Using this random value, you can do all sorts of things that are necessary for game programming, including adding an element of surprise to the movement of monsters or randomly selecting elements from arrays to create crazy weather forecasts.
Listing 17-3 shows a simple program that pops up a random value every time it’s run. Try running the program several times (in the JavaScript console or in JSFiddle) to verify that you don’t get the same value twice.
Listing 17-3 A Random Number Alert
alert(Math.random());
Figure 17-2 shows the random number that we got when we ran this statement in JSFiddle.

Figure 17-2: A random number.
What programmers usually do with these long decimal numbers, is to use operators and other functions to create the values or the range of random values that they need.
If you want a random number between 0 and 10, you can multiply the random number by 11, like this:
alert(Math.random() * 11);
If you want to remove the decimal numbers from the result, you can use the Math.floor() function, like this:
alert(Math.floor(Math.random() * 11);
If you want a random number between 10 and 1,000, you can multiply the random value by the result of subtracting the smallest number from the largest number and then adding the smaller number to that result, like this:
alert(Math.floor(Math.random() * (1000 - 100) + 100));
If you want to choose a random element from an array, it works the same way as picking a random number from a range starting with 0. Just multiply the random number by the length of the array.
For example, Listing 17-4 creates an array called myFriends and then uses Math.random() to choose one element from that array and alert the value of it.
Listing 17-4 Finding a Random Friend
var myFriends = ["Agatha", "Agnes", "Jermaine", "Jack"];
var randomFriend = Math.floor(Math.random() * myFriends.length);
alert(myFriends[randomFriend]);
When you run this program in JSFiddle, the result will be that an alert with a random friend name will appear, as shown in Figure 17-3.

Figure 17-3: Choose a random friend.
Now that you understand how to get random data using JavaScript, let’s move on to writing the app!
Writing the app
To write the random weather forecast, follow these steps.
- Go to
http://jsfiddle.netand log in if you’re not already logged in. - Create a new program by clicking the JSFiddle icon.
- Open the Fiddle Options panel on the left and enter a name for your program, such as Random Weather.
- Click Save in the top menu to save your work and publish it to your Public Dashboard.
In the HTML pane, create a div element with an id of 5DayWeather, like this:
<div id="5DayWeather"></div>In the JavaScript pane, start out by creating an array of the days of the week:
var days = ["Monday","Tuesday","Wednesday","Thursday","Friday"];-
Create a second array called weather.
The elements in this array should be different types of weather. Feel free to put in as many different types of weather as you can think of. Here’s our list:
var weather = ["Sunny", "Partly Sunny", "Partly Cloudy", "Cloudy", "Raining", "Snowing", "Thunderstorm", "Foggy"]; -
Create two variables — minTemp and maxTemp — to hold the minimum and maximum temperatures that you want the random weather program to output.
Here are our numbers (in degrees Fahrenheit):
minTemp = 0;maxTemp = 100; - Start a new function, called generateWeather().
function generateWeather() { The first line in the body of the function will start a for loop that will loop through each of the days of the week.
for (var i = 0; i < days.length; i++) {Declare a new variable, weatherToday, that will get a random element from the weather array.
var weatherToday = weather[Math.floor(Math.random() * weather.length)];Declare a new variable, tempToday, that will get a random temperature between the values of your minTemp and maxTemp variables.
var tempToday = Math.floor(Math.random() * (maxTemp - minTemp) + minTemp);-
Use innerHTML to output the values of weatherToday and tempToday inside the div element by adding the following code to the JavaScript pane.
document.getElementById("5DayWeather").innerHTML += "<div id='" + days[i] + "' class='" + weatherToday + "'><b>Forecast for " + days[i] + ":</b><br><br>" + weatherToday + " and " + tempToday + " degrees.</div>";Notice that the above code adds the name of the day of the week as an ID attribute and the type of weather as a class attribute. We’ll use these later on to style the elements using CSS.
- Close the loop and the function with closing curly brackets.
}} - Finally, insert a call to the generateWeather function after the variable declarations and above the function.
generateWeather(); - Click Update and then Set as Base in the top menu to save your work.
The finished JavaScript code should look like Listing 17-5.
Listing 17-5 The Finished JavaScript Code
var days = ["Monday", "Tuesday", "Wednesday", "Thursday", "Friday"];
var weather = ["Sunny", "Partly Sunny", "Partly Cloudy", "Cloudy", "Raining", "Snowing", "Thunderstorm", "Foggy"];
var maxTemp = 100;
var minTemp = 0;
generateWeather();
function generateWeather() {
for (var i = 0; i < days.length; i++) {
var weatherToday = weather[Math.floor(Math.random() * weather.length)];
var tempToday = Math.floor(Math.random() * (maxTemp - minTemp) + minTemp);
document.getElementById("5DayWeather").innerHTML += "<div id='" + days[i] + "' class='" + weatherToday + "'><b>Forecast for " + days[i] +":</b><br><br>" + weatherToday + " and " + tempToday + " degrees.</div>";
}
}
When you run this program (by clicking Run in the top menu of JSFiddle) the result is the five weekdays followed by a weather prediction for each, as shown in Figure 17-4.

Figure 17-4: The result of running Listing 17-5.
Inspecting the results
Now we have a basic weather forecast, but it’s not very visually appealing. Fortunately, we had the foresight to add id and class attributes to each div in the output.
Follow these steps to inspect the output in the Result pane and see the HTML elements and their attributes that have been added by the JavaScript look:
-
Click Update or Run in the top menu bar in JSFiddle.
The Result pane updates with a new list of forecasts.
-
Choose Chrome ⇒ More Tools ⇒Developer Tools.
The Chrome Developer Tools open.
-
Click the Elements tab in the Chrome Developer tools.
The Elements panel, shown in Figure 17-5, appears.
- Click the Inspector tool (which looks like a magnifying glass) in the upper left of the Elements panel.
-
Move your mouse over the Results pane.
Elements within the pane will become highlighted as your mouse moves over them, as shown in Figure 17-6.
-
While your mouse is hovered over one of the days of the week in the Result pane, click it.
The Elements panel updates to highlight the code that created the element you clicked, as shown in Figure 17-7.
- Click some of the other elements in the Result pane and see how the id attributes, classes, and content of each element are different.

Figure 17-5: The Elements panel in the Developer Tools.

Figure 17-6: Highlighting elements in the Result pane.

Figure 17-7: The element you clicked is highlighted.
In the next section, we use the id and class attributes to apply styles to the output of the program.
Styling the app
By selecting elements by their id and class attributes, we can style each day, and customize the look of the days based on the weather predicted for that day.
Follow these steps to apply some style to the app:
-
Create a rule in the CSS pane to style each of the days the same using this code.
#Monday, #Tuesday, #Wednesday, #Thursday, #Friday {width: 18%;height: 200px;float: left;border: 1px solid black;padding: 2px;font-family: sans-serif;font-size: 12px;}This rule creates a border, a width and height, a font family, and some padding on each of the days of the week. We’ve also set the float property equal to left in order to make all the days be side-by-side rather than stacked.
-
Create a rule for several of the different types of weather using this code:
.Sunny {background-color: skyblue;}.Raining {background-color: lightgrey;}.Cloudy {background-color: #eee;}.Thunderstorm {background-color: #333;color: #fff;}When you have spaces in a class attribute (such as in Partly Sunny and Partly Cloudy), the two words are treated as separate class attributes. So, an element with a class value of Partly Cloudy will be styled using the CSS associated with .Cloudy, and an element with a class value of Partly Sunny will be styled using the CSS associated with .Sunny.
-
Click Update and Set as Base to save your work.
The Result pane updates and displays your forecast in a new, more attractive format, as shown in Figure 17-8.

Figure 17-8: The finished Weather Forecast app.