Chapter 8
Building Your Dream Car with Operands
When you speak or write in a human language, you typically string together nouns and verbs to create action. You might then spice things up with adjectives, adverbs, pronouns, conjunctions, prepositions, and interjections. However, the real work of a sentence is done by the nouns and verbs.
Forming JavaScript sentences is called writing statements. Statements are mostly made up of operands (which are like nouns) and operators (which are like verbs).
In this chapter, you learn about the different types of operands and you see examples of how to work with operands in JavaScript programs.

Knowing Your Operands
An expression in JavaScript is any valid piece of code that resolves to a value.
When we say that an expression “resolves to a value,” what we mean is that when everything the computer needs to do is done, some sort of value is produced. For example,
- The expression 1 + 1 “resolves to” 2. Another way to say the same thing is that it has the value of 2.
- The expression x = 7 is a different kind of expression. It assigns its value (7) to the variable called x.
Expressions are made up of operands (such as the number 1 or the variable x) and operators (such as = or +). Operands can be any of the JavaScript data types that we talk about in Chapter 3, as well as objects or arrays.
In this chapter, we show you how to create and use your own objects. We show you how to create and use arrays in Chapter 11.
Instead of simply explaining the different types of possible data types that operands can use, let’s play a game. We’re going to list some valid JavaScript operands, and you’ll determine which type of data each operand is.
We’ll give you all the answers at first, until you get the hang of it. After that, we’ll still give you all the answers, but we’ll hide them a little better. Here we go!
For each of the following operands, tell us whether it’s a number, a string, or a Boolean:
- 100: This is, quite clearly, a number, because it’s not surrounded by quotes and it’s made entirely of numbers.
- "Hello JavaScript World!": This is a string, because it’s surrounded by quotes.
- false: This is a Boolean, because it’s true or false and it’s not surrounded by quotes.
- "true": This is a string, because, even though it contains the word true (which would seem to make it a Boolean), the word is surrounded by quotes (which makes it a string).
Now it’s your turn. For each of the following operands, decide whether it’s a number, a string, or a Boolean:
- 187
- "007"
- "Number 9"
- true
- 86
- "It's 5 o'clock somewhere"
How do you think you did? Here are the answers:
- 187 is a number.
- "007" is a string.
- "Number 9" is a string.
- true is a Boolean.
- 86 is a number.
- "It's 5 o'clock somewhere" is a string.
Operands aren’t always literal values. More often, in fact, programmers assign values to variables and use those variables as operands. Here are some statements that assign values to variables. For each of these, figure out the data type of the operand (number, string, or Boolean):
- distance = 3000
- distance = 800 * 4
- doTheMath = 7 + 8 + 36 + 18 + 12
- countrySong = "mama" + "truck" + "train" + "rain"
If you said that the first three of these are numbers and the last is a string, you got it right!
If you don’t believe us, try the following exercise to find out for yourself!
-
Open the JavaScript console in Chrome by pressing
 +Option+J (Mac) or Ctrl+Shift+J (Windows).
The JavaScript Console appears, as shown in Figure 8-1.
-
Use the typeof command to find out the data type of a number.
For example, type this:
typeof 8The JavaScript Console returns "number", as shown in Figure 8-2.
-
Type the following to create a variable and use an expression to set its value:
var doTheMath = 7 + 8 + 36 + 18 + 12The console returns undefined, letting you know that it has done its job.
-
Find out the type of your new variable using the typeof command.
typeof doTheMathThe result, once again, is "number".
-
Find out the type of a string with the following expression:
typeof "the cat's favorite toy"The result, of course, is "string".
-
Try finding the type of a word that’s not in quotes, like this:
typeof automobileThe result of this expression will be "undefined". What’s happening here is that JavaScript treats a word that’s not in quotes as if it’s a variable. Because we haven’t defined a variable named automobile, the result of asking for the type of the automobile variable is "undefined".

Figure 8-1: Opening the JavaScript Console.

Figure 8-2: Finding out the type of an operand.
Working with Objects
In addition to the basic data types (string, number, and Boolean), operands in JavaScript can also be of the object type. As we explain in Chapter 5, JavaScript objects can have properties (things that describe them) and methods (things that they can do).
Now, we’re going to show you how to create your own objects! To create an object, start with the var keyword, just as you do to create any variable, followed by an equal sign (=):
var myObject =
After the equal sign is where things get a little different. When you create an object, you always start with curly braces ({ and }):
var myObject = {};
Inside the curly braces, you can put multiple properties and methods. Each property or method of an object starts with a name (on the left), followed by a colon (:), followed by a value. If an object contains multiple properties or methods, they’re separated by commas.
Let’s practice making some objects and looking at their values in JSFiddle:
-
Go to
http://jsfiddle.netin your web browser.You should now have a blank fiddle, meaning that all four of the panes on the screen (HTML, CSS, JavaScript, and Result) are blank.
-
Enter the following into the JavaScript pane to create a dreamCar object:
var dreamCar = {make: "Oldsmobile",model: "98",color: "brown",year: 1983,bodyStyle: "Luxury Car",price: 4500}Feel free to customize your dream car in any way that you want!
 Notice that, in an object, it’s perfectly fine to mix properties with different data types. For example, in the dreamCar object, the make, model, color, and bodyStyle properties are all strings, and the year and price are numbers.
 - Type the following into the JavaScript pane after the object definition in order to find out the type of the dreamCar object:
alert("The type of dreamCar is: " + typeof dreamCar); -
Click Run.
An alert appears, showing you that your dreamCar is an object, as shown in Figure 8-3.

Figure 8-3: Your dream car is an object.
Configuring Your Dream Car
Enough talk! Let’s configure our dream car and get this baby on the road!
The first step in building any car is to create the frame. We’ll do that with HTML.
-
Enter the following HTML into the HTML pane in JSFiddle:
<div id="car">This <span id="modelyear"></span> dream car can be yours for just: $<span id="pricetag"></span><div id="body"></div><div id="frontwheel"></div><div id="backwheel"></div></div>This HTML simply creates a basic structure for our car — plus the price tag, of course. In the next step, we give the car some style.
-
Enter the following into the CSS pane:
#car {font-family: Arial;}#body {position: absolute;top: 50px;width: 80%;height: 100px;background-color: #000000;text-align: center;}#backwheel {position: absolute;left: 10%;top: 130px;background-color: #ffffff;border: 3px solid black;border-radius: 50%;width: 40px;height: 40px;}#frontwheel {position: absolute;left: 55%;top: 130px;background-color: #ffffff;border: 3px solid black;border-radius: 50%;width: 40px;height: 40px;}Great! We’ve built and styled a generic car, complete with a body, a price tag, and wheels.
-
Click Run to see where we’re at so far.
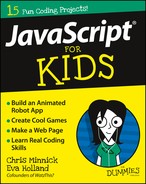
The generic car design appears in the Result pane, as shown in Figure 8-4.

Figure 8-4: A generic car.
Now, let’s get down to the business of customizing our car with JavaScript!
-
Create your dreamCar object in the JavaScript pane.
Here’s ours:
var dreamCar = {make: "Oldsmobile",model: "98",color: "brown",year: 1983,bodyStyle: "Luxury Car",price: 4500}; Write a statement to update the price of the car when the program runs:
document.getElementById("pricetag").innerHTML = dreamCar.price;Write a statement to update the model year on the price tag:
document.getElementById("modelyear").innerHTML = dreamCar.year;Write a statement to update the color of the car:
document.getElementById("body").style.backgroundColor = dreamCar.color;Write a statement to write out the make and model of the car on the side of the car:
document.getElementById("body").innerHTML = dreamCar.make + " " + dreamCar.model;
Now, click Run to see your amazing new car! Ours is shown in Figure 8-5.

Figure 8-5: Check out our sweet new ride.
Try customizing your car with different settings, and then run the program to see how the properties of an object can be used to change the output of a program or the CSS styles of a web page.