
This section is going to be a primer on SQLite3 and it won't have any Haskell code. We're going to take a moment, and translate a CSV file into SQLite3. In this section, we're going to take a look at introducing SQLite3; we will be creating a table in an SQLite3 database, and also adding a CSV file to that table that we created in our SQLite3 database.
So, let's go to our Haskell environment and open our browser. Using Google, search for usgs earthquake feed csv. USG is the United States Geological Survey, and they keep a database of every single earthquake that takes place on planet earth, and they offer this data in a CSV file. So, we're going to click that very first link, https://earthquake.usgs.gov/earthquakes/feed/v1.0/csv.php. You should see Spreadsheet Format at the top; scroll down to the heading where it says Past 7 Days on the right side of the page, and we want to find All earthquakes. We will have the option to download the all_week.csv file for all earthquakes that have happened in the past seven days in the United States:

So, let's save that file and go over to our Terminal, and type in ls:
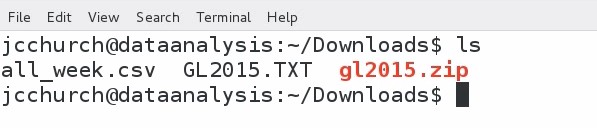
We see that we have, in our Downloads folder, an all_week CSV file; that's the file that we just downloaded. Let's convert this file to a CSV file by using the command shown in the following screenshot:

Now, let's take a look at the file. You can see that this particular file has a header line, and we can look at the header information of all of our columns:

The first five pieces of information on every record will be the time, latitude, longitude, depth, and magnitude. There's a lot of other information here that we could go through but for our purposes, we just want those first five columns of information. What we can do in order to narrow this dataset down to just those first five columns of information is to use a command called cut. cut is a very useful command for working with CSV files and we have to pass it a delimiter; the delimiter is going to be a comma because this is a comma-separated value file and we need to know what fields we would like to keep from our file. As we want the first five columns, we will type in the following command:

So, we type in 1,2,3,4,5 and we separate them all through commas, then we will pass in our filename, and we are going to name this as earthquakes.csv. Now that file, as you recall, had a header line; and we need to chop that header line out of the file. So, there is another tool that we could use in Linux, and it's called tail. If we type in tail -n +2 earthquakes.csv, we are then going to create a temporary file:

The e.tmp file is our temporary file, which will be our original file of earthquakes.csv but without that header line. Now, we can move our temp file over our earthquakes file, and this is the primed dataset that we would like to use. Here is the command:

So, let's take a look at earthquakes.csv:
![]()
The following screenshot shows all of the earthquake data over the past seven days:

We can see that there are 1,585 earthquakes represented in this dataset and we have the first five columns of information, which is the time, latitude, longitude, depth, and magnitude. Next, we need to install SQLite3 and the SQLite3 development library; and in Debian, the command for this is as follows:
sudo apt-get install sqlite3 libsqlite3-dev
Now that SQLite3 is installed on our system, we want to create our first SQLite3 database. Typically, SQLite3 database files end with the .sqlite3 extension. Since this is a database from the US Geological Survey, we are going to call our database using the following command:
sqlite3 usgs.sqlite3
That just created the database file on our hard drive. There's nothing in that file. There are no tables. What we need to do next is to create that first table. We're going to create a table called earthquakes, and then we are going to pass in the five columns from our file:

We are going to name them time, latitude, longitude, depth, and magnitude. Now, the first field is going to be of type Text, and so we have put the word TEXT after time; but the remaining four fields are all going to be based on floating-point numbers, and so we have used FLOAT type for those four types. Now, this has created the table in our usgs.sqlite3 database file, but it doesn't have any of the information in that table. What we would like to do is to import our data from CSV into SQLite3:
![]()
We need to tell SQLite3 in order to read from CSV, and the command for that is .mode csv. Next up, we perform the actual import as seen in the preceding screenshot, and then we need to tell it the name of the table; we named our table earthquakes.
If you didn't get any error messages, this means that you have created and imported all of the data from our Past 7 Days USGS earthquake feed into an SQLite3 database. Now, let's run run a simple SELECT query:

So, here we see SELECT * FROM earthquakes LIMIT 5;, and what this means is we want five records from our database, but we really don't care which records they are and give us all columns from those records. So, we got the result as shown in the preceding screenshot. Now, in order to get out of this interface, we hit Ctrl + D on the keyboard. If you've gotten this far, you should see a new file on your folder called usgs.sqlite3:

usgs.sqlite3 will have a little bit of information in it. If it's not the exact same size as mine, don't worry. There's going to be a different number of earthquakes going around the earth, depending on when you read this chapter. So, your size of the file will more than likely be different from mine, but you should have a few thousand earthquakes in that database.
Now, let's pretend that we're working with multiple CSV files. We can repeat our steps in this section and create a table in our SQLite3 database for each CSV file, and then import each CSV file into that database. This allows us to package many tables of information into a single file that can be represented with a clean, consistent interface. So, SQLite3 has lots of advantages, but it's not enough. We need a language like Haskell for serious number crunching. In our next section, we'll be discussing how to work with SQLite3 and Haskell.