Up to this point in the book, all of the games that you have worked on have been developed using Game Maker’s events and action icons. Game Maker’s actions allow object instances to perform different tasks. However, with only 125 actions available, there are limits to this developmental approach. Using Game Maker’s built-in programming language, GML, you get access to almost 1,000 predefined functions and variables that significantly extend Game Maker’s capabilities. This allows you to develop games with additional features and greater complexity. This chapter introduces GML and its use within Game Maker.
An overview of the major topics covered in this chapter includes:
Learning how to publish your Game Maker games on the Internet
A basic introduction to GML and its usage
An explanation of the different ways in which you can integrate GML into your games
A demonstration of how to create and execute GML scripts
Once you have finished working on your game and are ready to share it with others, you can create a standalone executable version of your game by clicking on File > Create Executable. Once created, you can share the executable version of your game with anyone you choose. This works well if you only want to distribute your games to a small number of friends. If you have a website and want to make your game available to a wider audience, you can upload it to your web page and make it available for download. Of course, only people who know of your website and who visit it will be able to download it.
As an alternative, you can make your game immediately available to an audience over 80,000 strong by publishing it on the YoYo Games website. All you have to do is register with the YoYo Games website and then upload your game.
Registering with the YoYo Games website is free and easy. Go to http://www.yoyogames.com/user/login as shown in Figure 8.1.

To register, click on the I Don’t Have a Login but I Would Like to Register for an Account option. This displays a form that you will need to fill out to complete the registration process. Once you have filled out this form, click on its Register button. The information that you supply is then validated, and if there are no errors, you are returned back to the YoYo Games login page. In addition, an email will be sent to your email account, welcoming you to YoYo Games.
Before you can use your new account to log in to the Game Maker website, you must confirm your registration. To do so, log in to your email account, locate and open the email sent by YoYo Games, and click on the embedded Click me! link. That’s it; you are set up and ready to begin distributing your games.
Assuming that you have registered for a new account at the YoYo Games website and that you have a game that you are ready to publish, you can begin the publishing process by clicking on File > Publish Your Game. In response, Game Maker will open your default web browser and load http://www.yoyogames.com/user/login, displaying the YoYo Game’s login page. Log in by entering your email address and password and then clicking on the Login button. Game Maker will display a web page showing your personal profile, which you can update if necessary.
To publish a game, click on the Share button displayed at the top of the page. This displays the Add Game Details page. Fill it out as demonstrated in Figure 8.2 and then click on the Next button.

The screen shown in Figure 8.3 appears. Click on the Select Images to Upload button. This displays a standard Select File dialog window, allowing to you select the screen prints you want to upload. You select files one at a time. An entry for each screen print that you add is displayed on the screen.

Trick
Unless you disable this feature, you can generate screen prints of your game when playing it by pressing the F9 key.
Once you have specified the screen prints you want to upload, click on the Select Game File to Upload button and use the Select File dialog window that appears to locate and select the game you want to upload. When done, click on the Upload & Continue button. The files that you have specified are then uploaded. You can view the status of the upload process as it executes as demonstrated in Figure 8.4.

As soon as the upload process is complete, a screen similar to the one shown in Figure 8.5 displays.

Figure 8.5. You can see your game’s screen prints as well as a summary of the information that you provided.
Once uploaded, the YoYo Games website will scan your game to ensure that it does not contain any viruses and will then make it available to the Game Maker community. Once uploaded, you can manage your game by clicking on the My Account link located at the top of all YoYo Games pages. This will display your personal profile page. Any games that you have uploaded are displayed at the bottom of the page. Here you will see links that when clicked allow you to modify game details, modify game files, or delete your game.
Game Maker Language or GML is an interpreted programming language that you can use to substantially enhance the games you create using Game Maker. GML provides you with an alternative way of approaching game development. Using GML, you can supplement, extend, or replace Game Maker’s actions. Alternatively, you can use GML as the basis for replacing action icons altogether.
Hint
As an interpreted programming language, scripts written using GML are interpreted and compiled (converted into an executable format) just before they are executed. So, every time a Game Maker application executes, every script that exists in the application must be re-interpreted before it can be executed. Interpreted programming languages are therefore slower than compiled programming languages, whose program code it compiles once at the end of the development process, allowing it to be executed repeatedly without having to be recompiled. The advantage of working with interpreted programming languages like GML is that you can quickly modify and re-execute them to see the results of your changes, whereas a compiled program must be recompiled before your changes can be tested. Fortunately, given the speed of today’s modern computers, there is little noticeable difference in the performance of interpreted languages and compiled languages.
GML is a key component of Game Maker and is tightly integrated into every aspect of its operations. For example, every Game Maker action corresponds to a GML script or function. As such, any game that you develop using actions can also be redeveloped using GML functions. In total, GML provides access to almost 1,000 functions and predefined variables.
There are many different ways of working with scripts in Game Maker. One of the most obvious ways is through commands made available on the Script’s menu, as shown in Figure 8.6.

The commands that you will find on this menu are outlined below.
Import Scripts. Allows you to import scripts stored in GML scripts into your application.
Export All Scripts/Export Selected Scripts. Allows you to export and save all scripts or a selected script in your applications.
Show Built-in Variables. Displays a list of all of the global and local variables available to your application.
Show Built-in Functions. Displays a list of all of Game Maker’s functions.
Show Extension Functions. Displays a list of functions added to Game Maker through the installation of extension packages.
Show Constants. Displays a list of all the constants available to your application.
Show Resource Names. Displays a list of all of the resources that are defined in your applications (sprites, sounds, objects, etc).
Search in Scripts. Allows you to search all of the scripts in your applications for a matching string.
Check Resource Names. Instructs Game Maker to look for resource name conflicts within the application.
Check All Scripts. Instructs Game Maker to perform a syntax check of all of the scripts in the application and to report on any errors.
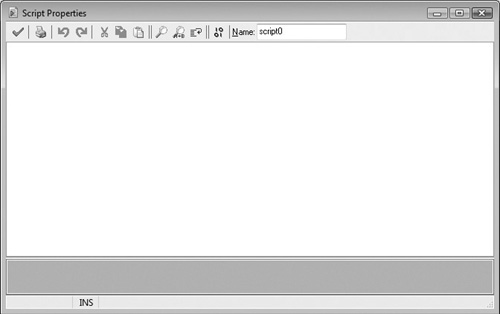
In addition to the commands located on Game Maker’s toolbar, Game Maker also offers a powerful script editor. You can access this editor through the Script Properties window, as demonstrated in Figure 8.7. The script editor provides everything you need to create and edit all of the scripts that you add to your games.

Hint
You can also access Game Maker’s script editor through the Execute Code action’s window and through the Room Creation Code window, both of which are discussed a little later in this chapter.
Scripts are created by typing GML statements into the editor’s text area. As you type, you will notice that Game Maker automatically applies a color-coding scheme to the different parts of your statements that help to identify their functions and purpose. As you will learn later in this chapter, you can disable color-coding or modify its color scheme.
The script editor also assists you as you are writing code statements by monitoring what you are typing and then displaying the statement syntax for all possible matching functions at the bottom of the window, as demonstrated in Figure 8.8. This way, even if you only remember the first part of a function name, Game Maker will help you find the function you are looking for and show you its syntax.

Another feature provided includes smart tabs, in which the editor automatically indents code statements based on the indentation level of preceding statements. The script editor includes a toolbar with single-click access to all of the commands shown in Figure 8.9.

Game Maker scripts are made up of one of more GML code statements embedded within an opening ({) bracket and a closing (}) bracket. A statement is a collection of GML keywords and functions that performs a specific task. Although not strictly required, all code statements should end with a ; character, marking the end of each statement. The following example demonstrates how all of this comes together to create a script.
{
  statements;
  .
  .
  .
}Game Maker provides multiple integration points for GML, allowing you to use it in a number of different ways. This provides a lot of flexibility, allowing you to do anything from supplementing Game Maker’s capabilities to completely eliminating the need to work with action icons at all. Different ways of using GML include:
Creating GML scripts
Adding GML code to events as actions
Adding GML code to rooms
Using GML expressions to supply actions with data
The most obvious place you can use GML is in the development of scripts. As far as Game Maker is concerned, scripts are just another type of resource, like sprites, rooms, and sounds. To learn how to create and execute a script, start a new Game Maker application. Add a room to it and then add an object to the room. Don’t worry about configuring the room or the object; you won’t need to. Like other resources, you can add to your games by clicking on Resources > Create Script or by right-clicking on the Scripts folder located in the resource tree folder and clicking on the Create Script command that appears. In response, Game Maker adds a new script to your game and displays the Script Properties window as shown in Figure 8.10.
Once created, you can finish the development of the script by adding GML code statements to it. As an example of how to do this, create a new application, and then add a script to it named scr_test. Next, double-click on the script’s name in the resource tree folder to display its Properties window and then type the following statements into it, using the Tab key as necessary to indent the statements.
{

   //Set the drawing color to white
   draw_set_color(c_black);

   //Draw a filled rectangle
   draw_rectangle(50,50,590,430, false);

   //Set the drawing color to black
   draw_set_color(c_yellow);

   //Add a new font
   font1 = font_add("Arial", 48, false, false, 32, 127);

   //Tell Game Maker to use the specified font to display text
   draw_set_font(font1);

   //Draw the specified text string
   draw_text(145,190, "Hello World!");

}
The above script begins with the { character and ends with the } character. Six code statements are embedded inside these brackets, each of which is preceded by a comment statement that describes what each statement does. You learn about GML scripting in Chapters 9 and 10, and you will get the chance to create a new game in Chapter 11 that requires GML scripting. For now, don’t get too hung up on what the above statements do or how they work. Instead, keep your focus on the overall mechanics.
Hint
Note when you key in these code statements that Game Maker automatically applies a color-coding scheme to it, making different types of text stand out. You will learn more about Game Maker’s application of color-coding, including how to modify and disable it, later in this chapter. Also, note that as you begin typing in statements, Game Maker displays syntax help at the bottom of the Script Properties window based on the input you type. You can use this information to make sure that you properly format your script statements.
Once you have added a script to a Game Maker application, you need to set up its execution. To do so, you need to select the object you added to the application and then add an event that will be used to trigger the execution of the object. In the case of this script, which draws graphic shapes and text, you will need to execute it by adding a Draw event. Once you have added the Draw event to the object, all you have to do is click on the Control tab and then drag and drop an instance of the Execute Script action to the actions area. Game Maker responds by displaying the Execute Script window. To configure the execution of the script, click on the context menu located at the end of the script field, and select scr_text from the list of scripts that is displayed, as demonstrated in Figure 8.11.

Once you have configured the object’s Draw event to execute the script, close the Object Properties window and click on Run > Run Normally. In response, Game Maker will compile and execute the application as shown in Figure 8.12.

Hint
The preceding script executed different GML functions instead of Game Maker actions. There is nothing in the preceding example that you could not have also accomplished by using Game Maker’s action icons. However, there are only 125 actions, whereas there are close to 1,000 GML functions that you can call upon to do things not possible using only actions. For every action that is supported, there is a corresponding function. Often these matching functions provide enhanced control over specific types of actions.
Defining scripts as outlined in the previous sections allows you to call upon those scripts for execution at any time from any location within your game, allowing you to define the script once but reuse it in as many different places in your game as necessary. This way you don’t have to redefine the same script over and over again for each event that you want to trigger it. If, on the other hand, you need to set up the execution of a set of GML statements that will only be executed in one place by one specific event, you have the option of executing the script using the Execute Code action.
For example, suppose you wanted to execute the following script.
{

   //Set the drawing color to white
   draw_set_color(c_black);

   //Draw a filled triangle
   draw_triangle(320, 20, 620, 460, 20, 460, false);

   //Set the drawing color to black
   draw_set_color(c_yellow);

   //Add a new font
   font1 = font_add("Arial", 48, false, false, 32, 127);

   //Tell Game Maker to use the specified font to display text
   draw_set_font(font1);

   //Draw the specified text string
   draw_text(210,200, "Triangle");

}
All you would have to do is add an Execute Code action to the appropriate object’s Draw event and then add the script to it, as shown in Figure 8.13.

When executed, this script generates the results shown in Figure 8.14.

In addition to executing GML code as scripts or running them within Execute Code actions, you can also execute GML code when rooms are created. To do so, open a room and click on its Settings tab. This tab lets you change the name, caption, width, height, and speed of the room. In addition, there is a button at the bottom of the tab labeled Creation Code. When clicked, Game Maker displays the window shown in Figure 8.15.

Any GML code that you type into the Room Creation Code window is executed when the room is first created in the game (once and only once). This provides a convenient means of executing any programming logic you want. For example, you might need to initialize default values, adding randomly placed object instances to the room.
One final place within Game Maker applications where you can execute GML code is by entering expressions into the text fields belonging to different Game Maker actions. An expression is a piece of GML code that, when executed, results in a value. You have already seen numerous examples of this in the games you have worked on in previous chapters. Figure 8.16 shows another example of how to use a GML expression within an action.

In this example, a new instance of an object named obj_alien_red is added to the game. Each object is added on the right-hand side of the game window at an x coordinate of 720 and a randomly generated y coordinate that is calculated using the following expression.
random(room_height - 150)
Here, a built-in GML function named random() is used to generate a random location of the object’s y coordinate. The random() function generates a random number between 0 and a specified value, which is passed to the function as an argument, which in this example is an expression rather than a number. The value of the expression is determined by subtracting 150 from the height of the room. The height of the room is retrieved from a built-in special variable that is automatically created by Game Maker. You will learn more about variables in Chapter 9. Once Game Maker resolves the expression to a numeric value, that value is passed to the Random() function providing it with the upper limit of the range from which it will generate a random number.
Like most other aspects of Game Maker, its built-in code editor is extremely configurable. To access the code editor’s configuration options, click on File > Preferences. This opens the Preferences window. Relevant configuration options are located on two tabs, the Scripts and Code tab and the Colors tab.
The configuration options for the code editor are located on the Preference window’s Scripts and Code tab, as shown in Figure 8.17.

The configurable code editor options include:
Group undo operations. Instructs Game Maker to undo groups of previous operations.
Number of undo. Specifies how many undo operations Game Maker defines as a group.
Automatic indentation. Instructs Game Maker to automatically indent new statements based on the indentation of previous statements.
Indent amount. Specifies how many spaces Game Maker should advance the cursor when the Tab key is pressed.
Smart tabs. Instructs Game Maker to automatically indent new code statements based on the indentation of the previous statement.
Show help on function and variable names. Displays help information for functions and variable names in your code statements.
Use built-in code editor. Instructs Game Maker to use its own built-in code editor.
Use external code editor. Allows you to specify an external third-party code editor in place of the Game Maker’s built-in code editor.
Game Maker automatically color-codes the text that makes up the GML code statements. To configure how Game Maker handles color-coding, click on the Preferences window’s Colors tab. If you want, you can disable color-coding by clearing the Use Color-Coding option located on the Preferences window’s Colors tab, as shown in Figure 8.18.

Figure 8.18. Game Maker allows you to modify the color-coding scheme it uses to display the different components of script statements.
By default, Game Maker displays normal text and GML keywords in black. Comments are displayed in green, resource names (objects, rooms, sprites, sounds, backgrounds, paths, fonts, and timelines) are displayed in purple, constants are displayed in brown, local and global variables are displayed in royal blue, and functions are displayed in dark blue. To modify color-coding assignments for any of these types of resources, select the resource type from the resource list located on the Colors tab, then click on the Change button, and select a new color from the Colors window that appears, as shown in Figure 8.19.

In addition to configuring how Game Maker applies color-coding, you can change the font type, style, and size that Game Maker uses to display the text that makes up code statements by clicking on the Font button. This displays the Font window shown in Figure 8.20.

This chapter began by showing you how to register for a free account at the YoYo Games website and walked you through the steps necessary to upload and publish your games at this website. This chapter also introduced you to GML and provided you with a first glimpse of how GML code looks. You learned how to work with Game Maker’s Scripts menu and script editor. This chapter explained all of the different places within games where you can apply GML scripts, including scripts, action code, room code, and as expressions used to provide data to actions. You saw examples of how to create and execute scripts and to add script to Execute Code actions.