
14
Creating a Continuous Integration Pipeline
In this chapter, we’ll learn how to create a continuous integration (CI) pipeline with GitHub Actions for our task manager application. We’ll start by learning about CI and why it’s important in the context of GitHub Actions. Then, we’ll learn how to create a GitHub repository to host our project and how to push our local files to the new repository. Finally, we’ll learn how to create a GitHub Actions pipeline to build and test our project and understand how this fits in a CI and deployment software development practice.
By the end of this chapter, you should have a basic overview of GitHub Actions, and know how to implement CI workflows and pipelines for your projects. Being able to create CI pipelines for your project will allow you and your team to adopt agile software development practices while guaranteeing that your application doesn’t break with each small change.
We will be covering the following topics in this chapter:
- Introducing GitHub Actions
- Creating and pushing the application into a GitHub repository
- Creating a GitHub Actions pipeline
Technical requirements
In this chapter, we’ll create CI pipelines that run on the GitHub Actions server and virtual machine (VM) infrastructure. There is no need to have a Java JDK or Node.js setup.
You will need a Git setup on your machine to be able to persist your code and push it to GitHub. You will also need access to the internet and a GitHub account.
You can download the full source code for this chapter from https://github.com/PacktPublishing/Full-Stack-Quarkus-and-React/tree/main/chapter-14.
Introducing GitHub Actions
Before we dig deeper into GitHub and its Actions infrastructure, we need to have a better understanding of the CI, continuous delivery, and continuous deployment (CD) concepts (usually abbreviated as CI/CD), and how these agile practices can help in the software delivery process.
What is continuous integration?
The term continuous integration was originally coined by Grady Booch in his book Object-Oriented Analysis and Design with Applications, published in 1991. CI is a software development practice by which several developers commit their work on a single development project to a central repository where automated builds and tests are run to guarantee that these changes won’t break the project. Further refinements of the CI term, especially those proposed by the Extreme Programming (XP) software development methodology, include repeating this operation multiple times a day.
CI tries to solve the problem where other development processes fail. In other methodologies, integrating several lines of work is a long and tedious process that often ends in unpredictable ways due to the bugs that might be introduced from the intersection of the different code changes. In CI, every change made to the project triggers a new build and a set of tests to ensure that the final product works. This means that every change is considered a standalone improvement and that these changes are integrated continuously, instead of delaying this process to a later time in the future, when the set of changes might have grown out of hand. Having a successful CI process requires a good infrastructure to be able to perform and run these builds and tests, as well as a good team culture where every member is committed to this practice. Continuous delivery and continuous deployment are built on top of CI but go a few steps further. Let’s see what they involve.
What are continuous delivery and continuous deployment?
Continuous delivery is a natural extension of CI, where each set of changes is not only integrated into a central repository but is ready to be deployed into production after a successful build and test iteration, in a safe, quick, agile, and sustainable way. The main purpose of continuous delivery is to minimize the cost, time, and risk of delivering changes to a project or product.
In continuous delivery, the deployment phase to the end users or customers is triggered manually, and still involves a set of approvals. Continuous deployment accounts for this extra step and includes deploying and releasing the software to the end users within its fully automated pipeline. This practice allows teams to deliver new functionalities multiple times a day, drastically reducing the lead time compared to other approaches.
Besides the cultural change and commitment in the teams involved, the other main requirement to be able to adopt these practices is having a reliable platform where automated builds and tests are run. GitHub Actions is the CI/CD solution provided by GitHub. Let’s learn a little bit more about its main features.
GitHub Actions overview
There are many tools available to help software development teams build their CI/CD pipelines. You can find self-hosted platforms such as Bamboo, Jenkins, TeamCity, and so on, as well as cloud-based software-as-a-service (SaaS) solutions such as CircleCI, GitLab CI/CD, Travis CI, and so on, most of which offer a free plan, especially for open source projects. In November 2019, GitHub made its own CI/CD SaaS solution, GitHub Actions, generally available (GA), which has quickly become one of the most popular and widely extended choices.
GitHub Actions enables the automation of any software development workflow, allowing you to build, test, and deploy your project in the most suitable way for your team, just like most of the other solutions available. However, its tight integration with GitHub makes it the best candidate when building pipelines for GitHub-hosted projects. GitHub Actions is free for any public open source project and has (at the time of writing) a free 2,000-minute/month free quota for private projects.
One of the strongest points of GitHub Actions is its tight integration with the GitHub platform in general. Workflows can be triggered by responding to several events set off by a GitHub repository, such as pushing a commit to a given branch, creating a pull request, creating a tag or a release, and so on. The Actions user interface (UI) is also tightly integrated with the rest of the GitHub ecosystem. Execution reports are easily accessible from many of the repository’s website sections. GitHub Actions has become an important part of the Pull Request (PR) user experience too, marking successful workflow executions as a requirement for a merge or being able to check the execution reports right from the PR interface are just a few examples of its tight integration.
GitHub Actions happen within a repository, so before creating a workflow for our task manager, we’ll need to create a repository and push it to GitHub. In the next section, we’ll learn how to use our GitHub account to create a GitHub repository and how to push our existing local project.
Creating and pushing the application into a GitHub repository
If you’ve been following along with this book, by now, you should have a directory in your filesystem that contains the complete application. If this is not the case, you can always download the ZIP file containing the application source code from https://github.com/PacktPublishing/Full-Stack-Development-with-Quarkus-and-React/, and use the code from Chapter 13 as the starting point. In this section, we’ll push the source code to a new GitHub repository.
GitHub user account
This section assumes you already have a GitHub user account. If this is not the case, you can easily create one by following the wizard at https://github.com/signup. The only requirement is having a valid email address.
Let’s start by creating the new repository by clicking on the plus symbol and the New repository menu entry:
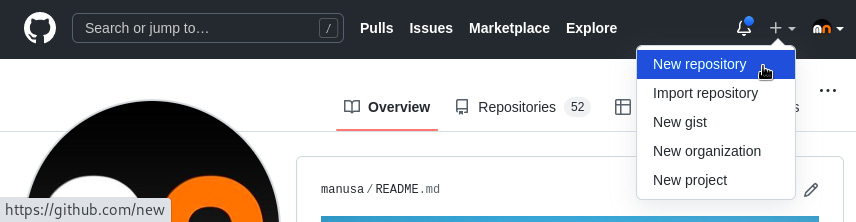
Figure 14.1 – A screenshot of GitHub’s Create new pop-up menu
Now, let’s fill in the details for the new repository. Here, you can introduce the repository name (in my case, task-manager) and leave the rest of the options with the default values:
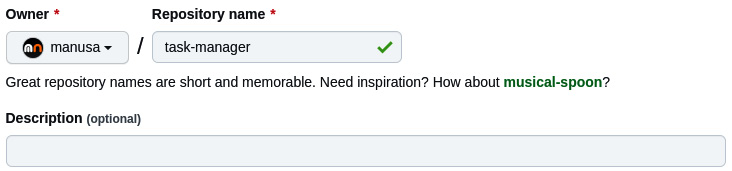
Figure 14.2 – A screenshot of the GitHub New repository form
GitHub should create the repository for you and redirect you to a page with instructions on how to initialize the local git repository. Before completing this step, we need to make sure that we can push to the remote repository either by setting up our SSH keys in our GitHub account or by creating a personal access token (PAT). A PAT is a type of token that can be used instead of a password to authenticate on GitHub; this is required when pushing git changes using HTTPS. Since pushing via HTTPS is the same procedure for all platforms, let’s learn how to generate a PAT. Feel free to omit this step if you already have your local SSH keys set up for your user and you’ll be using SSH instead.
Generating a PAT
You can generate a new PAT by visiting https://github.com/settings/tokens and clicking on the Generate new token button:

Figure 14.3 – A screenshot of the GitHub New personal access token form
In the wizard, make sure to select repo and workflow, and then click on the Generate token button to confirm. GitHub should generate the token for you and show it on the screen. Make sure to copy it and store it in a safe place since it won’t be visible again. Let’s continue by initializing the local git repository and pushing the project to GitHub.
Initializing the local git repository
We can initialize the local git repository by following these steps:
- Open a Terminal on the project’s root directory.
- Initialize the repository by running the following command:
git init -b main
- Stage the project files in the current working tree and update the git index:
git add .
- Commit the staged changes:
git commit -m 'Initial commit'
- Configure the GitHub repository as the remote origin. Note that you should change the address with the one for your repo:
git remote add origin https://github.com/manusa/task-manager.git
- Push the branch to GitHub; when prompted, use your GitHub username and the Personal Access Token (PAT) instead of your account password:
git push -u origin main
If everything goes well, your repository should now contain the source code for the project:

Figure 14.4 – A screenshot of the GitHub repository containing the project’s files
Now that we have set up the local and remote repositories, we can create the pipeline to build and test the project. Let’s continue by learning how to create the CI pipelines using GitHub Actions.
Creating a GitHub Actions pipeline
GitHub Actions pipelines or workflows are defined through YAML files that contain one or more jobs that are triggered by a set of specific git or GitHub events. The workflow YAML files must be located within the .github/workflows directory, so we’ll start by creating this directory:

Figure 14.5 – A screenshot of the IntelliJ New Directory dialog
Next, we can create the YAML file that will hold our workflow. For this purpose, we’ll create a new file called build-and-test.yaml in the .github/workflows directory. You can find the full source code for the pipeline at https://github.com/PacktPublishing/Full-Stack-Development-with-Quarkus-and-React/tree/main/chapter-14/.github/workflows/build-and-test.yaml. Now, let’s analyze the most relevant parts:
name: Build and Testname will be used to identify the workflow when referenced from the GitHub repository UI. You should always provide a descriptive and meaningful name.
Next, we must define the events that will trigger a workflow run:
on:
  push:
    branches:
      - main
  pull_request:
Since this workflow will be used for CI validation, we want to trigger the pipeline whenever a commit is pushed to the main branch and whenever a user opens a pull request in the repo. These are just two types of events; there are many more. However, they highlight quite well how GitHub Actions can respond to git-specific events, as well as to broader GitHub events such as creating a pull request, an issue, a release, and so on. In addition, you can configure manual triggering by leveraging the workflow_dispatch event or scheduled invocations with the scheduled event configuration.
Each workflow can have one or more jobs that will, by default, run in parallel on different VMs. In the following snippet, we are defining a single job for our workflow:
jobs:
  build-and-test:
    name: Build and test
    runs-on: ubuntu-latest
Each job is defined as an entry within the jobs object. In our case, we defined a single entry with a job_id of build-and-test and a field called name with a more readable name for the job.
The runs-on field is used to define the type of machine that will be used to run the job. GitHub includes a set of runner machines for the major platforms (Ubuntu/Linux, macOS, and Windows Server); however, you can configure your own hosted runner too. In this case, we’ll be using the latest Ubuntu version available, since we want to compile the application in Linux.
For each job, we need to define a sequence of steps or individual tasks to be executed in order. steps can either run a command, set up tasks, or use one of the predefined actions. In the following snippet, we are using one of the GitHub-provided actions to checkout the git repository:
    steps:
      - name: Checkout
        uses: actions/checkout@v3
We must also use predefined actions to set up a Java and a NodeJS environment that’s compatible with our project:
      - name: Setup Node
        uses: actions/setup-node@v3
        with:
          node-version: 16
      - name: Setup Java 17
        uses: actions/setup-java@v3
        with:
          java-version: 17
          distribution: temurin
In this case, the actions we are using are provided by GitHub, but you can use any of the ones provided in the GitHub Actions Marketplace (https://github.com/marketplace?type=actions) or even create and use your own.
For each of our steps, we set the name field with a meaningful description, and configure the uses field with the name and version of the GitHub action we want to use. Most actions accept some input parameters to further configure their behavior. In our case, we set the Node and Java versions to use, and the Java distribution provider.
The final part of the pipeline contains the actual build and test execution steps. In the following snippet, we are creating the step that will build the complete application, including the frontend and the backend, and that will run the Quarkus tests:
      - name: Build and test
        run: ./mvnw -Pfrontend clean package
This step contains a field with a legible name, and the actual command to run. In this case, we are just reusing the command that we described in the Running the application section of Chapter 11, Quarkus Integration.
This command will install the npm dependencies and build the ReactJS frontend application; however, it won’t run any of the frontend tests. We have two alternatives – create another Maven profile that runs the frontend tests when we package the application or add another step in the workflow to run them. Since, in this chapter, we’re dealing with GitHub Actions, let’s just add another step to the pipeline for this purpose:
      - name: Test frontend
        run: cd src/main/frontend && npm test -- --all –
          watchAll=false
In this step, we are once again leveraging the run field to invoke the npm command to run the frontend tests. The run command will change the working directory to the frontend’s project root, and then execute the command we described in the Running the tests from the command line section of Chapter 10, Testing Your Frontend.
The CI pipeline is ready to be tested – we just need to commit the changes and push them to our remote GitHub repository. From the same Terminal we used to initialize the git repository, let’s run the following commands to commit and push our changes:
- Stage the GitHub Actions workflow file:
git add .
- Commit the changes:
git commit -m 'ci: build and test pipeline'
- Push the changes to GitHub. You will be prompted for your username and PAT:
git push origin main
The commands should complete successfully and your workflow file should now be visible in your remote GitHub repository. Let’s visit the Actions tab to see the workflow running:

Figure 14.6 – A screenshot of the GitHub Actions dashboard for the project repository
The GitHub Actions dashboard should show us that the new Build and test workflow is running. The workflow run can be identified by the latest commit hash and message that was responsible for triggering the execution. We can also see that the workflow is running in the main branch. After a few minutes, the workflow should complete successfully. Let’s click on it to see the execution summary:

Figure 14.7 – A screenshot of the Build and test workflow run summary
Since our workflow is quite simple and only involves a single job, this view doesn’t provide too much value. The summary becomes handier when there are more jobs involved and when some of the jobs depend on others. The following screenshot shows a summary of a more complex workflow from a different repository:

Figure 14.8 – A screenshot of a complex workflow run summary
From the workflow execution summary, we can also check out the details of each job by clicking on their descriptions. GitHub will redirect us to the job execution details section, where we’ll be able to check the logs for each of the steps and manually re-run the job. Now, let’s click on the Build and test job to see its details:

Figure 14.9 – A screenshot of the Build and test job’s details
Notice how each step is identified by the name we provided in the YAML configuration file. Having explicit names that describe what each step does will help us quickly identify any problem whenever one of the steps fails. From this page, we can download the complete log for the job execution or expand each step to check their individual logs.
We’ve now created a CI pipeline that will make sure that any change we integrate into our main branch doesn’t break the application. We can further prove this point by creating a pull request that introduces some code that breaks the project. You can try this yourself by creating a new branch with some broken code and creating a new pull request from the GitHub interface. I will try this by modifying the @Path annotation of the TaskResource class; you can perform the same modification or change any other part of the application code (which has tests), maybe from the frontend. The following snippet shows my changes to the TaskResource class:
@Path("/api/v1/tasks-broken")After pushing my changes to a new branch, and creating a pull request, a new workflow execution should start and complete with failures. These failures should be visible in the pull request interface:

Figure 14.10 – A screenshot of a GitHub pull request with a failed job
This example clearly illustrates how we can use GitHub Actions and its tight integration with the rest of the GitHub interfaces to adopt a successful CI development practice. GitHub even allows us to define some required checks to be able to merge a pull request, so we could enforce a successful build before merging any changes into the main branch. This would be a good first step before moving into more complex development workflows, such as continuous delivery or deployment.
Summary
In this chapter, we learned how to create a CI pipeline for our task manager application with GitHub Actions. We started by learning about continuous integration, delivery, and deployment, and how these concepts are related to GitHub Actions. Then, we learned how to create a GitHub repository for our project, and how to push the application files we’ve been creating throughout this book. Finally, we learned how to create a GitHub Actions workflow to build and test our project to ensure future changes won’t break the application and help us start our journey with CI/CD. You should now have a basic understanding of GitHub Actions and know how to implement pipelines.
Amazing job! You have reached the end of Chapter 14, Creating a Continuous Integration Pipeline, and the end of Full Stack Quarkus and React. You should now have enough skills and confidence to implement, test, and deploy full-stack web applications using Quarkus as a backend and React as the frontend on your own.
Questions
- What is continuous delivery?
- What is continuous deployment?
- What is the advantage of GitHub Actions compared to other alternatives?
- How do you initialize a local git repository?
- Can you trigger a GitHub Actions workflow manually?