
Jenkins is quite a big topic to cover in a small section of a single chapter, so the walkthrough is going to be really basic and will only deal with building and launching containers.
The other thing to note is that I am going to be covering Jenkins 2.0; at the time of writing this, the first beta has just been released, which means that while things may change slightly as themes and such are refined, all of the features and basic functionality are locked in.
The reason for covering Jenkins 2.0 rather than the Jenkins 1.x branch is that as far as Jenkins is concerned, Docker is now a first-class citizen, meaning that it fully supports and embraces the Docker way of working. A full overview of the current status of Jenkins 2.0 can be found at https://jenkins.io/2.0/.
So what is Jenkins? Jenkins is an open source continuous integration tool written in Java, and it has a lot of uses.
Personally, I am really late to the Jenkins party; being from an operations background, I have always just shrugged it off a tool used for running unit tests on code; however, as I have moved more into orchestration and automation, I am finding the need for a tool that can run tasks based on the results of unit tests.
As I have already mentioned, I am not going to go into much detail about the testing side of Jenkins; there are plenty of resources that cover this functionality, such as the following:
These are both available from https://www.packtpub.com/.
Rather than running it locally, let's launch a DigitalOcean droplet and install Jenkins there. First off, we need to use Docker Machine to launch the droplet:
docker-machine create
    --driver digitalocean
    --digitalocean-access-token sdnjkjdfgkjb345kjdgljknqwetkjwhgoih314rjkwergoiyu34rjkherglkhrg0
    --digitalocean-region lon1
    --digitalocean-size 1gb
    jenkins
Once the droplet has been launched, we don't need to bother configuring our local Docker client to talk on the droplet by running the Docker engine as Jenkins will be handling everything to do with Docker.
Because we need Jenkins to run Docker, we will need to install it directly on our droplet rather than run it as a container; first of all, we will need to SSH onto the droplet. To do this, run the following command:
docker-machine ssh jenkins
Now, on the droplet, we need to install Docker Compose, Jenkins, and all of its prerequisites. Let's start by installing Docker Compose. I have written a quick script to do this, which can be executed by running the following command:
curl -fsS https://raw.githubusercontent.com/russmckendrick/docker-install/master/install-compose | bash
Now that we have Docker Compose installed, it's time to install Jenkins. As version 2 is currently in beta, it is not in any of the main repositories yet; however, there is a DEB package for it.
To install it, we need to download a local copy and run the following commands:
apt-get install gdebi-core
This will install the gdebi tool, which we will then use to install Jenkins and its dependencies:
wget http://pkg.jenkins-ci.org/debian-rc/binary/jenkins_2.0_all.deb
gdebi jenkins_2.0_all.deb
Now that Jenkins is installed, we need to add the Jenkins user to the Docker group so that the user has permissions to interact with Docker:
usermod -aG docker jenkins
Finally, to ensure that Jenkins picks up that it has been added to the group, we need to restart it using this command:
/etc/init.d/jenkins restart
You can now open your browser to complete the installation:
open http://$(docker-machine ip jenkins):8080/
When your browser opens, you should be greeted with a screen that looks like the following:

For security reasons, when the Jenkins container was launched, a random string was generated; before you can proceed with the installation, Jenkins requires you to confirm what this string is. You can find it out by running this command:
less /var/lib/jenkins/secrets/initialAdminPassword
You can quit less by pressing the Q key.
This feature is a most welcome one as not securing your Jenkins installation correctly from the start can have quite bad implications, as I found out when a third party hijacked a test Jenkins 1.x installation I had up running and forgotten about—whoops!
Once you have entered the initial admin password, click on the Continue button.
The next page you come to will ask you which plugins you would like to install:

For our purposes, just click on Install suggested Plugins, which is highlighted. The next page will show you the progress of the suggested plugins:

It will take a minute or two to complete. Once it has completed, you will be asked to create a Jenkins user:

As I have already mentioned, it's important to secure your Jenkins installation from the start, so I recommend you don't skip this step. Once you have filled in the requested information, click on the Save and Finish button. If all has gone well, you will be presented with the following screen:

All you have to do now is click on Start using Jenkins and you will be logged in and taken to the start screen, which looks like this:
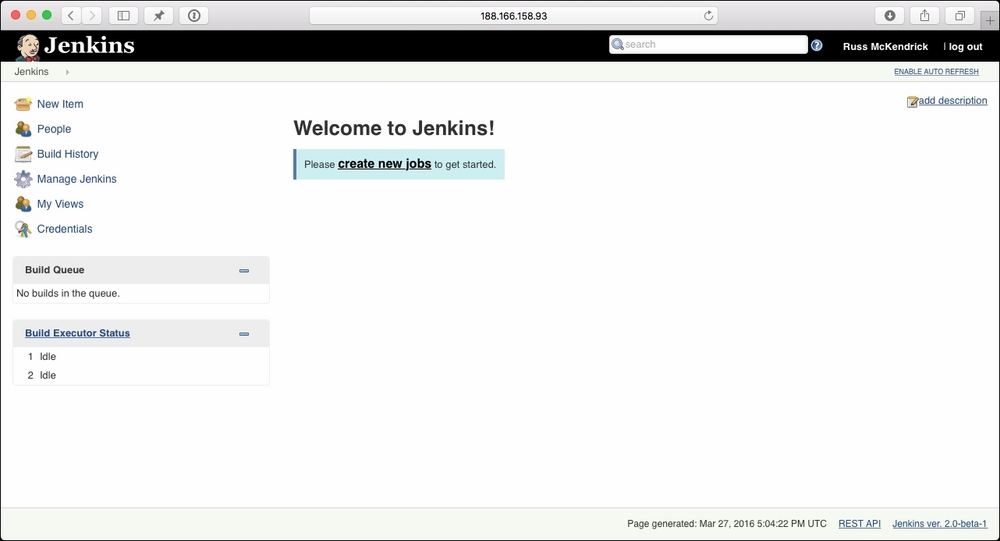
This installation process is one of the many improvements that Jenkins 2 brings to the table; earlier, you would have had to install Jenkins and then manually work through several wizards and procedures to both secure and configure the software, which as I have already mentioned can have bad consequences if you don't get it right.
The final step of the setup is to install the CloudBees Docker Pipeline plugin; to do this, click on the Manage Jenkins button from the left-hand side menu, and then click on Manage Plugins button.
As this is a new installation, you will probably see a message about plugins being updated at some point. Ignore the request to restart Jenkins; we will be doing this as part of the installation.
There are four tabs on the main screen; click on Available button and you will be presented with a list of all of the Jenkins plugins.
In the top right-hand portion of the main screen, there is a search box labelled Filter. Type in Docker Pipeline here, and you should receive one result. Tick the install box and then click on the Download now and install after restart button.

It will take a minute or two to restart Jenkins; after it has started back up, you will be prompted to log back in using the credentials you provided during the installation.
Now that you have Jenkins installed and configured, it's time to add our pipeline. To do this, we need an application to add.
There is a sample application based on Moby Counter available at the following GitHub repository: https://github.com/russmckendrick/jenkins-docker-example/tree/master. The main page looks like this:

Before we add the application, it is best that you fork the code, as we will be making changes to the codebase later on. To do this, click on the Fork button in the top right of the screen. You will be asked where you want to fork the repository. Once you have forked it, make a note of the URL.
As I own the repository, I was not able to fork it. Because of this, I have created a copy called jenkins-pipeline, so you will see references to this in the following section.
Now that Jenkins is configured and we have a GitHub repository that contains the application, we would like to deploy. It's time to roll our sleeves up and configure the pipeline within Jenkins.
To start, click on the create new jobs button on the main page, you will be taken to a screen that has several options on it, enter the name of the pipeline in the top box.
I am calling mine Docker Pipeline, and then click on Pipeline button. You should see a small box that says OK button at the bottom of the screen, click on the OK button to create the pipeline, which will take you to the configuration screen:

You will now be on the pipeline configuration screen, as you can see, there are a lot of options. We are going to be keeping things really simple and will be just adding a pipeline script. The script looks similar to the following code:
node {
  stage 'Checkout'
  git url: 'https://github.com/russmckendrick/jenkins-pipeline.git'

  stage 'build'
  docker.build('mobycounter')

  stage 'deploy'
  sh './deploy.sh'
}
Before you add the script to the Pipeline section of the configuration page, replace the Git URL with the one of your own repository. Leave all the other options as they are and click on the Save button:

That's it, our pipeline is now configured. We have told Jenkins to perform the following three tasks each time a build is triggered:
- Checkout: This downloads the latest code for our application from your GitHub repository.
- Build: This uses
Dockerfilethat is in the GitHub repository to build theMobycounterimage. - Deploy: This runs a script that clears down any currently running containers and then uses the included Docker Compose file to relaunch the application. When launching Redis, the Docker Compose file uses the built-in volume driver for
/data, meaning that the position of the Docker logos will persist between the containers being relaunched.
To trigger a build, click on the Build Now button option on the left-hand side menu. If everything goes well, you should see something similar to the following screenshot:

As you can see, all three tasks are executed without error. You should be able to see the application by opening your browser using the following command:
open http://$(docker-machine ip jenkins)/
Place some logos to test that everything is working as expected, and that's it, you have deployed your application using Jenkins:

Hold on a minute—there is a problem! As you may have already noticed, the page title is wrong.
Let's go ahead and fix that. To do so, navigate to the following page in your GitHub repository: your-github-repo | src | client | index.html. From here, click on the Edit button. Once in the editing screen, update the title between the <title> and </title> tags, and then click on the Commit changes button.

Now that you have updated your application code, go back to Jenkins and click on Build Now again. This will trigger a second build, which will deploy the changes we made in GitHub.

As you can see from the second browser tag in the previous screenshot, the title of our application has changed and the second build was successful. If you refresh your application window, you should see that your title has been updated and the Docker logos are where you left them.
A few other things to note are that that the second build confirms that there is one commit difference between our initial build and the current one. Also, the build itself took less time than our original build; this is because Docker didn't have to download the base image for a second time.
You can view logs for each task by hovering your mouse over the stage you want to see the logs for and clicking on the Logs link. This will make a dialog pop up with the logs for the task:

You can also look at the full console output for each build by clicking on the build number, say #2, in the left-hand side menu and then clicking on the Console Output button:

This is useful if your build has errors. Try clicking on some of the options, such as Docker Fingerprints and Changes, to look at the other information that is recorded during each build.
Going back to the main Jenkins page, you should see a quick summary of your builds. You should also see a sun icon next to your pipeline, meaning that everything is OK.

What if everything wasn't okay with the second build? Consider that we had made a syntax error within the Dockerfile when we edited the page title, what would have happened?
Jenkins would have checked the update files from GitHub, started the build of the updated image, detected the error, and then failed. As this stage would have given an error, the deploy stage would not have been executed, meaning that our application would still be running in its current state, wrong title and all.
This is where Jenkins' strength lies, if you configure enough tests with both your code and deployment pipelines, you can stop any potential service affecting changes being deployed, it also records enough information to be an extremely valuable resource when it comes to tracking down errors.
As you may have noticed, we have only touched the tip of the iceberg when it comes to Jenkins, there is a lot of functionality we haven't covered as it is out of scope of this book.
However, from the little we have discussed, I hope you can see the value of using a continuous integration and deployment platform such as Jenkins to help build and deploy your containers and code. Don't be late to the party like I was, if you deploy any type of code, then consider using Jenkins to assist you, don't wait until you have deployed a serious application-breaking bug.