
The Ember Inspector is an add-on for your browser that can help you debug your Ember app. In this recipe, we'll look at some examples on how to use it.
Before beginning, you must install the add-on. It's available for Chrome, Firefox, or Opera. Other browsers such as Internet Explorer can also be used via bookmarklet.
- Install the browser add-on for Ember Inspector:
- For Firefox, install the add-ons from the following website: https://addons.mozilla.org/en-US/firefox/addon/ember-inspector/
- On Chrome, install the add-on from the Chrome web store: https://chrome.google.com/webstore/detail/ember-inspector/bmdblncegkenkacieihfhpjfppoconhi
- All other browsers visit the Ember Inspector Github page for further instructions: https://github.com/emberjs/ember-inspector
- For the purposes of our recipe, we'll use Ember CLI Mirage to return a simple
schoolmodel. After creating a new project, run this command:$ ember install ember-cli-mirage $ ember g factory school
This will install all the necessary files so that we can mock an HTTP server.
- After the add-on for Ember CLI Mirage is installed, update the
config.jsfile in themiragefolder:// app/mirage/config.js export default function() { this.get('/schools'); }This will add an HTTP GET route that our Ember client will connect when retrieving the school information.
- Update the file for the school information in the
mirage/factories/folder calledschool.js:// app/mirage/factories/school.js import Mirage, {faker} from 'ember-cli-mirage'; export default Mirage.Factory.extend({ name:faker.name.firstName, // using faker city: faker.address.city, });This file will be used to generate fake names and city data for our fictitious school.
- Update the
default.jsfile:// app/mirage/scenarios/default.js export default function( server ) { server.createList('school', 2); }This will seed the data that we need from our factories for the application.
- Generate an
indexroute,model, and the RESTadapter:$ ember g route index $ ember g model school name:string city:string $ ember g adapter application
These files will be used in our application, which we'll discuss in the next section.
The purpose of this application is to return a list of schools. We'll be using the Ember Inspector to look at this data in more detail.
- Open the
application.jsfile in theadaptersfolder. Verify that theRESTAdapteris set:// app/adapters/application.js import DS from 'ember-data'; export default DS.RESTAdapter.extend({ });This tells Ember to use the REST adapter with Ember Data. Review Chapter 7, Ember Models and Ember Data, on Ember Data for a refresher.
- Edit the
school.jsfile in themodelsfolder:// app/models/school.js import DS from 'ember-data'; export default DS.Model.extend({ name: DS.attr('string'), city: DS.attr('string') }); - Update the
index.hbsfile in theapp/templatesfolder:// app/templates/index.hbs {{outlet}} {{#each model as |schoolName|}} Name:{{schoolName.name}}<br> City:{{schoolName.city}}<br> <br> {{/each}}The
eachhelper will iterate through every model returned and display the school information. - Update the
index.jsfile in theapp/routesfolder:// app/routes/index.js import Ember from 'ember'; export default Ember.Route.extend({ model() { return this.store.findAll('school'); } }); - Run
ember serverand you'll see a list of schools, as illustrated in the following image: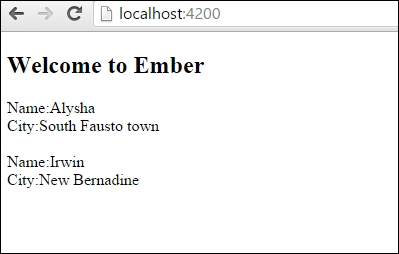
- Let's open the Ember Inspector and see what it shows. In Chrome, you can access this by opening the console and clicking on the Ember tab:
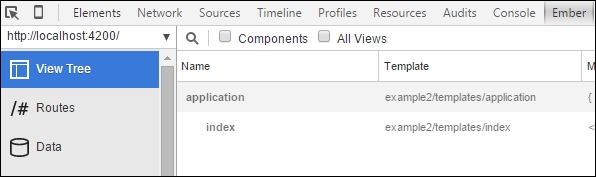
The Ember Inspector shows View Tree, Routes, Data, Deprecations, and Info.
- Click on Info in the Ember Inspector:
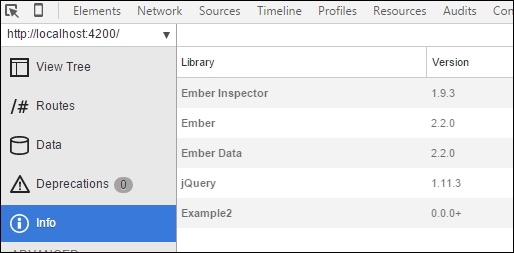
Info displays all the library information loaded in this application. This can be really useful in finding out what version everything is using.
- Click on View Tree in the Ember Inspector:
The View Tree shows all sorts of information about the application. It shows the current routes, templates, models, and more. This can be helpful to figure out what's currently loaded on the screen.
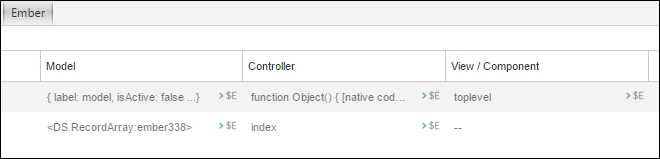
- Click on Routes in the Ember Inspector:
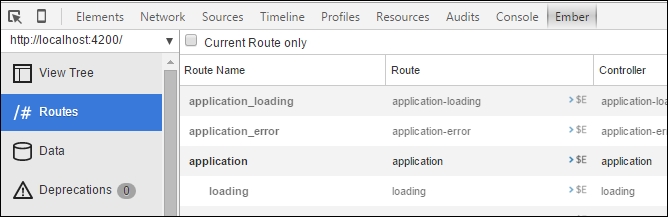
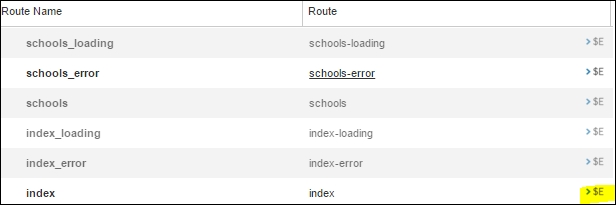
The Routes show all the available routes, controllers, and templates. Some routes may not be defined but will be displayed, such as loading.
- Click on $E next to the index route:
In the Inspector, you can assign instance variables by clicking on $E.
- Open the console and add a new record using the instance variable, $E:
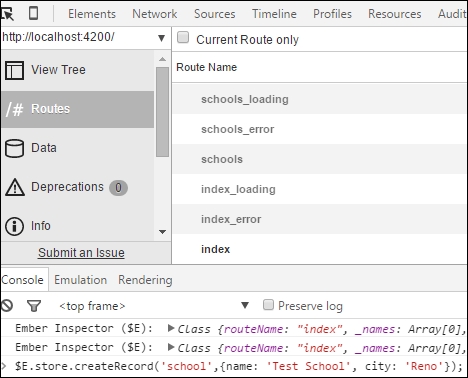
- You can type the following in the console window in the browser:
$E.store.createRecord('school',{name: 'Test School', city: 'Reno'});This will add a new record to your data store. The page will automatically update with this information. This is very valuable. You can use this anywhere to help troubleshoot issues.
- Click on
Datato see all the model data: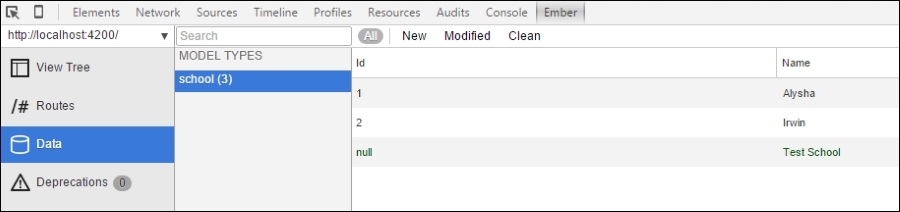
Optionally, you can click on any of this data and verify the attributes. You can make changes as well and it will automatically update to the screen.