
Chapter 2. Getting Started
Your First Excel Prototype
▪ Examples of Excel prototypes
▪ How to create your first Excel prototype
▪ About this book
▪ How to use this book
▪ How to use the associated files
Examples of Excel Prototypes
You need a quick and easy way to create prototypes. The prototyping tool should make credible-looking prototypes in variable degrees of fidelity. The tool should allow varying degrees of interactivity appropriate to your prototyping goals but not require you to code extensively. The ideal tool would also leverage skills that you already have so that you do not need to learn anything new. And the truly ideal tool would already be on your computer—for example, Microsoft Excel.
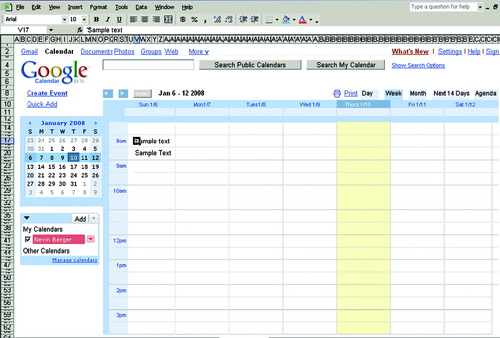
Look at the examples that follow (Figure 2.1, Figure 2.2, Figure 2.3 and Figure 2.4). These prototypes look as though they were made in a graphics tool, not a spreadsheet application. These prototypes were made possible by users learning to think of Excel as a graphics-based design tool rather than an application for spreadsheet calculations. After you make that mental leap, you will use styles, copy and paste, and drag and drop to unlock a new, very powerful prototyping tool.


How to Create Your First Excel Prototype
Let's assume that you are in a deadline situation. You have only 30 minutes in which to create a digital prototype to demonstrate a software concept at a design meeting with a couple of software engineers. The Excel prototype is based on a rough paper sketch that you have worked out with the product manager (Figure 2.5, page 22).
 |
| Figure 2.5 |
As with all the samples shown in this book, you can download a convenient ready-to-use template from the authors' Effective Prototyping Website: www.effectiveprototyping.com/ep_excel/.
To Adapt the Template:
Right-click the worksheet tab named canvas, choose Rename (Figure 2.6), and type in a new text label, Hotel Page (Figure 2.7).


To Add a Header:
2 Select the graphic that includes the site logo and header, TravelGenie, by clicking it (Figure 2.8).

3 Copy the graphic by pressing Ctrl-C.
4 Return to the Hotel Page tab; then press Ctrl-V to paste in the header graphic.
5 With the graphic still selected, drag it to the upper-left corner of the worksheet.
Place the cursor in cell A1 and then paste the graphic in the correct position (Figure 2.9).

6 Select the three rows below the header (rows 5, 6, and 7).
7 While the rows are still selected, right-click within the selected area and choose Format Cells from the menu.
8 In the Format Cells dialog box, click the Patterns tab; then select the gray box located two squares above the white box in the color palette (Figure 2.10).

10 In cell B6, type in the name of the site: TravelGenie.
11 With the cell selected, click the Bold button (Figure 2.11).

To Add a Search Text Entry Box and Accompanying Search Button:
1 Click the boxes and buttons worksheet tab.
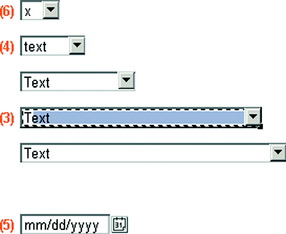
2 Select the entire text entry box (1) in row 17 (Figure 2.12).

3 With the box still selected, copy the box.
4 Return to the Hotel Page tab and select the cell that is two cells to the right of the TravelGenie text that you have just entered.
5 Paste the text entry box into position (Figure 2.13, page 26).

6 Return to the boxes and buttons worksheet and select the Search button.
7 Copy the Search button; then paste it to the right of the text entry box (Figure 2.14, page 26).

To Add Page Navigation:
2 Select the entire bar and copy it (Figure 2.15).

3 Return to the Hotel Page worksheet, select cell 8A, and paste the entire navigation bar into position (Figure 2.16).

To Build the Hotel Finder Area:
1 Select cell B10 and type in the text Hotel Finder; then make the text bold (Figure 2.17).

2 Go to the boxes and buttons worksheet; then select and copy the combo box graphic (3).
3 Be sure to copy the box as well as the graphic of the down arrow at the right end of the box (Figure 2.18).
4 Return to the Hotel Page worksheet and select cell C14.
5 Paste the combo box into position (Figure 2.19).

6 Select the cell at the far left of the combo box entry field; then type United States to replace the placeholder Text (Figure 2.20).

7 In the cell directly above the finished combo box, type in the label Country; then make the text bold (Figure 2.21).

8 Referring to Figure 2.5, use the same method to create the remainder of the text entry and combo boxes, labels, and entered text (boxes 3–6).
9 Copy the Search Hotels button (7) and paste it into position (see Figure 2.22, page 30).

To Create a Grouping Box Around the Hotel Finder Area:
1 Select all the cells that encompass the Hotel Finder area.
2 Right-click in the selected area and choose Format Cells from the menu.
3 In the Format Cells dialog box, click the Border tab.
4 Select the one-point black line style, and click the Outline icon (Figure 2.23, page 30).

An outline appears around the Hotel Finder grouping box (Figure 2.24, page 31).

To Create the Placeholder, the Images, and Descriptive Text for the Featured Hotels Area:
1 To create the first placeholder image, select the Rectangle function in the Drawing menu.
2 Click in the worksheet to the right of the Hotel Finder area and drag a rectangle shape (Figure 2.25, page 32).

3 Right-click the border of the rectangle that you just created and select Format AutoShape from the menu.
4 In the dialog box that appears, select a fill color of gray; then select the No Line color attribute (Figure 2.26, page 32).

5 To make the remaining image boxes, copy the one you just created; then paste it two times so that the boxes align vertically (Figure 2.27, page 33).

To Create the Placeholder Descriptive Text:
1 In the image library worksheet, copy the desired preformatted text and paste it in place to the right of the top placeholder box.
2 Paste two more copies of the text aligned vertically under the top placeholder text and aligned horizontally to the right of the placeholder images they are associated with (Figure 2.28, page 33).

To Create the Placeholder Promotional Information Area:
1 Select the Rectangle drawing tool again and draw a box for the promotional information area to the right of the Featured Hotels area.
2 Right-click the rectangle, choose Add Text from the menu that appears (Figure 2.29), then type in the text Promo.

All the elements you need in your initial prototype are now assembled and arranged in the prototype worksheet (Figure 2.30, page 34). Save the file and send it to everyone on your team; the design meeting can begin on time!

Summary
You have learned the first steps to becoming a successful Excel prototyper. Following similar steps in subsequent chapters will make you an even more accomplished Excel prototyper. You can start with a template, follow the step-by-step instructions, and learn both basic and advanced techniques of prototyping.
There are many spreadsheet applications now available in the marketplace. Aside from the dominant application, Microsoft Excel, other similar spreadsheet applications are now available for prototyping: Apple's Numbers, OpenOffice's Spreadsheet, and Google's Trixely. All these programs can do much the same thing in varying degrees; you only need to learn the different command structures and functions. Although we chose Excel due to its current pervasiveness, we do not necessarily recommend or endorse Excel to the exclusion of another spreadsheet application that you might already know. To use another product to achieve the same results, you might need to make a table that translates the Excel commands and functions portrayed in this book to those of your spreadsheet program. If you do make a translation table, we invite you to share it within the Effective Prototyping community by posting it to our book's Website: www.effectiveprototyping.com.
About This Book
This how-to style instructional book was inspired by our experience using Microsoft Excel as a rapid prototyping tool, a technique that was pioneered by former PeopleSoft engineer Mark Miller. (See Appendix B for more about our story on the discovery of Excel prototyping.) All the authors worked at PeopleSoft, in varying capacities, during the period from 2003–2005. We quickly saw the value of this unique use of Excel and proceeded to evolve the techniques from a simple tool to the robust rapid prototyping environment discussed in upcoming chapters. We were so excited about our discovery that we wanted to evangelize it by offering tutorials and writing this book. We decided that the best way to demonstrate how to use Excel is through practical examples of prototyping methods.
Each chapter will follow roughly this organization: what you will learn, introduction, how-to exercises, and summary. Each chapter begins with a brief list of what you will learn in the chapter, followed by a short introduction to the prototyping principles covered which will serve as the framework for the how-to examples. After the brief introduction, the body of the chapter focuses on a procedural, step-by-step instruction on how to perform the prototyping activity with Excel. The procedures are based on a case study scenario illustrated with supporting visual examples. Each chapter closes with a summary that is meant to wrap up the chapter as well as give you a hint of what to expect in the next chapter.
Excel has many redundant commands and ways to accomplish the various prototyping procedures. If there is an alternative way we know about, we will call it out in tips and notes, each clearly marked in a shaded box.
How to Use This Book
This book is structured and paced to guide you from an initial overview of Excel prototyping to presentations of more and more specific techniques of Excel prototyping. Accompanying each chapter are relevant principles of Excel prototyping that will become the structure from which we will describe the how-to techniques. Three different prototyping methods are used to demonstrate Excel prototyping through how-to procedures: storyboards, wireframes, and digital interactive prototypes.
You'll find that the procedures build on each other as you progress through the book. However, if you are already an Excel expert and familiar with many of its functions and techniques, you can skip through many of the procedures you already know and concentrate on the new parts that make prototyping in Excel come alive for you.
The examples and procedures in this book are based on Excel in Microsoft Office 2002 on Windows XP. You might need to adapt to the version of Excel on your computer.
How to Use the Associated Files
Although this book is a standalone how-to guide, it is accompanied by a set of templates and sample content, which can be found on our Website: www.effectiveprototyping.com.
You can download all the files in a single compressed archive from www.effectiveprototyping.com/ep_excel/prototypes.zip. Enter the user name excel and the password elsevier.
We suggest that you download the files now so that they're available as you work through the book. As you begin each chapter, you might find it convenient to open the associated files for easy reference.
..................Content has been hidden....................
You can't read the all page of ebook, please click here login for view all page.