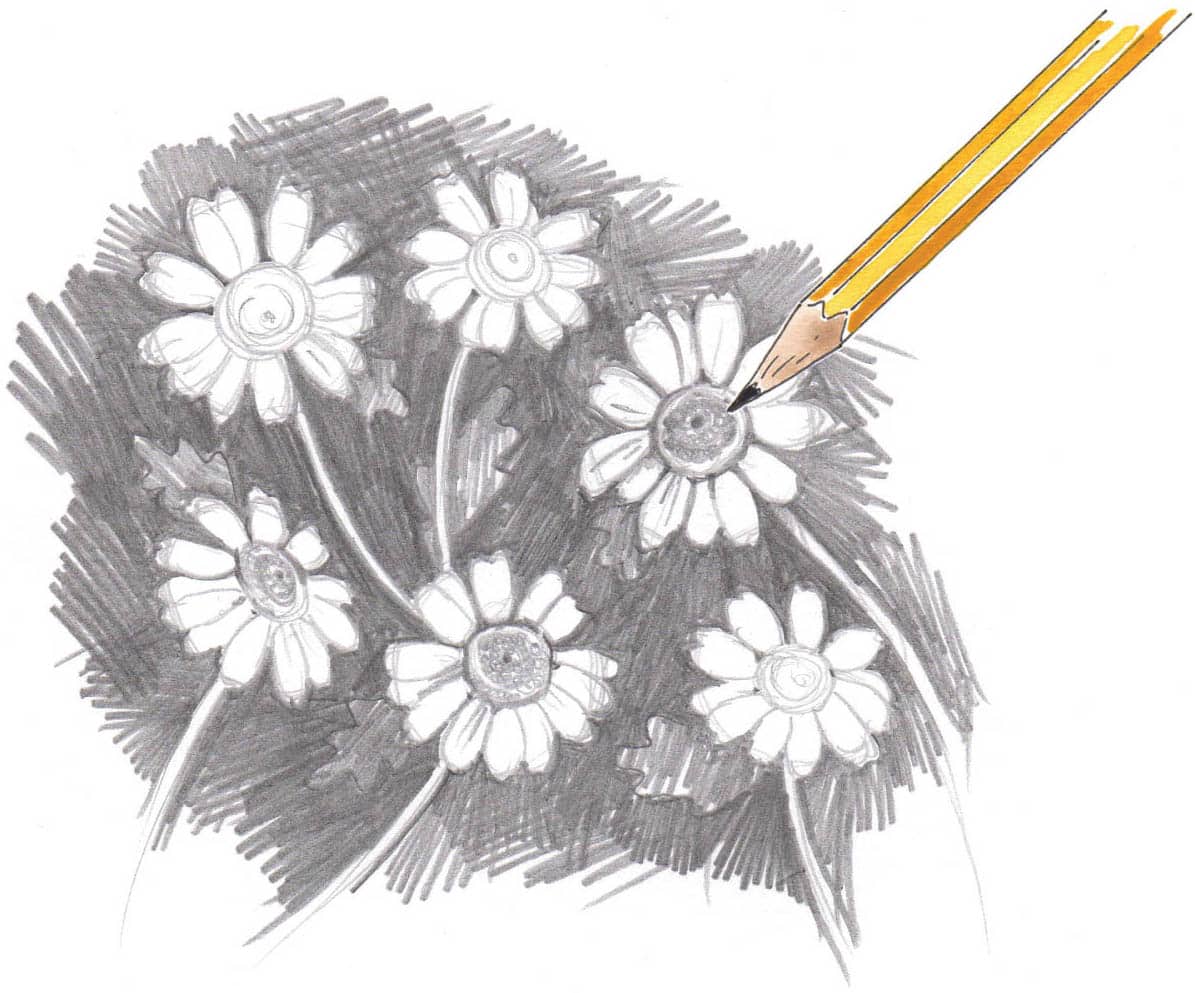
DAISIES
Regardless of what flower you choose to draw, start by breaking down the basic shapes. For these daisies, that includes the circular center and the outer circle created by the petal edges.
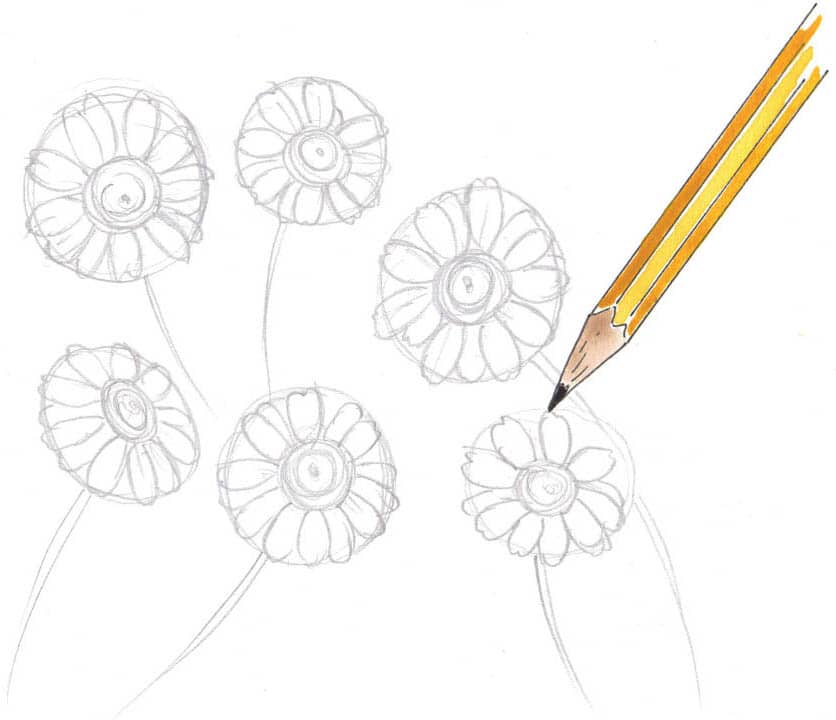
Lightly sketch in small oval shapes for the petals, which overlap in places. Some petals may extend outside the circle or curl inward over the center, so just lightly make a note of where these petals are. Add more detail to the centers of the daisies.

Start shading around the outside of the daisies and stems, being careful not to get any lead inside the petals or stems. Keeping a blunt tip on your pencil makes it easier to cover more area faster, with wider strokes. You can also hold the pencil on its side, so the lead is flat on the page.
Continue making the background darker, but leave some areas with just the first shading layer for the leaves. Begin adding more detail and texture to the centers of the daisies.
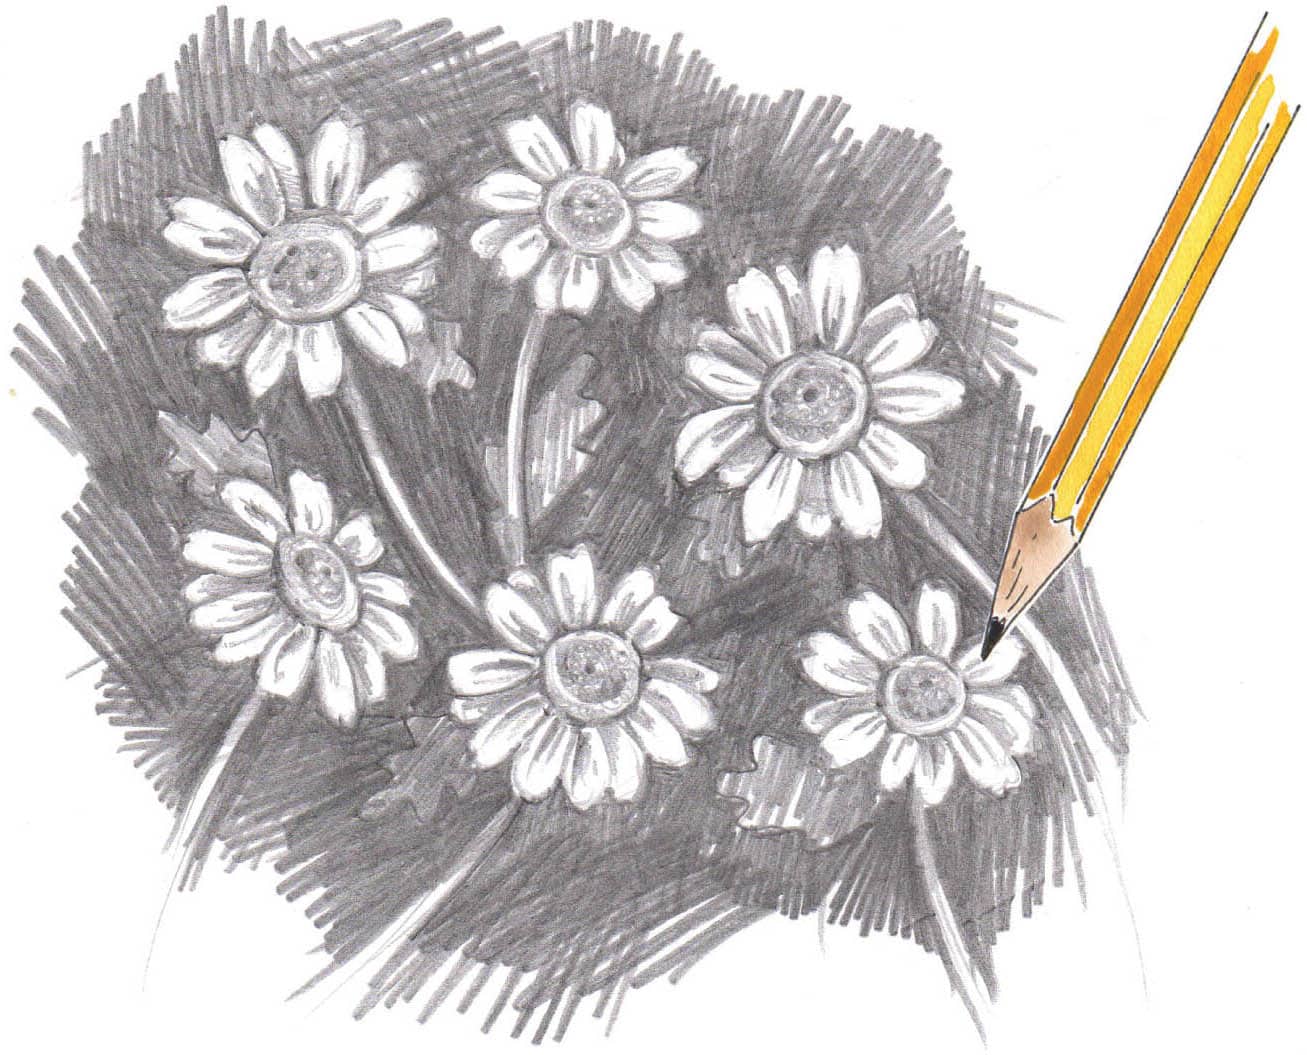
Start adding detail and shadows to the petals. The shadows should be fairly light—not nearly as dark as the background shadows or leaves. Leave areas of paper showing in between the pencil marks on the petals to show their curves. With a fine-pointed pencil, add tiny circles to the centers of the daisies.
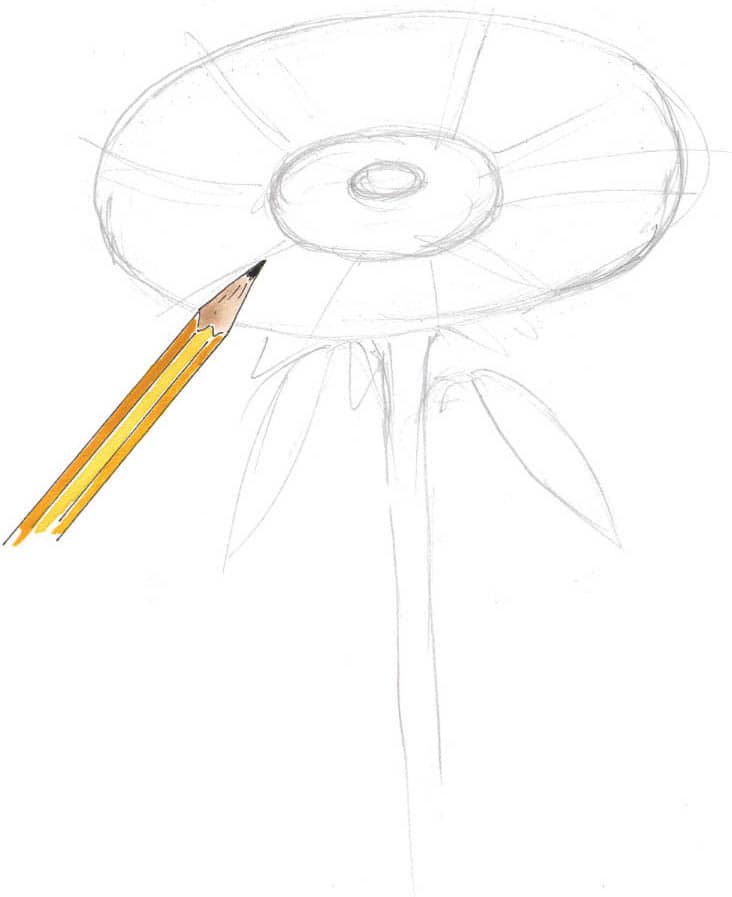
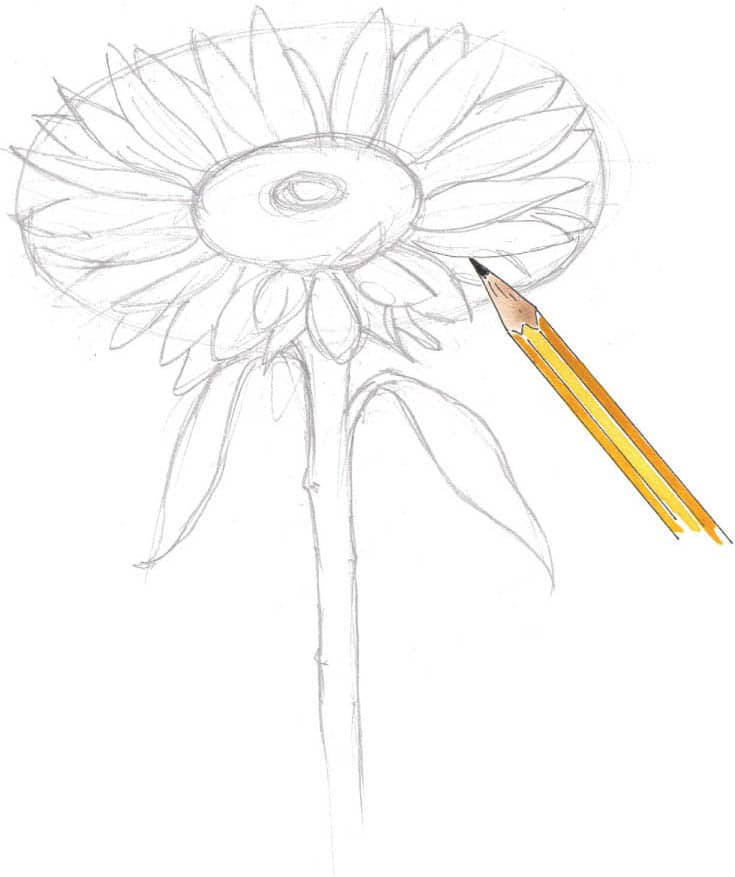
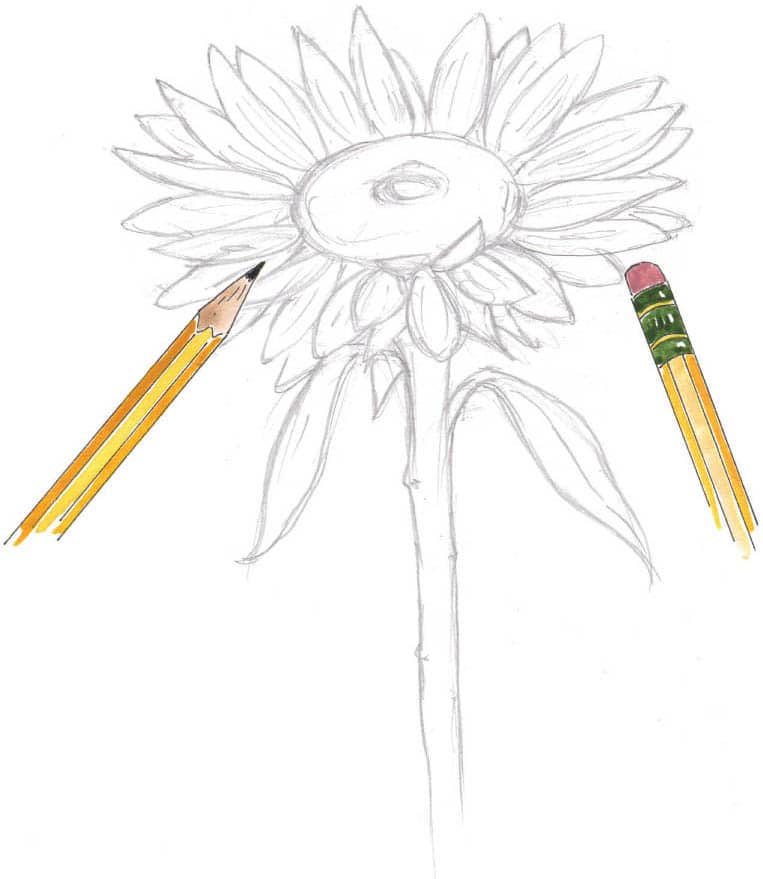
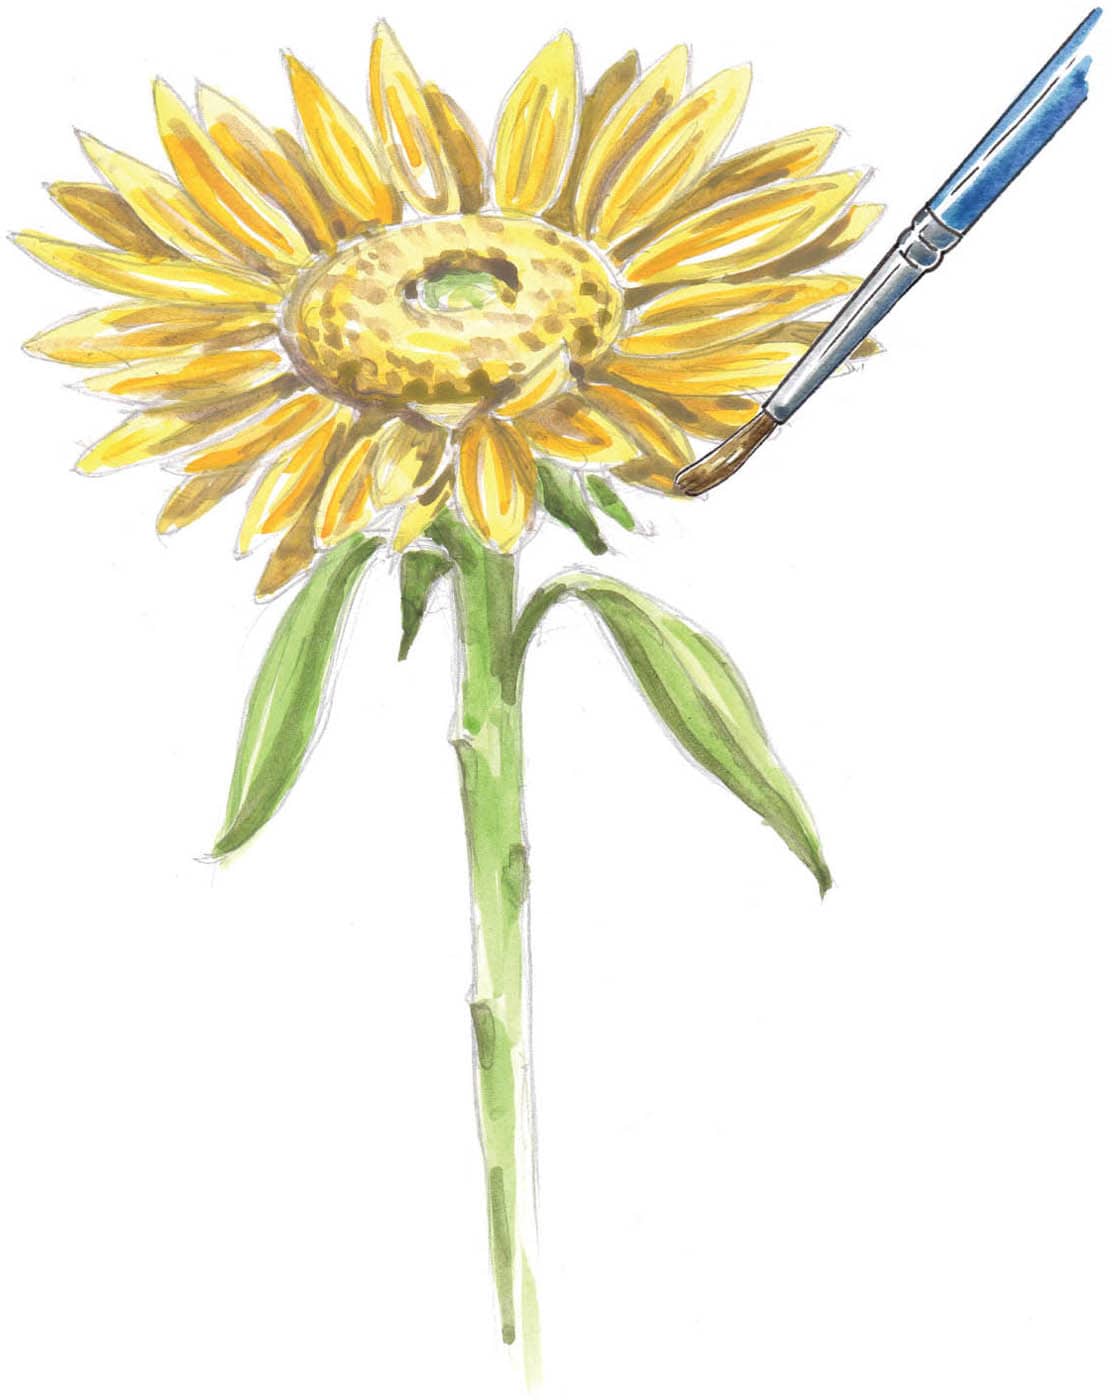
There are a few ways to incorporate color into your flowers. You can use color from the very start with watercolors or colored pencils, or you can add it later, like a coloring book. It’s up to you! This sunflower has more of an oval shape because it’s being viewed from the side. To help with adding petals in the next steps, sketch some lines to show the direction of the petals. They should radiate out from the center to the edge of the outer oval. Note that some lines point down toward the stem, because some petals are foreshortened at this angle. Lightly sketch in the petals. Each petal will be a little different, but most will be a long oval or almond shape. Let some of the petals overlap each other. The petals along the bottom edge are foreshortened and are a squatter, football-like shape. Erase any lines that you won’t need for adding color, including the outer oval you drew at the beginning. Then add lines to the petals to indicate the curves or highlights on the shape. Time for color! You can choose to use watercolor, but the steps for adding color in colored pencil or marker are similar. Start with a base layer of very light yellow on the petals and center. On the stem and leaves, add a light layer of green. When the first layer is dry, add slightly darker yellow on the ridge lines of the petals or the shadows on petals that are underneath another petal. You can also add another layer of green to build up the shadows on the stem and leaves. To blend accurate shadows for the petals and leaves, you need to use the complementary colors from the color wheel. Yellow can be blended with purple to make a brown shade for adding shadows on the overlapped petals and the petal ridges. In the center of the sunflower, add dots of color to create texture. For shading the stem and leaves, blend red with green to create an accurate brown shade for the shadows.SUNFLOWER

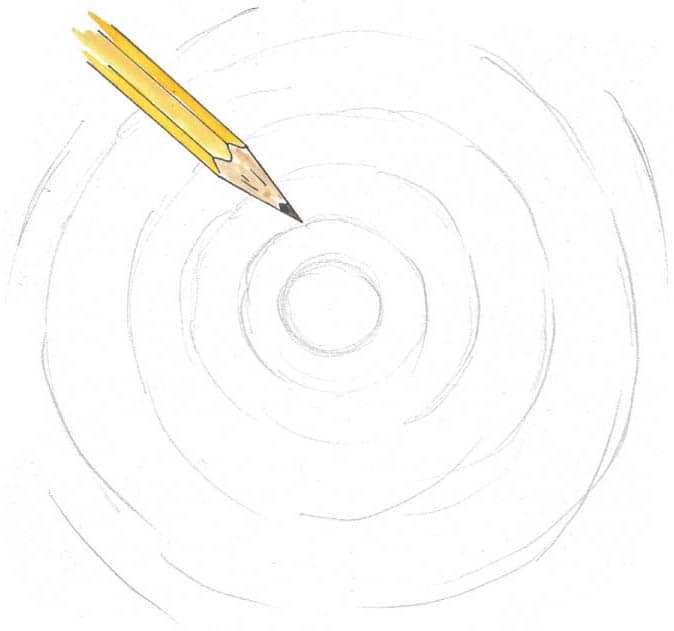
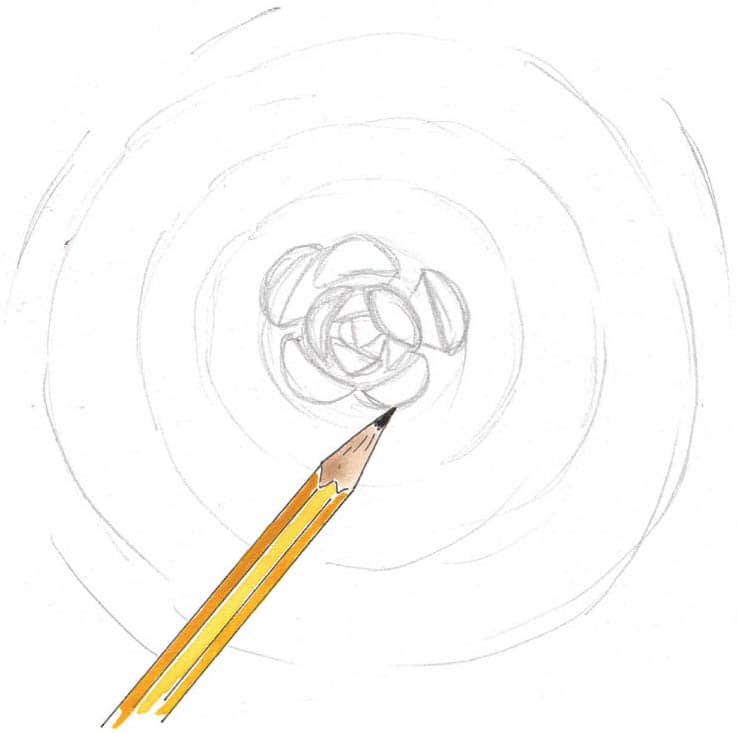
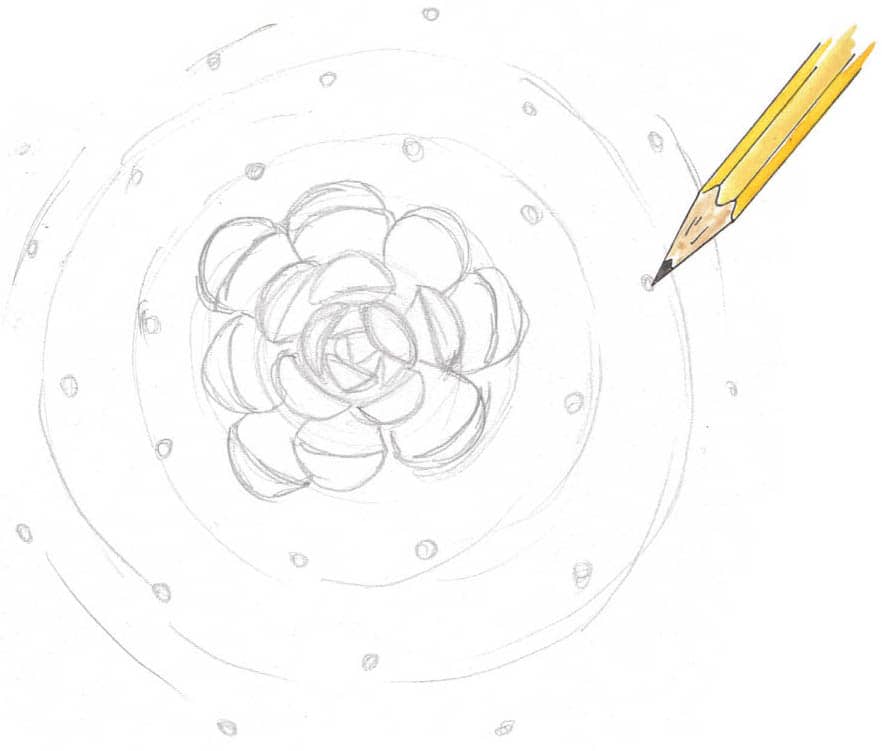
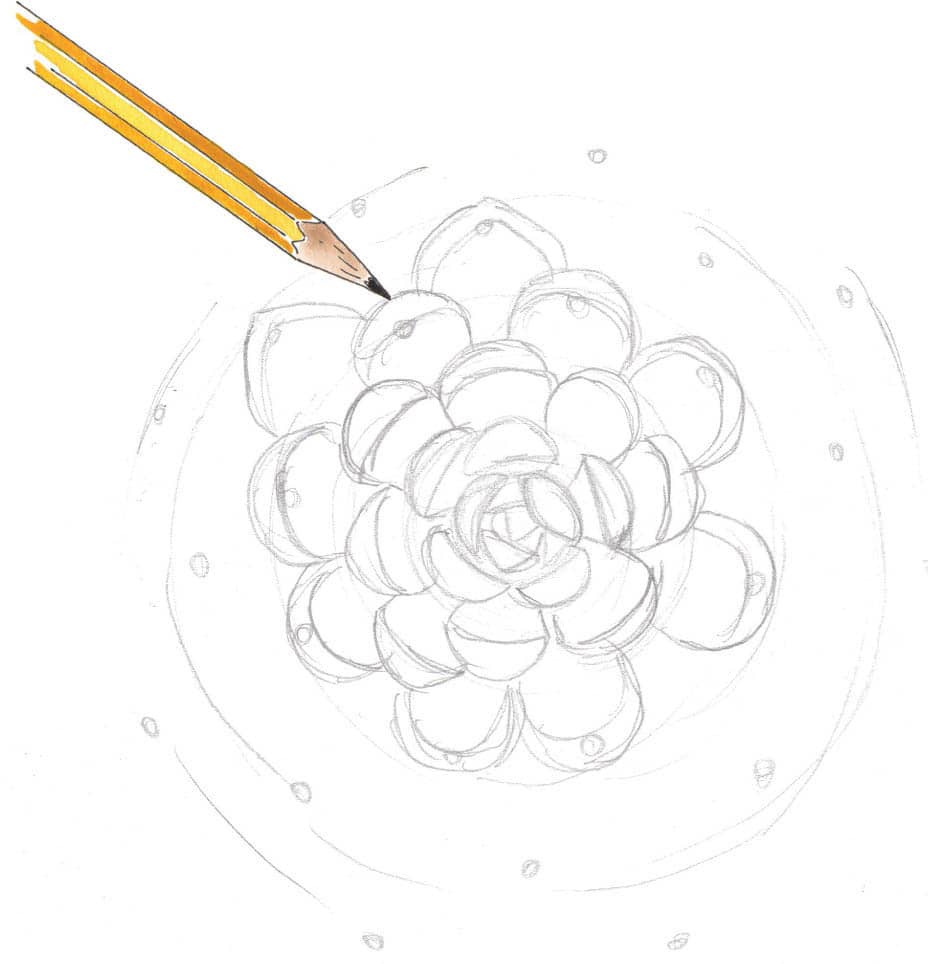
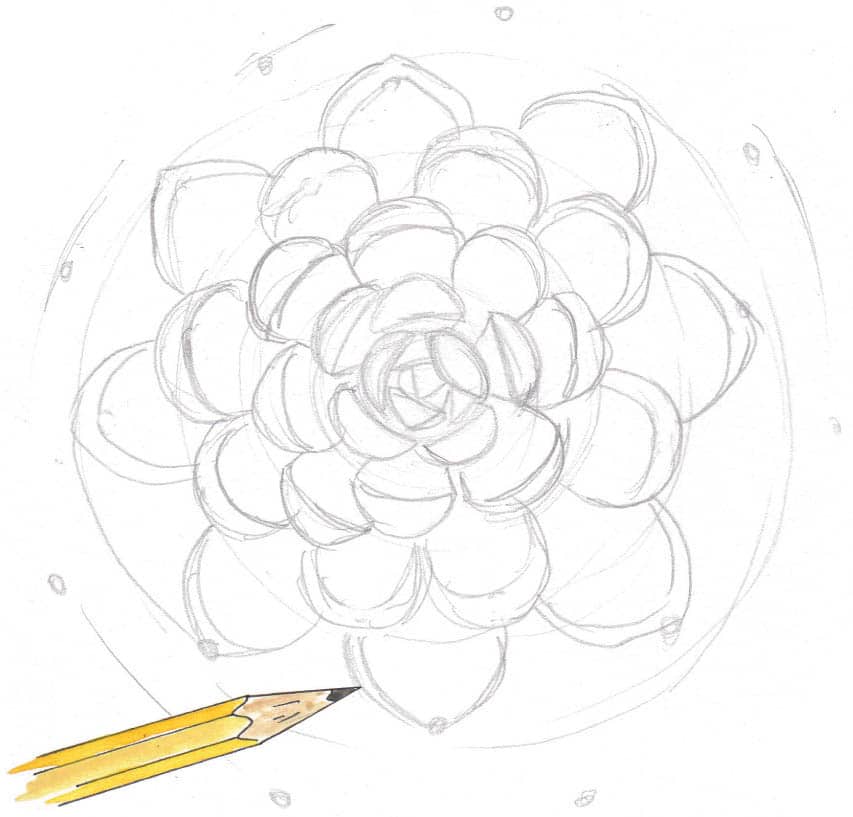
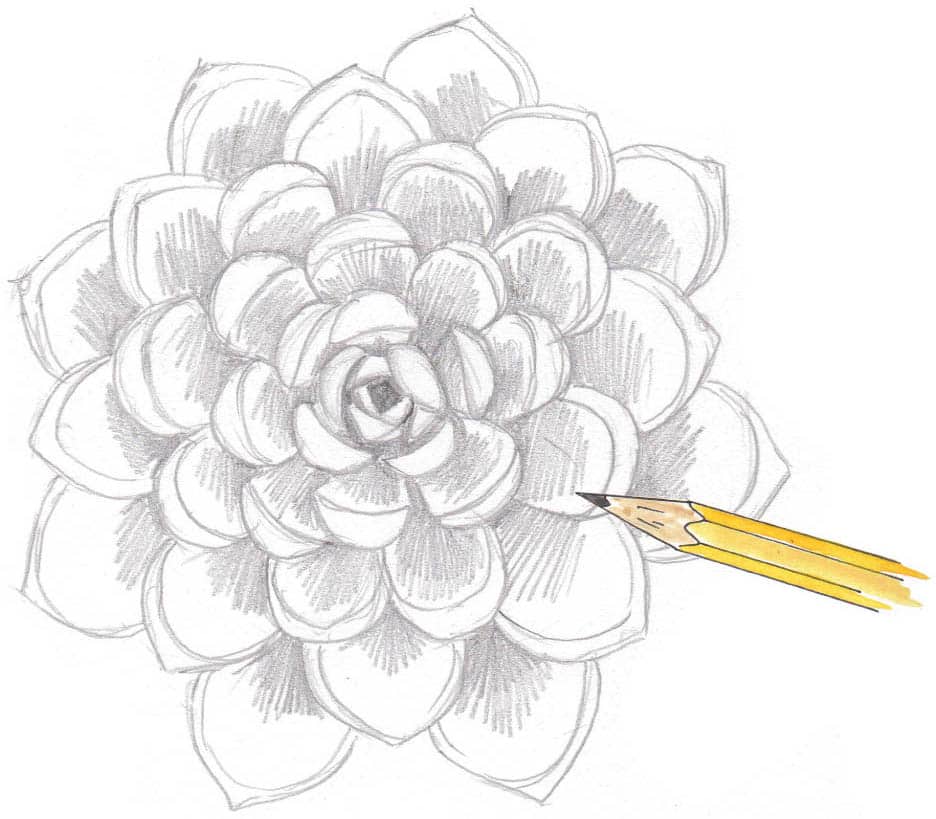
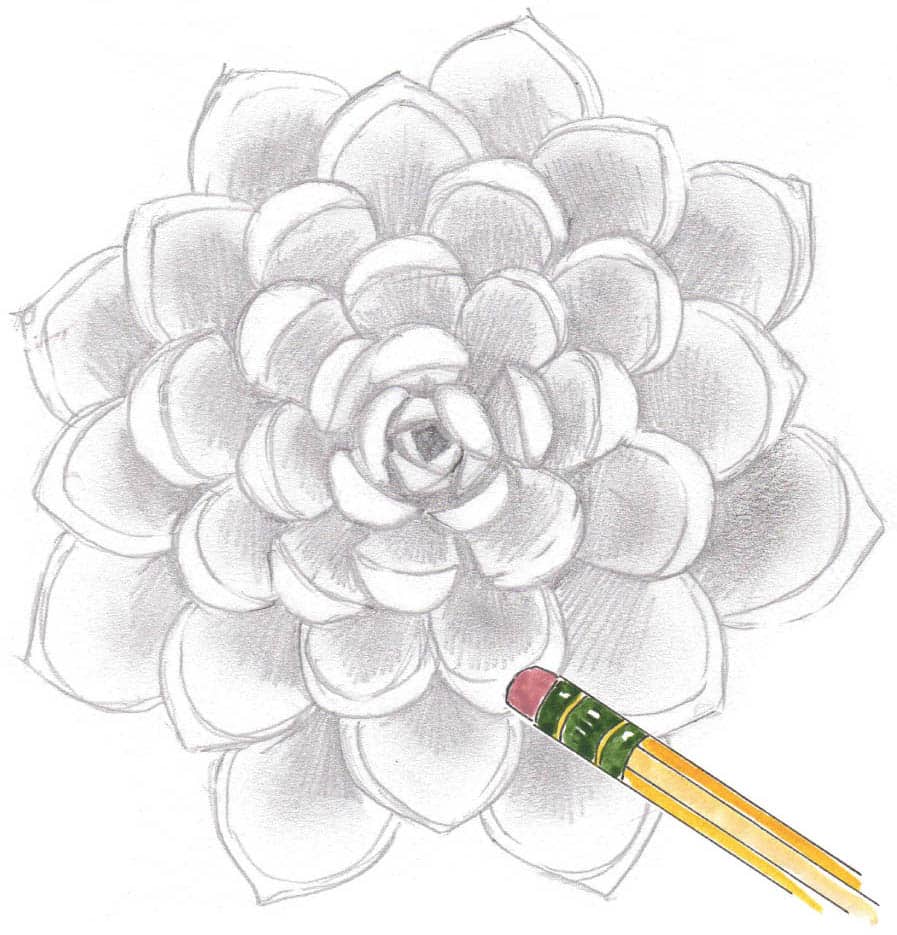
Succulents can be a lot of fun to draw because many varietals look like flowers. The leaves often form very intricate, geometric patterns that make for a great drawing challenge! Start by drawing concentric circles. Depending on the size of the succulent rosette, you might draw as many as six circles. These circles will guide you as you draw the leaves out from the center. In the very center, draw a small triangle and progressively larger, squat triangles around it. When you reach the next circle, start drawing scalloped shapes or half circles in varying sizes. In the third circle, the scalloped shapes line up right next to each other in a ring. Make small marks on the edge of the fourth circle that line up with the space or “V” shape formed by the scallop shapes in the third circle. Continue with the next circle, alternating the marks so they don’t directly line up with each other. As you continue to add leaves, the top of each leaf should land on one of the marks you made along the edges of the circles. The leaves start getting larger and have more of a crescent-moon shape, with long sides going back toward the center. When you reach the fifth circle, the top of each leaf should be pointier. Continue drawing the pointed leaves to complete each circle before moving on to the last layer. Finish drawing the leaves around the last circle. This last ring should have the largest and pointiest leaves. Once all the leaves are drawn, erase the lines and marks from the guide circles. Use a blunt pencil or place your pencil flat on its side on the page to start shading each leaf. The shadows will be at the base of each leaf and around the triangle shapes in the center. Using your finger, a rolled-up piece of tissue, or a tortillon, blend the shadows on each leaf. The darkest parts should still be at the base of each leaf, with the lightest shadows at the top. Try to keep the blended shadows out of the scalloped tops of the leaves. When you’re done blending each leaf, erase any pencil that may have smudged into the tops of the leaves. To finish, go back in with pencil and add details to the leaves and darken the shadows. You want high contrast between the dark shadows at the base of each leaf and the highlights of the white paper left along the top scalloped edges.SUCCULENT

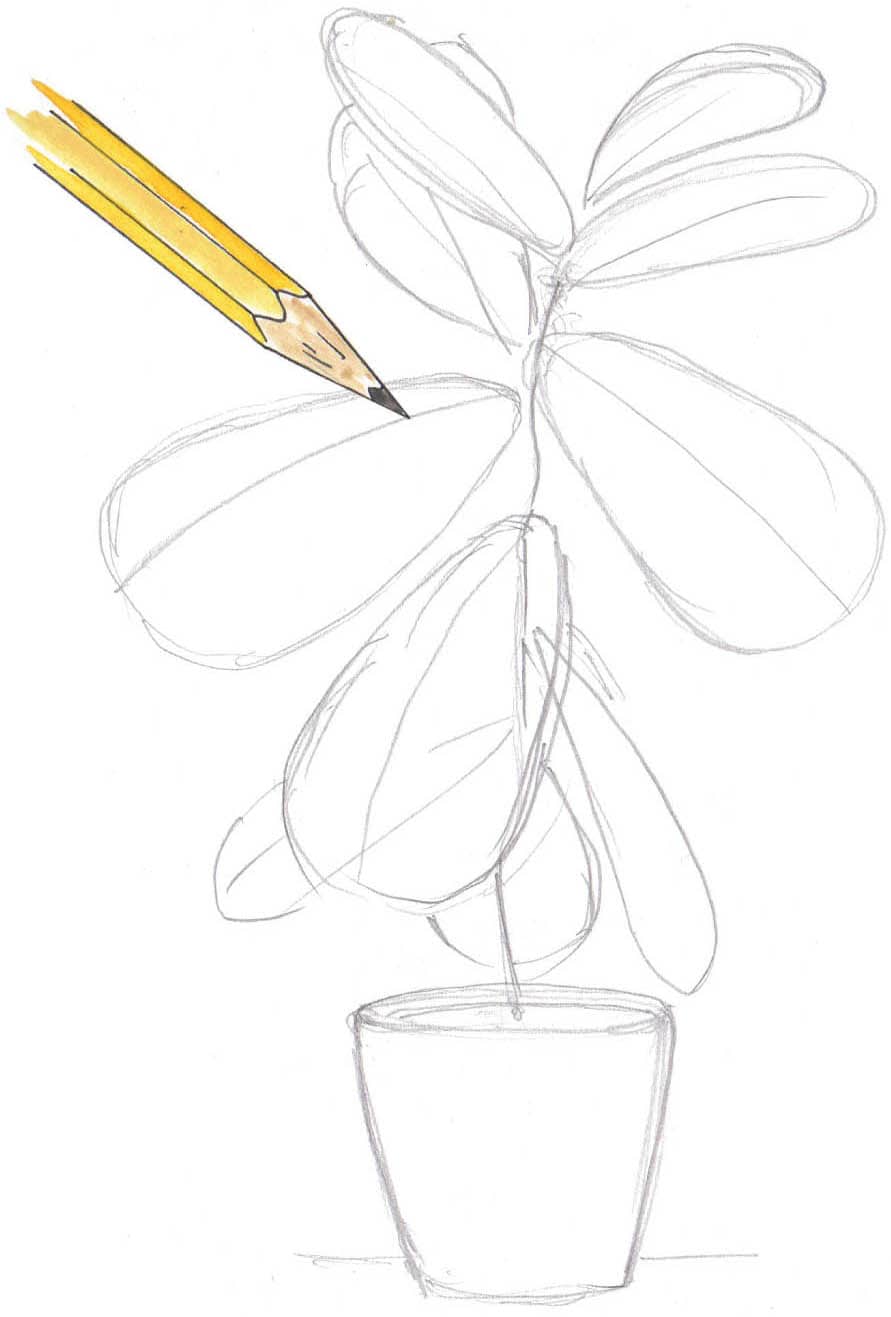
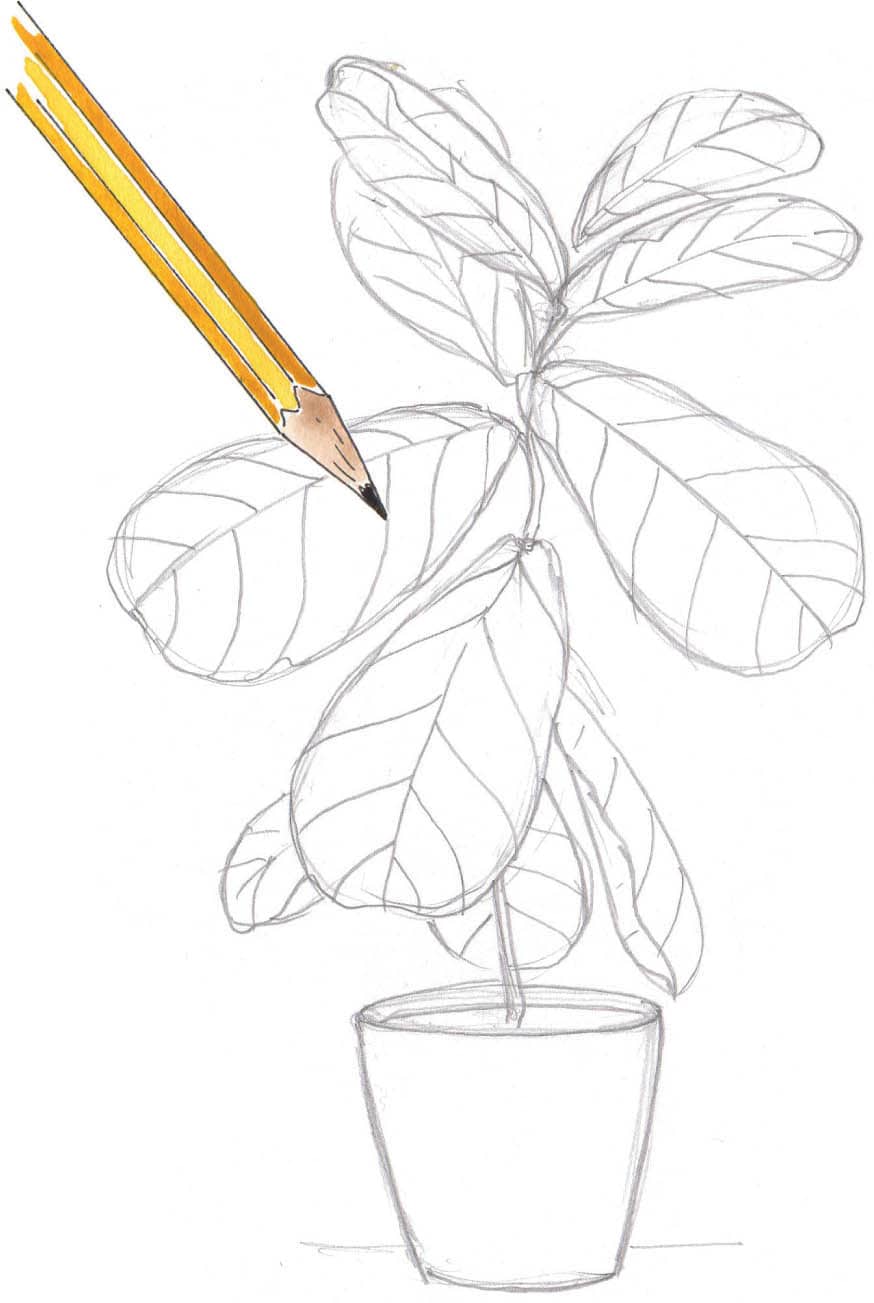
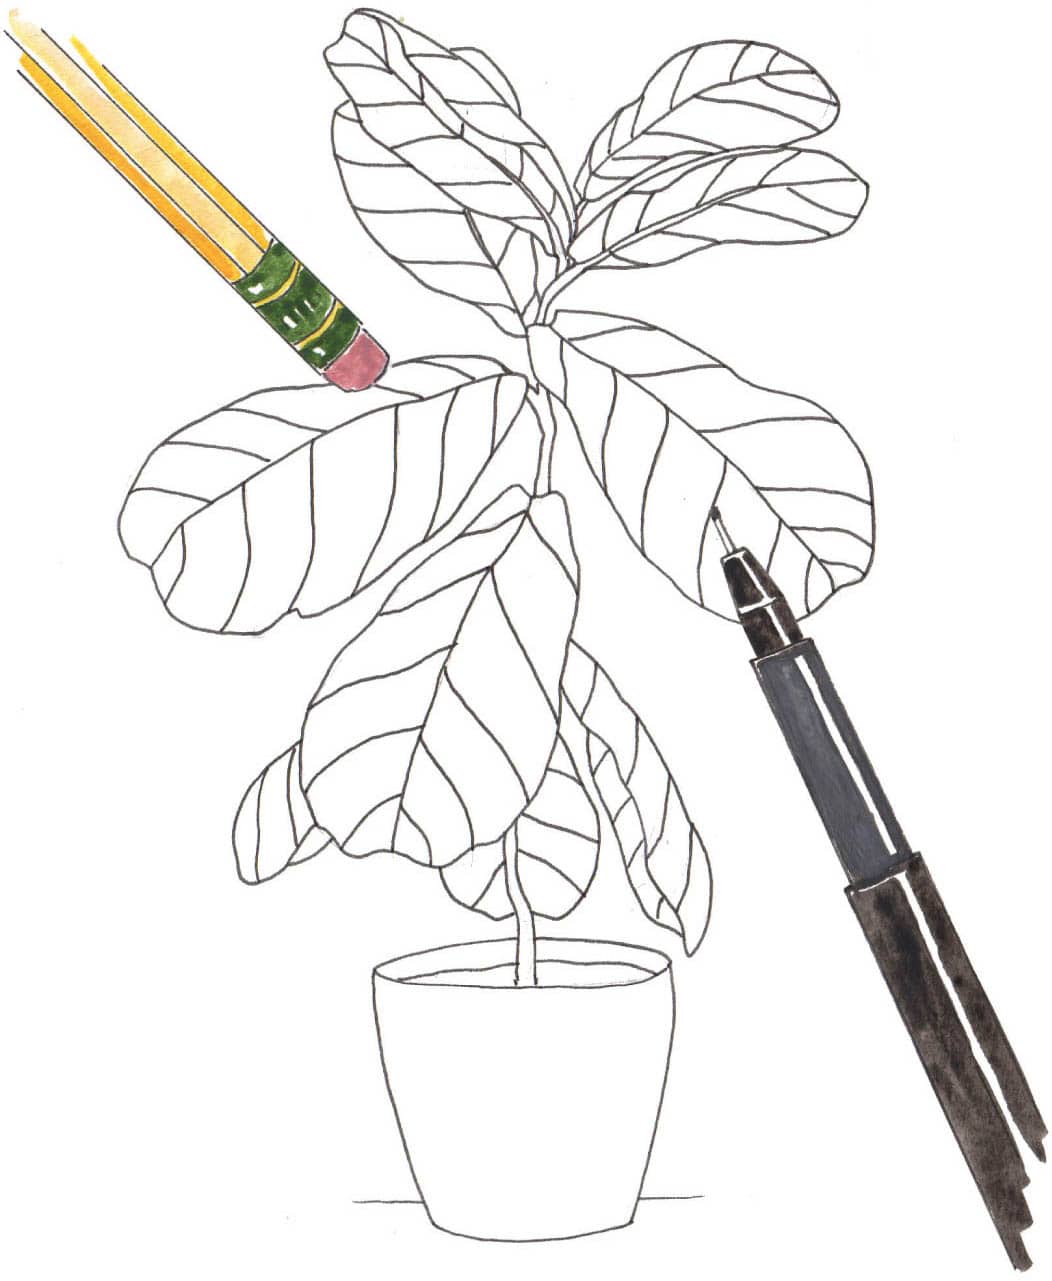
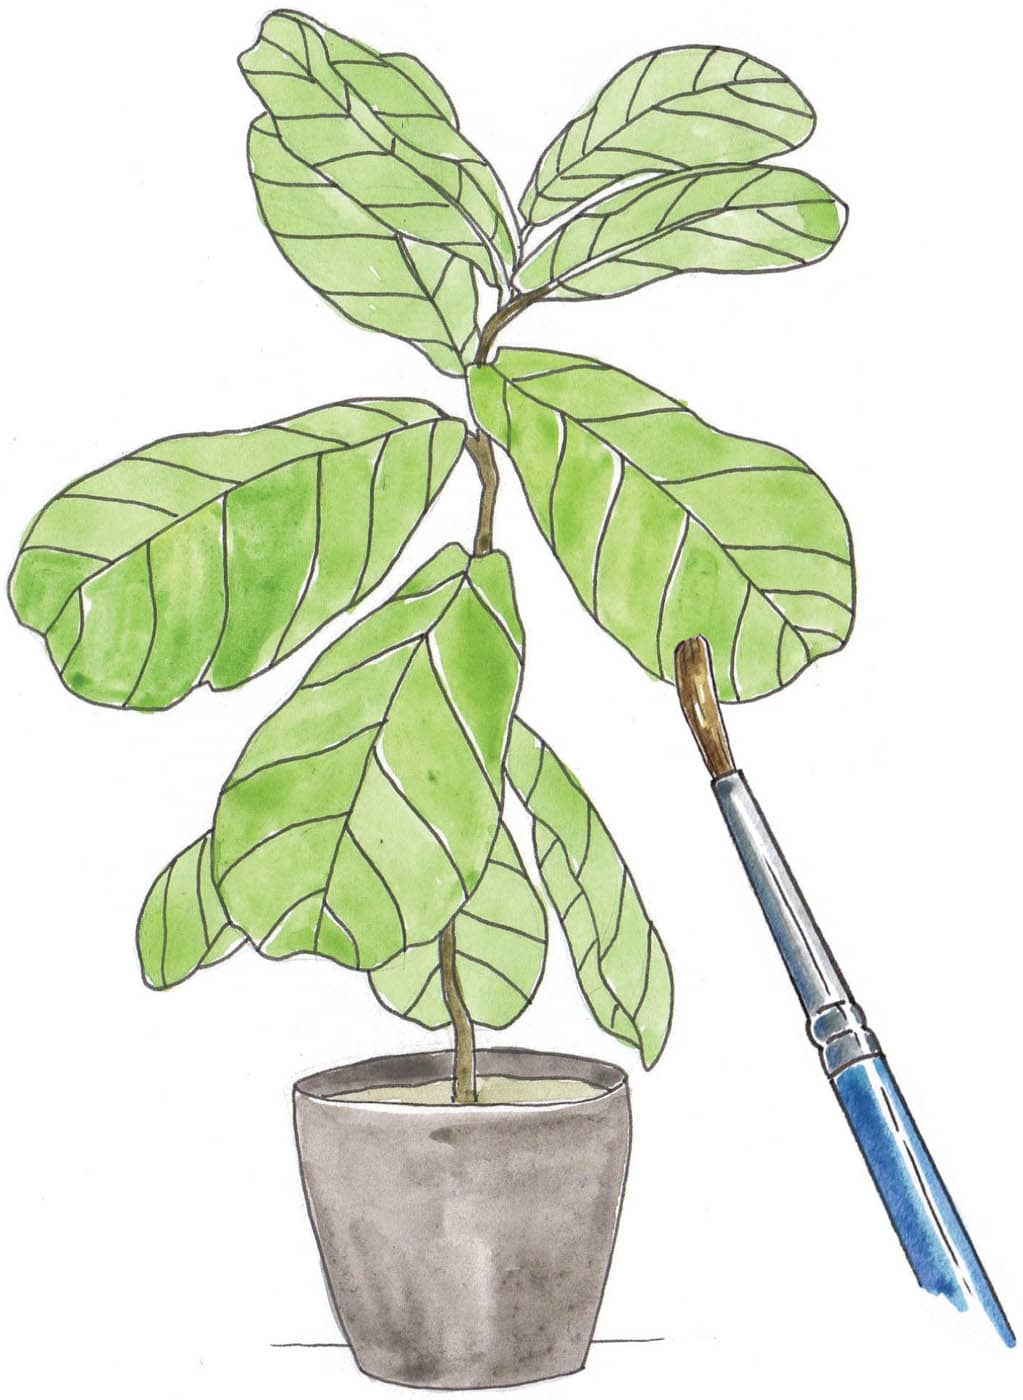
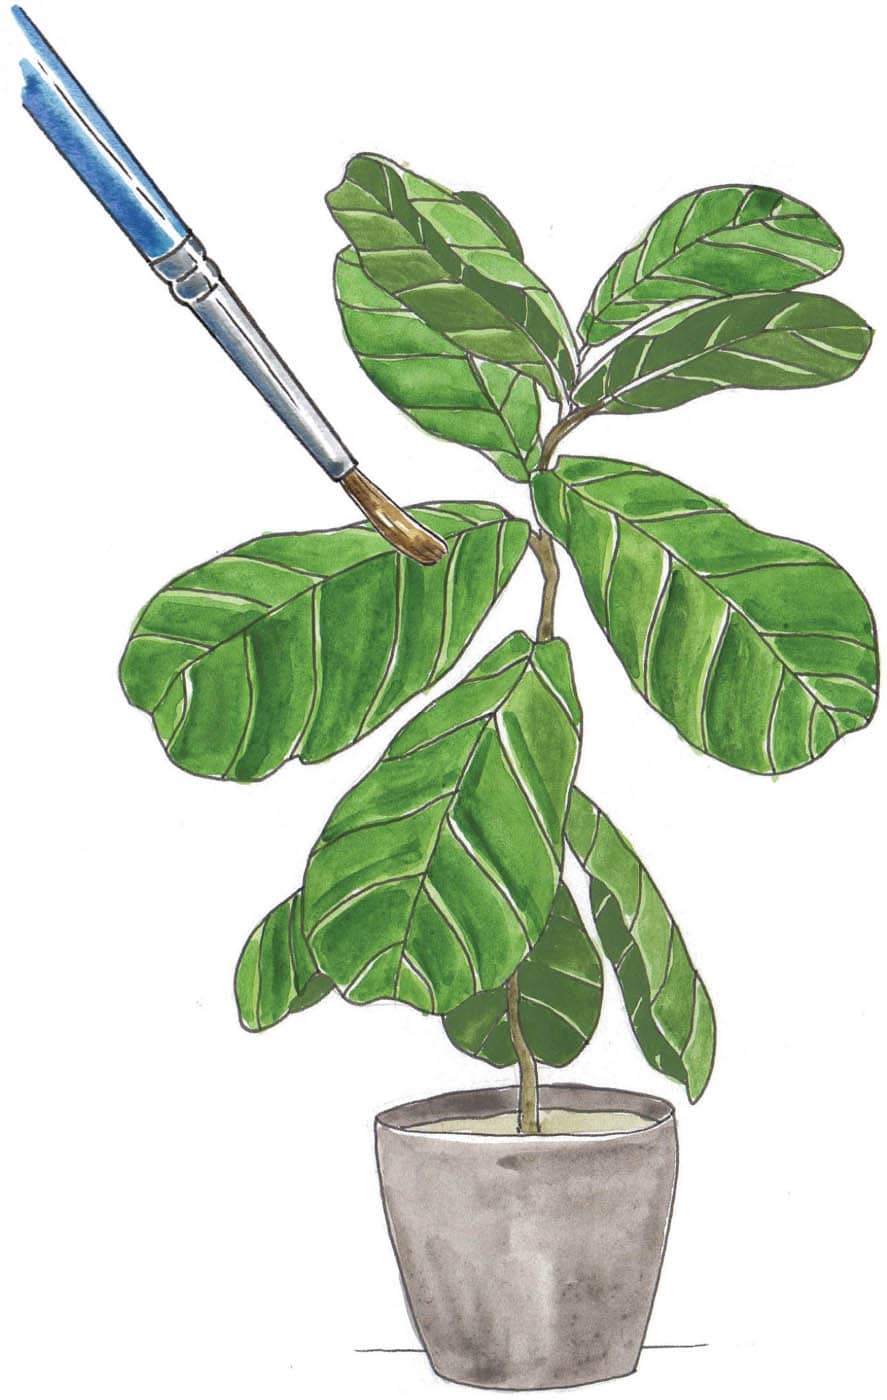
As you work your way toward larger plants, your drawings will become more complicated. Potted plants and trees are great for sketching, because it gives you the challenge of drawing subjects larger than your paper. You must translate a larger 3-D object into a smaller 2-D drawing. This can take practice, so be patient with yourself! Potted plants are a great stepping stone. Fiddle leaf fig plants are great for practice because the large leaves are simple teardrop or oval shapes. Sketch the pot, paying attention to the curve of the top edge. Lightly sketch the center stem and teardrops and ovals for the leaves. Draw a center vein down the center of each wide leaf that faces you. Start refining the shapes of the leaves. Make the edges irregular with an inverted tip at the front. For leaves that are turned away from you, sketch the farther edges if they’re visible. Very lightly sketch the rest of the veins on the leaves. Using a waterproof pen, go over all the lines on the plant. When the ink is dry, erase any visible pencil lines. With your choice of coloring medium, add a light base layer of green on the leaves and brown on the stem. Shade in the pot as well. Go over the leaves with a second layer of green, leaving some light spots along the veins and centers. Blend red with your green to create a darker, greenish brown to use for the shadows. Fiddle leaf fig leaves undulate and ripple, so the leaves should all be different. The undersides are darkest. It may take two layers of shading to achieve dark enough shadows.POTTED PLANT

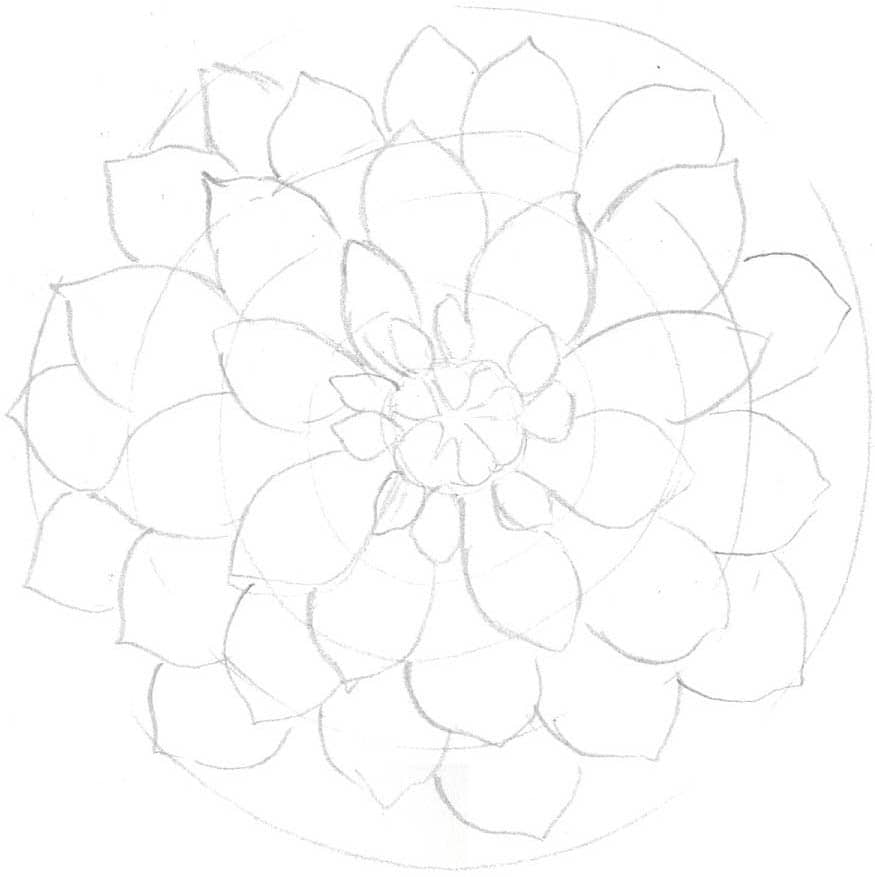
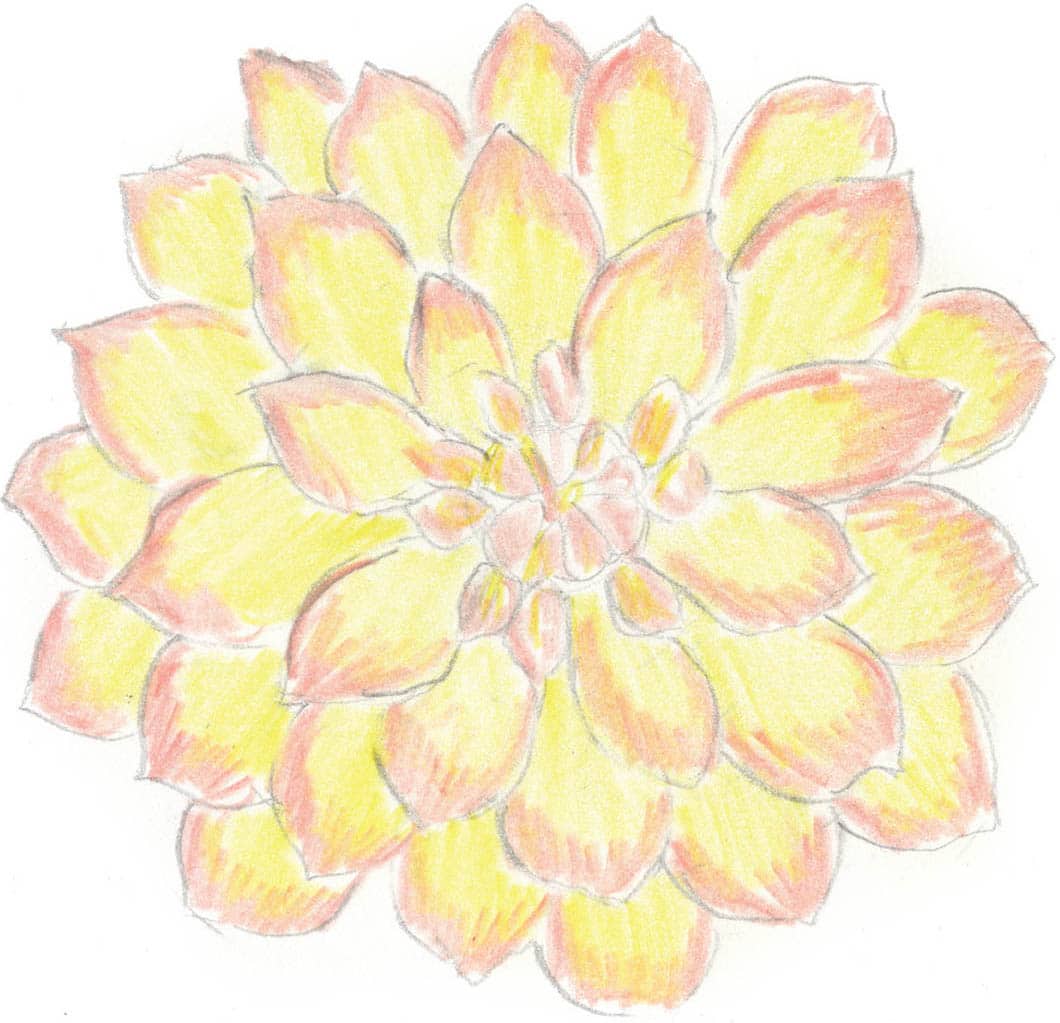
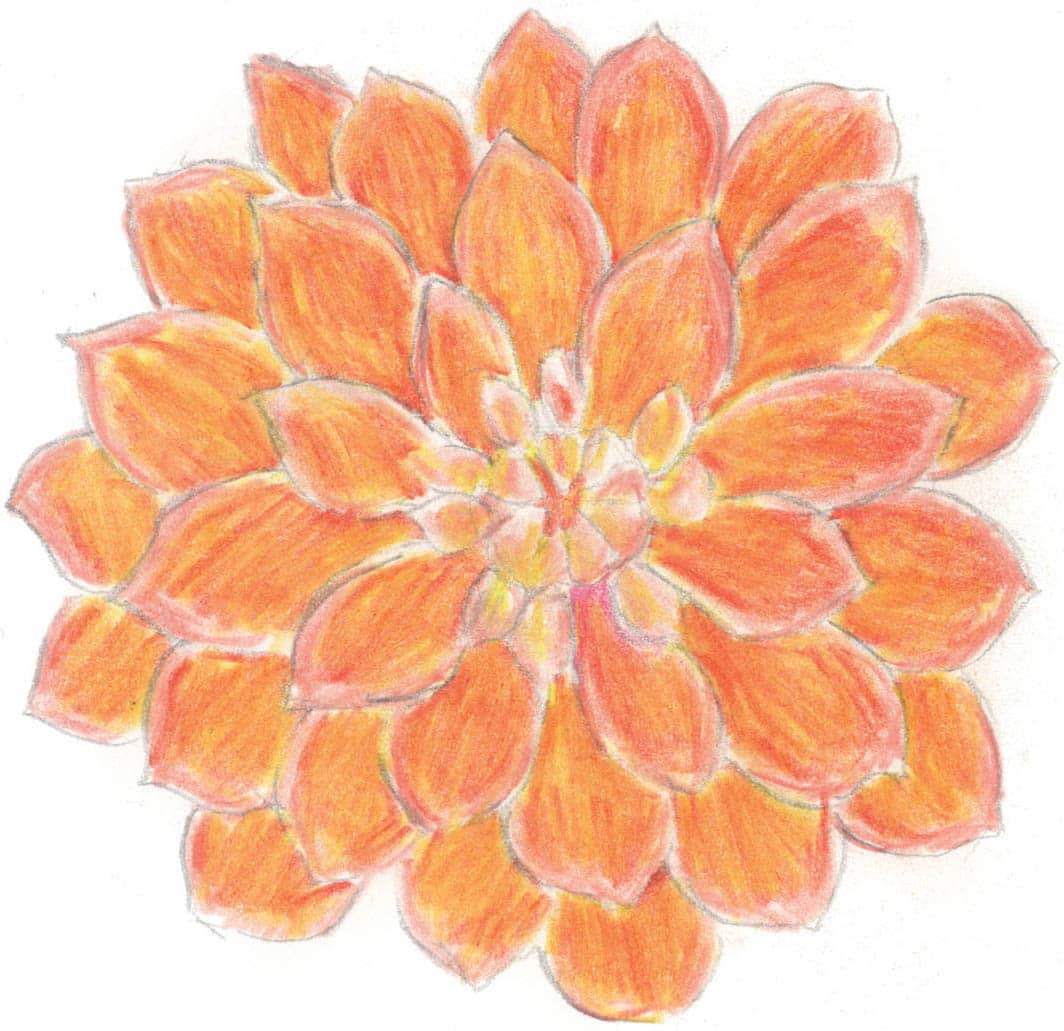
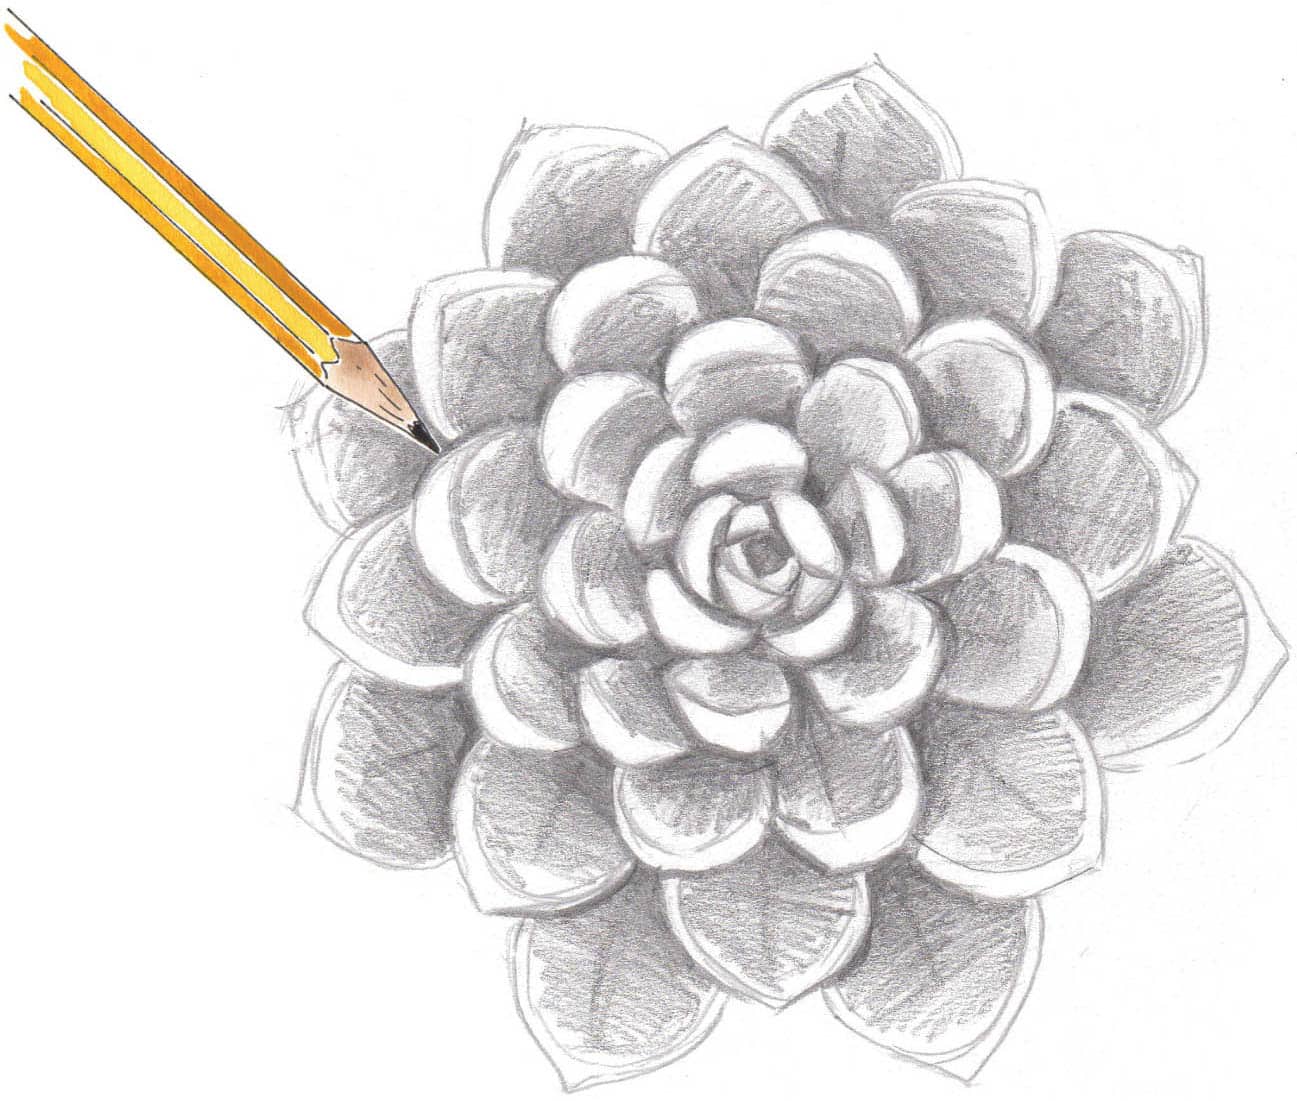
Similar to the succulent beginning on this page, the dahlia flower features petals—rather than leaves—radiating from the center in concentric circles. Start with a pencil and lightly draw the petals. With your lightest yellow and coral pencils, start shading in the petals. This dahlia doesn’t have any bright white highlights, so you don’t need to worry about preserving any white space. Shade in slowly with the side of the lead. With a slightly richer yellow, build up the color in your petals. You can start burnishing this yellow into the coral to blend it into the rest of each petal. Time to get those rich tones! Using darker yellow and orange, shade in the petals with long, smooth strokes. These strokes will help add texture to the petals and show their direction as they radiate from the center. Be careful not to color in any of the lighter yellow areas that will form the lighter highlights. Concentrate your color along the bottom of each petal and where they cast shadows on the underlying petals. With red and fuchsia pencils, burnish in some darker shadows along the bottoms of the petals and along their ridges. Continue with the red and fuchsia colors until you’ve shaded in all the shadowy areas and each petal has some darker ridges. Using a well-sharpened dark brown pencil, add another layer to the darkest shadows of the flower. Look along the bottom corners of the petals closest to the center for areas to darken to give your flower more contrast. If needed, grab one of your lighter yellows or a white pencil to burnish the lighter areas of the petals.DAHLIA