TOMATO
When drawing larger groups of fruits or vegetables, it’s a good practice to do a drawing or study of an individual fruit or veggie first. One single tomato before you draw the whole bunch is a great warm-up!
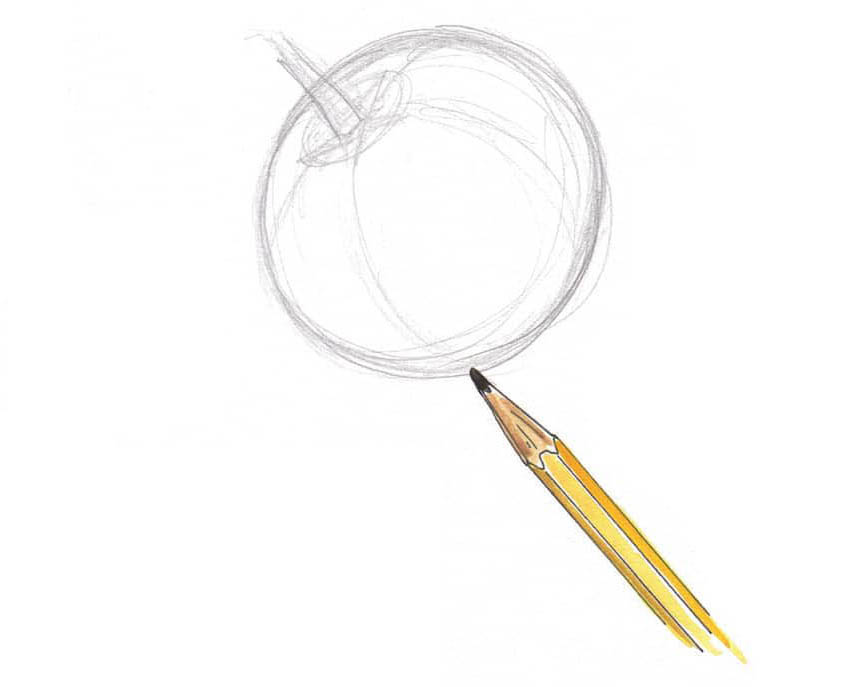
Sketch lightly and loosely to get the proper shape and angle of the tomato, as well as the stem, if it’s visible.
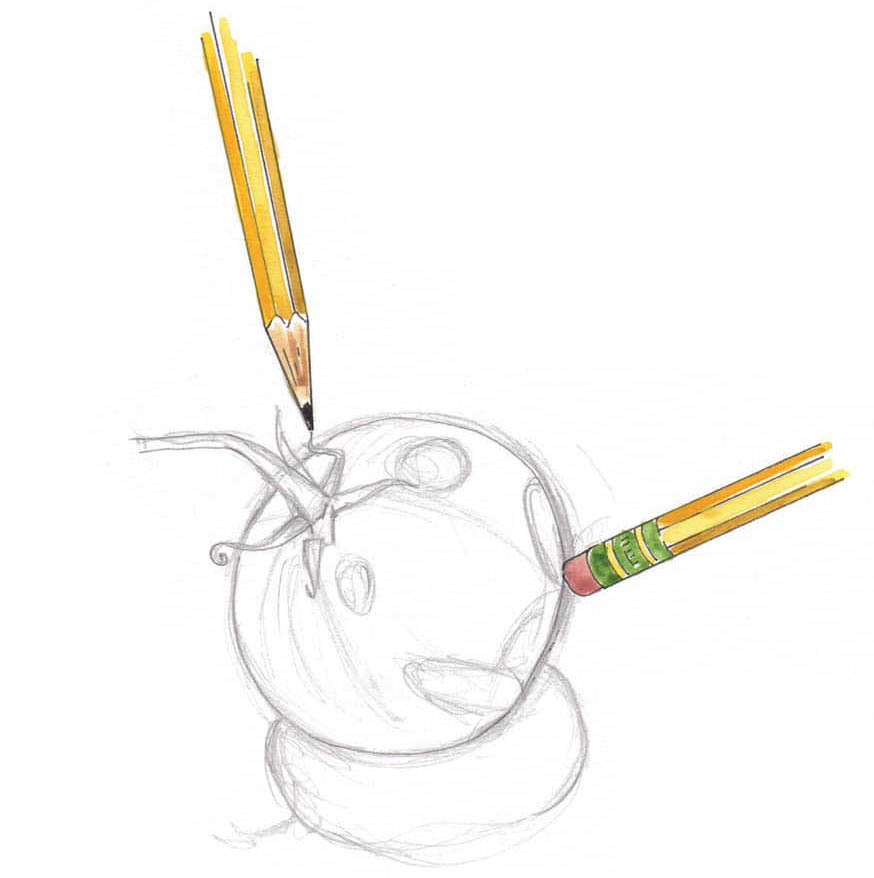
Add lines to show the curve of the tomato and notations for highlights.
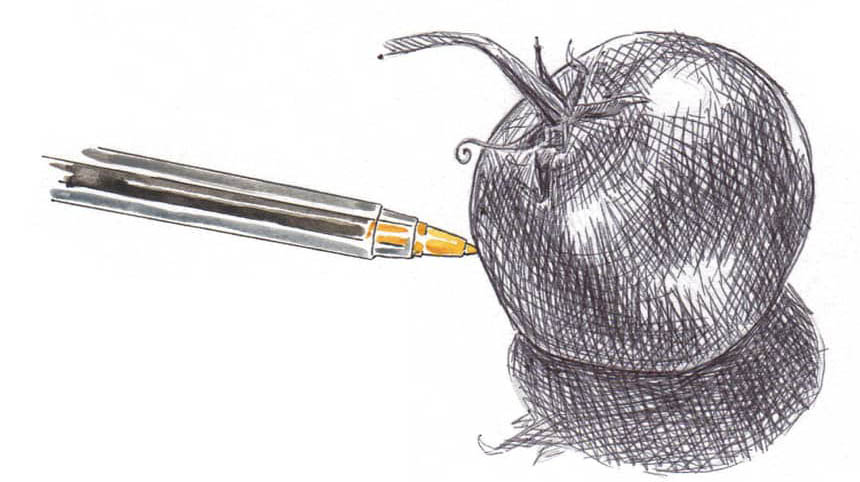
Use crosshatching to build up the layers. Ballpoint pens are fun for this because you can create smooth transitions or let the crosshatch marks show.
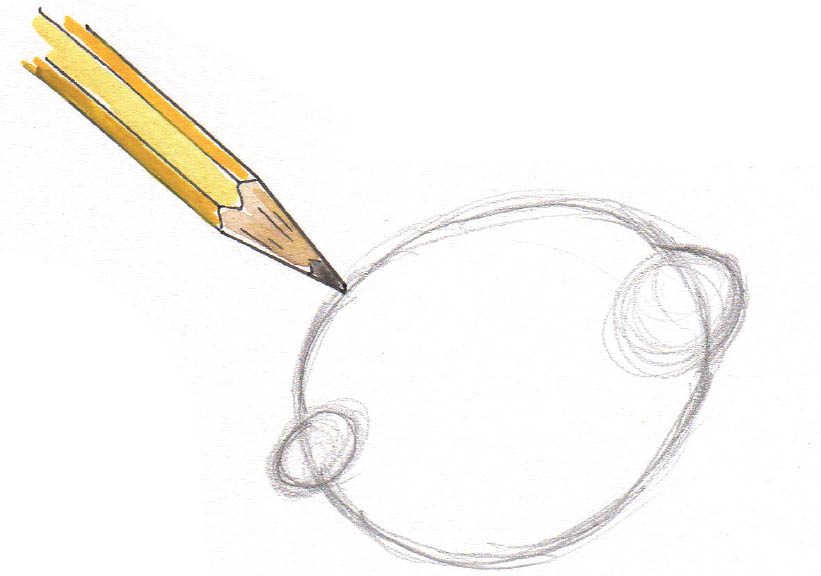
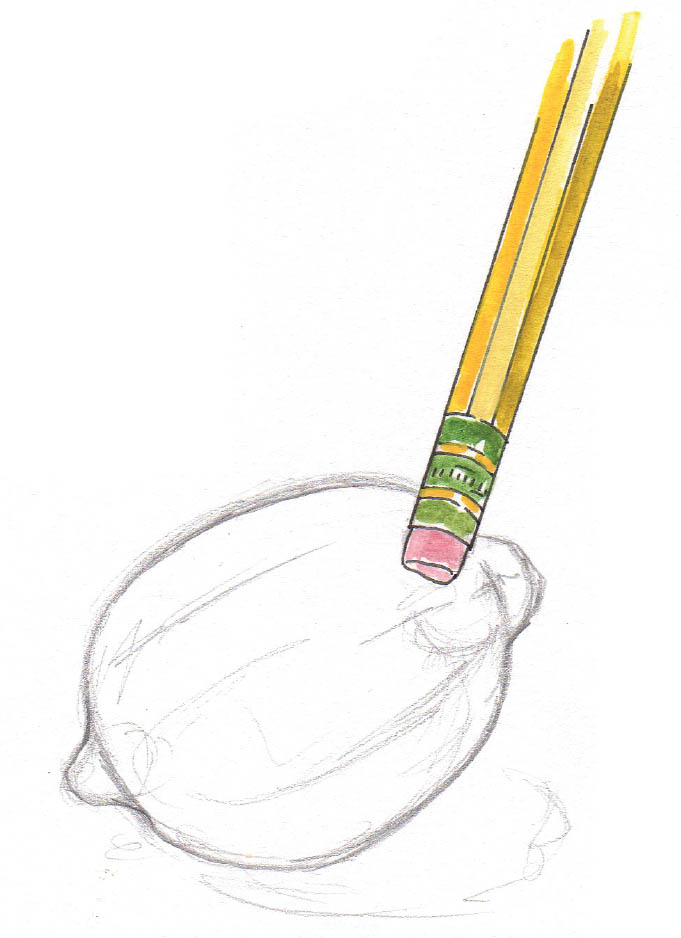
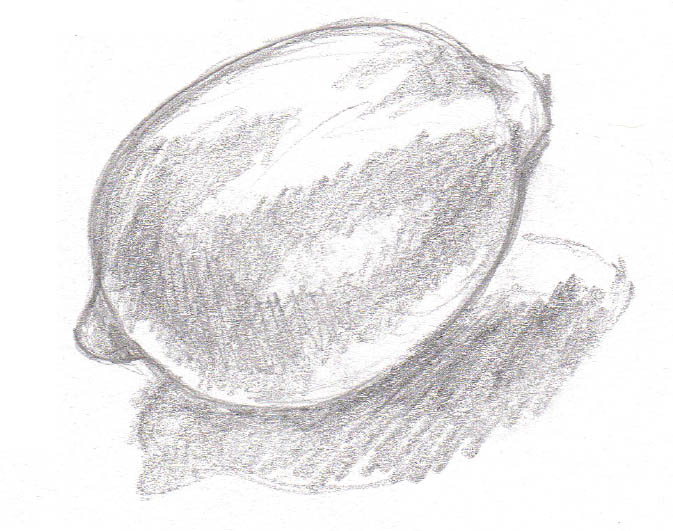
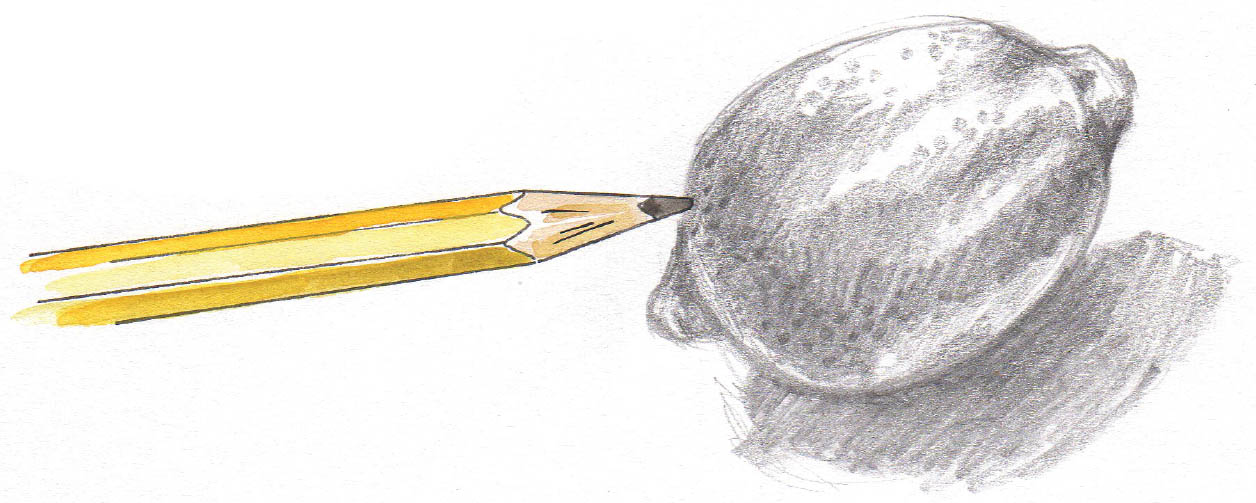
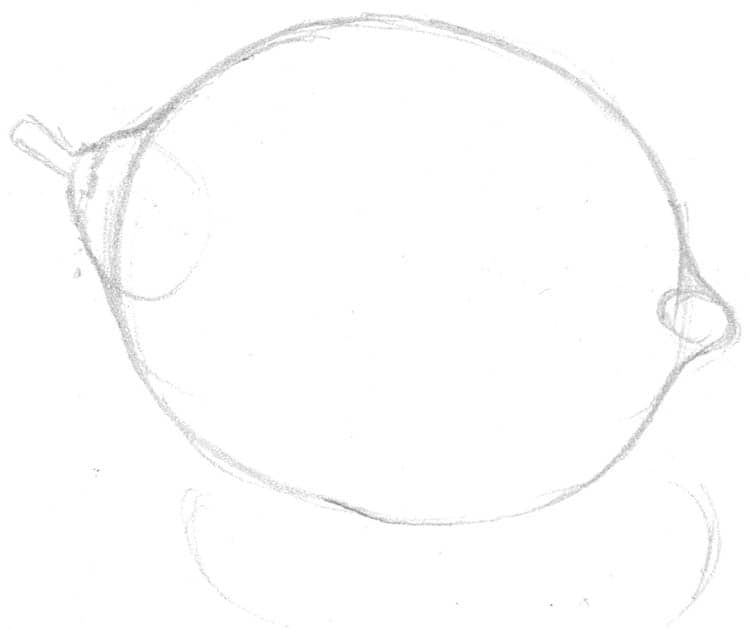
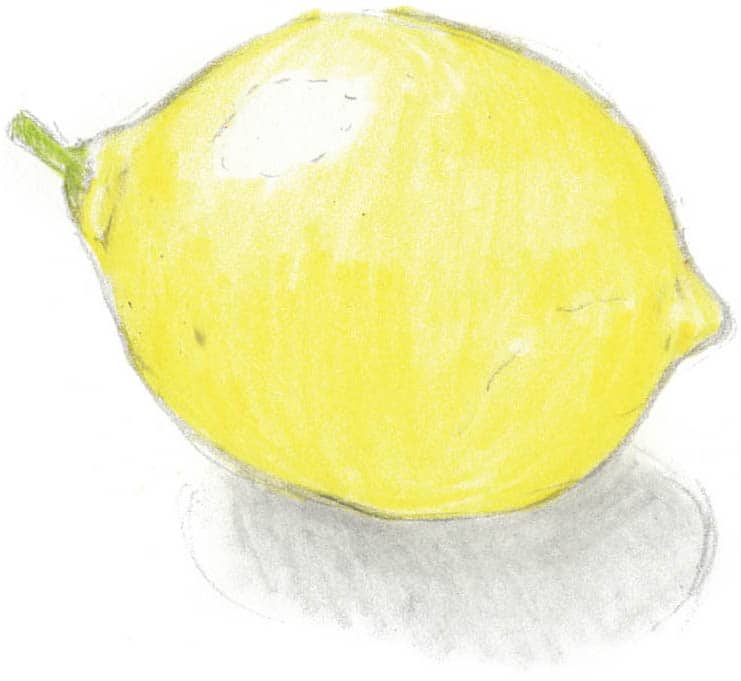
Lemons are useful to draw because of their simplicity. The initial sketch is comprised of circles and ovals. First lightly sketch the shape of the lemon and its two ends. Overlap the shapes to get the angles right. Connect the shapes with curved lines and erase any lines you no longer need. Identify any highlights on the lemon—you can even outline the highlights as a guide of where not to apply any shading. Slowly build up the shadows, paying attention to the direction of your marks. These lines can be drawn like hatch marks so that they mimic the lemon’s curves. Once the middle layers are complete, start adding more pressure to the pencil to create the darkest shadows. If you hold the pencil so the lead is flat across the page, you can cover the page faster and create smoother shadows and transitions from light to dark. Lastly, add texture. Small circles mimic the bumpy and irregular surface of the lemon.LEMON (IN GRAPHITE)

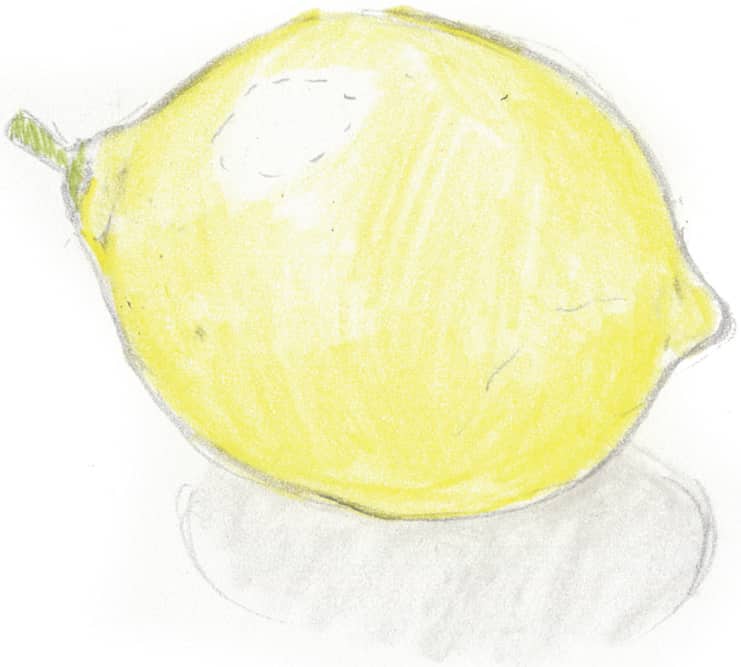
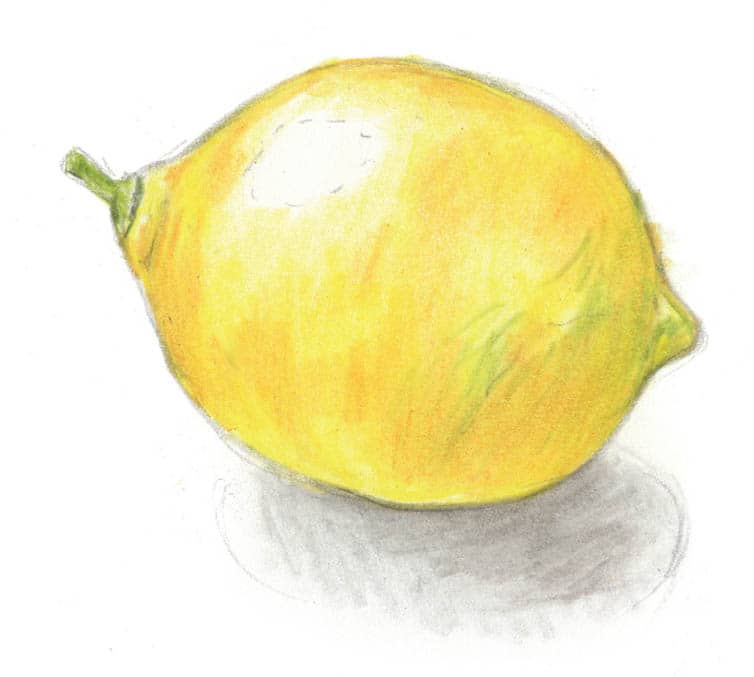
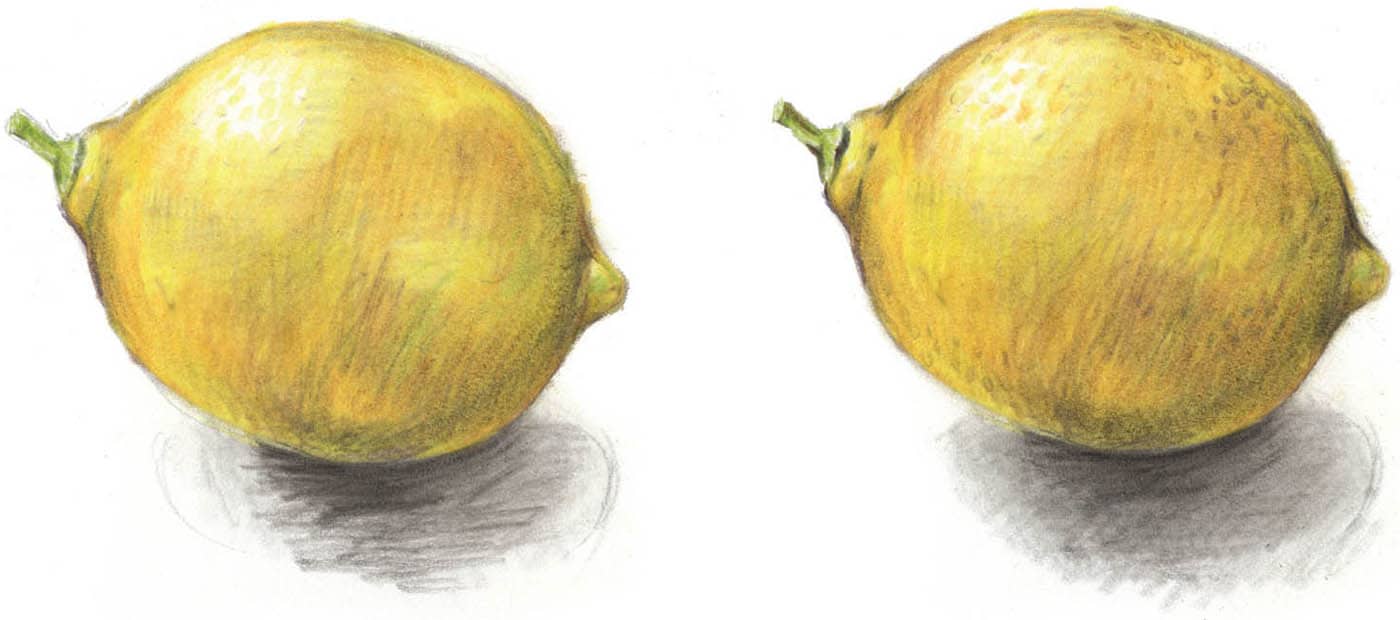
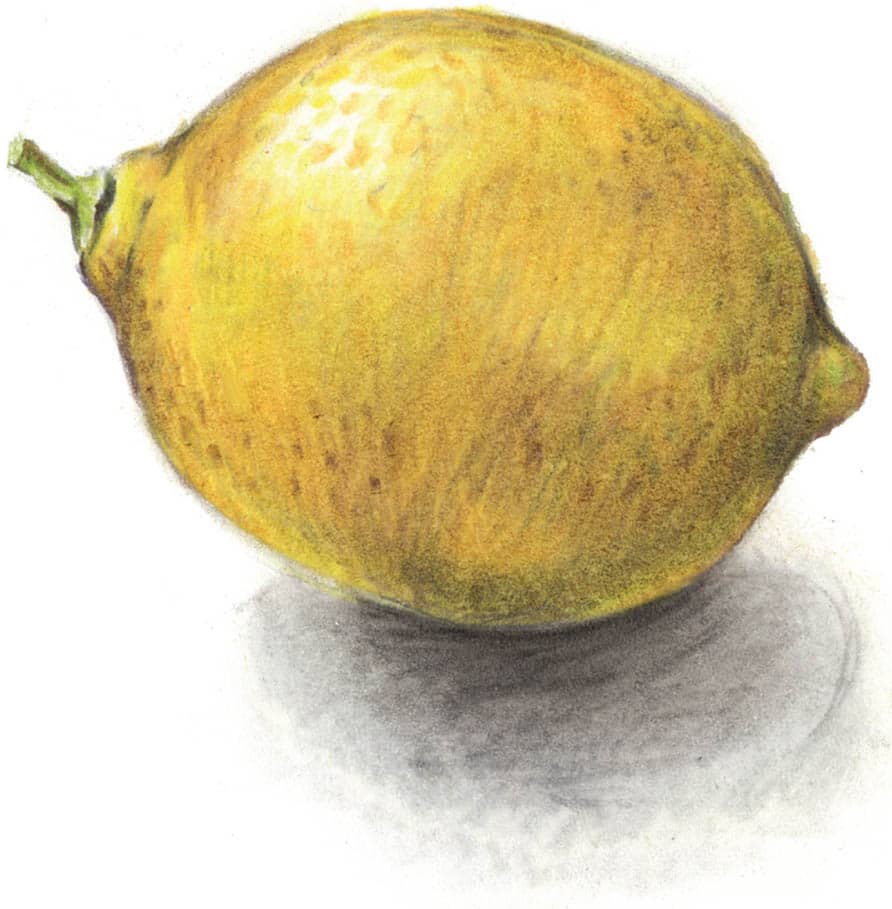
Now that you’ve drawn a lemon using graphite pencil, try your hand at a lemon in color! Sketch the lemon lightly in pencil first, breaking it down into its basic shapes and making notes as to where any highlights should be saved. Select your colors for the piece, starting with the basics. Add your first layers lightly, holding your pencils on their sides to apply soft, smooth layers. Be sure to avoid any areas that you’ve marked for highlights! Make another pass with your colored pencils to add a layer of color and begin burnishing the colors into your paper using heavy pressure to create a smooth, blended surface. You should be burnishing the colors well into the paper now. Take your time and slowly add more colors, keeping in mind that using complementary colors will create more realistic shading. Your layers should also build texture, if the piece needs it. Your marks can help convey shape as they curve around the sides of your object. Once you feel your piece is complete, make one more pass with your darkest shades to get those shadows to “pop.” Don’t be afraid to add another layer with your white or lighter colors to make the highlights shine or to burnish the lighter colors a bit more.LEMON (IN COLOR)
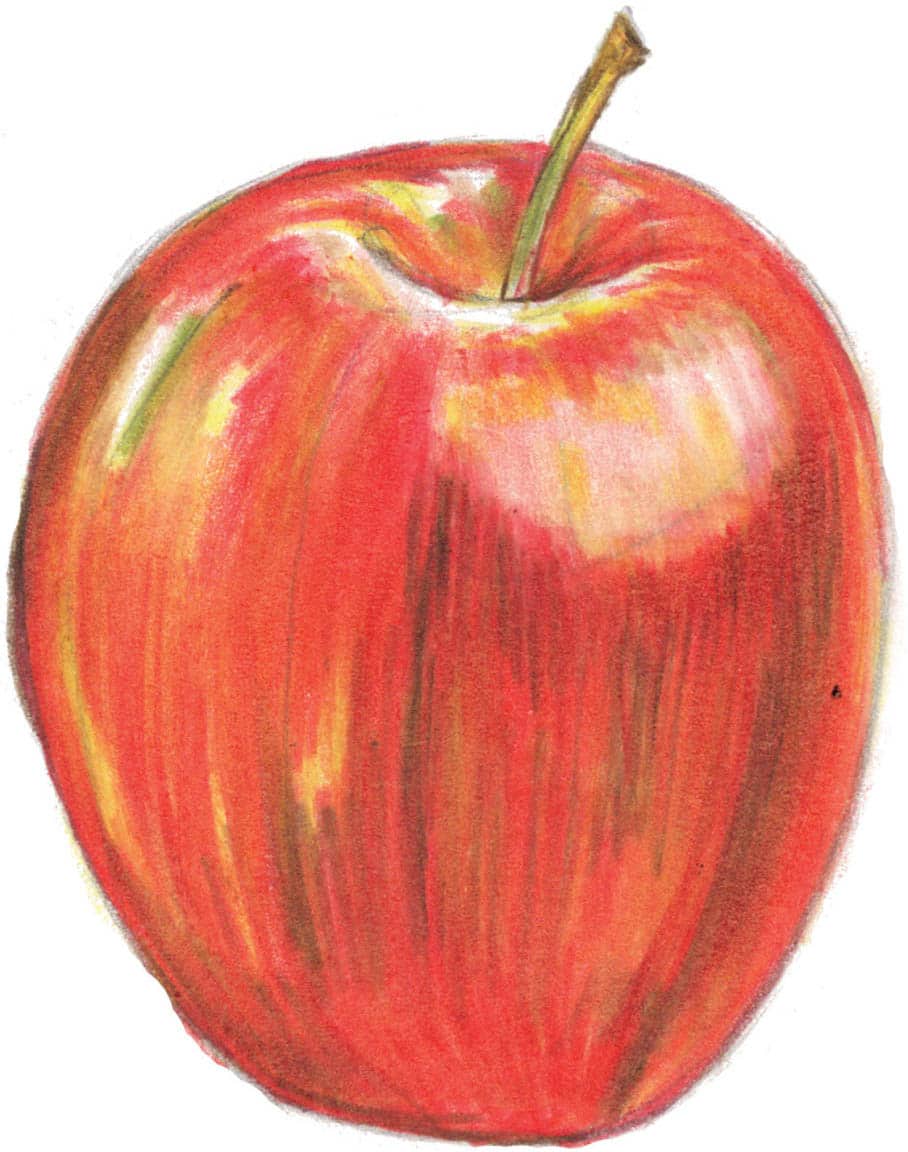
Apples are fun to draw—there are so many colors on this one small fruit! It may look solid red at first glance, but a closer look reveals the different shades and highlights waiting to be captured in colored pencil! Lightly sketch the apple in pencil, paying attention to the irregularities in its shape. Don’t forget the divot at the top where the stem sprouts. Add light marks to indicate the highlights too. Using the sides of your colored pencils, add long, smooth strokes of color that curve with the shape of the apple. The curved lines will help give the apple dimension and make it appear more realistic. Start with your lightest undertones or highlight colors. Build up that first layer with colors that are slightly richer and darker than the first, paying careful attention so you don’t color in the white highlight areas. Time to start building up those rich, red tones. Using the side of your red pencil, add a layer of red. It doesn’t need to be a solid layer of color—keeping the color application chunky and striated looks more realistic and allows your first layers of color to peek through. Add a light layer of color across the highlight areas that aren’t pure, shiny white. Using the same red or a darker shade, start burnishing the layers and building up more color in the areas with more shadow. Finally, using dark browns and greens, make those darker shadows and stripes of color more prominent. Make sure all your marks curve along the apple to help show the overall shape.APPLE


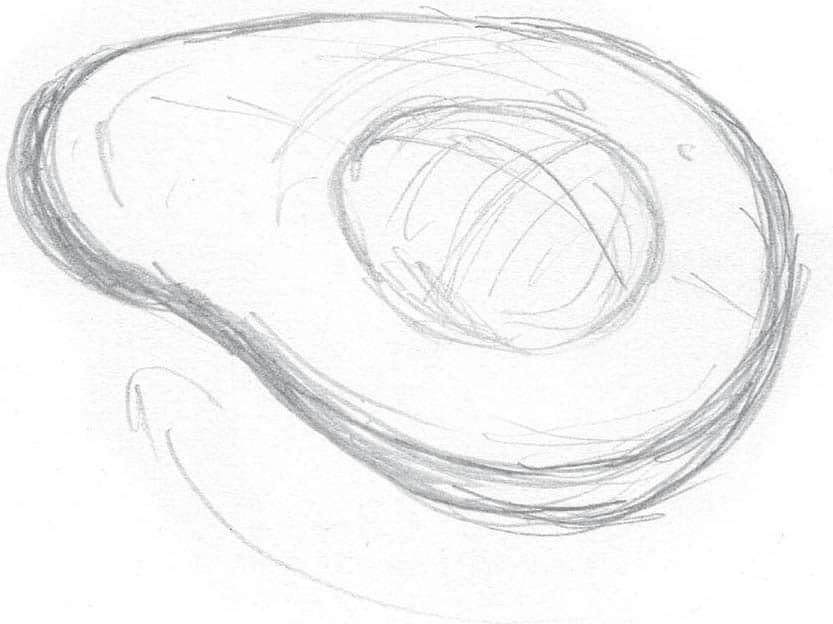
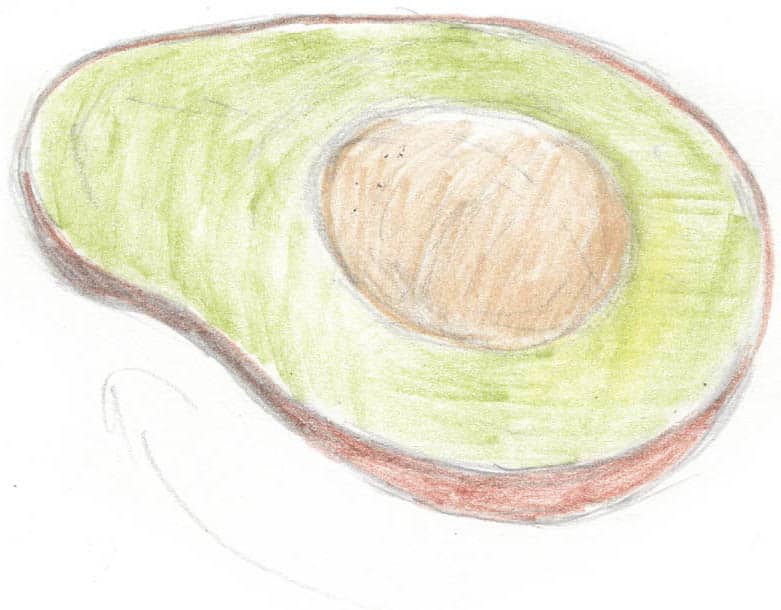
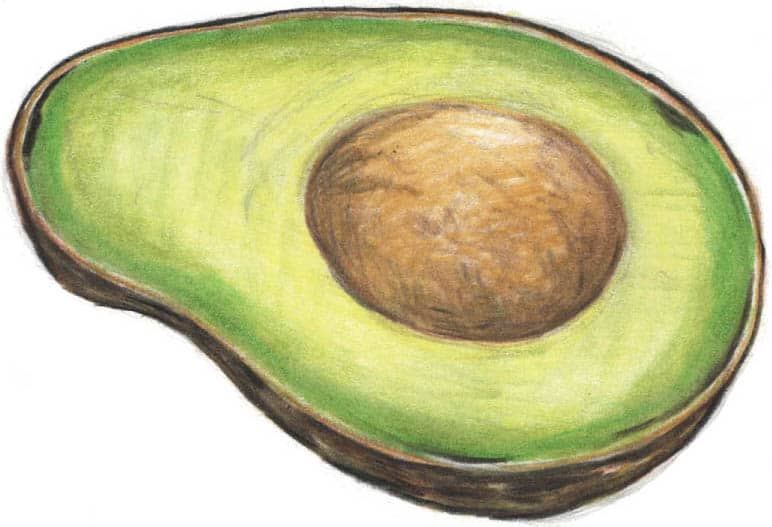
Another piece of produce that’s fun to draw is an avocado! The creamy interior offers a good exercise for blending colors smoothly, while the exterior is bumpy and textured, creating an interesting contrast and combination of exercises. Grab an avocado and slice it in half. Loosely sketch the avocado half and draw curved lines for guidance on the curves for when you start adding color. Also add a quick note of where the avocado casts a shadow on the table. Clean up some of your pencil marks before adding the first layers of light greens and browns for the green flesh, outer skin, and pit. Using the sides of slightly darker green and yellow colored pencils, start blending in smooth layers of color on the avocado flesh. You can also use some yellow on the pit. Try to keep the layers as smooth as possible on the avocado flesh; your layers can be chunky and loose on the pit and outer skin because these areas have more texture and variation. Add more dark green along the outer rim of the green avocado flesh. With light green, burnish those colors to create a smooth transition from light to dark. Using a darker brown, make chunky strokes on the outer skin to build up the texture. With a black or very dark brown pencil, make that outer skin “pop.” Using the same chunky marks as before, add more texture and shadow to the outer skin of the avocado. Pay attention to any shadows on the pit that need to be darkened, as well as small gaps between the skin and the avocado flesh. Another layer of dark green on the outer rim of the avocado flesh helps brighten the inner area. With one of your lighter brown pencils, shade in the pit with more texture. Use that same brown to show any discolorations or variations on the flesh of the avocado too. With a medium gray, add the shadow beneath the avocado.AVOCADO


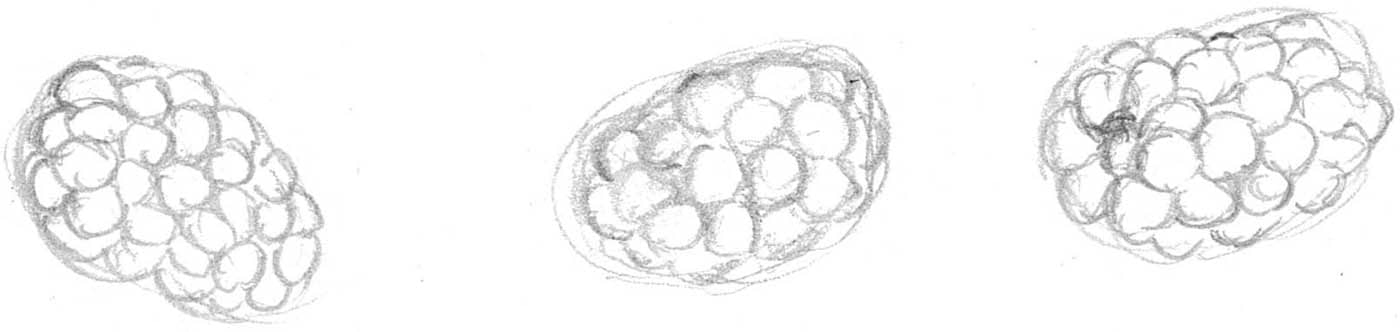
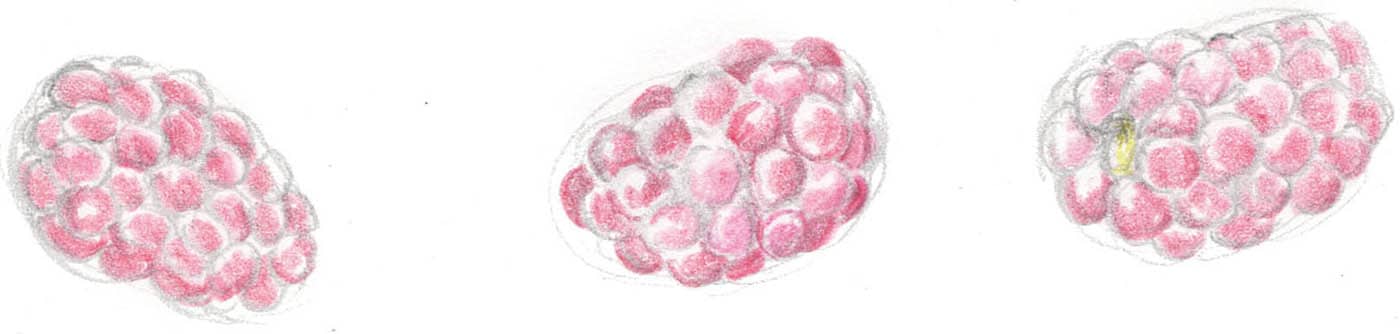
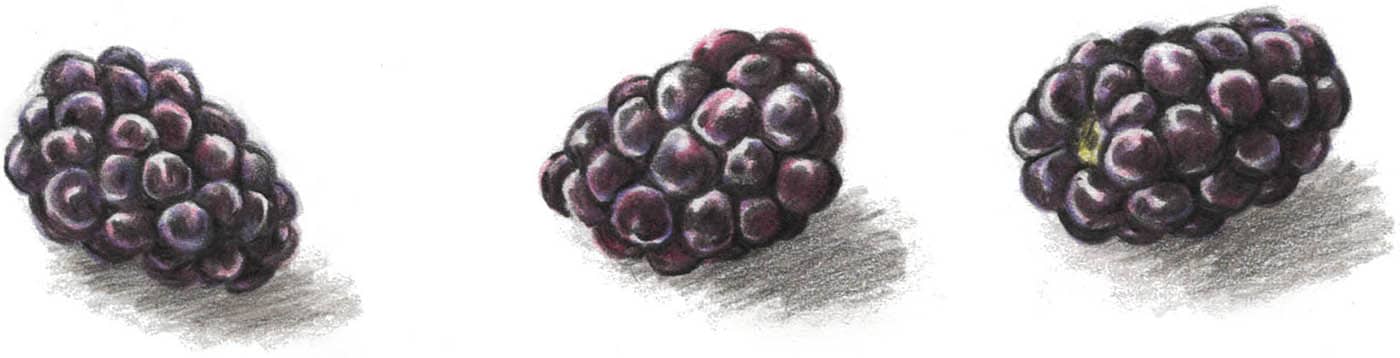
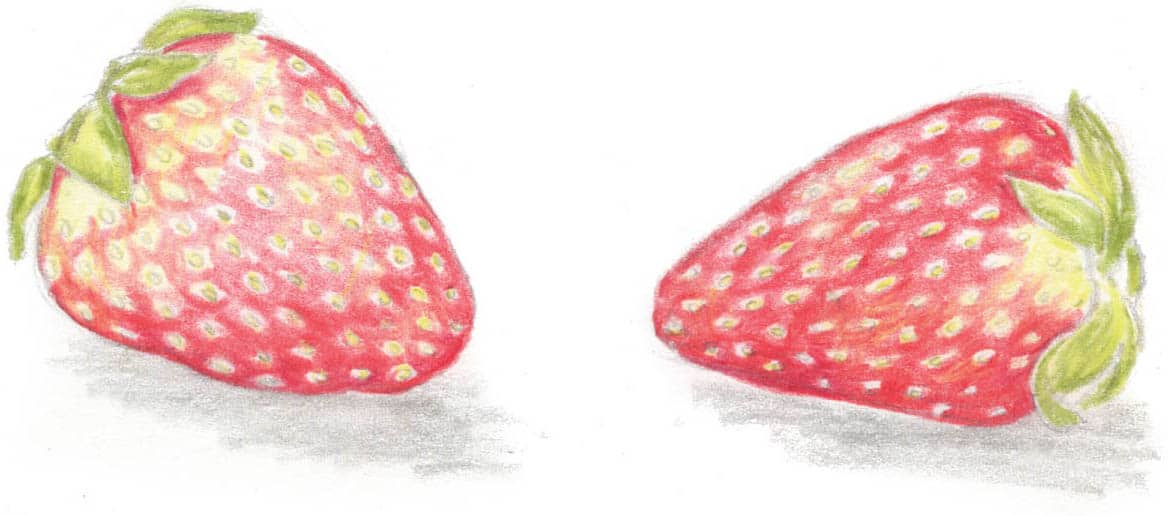
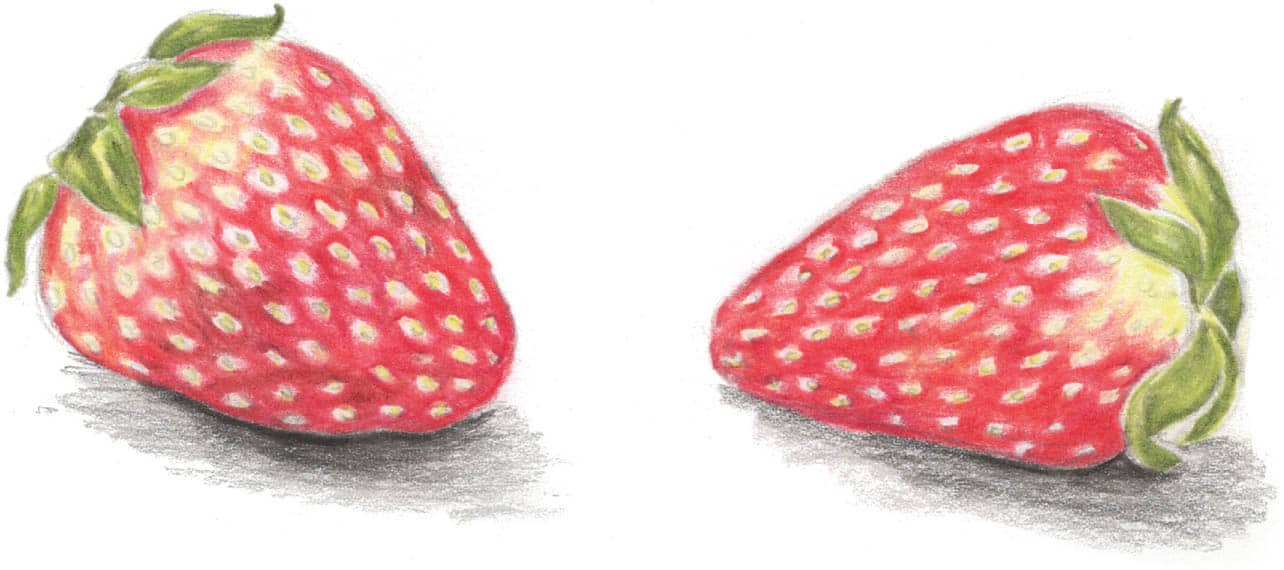
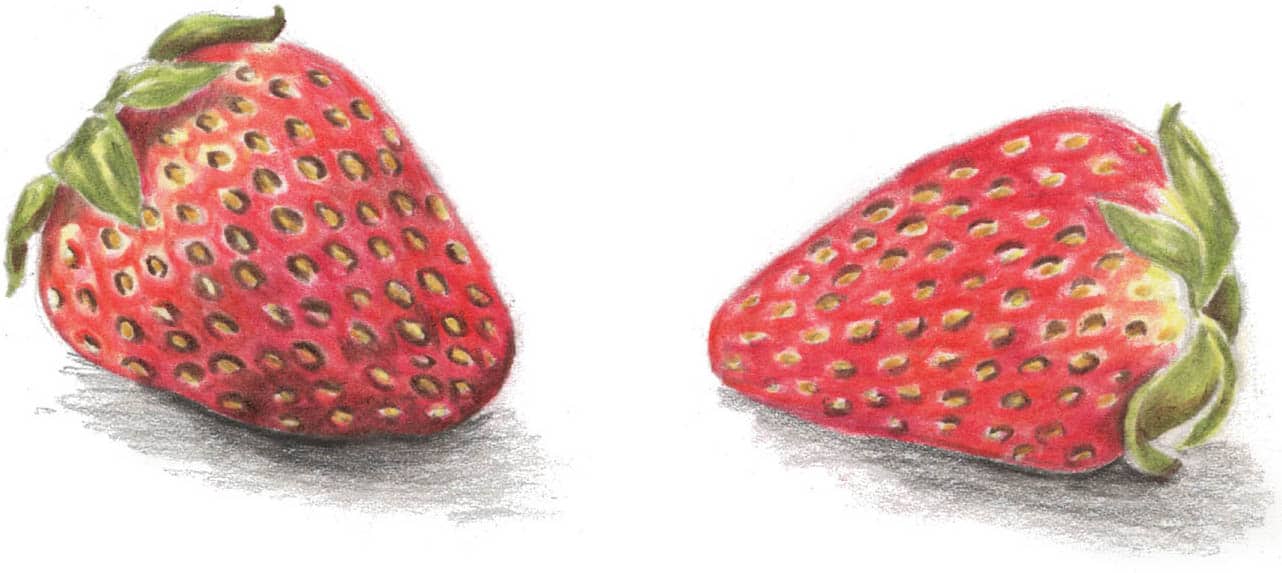
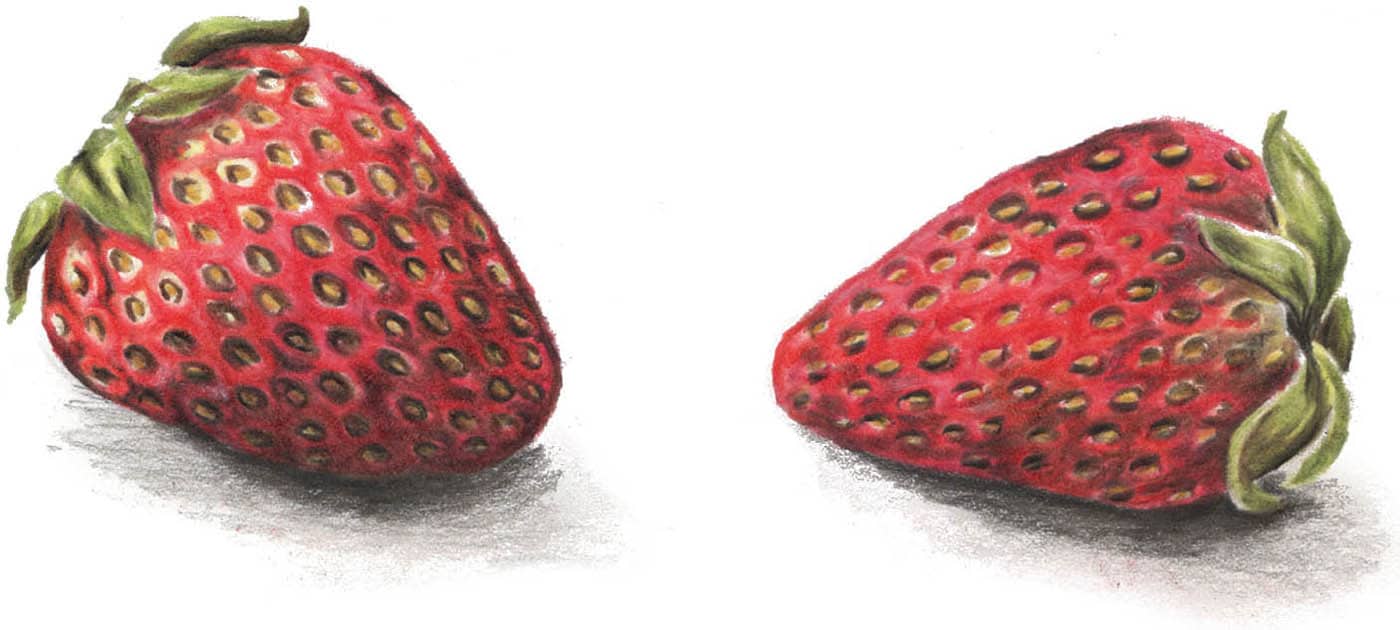
Even the smallest fruits can be challenging to draw. Strawberries and blackberries are rich in color and detail, so they can be more tedious subjects, but it’s so satisfying when you draw one realistically. Plus, they’re a great snack when you’re done drawing! Focus on drawing one berry if you prefer. Lightly sketch the overall shape before diving in and sketching the individual drupelets (the small juicy balls on the fruit). While blackberries look nearly entirely black once fully colored, you want to build that color up slowly. Start with warm fuchsia and light pink to shade in the drupelets, taking care to avoid the highlights. Add a small spot of yellow for the top bit where the stem would attach. With a dark purple pencil, start building up the shadows. Pay attention to the bumpy surface on the drupelets and how they catch the light in different ways. Not all drupelets are perfectly round, so aim for more faceted shapes. Add light gray below the berries for the shadows. Alternate between dark purple and black to darken the shadowed areas on the berries. Use dark purple to lightly shade over the highlights on some of the drupelets that catch less light and aren’t bright white. With a finely sharpened black pencil, shade the tiny shadows between the drupelets. Clean up any stray pencil marks and give those drupelets one last punch of black. You can also burnish them with your fuchsia or purple pencil to blend them more smoothly. This will make the blackberries “pop” off the page! Darken the shadows underneath the blackberries too. Start drawing strawberries by breaking them down into their basic shapes. Most strawberries are rough triangles with very rounded tops. From there, adjust your sketch to create the curved point, and add some marks to indicate the leaves. With a yellow pencil, start shading the lighter areas of the strawberries for the base layer of color. You can also add some yellow on the leaves. Start building up red layers in areas of richer red, both in the shadows and in places with a deeper concentration of color. Using red or a shade of fuchsia, start filling in the rest of the strawberries. Leave a slight halo around each of the seeds; you want to retain this space for a highlight or shadow. Add some light green to the leaves and a layer of gray for the shadows beneath the strawberries. With a warm brown pencil, start building up the shadows underneath the strawberries. You can also start building up the shadows in the leaves with a medium shade of green. With a finely sharpened golden yellow or yellow ochre pencil, shade in all the seeds. Using dark brown and black, shade in the shadows cast by the leaves, both on the other leaves and on the strawberries themselves. You can also sharpen your pencils and shade around the deeper seeds on the strawberries. With your black pencil, continue to shade the strawberries and leaves, as well as the cast shadows. Using white, burnish around the seeds to add more highlights. You can continue to burnish with red and fuchsia for the middle tones until you’re happy with the look.BERRIES