
Chapter 10: How To Nail It: Controlling Your Animation
At this point, we have a fully functional animation in our React Native app that starts playing as a loop when it is mounted and stops when unmounted. But what if we want to control the playback of the animation? Let's give an example: we need to display the animation of a loading bar while we sequentially download five different files into our app. The loading bar will show the progress of the downloading files by filling itself (20% more each time a file is downloaded), resulting in a fully filled bar once those five files have been downloaded.
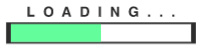
Figure 10.1 – Animated loading bar used as an example
In this case, we need to control the animation, updating it every time a file has been fully downloaded and stopping it while the next download is in progress.
To explain how this process works in lottie-react-native, we will review two different alternatives: the declarative and the imperative APIs. By the end of this chapter, we will know not only how to render Lottie animations in our React Native apps but we will be able to control their playback and layout.
To explain how this process works in lottie-react-native, we will review different alternatives:
- The declarative API
- The imperative API
Technical requirements
To complete this chapter, we have to have a functioning React Native app running on a simulator or device. We will modify this app to include a LottieView component as we learned in previous chapters so we can modify and control the animation through methods and properties.
The declarative API
The most frequent explanation for the distinction between imperative and declarative programming is that imperative code instructs the computer on how to perform tasks, whereas declarative code concentrates on what you want the computer to do.
Your code in imperative programming is made up of statements that affect the program's state by instructing the computer what to do. To put it another way, your code is built around defining variables and altering their values.
Your code in declarative programming is made up of expressions that evaluate their output based on their input by telling the machine what you want.
React was designed following the declarative paradigm, although it allows you to control some components the imperative way when needed. So does lottie-react-native as it provides different APIs for imperative or declarative control on the animations rendered within an app.
In this section, we will focus on how to control the example animated loading bar with the lottie-react-native library's declarative API.
Here's an example of how controlling a Lottie animation can be achieved with the declarative API:
const numFilesToDownload = 5;
const duration = 2000;
const App = ({downloadedFiles}) => {const progress = useMemo(() => new Animated.Value(0), []);
useEffect(() => { Animated.timing(progress, {toVal4deue: downloadedFiles.length / numFilesToDownload,
duration: duration,
useNativeDriver: true,
easing: Easing.linear,
}).start();
}, [downloadedFiles, progress]);
return (
<SafeAreaView>
<View style={styles.container}><LottieView
source={require('./assets/animations/loadingBar. json')} progress={progress}/>
</View>
</SafeAreaView>
);
};
export default App;
In this example, our App component receives a prop named downloadedFiles including the information of the files downloaded by the app. This information can be provided by Redux, MobX, a component wrapping app, or any other way. What's important for the sake of this example is to know that downloadedFiles is an array that will increase its size from 0 until the maximum number of files to be downloaded (defined by const numFilesToDownload = 5; in the example).
We are using the Animated API from React Native to hold the progress of the animation: const progress = useMemo(() => new Animated.Value(0), []); . This is an Animated.Value that will start from 0 and progressively reach 1, defining we want our animation to be complete. We are using useMemo here. As progress is a variable, we want to update it using React Native's Animated API:
useEffect(() => { Animated.timing(progress, {toValue: downloadedFiles.length / numFilesToDownload,
duration: duration,
useNativeDriver: true,
easing: Easing.linear,
}).start();
}, [downloadedFiles, progress]);
In this part, we are creating an effect that will update progress based on the number of files downloaded (downloadedFiles.length) and the number of files to be downloaded (numFilesToDownload). With this, we will be pushing the progress bar 20% toward its total every time a new file is downloaded. For example, if we've downloaded 2 of 5 files, progress will be set to 0.4, meaning the animation needs to smoothly play until 40% of its total play time.
We also define the duration for every push of the loading bar in the following line of code:
const duration = 2000;
The most important part in this example is the LottieView component:
<LottieView
source={require('./assets/animations/loadingBar. json')} progress={progress}/>
We use the progress prop here so we can declare the progress of the animation based on an Animated value (progress), which depends on the number of files being downloaded at a certain moment.
We can find all the declarative properties, their descriptions, and default values in the lottie-react-native library's README file (https://github.com/lottie-react-native/lottie-react-native/blob/master/docs/api.md).
All of them can be declaratively used on a LottieView component to control the rendering and behavior of our Lottie animations. In the next section, we will learn how to control our animations with the imperative API for those cases where we need to explicitly say what to do to our animation instead of reacting to state changes.
We have already learned how to use some of these properties in our LottieView objects. We will now show examples using other important props.
speed
The speed property is a number that sets the speed of the animation based on how many times the default speed should be played:
<LottieView
source={require('./assets/animations/myLottieFile.json')} speed={2} />
The example above will play our animation twice as fast as the original animation speed.
<LottieView
source={require('./assets/animations/myLottieFile.json')} speed={-1} />
The example above will play our animation in reverse at the original animation speed. With this in mind, we could create a loop that renders the animation back and forth every 2 seconds instead of repeating it over:
const App = ({}) => {const [speed, setSpeed] = useState(1);
const reverseSpeed = useCallback(() => { if (speed === 1) {setSpeed(-1);
} else {setSpeed(1);
}
}, [speed]);
useEffect(() => { setTimeout(() => {reverseSpeed();
}, 2000);
}, [reverseSpeed]);
return (
<SafeAreaView>
<View style={styles.container}><LottieView
source={require('./assets/animations/loadingBar. json')}autoPlay
speed={speed}/>
</View>
</SafeAreaView>
);
};
onAnimationFinish
The onAnimationFinish property is a callback that will be triggered when the animation completes its playback. We can use it to navigate away to a new screen when the displaying animation finishes its playback:
const App = ({navigation}) => { const onAnimationFinish = useCallback(() => { navigation.navigate('NextScreen');}, []);
return (
<SafeAreaView>
<View style={styles.container}><LottieView
source={require('./assets/animations/loadingBar. json')}autoPlay
onAnimationFinish={onAnimationFinish} loop={false}/>
</View>
</SafeAreaView>
);
};
Note loop={false} is necessary for onAnimationFinish to work properly as a looped animation won't ever finish.
colorFilters
The colorFilters property is an array of objects containing the string-coded hex colors that enables developers to change the colors for specific layers programmatically. For this prop to work properly, the correct keypath (a property set when creating the app in After Effects and stored in the Lottie JSON file) needs to be provided along with the code:
<LottieView
autoPlay
source={require('./assets/animations/loadingBar.json')} colorFilters={[ {keypath: 'button',
color: '#FF0000',
},
{keypath: 'circle',
color: '#00FF00',
},
{keypath: 'square',
color: '#0000FF',
},
]}
/>
This piece of code modifies three After Effect layers (button, circle, and square) to change their colors to red ('#FF0000'), green ('#00FF00'), and blue ('#0000FF') respectively.
textFiltersAndroid and textFiltersIOS
textFiltersAndroid and textFiltersIOS contain an array of objects including texts to replace so we can programmatically modify a specific text in the animation. This property is useful when dealing with translations in our apps:
<LottieView
autoPlay
source={require('./assets/animations/loadingBar.json')} textFiltersAndroid={[ {find: 'Hello!', replace: 'Hola!'}, {find: 'Bye!', replace: 'Adios!'},]}
textFiltersIOS={[ {find: 'Hello!', replace: 'Hola!'}, {find: 'Bye!', replace: 'Adios!'},]}
/>
In this example, we are replacing the text 'Hello!' with 'Hola!' and 'Bye!' with 'Adios!' in our animation for both iOS and Android devices.
Now that we have learned how to use the declarative API, let's move on to a different way of interacting with our Lottie animations: the imperative API.
The imperative API
Sometimes, it's just easier using imperative programming in our app, for example, sometimes we need to play/stop our animation based on user interactions inside the app. For these cases, we can use the lottie-react-native library's imperative API, which allows developers to control the animation playback in a very straightforward way.
React automatically provides the ref prop on all its components and the useRef hook to be used whenever we need to control the component in an imperative way.
The piece of code we wrote in the previous section is actually a good example of how imperative programming makes more sense when we need to directly trigger an action on a component, improving readability and making our code easier to reason about:
import React, {useEffect, useRef} from 'react';import LottieView from 'lottie-react-native';
import {SafeAreaView, View, StyleSheet} from 'react-native';const numFramesPerFile = 9;
const App = ({downloadedFiles}) => {const animation = useRef(null);
useEffect(() => { if (downloadedFiles.length === 0) {animation.current.reset();
} else {const startFrame = numFramesPerFile * (downloadedFiles. length - 1);
animation.current.play(startFrame, startFrame + numFramesPerFile);
}
}, [downloadedFiles]);
return (
<SafeAreaView>
<View style={styles.container}><LottieView
ref={animation} source={require('./assets/animations/loadingBar. json')} loop={false}/>
</View>
</SafeAreaView>
);
};
const styles = StyleSheet.create({ container: {width: '100%',
height: '100%',
justifyContent: 'center',
alignItems: 'center',
},
});
export default App;
For this approach, we need to first identify how many frames our animation contains and how many frames we need to render once we download each of the files to be downloaded. In this example, we could calculate it in the following way:
- Number of frames contained in the animation: 45
- Number of files to be downloaded: 5
- Number of frames to be played on every file download: 45 / 5 = 9
Then, we define the calculated number of frames to be played on every file download as a constant in our code:
const numFramesPerFile = 9;
Next, we need to create a reference to our LottieView component that will enable us to call imperative methods on it. We do this using the useRef hook provided by React:
const animation = useRef(null);
This reference needs to be passed as the ref prop to our LottieView component:
<LottieView
ref={animation} source={require('./assets/animations/loadingBar. json')} loop={false}/>
We also see how we explicitly pass loop={false} so the animation doesn't repeat when we call any imperative playback methods on it.
Having all this setup ready, we can create an effect that will be triggered on every file download. This effect will use the imperative play method on the referenced component. This play method accepts the initial and the final frames we want to play in the animation.
We will use these parameters to reproduce just a part of the animation on every file download:
useEffect(() => { if (downloadedFiles.length === 0) {animation.current.reset();
} else {const startFrame = numFramesPerFile * (downloadedFiles. length - 1);
animation.current.play(startFrame, startFrame + numFramesPerFile);
}
}, [downloadedFiles]);
When we know how many files the app has downloaded (downloadedFiles.length), we can easily calculate what the initial frame will be where the next animation part should start:
const startFrame = numFramesPerFile * (downloadedFiles.length - 1);
Then, we reach the most important part of this code: the part where we use the imperative API to reproduce the animation from the initial frame (startFrame) until the final frame (startFrame + numFramesPerFile):
animation.current.play(startFrame, startFrame + numFramesPerFile);
Note how we reset the animation if the number of downloaded files is zero, so we make sure we always start from the initial frame:
if (downloadedFiles.length === 0) {animation.current.reset();
}
Besides play and reset, we can find other imperative methods in the lottie-react-native library's README file found at https://github.com/lottie-react-native/lottie-react-native/blob/master/docs/api.md.
Summary
In this chapter we reviewed the differences between the declarative and the imperative APIs for lottie-react-native, which can be used to control the looks and the playback of our animation. On top of that, we learned how to use React Native's Animated API to smoothly control the progress of a Lottie animation.
In the next chapter, we will go through some of the most common issues, pitfalls, and problems we may face when using lottie-react-native in our React Native apps.