
1
Creating a Unity Project
In this chapter, we will learn how to install Unity and create a project with Unity Hub, a tool that manages different Unity installations and projects, among other tasks. Unity Hub gives easy access to community blogs, forums, resources, and learning portals; it also manages your licenses, and allows you to change the building platform before opening the project on top of managing different installs and projects.
Specifically, we will examine the following concepts in this chapter:
- Installing Unity
- Creating projects
Let’s start by talking about how to get Unity up and running.
Installing Unity
We’ll begin with a simple but necessary first step: installing Unity. It seems like a straightforward first step, but we can discuss the proper ways to do this. In this section, we will be looking at the following concepts:
- Unity’s technical requirements
- Unity versioning
- Installing Unity with Unity Hub
First, we will discuss what is necessary to run Unity on our computers.
Unity’s technical requirements
To run Unity 2022, your computer will need to meet the following operating system requirements:
- If you use Windows, you need Windows 7 Service Pack 1 or greater, Windows 10, or Windows 11. Unity will run only on 64-bit versions of those systems; there is no 32-bit support unless you are willing to work with Unity versions before 2017.x, but that’s outside the scope of this book.
- For Mac, you need Big Sur 11.0 to run Apple silicon versions of the editor. In any other case, you can run Intel versions of the editor from High Sierra 10.13 or superior.
- For Linux, you need exactly Ubuntu 20.04, 18.04, or CentOS 7.
Regarding the CPU, these are the requirements:
- Your CPU needs to support 64 bits
- Your CPU needs to support SSE2 (most CPUs support it)
- In the case of Macs with Apple silicon, M1 or above is needed
Finally, regarding graphics cards, these are the supported ones:
- On Windows, we need a graphics card with DirectX 10, 11, or 12 support (most modern GPUs support it)
- On Mac, any Metal-capable Intel or AMD GPU will be enough
- On Linux, OpenGL 3.2 or any superior version, or a Vulkan-compatible card from Nvidia and AMD is supported
Now that we know the requirements, let’s discuss the Unity installation management system.
Unity versioning
Unity releases a new major version each year—at the time of writing, 2022.1—and during that year it receives an update with new features, which is planned to be 2022.2 at the time of writing this book. Near the end of the year or during the beginning of the next one, an LTS (long-term support) version is released, which will be 2022.3 for this edition of the book, marking the end of new features being added to that year’s version of the engine. After that, the next year’s edition of the engine is released, and the cycle repeats.
LTS versions have the benefit that they are planned to be updated bi-weekly with bug fixes for 2 years, while new major versions of Unity release. That’s the reason most companies stick to LTS versions of the engine: because of its stability and long-term support. In this book we will be using 2022.1 just to explore the new features of the engine, but consider sticking to LTS versions when developing commercial game titles.
Considering this, you may need to have several versions of Unity installed in case you work on different projects made with different versions. You may be wondering why you can’t just use the latest version of Unity for every project, but there are some problems with that.
In newer versions of Unity, there are usually lots of changes to how the engine works, so you may need to rework lots of pieces of the game to upgrade it, including third-party plugins. It can take lots of time to upgrade the whole project, and that can push the release date back. Maybe you need a specific feature that comes with an update that will help you. In such a case, the cost of upgrading may be worthwhile. For projects that are maintained and updated for several years, developers are used to updates only to the latest LTS versions of the editor, although this policy may vary from case to case.
Managing different projects made with different Unity versions, and installing and updating new Unity releases, all used to be a huge hassle. Thus, Unity Hub was created to help us with this, and it has become the default way to install Unity. Despite this, it is not necessary for installing Unity, but we will keep things simple for now and use it. Let’s look closer into it.
Installing Unity with Unity Hub
Unity Hub is a small piece of software that we will install before installing Unity. It centralizes the management of all your Unity projects and installations. You can get it from the official Unity website. The steps to download it change frequently, but at the time of writing this book, you need to do the following:
- Go to unity.com.
- Click on the Get started button, as shown in the following screenshot:

Figure 1.1: The Get started button on Unity’s website
- Click on the Student and hobbyist tab; then, under the Personal section, click on the Get started button, as illustrated in the following screenshot:

Figure 1.2: Choosing an individual/free license
- Scroll down to the section saying 1. Download the Unity Hub and click on the Download button according to your operating system. For Windows, click Download for Windows, and for Mac, click on Download for Mac. For Linux, there is an Instructions for Linux button with further info about how to install on that platform, but we won’t be covering Unity in Linux in this book:

Figure 1.3: Starting the download
- Execute the downloaded installer.
- Follow the instructions of the installer, which will mostly be clicking Next all the way to the end.
Now that we have Unity Hub installed, we must use it to install a specific Unity version. You can do this with the following steps:
- Start Unity Hub.
- If prompted to install a Unity version and/or create a license, please skip these steps with the corresponding Skip buttons (which may vary according to the Unity Hub version). This way to install Unity and licenses is only available the first time you run Unity Hub, but we are going to learn the way to do this that works after the first time.
- Log in to your account by clicking on the “person” icon at the top-left part of the window and selecting Sign in:
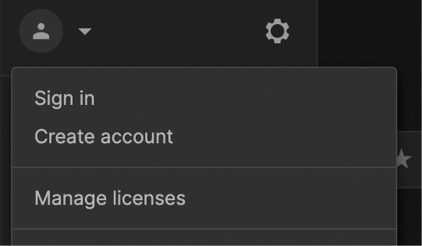
Figure 1.4: Signing into Unity Hub
- Here, you also have the option to create a Unity account if you haven’t already, as illustrated in the link labeled create one that appears in the Unity login prompt in the following screenshot:

Figure 1.5: Logging into Unity Hub
- Follow the steps on the installer and then you should see a screen like the one in the next image. If it is not the same, try clicking the Learn button at the top-left part of the screen:
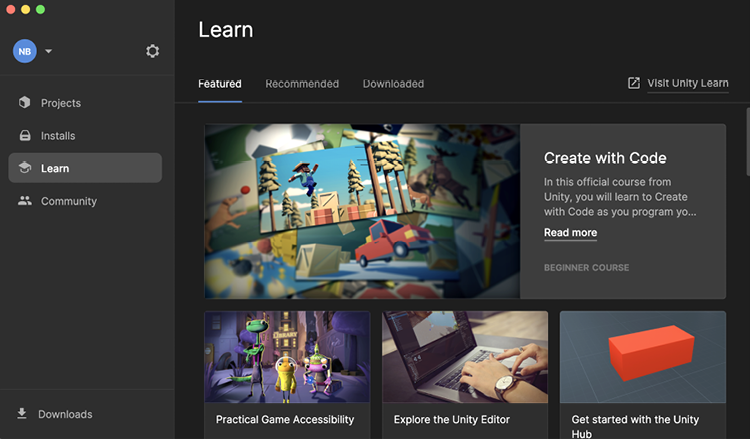
Figure 1.6: The Unity Hub window
- Click on the Installs button and check if you have Unity 2022 listed there.
- If not, press the Install Editor button at the top-right corner. This will show a list of Unity versions that can be installed from here:

Figure 1.7: Unity versions available to install
- You will see three tabs here. Official releases contains the latest versions of each major release already released. Pre-releases contains alpha and beta releases of Unity, so you can participate in these programs and test new features before they are officially released. Archive contains a link to the Unity Download Archive that contains every single Unity version released. For example, the official release at the moment of writing this is 2022.1.20, but the project is being developed in 2022.1.14, so you can install the correct version from the archive.
- Locate Unity 2022.1 in the Official releases tab.
- Click on the Install button at the right of Unity 2022.1.XXf1, where XX will vary according to the latest available version. At the moment of writing this book we are using 2022.1.14f1. You might need to scroll down to find this version. If not present, install the latest 2022 version available (for example, 2022.2.XX or 2022.3.XX). Newer versions might vary of what is seen in the book, if you find the images of the book being too different consider looking for Unity 2022.1.14 in the archive.
- A modules selection window will show up. Make sure the Visual Studio feature is checked. While this program is not needed to work in Unity, we will be using it later in the book. If you already have a C# IDE installed, feel free to skip it.
- Now, click the Continue button:
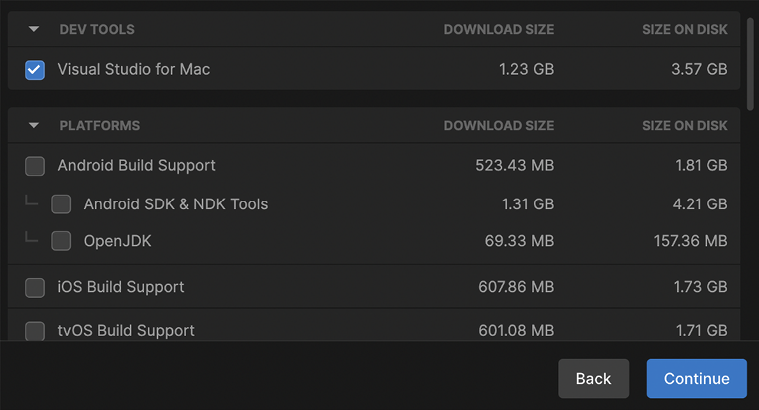
Figure 1.8: Selecting Visual Studio

Figure 1.9: Accepting Visual Studio’s terms and conditions
It is important to note that Visual Studio is the program we will use in Chapter 5, Introduction to Scripting with C# and Visual Scripting, to create our code. We do not need the other Unity features right now, but you can go back later and install them if you need them.
- You will see the selected Unity version downloading and installing. Wait for this to finish. If you don’t see it, click the Downloads button to reopen it:
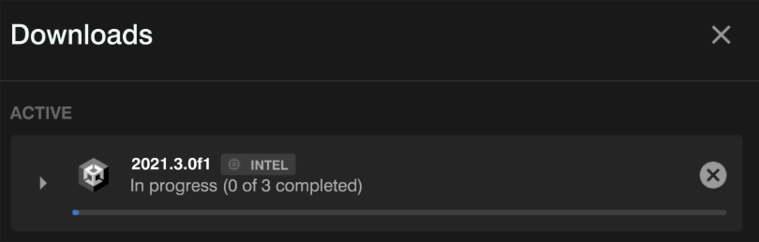
Figure 1.10: Currently active Unity Hub downloads
- If you decided to install Visual Studio, after Unity has finished installing, the Visual Studio Installer will automatically execute. It will download an installer that will download and install Visual Studio Community:

Figure 1.11: Installing Visual Studio
- To confirm everything worked, you must see the selected Unity version in the list of Installs of Unity Hub:
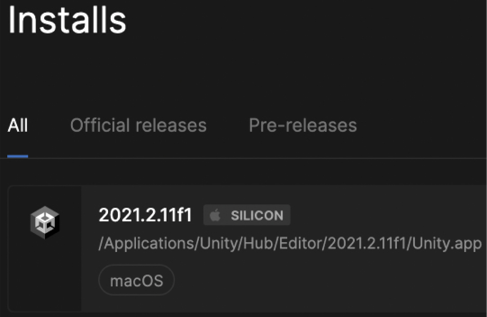
Figure 1.12: Available Unity versions
Now, before using Unity, we need to acquire and install a free license to make it work by doing the following:
- Click the Manage licenses button at the top-right corner of the Unity Hub. If you don’t see it, click your account icon at the top-left corner and click Manage licenses there:

Figure 1.13: The Manage licenses button to press in order to acquire a free license
- Click the Add button in the Licenses list window:

Figure 1.14: The Licenses list window’s Add button
- Click the Get a free personal license button:

Figure 1.15: Option to get a free personal license
- Read and accept the terms and conditions if you agree with them by clicking the Agree and get personal edition license button:

Figure 1.16: The button to accept the terms and conditions
Remember that the preceding steps may be different in new Unity Hub versions, so just try to follow the flow that Unity designed—most of the time, it is intuitive.
Now it is time to create a project using Unity.
Creating projects
Now that we have Unity installed, we can start creating our game. To do so, we first need to create a project, which is basically a folder containing all the files that your game will be composed of. These files are called assets and there are different types of them, such as images, audio, 3D models, script files, and so on. In this section, we will see how to manage a project, addressing the following concepts:
- Creating a project
- Project structure
Let’s learn first how to create a blank project to start developing our project.
Creating a project
As with Unity installations, we will use the Unity Hub to manage projects. We need to follow these next steps to create one:
- Open the Unity Hub and click on the Projects button, and then click on New project:

Figure 1.17: Creating a new project in Unity Hub
- Pick the 3D (URP) template as we will be creating a 3D game with simple graphics, prepared to run on every device Unity can be executed on, so the Universal Render Pipeline (or URP) is the better choice for that. In Chapter 10, Materials and Effects with URP and Shader Graph, we will be discussing exactly why.
- If you see a Download template button, click it; if not, that means you already have the template:

Figure 1.18: Downloading the 3D URP template
- Choose a Project name and a Location, and click Create project:
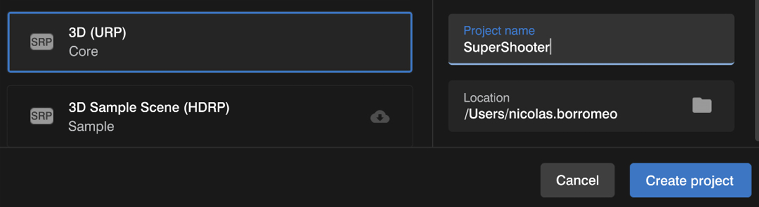
Figure 1.19: Selecting the Universal Render Pipeline template
- Unity will create and automatically open the project. This can take a while, but after that you will see a window similar to the one in the following image. You might see the dark-themed editor instead, but for better clarity we will use the light theme throughout the book. Feel free to keep the dark theme:
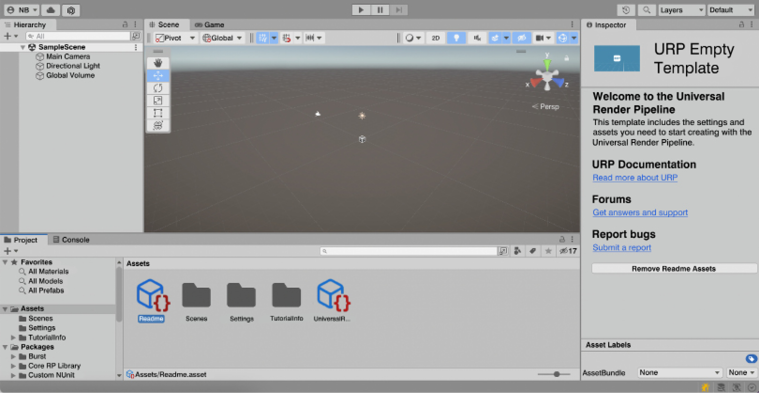
Figure 1.20: The Unity Editor window
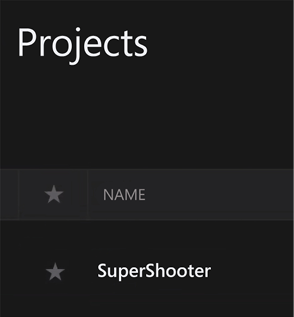
Figure 1.21: Reopening the project
Now that we have created the project, let’s explore its structure.
Project structure
We have just opened Unity, but we won’t start using it until the next chapter. Now, it’s time to see how the project folder structure is composed. To do so, we need to open the folder in which we created the project. If you don’t remember where this is, you can do the following:
- Right-click the Assets folder in the Project panel, located at the bottom part of the editor.
- Click the Show in Explorer option (if you are using a Mac, the option is called Reveal in Finder). The following screenshot illustrates this:
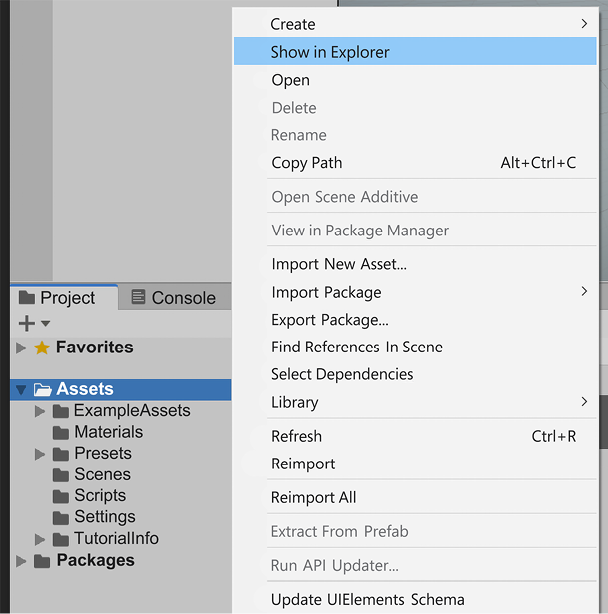
Figure 1.22: Opening the project folder in Explorer
- Then, you will see a folder structure similar to this one (some files or folders may vary):

Figure 1.23: Unity project folder structure
If you want to move this project to another PC or send it to a colleague, you can just compress all those files and send it to them as a ZIP file, but not all the folders are necessary all of the time. The important folders are Assets, Packages, and ProjectSettings. Assets will hold all the files we will create and use for our game, so this is a must. We will also configure different Unity systems to tailor the engine to our game; all the settings related to this are in the ProjectSettings and UserSettings folders. Finally, we will install different Unity modules or packages to expand its functionality, so the Packages folder will hold which ones we are using.
It’s not necessary to copy the rest of the folders if you need to move the project elsewhere or add it to any versioning system, but let’s at least discuss what the Library folder is, especially considering it’s usually a huge size. Unity needs to convert the files we will use to its own format in order to operate, and an example would be audio and graphics. Unity supports MPEG Audio Layer 3 (MP3), Waveform Audio File Format (WAV), Portable Network Graphics (PNG), and Joint Photographic Experts Group (JPG) files (and much more), but prior to using them, they need to be converted to Unity’s internal formats, a process called Importing Assets. Those converted files will be in the Library folder. If you copy the project without that folder, Unity will simply take the original files in the Assets folder and recreate the Library folder entirely. This process can take time, and the bigger the project, the more time involved.
Keep in mind that you want to have all the folders Unity created while you are working on the project, so don’t delete any of them while you work on it, but if you need to move an entire project, you now know exactly what you need to take with you.
Summary
In this chapter, we reviewed how the Unity versioning system works. We also saw how to install and manage different Unity versions using Unity Hub. Finally, we created and managed multiple projects with the same tool. We will use Unity Hub a lot, so it is important to know how to use it initially. Now, we are prepared to dive into the Unity Editor.
In the next chapter, we will start learning the basic Unity tools to author our first level prototype.
Join us on Discord!
Read this book alongside other users, Unity game development experts, and the author himself.
Ask questions, provide solutions to other readers, chat with the author via Ask Me Anything sessions, and much more.
Scan the QR code or visit the link to join the community.
