
Chapter 13: Planning and Implementing Privileged Access and Access Reviews
The previous chapter covered the planning and implementation process for entitlement management. This includes life cycle management for external users and managing the terms of use. In this chapter, we will discuss planning and implementing our privileged access for administrator accounts and managing them with access reviews. This will include the benefits of using Privileged Identity Management and how to audit these privileged assignments.
In this chapter, we're going to cover the following main topics:
- Defining a privileged access strategy for administrative users
- Configuring Privileged Identity Management for Azure AD roles and Azure resources
- Creating and managing break-glass accounts
- Planning for and automating access reviews
- Analyzing PIM audit history and reports
Technical requirements
In this chapter, we will continue to explore configuring a tenant for use in Microsoft 365 and Azure. There will be exercises that will require access to Azure AD. If you have not yet created the trial licenses for Microsoft 365, please follow the directions provided within Chapter 1, Preparing for Your Microsoft Exam.
Defining a privileged access strategy for administrative users
In the previous chapter, we discussed Identity Governance as it pertains to user access packages for applications and SharePoint sites. A major area of identity governance that we need to manage is privileged access based on administrative user accounts. Within this book, we have identified administrator roles necessary for managing services within Azure AD. As we continue to add and activate these administrative roles within our tenant, we begin to increase the attack surface in that someone who gains unauthorized access to a compromised account may have elevated privileges.
As identity and access administrators, it is our duty to protect and defend this layer through utilizing the concepts of zero trust and the principle of least privilege to assign and manage these administrator accounts. You should have a clear strategy with defined job tasks for every administrator account to plan for the proper assignment of these roles. This strategy should include meetings with stakeholders and discussing the roles that each department member requires to complete their job tasks. This will determine the level of just enough access that a user requires. It is easy to make everyone a global administrator, but that is not the best practice in securing access to information and resources. In addition, you should be monitoring the activity of these accounts and verifying the continued requirement for users to have these privileged access roles.
To enforce the concepts of zero trust, you have the capability to assign Conditional Access policies to these accounts. This was discussed in Chapter 9, Planning, Implementing, and Administering Conditional Access and Azure Identity Protection. To address and protect privileged assignments, Azure AD provides Privileged Identity Management (PIM) within the set of Identity Governance solutions.
PIM provides just-in-time privileged access to users, which means users are administrators for a short period of time, rather than the practice in the past of permanently setting a user as an administrator. Since users are only set active administrator roles for a short window of time, this reduces the attack surface and potential for these user accounts to expose privileged access to an attack. PIM provides an approval and justification process for activating privileged role assignments, which includes notifications when a role is activated and an audit trail of these activations.
PIM requires an Azure AD Premium P2 license. To assign PIM to member accounts, each user must have this license. However, for guest users who require privileged access with PIM, five guests can be assigned PIM roles for every Azure AD Premium P2 license that you have in your tenant. For additional information on licensing for PIM, you can visit this link: https://docs.microsoft.com/en-us/azure/active-directory/privileged-identity-management/subscription-requirements.
PIM can be accessed directly by searching for Privileged Identity Management in the search bar in the Azure portal or it can be found in the Azure AD Identity Governance tile, as shown in Figure 13.1:
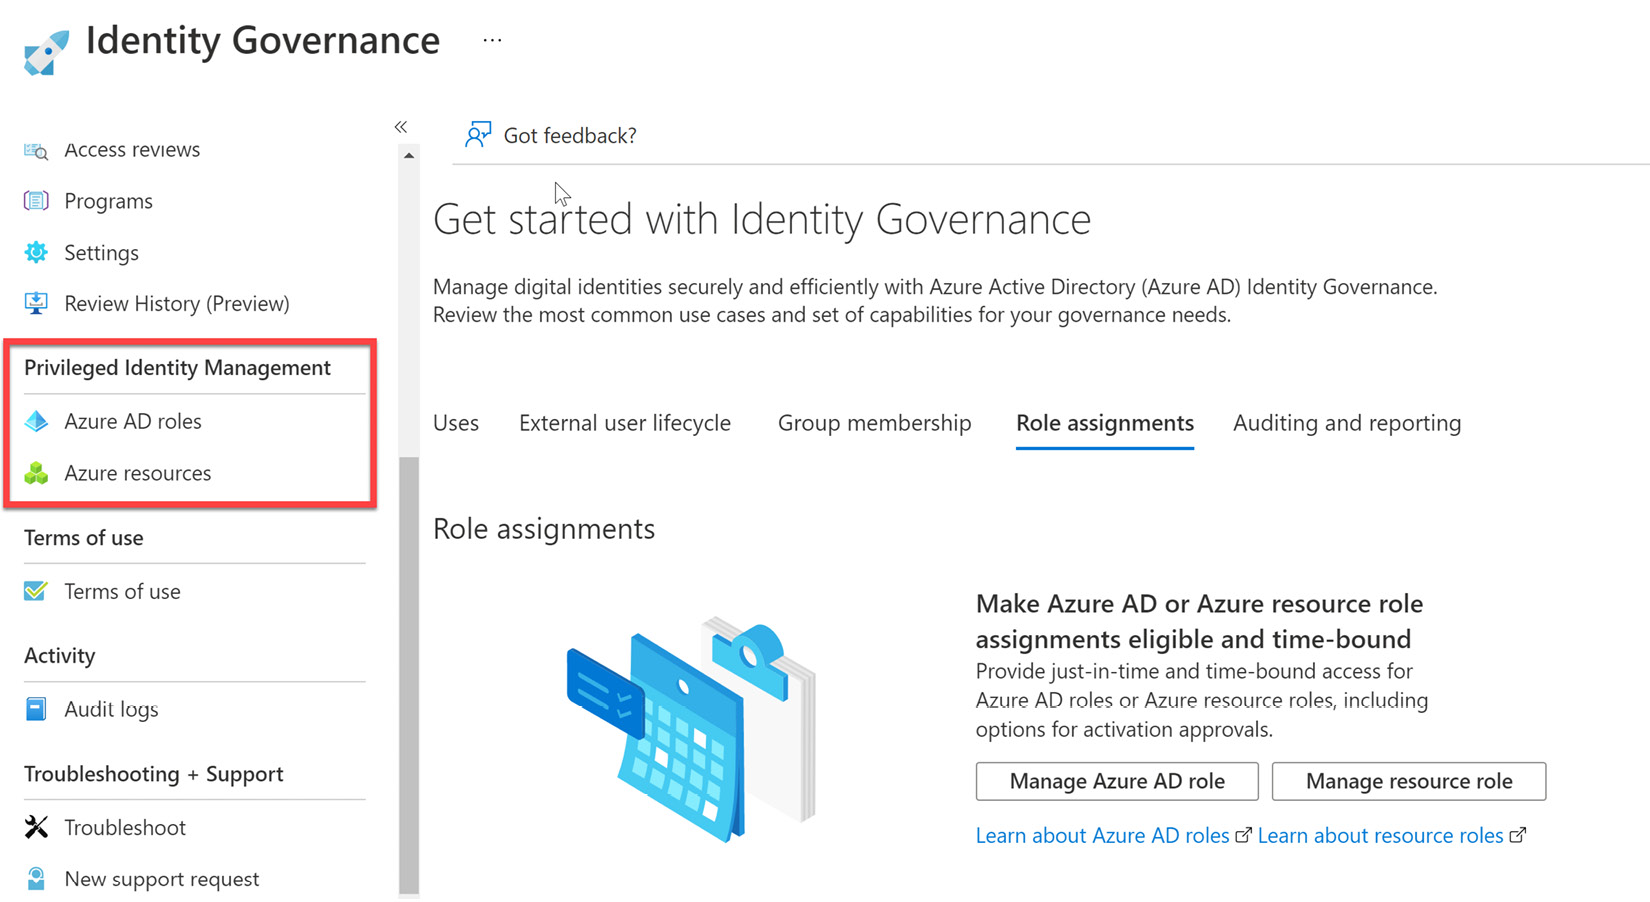
Figure 13.1 – PIM within Identity Governance services
Let's now discuss how to configure PIM and assign roles to users.
Configuring PIM for Azure AD roles and Azure resources
In the previous section, we discussed planning role assignments and defined PIM. This section will discuss how to configure PIM for Azure AD roles and resources:
- Navigate in the search bar for Privileged Identity Management. Under the Quick start menu, select Manage, as shown in Figure 13.2:
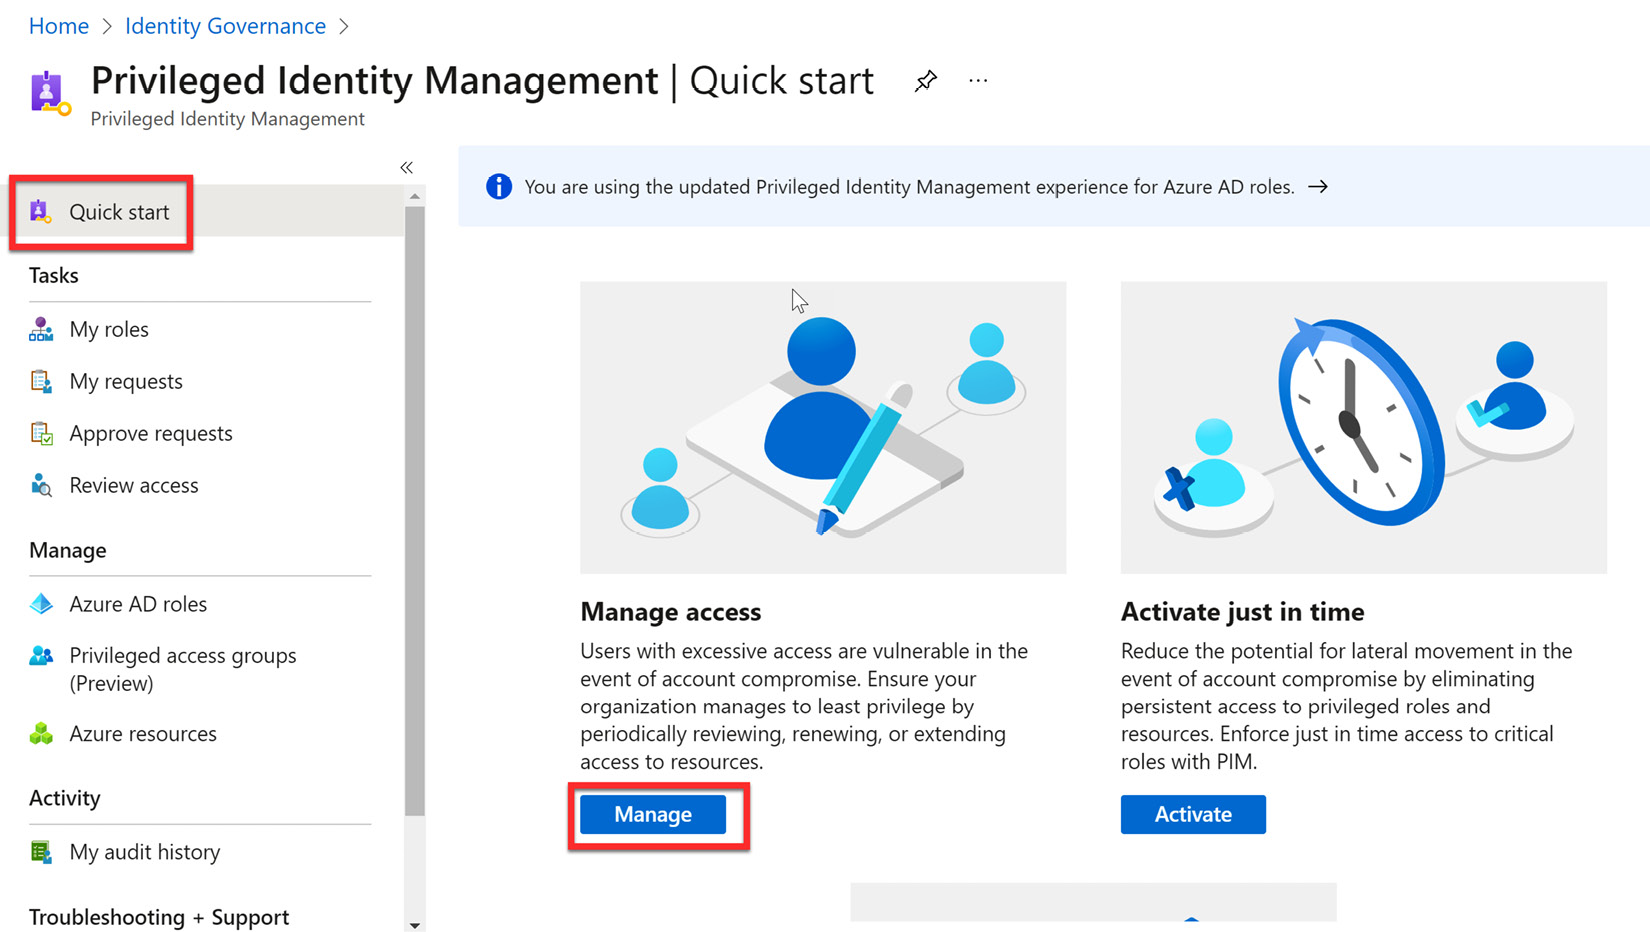
Figure 13.2 – Managing PIM access
- Select Roles under Manage in the menu bar and then select + Add assignments to create a new PIM role assignment:

Figure 13.3 – Adding a new PIM assignment
- In the Add assignments tile, choose the Select role dropdown and find Privileged Role Administrator:
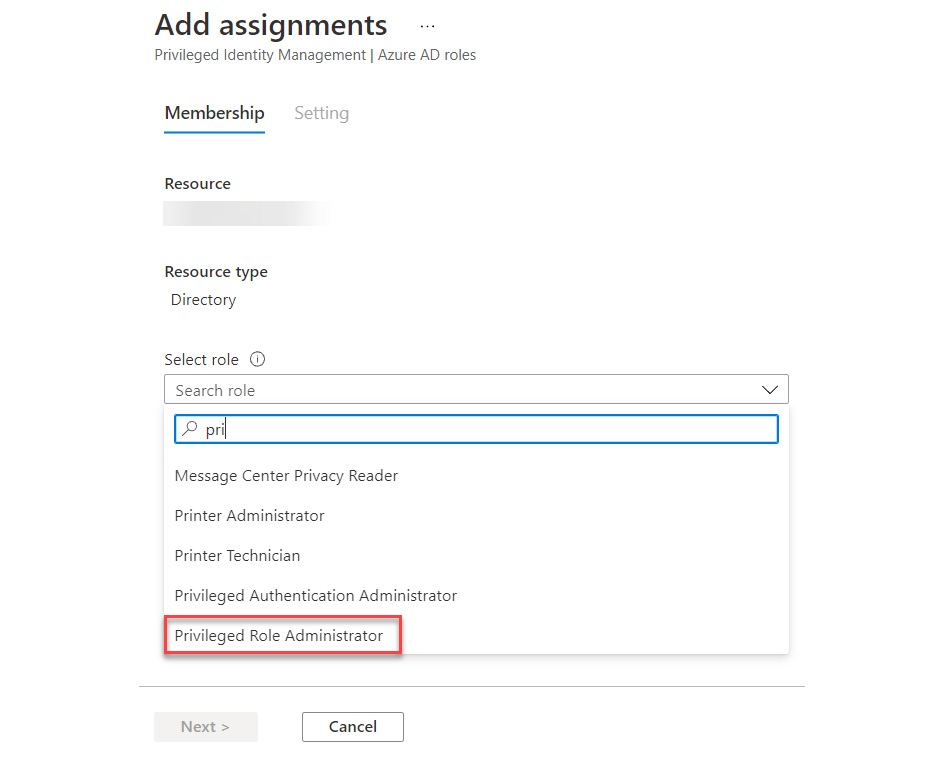
Figure 13.4 – Selecting the Privileged Role Administrator role
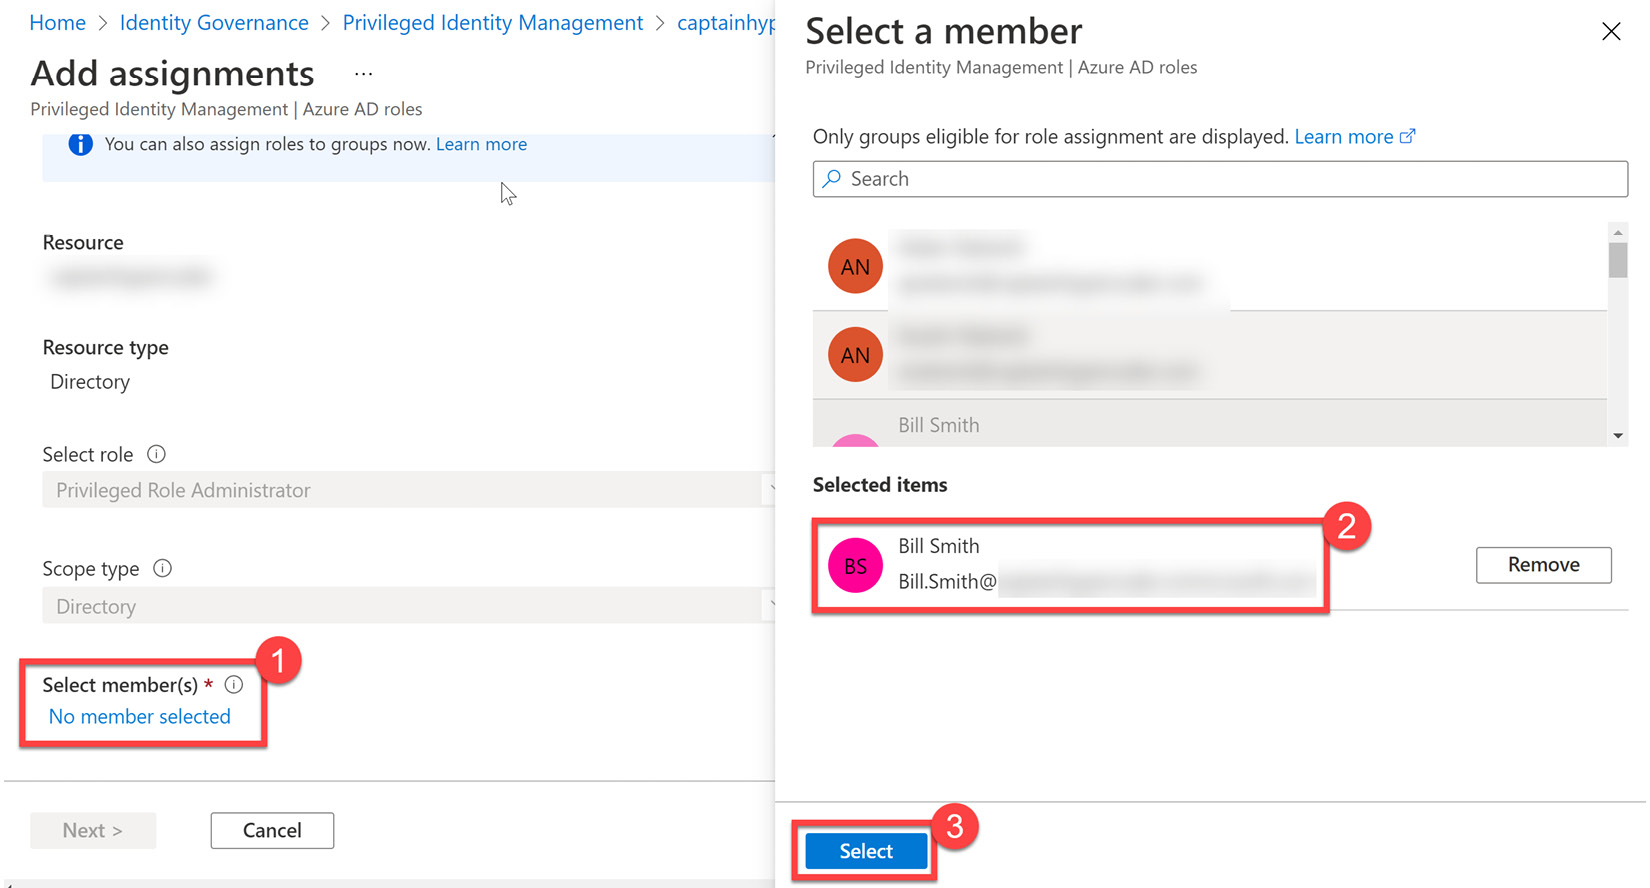
Figure 13.5 – Selecting members for role assignment
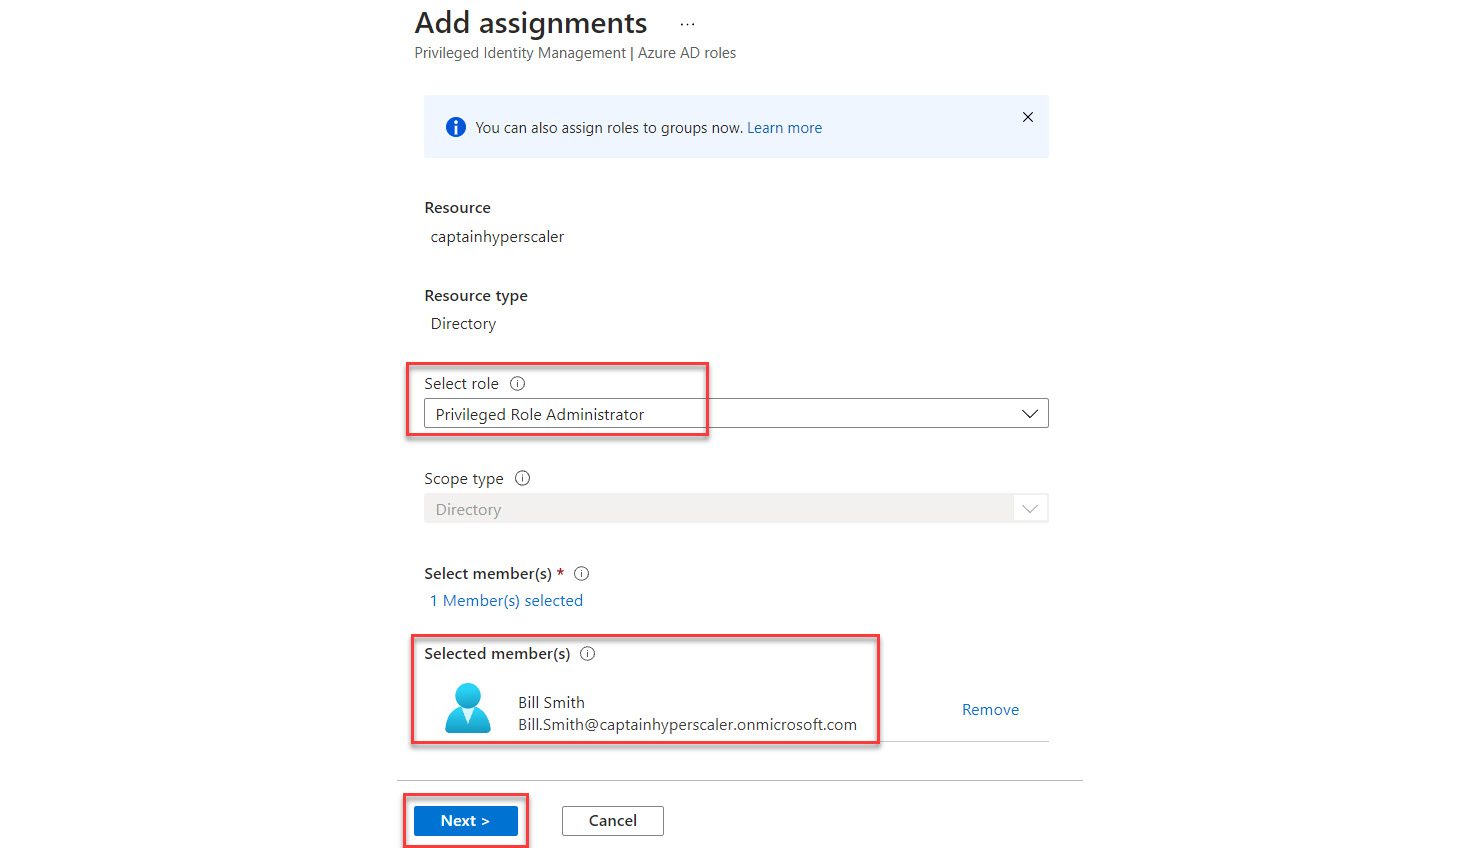
Figure 13.6 – Selecting Next to continue the assignment configuration
- On the next tile, verify that Eligible is the Assignment type option and deselect the Permanently eligible checkbox. Leave the assignment start and end dates as their default values, as shown in Figure 13.7. Select Assign:
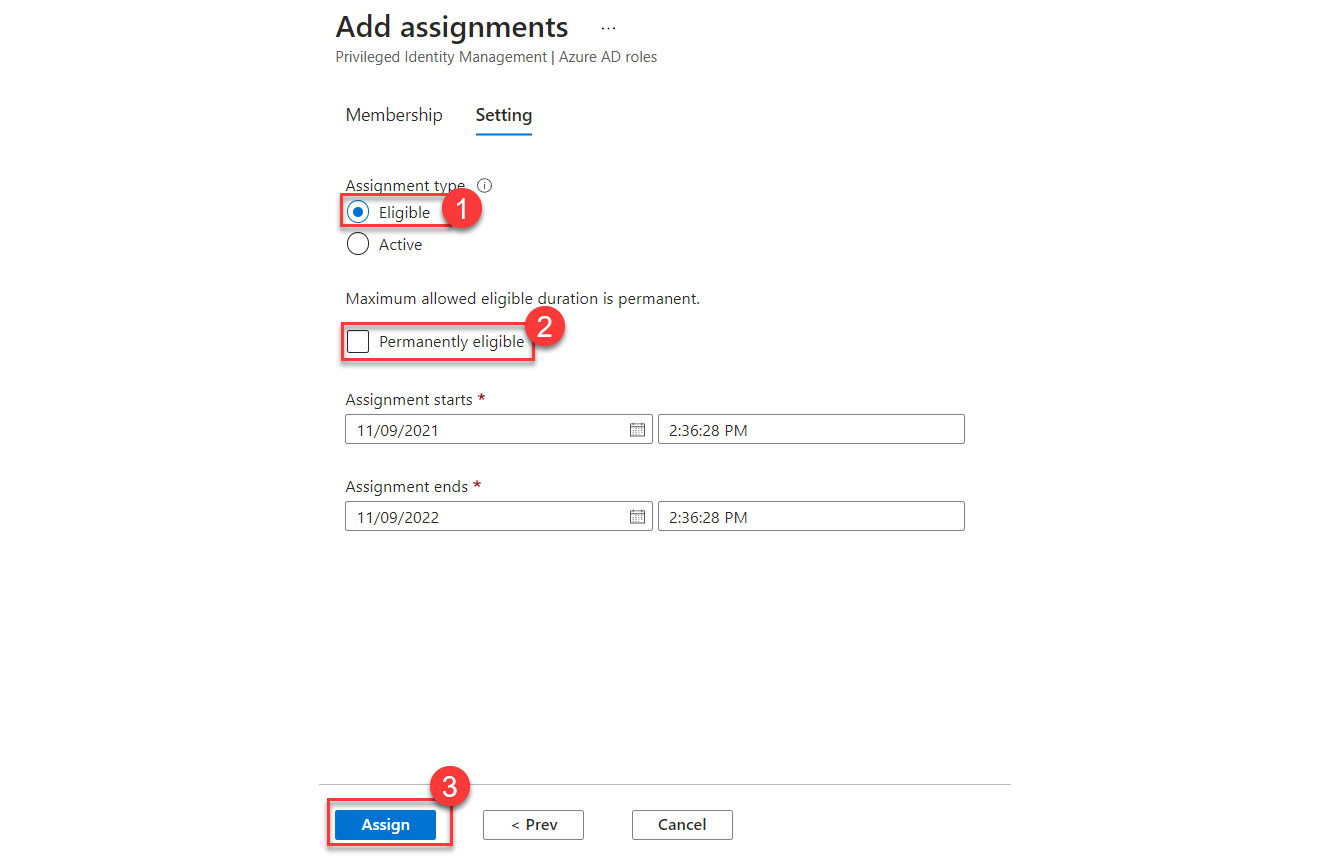
Figure 13.7 – Role assignment settings
- The new role assignment will appear in the assignments tile under the Eligible assignments tab. To change this eligible assignment to active, choose Update, as the arrow shows in Figure 13.8:
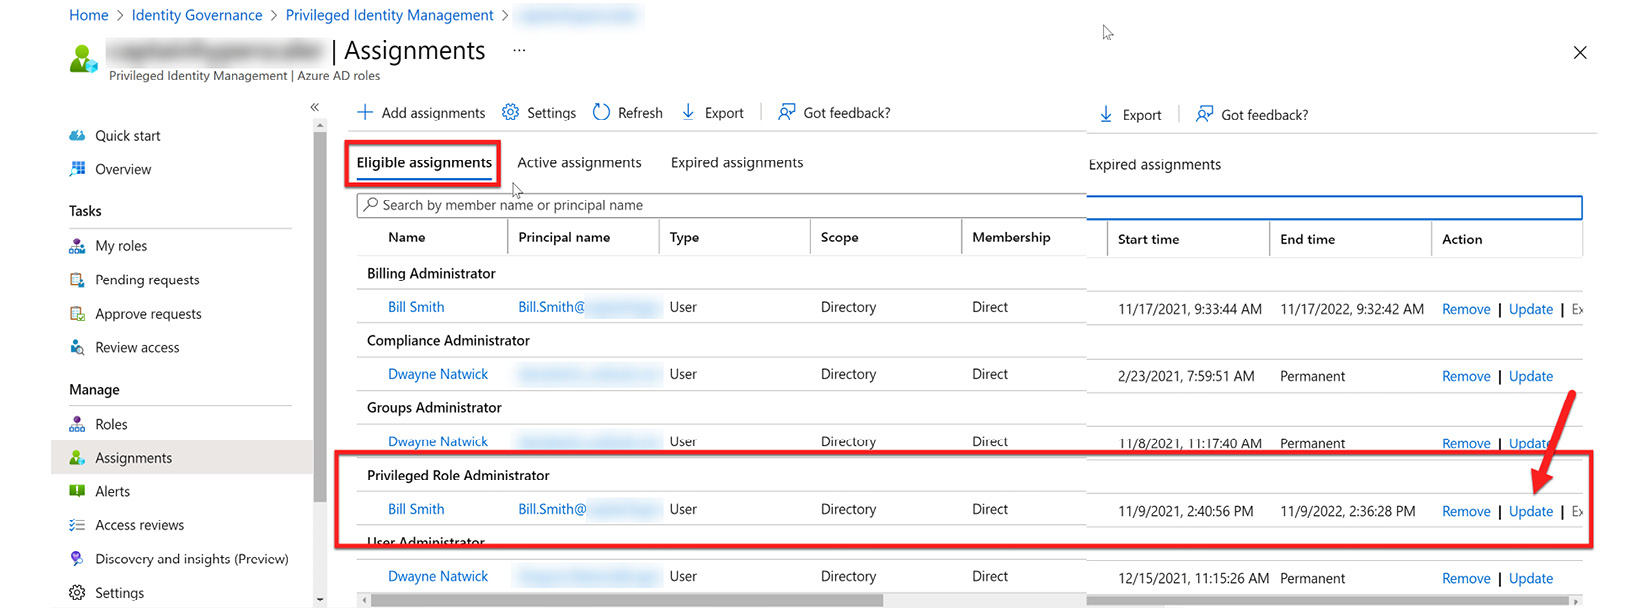
Figure 13.8 – Updating the role assignment
- In Membership settings, change the Assignment type dropdown to Active, deselect Permanently assigned, set an Assignment ends date, and provide a justification. Select Save to save the changes:
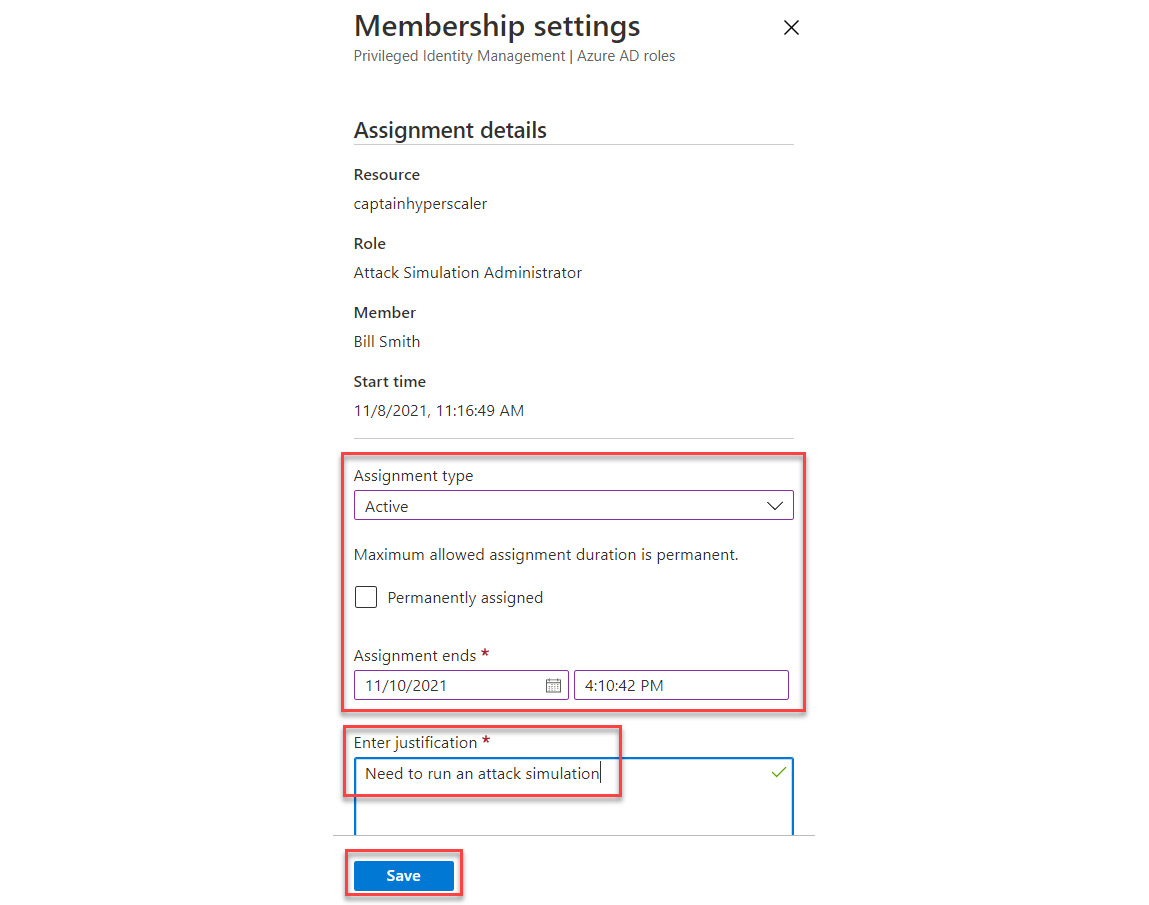
Figure 13.9 – Changing membership settings to Active
- On the Assignments tile, navigate to the Active assignments tab, and you will see the now active role assignment for your user with the end date that you set:

Figure 13.10 – Active assignments
You have now created a Privileged Role assignment and activated it within Privileged Identity Management. Once the end time is reached, the privileged role is automatically removed and given eligible status. No administrator intervention is required.
In the next section, we will discuss creating and managing break-glass accounts.
Creating and managing break-glass accounts
As we continue to secure our identities with security and governance features, such as Multi-Factor Authentication, Conditional Access policies, Identity Governance, and PIM solutions, it is important to make sure that we do not mistakenly get locked out of Azure AD. To protect against potential lockout and to make sure that access is still available in a potential emergency situation, you should configure at least two emergency-access or break-glass accounts. These accounts are accounts of high privileges with access at the level of a global administrator. These accounts are not protected with Multi-Factor Authentication, meaning that they can gain access quickly to resources when other administrator accounts cannot gain access. They should also be excluded from all Conditional Access policies. The use of these accounts should be limited to this scenario and the credentials should be locked away and kept in a secure location, such as a password vault, until the time that they are absolutely needed.
Break-glass accounts are member accounts that are tied directly to the Azure AD tenant. Therefore, they can be utilized in situations where federated identity providers are being utilized for authentication and there is an outage to that identity provider. Other use cases would be that the global administrator has lost access to their MFA device to verify their identity, a global administrator has left the company and it is needed to delete that account, and a storm has taken down cellular services and you cannot verify with MFA.
Additional information on emergency-access or break-glass accounts can be found at this link: https://docs.microsoft.com/en-us/azure/active-directory/roles/security-emergency-access.
Break-glass accounts should not be associated with any particular users within the Azure AD tenant. The steps to create and secure these accounts are as follows:
- The first step in creating a break-glass account is to create the user account in Azure AD. Go to Azure AD | Users and select + New user:

Figure 13.11 – Creating a new user
- Create the emergency admin user. Do NOT use the custom domain for this account; use the tenant.onmicrosoft.com domain, where the tenant is the name of your tenant. When creating a password, use a strong password generator to create the password. Save that password and lock it away in a safe place.
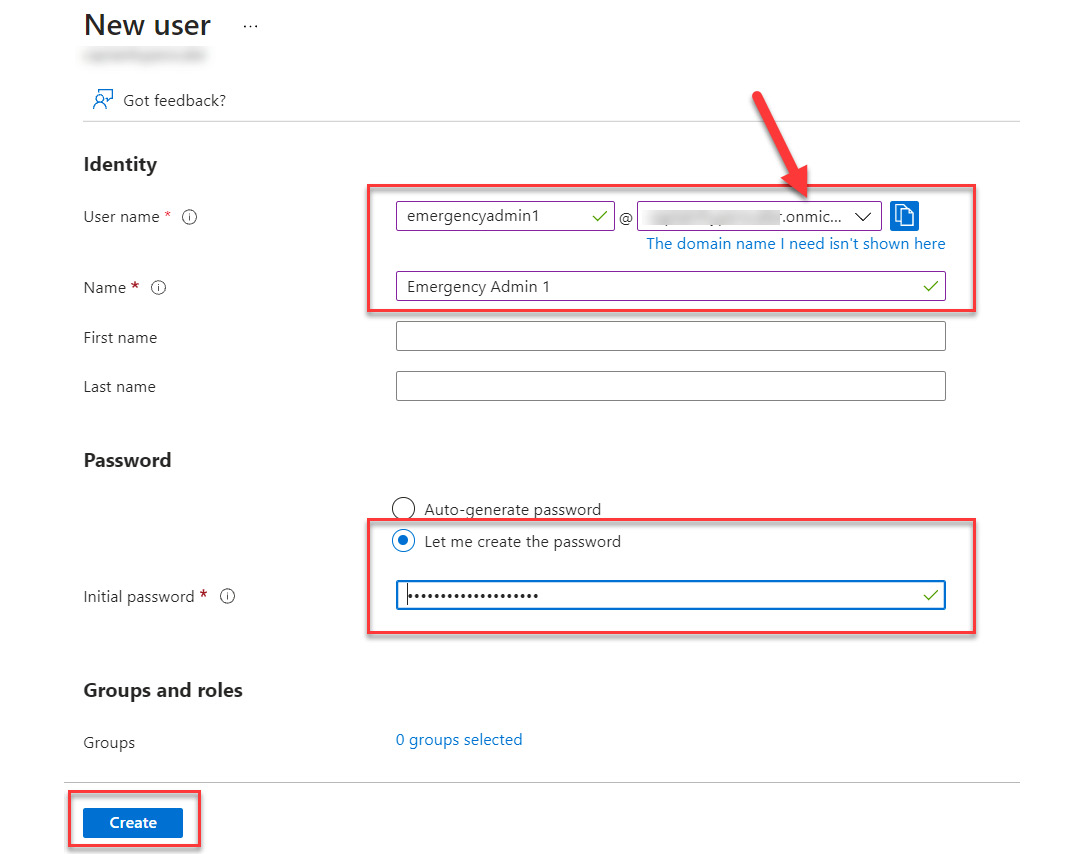
Figure 13.12 – Creating the username and password
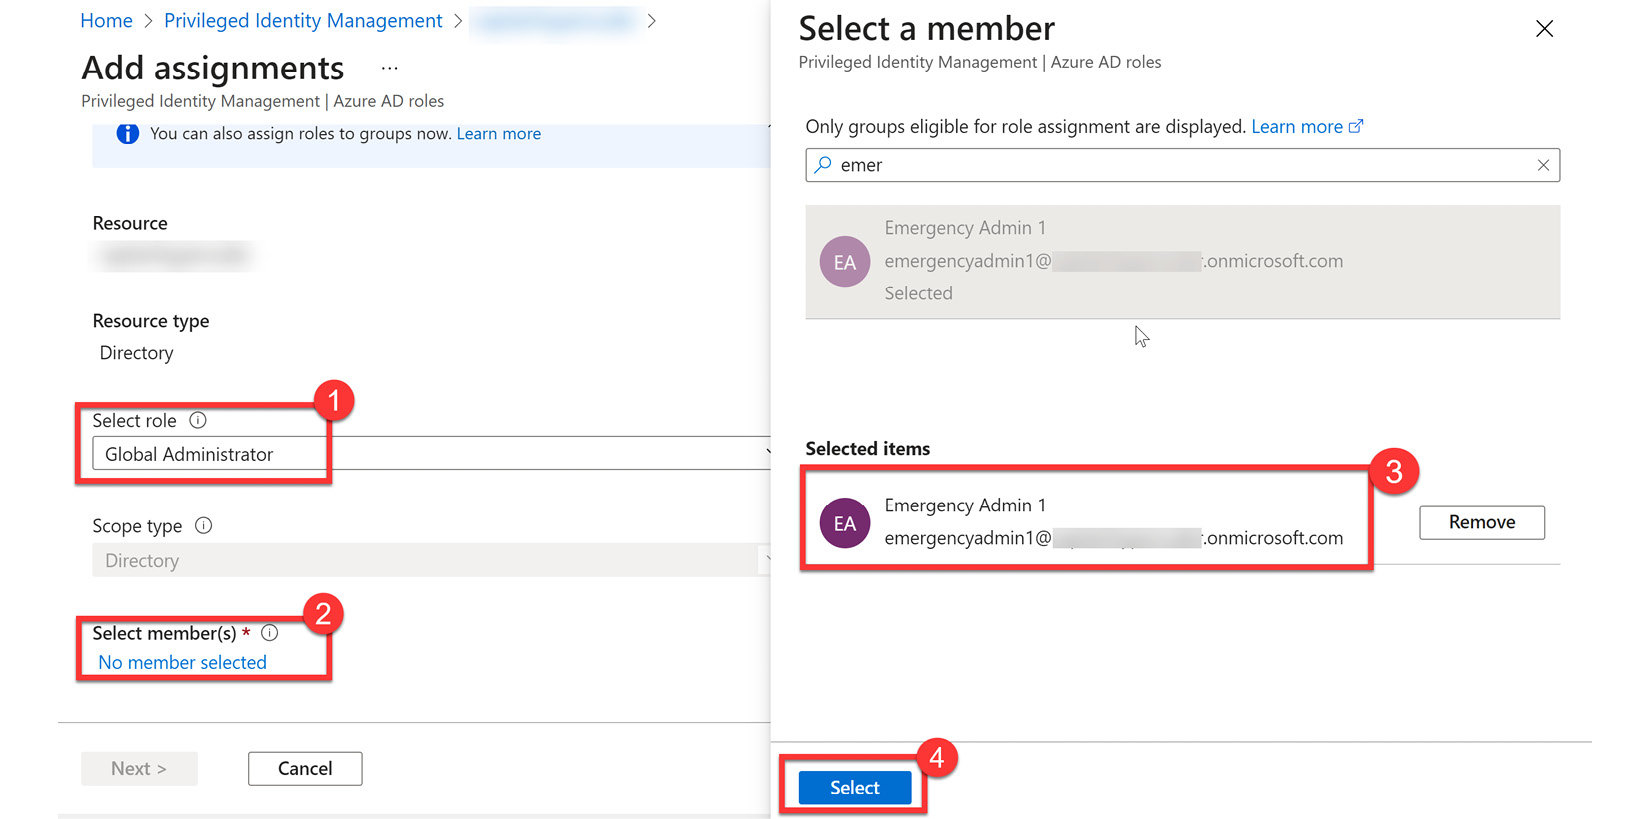
Figure 13.13 – Creating the Global Administrator role assignment
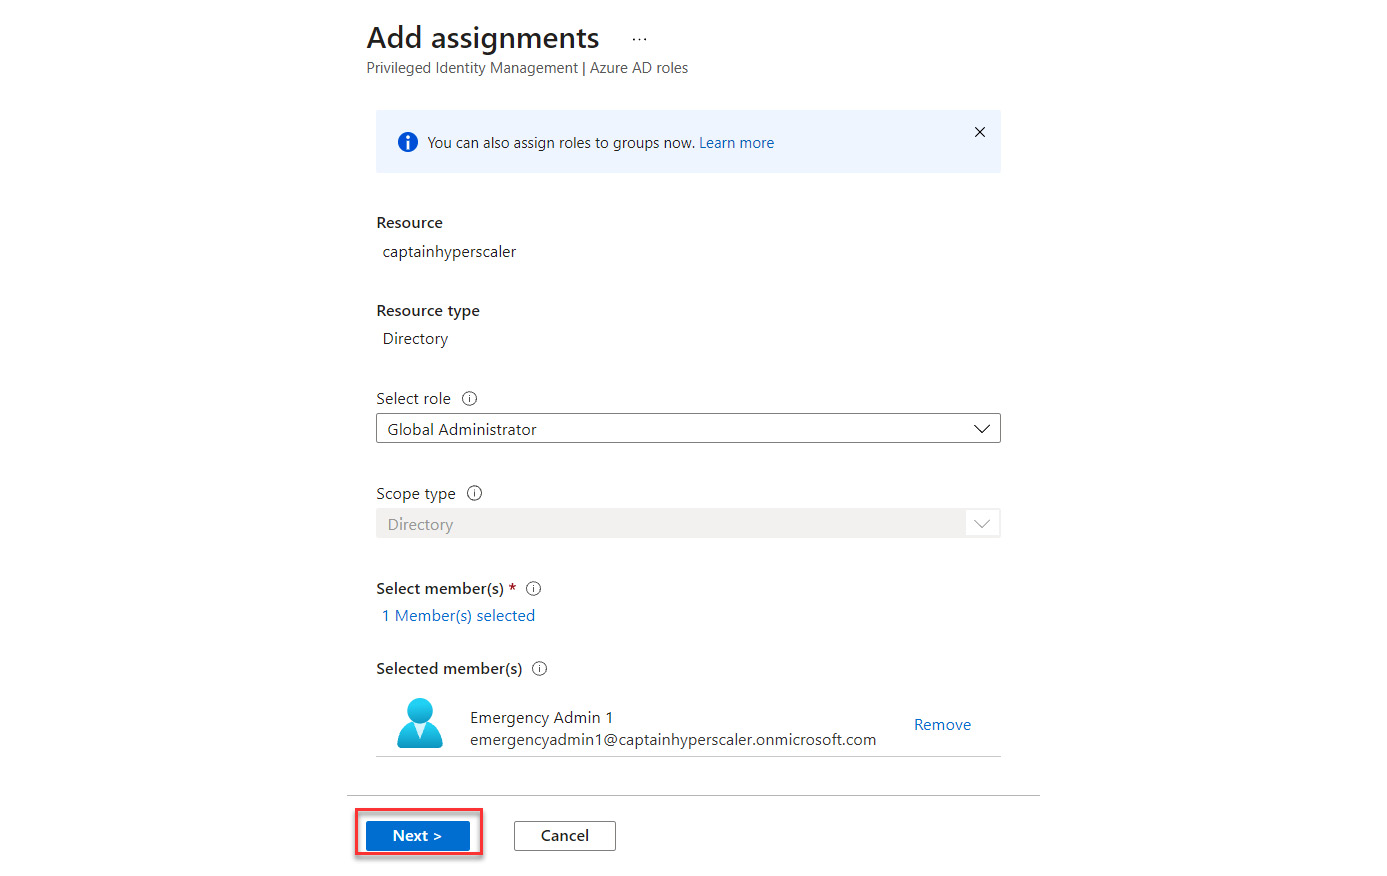
Figure 13.14 – Selecting Next to continue
- When configuring the role assignment, it should be made active and permanent to avoid being locked out:
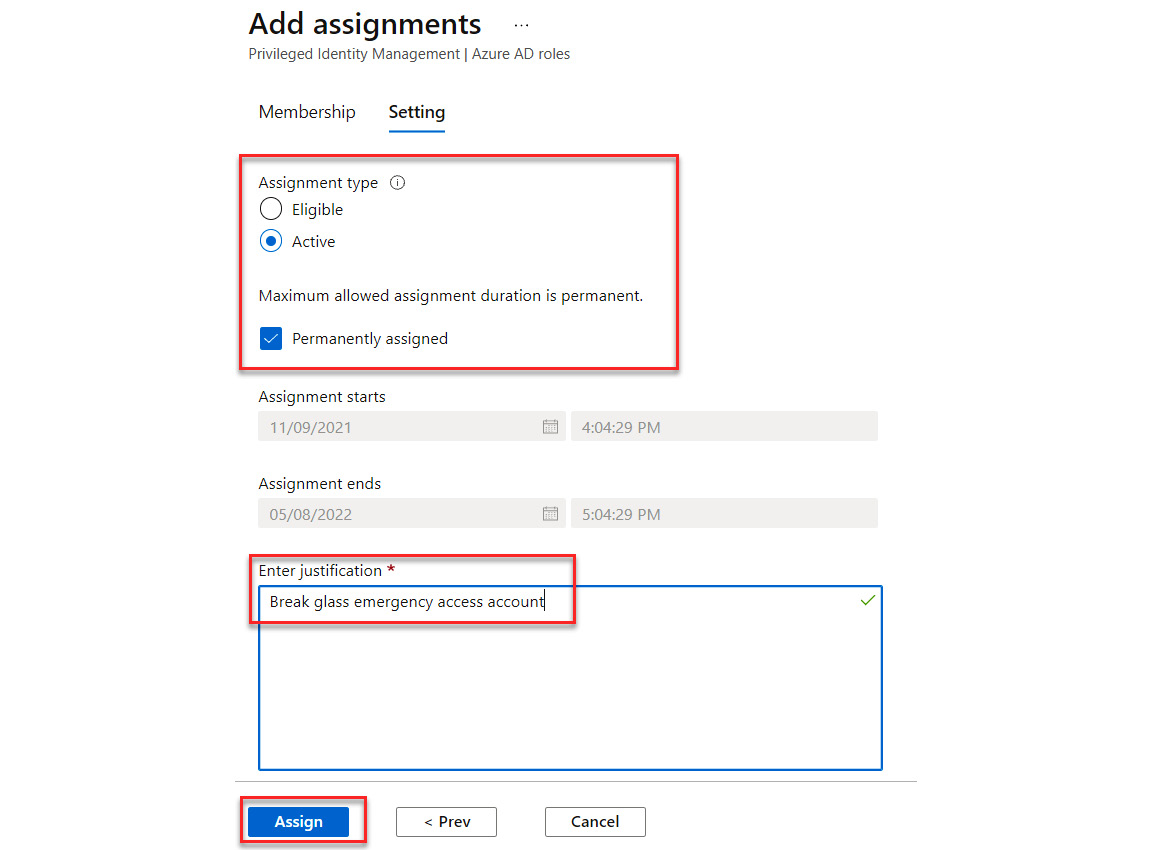
Figure 13.15 – Creating a permanent assignment for the account
You have now configured a break-glass or emergency-access account. You should secure the credentials in a safe place and have directions on how to access the account within your company business continuity plan. Additional information on monitoring these accounts can be found here: https://docs.microsoft.com/en-us/azure/active-directory/roles/security-emergency-access#monitor-sign-in-and-audit-logs.
The next section will discuss planning and automating access reviews for privileged access users.
Planning for and automating access reviews
In terms of an access life cycle, you should consider the access life cycle of your member users and your guest users, and especially your privileged administrators. These should be handled differently, as the life cycle of our member users is based on employment within the company being terminated or changes in a role, and the access that is required for the department or team that they belong to. Guest users are provided access based on a partnership and external collaboration trust relationship. Chapter 12, Planning and Implementing Entitlement Management, discussed using access reviews for member and guest user entitlements.
Privileged administrative user access should be regularly reviewed in a similar manner. Since these are elevated access assignments, the review of these should be done on a consistent basis as identified by the policies of the company. Unused and unnecessary privileged assignments should be removed as soon as possible. Automated removal should also be configured for users who are no longer with the company or have changed departments within the company. The steps for access review configuration and automation are provided as follows:
- Access reviews can manage the access life cycle. Within Privileged Identity Management, this is found under the Manage menu, as shown in Figure 13.16:
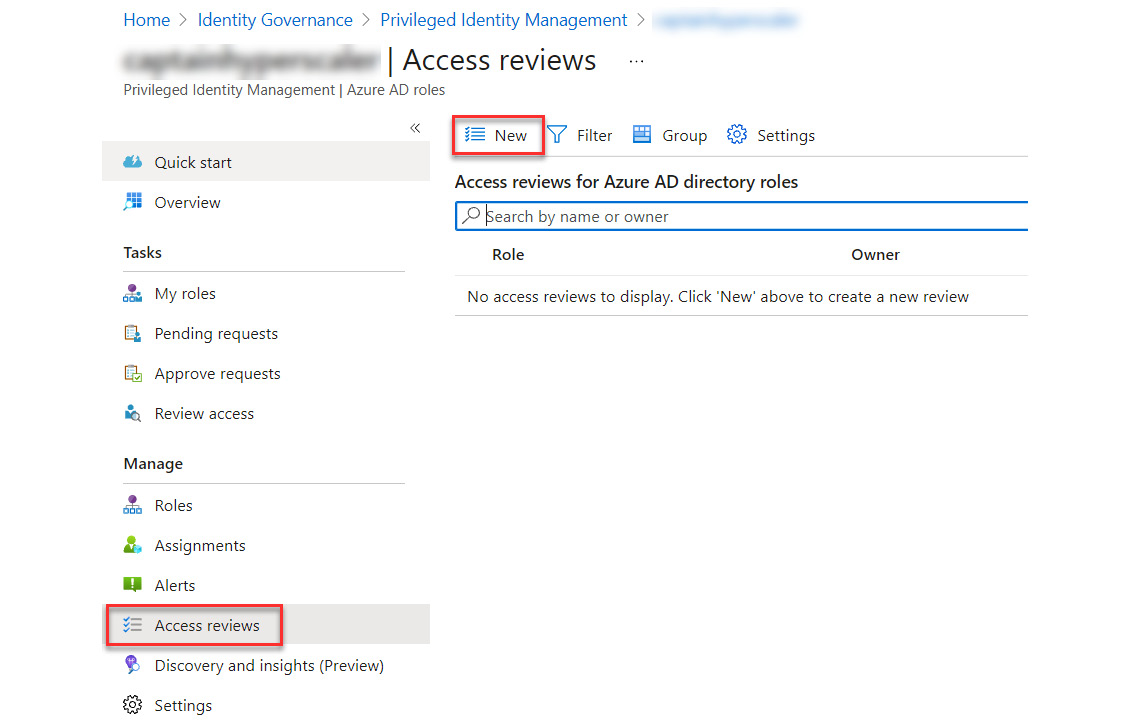
Figure 13.16 – Creating a new access review
- Name the access review and set the start date and frequency. Duration is how long the access review will run before it expires. You can set the end to be a specific date or after a number of occurrences. The example is creating a monthly review for all users and groups. Then, select the user scope of the access review, as shown in Figure 13.17:
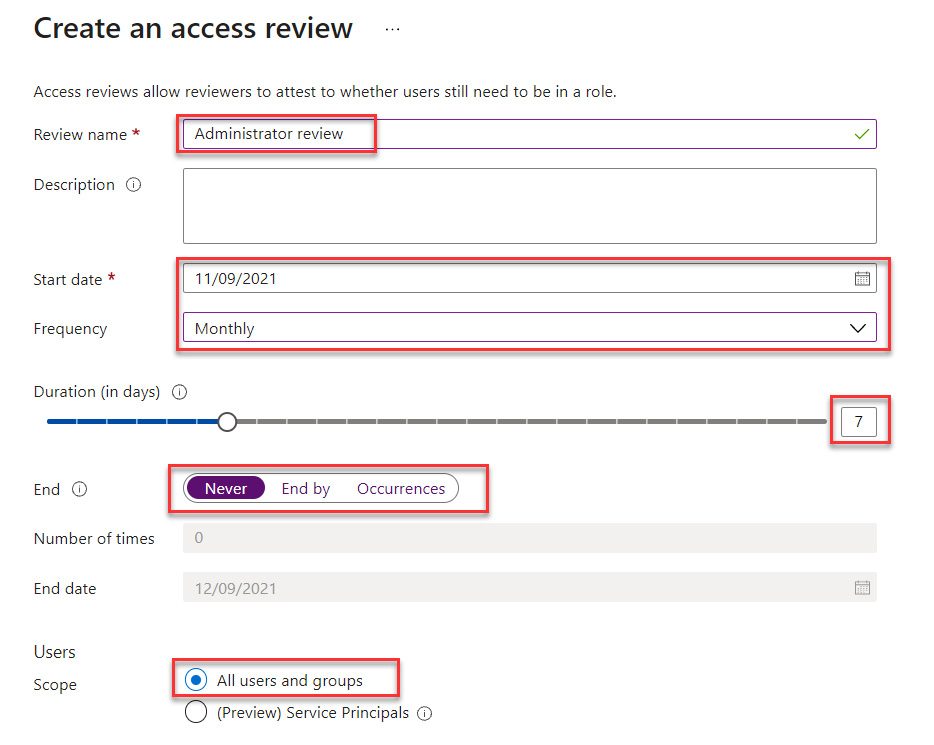
Figure 13.17 – Configuring the access review
- Select the scope for the roles that will be part of this scope. You can add all roles or only select specific roles for certain reviews, with administrator roles being the primary focus:
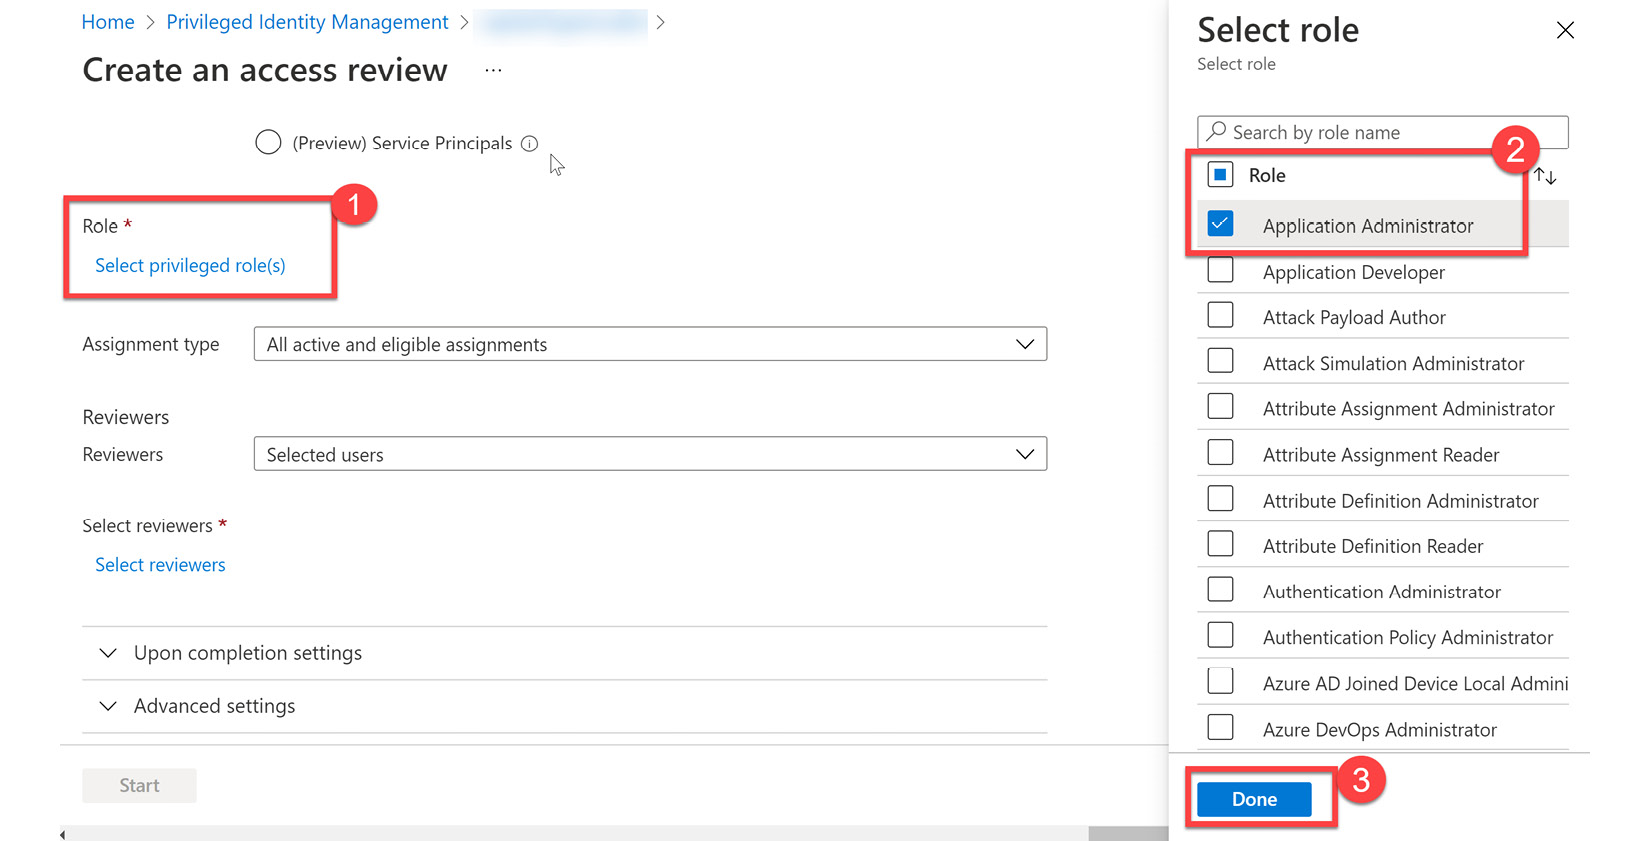
Figure 13.18 – Selecting the roles to review
- The next step is to determine the reviewers. These reviewers can be the member themselves, who will do a self-review, or can be assigned to supervisors if reviewing access for an entire department. It is a best practice that another administrator completes these reviews rather than a self-review. You can also set the action when a reviewer does not respond to automatically remove that privileged access from the member. A best practice would be to remove a review when no response is received.
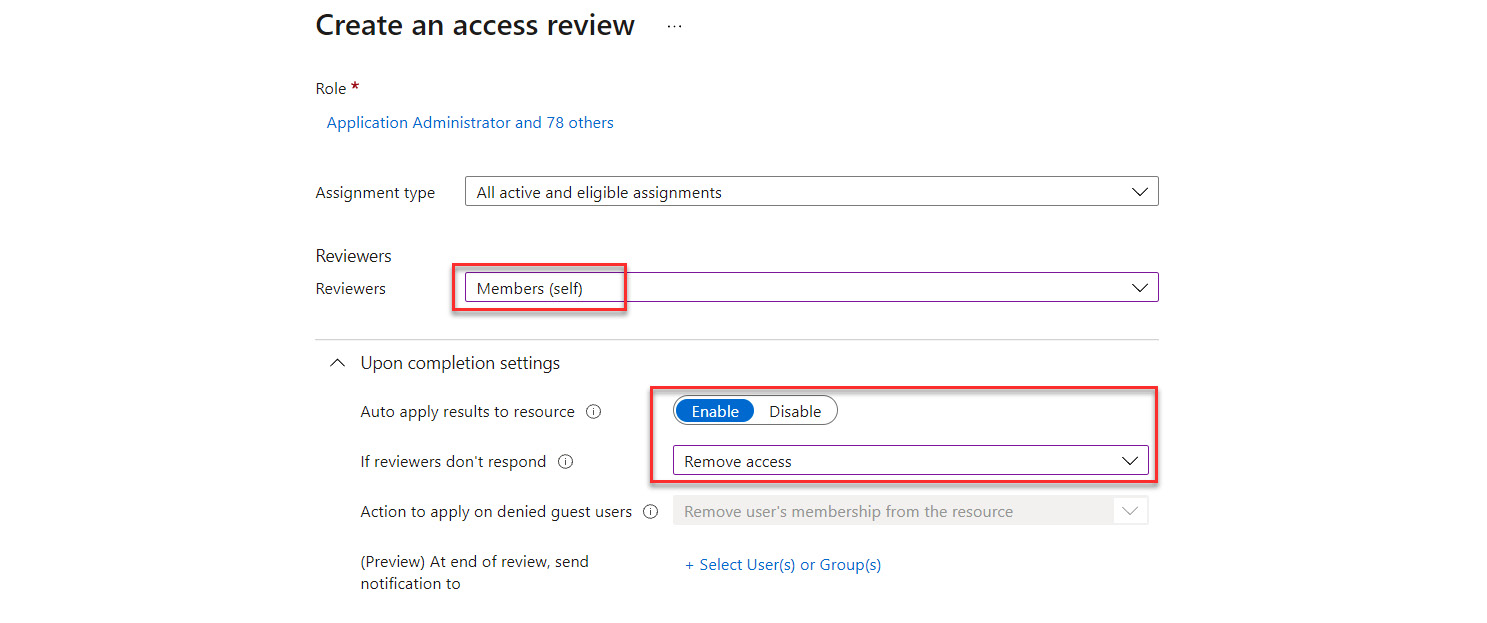
Figure 13.19 – Settings for the access review
- The advanced settings allow you to put a message as part of the review, as shown in Figure 13.20. Select Start to initiate the access review:
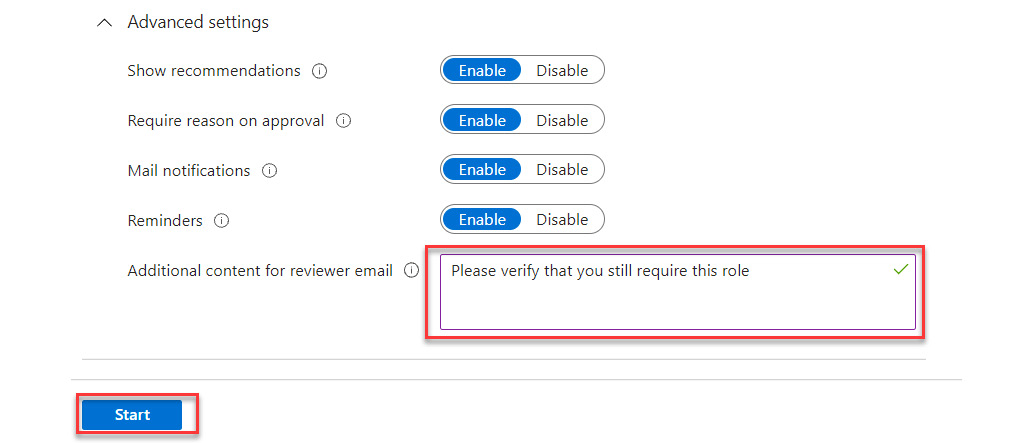
Figure 13.20 – Advanced access review settings
- When the access review is created, the access review list will populate with the roles and owners of the reviews, as shown in Figure 13.21:

Figure 13.21 – Access reviews active
- Members who are being reviewed will receive an email, similar to Figure 13.22:
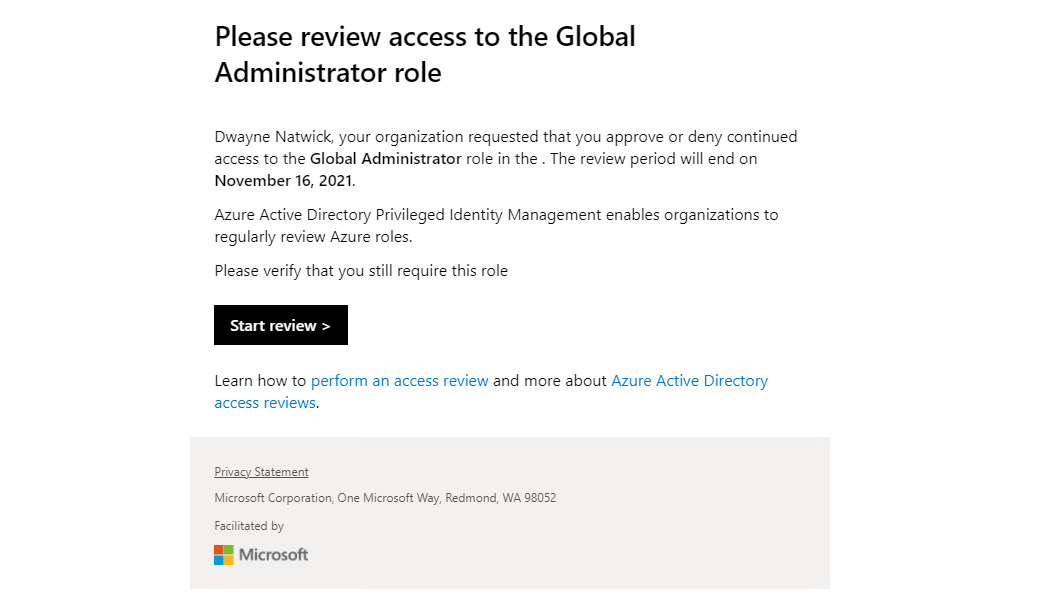
Figure 13.22 – Access review action email
- Selecting an access review of one of the roles will provide the status of these access reviews. Figure 13.23 shows the current review of Global Administrator roles:
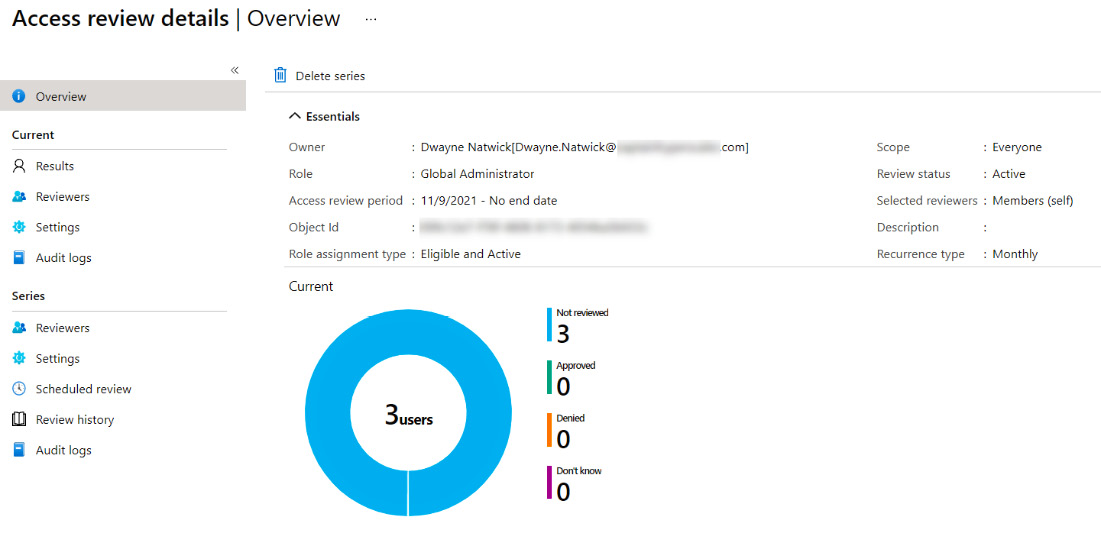
Figure 13.23 – Status of the access review
Additional information on creating access reviews can be found at this link: https://docs.microsoft.com/en-us/azure/active-directory/privileged-identity-management/pim-create-azure-ad-roles-and-resource-roles-review.
The next section will discuss how to use reports and audit history to analyze PIM.
Analyzing PIM audit history and reports
A key benefit to utilizing PIM is the ability to audit the use of privileged access to administrator roles. Since the activation of a PIM role requires justification, this creates an audit history that you can review and create reports to review.
You can access this history and create your reports from the Activity menu of Privileged Identity Management by choosing Resource audit, as shown in Figure 13.24:
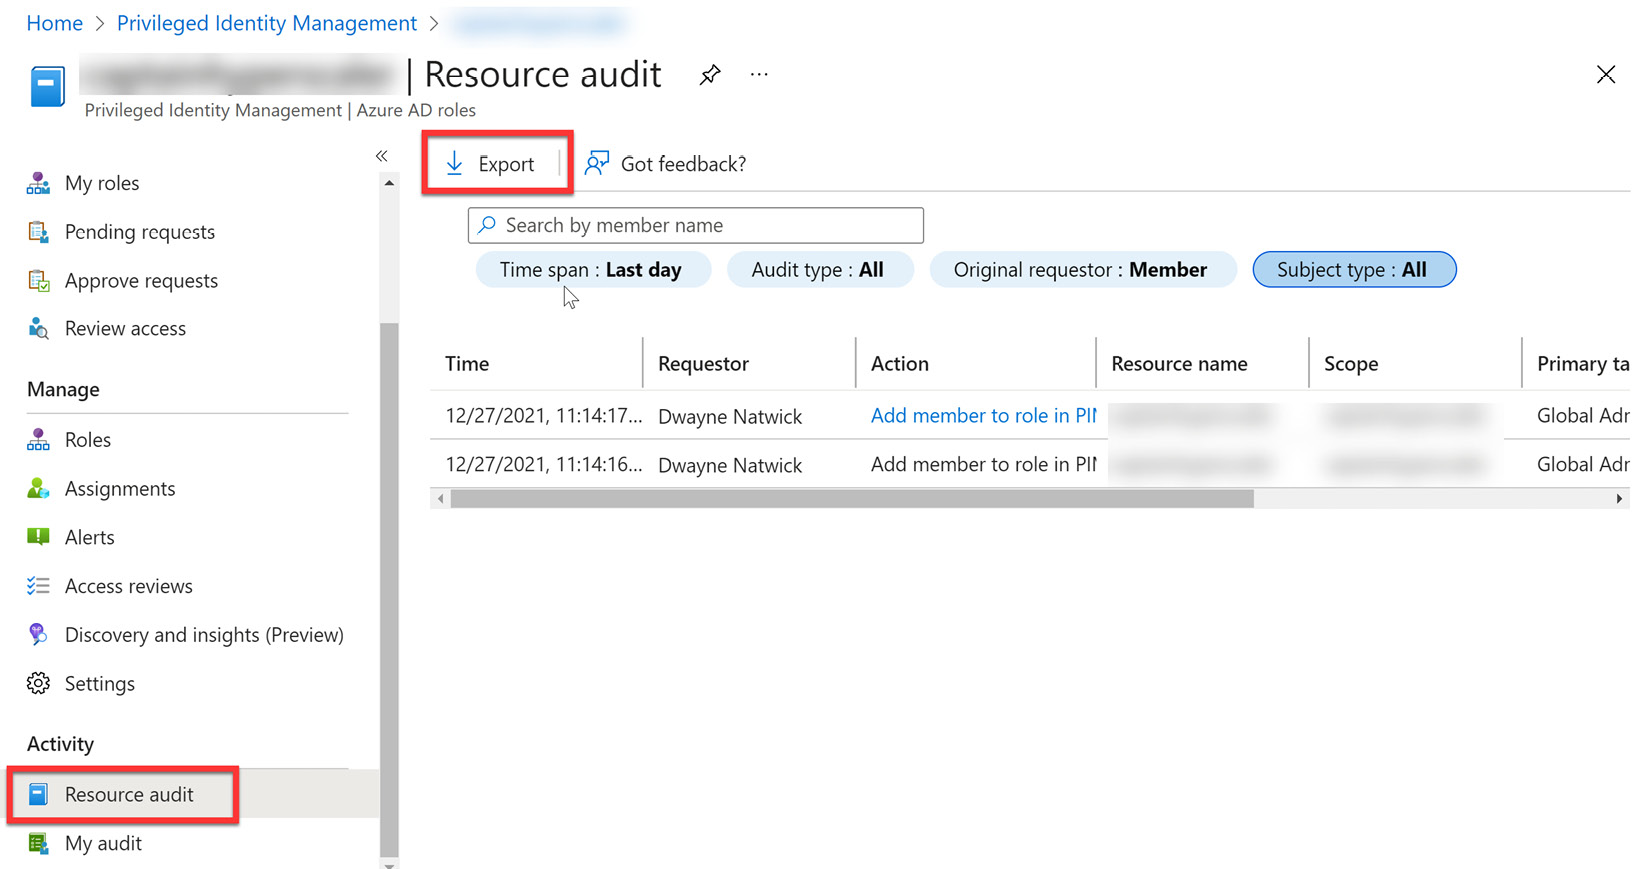
Figure 13.24 – Resource audit
From this tile, you can sort by users and filter the information for different time spans and requestor information. You can export the results to provide reports to management. Additional information can be found at this link: https://docs.microsoft.com/en-us/azure/active-directory/privileged-identity-management/pim-email-notifications#weekly-privileged-identity-management-digest-email-for-azure-ad-roles.
Next, we will provide a summary of what was discussed in this chapter.
Summary
In this chapter, we covered the areas of PIM. This included creating just-in-time administrator access with PIM and how to create break-glass or emergency-access accounts. Since these accounts provide elevated privileges within our company, it is very important to manage and govern these administrator accounts to protect against internal and external threats. Internal users with elevated access privileges have the potential to expose information that they are not authorized to access. We discussed how to do this through access reviews and by analyzing the audit history and reports for PIM. In the next chapter, we will further discuss how to analyze and investigate sign-in logs and elevated-risk users within Azure AD.