
Chapter 12: Planning and Implementing Entitlement Management
The previous chapter covered the advanced tools and capabilities of Microsoft Defender for Cloud Apps, formerly Microsoft Cloud App Security, to monitor and manage the use of cloud applications in your company. In this chapter, we will discuss the planning and implementation process for entitlement management as an important part of Identity Governance. This includes life cycle management for external users and managing the terms of use.
In this chapter, we're going to cover the following main topics:
- Defining catalogs and access packages
- Planning, implementing, and managing entitlements
- Implementing and managing terms of use
- Managing the life cycle of external users in Azure AD Identity Governance settings
Technical requirements
In this chapter, we will continue to explore configuring a tenant to use Microsoft 365 and Azure. There will be exercises that will require access to Azure Active Directory (AD). If you have not yet created the trial licenses for Microsoft 365, please follow the directions provided within Chapter 1, Preparing for Your Microsoft Exam.
Defining catalogs and access packages
Up to this point, you have worked on planning and implementing various aspects of security identity and access throughout the company tenant. This has included providing access to the tenant for members and external users. When adding a member or external user, you need to govern that they have the authorization to access immediately upon authenticating them to the company tenant. The catalogs that are created define the resources that a user or group is authorized to use. This allows clear governance of the resources that a user or group has access to use once they authenticate to the tenant. Entitlement management provides this governance through the creation of catalogs and access packages that you can build for these groups of users. Entitlement management is a premium feature and requires Azure AD Premium P2 licenses to assign to users and groups. Entitlement management is found under Identity Governance within Azure AD. Figure 12.1 shows the Getting started tile of this service and where Entitlement management is found in the menu:

Figure 12.1 – Identity Governance services
For additional information, please refer to this link: https://docs.microsoft.com/en-us/azure/active-directory/governance/entitlement-management-overview. Let's discuss how catalogs and access packages work to provide this governance.
Catalogs
The first step in entitlement management is to create catalogs. If you do not create a catalog for your access packages, users will have access to the general catalog. If you want to clearly define the catalog, then one should be created because you cannot move an access package to another catalog once it is created. Additional information can be found at this link: https://docs.microsoft.com/en-us/azure/active-directory/governance/entitlement-management-access-package-create#basics. These catalogs can be created within the Identity Governance services within Azure AD under the Entitlement management menu, as shown in Figure 12.2:

Figure 12.2 – Entitlement management menu
Catalogs are a collection of users and groups, SaaS applications (Salesforce, Workday, ServiceNow, and others), enterprise applications, and SharePoint sites. To create these catalogs, you must be assigned the Identity Governance Administrator role or Global Administrator role. Previously, the User Administrator role was authorized to create these catalogs, but that is currently being phased out. In the Planning, implementing, and managing entitlements section, we will go through the steps to create catalogs. Let's define each of the areas that make up this catalog. For additional information and examples, refer to this link: https://docs.microsoft.com/en-us/azure/active-directory/governance/entitlement-management-access-package-create#overview.
Users and groups are assigned to catalogs in order to access the applications and sites that are within the catalog. These users and groups can include internal and external users. The ability to create catalogs with internal and external users allows us to use entitlements for project-based access or other applications, such as branch offices and departmental assignments.
Applications are the enterprise and cloud applications that are registered through the steps that were completed in Chapter 10, Planning and Implementing Enterprise Apps for Single Sign-On (SSO). The applications that are added to the catalog provide the users and groups assigned with the authorization to use these applications.
SharePoint sites can be added to a catalog. These sites can be a project-based internally created SharePoint site, a file share site on SharePoint, or any SharePoint URL that you determine should be assigned to the catalog. Multiple sites can be added to a single catalog.
Once these three areas are configured, we have our catalog prepared and ready to be assigned. You will go through the configuration process in the Implementing entitlements section of this chapter.
The next section will discuss the next step of entitlement management, which is the access package.
Access packages
As discussed in the previous section, catalogs define the groups and teams, applications, and SharePoint sites within Identity Governance. Creating a catalog does not establish access to these catalogs. You must go through the creation of access packages to approve and allow access to these catalogs. As stated in the previous section, once an access package is created and assigned to a catalog, this cannot be changed.
When creating an access package, at a minimum, you define the catalog that the access package governs, how requests are handled, and the life cycle of the access package, as shown in Figure 12.3:

Figure 12.3 – Access Package creation tabs
The configuration and assignment of an access package will be shown in the Implementing entitlements section.
The next section will go through the process of planning, implementing, and managing entitlements.
Planning, implementing, and managing entitlements
In the previous sections, we discussed and defined how catalogs and access packages are used for Identity Governance within entitlement management. This section will discuss how to plan for these entitlements, how they are implemented, and how to manage access and review these entitlements.
Planning entitlements
Before creating catalogs and access packages, you should plan and determine how they are going to be used within your company. Entitlement management can be a helpful tool for companies that have projects that utilize internal and external users, departments that utilize different and specialized resources that other departments don't require access to, and branch and global offices that have their own users, groups, and partners.
As someone in charge of Identity Governance, you should work with stakeholders to plan these catalogs and access packages, as well as determine how often they will be reviewed for continued use and access. Proper planning with stakeholders based on the business model will allow the stakeholders to quickly provide users with access to the resources that are required for a given project or department once they are onboarded.
Something that is going to be important in the meeting with stakeholders will be to determine the internal and external users that will make up the group that will be assigned to the catalog. Stakeholders should be asked what the job roles for the users that need access are and what the list of applications that they need to be authorized to use is. This may need to be created prior to the implementation of the entitlement. Stakeholders should also provide the list of applications and SharePoint sites that the entitlement will be required to access.
The next section will go through the process of creating a catalog and access package.
Implementing entitlements
After planning with the necessary groups about what is needed for catalogs and access packages within your company, they are ready to be implemented. To better understand how catalogs and access packages are created, let's go through the steps to create a catalog that identifies the users and groups with access and the applications and SharePoint sites that they have access to. Then, you will step through how to assign that catalog through the creation of an access package:
- Select Catalogs from the Entitlement management menu.

Figure 12.4 – Selecting Catalogs
- From the Catalogs tile, select + New catalog, as shown in Figure 12.5:

Figure 12.5 – Adding a new catalog
- Enter a name and description for your catalog. These two fields are required information. Then, you will select whether to enable the catalog and whether to enable this catalog for external users who are assigned to the groups within the catalog. After filling out this information, select Create.

Figure 12.6 – Entering information to create the new catalog
- The catalog will now be shown within the catalog list along with the General catalog, a built-in catalog that is there by default. Select the catalog to begin the configuration.
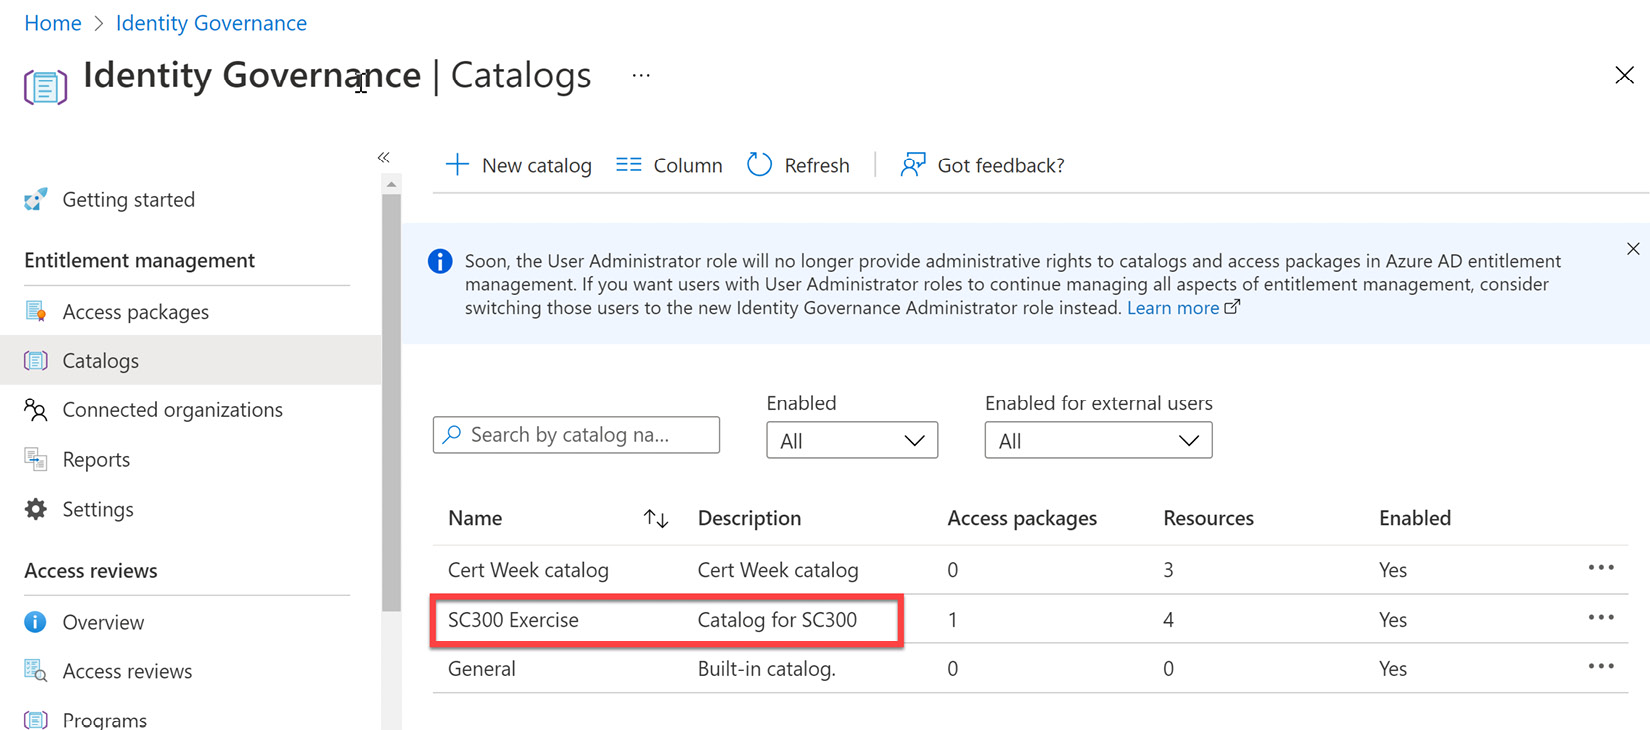
Figure 12.7 – Selecting the catalog from the list of catalogs
- Selecting the catalog will take you to a new tile, as shown in Figure 12.8. This tile provides an overview of the catalog configuration, which includes the resources assigned, the access packages, and the roles and administrators that are able to manage this catalog.

Figure 12.8 – Catalog overview
- Under the Manage menu, select Resources.

Figure 12.9 – Selecting Resources under the Manage catalog menu
- Within Resources, select + Add resources.
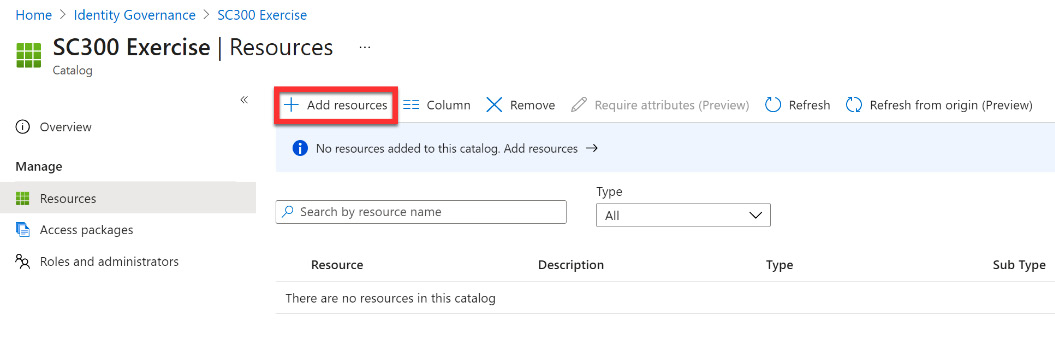
Figure 12.10 – Adding resources to the catalog
- In the Add resources tile, you can now add groups and teams, applications, and SharePoint sites to your catalog. Here is where you will fully define the catalog that will govern the access and authorization for the assigned groups. The following screenshot shows where you will add these resources to the catalog:

Figure 12.11 – Adding catalog resources
- Select + Groups and Teams. Select the security groups and teams that will be assigned and authorized to this catalog.

Figure 12.12 – Selecting a group to assign to the catalog
- Select + Applications. Select the enterprise and cloud applications that will be authorized for use within this catalog. The allowed applications will be those enterprise and cloud applications that you registered when completing the steps that were discussed in Chapter 10, Planning and Implementing Enterprise Apps for Single Sign-On (SSO).

Figure 12.13 – Selected applications for the catalog
- Select + SharePoint sites. Some companies have different SharePoint sites specific to departments or projects. If your company has these sites created in SharePoint Online, they can be assigned here.
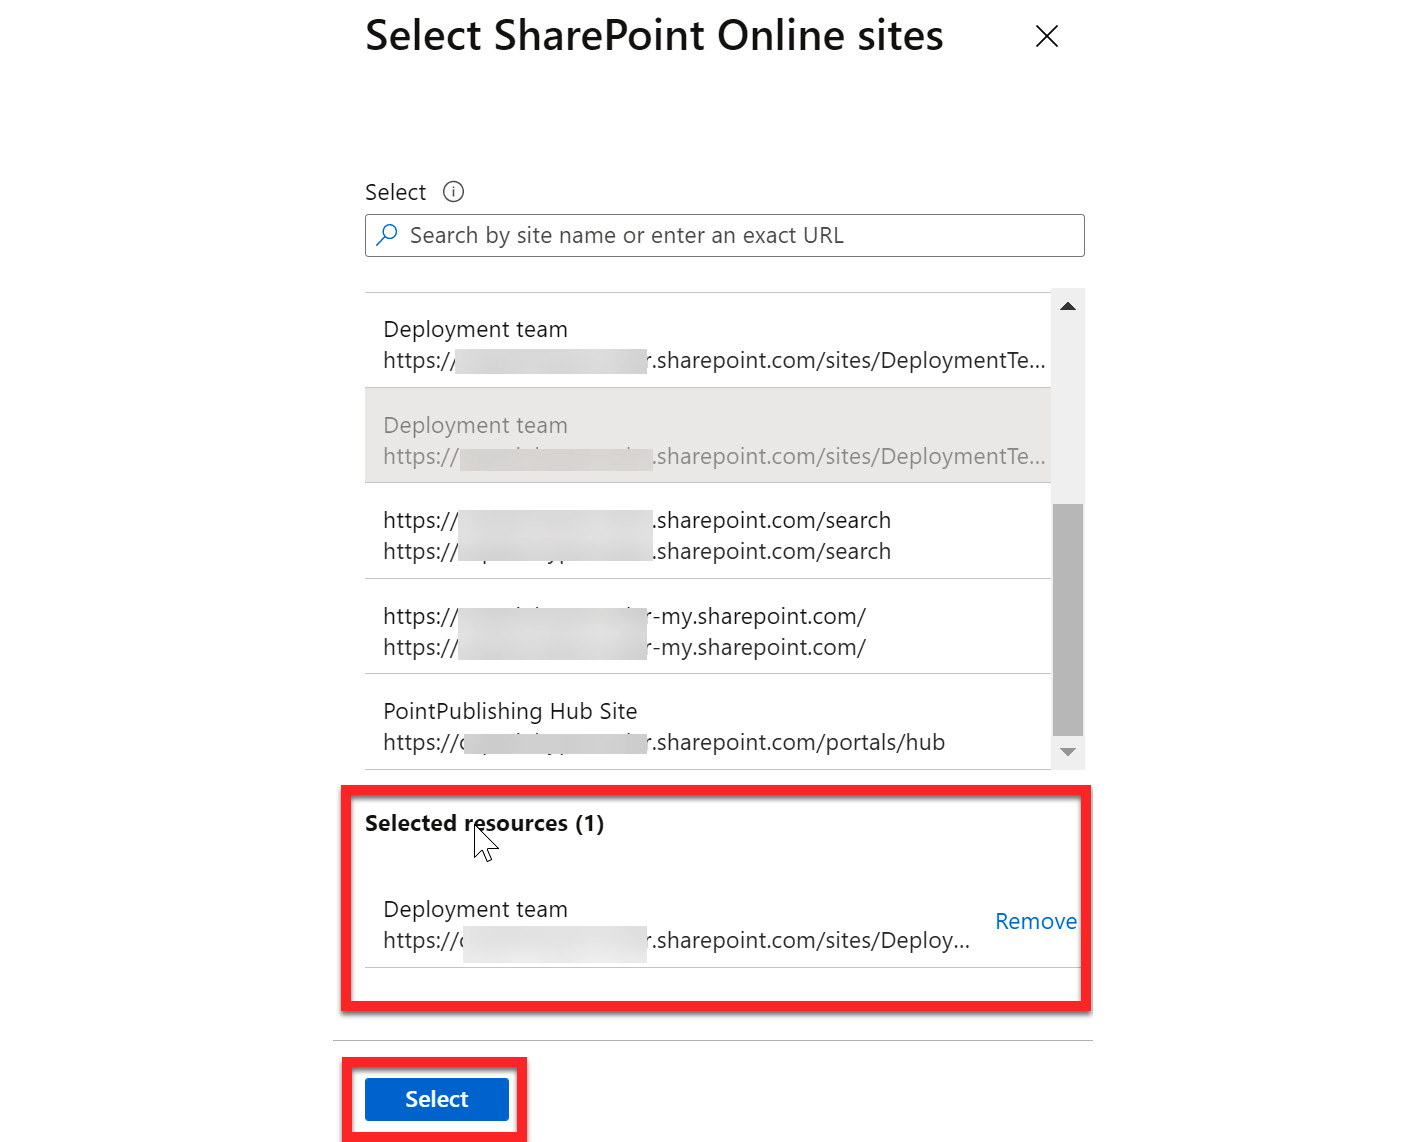
Figure 12.14 – Selecting SharePoint sites
- After each of these areas has been configured, select Add to complete the configuration of the catalog, as shown in Figure 12.15:

Figure 12.15 – Adding selected resources
This completes the process of creating a catalog. Next, you will implement the access package that will have this catalog as the assignment:
- To create an access package, select Access packages from the Entitlement management menu within Identity Governance, as shown in Figure 12.2. Since you are still within the catalog tile, you can select Access packages here as well, as shown in Figure 12.16:

Figure 12.16 – Selecting Access packages
- Select + New access package:

Figure 12.17 – Creating a new access package
- You will step through the wizard to create your access package, starting with the name and description. Enter a name and description and select Next: Resource roles:

Figure 12.18 – Name and description for an access package
- The Resource roles tile allows you to assign different Member and Owner roles for the access package. This can be the groups and teams that were assigned to the catalog or other groups and teams that are not assigned to the catalog. When using dynamic groups, you will not see any other roles available other than the owner role. Figure 12.19 shows the previous catalog group as well as a group from outside the catalog being added and the assignment of the Owner or Member role from the dropdown. This section is not required. Select Next: Requests:

Figure 12.19 – Resource role assignments
- The Requests tile is where you will define how members of the catalog will gain access to the catalog. In this exercise, you will select For users in your directory and All members (excluding guests). You can require approval and configure levels of approval to this access package. For this exercise, you will leave this as No and set Enable to Yes, as shown in Figure 12.20. Select Next: Requestor Information:

Figure 12.20 – Configuring requests
- The Requestor information tile is another optional tile to configure. Here, you can create attributes for a question-and-answer response that is required from users to be authorized to the access package. More information can be found at this link: https://docs.microsoft.com/en-us/azure/active-directory/governance/entitlement-management-access-package-create#enable-requests. Select Next: Lifecycle:
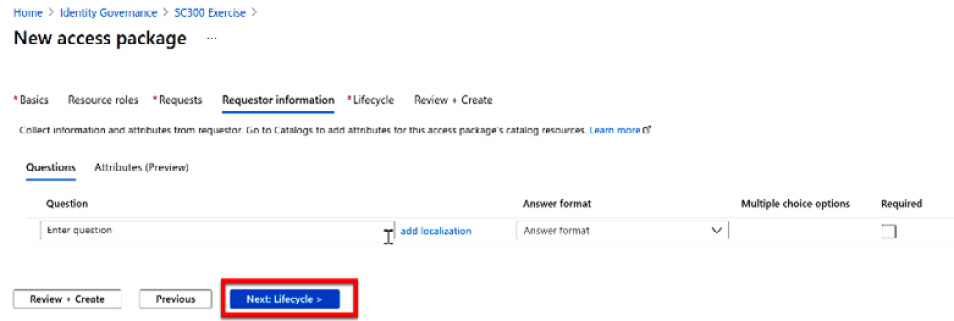
Figure 12.21 – Optional requestor information
- The Lifecycle section is where we can set an expiration date for the access package. When creating an access package for a specific project, you can define an expiration that aligns with the completion of the project. You can also add access reviews to the access package to review the membership to the access package, as shown in Figure 12.22. Select Next: Review + Create:

Figure 12.22 – Configuring the access package life cycle
- Review + Create provides a summary of the configuration that you just completed. Select Create to create the access package:
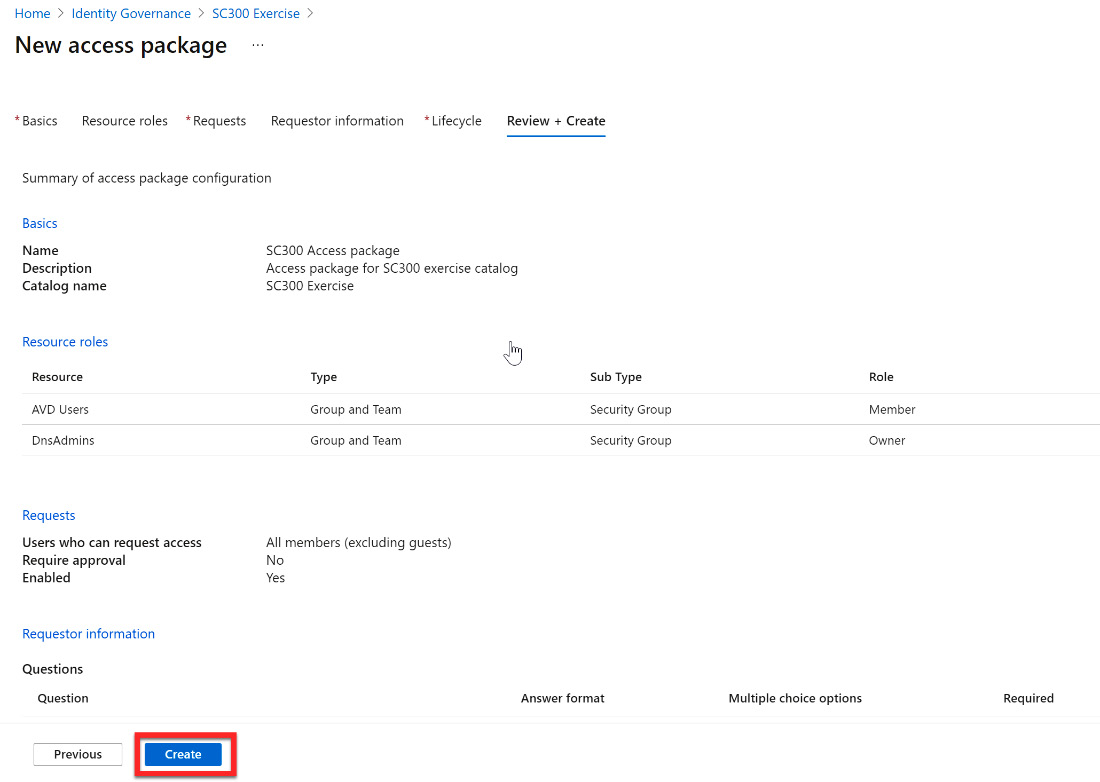
Figure 12.23 – Review + Create summary
- After creating the access package, the access package overview tile opens. From within this tile, you can manage and modify the configuration that you just created. Also within this overview is My Access portal link. This URL is provided to the group members assigned to this access package for easy access to applications and SharePoint sites in the catalog.

Figure 12.24 – New access package management tile
Now that you have configured your catalog and access package, you will want to understand how to manage these entitlements; this includes how to request access and validate access. The next section will go through how you can manage access packages, catalogs, and entitlements.
Managing entitlements
In the previous section, you configured your catalog and access package. Once the access package has been created and enabled, you should understand how to manage these entitlements.
After creating an access package, you are taken to the management tile for that specific access package, as shown in Figure 12.24. For users who are in the group assigned to the access package, there is a URL created for direct access to the applications and SharePoint sites in the catalog. This URL is pointed out in Figure 12.24. For administrators that need to manage the access package, you will use the Manage menu shown in Figure 12.25:
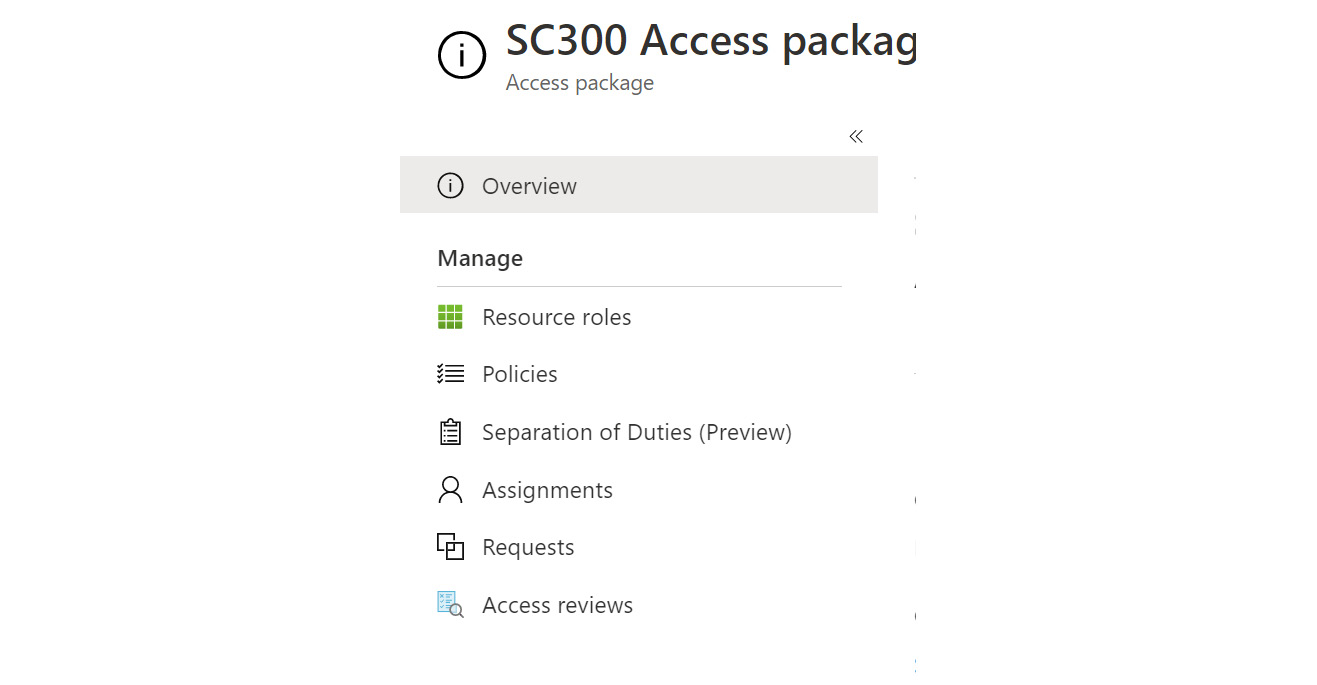
Figure 12.25 – Access package manage menu
In this menu, you can adjust the configuration of the resource roles, requests, and access reviews. There are also additional management areas to configure policies, separation of duties, and assignments for the access package. If you select Policies, you will see that an initial policy is assigned to the access package. This policy is created based on the access package configuration and can be selected to view, as shown in Figure 12.26:

Figure 12.26 – Viewing the initial access package policy
If you require additional policies, assignments, and separation of duties, select those sections and add them as needed for additional access policy governance. For more information on managing Identity Governance and entitlement management, see the Microsoft Docs link here: https://docs.microsoft.com/en-us/azure/active-directory/governance/identity-governance-overview.
In the next section, we will discuss implementing and managing terms of use within Identity Governance.
Implementing and managing terms of use
If your company requires particular terms of use for the applications or sites that are being accessed by member and guest users, Azure AD Identity Governance allows companies to assign these terms of use and tie them to a Conditional Access policy to allow access to the application. Figure 12.27 shows where to find the terms of use within the Identity Governance menu. You can select + New terms to add new terms:

Figure 12.27 – Terms of use in Identity Governance
When you select + New terms, the configuration wizard tile will open for adding the terms of use. This document is a PDF that can be in multiple languages. This is shown in Figure 12.28. At the bottom of this tile is where you can create a Conditional Access policy to enforce acceptance of the terms of use before accessing an application:

Figure 12.28 – Configuring the terms of use with Conditional Access
More information on how to implement and manage the terms of use can be found at this link: https://docs.microsoft.com/en-us/azure/active-directory/conditional-access/terms-of-use.
The next section will discuss managing the life cycle of external users in the Identity Governance settings.
Managing the life cycle of external users in Azure AD Identity Governance settings
When discussing Azure AD Identity Governance, the key concepts in managing governance are how we are managing privileged roles, access packages, and the life cycle of access. You configured access packages earlier in this chapter. This chapter will discuss managing privileged roles and access. In terms of the access life cycle, you should consider the access life cycle of your member users and your guest users. These should be handled differently as the life cycle of our member users is based on the employment within the company and the access that is required for the department or team that they belong to.
Guest users are provided access based on a partnership and external collaboration trust relationship. This access can be due to a managed services contract, a particular project, or perhaps a merger/acquisition. In any case, these relationships have a life cycle that will eventually come to an end. Therefore, you should have governance in place to manage this life cycle. Within Identity Governance, this is managed through the creation of access reviews.
Access reviews
Access reviews can manage the access life cycle. Azure AD Identity Governance provides an Overview dashboard showing the status of access reviews, as shown in Figure 12.29:

Figure 12.29 – Access review overview
Under the Access reviews menu, you can select Access reviews to configure an access review for guest users. You can select + New access review to create your guest user access review. The tile will open to configure the access review for guest users. Figure 12.30 shows this tile and how to configure an access review for guest users:

Figure 12.30 – Guest user access review
The next tile is where you configure who reviews and approves access, how often access will be reviewed, and when access will expire. Guest users should not review their access. An internal member user should be assigned to review guest access. This is shown in Figure 12.31:
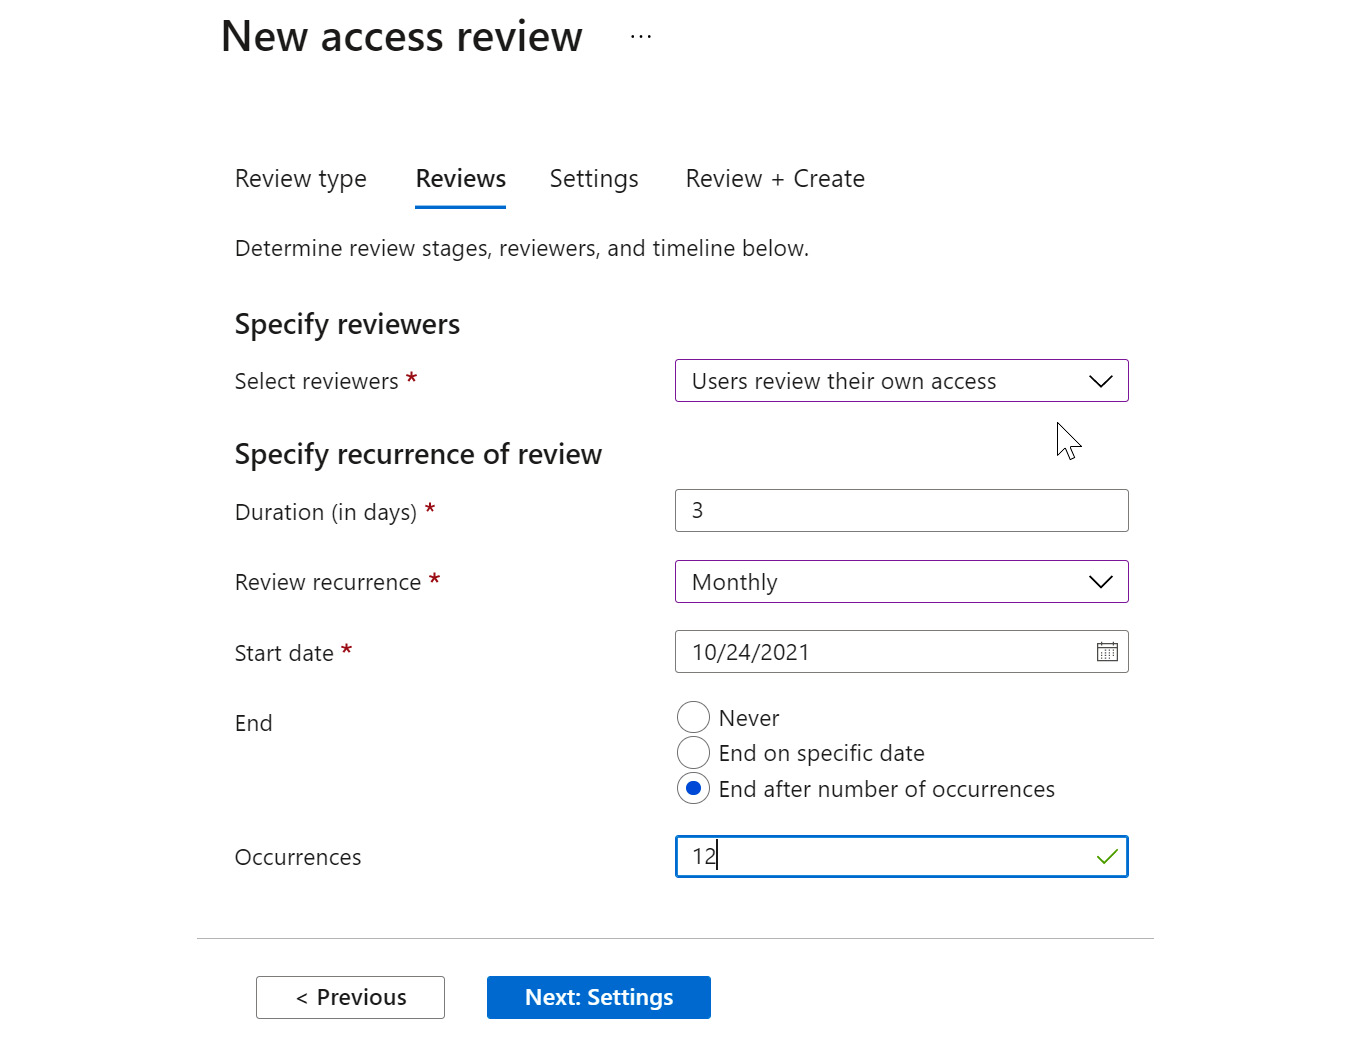
Figure 12.31 – Review settings
Finally, you will configure the settings for how the review will take place and what happens when the guest user responds or does not respond. This is shown in Figure 12.32:

Figure 12.32 – Settings for the access review
Once you review and create the access review, this will show as an access review in the list. It will also show within the access review overview dashboard as a guest member review.
Next, we will provide a summary of what was discussed in this chapter.
Summary
In this chapter, we covered the areas of entitlement management and guest access life cycle management within Azure AD Identity Governance. This included creating new catalogs and access packages for providing entitlement management of users, applications, and SharePoint site access. You went through an exercise on implementing a new catalog and an access package. We then discussed how to manage entitlements and the access life cycle for access packages and guest user access. In the next chapter, we will discuss privileged identity management (PIM) within Azure AD Identity Governance.