
Here, we will prepare a YAML configuration file for creating Kubernetes Deployments and related Services under a new Namespace. It will be used to build resources through the dashboard:
// the configuration file for creating Deployment and Service on new Namespace: dashboard-test
$ cat my-nginx.yaml
apiVersion: apps/v1beta2
kind: Deployment
metadata:
  name: my-nginx
  namespace: dashboard-test
spec:
  replicas: 3
  selector:
    matchLabels:
      run: demo
  template:
    metadata:
      labels:
        run: demo
    spec:
      containers:
      - name: my-container
        image: nginx
        ports:
        - containerPort: 80
---
apiVersion: v1
kind: Service
metadata:
  name: my-nginx
  namespace: dashboard-test
spec:
  ports:
    - protocol: TCP
      port: 80
  type: NodePort
  selector:
    run: demo
First, click the CREATE button on the top right side of the web page.
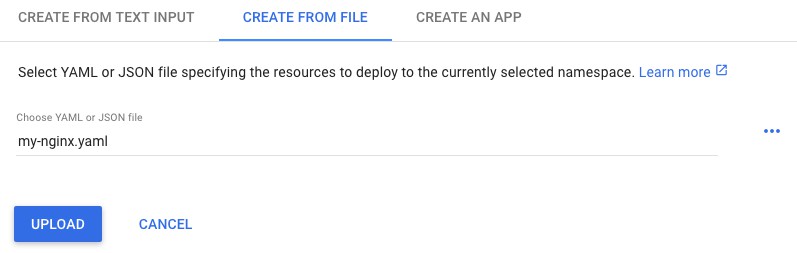
There are three methods for deployment. Let's choose the second one and upload the configuration file introduced previously. Click the UPLOAD button:
Unfortunately, errors happened:

Dashboard displays the resource according to a given Namespace, which is picked by user on the left-hand menu. This error message popped up and told users that the Namespace mentioned in the file does not match to dashboard one. What we have to do is to create a new Namespace and switch to it.
This time, we are going to create a Namespace using plain text. Click the CREATE button again, and pick the create from text input method. Paste the following lines for a new Namespace to the web page:
apiVersion: v1
kind: Namespace
metadata:
  name: dashboard-test
Now, we have a new Namespace, dashboard-test. Choose it as the main Namespace on the dashboard, and submit the my-nginx.yaml file again:

Now you can see the overview of this deployment! Yellow circles mean the pending status. They will turn to green once the pods are ready, or turn to red if they failed, but you will not see red ones if you are following these steps:
