Navigate is an under-appreciated tool for both the user and for the developer. Our focus here is on its value to the developer. Navigate (Page 344) finds and displays the counts and types of all the associated entries for a particular posting transaction. The term "associated", in this case, is defined as those entries having the same Document Number and Posting Date. This is a handy tool for the developer as it can show the results of posting activity and provide the tools to drill into the detail of all those results. If we add new transactions and Ledgers as part of an enhancement, our Navigate function should cover them too.
Navigate can be called from the Navigate action, which appears in a number of places in the Departments Tasks menu and Role Center ribbons. From anywhere within NAV, the easiest way to find Navigate is to type the word into the Search box (see the following image):

If we invoke the Navigate page using the menu action item, we must enter Posting Date and Document Number for the entries we wish to find. Alternately, we can enter Business Contact Type (Vendor or Customer), Business Contact No. (Vendor No. or Customer No.), and optionally, External Document No. There are occasions when this option is useful, but the Posting Date + Document No. option is more frequently useful.
Instead of seeking out a Navigate page and entering the critical data fields, it is much easier to call Navigate from a Navigate action on a page showing data. In this case, we just highlight a record and click on Navigate to search for all the related entries. In the following example, Posted Invoice is highlighted:

After clicking the Navigate action, the page will pop up, filled in like the following screenshot:
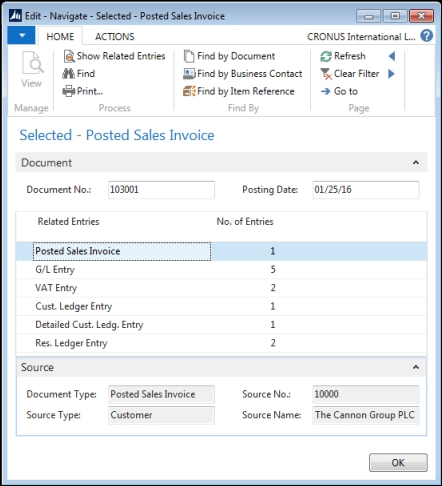
Had we accessed the Navigate page through one of the menu entries we found via Search (Ctrl + F3), we would have filled in the Document No. and Posting Date fields and clicked on Find. As we can see here, the Navigate page shows a list of related, posted entries (one of which will include the entry we highlighted when we invoked the Navigate function). If we highlight one of the lines in the Related Entries list and then click on the Show Related Entries icon at the top of the page, we will see an appropriately formatted display of the chosen entries.
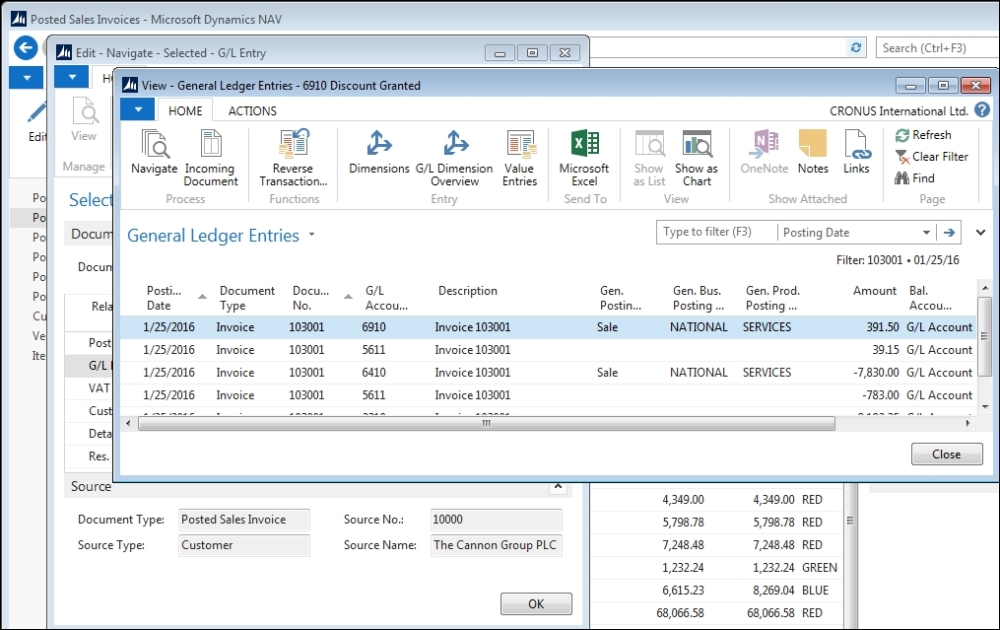
If we highlight the G/L Entry table entries and click on Show, we will see a result like the following screenshot. Note that all G/L Entry are displayed for same Posting Date and Document No., matching those specified at the top of the Navigate page:
If our modification creates a new table that will contain posted data and the records contain both Document No. and Posting Date fields, we can include this new table in the Navigate function.
The C/AL Code for Posting Date + Document No. Navigate functionality is found in the FindRecords and FindExtRecords functions of Page 344 – Navigate. The following screenshot shows the segment of the Navigate CASE statement code for the Check Ledger Entry table:

The code checks READPERMISSION. If that permission is enabled for this table, then the appropriate filtering is applied. Next, there is a call to the InsertIntoDocEntry function, which fills the temporary table that is displayed in the Navigate page. If we wish to add a new table to the Navigate function, we must replicate this functionality for our new table.
In addition, we must add the code that will call up the appropriate page to display the records that Navigate finds. This code should be inserted in the ShowRecords function trigger of the Navigate page, modeling on the applicable section of code in this function (that is, choose the code set that best fits our new tables). Making a change like this, when appropriate, will not only provide a powerful tool for our users, but also provide a powerful tool for us as developers.