
If you’re a DIY electronics or Arduino novice, the information in this chapter will help you get the most out of building and programming the gadgets in this book.
If you’re already building your own electronics, consider this chapter a refresher to dip into as needed.
Arduino is best described as a single-board computer that is deliberately designed to be used by people who are not experts in electronics, engineering, or programming. It is inexpensive, cross-platform (the Arduino software runs on Windows, Mac OS X, and Linux), and easy to program. Both Arduino hardware and software are open source and extensible.
Arduino is also powerful: despite its compact size, it has about as much computing muscle as one of the original navigation computers from the Apollo program, at about 1/35,000 the price.
Programmers, designers, do-it-yourselfers, and artists around the world take advantage of Arduino’s power and simplicity to create all sorts of innovative devices, including interactive sensors, artwork, and toys.
We built each of the products in this book using the Arduino Uno (Figure 1-1 and Figure 1-2), which, at the time of writing, is the latest model. By the time you’re reading this, there may be something newer.
You don’t have to know Arduino Uno’s technical specifications to build and program the gadgets in this book, but if you’re interested, you can find them at the official Arduino website.


An electronic circuit is, as the term implies, electricity moving in a path very much like a circle. Each circuit has a beginning, a middle, and an end (which is usually very close to where it began). Somewhere in the middle, the circuit often runs through various electronic components that modify the electrical current in some way.
Each device in this book is a circuit that combines Arduino with different electronic components. Some of these manage the power and path of the electricity, others sense certain conditions in the environment, and still others display output about those conditions.
Let’s take a look at some of the components we will be using in our circuits:
- Light emitting diodes (LEDs)
An LED is a lamp made of various rare-earth metals, which give off a large amount of light when a tiny current is run through them. The composition of the substances within the LED determine the particular wavelength of light emitted: you can buy green, blue, yellow, red, even ultraviolet and infrared LEDs.
Technically, the LEDs used in our gadgets are “miniature LEDs,” tiny lamps with two wire leads: one long (called the anode) and the other a bit shorter (called the cathode). These come in various useful forms (including single lamps from 2 mm to 8 mm in diameter, display bars, and alphanumeric readouts) and can serve as indicators, illuminators, or even data transmitters.
You’ll learn how to use these different types of LEDs while building the different environmental sensors in this book.
- Resistors
Resistors are the workhorses of the electronics world. What do resistors do? They simply resist letting electricity flow through by being made of materials that naturally conduct electricity poorly. In this way, resistors serve as small dumb regulators to cut down the intensity of electric current.
Resistance is valuable because some electronic components are very delicate: they burn out easily if they’re powered with too much current. Putting a resistor in the circuit ensures that only the proper amount of electricity reaches the component. It’s hard to imagine any circuit working without a resistor, and with LEDs, resistors are almost mandatory.
While building the projects in this book, you’ll learn various creative ways to regulate current with resistors.
- Soldering
Soldering involves heating up conductive metal, called solder, and then using it to fuse other pieces of metal together. In small-scale electronics, we use an electrical tool called a soldering iron, which has a small tip, to heat up thin wires of solder and drip the solder onto the components we wish to join into the circuit.
Soldering creates a very stable circuit, and that stability can be a drawback. Fusing together components can make it difficult to reuse or reconfigure circuits. You also must be very careful to not short-circuit components while soldering. Knowing how to solder can be a very useful skill in DIY electronics. If you’re interested in learning how, this online resource is a good place to start.
The alternative to soldering is to use a solderless breadboard.
- Solderless breadboards
Solderless breadboards are small plastic boards studded with pins that can hold wires (more about these next). These wires can then be connected to other electronic components, including Arduino.
Solderless breadboards make it much easier to design circuits, because they allow you to quickly try out various assemblies and components without having to solder the pieces together. While solderless breadboards typically are intended for use only in the design phase, many hobbyists keep a breadboard in the final version of a device because they’re so fast and easy to use.
If you don’t feel like soldering circuit boards, solderless breadboards are the way to go. Each gadget in this book uses a solderless breadboard.
- Wire
- Wire is the most basic electronic component, creating the path along which electrons move through a circuit. The projects in this book use 1 mm “jumper wires,” which have solid metal tips perfectly sized to fit into Arduino and breadboard pins, and come sheathed in various colors of insulation.
Tip
Get as much jumper wire as you can afford, in several colors. When building circuits with Arduino, you can’t have too many jumper wires.
We order most of our electronics components from these online retailers:
Maker Shed, from MAKE and O’Reilly Media, sells books, kits, and tools, as well as many of the components needed to build the projects in this book including Arduino, breadboards, sensors, and basic electronic components. Maker Shed also supplies convenient bundles for many of the projects in this book (you can find more information about these bundles in the individual project chapters).
Don’t count out your friendly local RadioShack, though. While writing this book, more than once we ran out to RadioShack for a last-minute component.
For years RadioShack cut back on its electronic components inventory, apparently seeing a better future for the business by featuring cell phones and other consumer electronics. But the company has recently begun to embrace the maker movement; at the time of writing, most of their stores around the country are even carrying Arduinos. We’re hopeful RadioShack is on the return path to being the hacker heaven it was years ago.
A computer program is a coded series of instructions that tells the computer what to do. The programs that run on Arduino are called sketches.
The sketches used in this book mostly tell Arduino to read data from one of the pins, such as the one connected to a sensor, and to write information to a different pin, such as the pin connected to an LED or display unit.
Sometimes the sketches also instruct Arduino to process that information in a certain way: to combine data streams, or compare the input with some reference, or even place the data into a readable format.
An Arduino program has two parts: setup() and loop().
- setup()
-
The
setup()part tells Arduino what it needs to know in order to do what we want it to do. For example,setup()tells Arduino which pins it needs to configure as input, which pins to configure as output, and which pins won’t be doing much of anything. If we’re going to use a special type of output to show our results, such as an LCD display,setup()is where we tell Arduino how that output works. If we need to communicate with the outside world through a serial port or an ethernet connection,setup()is where we put all the instructions necessary to make that connection work. - loop()
-
loop()tells Arduino what to do with the input or output. Arduino runs the instructions inloop(), then goes back to the top ofloop()and runs them again. And again. And again.loop()continues to loop as long as the Arduino has power.
By long tradition (going back to 2006), the first Arduino sketch you will write is to make an LED blink.
Arduino pins can be used for input and output, as long as you tell the computer which is which. So in this sketch, we tell the Arduino to set pin 13 to be the LED OUTPUT pin, and then we alternately send electricity to pin 13 (setting the pin HIGH) and cut off the electricity to pin 13 (setting the pin LOW). With each alternation, the LED turns on and off.
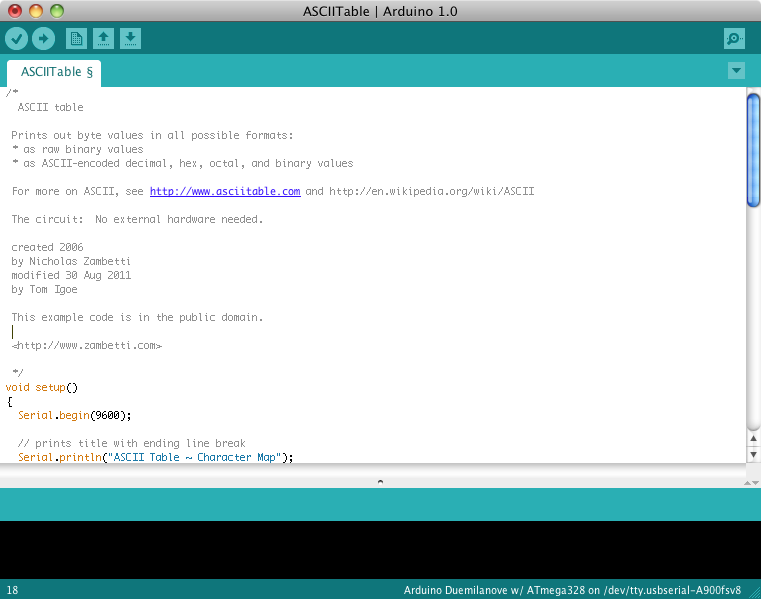
We’ll write all the sketches in this book using the Arduino integrated development environment (IDE), which, simply put, is special software for writing and uploading code to Arduino.
Download the Arduino IDE, and follow the provided instructions to install it on your computer.
Once you’ve installed the software, open the IDE. You should see a screen that looks something like Figure 1-3.
The circuit portion of this project is very simple: take an LED and place the long lead into pin 13 on Arduino, as you can see in the Figure 1-4 breadboard view.

You can find this code in the Arduino IDE under File → Examples or on the EMWA GitHub Repository → chapter-1 → blink.
/*
  Blink
  Turns on an LED for one second,
  then off for one second, repeatedly.
  This example code is based on example code
  that is in the public domain.
*/

void setup() {
  // initialize the digital pin as an output.
  // Pin 13 has an LED connected on most Arduino boards:
  pinMode(13, OUTPUT);
}

void loop() {
  digitalWrite(13, HIGH);   // set the LED on
  delay(1000);              // wait for a second
  digitalWrite(13, LOW);    // set the LED off
  delay(1000);              // wait for a second
}
Tip
Normally, you’d need to put a resistor in between the power source and the LED, so as not to burn out the LED. Arduino Unos (and later models) have a resistor built into pin 13, so that’s taken care of.
In this sketch, the code in loop() simply tells Arduino to set pin 13 HIGH—taking it up to 5 volts—for 1,000 milliseconds (one second), followed by setting it LOW—taking it down to 0 volts—for another 1,000 milliseconds.
Do you notice the /* … */ sections and the // lines in the example above? Those are ways to put comments into your code to explain to others (and to yourself) what the code does:
-
/*and*/tell the computer that everything between those marks should be ignored while running the program. -
//tells the computer that everything afterward on that line is a comment.