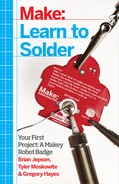
Welcome to MAKE’s Getting Started with Soldering Kit, and congratulations on taking a big step into the world of DIY electronics. Once you get the hang of soldering, you can put together some of the many great kits that are available, fix electronics that are broken, and build inventions of your own. With this kit, you’ll learn how to:
Prepare and clean your soldering iron
Assemble electronic circuits from kits
Transfer circuit designs from a solderless breadboard to a prototyping PCB
Correct soldering mistakes you’ve made
There’s a lot of great stuff in the box, and before you start using it, here’s a tour of what you’ll find in there. Figure 1 shows the soldering tools you’ll be using most of the time.
- Deluxe soldering iron
(Top left) This soldering station includes a variable temperature controller, a cleaning sponge, soldering iron, and a ringed holder.
- Crosscut pliers
(Left) You’ll use these to trim away excess leads after you solder components in place.
- Solder tube
(Bottom) This is enough solder to get you started and keep you busy over many projects.
- Helping hands
(Right) For those times when you need a third or fourth hand, the helping hands let you hold items steady while you solder.

