
The last step in becoming an Android game developer is getting your game to your players. There are two possible routes:
- Take the APK file from your project’s bin/ folder, put it on the Web, and tell your friends to download it and install it on their devices.
- Publish your application on Google Play, like a real pro.
The first option is a great way to let other people test your application before you throw it on the Google Play store. All they need to do is get a hold of the APK file and install it on their devices. The real fun starts once your game is ready for prime time.
A Word on Testing
As we’ve seen in the previous chapters, there are various differences among devices. Before you publish your application, make sure it runs well on a couple of common devices and different Android versions. There are a few ways to approach this problem. You can either purchase an array of devices with different hardware capabilities running different versions of Android and test in-house, or you can pay for any one of the new Android testing services. We are lucky enough to have several phones and tablets, covering different device classes and generations, for testing. Depending on your budget, though, neither of these approaches might be an option. You might have to rely on the emulator (but not too much, as it is indeed unreliable) or preferably on a couple of friends to help you out.
Another way to test your application is to put a beta version on the Google Play store. You can clearly mark your application as beta in its title so that users know what to expect. Some users, of course, will gladly ignore all the warnings and still complain about the quality of your potentially unfinished application. That’s just how life is, and you’ll probably have to deal with negative and possibly unjustified comments. Remember, though: Your users are king. Don’t get angry at them—try to figure out how to improve your application instead.
Here’s a list of devices we commonly use for testing applications before release:
- Samsung Galaxy Leo/I5801, 320×240-pixel screen
- HTC Hero with Android 1.5, 480×320-pixel screen
- HTC G1 with Android 1.6, 480×320-pixel screen
- Motorola Milestone/Droid with Android 2.1, 854×480-pixel screen
- HTC Desire HD with Android 2.2, 800×480-pixel screen
- Nexus One with Android 2.3, 800×480-pixel screen
- HTC Evo 4G with Android 2.2, 800×480-pixel screen
- Samsung Galaxy S with Android 2.2 and 4.0, 800×480-pixel screen
- Samsung Nexus S with Android 4.1, 800×480-pixel screen
- Samsung Galaxy Nexus with Android 4.1, 800×480-pixel screen
- Samsung Galaxy Tab 10.1 with Android 3.1, 1280×800-pixel screen
- Google Nexus 7 Tablet with Android 4.1, 1280×800-pixel screen
As you can see, we cover quite a range of screen sizes/resolutions and device generations. If you look for outside testers, make sure you get coverage of most of the device generations outlined here. Newer devices should, of course, also be on your list, but less for reasons of performance testing than for compatibility testing. If nothing else, make sure you at least are testing on a few of the official Google devices, which include the Nexus 7, Galaxy Nexus, Nexus S, and Nexus One devices. If your game isn’t working well on these devices, you are sure to have trouble heading your way if you don’t make changes.
Finally, you have to accept the fact that you can’t test your application on all the devices out there. You are likely to receive error reports that are inexplicable and might well stem from the fact that a user is running a custom ROM that doesn’t behave as expected. In any case, don’t panic; this is normal to some extent. If the problem with errors goes overboard, though, you’ll have to try to come up with a scheme to battle it. Luckily, Google Play helps us out in that regard. We’ll see how that works in a bit.
Note Apart from Google Play’s error reporting feature, there’s another nice solution called Application Crash Report for Android (ACRA), which is an open source library specifically designed to report all crashes of your Android application. It’s available at http://code.google.com/p/acra/ and is very easy to use. Just follow the guide on the Google Code page to integrate it into your application.
Becoming a Registered Developer
Google makes it really easy to publish your application on the Google Play store. All you have to do is register an Android developer account for a one-time fee of $25 USD. Assuming you live in one of the countries on Google’s long list of supported locations for distributing applications, this account will allow you to post your apps on Google Play. Whether you can post free apps only or both free and paid apps depends on which country you live in. To post paid apps, you must live in one of the countries on Google's somewhat shorter list of supported locations for merchants. Google also has separate lists of countries to which you can distribute apps freely and countries to which you can distribute paid apps. Google is working hard to expand these lists so that your apps can reach the entire globe.
Your Google Play Store publisher account is tied directly to a Google account. Unless restrictions have been lifted, you may not separate the publisher account from the Google account. It’s important to take that into account when deciding between registering with an existing account or registering with a new, dedicated account. Once you’ve made that decision and have your Google account ready, visit https://play.google.com/apps/publish/signup and follow the instructions given there to register for the Google Play store.
In addition to your Android developer account, you will also need to register for a free Google Checkout merchant account if you want to sell your applications. You will have the option to do this during the developer account sign-up process. We’re not lawyers, so we can’t give you any legal advice at this point, but make sure you understand the legal implications of selling an application before you do so. If in doubt, consider consulting an expert on the matter. We don’t mean to scare you off by this, as the process is pretty streamlined in general, but you should be prepared to keep your government’s tax department apprised about your sales activity.
Google will take a percentage of your hard-earned money (30% as of this writing) for distributing your app and providing the infrastructure. That seems to be pretty much the standard cut taken by all the application stores on the various platforms.
Signing Your Game’s APK
After you have successfully registered as an official Android developer, it’s time to prepare your application for publication to Google Play. In order to publish your application, you have to sign the APK file. Before you do that, you should make sure everything is in place. Here’s a laundry list of things to do before signing the APK file:
- Remove the android:debuggable attribute from the <application> tag in your manifest file or set it to "false".
- In the <manifest> tag, you’ll find the android:versionCode and android:versionName attributes. If you have already published a previous version of your application, you must increase the versionCode attribute, and you should also change the versionName attribute. The versionCode attribute has to be an integer; the versionName attribute can be anything you like.
- If your build target is equal to or higher than SDK level 8 (Android 2.2), you should also make sure the <manifest> tag has the android:installLocation attribute set to preferExternal or auto. This will satisfy your users by ensuring that your application is installed on external storage if possible.
- Make sure you only specify the permissions that your game really needs. Users don’t like to install applications that seem to demand unnecessary permissions. Check the <uses-permission> tags in your manifest file.
- Confirm that you set the android:minSdkVersion and android:targetSdkVersion attributes correctly. Your application will be visible on Google Play only on phones that run a version of Android equal to or higher than the specified SDK version.
Double-check all of these items. Once you are done, you can finally export a signed APK file that is ready to be uploaded to Google Play by following these steps:
- Right-click your project in the Package Explorer view and select Android Tools
 Export Signed Application Package to launch the Export Android Application wizard. You’ll be greeted with the Project Checks dialog, shown in Figure 15-1.

Figure 15-1. The signed export dialog
- Click the Next button to move to the Keystore selection dialog, shown in Figure 15-2.

Figure 15-2. Choosing or creating the keystore
- A keystoreis a password-protected file that stores the key with which you sign your APK file. Since you haven’t created a keystore yet, you’ll do so now in this dialog. With the “Create new keystore” radio button selected, just provide the location where you want to store the keystore, along with the password that you will use to secure it. Click the Next button to move to the Key Creation dialog, shown in Figure 15-3.

Figure 15-3. Creating the key for signing the APK
- To create a valid key, you have to complete the Alias, Password, and Validity (years) fields, as well as enter a name in the First and Last Name field. The rest of the fields are optional, but it’s a good idea to fill them out nevertheless. Click Next, and you are shown the final dialog (see Figure 15-4).

Figure 15-4. Specifying the destination file
- Specify where the exported APK file should be stored, and make sure to note the path. You’ll need it later when you want to upload that APK. Click Finish.
When you want to publish a new version of a previously published application, you can just reuse the keystore you created the first time you went through the wizard. Launch the wizard, and when you get to the Keystore selection dialog shown in Figure 15-2, select the “Use existing keystore” radio button, provide the location of the keystore file you created previously, and provide the password for the keystore. When you click Next, you’ll see the “Key alias selection” dialog, shown in Figure 15-5. Just select the key you created previously, provide the password for it, click Next, and proceed as before. In both cases, the result will be a signed APK file that is ready for upload to Google Play.
Note Once you upload a signed APK, you have to use the same key to sign any subsequent versions of the same application.

Figure 15-5. Reusing a key
So, you’ve created your first signed APK—congratulations! Now we’ll throw a wrench into the works and inform you about the multiple APK support. For a single app, you can create multiple APKs that use device capability filtering to get the “best fit” for each user who installs your app. This is a great feature because it means you can do things like the following:
- Ship specific image sets that are compatible with specific GPUs.
- Have a limited feature set targeted for older versions of Android.
- Ship larger-scale graphics for larger screen sizes and regular-scale graphics for all others.
Google will surely add more filters as time goes by, but just the set outlined here enables you to really hone in on a target device (like tablets) without having to jump through too many hoops to keep the download at a reasonable size for first-generation device support.
Putting Your Game on Google Play
It’s time to log in to your developer account on the Google Play website. Just go to https://play.google.com/apps/publish and sign in. You’ll be greeted with the interface shown in Figure 15-6.

Figure 15-6. Welcome to Google Play, developer!
This interface is what Google calls the Android Developer Console, which is what you caught a glimpse of when initially registering. Now we’re ready to actually use it. Clicking the Upload Application button at the bottom of the screen will let you do that, by opening the Edit Application screen. Let’s go through some of the sections of the Edit Application screen, the first of which, Upload assets (on the Product details tab), is shown in Figure 15-7.

Figure 15-7. Edit Application screen of the Android Developer Console
Uploading Assets
There are a number of required assets and pieces of information required to publish your game. Screenshots, icons, descriptions, categories and more, all with required sizes and formats are outlined on the Product details tab.
As shown in Figure 15-7, you must provide at least two screenshots of your application. They must be of a certain format (24-bit JPEG or PNG) and size (320×480, 480×800, 480×854, 1280×720, or 1280×800). These screenshots will display when a user views the details of your application on the Google Play store (on the mobile app and on the official website at http://play.google.com/store).
Next, you have to upload a 512×512, high-resolution, 32-bit PNG or JPEG of your app’s icon. At present, this is only shown when a user views your app on the Google Play store website. Make it fancy.
The promo graphic (180w×120h, 24-bit PNG or JPEG) and feature graphic (1024×500, 24-bit PNG or JPEG) show up on the Google Play store if your game is featured. Being featured is a huge deal, as it means that your game will be one of the first apps users see when they open the Google Play store on the mobile app or website. Who gets featured is up to Google, and only they know the basis for this decision.
You can provide a link to a promotional YouTube video of your application. This will appear on the Google Play store website, and it is an important marketing tool because it gives users a good preview of your game before they make their decision to download it. It is also something that Google may look at when considering whether to feature your game.
If your game has a privacy policy that dictates how user’s information is stored, handled, and released, you can add a link to the information in the Privacy Policy field. If you do not have a privacy policy, just check “Not submitting a privacy policy URL at this time.”
Note that the Google Play developer interface is constantly changing and may include additional features not listed here.
Product Details
Scroll down to the Listing details section of the Edit Application screen, as shown in Figure 15-8. These details will be displayed to users on the Google Play store. You can specify the language, provide the title (30 characters maximum), and, optionally, add a description (4000 characters maximum) of your app. An additional 500 characters are available to notify users of recent changes in the latest version of your application. The promo text (80 characters maximum) will be used only if your application gets featured by Google.

Figure 15-8. Listing details section of the Android Developer Console
Next, you have to specify your application’s type and category. For each application type, there’s a range of categories from which you can choose. For games, you can specify Arcade & Action, Brain & Puzzle, Cards & Casino, Casual, or Racing and Sports. The options make categorization a bit confusing (racing is not a sport?), and they could be better thought out. Here’s hoping for some changes in the future.
Publishing Options
The Publishing options section of the Edit Application screen lets you specify whether you want to copy protect your application, its content rating, and the locations where you want it to be available.
The copy protection feature is deprecated and you should not use it because it is not effective and it creates some other issues. Instead, Google offers an API to integrate a licensing service into your application. This service is supposed to make it harder for users to pirate your game. Evaluating this service is beyond the scope of this book; we suggest heading over to the Android Developers site if you are paranoid about pirates. As with many digital rights management (DRM) schemes, problems have been reported by users who can’t run or install an app that uses the licensing service. Take this with a grain of salt, of course. It’s the best option you currently have for DRM if you need it.
The content rating allows you to specify your target audience. There are guidelines for rating your own application, which you can find out about by clicking the Learn More link directly under the Content Rating heading. Your application will be filtered by Google Play based on the content rating you give it. So, carefully evaluate the rating that fits your game. Google may decide that your application requires a more mature content rating, in which case the Google team will designate which rating they deem more appropriate.
You can choose the locations where your application will be available. Usually, you want it to be available everywhere, of course. However, though this is unlikely, there might be scenarios where you want to publish your application only in select locations, possibly for legal reasons.
Now you have to decide whether users will pay for your game or not. This decision is final. Once you implement one of the two options, you can’t change it unless you publish your game anew, with a different key. If you do so, you’ll lose any user reviews, and you’ll also alienate your users a little. Think about the route you want to go with your game. We won’t give you tips on pricing your game, as that depends on a variety of factors. A price of $0.99 USD seems to be the standard for most games, and users sort of expect it. However, there’s nothing keeping you from experimenting a little here. If you sell your game, make sure that you understand the legal issues involved in doing so.
Finally, at the bottom of the Publishing options section, you will get some information on the devices your app supports. Attributes such as screen layout support and required device features are listed here. When you click on the Show devices link, you will see the screen in Figure 15-9. This lists all of the devices that are found to be compatible with your APKs. You can search for devices and manually exclude a device in this dialog. When a device is excluded or isn’t in the supported list, your game will not show up at all in the Google Play store for that particular device. If you are ever running into issues with your game not showing up for a particular device, this is the screen to use to debug the issue.
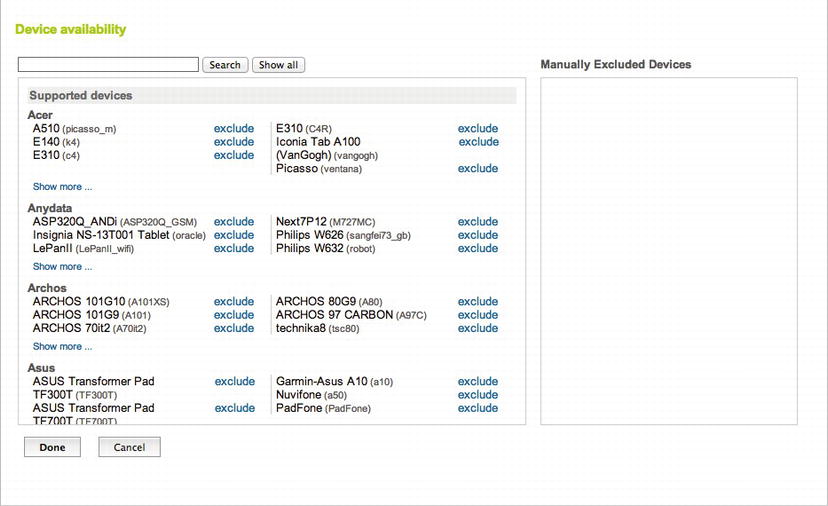
Figure 15-9. Device availability
Before you complete the final two sections of the Product details tab, discussed shortly, switch to the APK files tab and read the following information about managing your APK files.
APK Files Management
The second tab on the Edit Application screen, APK files, lets you manage your APKs and also provides some additional insight into the device filtering being applied. Figure 15-10 shows the APK files tab for the game Antigen: Outbreak.

Figure 15-10. APK file management
While only one APK is active here, you can see clearly that multiple APKs can be supported by changing the API level, supported screens, OpenGL textures, and native platforms of different APKs. This APK supports API levels 3–16+, small to extra-large screens, all OpenGL textures, and armeabi (ARM) devices.
After clicking on “more” under the app icon, as we’ve already done in Figure 15-10, you can see all of the permissions and features of the game. This game requires course location, Internet, vibration, and Bluetooth features, and the user will be presented with those requirements before installing the game.
Adding more APKs here is as simple as clicking Upload APK. When it’s time to upgrade, remember that you can only have one active APK with the same exact set of feature support, so make sure to deactivate your old APK before finishing.
Publish!
Switching back to the Product details tab, the last few things you will specify are your contact information, your consent to the Android Content Guidelines (linked on the same page—read them), and confirmation that your application complies with all U.S. export laws, which is a safe bet if your game is a standard Android app.
After providing all of that information, it’s time to click the huge Publish button at the bottom of the page and make your game available to millions of people around the globe! There is no review process, so after an hour or two of server propagation time, your game will come online for all of the supported devices in the Google Play store.
More On The Developer Console
Once your game is published on Google Play, you will want to keep track of its status. How many people have downloaded it so far? Have there been crashes? What are the users saying? You can check all this out in the Android Developer Console (see Figure 15-6).
For each of your published applications, you can get a few pieces of information:
- Overall rating of your game and number of ratings
- Comments made by users (just click the Comments link for the respective application)
- Number of times your application has been installed
- Number of active installs of your application
- Error reports
The error reports are of special interest to us. Figure 15-11 shows the error reports received for the game Antigen: Outbreak.

Figure 15-11. Error Reports overview
In total, there have been one freeze and seven crashes. Antigen: Outbreak has been on the market for more than a year, so that’s not bad. You can drill down further into the specific errors, of course. The error-reporting feature of the Developer Console will provide you with detailed information about the crashes and freezes, such as the device model on which the problem occurred, full stack traces, and so on. This can be of immense help when you’re trying to figure out what’s actually going wrong with your app. Comments on the market won’t help for much more than general problem identification.
Note Error reporting is a device-side feature that is not supported on older Android versions. If you want to have full confidence that you are catching all problems, we suggest giving ACRA a look, as mentioned earlier.
Summary
Publishing your game on Google Play is a breeze, and it has a very low barrier of entry. You now have all the knowledge necessary to design, implement, and publish your first game on Android. May the force be with you!