
CHAPTER 20
Identifying the Contents and Terms in Your Document: TOCs, Captions, and Indexing
- Creating tables of contents based on styles and outline levels
- Creating a table of contents manually
- Working with TOC styles
- Inserting captions manually and automatically
- Customizing caption labels
- Adding a table of captioned items
- Marking index entries and subentries
- Compiling an index
Long documents such as proposals, detailed project quotations, annual reports, technical whitepapers, product user manuals, and so on require formal features to help the reader navigate the document and find and understand information. This chapter looks at some features that you will likely need to include in formal documents like this: a table of contents; captions for info-graphics such as tables, charts, and other illustrations; a table of captioned items; and an index of key terms and the pages that discuss them. Adding any of these items to a formal long document can be a sign of professionalism.
Automating Table of Contents Creation
A table of contents is a heading-oriented list of what's in a document, and on what page each heading (or other table of contents entry) occurs. If you use Word's built-in heading styles, you can insert a table of contents quickly and might never have to worry about some of the finer points of working with tables of contents. If, on the other hand, you need additional flexibility, you can use other styles as the basis for your table of contents, as well as entries you mark directly, to create a table of contents.
Tables of contents and heading styles
By far, the easiest way to create a table of contents is to use Word's built-in Heading 1 through 9 styles to organize the headings in a document and then to generate the table of contents based on those headings. As discussed in Chapter 3, “Working Smarter, Not Harder, in Word,” and Chapter 7, “Using Styles to Create a Great-Looking Document,” using heading styles and the Outline view (which automatically applies heading styles) are among the most practical time-saving methods you can use when creating long documents in Word. Not only does it give you instant access to Word's powerful tools for organizing and formatting a document, it gives you the inside track on creating tables of contents as well. To create a table of contents using heading styles:
- Position the insertion point where you want the table of contents to appear. In a formal report or proposal, you will typically insert the table of contents at the top of the page immediately after the cover page.
- If the formatting standard you are using requires a page break after the table, use Page Layout
 Page Setup Breaks Page Break or Next Page (under Section Breaks), and then press the Up Arrow to move the insertion point back up to the blank page. If you insert the table without the page break and then insert the page break afterward, you would then need to update the table as described later under “Updating or Deleting a Table of Contents.”
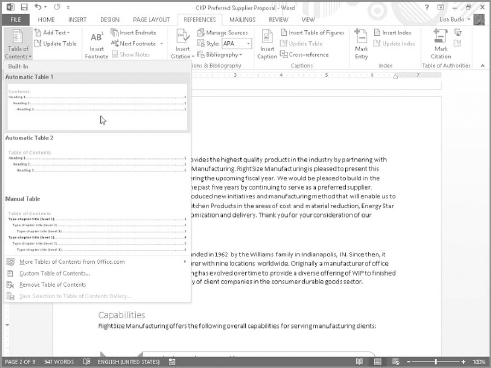
 - In the Table of Contents group on the References tab, click Table of Contents. As shown in Figure 20.1, the gallery offers three built-in options:
- Automatic Table 1: Inserts a title (Contents) followed by a table of contents field
- Automatic Table 2: Inserts a title (Table of Contents), a table of contents field, and a page break
- Manual Table: Inserts a title (Table of Contents) and a dummy table of contents, ready for you to edit and replace with your own text and page numbers
- Click the desired choice. Word inserts the table of contents in a Table of Contents content control. (Chapter 24, “Creating Custom Forms,” covers more about inserting and working with other types of content controls.)
- If you inserted the third type of table from the gallery, click each heading control and type the desired content; to add more headings at a desired location, select and copy the line for another heading at the same outline level, position the insertion point, and paste. Figure 20.2 shows an automatic table of contents inserted in the document. When you move the mouse pointer over it, gray field highlighting appears as shown in Figure 20.2. Clicking the table displays its content control.
The Table of Contents gallery offers three built-in options.
Word created this table of contents based on the heading styles applied throughout the document.

Your reader also can use a table of contents based on formatted headings as a navigational aid. In that instance, each of the table of contents headings listed also functions as a hyperlink. The reader can click in the table of contents content control, and then Ctrl+click any listed heading to jump to that heading later in the document.
Table of contents defaults and options
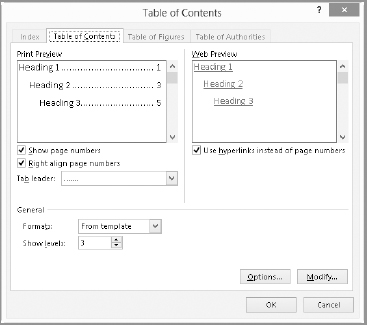
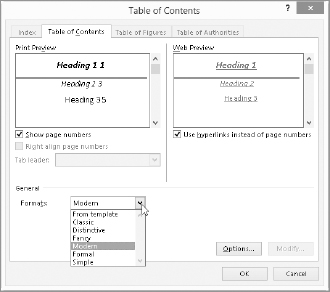
If none of the tables of contents in the gallery in Figure 20.1 meets your needs, click Custom Table of Contents at the bottom of the gallery, which displays the Table of Contents dialog box, shown in Figure 20.3. The dialog box shows approximate Print and Web previews, without the actual table of contents material. Instead, it shows what styles will be used based on the settings shown in the dialog box.
Word's table of contents feature defaults to showing three heading levels and using hyperlinks for easy onscreen navigation.
NOTE
The Use hyperlinks instead of page numbers setting at the right under Web Preview has two effects. First, when the table of contents is displayed in Web Layout view, you will see hyperlinks (displayed using the hyperlink setting for the current theme) instead of page numbers. Second, the table of contents items are hyperlinks to the corresponding headings. Press Ctrl and click the heading to go to that heading in the document.
Word's table of contents defaults include the following:
- Show page numbers enabled
- Right-align page numbers enabled
- Separate table of contents heading text from numbers using dot leaders (…)
- Use TOC style formatting from the current template
- Show levels 3 (uses Heading 1 through Heading 3, plus anything else assigned to those levels)
- Use hyperlinks instead of page numbers in Web Layout view (see the preceding note)
If you click the Options button in the Table of Contents dialog box, the Table of Contents Options dialog box shown in Figure 20.4 appears. You can use it to:
- Build table of contents from styles and outline levels
- Determine whether to use Table entry fields
- Reset all of the Table of Contents settings to the defaults by clicking the Reset button shown at the lower left in Figure 20.4
You can use the built-in outline level assignments or assign levels to other styles.
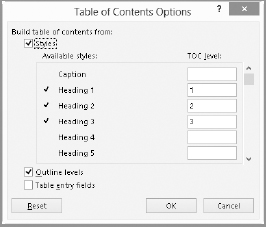
By default, with both Styles and Outline levels checked as shown in Figure 20.4, the TOC level list at the right has a number from 1 through 3. The styles Heading 1 through Heading 3 are assigned TOC levels 1–3, respectively. You can annotate the TOC level list either to change the default assignments or to assign levels to additional styles. Suppose, for example, that you have used the built-in Title and Caption styles in the document, and that you also want them included in the table of contents, as levels 1 and 4, respectively. Scroll down the TOC level list and enter a 1 next to the Title style, and then scroll back up and enter a 4 next to the Caption style. When you do that and click OK, the Show levels setting in the Table of Contents dialog box shown in Figure 20.3 is automatically reset to 4.
Setting levels using the controls shown in Figure 20.4 does not affect the formatting of the paragraphs. It affects only how the TOC field treats the corresponding styles in compiling the table of contents.
If you don't want to use styles (Heading 1 through 9 or otherwise) for the table of contents, reopen the Table of Contents Options dialog box (Figure 20.4) and remove the check next to Styles. If you do want to use styles but not Headings 1 through 9, remove the default numbers from the TOC level list, and place 1, 2, 3, and so on next to the styles you want to use for the corresponding levels in the table of contents.
If your document doesn't use heading styles or other identifiable styles that you want to use for establishing TOC heading levels, you will have to use another method to build the TOC. See “Manually Creating a Table of Contents,” later in this chapter.
Understanding the Add Text tool
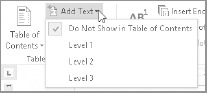
In the References tab Table of Contents group, notice the Add Text item, shown in Figure 20.5. It functions as a References tab alternative for assigning Outline levels. It has its limitations, but if you understand how to use it, it may come in handy from time to time. Note that this tool does not automatically create table of contents entries. However, if you reformat text using this tool and have built your table automatically using table styles as described earlier, you can then update the table of contents so that the newly reformatted text will be included.
Add Text does not create fields for manual table of contents entries; it merely formats text.
NOTE
The number of levels shown in the Add Text tool reflects the Show levels setting in the Table of Contents tab in the Table of Contents dialog box shown in Figure 20.3. The default setting is 3. Increase the setting to 9 to include all nine heading styles in the TOC and to enable the Add Text tool to apply all nine levels of heading styles.
The Add Text tool's behavior depends on whether the selected paragraph(s) are formatted with a Heading 1 through 9 style, as well as whether the TOC level has already been manipulated directly.
Applying a command from Add Text has the following effects:
- If you choose Add Text Do Not Show in Table of Contents, the style of the selected paragraph is changed to Normal.
- If you choose Add Text Level 1 through Level 9 and the selected paragraph is formatted with the corresponding Heading 1 through 9 style, the command has no effect.
- If you choose Add Text Level 1 through Level 9 and the selected paragraph is formatted with a Heading 1 through 9 style with a different level, the command applies the corresponding numbered Heading style. For example, if you apply Level 2 to a paragraph formatted as Heading 4, the paragraph will be reformatted as Heading 2.
- If the selected paragraph is not formatted with a Heading 1 through 9 style, using Add Text Level 1 through 9 reformats that paragraph with the corresponding numbered Heading style.
NOTE
If you have the Styles pane open while using Add Text, you may see that the numbered heading style corresponding to the level you apply may not be selected immediately. In some cases you have to click off the text you just formatted with Add Text, and then click back in it to verify that the appropriate numbered heading style is applied.
Using outline levels for the table of contents
In addition to using the Heading 1 through 9 styles, the Table of Contents feature automatically uses styles that have outline levels assigned to them. Such styles show up with levels already assigned to them in the Table of Contents Options dialog box shown in Figure 20.4. If you want to use these, you don't have to do anything further, because Word uses them by default.
If you don't want to use non-Heading 1 through 9 styles that have outline levels assigned to them, remove the check next to Outline levels, shown in Figure 20.4. For additional information on assigning outline levels to non-heading styles, see “Creating custom levels for non-heading styles” in Chapter 3.
Changing TOC formats
The Table of Contents dialog box that appears when you click the Table of Contents button and then click Custom Table of Contents as discussed earlier includes a Formats drop-down list in the General section. Click the Formats drop-down list arrow to display additional formatting options, shown in Figure 20.6. After you click one of the Formats choices, the Print Preview and Web Preview previews change to show the new formatting. For example, in Figure 20.6 the Modern choice centers the TOC entries and includes a border below Heading 1 entries. Click OK to close the Table of Contents dialog box and apply the formatting. If you had already inserted and selected a table of contents before choosing a format, a message box appears to ask you to confirm whether to replace the selected table of contents. Click Yes to do so.
You can use TOC styles from the applied document template or choose from among presets.
The hyperlink field used by Word to create an automatic table as described earlier, and the TOC field, which you can use to create a table of contents manually, both use styles named TOC 1 through TOC 9 to format the table of contents. By default, they use the settings for TOC 1 through TOC 9 that are stored in the current document template. If you choose one of the Formats alternatives in the Table of Contents dialog box, the TOC styles are redefined according to your selection.
CAUTION
Applying a different Format setting redefines the TOC styles in that document. If you later delete the TOC entries, your TOC styles remain redefined. If, for example, your table of contents styles previously used Times New Roman as the basic font, and Modern uses Calibri as the font, the latter Calibri font will be kept for the TOC 1-9 styles, even if the table of contents field is deleted. Thereafter, the From template and Modern formats will yield the same result. If you save that document, the table of contents styles in it are permanently changed. The only way to get back the former styles would be to reattach the underlying template and choose the Automatically update document styles option.
Working with TOC Styles
As noted in the previous section, Word uses nine built-in styles to format the table of contents: TOC 1 through TOC 9. If you don't like the way the table of contents looks, the best way to “fix” it is not by formatting the table itself. The best way is to change the TOC 1–TOC 9 styles. If you tried to modify TOC formatting manually, it would be possible to introduce inconsistences. For example, you might end up with one TOC 1 line formatted with a 0.4 indent and 12-point Comic Sans and have the rest of the TOC 1 lines formatted with an 0.8 indent and 10-point Cambria. This would tend to confuse your reader as to what text is at what level in the document. When you modify a TOC style instead of formatting table of content text directly, you ensure that all items using that style change to use the same formatting.
CAUTION
One of the mistakes users sometimes make with tables of contents is trying to manually reformat them because they don't like the appearance. This is a mistake because your manual efforts will be wiped out when the table of contents is updated to reflect the latest changes in document content as will be described shortly.
To modify the TOC 1–TOC 9 styles, you can use the methods described in Chapter 7. Alternatively, you can use the Modify button in the bottom-right corner of the Table of Contents dialog box (refer to Figure 20.3) to change style formatting as follows:
- In the References tab Table of Contents group, choose Table of Contents Custom Table of Contents to open the Table of Contents dialog box.
- Click Modify. If the Modify button is disabled, choose the From template. The Style dialog box appears with just the TOC styles, as shown in Figure 20.7. By default, TOC 1–TOC 9 are formatted using the default paragraph font. The only difference in their formatting is the left indentation setting.
- Select different styles, and review their settings. Notice that the Preview and Description change very little, except that the +Body preview scoots to the right as the level increases.
- To change the style definition for a TOC style, select the style and click Modify. The familiar Modify Style dialog box appears, as shown in Figure 20.8.
- To make changes to the table of contents style, choose Format and proceed as described in Chapter 7.
- When you finish making changes, click OK three times to close all open dialog boxes and apply your changes.
TIP
If you find the perfect blend of formatting for your tables of contents, when modifying each style you change, click to enable New documents based on this template in the Modify Style dialog box. This will make your changes available to future generations of tables of contents when using that template (which might or might not be Normal.dotm).
By default, TOC 1–TOC 9 are formatted identically except for the amount of the left indent.

All of the TOC styles default to Automatically update.

Manually Creating a Table of Contents
Manually creating a table of contents requires two steps. First you have to mark the heading or other items you want to include in the table of contents. Then, use the Table of Contents dialog box to instruct Word to use those marked items, rather than or in addition to styles, and insert the TOC.
Marking entries for the table of contents
The most efficient way to mark entries is to mark them all at once when your document is just about finished. However, if you prefer, you can mark them as you go along. It's your choice.
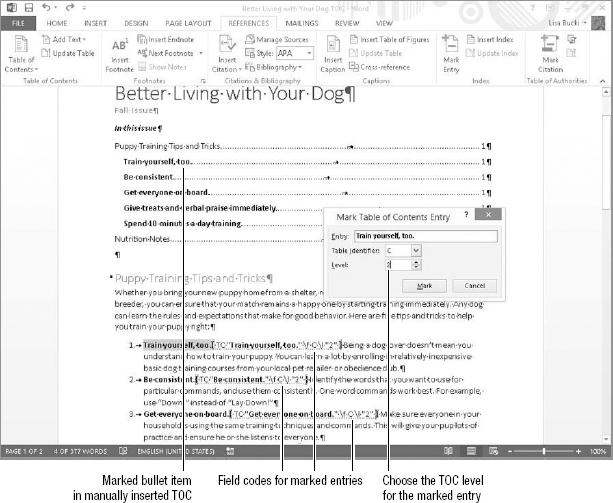
Assuming that what you want in the table of contents is exactly what you have in the text, the easiest way to mark entries is to select the entry and then display the Mark Table of Contents Entry dialog box, shown in Figure 20.9. The built-in keystroke for this is Alt+Shift+O. (If you prefer a button to the keyboard shortcut, add the Mark Entry command from Commands Not in the Ribbon to the QAT or Ribbon. Chapter 30, “Customizing the Quick Access Toolbar and Ribbon” explains how to add command buttons.) If necessary, make any changes in the Entry field and set the Level to the desired TOC level in the finished TOC. Click Mark, and Word inserts a TC field to the right of the selection to identify it as a marked table of contents entry. In the example in Figure 20.9, the numbered list items are marked as level 2 TOC entries, because ordinarily, numbers in a list would not be included in the TOC. Also note that only the first sentence for each list item is marked; including these items in the TOC by style (List Paragraph) would result in all of the list text being included in the TOC, which is not the desired outcome.
If you have a lot of entries to mark, you will quickly discover why using Heading 1 through 9 styles is so much more efficient than manually marking entries. The Mark Table of Contents Entry dialog box is nonmodal, so it doesn't go away when you click Mark. If all of your entries are ready to be marked, a good strategy is to select what you want to use for an entry, click Mark, select the next entry in the document, click on the dialog box to reactivate it, click Mark, and so on until you're done. If you have hundreds of these to do, you might consider writing a macro, and you most certainly will give styles serious consideration the next time you confront a document like this one.
NOTE
TC fields are formatted as hidden text. If Hidden text is displayed via Word options, TC fields are displayed as field codes all the time, and you can't turn them off using the Show/Hide button in the Paragraph group of the Home tab. You have to choose File ![]() Options
Options ![]() Display, and then uncheck Hidden text under Always show these formatting marks on the screen. Make sure they don't print by unchecking Print hidden on the Display tab under Printing Options. Click OK to apply the changes. If TC fields are hidden from view, you run a substantial risk of accidentally deleting them, so think twice before hiding them.
Display, and then uncheck Hidden text under Always show these formatting marks on the screen. Make sure they don't print by unchecking Print hidden on the Display tab under Printing Options. Click OK to apply the changes. If TC fields are hidden from view, you run a substantial risk of accidentally deleting them, so think twice before hiding them.
By default, the table of contents field uses Table identifier C as shown in the Mark Table of Contents Entry dialog box; change the Level setting as needed.
Inserting a table of contents using marked entries
After you have marked the desired entries for the TOC, follow these steps to insert the table in the document:
- Click to position the insertion point in the location where you'd like to insert the table of contents. As when inserting a TOC automatically, insert page or section breaks if desired to set off the TOC from other document text.
- In the Table of Contents group on the References tab, choose Table of Contents Custom Table of Contents. The Table of Contents dialog box opens with the Table of Contents tab selected.
- Click Options to open the Table of Contents Options dialog box. Refer to Figure 20.4.
- If your marked entries are supplementing styles and outline levels, click to add a check next to Table entry fields; if you're using entries instead of styles and/or outline levels, clear the Styles and/or Outline levels check boxes as needed.
- Click OK twice to insert the table of contents.
- If needed, add a title above the inserted table of contents.
Updating or Deleting a Table of Contents
Generally, you need to perform two types of maintenance on a table of contents. One is to update the table of contents when the contents of the document have changed. The need for updating occurs when the headings have changed or when anything moves to a different page (because material has been added to or removed from the document).
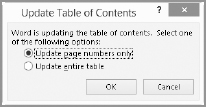
To update the table of contents to reflect changes in the document, click anywhere in the table of contents (in the content control for an automatic table or the field code for a custom table) and press the F9 key or click the Update Table button in the Table of Contents group of the References tab. If you inserted the table manually, right-click anywhere in the table of contents and choose Update Field. Word displays the Update Table of Contents dialog box shown in Figure 20.10. If none of the headings have changed but only the page numbers, and/or you've manually reformatted a table of contents, you can save a little time and preserve that manual formatting by choosing Update page numbers only. If more substantial changes were made—such as headings added or removed, or additional items marked for inclusion—choose Update entire table. With this option, if you have made manual formatting changes other than through the TOC 1 through TOC 9 styles, those changes will be lost. Click OK to finish the update.
The Update page numbers only option preserves any touch-up editing you might have done.
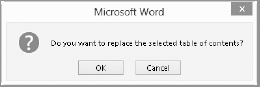
The other type of maintenance occurs if you want to change the way you present the table of contents. Perhaps you were including only levels 1 through 3, and now want to include level 4 as well. Perhaps you've changed your mind about hyperlinks or some other aspect. To edit the table of contents settings, select the entire table of contents, then choose Table of Contents ![]() Custom Table of Contents. Make any changes you need to make in the Table of Contents and Table of Contents Options dialog boxes as described earlier, and then then click OK as needed to close the dialog boxes. Word may now prompt as shown in Figure 20.11. If you're sure that you want to replace the table with your changes, click OK.
Custom Table of Contents. Make any changes you need to make in the Table of Contents and Table of Contents Options dialog boxes as described earlier, and then then click OK as needed to close the dialog boxes. Word may now prompt as shown in Figure 20.11. If you're sure that you want to replace the table with your changes, click OK.
Click OK to confirm that you want to replace the table and use new settings.
To delete a table of contents, click in it and choose Table of Contents ![]() Remove Table of Contents in the Table of Contents group of the References tab. Or for an automatic table contained in a content control, click in the table. On the control tab or toolbar, click the Table of Contents button, and then click Remove Table of Contents, as shown in Figure 20.12. Word doesn't prompt you to confirm the table deletion, but you can press Ctrl+Z automatically when you need to undo a deletion.
Remove Table of Contents in the Table of Contents group of the References tab. Or for an automatic table contained in a content control, click in the table. On the control tab or toolbar, click the Table of Contents button, and then click Remove Table of Contents, as shown in Figure 20.12. Word doesn't prompt you to confirm the table deletion, but you can press Ctrl+Z automatically when you need to undo a deletion.
An automatic table content control also enables you to access the commands for working with a table, such as the Remove Table of Contents command.

Converting a Table of Contents into Text
Sometimes it's desirable to convert the table of contents into actual text, rather than a field code. In some cases, you will want to have the table of contents in a separate document. You can always reinsert the field code if needed later, using the techniques shown in this chapter. To convert a table of contents into actual text, select the entire table of contents and press Ctrl+Shift+F9 or Ctrl+6.
TIP
Have you ever wanted just a document's outline in a separate file? When you display a document in Outline view, the whole document is really there. You can select what you see and then paste it elsewhere to get just the outline. To get a separate copy of the outline, insert a table of contents using the outline levels you need to see, and then use Ctrl+Shift+F9 to convert it to actual text. Instant outline! You might want to create an outline in this way and then import it into PowerPoint to make a presentation that covers the content in the Word document.
TIP
Once you get a table of contents format just the way you like, you can save it for later use. Select the table of contents and in the Table of Contents group on the References tab, choose Table of Contents ![]() Save Selection to Table of Contents Gallery. In the Create New Building Block dialog box, type a name for the table of contents, leave Gallery set to Table of Contents (so it will show up in the list when you first click Table of Contents in the References tab), and set Save In to the desired location (usually the template on which the document is based or the Building Blocks template). You might want to consider setting Options to Insert content in its own page, because tables of contents usually are on a separate page. Click OK to add the table to the gallery.
Save Selection to Table of Contents Gallery. In the Create New Building Block dialog box, type a name for the table of contents, leave Gallery set to Table of Contents (so it will show up in the list when you first click Table of Contents in the References tab), and set Save In to the desired location (usually the template on which the document is based or the Building Blocks template). You might want to consider setting Options to Insert content in its own page, because tables of contents usually are on a separate page. Click OK to add the table to the gallery.
The TOC Field Code
When you insert an automatic or manual table, Word creates the table of contents using a TOC field code. If you've never looked at the table of contents field code, you might be surprised that such a simple little code could be so powerful. By default, the table of contents field code that Word uses to create an automatic table is as follows:
{ TOC o “1-3” h z u }
In fact, it could be as simple as { TOC } and still produce a serviceable table of contents. To fully understand what each of the switches means, click the Insert tab, and in the Text Group, choose Quick Parts ![]() Field. In the Field dialog box, under Field names, scroll down and click TOC, but don't click the Table of Contents button or you'll be taken to the Table of Contents dialog box—and you've already made that particular pilgrimage in this chapter. Click Field Codes instead. This displays the TOC field with no switches in the Field Codes box. Click the Options button to see a list of the possible switches, shown in Figure 20.13.
Field. In the Field dialog box, under Field names, scroll down and click TOC, but don't click the Table of Contents button or you'll be taken to the Table of Contents dialog box—and you've already made that particular pilgrimage in this chapter. Click Field Codes instead. This displays the TOC field with no switches in the Field Codes box. Click the Options button to see a list of the possible switches, shown in Figure 20.13.
The TOC field code has 16 different switches you can use.
Look at the three switches shown earlier in the default TOC field code:
- h: Creates a hyperlink for each TOC entry and page number within the table of contents
- u: Uses the paragraph outline levels to compile the TOC
- z: When shown in Web Layout view, displays the TOC without page numbers
Click each of the switches to see additional options. You never know when they might prove useful. In this case, for example, you see that hyperlinking and hiding page numbers, combined into the single Use hyperlinks instead of page numbers option shown in Figure 20.3, are two distinct options. If you want one but not the other, you can have it by editing the field code switches
In the document, display the table of contents and press Alt+F9 to toggle field code display. Remove the unwanted switch and press Alt+F9 to toggle field code display off. Right-click the field and choose Update Field (or simply press F9), choose the desired option in Figure 20.10, and click OK.
Captions and Tables of Captioned Items
Captions are snippets of text that number and identify pictures, equations, tables, charts, and other items in your document. Word can automatically insert captions for you, automatically numbering such items as they are inserted. By being systematic in how you insert captions in your documents, creating a table of figures, equations, or tables (for example) is a snap, as is numbering them. If you insert or remove a numbered item, Word can automatically renumber all of the items that follow. When you need numbered items in a formal long document, Word's automation can save you loads of time.
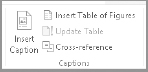
Captions settings reside in the Captions group on the Ribbon's References tab, shown in Figure 20.14. Other tools in this group include Insert Table of Figures, Update Table, and Cross-reference. Note that “Table of Figures” is a generic label. In your mind, substitute “whatever things I want a table of” for the word Figures. In other words, it can be a table of equations or a table of tables. Figures include any type of graphic you want to add a caption to: inserted pictures, charts, SmartArt graphics, and so on.
Control captions with the settings in the Captions group.
Strictly speaking, the Cross-reference tool in the Captions group is not just about captions. Though you can use it to refer to captioned items, you can use it to refer to just about anything else as well. With respect to captions, use it to insert references like “See Figure 3.” Why would you use a special feature for this rather than just type that text? Sometimes figures are moved, added, or removed. What referred to Figure 3 this morning might refer to Figure 17 this afternoon. By using Word's captioning and cross-referencing features, when figures, references to them, and text are shuffled around in a document, their respective numbers remain correct. Word automatically updates, increments, and decrements the captioned and cross-referenced items as needed.
Inserting a caption
To insert a caption, follow these steps:
- Select the object or table for which you want to add a caption. For a table, this means selecting the table move handle. For an equation, click the equation, and then click the button at the right side of the control twice.
- Choose Insert Caption in the Captions group in the References tab of the Ribbon. As shown in Figure 20.15, the Caption dialog box appears.
No matter what kind of object is selected, Word will always propose the most recently chosen Label, defaulting to Figure if this is the first caption you're creating.
- If you want a different type of label, select it from the Label drop-down list.
NOTE
You'll learn more details about working with the New Label, Numbering, and Delete Label options in the upcoming sections.
The Caption dialog box helps you create consistent captions.
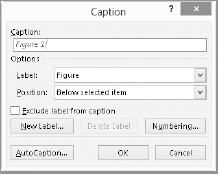
- Open the Position drop-down list and choose Below selected item or Above selected item as desired.
- Edit the text in the Caption text box as needed. Standard practice is to add a period and space following the caption label and number, along with some text describing the captioned item.
- Click OK to insert the caption. Word formats it using the Caption style in the current document template.
NOTE
A caption usually consists of more than just the label and number. As demonstrated in the book you're reading, captions also exist to tell the reader what they're looking at or why it matters in the context of the document. Caption length is limited. You can include 253 characters in addition to the caption label and number.
Labels
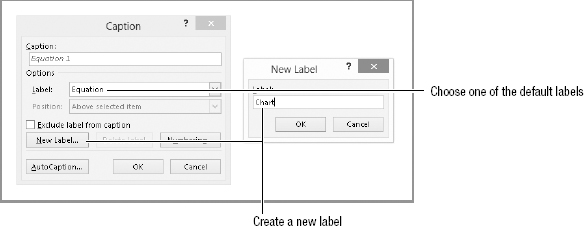
If you want to use a label for your captions other than the default Figure setting, open the Label drop-down list under Options in the Caption dialog box. By default, Word offers three label options: Equation, Figure, and Table. You are not limited to those three. To add labels of your own, click New Label. In the New Label dialog box, shown in Figure 20.16, type a name for the label you want to create and click OK twice. Label naming is generously liberal. There are no restrictions on what you can type.
Labels you create are remembered by Word across multiple sessions. The next time you open Word and click Insert Caption, Word offers the last label you used, as well as any you've created in the Label drop-down list. For example, if you've used Widget, Picture, and Diagram, Word will offer those in addition to the default three. If you believed the preceding paragraph's assertion that there are no restrictions on label names and typed something embarrassing, select that label and click Delete Label. Then either proceed with captioning the selected item or click Cancel to close the dialog box.
You can create whatever custom label you need: Photo, Picture, Chart, Graph, Snapshot— you name it.
Adding numbering
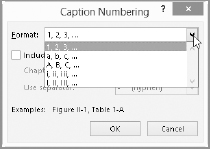
By default, Word numbers captions using 1, 2, 3, and so on. If that scheme doesn't meet your needs, click Numbering in the Caption dialog box to display the Caption Numbering dialog box shown in Figure 20.17. Use the Format drop-down list to see if one of the five numbering options offers what you want. If you need options for more custom numbering, jump ahead to “How numbering is done” to find some fresh alternatives.
Word offers five numbering styles.
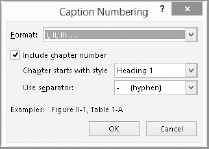
If you use the Multilevel List button in the Paragraph group of the Home tab to apply numbering along with the numbered heading styles, you also can include chapter numbers along with the regular caption number. As shown in Figure 20.18, click Include chapter number in the Caption Numbering dialog box to enable this feature. Choose the appropriate numbered Heading style from the Chapter starts with style drop-down list. The Separator choice enables you to determine what character appears between the chapter and caption number, choose from among the following: hyphen, period, colon, em dash, or en dash.
You also can include a chapter number in a caption.
How numbering is done
Word creates and maintains caption numbers using a SEQ field, SEQ identifier, where the selected label is used as the identifier, for example, SEQ figure, SEQ equation, or SEQ table, and so on. If you choose the Include chapter number option, the chapter number is inserted by using a STYLEREF field. For example, with field codes showing (Alt+F9), a typical caption might appear as follows:
Figure { STYLEREF 1 s }- { SEQ Figure * roman s 1 }
Chapter 23, “Automating Document Content with Fields,” provides more detailed coverage of fields and how to work with switches to get the desired formatting displayed with the field results.
NOTE
If you move captioned items around in a document, you'll need to update the captions. Select the text holding the captioned items and press F9 to perform the updates. (Because captions use fields, you press F9 to update them as for any other field.) You can select an individual caption and use F9 to update it, or press Ctrl+A first and press F9 to update the entire document. However, if the document includes a table of contents, table of captioned items, index, bibliography, or other features based on fields, they will update as well.
Eliminating the numbers
You probably noticed that None is not one of the numbering options. Excluding numbers from your captions is easy, however. To insert an unnumbered caption, position the insertion point where you want it to appear and apply the Caption style. Type the caption label you want to use. In other words, if you don't want numbered captions, you don't need the caption feature. The whole idea of using the caption feature is to coordinate and automate the process of numbering the dang things. If you don't want numbered captions, then this feature has nothing to offer you.
Removing the label
If you have only one type of figure (or whatever) in your document and want to exclude the label, you can. In the New Label dialog box shown in Figure 20.16, click to place a check next to Exclude label from caption. Why would you want to do this? That's a private matter between you and your document.
The Caption style
As noted earlier, Word provides a caption-oriented style named Caption. It is a paragraph style, and it is applied to the entire paragraph. There is no way to change the style that Word applies to captions inserted using the caption feature. You can, however, modify the Caption style. With a caption selected, press Ctrl+Shift+S and choose Modify. Modify the style as described in Chapter 7.
Note that by default the Caption style is color-coordinated with the current theme. By default, the Caption style uses the Text 2 theme color to the Caption style. Keep this in mind if your caption text suddenly changes color when you apply a new theme. For more about themes, see Chapter 18, “Saving Time with Templates, Themes, and Master Documents.”
Turning on AutoCaptioning
You can also instruct Word to automatically insert captions when you insert particular kinds of graphics and other objects. If you have a lot of installed applications with object types that Word recognizes, it can be a little daunting, however, trying to figure out what's what.
As of this writing, the list of things for which AutoCaptioning works is short: Microsoft Equation 3 (the Word 2003 version), Word tables, and Microsoft Graph Chart, and perhaps a few others. It does not work for SmartArt, pictures, WordArt, charts, or a vast majority of other object types.
AutoCaption must be enabled for the specific objects for which you want to use it. To enable it, on the References tab, choose Insert Caption in the Captions group, and then click AutoCaption in the Caption dialog box to display the AutoCaption dialog box, shown in Figure 20.19. In the Add caption when inserting list, click to check each kind of item you want to AutoCaption. Make choices as before from the Use label and Position drop-down lists, or click New Label to add a new label to the list of labels you use. Click OK. Word will now use those settings to add captions for all objects of the specified type.
AutoCaption must be enabled for each type of object you want captioned.

NOTE
If you insert a table by pasting one from the Clipboard, AutoCaption will insert a caption only if the Clipboard contains just a table. If the Clipboard contains additional text or other objects, AutoCaption is suppressed. Inserting a table from the Quick Parts Gallery or the Building Blocks Gallery also does not insert an AutoCaption. If you want either of those to contain a caption, you should save a caption with the table when you save it as a Building Block or a Quick Part. In addition, AutoCaption doesn't work for every kind of object. If the object type you seek isn't listed, you'll have to continue manually inserting captions for that type.
Adding tables of captioned items
Word can insert a table of captioned items that appear in the document. Word bases the table on caption labels. Hence, if you have used the Figure label for different kinds of things, they will all be included in the table. If you have used a variety of labels—Figure, Table, and so on—you will have to create a table for each different label type. That's why it's important to think about how you want to label your captions when inserting them, based on whether you want all captioned items listed in a single table or want separate tables to distinguish different types of items.
To insert a table of captioned items:
- Click to position the insertion point in the location where you want to insert the table.
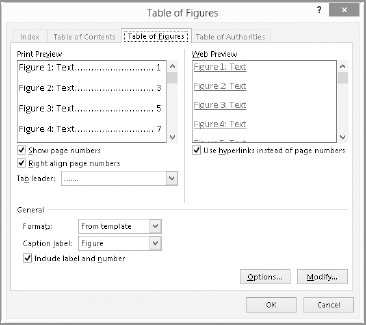
- In the Captions group of the References tab, choose Insert Table of Figures. The Table of Figures dialog box appears with the Table of Figures tab selected, as shown in Figure 20.20.
Insert Table of Figures means “figures” in a generic sense and can be used to insert a table of any type of captioned item.
- Open the Caption label drop-down list and choose the caption label (that is, Table or another choice rather than Figure) for which you want to compile the table.
- Specify other options on the tab as needed. These options work the same as those for a table of contents described earlier in the chapter, and include:
- Show page numbers
- Right-align page numbers
- Tab leader (separate table of contents heading text from numbers using…leaders)
- Formats (use From template to use TOC style formatting from the current template)
- Use hyperlinks instead of page numbers in Web Layout view
- Caption label
- Include label and number (clear this check mark to suppress the display of these items in the final table)
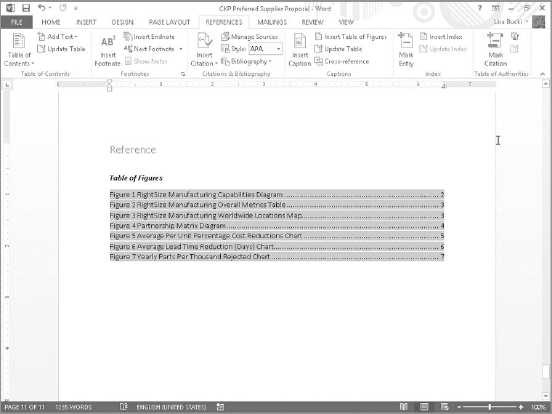
- Click OK to insert the table. As shown in the example in Figure 20.21, if you click the table, the field highlighting appears. A table of captioned items is inserted as a series of hyperlinked fields, with an overall TOC field controlling the table.
This inserted table of figures resembles a table of contents and is similarly compiled using fields.
Options for creating the table
For additional options, shown in Figure 20.22, click the Options button in the Table of Figures dialog box. By default, Word builds the table based on occurrences of the selected label formatted with the Caption style. If you haven't used the Caption style but used styles named Normal or Table of Figures instead, click the drop-down arrow to the right of the Style box and click the alternate style used.
You can base a table of figures on different styles or on table entry fields.

In addition to or instead of basing a table of figures on the presence of a given label formatted with a given style, you can build a table of figures based on the presence of table entry fields. Recall that earlier in this chapter you learned that Word defaults to a table identifier of C for the table of contents. For the table of figures, it defaults to a table identifier of F. As you learned earlier in the section “Marking entries for the table of contents,” you can select an item to mark, and press Alt+Shift+O to open the Mark Table of Contents Entry dialog box. For a table of captioned items, change the Table identifier drop-down list choice to F and click Mark. After marking all the entries, insert the table of figures, open the Table of Figures Options dialog box, check Table entry fields, and click OK before clicking OK in the Table of Figures dialog box.
Updating the table of figures
When you insert captions using AutoCaption or the Insert Caption command, Word automatically updates all of the relevant numbering fields for other captions in that series. If you move tables, figures, and so on around, or delete them manually, however—using copy, cut, and paste—the numbers are not automatically updated. Assuming you don't have unrelated fieldbased numbering systems that you don't want updated, you can update the captioned items by pressing Ctrl+A to select all of the text in the document and pressing F9. You can also update caption numbering fields individually, which you may want to do to avoid mistakenly updating other field-based elements in the document, such as a table of contents, either by selecting each and pressing F9 or by right-clicking the selection and choosing Update Fields.
Indexing a Document
For paper books, especially reference books, the index is the key to whether readers will find the book useful as a reference. Word enables you to create indexes (or indices, if you prefer) in a variety of formats and styles. For online documents, indexes are less important because readers are able to search for what they're looking for. Even there, however, an index can help steer readers to more substantive discussions as opposed to incidental mentions of a given topic or keyword.
Unlike with tables of contents and figures, the indexing process can't be fully automated, although there are some things you can do as you're writing to make things easier. We look at some of those in this section, along with how you set up a document for indexing and how you insert an index.
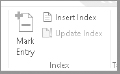
As a feature set, indexing lives in the Index section of the References tab, as shown in Figure 20.23. Tools provided there are as follows:
- Mark Entry: Use to mark locations in the text you want indexed as well as to specify how each location is treated.
- Insert Index: Use to insert and format an index.
- Update Index: Updates the index. This command is available only when the insertion point is located somewhere within an index.
In the References tab, use the Index group to mark items for including in the index as well as to insert and update indexes.
Indexing is a two-step process:
- Create the index entries—words and phrases in the text you want indexed, as well as categories and subentries—by marking text for indexing.
- Compile and format the index.
Marking Index Entries
You mark index entries by inserting an index entry field (XE). You can do this in three ways:
- Use the Mark Entry tool in the Index group of the References tab.
- Use the Mark All tool from the Index dialog box.
- Insert an XE field directly either manually or by using Insert Field.
This section describes how to use the Index tools in the References tab. See the “Index field codes” section later in this chapter, and Chapter 23, for more information on fields.
Creating index entries using Mark Entry
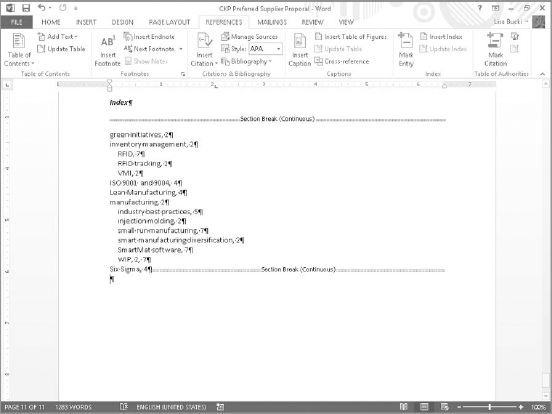
Index entries are items you want in the index. For example, if you were to go about indexing a mention of the word table, you might simply include that word in the index. Or, if tables were mentioned frequently in the book, and in a variety of contexts, you would probably want to have a main index entry for tables, along with subentries about each of the different kinds of tables (table of contents, table of figures, and so on). Examples of an entry and subentries are shown in Figure 20.24. Note that the subentries are indented below the main entries.
To create an index entry and/or subentry:
- Select the text you want indexed, or click at the beginning of the section you want indexed. This ultimately will insert a tag into the text that will move with that location if text is added or removed before the entry location. This enables the index to refer to the correct page even if the document is heavily edited, as long as the index entry itself is not deleted. Note that selected text will always go into the Main entry box. There is no built-in way to make selected text go into the subentry field.
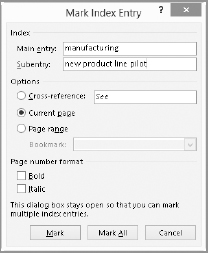
- Click Mark Entry in the Index group of the References tab, press Alt+Shift+X, or click Mark Entry from the Insert Index dialog box. This displays the Mark Index Entry dialog box, shown in Figure 20.25. If text is selected, it will automatically be displayed in the Main entry field. This dialog box is nonmodal and can be kept onscreen as you navigate, so you can mark multiple items without having to dismiss and resummon the dialog box.
Use subentries to provide detail when a topic is covered extensively.
- If the Main entry text box is blank or does not contain the entry you want, type the desired index entry. Word will use the capitalization and formatting you supply. Use character formatting shortcut keys to format the text boxes (Main entry, Subentry, and Cross-reference) as you want them to appear in the index. For example, select text in the dialog box text fields and press Ctrl+I, Ctrl+B, Ctrl+U, Ctrl+Shift+D, and so on.
- If desired, enter a subentry. If the text you want to enter in the Subentry text box is in the Main entry text box, follow these steps:
- To change the marked text to a Subentry, select and cut it (Ctrl+X) from the Main entry text box.
- Type the appropriate main entry.
- Click in the Subentry text box and press Ctrl+V to paste the subentry.
Use the Mark Index Entry dialog box to create index main entries and subentries.
This will become a category within the Main entry, as shown in Figure 20.24. See the section “Working with subentries and styles” later in this chapter for more information on subentries.
- If desired, select Bold or Italic for the Page number format. In some publications, key entries are formatted differently (for example, where a concept is defined or introduced) so they can be found more readily.
- To refer to another entry, choose Cross-reference and supply the text needed.
- To specify a page range rather than a single page, bookmark the range of pages prior to inserting the index, choose Bookmark in the Mark Index Entry dialog box, and use the drop-down arrow to indicate which bookmark to use.
- Click Mark to insert an index entry field either at the insertion point or next to the text that was selected. If you want to mark every instance of text matching the Main entry (whether it is selected or not), click Mark All.
When you click Mark or Mark All, the Mark Index Entry dialog box remains onscreen. An XE field is inserted as hidden text into the document. If hidden text is showing, XE fields always display as field codes. They never collapse into field results. This enables them to be conspicuous, as shown in Figure 20.26, and less subject to accidental deletion. When proofing or reading a finished document, they can be distracting, however. Toggle hidden text on/off using File ![]() Options
Options ![]() Display as described earlier in the chapter for manually marked TOC entries if you find glaring XE fields distracting.
Display as described earlier in the chapter for manually marked TOC entries if you find glaring XE fields distracting.
Index entry (XE) fields are inserted as hidden text.

TIP
Because the Mark Index Entry dialog box is nonmodal, you can move readily between it and the text area. If you select text in the document, when you click back in the Mark Index Entry dialog box, the selected text is automatically copied to the Main entry field.
Automatically marking index entries using AutoMark
If you have a long document with numerous entries, marking them manually can prove tedious. A simple solution is to create a list of words (called a concordance file) you want indexed, and use the AutoMark feature to insert the XE entries for you.
To do this, you first create the concordance file using Word. A concordance file should contain only a two-column table. The first column contains the text you want indexed, using the exact capitalization, punctuation, and formatting you want to appear in the index. The second column contains the XE field you want used. When you run the AutoMark command, Word finds each occurrence of every word or phrase in the list and inserts the XE field from the second column. The concordance file is saved in Word format and should resemble the example shown in Figure 20.27.
Use a concordance table to automatically insert index entry (XE) fields into your document.

Notice that Figure 20.27 does not show any subentries. That's because subentries do not work when applied using a concordance file. If you attempt to use subentries, separated by colons, only the rightmost category will be included in the resulting XE fields.
To run AutoMark (the Word procedure that uses the concordance file), click Insert Index from the Index group of the References tab, and then click AutoMark. In the Open Index AutoMark File dialog box, navigate to the concordance file, select it, and click Open.
NOTE
If you get the No index entries were marked message, it usually means that no instances of the words in the first column of the concordance file match anything in the document. It can also mean that the concordance file is defective in some way, often meaning that it contains something other than the expected table with XE fields.
Compiling and Inserting an Index
Compiling an index means collecting all of the XE entries and putting them into the form of an index. Once the XE entries have been inserted using the methods described earlier in this chapter, use these steps to insert the index:
- Move the insertion point to where you want the index inserted, perhaps setting it off with a page break or section break (Page Layout Page Setup Breaks).
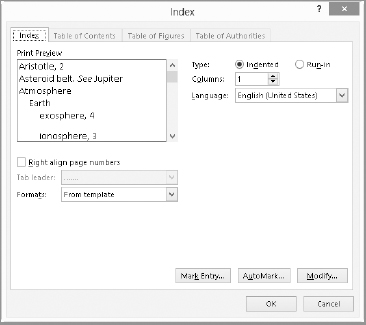
- In the Index group of the References tab, click Insert Index, which displays the dialog box shown in Figure 20.28.
- Change settings as desired:
- Print Preview: This shows an approximate preview of the finished index using the current settings.
- Right align page numbers: Moves page numbers to the far right. With indexes, this sometimes makes it difficult to associate entries and page numbers, even with leaders. Unless you're using narrow columns of text, right-aligned is usually not a good choice.
- Tab leader: When right-aligning page numbers, specify a leader to help the reader connect the dots between the index entry and the page number.
- Formats: Choose the From template option to use Index 1 through Index 9 styles defined in the current template, or choose one of the preset options available through the Formats drop-down control.
- Type: Indented or Run-in. Subentry levels can be indented or presented in the same line as the main entry (assuming there's room). The former usually results in a neater and more organized appearance. The latter generally results in a more compact index that's sometimes easier for readers to follow, because all of the entry/subentry category information is presented in one place, eliminating the need to visually backtrack to figure out where a given entry originated.
- Columns: Word can organize the index into snaking columns. Narrower columns, as long as entries are fairly terse, often are easier to follow, and use paper more wisely. The default is two columns, and you can specify up to four columns.
- Language: If you have indexes in multiple languages, be sure to associate the correct language with each for proper proofing.
- Modify: Use this option to modify built-in Index 1 through 9 styles when Formats is set to From template. See “Working with subentries and styles” a little later in this chapter.
- Click OK to compile and insert the index. Word responds by inserting an INDEX field in the document, using switches corresponding to the options selected in the Index dialog box.
Use the Index dialog box to launch Mark Entry or AutoMark, to modify index styles, or to format and insert an index.
Index field codes
Unlike index entry fields, the INDEX field itself does display a field result. With field codes displayed, a typical run-in index field might appear as follows:
{ INDEX h “ ” c “2” z “1033” }
To see what the switches mean, choose Insert ![]() Text
Text ![]() Quick Parts
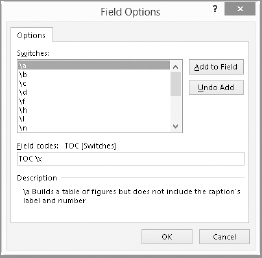
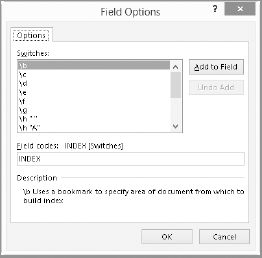
Quick Parts ![]() Field. Select Index in the Field Names list, click Field Codes in the bottom-left corner, and then click Options to open the Field Options dialog box shown in Figure 20.29. Alternatively, if the index has already been inserted, right-click it and choose Edit Field
Field. Select Index in the Field Names list, click Field Codes in the bottom-left corner, and then click Options to open the Field Options dialog box shown in Figure 20.29. Alternatively, if the index has already been inserted, right-click it and choose Edit Field ![]() Options. The switches used here are as follows:
Options. The switches used here are as follows:
- : Keeps index subentries on the same line as the main entry
- h “ ”: Separates groups in the index with a blank line formatted with the Index Heading style
- c “2”: Specifies the number of columns (2) to use for the index
- z “1033”: Specifies the language ID (1033 means U.S. English)
Field options for the Index field
Working with subentries and styles
You are not limited to just one subentry level. You can have up to nine levels in an index, which means up to eight subentries below the main entry. To designate additional subentry levels, mark the text that will be the index entry, and then edit the field code to indicate the entries by level, separating each level with a colon. In the following example, manufacturing is at the main entry index level, new product line pilot is at the first subentry level, and green is at the next subentry level (third level overall in the index):
{ XE “manufacturing:new product line pilot:green” }
You can format different subentry levels differently. Word uses built-in styles named Index 1 through Index 9. By default, the only formatting differentiation is indent levels. If you want to change the associated formatting, in the References tab choose Insert Index and then click the Modify button in the Index dialog box, which displays the Style dialog box. Click on Index 2 through Index 9; notice that, by default, only the Left Indent setting changes. To change the indentation or differentiate in other ways, click Modify to change the selected style. For information on modifying styles, see Chapter 7.
Updating an index
If you revise a document, adding and deleting pages and marking additional index entries, you'll need to update the index contents. To do so, click in the Index and press F9, or click Update Index in the Index group of the References tab.
Creating Multiple Indexes
Word lets you create up to 26 separate indexes for a document. However, no automatic support for this is provided in the Index group on the References tab. To create separate indexes, you must include the findex switch in each of the XE fields you insert, where index identifies the index in which the item would be included. These 26 indexes can be designated as a through z, alpha through zulu, or artichokes through zucchini, the point being that they must start with the letters a through z, and that the names themselves aren't important.
When you insert the index, you also include a findex switch in its field code. The { index fa } generates an index for index entries such as { XE fa “finches” }, { index fb } for index entries such as { XE fb “larks” }, and so on.
Summary
In this chapter you've seen how to add important reference features to a long document, including tables of contents, tables of captioned items (such as figures), and indexes. You've learned how to mark TOC and index entries manually, as well as how to insert captions manually, and you should have a good understanding of how a TOC, table of figures or other captioned items, or index is compiled. You should now be able to accomplish the following in finishing your document:
- Insert an automatic table of contents based on heading styles in your document
- Mark table of contents entries for manually creating a table of contents
- Selectively use non-heading styles in a table of contents
- Save a custom table of contents to the Table of Contents Gallery for reuse
- Perform custom edits to the TOC field to change features to which the Table of Contents dialog box doesn't provide access
- Create new labels for captioning a variety of objects
- Change the caption numbering style
- Insert a table of figures, tables, and so on using caption labels
- Mark captioned items manually and insert a table using table entry fields
- Use the Mark Entry dialog box to mark index entries
- Insert and update an index