
Chapter at a Glance

In Chapter 19, we discussed creating Microsoft OneNote notebooks, sections, and pages within which to store electronic information. In this chapter, we move on to the task of collecting and storing the information.
OneNote 2010 provides two primary ways to collect information: the OneNote program window and the OneNote Side Note utility. In addition, options in other programs—such as the Send To OneNote command on the Windows Internet Explorer Tools menu, and the Send To OneNote 2010 printer available when printing from any Windows program—make it easy to collect information without starting or switching to OneNote.
You can store almost any type of electronic information in a OneNote notebook, including text, graphics, photos, Web clippings and pages, hyperlinks, audio clips, and video clips. You can store as much or as little information as you want on each individual page.
In this chapter, you’ll insert text, graphics, handwritten notes, screen clippings, Web notes, and media clips into note containers on pages of a OneNote notebook by using various methods.
Note
Practice Files Before you can complete the exercises in this chapter, you need to copy the book’s practice files to your computer. The practice files you’ll use to complete the exercises in this chapter are in the Chapter20 practice file folder. A complete list of practice files is provided in Using the Practice Files at the beginning of this book.
Each piece of information you store on a notebook page exists within a note container. Similar to a text box that you might use to position text in a Microsoft Word document or on a Microsoft PowerPoint slide, a note container consists of a frame that has a move handle and a sizing handle. Each object (such as a text block, image, or URL) within the note container has an object selector.

Unlike a text box in other programs, you don’t have to insert a note container on the page before entering content into it—simply click anywhere on the page and type or paste content, or insert content from another source, to create the container. A note container can contain any sort of content, such as text, images, handwritten notes, screen clippings, or Web notes (Web page content you send to OneNote directly from Internet Explorer).
You can manipulate a note container on the page in the same way that you would manipulate a text box or other type of content frame in a word-processing or graphics program. You can change its size, relocate it on the page, and cut, copy, or delete it.
The contents of an entire page may be stored in one note container or in many note containers. While you work in OneNote, the frame of the active note container is visible, but the frames of the other note containers are not. Pointing to the content displays the note container’s frame, and pointing to an object within the active container displays the object selector. You can manipulate individual objects within the container by dragging, clicking, or right-clicking the associated object selector.
The simplest type of information you will store in a OneNote notebook, and probably the most common, is text. You can enter text by typing directly on the notebook page or by pasting it from another source. But you aren’t limited to simple text entry. You can insert attachments, formatted file contents, images, multimedia objects, and handwritten notes, all with a minimum amount of effort.
Tip
When deciding how much information to include on a notebook page, consider whether you want to scroll down the page. If you want to see all the information at a glance, limit the content to about 30 lines of standard text.
When conducting research, you might identify an entire file of information—such as a document, image, or video clip—that you want to include in your notebook. You can store this information in the following three ways:
Link to the external file on a local drive, network drive, or Web site by clicking the Link button in the Links group on the Insert tab, browsing to the file, and then clicking OK.
Insert the file as an attachment by clicking the Attach File button in the Files group on the Insert tab, browsing to the file, and then clicking Insert.
Insert the file’s contents on the page by clicking the File Printout button in the Files group on the Insert tab, browsing to the file, and then clicking OK.

Tip
The name of the File Printout button is somewhat misleading. Clicking this button sends the contents of the external file that you select into the note container, in the same way that you send a file’s contents to a printer. It does not print the OneNote page or notebook.
Tip
OneNote automatically inserts the date and time when you send content from another source to OneNote. (For more information, see the sidebar Inserting the Date and Time later in this chapter.)
On any computer that has a mouse, you can enter “handwritten” notes by using a pen tool that you control with the mouse. On a Tablet PC, you can enter handwritten notes by using the tablet pen, just as you would in other handwriting-enabled programs.

You can insert and attach image files just as you can document files. You can insert an image at a size that is scaled to fit the available space by using the Insert Picture command, or you can insert an image at its full size by using the File Printout command.
To insert scaled versions of one or more photos or other image files onto a OneNote notebook page:
You can easily change the size of an image on the page.
To change a scaled image to its full size:
Right-click the image, and then click Restore To Original Size.
To manually resize an inserted image:
Click the image (not the note container).
Sizing handles appear in the corners and at the center of each side of the image.
Drag a sizing handle to resize the image.
Drag a round corner sizing handle to maintain the image’s aspect ratio.
Drag a square edge handle to resize the image in one direction only.
Using the new Screen Clipping tool, you can insert clip art (free graphics, photos, sounds, and movies) into your notes, but there is no built-in command for doing so. You must do one of the following:
Insert the clip art into another Office document, such as a Word document, cut or copy the clip art from the document, and then paste it onto the notebook page.
From the Start menu, open the Microsoft Office Clip Organizer, locate and copy the clip art you want, and then paste it onto the notebook page.
Note
See Also For information about inserting screen clippings, see Sending Content to OneNote later in this chapter.
You can change the appearance of text in notes in much the same way that you do in other Office 2010 programs. OneNote supports character-level formatting such as font, size, and color, and simple styles such as headings and titles.
OneNote 2010 provides several standard paragraph formatting options, including:
Alignment (left, center, or right)
Spacing (before, after, and within a paragraph)
Lists (bulleted and numbered)
Indent level
The paragraph formatting options settings aren’t as complete as those in Word and the other Office 2010 programs, but they are a great improvement over what was available in OneNote 2007.
You can assign outline levels (1 through 5) to paragraphs by indenting the paragraph. An icon appears to the left of each paragraph when you point to the paragraph. You can select all the content within the level headed by the paragraph by clicking the icon, and you can collapse or expand the content within the level by double-clicking the icon. You can also hide levels, which gives you the equivalent of an outline view.
To change the paragraph indentation for the purpose of assigning an outline level:
Click to place the cursor at the beginning of the paragraph, or drag to select multiple paragraphs.
Press the Tab key to increase the level, or press the Backspace key or Shift+Tab to decrease the level.
To select all text of a specific outline level within a note:
Right-click the note container header, click Select, and then click the outline level you want to select.

Note
Keyboard Shortcuts Press Alt+Shift+level number (for example, Alt+Shift+1) to show all content through the specified outline level. Press Alt+Shift+0 to expand all outline levels. Press Alt+Shift+Plus Sign to expand a collapsed outline. Press Alt+Shift+Minus Sign to collapse an expanded outline.
By default, a OneNote notebook page has a blank white background. You can modify the appearance of the page in several ways. For example, you can:
Change the page size, orientation, and margins.
Change the page background to any of 16 background colors. The available colors are muted so they don’t obscure the page content.
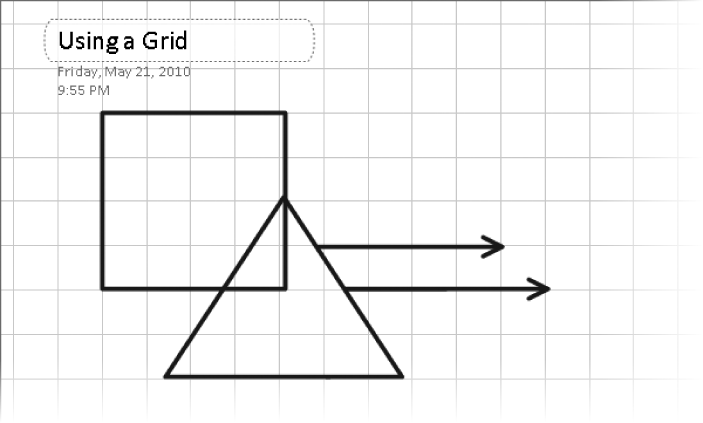
Display any of four horizontal rule line patterns (Narrow, College, Standard, and Wide) or four grid line patterns (Small, Medium, Large, and Very Large).
Hide rule lines and grid lines (while leaving them in place for alignment purposes) or change the line color to any of 17 colors.
These and other options are available on the View tab, in the Page Setup group.
Tip
Changing the size, orientation, background, or other attribute of a page does not affect other pages of the notebook.
You can change the color of a section tab and its Page Tabs area by right-clicking the page tab, clicking Section Color, and clicking the color you want.
In this exercise, you’ll enter text; insert, attach, and manipulate images; and create a handwritten note by using the OneNote writing tools.
Note
SET UP You need the SBS Content Entry notebook, the Landscaping presentation, and the Cabo, California_Poppy, Desert, and ADatumLogo images located in the Chapter20 practice file folder. Open the SBS Content Entry notebook, and then follow the steps.
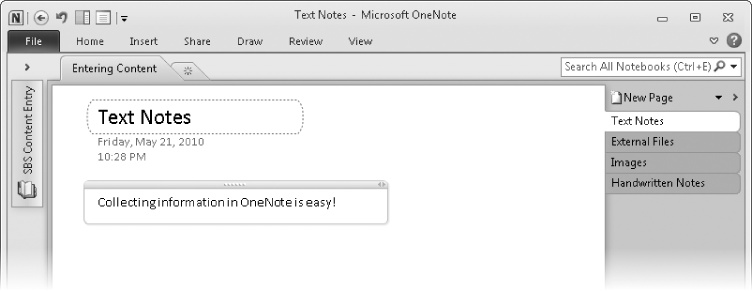
On the Text Notes page, click to place the cursor on the page, and then type Collecting information in OneNote is easy!
OneNote creates a visible note container when you type the first character and then expands the note container to fit the remaining text.
 On the Insert tab, in the Files group, click the File
Printout button.
On the Insert tab, in the Files group, click the File
Printout button.The Choose Document To Insert dialog box opens.
Note
See Also For information about the File Printout button, see the Referencing External Files section of this topic.
Browse to the Chapter20 practice file folder. Click the Landscaping presentation, and then click Insert.
OneNote inserts the presentation file as an attachment, the Inserted From reference, and then each slide of the presentation, at its full size. Each slide is an individually sizable object.
 On the Insert tab, in the Images group, click the Picture button.
If necessary, browse to the Chapter 20 practice file folder. Click the ADatumLogo image, and then click Insert.
The inserted image appears on the page.
Note
Troubleshooting The appearance of buttons and groups on the ribbon changes depending on the width of the program window. For information about changing the appearance of the ribbon to match our screen images, see Modifying the Display of the Ribbon at the beginning of this book.
Click the inserted image.
Within the note container, a dotted outline appears around the image to indicate that it can be manually resized on the notebook page. Sizing handles appear on each side and in each corner of the inserted image.
Drag the bottom handles to change the height of the image, making it smaller and approximately square.
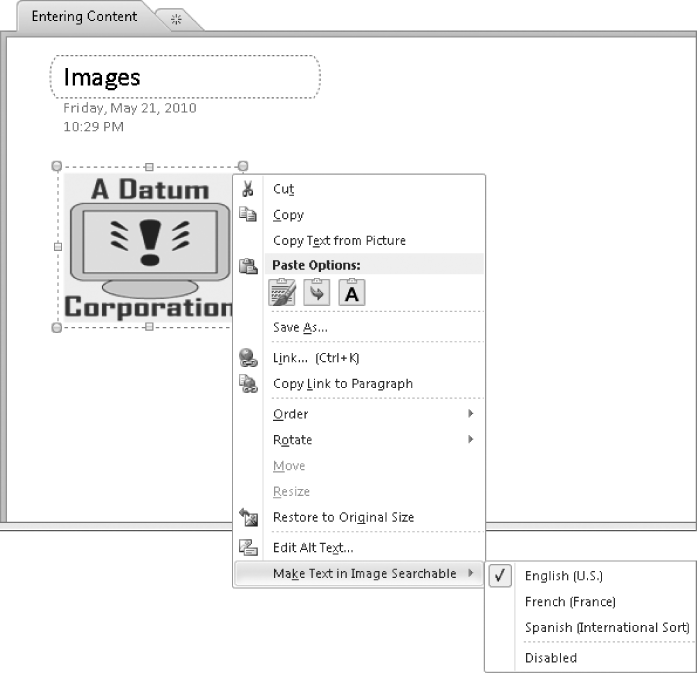
Right-click the image, and then click Make Text in Image Searchable.
Notice that by default, OneNote searches the text of the embedded image.
 Click to place the cursor to
the right of the logo. Then on the Insert tab, in the Files group, click the Attach File button.
Click to place the cursor to
the right of the logo. Then on the Insert tab, in the Files group, click the Attach File button.The Choose A File Or A Set Of Files To Insert dialog box opens.
If necessary, browse to the Chapter20 practice file folder. Click the Cabo image, hold down the Shift key, and then click the Desert image.
The three images (the two you clicked and the one in-between) are selected in the dialog box.
In the Choose a file or a set of files to insert dialog box, click Insert.
The icons and file names representing the attached images appear on the page.
Point to the California_Poppy image.
A ScreenTip containing file information is displayed.
Note
Troubleshooting The displayed icons represent the program that is set up on your computer as the default program for this file type (the program in which the file opens when you double-click it). If your default programs are different from ours, the icons shown on your notebook page won’t match the icons shown here.
Double-click the California_Poppy image. If a warning message appears, select the Don’t show this again check box, and then click OK.
The image opens in the default program for viewing .jpg files.
Close the image window to return to OneNote.
In the Page Tabs area, click the Handwritten Notes page tab.
 On the Draw
tab, in the Tools group, click
the Blue Pen (.05 mm) button.
On the Draw
tab, in the Tools group, click
the Blue Pen (.05 mm) button.Point to the notebook page.
The pointer shape changes from an arrow to a blue dot.
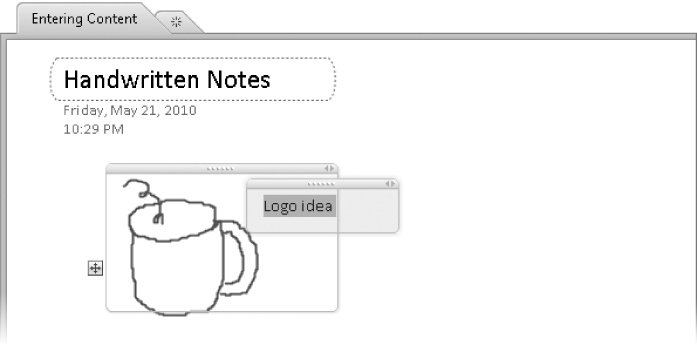
By dragging the pen on the notebook page, draw a picture depicting a possible business logo.
 On the Draw
tab, in the Tools group, click
the Select & Type button.
On the Draw
tab, in the Tools group, click
the Select & Type button.Click to place the cursor on the page to the right of the note containing the logo (not in the same note container), and type Logo idea. Then drag the note container for the typed words to the left, to overlap the note container for the drawing.
The content of both note containers is visible where they overlap.
Experiment on your own with additional pens, colors, and commands from the Writing Tools toolbar.


Tagging Content
You can identify content that fits into specific categories by attaching a visual identifier, a tag, to the content. Tags are not only icons, however—they function as a property attached to the content. You can locate specific content based on the tags attached to it. OneNote 2010 includes nearly 30 built-in tags. You can modify any built-in tag, and also create your own tags.

You apply a tag to a paragraph by right-clicking the paragraph, clicking Tag, and then clicking the tag you want to apply. You apply a tag to the active paragraph by clicking the tag in the Tags gallery on the Home tab.
Alternatively, you can use the keyboard shortcuts in the following table to work with tags.
|
To do this |
Press this |
|---|---|
|
Apply, mark, or clear the To Do tag |
Ctrl+1 |
|
Apply or clear the Important tag |
Ctrl+2 |
|
Apply or clear the Question tag |
Ctrl+3 |
|
Apply or clear the Remember for later tag |
Ctrl+4 |
|
Apply or clear the Definition tag |
Ctrl+5 |
|
Apply or clear a custom tag |
Ctrl+6 |
|
Apply or clear a custom tag |
Ctrl+7 |
|
Apply or clear a custom tag |
Ctrl+8 |
|
Apply or clear a custom tag |
Ctrl+9 |
|
Ctrl+0 | |
|
Move the selected page tab up |
Alt+Shift+Up Arrow |
|
Move the selected page tab down |
Alt+Shift+Down Arrow |
|
Move the insertion point to the page title |
Ctrl+Shift+T |
The tools available in OneNote make collecting on-screen information in a OneNote notebook incredibly simple. You can send content from any screen to OneNote as a screen clipping, or send an entire Web page as a Web note. When viewing a Web page, you can send the entire page to your notebook without leaving Internet Explorer.
You can specify what you want OneNote to do with screen clippings, Web notes, and content that you print to OneNote from another program (by using the Print command and selecting the Send To OneNote 2010 printer) by setting the default action on the Send To OneNote page of the OneNote Options dialog box.

For Web notes and content printed to OneNote, the options are:
Always ask where to send After capturing a Web note or printing to the OneNote Printer, you can select the section in which you want to save the content.
To current page OneNote inserts the Web note into a new note container on the active notebook page.
To new page in current section OneNote creates a new page in the active section and inserts the Web note into a note container at the top of the new page.
Set default location You choose a specific location to which all Web notes and printed content are sent. This location is usually the Unfiled Notes section, from which you can move content into any notebook.
For screen clippings, the options are:
Always ask where to send After capturing a screen clipping, you can select the section in which you want to save the clipping.
To Clipboard only OneNote copies the screen clipping to the Microsoft Office Clipboard. You can paste it into OneNote or another program by using the Paste command in that program.
Set default location You choose a specific location to which all Web notes are sent. This location is usually the Unfiled Notes section, from which you can move content into any notebook.
You can use the Screen Clipping tool to capture an image of anything that is visible on your computer screen. When the Screen Clipping tool is active, a transparent white overlay appears on the screen. Drag with your mouse (or pen, if you’re using a Tablet PC) to define the area you want to “clip.” As you drag, the white overlay becomes clear in the area you define. When you release the mouse button or lift the pen, the selected area is clipped.
Using the default settings, you can use one method to add a screen clipping to the active notebook page, and another method to send a screen clipping to a new page in any section of an active OneNote notebook.
To add a screen clipping to the active notebook page, follow these steps:
Display the content you want to clip.
Open the OneNote notebook and display the page to which you want to add the screen clipping.
On the Insert tab, in the Images group, click the Screen Clipping button.
The OneNote window minimizes to the taskbar, and the Screen Clipping tool starts.
Capture the screen clipping you want.
When you release the Screen Clipping tool, OneNote reappears, and the screen clipping is inserted into a note container on the page.
To send a screen clipping to a new page, follow these steps:
Display the content you want to clip.
In the notification area of the taskbar, right-click the OneNote icon, and then click Create Screen Clipping.
The Screen Clipping tool starts.
Capture the screen clipping you want.
When you release the Screen Clipping tool, the Select Location In OneNote dialog box opens.
In the Select Location In OneNote dialog box, click the section to which you want to send the screen clipping, and then click Send To Selected Location. If the notebook to which you want to send the screen clipping is not open, click the Unfiled Notes section.
Note
See Also For more information about the Unfiled Notes section, see Exploring OneNote in the Default Notebook in Chapter 18.
Display OneNote.
The selected section is active. The screen clipping appears on a new page in the section.
If you clipped content from a Web page, the notebook page tab name matches the Web page title. If you clipped content from the desktop or from another program, the notebook page tab name is Screen clipping taken:, followed by the date. In either case, the page title box at the top of the page is empty.


From Internet Explorer, you can send an entire Web page to OneNote.
To capture a Web note, follow these steps:
In Internet Explorer, display the Web page you want to send to OneNote.
On the Tools menu, click Send To OneNote.
In the Select Location In OneNote dialog box, click the section to which you want to send the screen clipping, and then click Send To Selected Location. If the notebook to which you want to send the screen clipping is not open, click the Unfiled Notes section.
OneNote creates a new page in the selected section and inserts the Web page content in a note container on the page.
Depending on the complexity of the content, the page layout in OneNote might not precisely reflect the on-screen layout.

If your computer system includes a microphone, such as a built-in microphone or a freestanding or headset microphone, you can record audio directly into a file stored on a OneNote notebook page. (You’ll get the best results by using a headset microphone.) Similarly, if your system includes a built-in or external webcam, you can record video directly into a file stored on a OneNote notebook page.
You can record audio that is playing on your computer, or audio that you speak, sing, or otherwise communicate through a microphone.
Tip
If you haven’t already configured your audio input device, you can do so by using the Microphone Setup Wizard available from the Speech Recognition window of Control Panel.
You can record video that you capture by using a webcam. The quality of the video you capture depends greatly on the webcam, lighting, and other factors not specific to OneNote. Many portable computers have built-in webcams that will automatically work with OneNote. If you don’t have a built-in webcam, you can purchase one that connects to your desktop or portable computer through a USB cable.
Video is recorded and displayed in a window separate from the OneNote program window. You can move it around the screen by dragging its title bar, change its size by dragging the window frame, and minimize, maximize, or restore it by clicking the buttons on the window’s title bar. If you’re working on a Windows 7 computer, you can use the new window-management techniques such as Snap To Screen and Shake to manage the video window as you would any other.
The first time you record an audio or video clip, OneNote prompts you to indicate whether you want to configure the recordings so that OneNote can search the audio recording or the audio track of the video recording for spoken words. By enabling the Audio Search feature, spoken words matching the search criteria you enter in the Search box will be included in search results. For this feature to work effectively, the audio recording must be of a high quality, words must be spoken clearly, and the spoken language must match that of the OneNote user interface. Audio Search is currently supported for nine languages: English, Spanish, German, French, Italian, Traditional Chinese, Simplified Chinese, Japanese, and Korean.
In this exercise, you’ll record and play back an audio clip and a video clip in OneNote.
Note
SET UP You don’t need any practice files, but you do need to have a microphone and webcam installed to complete the exercise in its entirety. Display a blank notebook page, and then follow the steps.
In the page title box, type My Recordings. Then press Enter.
OneNote creates a note container below the timestamp.
 On the Insert tab,
in the Recording group, click the Record Audio
button.
On the Insert tab,
in the Recording group, click the Record Audio
button.If you haven’t previously made an Audio Search selection, the Audio Search dialog box opens.
 If the Audio Search
dialog box opens, and you want to make a selection at this time, click
Enable Audio Search or Keep Audio Search Disabled. Otherwise, click
the Close button on the window title bar,
and OneNote will prompt you again later.
If the Audio Search
dialog box opens, and you want to make a selection at this time, click
Enable Audio Search or Keep Audio Search Disabled. Otherwise, click
the Close button on the window title bar,
and OneNote will prompt you again later.Tip
If you have a lot of audio and video content stored in a notebook, enabling the Audio Search feature can slow down the search process. You can change your Audio Search setting at any time by selecting or clearing the Enable Searching Audio And Video Recordings For Words check box on the Audio & Video page of the OneNote Options dialog box.
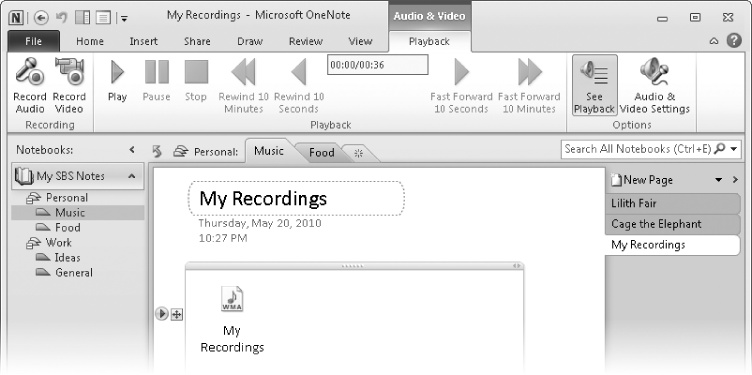
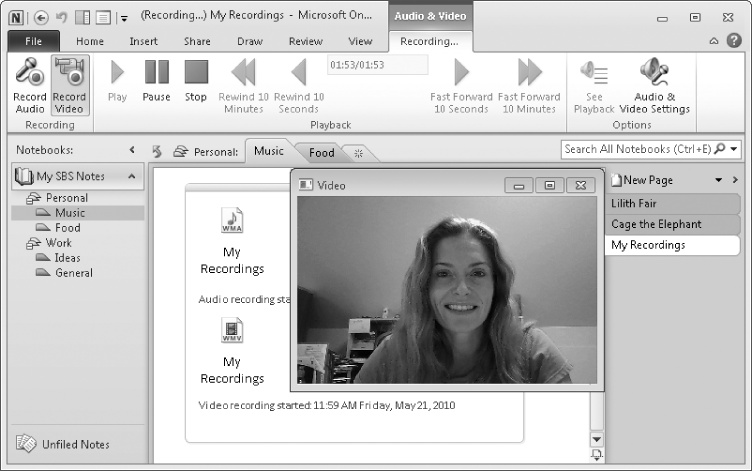
OneNote inserts a Windows Media Audio (.wma) file icon, a file name that matches the page name, and the recording start time, and displays the Audio & Video Recording contextual tab of the ribbon. (Recording…) appears at the beginning of the page name in the program window title bar to indicate that you’re currently recording an audio or video clip.
Speak, sing, or otherwise deliver approximately 30 seconds of audio content. (Go ahead—take a chance on your favorite song!)
As the recording progresses, the timer in the Playback group on the Recording tab indicates the length of the recording.
 When you finish, click the Stop button in the Playback
group on the Recording tab.
When you finish, click the Stop button in the Playback
group on the Recording tab.The Recording tab changes to the Playback tab.
Point to the My Recordings audio file icon.
The note container becomes visible, and a Play button appears to the left of the note container. You can play a recording by clicking the Play button on the Playback tab or the Play button to the left of the note container.
Note
Keyboard Shortcut Press Ctrl+Alt+P to play the most recently active audio or video recording on the page.
OneNote plays your audio recording. (If you can’t hear it, check that your computer’s speaker volume is turned up.) Additional commands for controlling the playback become active on the Playback tab.
 On the Playback tab,
in the Playback group, watch the progress
of the timer. After the first 15 seconds of the recording, click the
Rewind 10 Seconds button.
On the Playback tab,
in the Playback group, watch the progress
of the timer. After the first 15 seconds of the recording, click the
Rewind 10 Seconds button. When the audio playback is finished, click the
Record Video button in the Recording group on the Playback tab.
When the audio playback is finished, click the
Record Video button in the Recording group on the Playback tab.OneNote inserts a Windows Media Video (.wmv) file icon, a file name that matches the page name, and the recording start time. A video window opens on the page, displaying video captured by your webcam.
The Playback tab changes to the Recording tab, and (Recording…) appears at the beginning of the page name in the program window title bar.
 Record a short video segment, and then click the
Pause button.
Record a short video segment, and then click the
Pause button.The picture in the video window freezes.
Click the Pause button again to restart the recording. Record another short video segment, and then click the Stop button.
 On the Playback tab,
in the Playback group, click the Play button to play your video
recording.
On the Playback tab,
in the Playback group, click the Play button to play your video
recording.Note that there is no pause or transition between the two video segments you recorded.


Note
CLEAN UP Retain the My Recordings page for future reference, if you want to, or delete it by right-clicking the page tab and then clicking Delete.
Missing the OneNote Icon?
If the OneNote icon does not appear in the notification area when the program is running, follow these steps to verify that the feature is turned on:
If the check box is selected and the icon still doesn’t appear, follow these steps to verify that the icon is not hidden:
At the left end of the notification area of the status bar, click the Show Hidden Icons button, and then click Customize.
In the Notification Area Icons window of Control Panel, scroll down the Icons list to locate Microsoft OneNote Quick Launcher.
In the associated Behaviors list, click Show Icon And Notifications.
The icon will now appear in the notification area at all times.
Click OK to close the dialog box and save your changes.

It’s not necessary to start OneNote each time you want to take notes or otherwise store information. You can also enter information into a Side Note—a simplified version of the OneNote program window. You can quickly open a Side Note by clicking the OneNote icon located in the notification area of the Windows Taskbar.
You can also open a Side Note from within the OneNote program window by clicking the New Side Note button, in the Window group, on the View tab.

You can dock a Side Note to the desktop or display it in the full OneNote window by clicking the view buttons on the Quick Access Toolbar.
You work with content in a Side Note in the same way you work with it in the OneNote program window—because, in fact, that is precisely what you are doing. If you click the Full Page View button in the Side Note window (and then enlarge the window to provide perspective), you’ll find yourself working on a page in the Unfiled Notes section.

The purpose of the Side Note window is to provide a small and easily accessible interface to OneNote. Because of the small size of the Side Note window, only a subset of the ribbon tabs may be visible at a time.
Note
See Also For more information about the ribbon in OneNote, see Working in the OneNote Program Window and Exploring OneNote in the Default Notebook in Chapter 18.
When the Keep On Top button in the Window group on the View tab is active, you can position the Side Note in a convenient location on your screen, changing its size as necessary, and enter information as you want to. When the Side Note window is on top, it may get in the way of other windows, information, or commands that you might want to access, so you’ll want to choose a location that doesn’t interfere with your work. You can change the height or width of the window by dragging any side or corner of it.
Right-clicking the OneNote icon on the taskbar displays a list of options for collecting information.
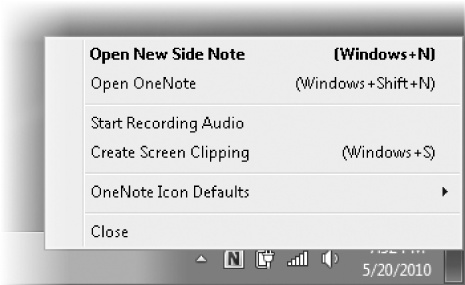
You can change the action that occurs when you click the OneNote icon to suit your needs. For example, if you frequently record audio, you might make that the default action. The available actions are Open New Side Note (the default), Open OneNote, Start Recording Audio, and Create Screen Clipping.
To change what happens when you click the OneNote icon:
On the taskbar, right-click the OneNote icon, click OneNote Icon Defaults, and then click the action you want.
Notes are stored on a page in note containers. Each object within a note container can be manipulated separately.
You can resize images inserted on a page and open file attachments directly from a page.
You can use the OneNote writing tools to create handwritten notes and drawings.
You can collect and store selected images of anything displayed on your screen by using the Screen Clipping tool.
You can collect and store an entire Web page by using the Send To OneNote command on the Internet Explorer Tools menu.
You can jot down quick notes without interfering with other program windows, by using Side Notes.
You can display the OneNote icon in the notification area of the taskbar and choose the action that occurs when you click the icon.