
In this chapter, you will learn how to | |
|---|---|
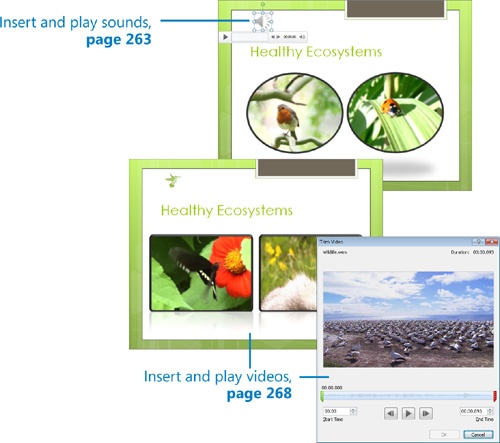
✓ | Insert and play sounds. |
✓ | Insert and play videos. |
A Microsoft PowerPoint presentation is usually created to convey a lot of information in a short time. That information can be in the form of text, graphics, charts, and tables, but it might also consist of audio content. And sometimes the best way to ensure that your audience understands your message is to show a video. For example, if your company has developed a short advertising video, it makes more sense to include the video in a presentation about marketing plans than to try and describe it with bullet points or even pictures.
In this chapter, you’ll insert a sound clip and a sound file and make various adjustments to their settings. You’ll also insert two video files, edit one of them, and format them both.
Practice Files
Before you can complete the exercises in this chapter, you need to copy the book’s practice files to your computer. The practice files you’ll use to complete the exercises in this chapter are in the Chapter11 practice file folder. A complete list of practice files is provided in Using the Practice Files at the beginning of this book.
In Adding Transitions in Chapter 5, you added sound to a slide transition. You can also insert the following types of sounds:
Audio files. You can insert an audio file—for example, a speech or interview—by clicking the Audio button in the Media group on the Insert tab, and then selecting the file.
Sound clips. You can insert a sound clip by clicking the Audio arrow in the Media group on the Insert tab, and then clicking Clip Art Audio to display the Clip Art task pane, where you can search for and select the sound you want. Clicking Find More At Office.com at the bottom of the task pane takes you to the Office.com Web site, where you can search for additional sounds.
See Also
For information about using the Clip Art task pane, see Inserting Pictures and Clip Art Images in Chapter 5.
Recorded sounds. You can record a sound or narration and attach it to a slide, all from within PowerPoint.
See Also
For information about recording sounds, see the sidebar Recording Presentations in Chapter 14.
After you add a sound object, it appears on the slide represented by an icon. When the sound object is selected, a play bar appears below its icon with controls for playing the sound, and PowerPoint adds Format and Playback contextual tabs to the ribbon. You can change the icon as follows:
Drag the object to locate it anywhere on the slide.
Drag its sizing handles to make it larger or smaller.
Use commands on the Format tab to change its appearance, in much the same way that you would format a picture.
Click the Change Picture button to replace the default icon with a picture.
You can modify the sound itself on the Playback tab, as follows:
Click the Trim Audio button in the Editing group to edit the sound so that only part of it plays.
Specify Fade In and Fade Out settings to have the sound gradually increase and decrease in volume.
Click the Volume button to adjust the volume to Low, Medium, or High, or to mute the sound.
Specify whether the sound plays:
Automatically when the slide appears.
Only if you click its icon.
Throughout the presentation.
Select the Hide During Show check box to make the sound object invisible while the presentation is displayed in Reading view or Slide Show view.
Select the Loop Until Stopped check box to have the sound play continuously until you stop it.
Select the Rewind After Playing check box to ensure that the sound starts from the beginning each time it is played.
To play a sound, you must have a sound card and speakers installed. In Normal view, you can test the sound associated with a slide by clicking its icon and then either clicking the Play/Pause button on its play bar or clicking the Play button in the Preview group on the Playback contextual tab.
In this exercise, you’ll insert a sound clip into a slide, adjust the position of the sound object, change its picture, and make various other adjustments to its settings. Then you’ll insert an audio file into another slide and make the file play continuously throughout a presentation.
Set Up
You need the HealthyEcosystemsA_start and AGKCottage_start presentations, the Bird picture, and the Amanda audio file located in your Chapter11 practice file folder. Open the AGKCottage_start presentation, and save it as AGKCottage. Then open the HealthyEcosystemsA_start presentation, and save it as HealthyEcosystemsA. Be sure to turn on your computer’s speakers for this exercise. (If you do not have a sound card and speakers, you can still follow the steps, but you won’t be able to hear the sound.) With HealthyEcosystemsA displayed on your screen, follow the steps.
On the Insert tab, in the Media group, click the Audio arrow, and then click Clip Art Audio.
The Clip Art task pane opens, displaying thumbnails of common sound clips.
In the Search for box, type birds, and then click Go.
The task pane now displays thumbnails of bird calls.
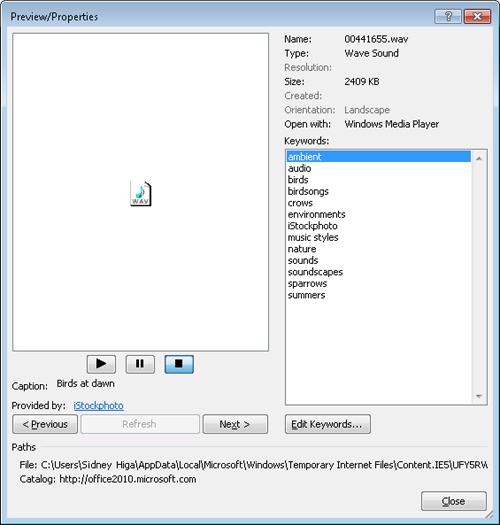
Click any thumbnail, click the arrow that appears, and then click Preview/Properties.
The Preview/Properties dialog box for the sound clip you selected opens.
Click Close to close the dialog box, and continue previewing sound clips.
When you are ready, double-click a sound clip that you think is appropriate for the slide, and then close the Clip Art task pane.
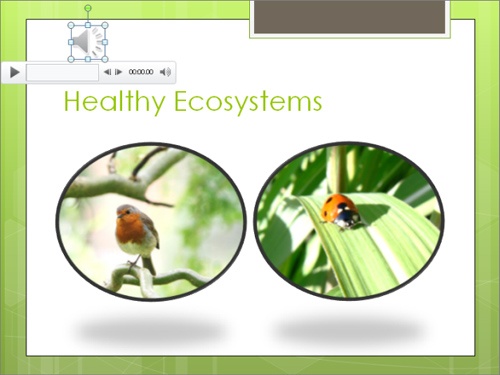
We chose Birds Singing. A small speaker icon representing the sound object appears in the middle of the slide, along with a play bar. It is hard to see the icon because it is on top of the picture.
Drag the sound object to the upper-left corner of the slide.
The play bar moves with the sound object.
On the play bar, click the Play/Pause button to hear the sound.
The sound plays. Now let’s change the picture associated with the object.
With the sound object selected, on the Format contextual tab, in the Adjust group, click the Change Picture button. Then in the Insert Picture dialog box, double-click the Bird picture in your Chapter11 practice file folder.
On the Playback contextual tab, in the Audio Options group, display the Start list, and click Automatically. Then select the Loop until Stopped check box.
On the View Shortcuts toolbar, click the Reading View button.
PowerPoint plays the sound clip.
Move the pointer over the bird representing the sound object, and when the play bar appears, click the Play/Pause button. Then press the Esc key to return to Normal view.
Display the AGKCottage presentation, and view it in Reading view, pressing Esc after a few slides.
This presentation would benefit from a "sound track."
With slide 1 displayed, on the Insert tab, in the Media group, click the Audio button. Then in the Insert Audio dialog box, double-click the Amanda file in your Chapter11 practice file folder.
On the Playback tab, In the Audio Options group, display the Start list, and then click Play across slides. Then select the Hide During Show and Loop until Stopped check boxes.
Switch to Reading view.
The audio file plays while PowerPoint moves from slide to slide.
Press Esc to stop the presentation and return to Normal view.
In keeping with the trend toward more visual presentations, PowerPoint 2010 has new video capabilities that broaden the range of videos you can use and what you can do with them. You can insert the following types of movies in slides:
Video files. You can insert a digital video that has been saved as a file in one of two ways: If a slide’s layout includes a content placeholder, you can click the Insert Movie Clip button in the placeholder. You can also click the Video button in the Media group on the Insert tab. Either way, the Insert Video dialog box opens so that you can select the file.
Videos from Web sites. For information, see the sidebar Inserting Videos from Web Sites later in this chapter.
Clip art videos. Clip art videos are animated graphics, rather than real videos. Clicking the Video arrow in the Media group on the Insert tab and then clicking Clip Art Video displays the Clip Art task pane, where you can search for and select the clip you want. Clicking Find More At Office.com at the bottom of the task pane takes you to the Microsoft Office Online Web site, where you can search for additional clips. When you insert a clip art video, it appears as a picture on the slide, and PowerPoint adds a Format contextual tab to the ribbon so that you can adjust the way the picture looks. The clip moves only when you display the slide in Reading view or Slide Show view, and you cannot adjust its action.
See Also
For information about using the Clip Art task pane, see Inserting Pictures and Clip Art Images in Chapter 5.
Both video files and videos from Web sites appear on the slide as video objects that you can size and move to meet your needs. When you select a video object, PowerPoint adds Format and Playback contextual tabs to the ribbon. You can change the way the object appears on the slide as follows:
Drag the object to locate it anywhere on the slide.
Drag its sizing handles to make it larger or smaller.
Use commands on the Format tab to change its appearance, in much the same way that you would format a picture.
You can modify the video itself on the Playback tab, as follows:
Click the Trim Video button in the Editing group to edit the video so that only part of it plays.
Specify Fade In and Fade Out settings to have the video gradually appear and disappear.
Click the Volume button to adjust the volume to Low, Medium, or High, or to mute the sound.
Specify whether the video plays:
Automatically when the slide appears.
Only if you click the object.
Select the Play Full Screen check box to have the video occupy the entire slide space while playing.
Select the Hide While Not Playing check box to make the video object invisible while the presentation is displayed in Reading view or Slide Show view.
Select the Loop Until Stopped check box to have the video play continuously until you stop it.
Select the Rewind After Playing check box to ensure that the video starts from the beginning each time it is played.
In Normal view, you can test the video associated with a slide by clicking the video object and then either clicking the Play/Pause button on its play bar or clicking the Play button in the Preview group on the Playback contextual tab.
In this exercise, you’ll insert two videos into a slide, adjust the size of their objects, format the objects, and make various other adjustments to their settings.
Set Up
You need the HealthyEcosystemsB_start presentation and the Butterfly and Wildlife video files located in your Chapter11 practice file folder. Open the HealthyEcosystemsB_start presentation, and save it as HealthyEcosystemsB. Then follow the steps.
In the Slide pane, in the left content placeholder, click the Insert Media Clip button.
In the Insert Video dialog box, double-click the Butterfly file in your Chapter11 practice file folder.
The video is inserted as an object in the content placeholder with a play bar below it.
On the play bar, click the Play/Pause button to watch the video.
Repeat steps 1 through 3 to insert the Wildlife video in the right content placeholder, and then play the video.
Let’s trim this video so that it shows only the animal that looks like a big ground squirrel.
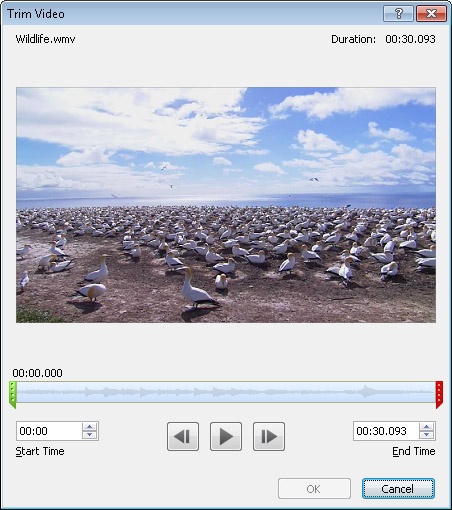
With the Wildlife video selected, on the Playback contextual tab, in the Editing group, click the Trim Video button.
The Trim Video dialog box opens.
Drag the green start marker to the right until it sits at about the 00:17.020 mark. Then click the Next Frame button, pausing after each click, until the first ground squirrel frame comes into view at the 00:17.288 mark.
Drag the red stop marker to the left until it sits at about the 00:20.900 mark. Then click the Next Frame button, pausing after each click, until the last ground squirrel frame comes into view at the 00:20.799 mark.
Click OK. Then play the trimmed video.
Click the Butterfly video object, and on the Format tab, in the Size group, click the Height arrow until the object is 3 inches tall.
The width of the object increases proportionally. Let’s make the Wildlife object the same size.
Click the Wildlife object, and in the Size group, change its Height to 3.
Because this video object is now too wide, we need to crop it from the left.
Right-click the object, and click Format Video. Then in the Format Video dialog box, click the Crop tab.
The settings on this page take the trial-and-error out of any cropping task.
In the Crop position area, change the Width setting to 4". Then click Close.
Drag the objects until they are evenly spaced on the slide, using the Align commands in the Arrange group as necessary to line them up.
With both objects selected, click the More button in the Video Styles group.
The Video Styles gallery appears.
Under Intense, click the fifth thumbnail in the first row (Reflected Bevel, Black). Then click away from the objects.
Click the Butterfly object, and on the Playback contextual tab, in the Video Options group, click the Volume button, and then click Mute.
In the Video Options group, display the Start list, and click Automatically. Then select the Loop until Stopped check box.
Click the Wildlife object, set Volume to Mute, leave Start set to On Click, and select the Loop until Stopped check box.
Switch to Reading view, and preview and pause the Butterfly video. Then preview and pause the Wildlife video.
Press Esc twice to return to Normal view.


Inserting Videos from Web Sites
If you find a video on a public Web site that you want to use to illustrate a point in a presentation, you might be able to insert a link to the video into a slide. The format of the video must be supported by Windows Media Player, and the owner of the video must have made it available to the public. You can tell which videos are publicly available by right-clicking the video and looking for a Copy Embed HTML command. If you do not see this command, the owner has secured the video, and you cannot play it from anywhere but the site on which it is published.
To insert a link to a video on a Web site:
Display the video, right-click it, and then click Copy Embed HTML.
Display the slide into which you want to insert the video.
On the Insert tab, in the Media group, click the Video arrow, and then click Video From Web Site.
The Insert Video From Web Site dialog box opens.
In the dialog box, click in the text box, and then press Ctrl+V (the keyboard shortcut for the Paste command).
The copied embed code is inserted at the cursor.
Click OK.

To view the video, switch to Reading view or Slide Show view, and then click the Play/Pause button. PowerPoint then uses the embed code to locate and play the video. Provided the video remains available in its original location, and provided you have an active Internet connection, you will be able to access and play the video from the slide at any time.