Chapter . Building an Enterprise Framework
Programming today is a race between software engineers striving to build bigger and better idiot-proof programs, and the Universe trying to produce bigger and better idiots. So far, the Universe is winning.
There is no such thing as perfect design. The Flex framework is evolving, and we are grateful that software engineers from the Flex team made this framework extendable. Because this book covers the use of the Flex framework in enterprise software development, we will identify and enhance those components that are widely used in business RIA.
For the majority of the enterprise applications, development comes down to a few major activities:
Creating data grids
Working with forms
Validating data
Printing
If you, the architect, can achieve improvements in each of these areas by automating common tasks, application developers will spend less time writing the same mundane code over and over again. The key is to encapsulate such code inside reusable Flex components, to create smarter components that can be collected into libraries.
Chapter 1 reviewed such architectural frameworks as Cairngorm, PureMVC, and Mate, which mainly helped with separating the code into tiers, but now you’ll learn how to build another type of framework by enhancing existing Flex components. Specifically, this chapter demonstrates how to build a framework that radically simplifies creation of data entry applications by:
Identifying common reusable components, which in turn reduces the number of errors inevitably introduced during manual coding
Encapsulating implementation of architectural patterns inside selected components
Defining best practices and implementing them in concrete components rather than just describing them on paper
You’ll learn how to inherit your components from the existing ones,
starting with the basic techniques, while extending a simple CheckBox, then approaching the more complex
ComboBox component. The remainder of the
chapter is devoted to extending components that every enterprise application
relies on, namely DataGrid, Form, and Validator.
By providing a framework that integrates the work of programmers, business analysts, designers, and advanced users, you can drastically simplify the development of enterprise applications.
Every web developer is familiar with Cascading Style Sheets (CSS),
which let designers define and change the look and feel of the applications
without the need to learn programming. As you’ll learn in this chapter,
Business Style Sheets (BSS) serve
a similar role for enterprise application developers, enabling software
developers to attach a remote data set to a component with minimum coding.
For example, you’ll see how a simple resource file can instruct a ComboBox (or any other component) on where to get
and how to display the data. Think of it as a data skinning. With BSS, you
can develop artifacts that are highly reusable across enterprise
applications.
Along the way, you’ll learn more about BSS and other techniques for enhancing and automating Flex components. Although you won’t be able to build an entire framework here (the challenges of printing and reporting are covered in the last chapter), you’ll get a good start in mastering valuable skills that any Flex architect and component developer must have.
Upgrading Existing Flex Components
Flex evolved as a Flash framework from the HTML object model, and
the base set of Flex controls capitalized on the simplicity of HTML. The
price that Flex developers have to pay for this is that each control has
its own (different) set of properties and behaviors. This can make
building an enterprise framework a challenge. Consider a CheckBox control as an example. To quickly and
easily integrate CheckBox into a
variety of frameworks, developers would prefer the component to have a
unified property value (on or
off) that’s easily bindable to application data.
Currently, Flex’s CheckBox has a
property called selected and developers
need to write code converting Yes/No data into the
true or false that the selected property expects. If you later use
another control, you must then convert these Yes/No
values into the form that the new control requires. Clearly some common
ground would reduce the amount of redundant coding.
The sections that follow will take a closer look at the CheckBox as well as other major Flex components
that every application needs, and identify what they are missing and how
to enhance them.
Introducing Component Library clear.swc
As you may remember from Chapter 1, Clear Toolkit’s component library, clear.swc, contains a number of enhanced Flex components (Figure 30). Specifically, this component library consists of three packages:
com.farata.components
com.farata.grid
com.farata.printing

To demonstrate how you can extend components, in the following sections we’ll explain how we built some of the components from the package com.farata.components. Later you can use these discussions for reference, if you decide to build a similar (or better) library of components. (Some of the classes from the other two packages will be discussed in Chapter 11 of this book.)
Note
You can find the source code of all components described in this chapter in the clear.swc component library. The code of some of the components explained here was simplified to make explanations of the process of extending Flex components easier. Neither this chapter nor the book as a whole is meant to be a manual for the open source clear.swc library. If you just want to use clear.swc components, refer to https://sourceforge.net/projects/cleartoolkit/, where the ASDoc-style API and the source code of each component from clear.swc are available.
You can use clear.swc independently by linking it to your Flex project. To help you understand how its components can help you, the following sections examine simplified versions of some of the library’s controls.
Creating a Value-Aware CheckBox
The CheckBox in Example 55 has been enhanced
with additional value and text properties. You can specify which value
should trigger turning this control into the on/off position.
package com.farata.controls {
    import flash.events.Event;
    import flash.events.KeyboardEvent;
    import flash.events.MouseEvent;

    import mx.controls.CheckBox;
    import mx.events.FlexEvent;

    public class CheckBox extends mx.controls.CheckBox {

        public var onValue:Object=true;
        public var offValue:Object=false;
        private var _value:*;

        public function set text(o:Object):void {
            value = o;
        }
        public function get text():Object {
            return value;
        }

        [Bindable("valueCommit")]
        public function set value(val:*) :void {
            _value = val;
            invalidateProperties();
            dispatchEvent(new FlexEvent (FlexEvent.VALUE_COMMIT));
        }

        public function get value():Object  {
           return selected?onValue:offValue;
        }

        override protected function commitProperties():void {
            if (_value!==undefined)
                selected = (_value == onValue);
            super.commitProperties();
        }
    }
}
This CheckBox will
automatically switch itself into a selected or unselected state: just
add it to your view, set the on and off values, and either assign a
string or an Object value to it. You
should note that the value setter
calls the function invalidateProperties(), which internally
schedules the invocation of the function commitProperties() on the next UI refresh
cycle.
The commitProperties() function
enables you to make changes to all the properties of a component in one
shot. That’s why we set the value of the selected property based on the
result of the comparison of _value
and onValue in this function.
Example 56 is a
test application illustrating how to use this CheckBox, with the resulting interface shown
in Figure 31. To run a test,
click the first Set OnValue= button
to teach the CheckBox to turn itself
on when the value Male is
assigned, and off when its property text has the
value of Female. Then, click the first or second
cbx_test.text button to assign a value to the newly
introduced property text of this CheckBox, and watch how its state
changes.
<?xml version="1.0" encoding="utf-8"?>
<mx:Application xmlns:mx="http://www.adobe.com/2006/mxml"
    xmlns:clear="com.farata.controls.*" layout="vertical">

    <clear:CheckBox id="cbx_test" label="Assign me a value" />

    <mx:Button label="Set OnValue='Male' and offValue='Female'"
         click="cbx_test.onValue='Male';cbx_test.offValue='Female';"/>

    <mx:Button label="cbx_test.text='Male'" click="cbx_test.text='Male'" />
    <mx:Button label="cbx_test.text='Female'" click="cbx_test.text='Female'" />

    <mx:Button label="Set OnValue=Number('1') and offValue=Number('0')"
         click="cbx_test.onValue=Number('1'),cbx_test.offValue=Number('0'),"/>

    <mx:Button label="cbx_test.value='Number('1')'"
            click="cbx_test.value =new Number('1')" />
    <mx:Button label="cbx_test. value='Number('0')"
            click="cbx_test.value =new Number('0')" />

</mx:Application>
Creating a Centered CheckBox
This example demonstrates how to create a CheckBox that can center itself horizontally
in any container, including a data grid cell.
Although you could introduce an item renderer that uses a CheckBox inside an HBox with the style horizontalAlign set to center, using a container inside the item
rendered negatively affects the data grid control’s
performance.
The better approach is to extend the styling of the CheckBox itself. Example 57 is a code extension
that “teaches” a standard Flex CheckBox to respond to the textAlign style if the label property of the CheckBox is not defined.
override protected function updateDisplayList(unscaledWidth:Number,
      unscaledHeight:Number):void {

    super.updateDisplayList(unscaledWidth, unscaledHeight);
    if (currentIcon) {
        var style:String = getStyle("textAlign");
        if ((!label) && (style=="center") ) {
            currentIcon.x = (unscaledWidth - currentIcon.measuredWidth)/2;
    }
            }
        }
In the example code, the x
coordinate of the CheckBox icon will
always be located in the center of the enclosing container. Because no
additional container is introduced, you can use this approach in the
DataGridColumn item renderer, which
is a style selector. When you use this enhanced CheckBox as a column item renderer, textAlign automatically becomes a style of
this style selector, and you can simply set textAlign=center on DataGridColumn.
Creating a Protected CheckBox
The standard Flex CheckBox has
a Boolean property called enabled
that is handy when you want to disable the control. Unfortunately, a
disabled CheckBox is rendered as
grayed out. What if you want to use a CheckBox in some noneditable container, say in
a DataGridColumn, and you want it to
be nonupdateable but look normal?
The answer is to use a new class called CheckBoxProtected, which includes an
additional property updateable. Its
trick is to suppress standard keyboard and mouse-click processing.
Overriding event handlers by adding the following:
if (!updateable) return;
works like a charm! Example 58 lists the complete code.
package com.farata.controls
{
    import flash.events.Event;
    import flash.events.KeyboardEvent;
    import flash.events.MouseEvent;
    import mx.controls.CheckBox;

    public class CheckBoxProtected extends mx.controls.CheckBox {

    public var updateable:Boolean = true;

    public function CheckBoxProtected() {
        super();
        addEventListener(MouseEvent.CLICK, onClick);
    }
    private function onClick (event:MouseEvent):void {
        dispatchEvent(new Event(Event.CHANGE));
    }
    override protected function keyDownHandler(event:KeyboardEvent):void {
            if (!updateable) return;
            super.keyDownHandler(event);
    }
    override protected function keyUpHandler(event:KeyboardEvent):void {
            if (!updateable) return;
            super.keyUpHandler(event);
    }
    override protected function mouseDownHandler(event:MouseEvent):void {
           if (!updateable)return;
           super.mouseDownHandler(event);
    }
    override protected function mouseUpHandler(event:MouseEvent):void {
             if (!updateable)return;
            super.mouseUpHandler(event);
    }
    override protected function clickHandler(event:MouseEvent):void {
            if (!updateable)return;
            super.clickHandler(event);
        }
    }
}
To test the protected CheckBox,
use Example 59.
<?xml version="1.0" encoding="utf-8"?>
<mx:Application xmlns:mx="http://www.adobe.com/2006/mxml"
    xmlns:clear="com.farata.controls.*" layout="vertical">

 <clear:CheckBoxProtected updateable="false"
                label="I am protected" fontSize="18"/>
 <mx:CheckBox enabled="false"
                label="I am disabled" fontSize="18"/>

</mx:Application>
Running this application produces the results in Figure 32, which shows the difference between the protected and disabled checkboxes.

Why not use the extensibility of the Flex framework to its fullest? This chapter is about what you can do with Flex components. Armed with this knowledge, you’ll make your own decisions about what you want to do with them.
For example, think of a CheckBox with a third state. The underlying
data can be Yes, No, or null. If the value is null (the third state), the CheckBox needs to display a different image,
such as a little question mark inside. In addition to supporting three
states (selected, unselected, and null), this control should allow an easy
switch from one state to another. Such an enhancement includes a
skinning task—create a new skin (with a question mark) in Photoshop and
ensure that the control switches to this state are based on the
underlying data. For a working example, see CheckBox3Stated in the clear.swc component library.
Upgrading ComboBox
The CheckBox is easiest to
enhance because it’s one of the simplest controls, having only two
states (on or off). You can apply the
same principles to a more advanced ComboBox, however. Identify reusable
functionality, program it once, and incorporate it into the
component.
What if, for example, you need to programmatically request a
specific value to be selected in a
ComboBox? The traditional approach is
to write code that loops through the list of items in the ComboBox data provider and manually works with
the selectedIndex property. To set
Texas as a selected value of a
ComboBox that renders states, you could use:
var val:String; val= 'Texas' ;
for (var i: int = 0; i < cbx.dataProdider.length; i++) {
 if ( val == cbx_states.dataProvider[i].[cbx_states.labelField])
 {
      cbx_states.selectedIndex = i;
      break;
  }
}
The downside of this approach is that if your application has 50
ComboBox controls, several developers
will be writing similar loops instead of a single line, such as cbx_states.value="Texas".
Unfortunately, ComboBox does
not provide a specific property that contains the selected value. It has
such properties as labelField,
selectedIndex, and selectedItem. Which one of them is actually a
data field? How do you search by value? Do you really care about the
number of the selected row in the ComboBox? Not at all—you need to know the
selected value.
Let’s revisit the earlier code snippet. The labelField of a ComboBox knows the name of the property from
the objects stored in the backing collection. But what about the data
field that corresponds to this label (in the case of Texas, a good candidate to be considered as
the ComboBox data could be TX)? Currently, finding such data is the
application programmer’s responsibility.
Even if you are OK with writing these loops, considering the
asynchronous nature of populating data providers, this code may need to
wait until the data arrives from the server. It would be nice, though,
if you could simply assign the value to a ComboBox without the need to worry about
asynchronous flows of events.
Consider a List control, the
brother of the ComboBox. Say the user
selected five items, and then decided to filter the backing data
collection. The user’s selections will be lost. The List could benefit from yet another property
that would remember selected values and could be used without worrying
about the time of the data arrival.
Example 60 offers a
solution: the class ComboBoxBase,
which extends ComboBox by adding the
value property (don’t confuse it with
<mx:ComboBoxBase>). After
introducing the value property, it
uses the dataField property to tell
the ComboBox the name of the data
field in the object of its underlying data collection that corresponds
to this value. The new dataField property enables you to use any
arbitrary object property as ComboBox
data.
You’ll also notice one more public property: keyField, which is technically a synonym of
dataField. You can use keyField to avoid naming conflicts in
situations where the ComboBoxBase or
its subclasses are used inside other objects (say, DataGridColumn) that also have a property
called dataField.
package com.farata.controls {
    import flash.events.Event;

    import mx.collections.CursorBookmark;
    import mx.collections.ICollectionView;
    import mx.collections.IViewCursor;
    import mx.controls.ComboBox;
    import mx.controls.dataGridClasses.DataGridListData;
    import mx.controls.listClasses.ListData;
    import mx.core.mx_internal;
    use namespace mx_internal;

    public class ComboBoxBase extends ComboBox {

    public function ComboBoxBase() {
        super();
        addEventListener("change", onChange);
    }

    // Allow control to change dataProvider data on change
    private function onChange(event:Event):void {
         if (listData is DataGridListData) {
             data[DataGridListData(listData).dataField] = value;
         }else if (listData is ListData && ListData(listData).labelField in data) {
             data[ListData(listData).labelField] = value;
         }
    }

    protected function applyValue(value:Object):void {
       if ((value != null) && (dataProvider != null)) {
             var cursor:IViewCursor = (dataProvider as ICollectionView).createCursor();
                var i:uint = 0;
                for (cursor.seek( CursorBookmark.FIRST ); !cursor.afterLast;
                                                    cursor.moveNext(), i++) {
                    var entry:Object = cursor.current;
                    if ( !entry ) continue;
                    if ( (dataField in entry && value == entry[dataField])) {
                        selectedIndex = i;
                        return;
                    }
                }
            }
            selectedIndex = -1;
        }

    private var _dataField:String = "data";
    private var _dataFieldChanged:Boolean = false;

    [Bindable("dataFieldChanged")]
    [Inspectable(category="Data", defaultValue="data")]

    public function get dataField():String { return _dataField; }
    public function set dataField(value:String):void {
        if ( _dataField == value)
        return;

        _dataField = value;
        _dataFieldChanged = true;
        dispatchEvent(new Event("dataFieldChanged"));
        invalidateProperties();
    }

    public function get keyField():String { return _dataField; }

    public function set keyField(value:String):void {
        if ( _dataField == value)
            return;
        dataField = value;
    }

    private var _candidateValue:Object = null;
    private var _valueChanged:Boolean  = false;

    [Bindable("change")]
    [Bindable("valueCommit")]
    [Inspectable(defaultValue="0", category="General", verbose="1")]

    public function set value(value:Object) : void {
            if (value == this.value)
                return;

         _candidateValue = value;
         _valueChanged = true;
         invalidateProperties();
    }

    override public function get value():Object {
         if (editable)
            return text;

         var item:Object = selectedItem;

         if (item == null )
            return null;

         return dataField in item ? item[dataField] : null/*item[labelField]*/;
    }

    override public function set dataProvider(value:Object):void {
           if ( !_valueChanged ) {
               _candidateValue = this.value;
               _valueChanged = true;
           }
           super.dataProvider = value;
    }

    override public function set data(data:Object):void {
         super.data = data;
         if (listData is DataGridListData) {
           _candidateValue = data[DataGridListData(listData).dataField];
           _valueChanged = true;
           invalidateProperties();
         }else if (listData is ListData && ListData(listData).labelField in data) {
           _candidateValue = data[ListData(listData).labelField];
           _valueChanged = true;
           invalidateProperties();
         }
        }

    override protected function commitProperties():void {
         super.commitProperties();
         if (_dataFieldChanged) {
               if (!_valueChanged && !editable)
               dispatchEvent( new Event(Event.CHANGE) );

                _dataFieldChanged = false;
         }

         if (_valueChanged) {
             applyValue(_candidateValue);
             _candidateValue = null;
             _valueChanged = false;
         }
    }

    public function lookupValue(value:Object, lookupField:String = null):Object {
      var result:Object = null;
      var cursor:IViewCursor = collectionIterator;
      for (cursor.seek(CursorBookmark.FIRST);!cursor.afterLast;cursor.moveNext()) {
           var entry:Object = cursor.current;
           if ( value == entry[dataField] ) {
              result = !lookupField ? entry[labelField] : entry[lookupField];
              return result;
           }
      }
      return result;
    }
 }
}
The new property value is
assigned in the following setter function:
[Bindable("change")]
[Bindable("valueCommit")]
[Inspectable(defaultValue="0", category="General", verbose="1")]
 public function set value(value:Object) : void {
    if (value == this.value)
       return;

   _candidateValue = value;
   _valueChanged = true;
   invalidateProperties();
}
Notice that when the function turns on the flag _valueChanged, invalidateProperties() internally schedules a
call to the method commitProperties()
to ensure that all changes will be applied in the required sequence. In
the example, the code in the commitProperties() function ensures that the
value of the dataField is processed
before explicit changes to the value
property, if any.
ComboBox is an asynchronous
control that can be populated by making a server-side call. There is no
guarantee that the remote data has arrived by the time that you assign
some data to the value property. The
_candidateValue in the value setter is a temporary variable
supporting deferred assignment in the method commitProperties().
The function commitProperties()
broadcasts the notification that the value has been changed (in case some other
application object is bound to this value) and passes the _candidateValue to the method applyValue():
override protected function commitProperties():void {
         super.commitProperties();
         if (_dataFieldChanged) {
               if (!_valueChanged && !editable)
              dispatchEvent( new Event(Event.CHANGE) );

               _dataFieldChanged = false;
         }

         if (_valueChanged) {
             applyValue(_candidateValue);
             _candidateValue = null;
             _valueChanged = false;
         }
}
The method applyValue() loops
through the collection in the dataProvider using the IViewCursor iterator. When this code finds the
object in the data collection that has a property specified in the
dataField with the same value as the
argument of this function, it marks this row as selected:
protected function applyValue(value:Object):void {
       if ((value != null) && (dataProvider != null)) {
           var cursor:IViewCursor = (dataProvider as ICollectionView).createCursor();
                var i:uint = 0;
                for (cursor.seek( CursorBookmark.FIRST ); !cursor.afterLast;
                                                    cursor.moveNext(), i++) {
                    var entry:Object = cursor.current;
                    if ( !entry ) continue;
                    if ( (dataField in entry && value == entry[dataField])) {
                        selectedIndex = i;
                        return;
                    }
                }
       }
       selectedIndex = -1;
}
Tags such as:
[Inspectable(defaultValue="0",category="General", verbose="1")]Inspectable tag
ensure that corresponding properties will appear in property
sheets of ComboBoxBase in Flash
Builder’s design mode (in this case, under the category
General with specified initial values in defaultValue and verbose).
Meta tags such as [Bindable("dataFieldChanged")] ensure that the
dataFieldChange event will be
dispatched (to those who care) whenever the value of the dataField changes.
In Example 61, the small
application TestComboBoxApp.mxml
demonstrates the use of the ComboBoxBase component.
<?xml version="1.0" encoding="utf-8"?>
<mx:Application xmlns:mx="http://www.adobe.com/2006/mxml"
    xmlns:clear="com.farata.controls.*" layout="vertical">
    <mx:ArrayCollection id="cbData">
        <mx:Array>
            <mx:Object label="Adobe" data="ADBE" taxID="1111"/>
            <mx:Object label="Microsoft" data="MSFT"  taxID="2222"/>
            <mx:Object label="Farata Systems" data="FS"  taxID="3333"/>
       </mx:Array>
   </mx:ArrayCollection>

    <clear:ComboBoxBase  dataProvider="{cbData}" value="FS"/>

    <clear:ComboBoxBase  dataProvider="{cbData}" dataField="taxID" value="3333"/>

</mx:Application>
Both drop-downs use the same dataProvider. When you run Example 61’s application, you’ll see
a window similar to Figure 33.
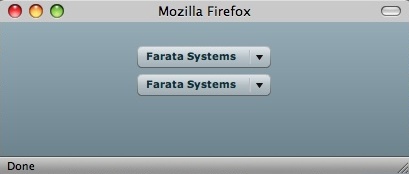
The first ComboBoxBase shows
“Farata Systems” because of the assignment value="FS", which compares it with values in
the data field of the objects from
the cbData collection.
The second drop-down sets dataField="taxID", which instructs the
ComboBox to use the value of the
taxID property in the underlying data
collection. If the code assigns a new value to taxID—e.g., an external data feed—the
selection in the ComboBox will change
accordingly. This behavior better relates to the real-world situations
in which a collection of DTOs with multiple properties arrives from the
server and has to be used with one or more ComboBox controls that may consider different
DTO properties as their data.
Resources As Properties of UI Controls
An even more flexible solution for enhancing components to better
support your enterprise framework is the use of a programming technique
that we call data styling or Business Style Sheets
(BSS), as mentioned earlier. The basic process is to create small files,
called resources, and attach them as a property to a
regular UI component as well as a DataGrid column.
Example 62 illustrates this BSS technique and contains a small MXML file called YesNoCheckBoxResource.mxml.
<?xml version="1.0" encoding="utf-8"?>
<fx:CheckBoxResource
    xmlns="com.farata.resources" xmlns:mx="http://www.adobe.com/2006/mxml"
    xmlns:resources="com.theriabook.resources.*"
    offValue = "N"
    onValue = "Y"
    textAlign="center"
    >

</fx:CheckBoxResource>
Doesn’t it look like a style to you? You can easily make it specific to a locale by, for example, changing the on/off values of Y/N to Д/Η, which mean Да/Ηет (which you might be more familiar with as Da/Nyet) in Russian, or Si/No for Spanish. When you think of such resources as entities that are separate from the application components, you begin to see the flexibility of the technique. Isn’t such functionality similar to what CSS is about?
As a matter of fact, it’s more sophisticated than CSS, because this
resource is a mix of styles and properties, as illustrated in Example 63. Called StateComboBoxResource.mxml, this resource
demonstrates using properties (e.g., dataProvider) in a BSS. Such a resource can
contain a list of values, such as names and abbreviations of
states.
<?xml version="1.0" encoding="utf-8"?>
<fx:ComboBoxResource
    xmlns="com.farata.resources" xmlns:mx="http://www.adobe.com/2006/mxml"
    xmlns:resources="com.theriabook.resources.*"
    dropdownWidth="160"
    width="160"
    >
    <fx:dataProvider>
        <mx:Array>
            <mx:Object data="AL" label="Alabama" />
            <mx:Object data="AZ" label="Arizona" />
            <mx:Object data="CA" label="California" />
            <mx:Object data="CO" label="Colorado" />
            <mx:Object data="CT" label="Connecticut" />
            <mx:Object data="DE" label="Delaware" />
            <mx:Object data="FL" label="Florida" />
            <mx:Object data="GA" label="Georgia" />
            <mx:Object data="WY" label="Wyoming" />
        </mx:Array>
    </fx:dataProvider>
</fx:ComboBoxResource>
Yet another example of a resource, Example 64 contains a reference to a remote destination for automatic retrieval of dynamic data coming from a DBMS.
<?xml version="1.0" encoding="utf-8"?>
<fx:ComboBoxResource
    xmlns="com.farata.resources" xmlns:mx="http://www.adobe.com/2006/mxml"
    xmlns:resources="com.theriabook.resources.*"
    width="160"
    dropdownWidth="160"
    destination="Employee"
    keyField="DEPT_ID"
    labelField="DEPT_NAME"
    autoFill="true"
    method="getDepartments"
    >
</fx:ComboBoxResource>
As a matter of fact, you can’t tell from this code whether the data
is coming from a DBMS or from somewhere else. That data is cleanly
separated from the instances of the ComboBox objects associated with this particular
resource and can be cached either globally (if the data needs to be
retrieved once) or according to the framework caching specifications. When
developing a business framework, you may allow, for example, lookup
objects to be loaded once per application or once per view. This
flexibility doesn’t exist in singleton-based architectural frameworks.
Frameworks built using the resource technique/BSS, however, do allow the
flexibility to look up objects.
Based on this resource file, you can say only that the data comes
back from a remote destination called Employee, which is either a name of a class or a
class factory. You can also see that the method getDepartments() will return the data containing
DEPT_ID and DEPT_NAME, which will be used with the enhanced
ComboBox described earlier in this
chapter (Example 60).
In addition to such resources, however, you need a mechanism of
attaching them to Flex UI components. To teach a ComboBox to work with resources, add a resource property to it:
private var _resource:Object;
public function get resource():Object
{
    return _resource;
}

public function set resource(value:Object):void {
    _resource = value;
    var objInst:*  = ResourceBase.getResourceInstance(value);
    if(objInst)
        objInst.apply(this);
}
The section The Base Class for Resources will
describe in detail the ResourceBase
class. For now, concentrate on the fact that the resource property enables you to write something
like this:
<fx:ComboBox resource="{DepartmentComboResource}"Each of the enhanced UI components in your framework should include
such a property. Because interfaces don’t allow default implementation of
such a setter and getter and because ActionScript does not support
multiple inheritances, the easiest way to include this implementation of
the resource property to each control
is by using the language compile-time directive #include, which includes the contents of the
external file—say, resource.as—into
the code of your components:
#include "resource.as"
Styles Versus Properties
Before going too deep into the BSS and resources approach, you
need to understand some key differences between styles and properties.
For instance, although simple dot notation (myObject.resource=value) is valid Flex syntax
for properties, it is not allowed for styles. Instead, application
programmers have to use the function setStyle(). Suffice it to say that the
StyleManager handles styles that can
be cascading, yet properties can’t cascade. From the framework
developer’s point of view, properties allow defining classes with
getters and setters and take advantage of inheritance. With styles, you
can’t do this. On the other hand, you can’t add properties (i.e., value
and destination) to styles.
The designers of the Flex framework separated styles from
properties for easier separation of internal processes; if an
application code changes the style, the Flex framework performs some
underground work to ensure that cascading style conventions are properly
applied—for example, a global style that dictates that the Verdana font
family is properly overridden by the style applied
to a Panel or its child.
From an enterprise framework designer’s perspective, this means
that if you create a base class for the styles, and some time later
decide to change it, the change may affect all derived classes. Suppose
that you subclass ComboBox and define
some new styles in the derived MyComboBox and then later change the style of
the ComboBox. For the descendant
class, this means that now code changes are required to properly
(according to the changed rules) apply the overridden and added
styles.
All this explains why every book and product manual keeps warning
that styles are expensive and you should limit the use of the setSyle() function during runtime. With
properties, life is a lot easier.
A beneficial framework would allow application programmers to define a small named set of application-specific styles and properties and the ability to govern the work of the UI control with selectors.
To accomplish this, get into the DataGrid state of mind. Have you ever thought
of how a DataGridColumn object sets
its own width, height, and other values? The DataGridColumn class is a descendant
of a style selector called CSSStyleSelector, which means that it can be
used to modify styles but not properties.
DataGrid examines every
DataGridColumn and asks itself, “Do I
have the same as this column object in my cache?” If it does not, it
answers, “Nope, there’s nothing I can reuse. I need to create a new
class factory to supply a new item renderer.” After this is done, the
DataGrid code assigns the supplied
DataGridColumn to the item renderer
as a style. (Search for renderer.styleName=c in the code of DataGridBase.as to see for yourself.) At this
point, all the specified column’s styles (height, width, color, and text
alignment) are applied as styles to the item renderer.
Treat DataGridColumn as a CSS
style selector that also includes a limited number of properties (i.e.,
itemRenderer). DataGrid creates one instance of such a
selector object and then reapplies it to every cell in this
column.
Unfortunately, designing a DataGrid this way makes it next to impossible
to externalize this CSS style selector, and you can’t extend the
properties of the data grid column to make them specific to the item
renderer. Say you wanted to use a CheckBox with a property value (on/off) as an item renderer. Tough
luck—DataGridColumn is not a dynamic
object and you can’t just add this as a new property.
Flex is an extendable framework, however, and what you
can add is a new resource class with behaviors more
to your liking. In fact, that’s exactly what the ResourceBase class does, and it’s described
next.
The Base Class for Resources
Example 65 depicts the class ResourceBase, which serves as a base class for
all resources for all components. This class can tell properties from
styles. In Chapter 2, you learned
about a class factory that accepts a class or a function name to create
instances of objects. We applied that same technique here: with ResourceBase, a resource instance can be
created from a class factory or a class.
Technically, the ResourceBase
class applies specified values as either properties or resources.
package com.farata.resources {
    import com.farata.controls.TextInput;

    import flash.system.ApplicationDomain;

    import mx.core.ClassFactory;
    import mx.core.UIComponent;
    import mx.utils.StringUtil;

    public dynamic class ResourceBase {
        public var resourceProps:Array = [];
        public var resourceStyles:Array = [];

    public function load(source:Object):void {
        for each(var propName:String in resourceProps) {
            try    {
                if( source[propName])
                    this[propName]= source[propName] ;
            }
            catch (e:Error) {}
        }
        for each(var styleName:String in resourceStyles){
            try    {
                if(source.getStyle(styleName))
                    this[styleName] = source.getStyle(styleName);
            }
            catch (e:Error){}
        }
    }

    public function apply(target:Object):void         {
        try {
            for each(var propName:String in resourceProps)
                if (this[propName]!=undefined)
                    target[propName] = this[propName];
        } catch (e:Error) {
            var error:String = mx.utils.StringUtil.substitute(
          "Incompatible resource class. Can not apply
             property {0} of {1} to {2}",
              [propName,this.toString(), target.toString()]    );
           throw new Error(error);
        }
        try {

            for each(var styleName:String in resourceStyles)
                if(this[styleName])
                    target.setStyle(styleName, this[styleName]);
    }

    public static function getResourceInstance(value:Object,
                                styleOwner:Object=null):*    {
        var resClass:Object;
        if(value is Class) {
            resClass = Class(value);
            if (styleOwner) {
                try     {
                    var result:* = new resClass(styleOwner);
                    return result;
                }
                catch (e:Error) {
                    return new resClass();
                }
            }
            else
                return new resClass();
        }
        else if(value is ResourceBase)
            return value;
        else if(value is ClassFactory)
            return ClassFactory(value).newInstance();
        else  if (value != null)     {
            var v:String = String(value).replace(/{/,"");
            v = v.replace(/}/,"");
            resClass = ApplicationDomain.currentDomain.getDefinition(v);
            if (styleOwner) {
                try    {
                    var result2:* = new resClass(styleOwner);
                    return result2;
                }
                catch (e:Error)    {
                    return new resClass();
                }
            }
            else
                return new resClass();
        }
    }
    public function get itemEditor() : UIComponent {
        return new TextInput();
    }
}
}
When application programmers design a resource for a particular
type of Flex UI control, they simply extend it from a ResourceBase class (or build an MXML component
based on it) and specify the names of the variables and their default
values, if need be.
The ResourceBase class relies
on two arrays: resourceProps and
resourceStyles. When application
developers create concrete resources, they also must populate these
arrays. Example 66 illustrates the
implementation of a sample class called ComboBoxResource. Note how the array resourceProps is populated with the data in
the constructor.
package com.farata.resources {
    import mx.core.IFactory;
    import mx.core.UIComponent;
    import mx.styles.CSSStyleDeclaration;
    import mx.styles.StyleManager;
    import com.farata.controls.ComboBox;

    dynamic public class ComboBoxResource extends ResourceBase {
        public var autoFill :Boolean = false;
        public var keyField : String = "data";
        public var destination:String=null;
        public var dropdownWidth : int = 0;
        public var editable:Boolean = false;
        public var itemRenderer:IFactory = null;
        public var labelFunction : Function = null;
        public var labelField : String = "label";
        public var dataField : String = "label";
        public var method : String = null;
        public var width:int=-1;
        public var dataProvider : Object;

        public function ComboBoxResource(styleOwner:Object=null) {
            resourceProps.push("autoFill", "keyField", "destination",
              "dropdownWidth", "editable","itemRenderer", "labelField",
           "labelFunction","method", "dataProvider", "width");

            var sd:CSSStyleDeclaration =
                  StyleManager.getStyleDeclaration(".comboBoxResource");
            if (!sd)        {
                sd = new CSSStyleDeclaration();
                StyleManager.setStyleDeclaration(".comboBoxResource",
                   sd, false);
                sd.setStyle("paddingBottom", 0);
                sd.setStyle("paddingTop", 0);
            }
            if ( styleOwner!= null )
                load( styleOwner );
        }
        override public function get itemEditor() :UIComponent {
                return new ComboBox();
        }
    }
}
This class has to be written once for your enterprise framework,
and after that any junior programmer can easily create and update
resources such as StateComboResource
or DepartmentComboResource, shown
earlier in this chapter in Examples 63 and 64.
Similarly to CSS, resources should be compiled into a separate .swf file. They can be loaded and reloaded during the runtime. You can find out more about class loaders in Chapter 7.
DataGrid with Resources
The most interesting part about these resources is that you can
attach them not only to regular controls, but also to such dynamic
controls as DataGridColumn. For
example, the following code snippet instructs the DataGridColumn (it was also enhanced and is
available in clear.swc) to turn
itself into a ComboBox and populate
itself based on the configured resource DepartmentComboResource shown in Example 64:
<fx:DataGridColumn dataField="DEPT_ID" editable="false"
headerText="Department"
resource="{com.farata.resources.DepartmentComboResource}"/>
A resource attached to a DataGridColumn not only sets a column’s
properties but also identifies the item renderer and editor for this
column.
As discussed in Chapter 2, class
factories become extremely powerful if you use them as item renderers
for a data grid column. Using this methodology, you can also encapsulate
a number of properties and styles in the object provided by the factory.
For example, you can enable the support of resources on the enhanced
DataGridColumn object by adding the
code fragment in Example 67.
private var _resource:Object;
public function set resource(value:Object):void{
    _resource = ResourceBase.getResourceInstance(value, this);
    if(labelFunction==null) {
        getLabelFunctionByResource(_resource, this);
    }
}

public function get resource():Object{
    return _resource;
}
public static function getLabelFunctionByResource(resourceRef:Object,
                                              column:Object):void {
    var resource:ResourceBase = resourceRef as ResourceBase;
    if (resource) {
        if(resource.hasOwnProperty("destination") &&
                                         resource["destination"])
            CollectionUtils.getCollection(
                function(ev:Event, collection:Object):void {
                    collectionLoaded(collection, column);
                },
                resource.destination,
                resource.method
            );
        else if (resource.hasOwnProperty("dataProvider") &&
                                      resource["dataProvider"]) {
            collectionLoaded(
                resource.dataProvider,
                column,
                safeGetProperty(resource, "labelField", "label"),
                safeGetProperty(resource, "keyField", "data")
            );
        }
    }
}
private static function collectionLoaded(collection:Object, column:Object,
                  labelField:String = null, dataField:String = null):void {
    if (null == collection) return;
    labelField =
        labelField ?
            labelField :
            (column["labelField"] != null ?
                column.labelField :
                (column.resource.labelField ?
                    column.resource.labelField : "label"));

    if (!dataField)
        dataField = column.resource.keyField ?
                    column.resource.keyField : column.dataField;

    collection = CollectionUtils.toCollection(collection);

    const options:Dictionary = new Dictionary();

    // copy only when collection is non empty
    if (collection != null && collection.length > 0 ) {
        const cursor:IViewCursor = collection.createCursor();
        do {
    options[cursor.current[dataField]] =
                                           cursor.current[labelField];
        } while(cursor.moveNext())
    }

    column.labelFunction = function(data:Object, col:Object):String {
        var key:* = data is String || data is Number ? data :
                                                    data[col.dataField];
        var res:String = options[key];
        return res != null ? res : '' + key;
    };
}
Suppose that you have a DataGrid and a ComboBox with the values 1, 2, and 3 that
should be displayed as John, Paul, and Mary. These values are
asynchronously retrieved from a remote DBMS. You can’t be sure, however,
whether John, Paul, and Mary will arrive before or after the DataGrid gets populated. The example code
extends the DataGridColumn with the
property resource and checks whether
the application developer supplied a labelFunction. If not, the code tries to
“figure out” the labelFunction from
the resource itself.
If resource has the destination
set and the method is defined as the
DepartmentComboResource as in Example 64, the code loads
the Collection and after that,
creates the labelFunction (see the
collectionLoaded() method) based on
the loaded data.
The resource may either come with a populated dataProvider as in Example 63, or the data for
the dataProvider may be loaded from
the server. When the dataProvider is
populated, the collectionLoaded()
method examines the dataProvider’s
data and creates the labelFunction.
The following code attaches a labelFunction on the fly as a dynamic function
that gets the data and, by the key, finds the text to display on the grid:
column.labelFunction = function(data:Object, col:Object):String {
        var key:* = data is String || data is Number ? data :
                                               data[col.dataField];
var res:String = options[key];
        return res != null ? res : '' + key;
        };
This closure uses the dictionary options defined outside. The code above this
closure traverses the data provider and creates the following entries in
the dictionary:
| 1, John |
| 2, Paul |
| 3, Mary |
Hence the value of the res
returned by this label function will be John, Paul, or Mary.
These few lines of code provide a generic solution for the
real-life situations that benefit from having asynchronously loaded code
tables that can be programmed by junior developers. This code works the
same way as translating the data
value into John and Mary, Alaska and Pennsylvania, or department
names.
Note
With resources, the properties and styles of UI controls become available not only to developers who write these classes but also to outsiders, in a fashion similar to CSS. The examples of resources from the previous section clearly show that they are self-contained, easy-to-understand artifacts that can be used by anyone as BSS.
You can create a resource as a collection of styles, properties, and event listeners that also allows the provision of a class name to be used with it. You can also create a class factory that will produce instances of such resources.
Technically, any resource is an abstract class factory that can play the same role that XML-based configurable properties play in the Java EE world. But this solution requires compilation and linkage of all resources, which makes it closer to configuring Java objects using annotations. Just to remind you, in Flex, CSS also get compiled.
To summarize, resources offer the following advantages:
They are compiled and work fast.
Because they are simple to understand, junior programmers can work with them.
You can inherit one resource from another; Flash Builder will offer you context-sensitive help, and Flex compiler will help you to identify data type errors.
You can attach resources to a
DataGridColumnand use them as a replacement for item renderers.
Resources are a good start for automation of programming. In Chapter 6, you’ll get familiar with
yet another useful Flex component: DataCollection, a hybrid of ArrayCollection and RemoteObject, which is yet another step toward
reducing manual programming.
Data Forms
In this section, you’ll continue adding components to the enterprise
framework. It’s hard to find an enterprise application that does not use
forms, which makes the Flex form component a perfect candidate for
possible enhancements. Each form has some underlying model object, and the
form elements are bound to the data fields in the model. Flex 3 supports
only one-way data binding: changes on a form automatically propagate to
the fields in the data model. But if you want to update the form when the
data model changes, you have to manually program it using the curly braces
syntax in one direction and BindingUtils.bindProperty() in
another.
Flex 4 introduces a new feature: two-way binding. Add an @ sign to
the binding expression (@{expression})
and notifications about data modifications are sent in both
directions—from the form to the model and back. Although this helps in
basic cases where a text field on the form is bound to a text property in
a model object, two-way binding doesn’t have much use if you’d like to use
data types other than String.
For example, two-way binding won’t help that much in forms that use
the standard Flex <mx:CheckBox>
component. What are you going to bind here? The server-side application
has to receive 1 if the CheckBox was
selected and 0 if not. You can’t just bind its property selected to a numeric data property on the
underlying object. To really appreciate two-way binding, you need to use a
different set of components, similar to the ones that you have been
building in this chapter.
Binding does not work in cases when the model is a moving target.
Consider a typical master/detail scenario: the user double-clicks on a row
in a DataGrid and details about the
selected row are displayed in a form. Back in Chapter 1, you saw an example of
this: double-clicking a grid row in Figure 1-19 opened up a form
that displayed the details for the employee selected in a grid. This magic
was done with the enhanced form component that you are about to
review.
The scenario with binding a form to a DataGrid row has to deal with a moving model;
the user selects another row. Now what? The binding source is different
now and you need to think of another way of refreshing the form
data.
When you define data binding using an elegant and simple notation with curly braces, the compiler generates additional code to support it. But in the end, an implementation of the Observer design pattern is needed, and “someone” has to write the code to dispatch events to notify registered dependents when the property in the object changes. In Java, this someone is a programmer; in Flex it’s the compiler, which also registers event listeners with the model.
Flex offers the Form class, which
an application programmer binds to an object representing the data model.
The user changes the data in the UI form, and the model gets changed, too.
But the original Form implementation
does not have a means of tracking the data changes.
It would be nice if the Form
control (bound to its model of type DataCollection) could support similar
functionality, with automatic tracking of all changes compatible with the
ChangeObject class that is implemented
with remote data service. Implementing such functionality is the first of
the enhancements you’ll make.
The second improvement belongs to the domain of data validation. The enhanced data form should be smart enough to be able to validate not just individual form items, but the form in its entirety, too. The data form should offer an API for storing and accessing its validators inside the form rather than in an external global object. This way the form becomes a self-contained black box that has everything it needs. (For details on what can be improved in the validation process, see the section Validation.)
During the initial interviewing of business users, software
developers should be able to quickly create layouts to demonstrate and
approve the raw functionality without waiting for designers to come up
with the proper pixel-perfect controls and layouts. Hence your third
target will be making the prototyping of the views developer-friendly.
Besides needing to have uniform controls, software developers working on
prototypes would appreciate not being required to give definitive answers
as to which control to put on the data form. The first cut of the form may
use a TextInput control, but the next
version may use a ComboBox instead. You
want to come up with some UI-neutral creature (call it a data
form item) that will allow a lack of specificity, like, “I’m a
TextInput”, or “I’m a ComboBox”. Instead, developers will be able to
create prototypes with generic data items with easily attachable
resources.
The DataForm Component
The solution that addresses your three improvements is a new
component called DataForm (Example 68). It’s a subclass of a Flex Form, and its code implements two-way binding
and includes a new property, dataProvider. Its function validateAll() supports data validation, as
explained in the next sections. This DataForm component will properly respond to
data changes, propagating them to its data provider.
package com.farata.controls{
import com.farata.controls.dataFormClasses.DataFormItem;

import flash.events.Event;

import mx.collections.ArrayCollection;
import mx.collections.ICollectionView;
import mx.collections.XMLListCollection;
import mx.containers.Form;
import mx.core.Container;
import mx.core.mx_internal;
import mx.events.CollectionEvent;
import mx.events.FlexEvent;
import mx.events.ValidationResultEvent;

public dynamic class DataForm extends Form{
    use namespace mx_internal;
    private var _initialized:Boolean = false;
    private var _readOnly:Boolean = false;
    private var _readOnlySet:Boolean = false;

    public function DataForm(){
        super();
        addEventListener(FlexEvent.CREATION_COMPLETE, creationCompleteHandler);
    }

    private var collection:ICollectionView;
    public function get validators() :Array {
        var _validators :Array = [];
        for each(var item:DataFormItem in items)
            for (var i:int=0; i < item.validators.length;i++)    {
                _validators.push(item.validators[i]);
            }
        return _validators;
    }
    public function validateAll(suppressEvents:Boolean=false):Array {
        var _validators :Array = validators;
        var data:Object = collection[0];
        var result:Array = [];
        for (var i:int=0; i < _validators.length;i++) {
            if ( _validators[i].enabled ) {
                var v : * = _validators[i].validate(data, suppressEvents);
                if ( v.type != ValidationResultEvent.VALID)
                    result.push( v );
            }
        }
        return result;
    }

    [Bindable("collectionChange")]
    [Inspectable(category="Data", defaultValue="undefined")]

    /**
     *  The dataProvider property sets of data to be displayed in the form.
     *  This property lets you use most types of objects as data providers.
     */
    public function get dataProvider():Object{
        return collection;
    }

    public function set dataProvider(value:Object):void{
        if (collection){
            collection.removeEventListener(CollectionEvent.COLLECTION_CHANGE,
                                                       collectionChangeHandler);
        }

        if (value is Array){
            collection = new  ArrayCollection(value as Array);
        }
        else if (value is ICollectionView){
            collection = ICollectionView(value);
        }
        else if (value is XML){
            var xl:XMLList = new XMLList();
            xl += value;
            collection = new XMLListCollection(xl);
        }
        else{
            // convert it to an array containing this one item
            var tmp:Array = [];
            if (value != null)
            tmp.push(value);
            collection = new ArrayCollection(tmp);
        }

        collection.addEventListener(CollectionEvent.COLLECTION_CHANGE,
                                               collectionChangeHandler);
        if(initialized)
            distributeData();
    }

    public function set readOnly(f:Boolean):void{
        if( _readOnly==f ) return;
        _readOnly = f;
        _readOnlySet = true;
        commitReadOnly();
    }

    public function get readOnly():Boolean{
        return _readOnly;
    }

     /**
     *  This function handles CollectionEvents dispatched from the data provider
     *  as the data changes.
     *  Updates the renderers, selected indices and scrollbars as needed.
     *
     *  @param event The CollectionEvent.
     */
    protected function collectionChangeHandler(event:Event):void{
        distributeData();
    }

    private function commitReadOnly():void{
        if( !_readOnlySet ) return;
        if( !_initialized ) return;
        _readOnlySet = false;
        for each(var item:DataFormItem in items)
            item.readOnly = _readOnly;
    }

    private function distributeData():void {
        if((collection != null) && (collection.length < 0)) {
            for (var i:int=0; i<items.length; i++)    {
                DataFormItem(items[i]).data = this.collection[0];
            }
        }
    }

    private var items:Array = new Array();
    private function creationCompleteHandler(evt:Event):void{
        distributeData();
        commitReadOnly();
    }

    override protected function createChildren():void{
        super.createChildren();
        enumerateChildren(this);
        _initialized = true;
        commitReadOnly();
    }
    private function enumerateChildren(parent:Object):void{
        if(parent is DataFormItem){
            items.push(parent);
        }
        if(parent is Container){
            var children:Array = parent.getChildren();
            for(var i:int = 0; i < children.length; i++){
                enumerateChildren(children[i]);
            }
        }
    }
 }
}
Let’s walk through the code of the class DataForm. Examine the setter dataProvider in the example code. It always
wraps up the provided data into a collection. This is needed to ensure
that the DataForm supports working
with remote data services the same way that DataGrid does. It checks the data type of the
value. It wraps an Array into an
ArrayCollection, and XML turns into
XMLListCollection. If you need to
change the backing collection that stores the data of a form, just point
the collection variable at the new data.
If a single object is given as a dataProvider, turn it into a one-element array
and then into a collection object. A good example of such case is an
instance of a Model, which is an
ObjectProxy (see Chapter 2) that knows how to dispatch events
about changes of its properties.
Once in a while, application developers need to render noneditable
forms; hence, the DataForm class
defines the readOnly
property.
The changes of the underlying data are propagated to the form in
the method collectionChangeHandler(). The data
can be modified either in the dataProvider or from the UI, and the DataForm ensures that each visible DataFormItem object (items[i]) knows about it. This is done in the
function distributeData():
private function distributeData():void {
    if((collection != null) && (collection.length < 0)) {
        for (var i:int=0; i<items.length; i++)    {
            DataFormItem(items[i]).data = this.collection[0];
        }
    }
}
This code always works with the element 0 of the collection,
because the form always has one object with data that is bound to the
form. Such a design resembles the functionality of the data variable of the Flex DataGrid, which for each column provides a
reference to the object that represents the entire row.
Again, we need the data to be wrapped into a collection to support
DataCollection or DataService from LCDS.
Technically, a DataForm class
is a VBox that lays out its children
vertically in two columns and automatically aligns the labels of the
form items. This DataForm needs to
allow nesting—containing items that are also instances of the DataForm object. A recursive function,
enumerateChildren(), loops through
the children of the form, and if it finds a DataFormItem, it just adds it to the array
items. But if the child is a
container, the function loops through its children and adds them to the
same items array. In the end, the
property items contains all DataFormItems that have to be
populated.
Notice that the function validateAll() is encapsulated inside the
DataForm; in the Flex framework, it
is located in the class Validator.
There, the validation functionality was external to Form elements and you’d need to give an array
of validators that were tightly coupled with specific form
fields.
Our DataForm component is
self-sufficient; its validators are embedded inside, and reusing the
same form in different views or applications is easier compared to the
original Flex Form object, which
relies on external validators.
The DataFormItem Component
The DataFormItem, an extension
of the Flex FormItem, is the next
component of the framework. This component should be a bit more humble
than its ancestor, though. The DataFormItem should not know too much about
its representation and should be able to render any UI component. The
design of new Flex 4 components has also been shifted toward separation
between their UI and functionality.
At least half of the controls on a typical form are text fields.
Some of them use masks to enter formatted values, like phone numbers.
The rest of the form items most likely are nothing but checkboxes and
radio buttons. For these controls (and whatever else you may need), just
use resources. Forms also use combo boxes. The earlier section DataGrid with Resources showed you how class factory–based
resources can be used to place combo boxes and other components inside
the DataGrid. Now you’ll see how to
enable forms to have flexible form items using the same
technique.
The DataFormItem is a binding
object that is created for each control placed inside the DataForm. It has functionality somewhat
similar to that of BindingUtils to
support two-way binding and resolve circular references. The DataFormItem has two major functions:
The first function requires the DataFormItem control to support the syntax of
encapsulating other controls, as it’s implemented in FormItem, for example:
<lib:DataFormItem dataField="EMP_ID" label="Emp Id:">
  <mx:TextInput/>
</lib:DataFormItem>
In this case, the DataFormItem
performs binding functions; in the Flex framework, <mx:FormItem> would set or get the value
in the encapsulated UI component, but now the DataFormItem will perform the binding duties.
Assignment of any object to the dataField property item of the DataFormItem will automatically pass this
value to the enclosed components. If an application developer decides to
use a chart as a form item, for example, the data assigned to the
DataFormItem will be given for
processing to the chart object. The point is that application developers
would use this control in a uniform way regardless of what object is
encapsulated in the DataFormItem.
The second function, creating a UI control, is implemented with
the help of resources, which not only allow specifying the styling of
the component, but also can define what component to use. If you go back
to the code of the class ResourceBase, you’ll find a better itemEditor that can be used for the creation
of controls. Actually, this gives you two flexible ways of creating
controls for the form: either specify a resource name, or specify a
component as itemEditor=myCustomComponent. If neither of
these ways is engaged, a default TextInput control will be created.
The previous code looks somewhat similar to the original FormItem, but it adds new powerful properties
to the component that represents the form item. The data of the form
item is stored in the EMP_ID property
of the data collection specified in the dataProvider of the DataForm. The label property plays the same role as in
FormItem.
The source code of the DataFormItem component is shown in Example 69. It starts with defining properties, as
in DataGrid: dataField, valueName, and itemEditor. The DataGridItem can create an itemEditor from a String, an Object, or a class factory. It also defines an
array validator, which will be
described later in this chapter.
package com.farata.controls.dataFormClasses {
    import com.farata.controls.DataForm;
    import csom.farata.controls.MaskedInput;
    import com.farata.core.UIClassFactory;
    import com.farata.resources.ResourceBase;
    import com.farata.validators.ValidationRule;

    import flash.display.DisplayObject;
    import flash.events.Event;
    import flash.events.IEventDispatcher;
    import flash.utils.getDefinitionByName;

    import mx.containers.FormItem;
    import mx.events.FlexEvent;
    import mx.validators.Validator;

    dynamic public class DataFormItem extends FormItem {
        public function DataFormItem()    {
            super();
        }

        private var _itemEditor:IEventDispatcher; //DataFormItemEditor;

        [Bindable("itemEditorChanged")]
        [Inspectable(category="Other")]
        mx_internal var owner:DataForm;

        private var _dataField:String;
        private var _dataFieldAssigned:Boolean = false;
        private var _labelAssigned:Boolean = false;
        private var _valueName:String = null;
        private var _readOnly:Boolean = false;
        private var _readOnlySet:Boolean = false;

        public function set readOnly(f:Boolean):void{
            if( _readOnly==f ) return;
            _readOnly = f;
            _readOnlySet = true;
            commitReadOnly();
         }

        public function get readOnly():Boolean {
            return _readOnly;
        }

        public function set dataField(value:String):void {
            _dataField = value;
            _dataFieldAssigned = true;
        }

        public function get dataField():String{
            return _dataField;
        }

        override public function set label(value:String):void  {
            super.label = value;
            _labelAssigned = true;
        }

        public function set valueName(value:String):void {
            _valueName = value;
        }

        public function get valueName():String {
            return _valueName;
        }

        override public function set data(value:Object):void {
            super.data = value;
            if(_itemEditor)
                if (_itemEditor["data"] != value[_dataField])
                    _itemEditor["data"] = value[_dataField];

            for ( var i : int = 0; i < validators.length; i++) {
                if ( validators[i] is ValidationRule && data)
                    validators[i]["data"]= data;
                validators[i].validate();
            }
        }

        override protected function createChildren():void{
            super.createChildren();
            if(this.getChildren().length > 0) {
                _itemEditor = new DataFormItemEditor(this.getChildAt(0), this);
                _itemEditor.addEventListener(Event.CHANGE, dataChangeHandler);
                _itemEditor.addEventListener(FlexEvent.VALUE_COMMIT,
                                                          dataChangeHandler);
            }
        }

        public function get itemEditor():Object {
            return _itemEditor;
        }

        private var _validators :Array = [];

        public function get validators() :Array {
            return _validators;
        }
        public function set validators(val :Array ): void {
            _validators = val;
        }

        public var _dirtyItemEditor:Object;

        public function set itemEditor(value:Object):void{
            _dirtyItemEditor = null;
         if(value is String){
           var clazz:Class = Class(getDefinitionByName(value as String));
              _dirtyItemEditor = new clazz();
            }
            if(value is Class)
                _dirtyItemEditor = new value();
            if(value is UIClassFactory)
                _dirtyItemEditor = value.newInstance();
            if(value is DisplayObject)
                _dirtyItemEditor = value;
       }

       private function dataChangeHandler(evt:Event):void{
            if (evt.target["data"]!==undefined)    {
                if (data != null) {
                    data[_dataField] = evt.target["data"];
                   }
            }
        }

        private var _resource:Object;
        public function set resource(value:Object):void {
            _resource = ResourceBase.getResourceInstance(value);
            invalidateProperties();
        }

        public function get resource():Object{
            return _resource;
        }

        private function commitReadOnly():void{
            if( _itemEditor==null ) return;
            if( !_readOnlySet ) return;
        if( Object(_itemEditor).hasOwnProperty("readOnly") )
        {
            Object(_itemEditor).readOnly = _readOnly;
            _readOnlySet = false;
        }
        }

        override protected function commitProperties():void{
            super.commitProperties();
            if(itemEditor == null) //no child controls and no editor from resource
            {
                var control:Object = _dirtyItemEditor;
                if(!control && getChildren().length > 0)
                    control = getChildAt(0);  //user placed control inside
                if(!control)
                    control = itemEditorFactory(resource as ResourceBase);

                if(resource)
                    resource.apply(control);
                if( (control is MaskedInput) && hasOwnProperty("formatString"))
                    control.inputMask = this["formatString"];

                addChild(DisplayObject(control));
                //Binding wrapper to move data back and force
                _itemEditor = new
                            DataFormItemEditor(DisplayObject(control),this);
                _itemEditor.addEventListener(Event.CHANGE, dataChangeHandler);
                _itemEditor.addEventListener(FlexEvent.VALUE_COMMIT,
                                                          dataChangeHandler);
        } else
                control = itemEditor.dataSourceObject;

         commitReadOnly();

        for ( var i : int = 0; i < validators.length; i++) {
            var validator : Validator = validators[i] as Validator;
            validator.property = (_itemEditor as DataFormItemEditor).valueName;
            validator.source = control;
            if ( validator is ValidationRule && data)
                validator["data"]= data;
            validator.validate();
        }
        }
        protected function itemEditorFactory(resource : ResourceBase =
                                                         null):Object{
            var result:Object = null;
            if (resource && ! type)
                result = resource.itemEditor;
            else {
                switch(type)    {
                case "checkbox":
                    result = new CheckBox();
                    if (!resource) {
                        resource = new CheckBoxResource(this);
                        resource.apply(result);
                    }
                    break;
                case "radiobutton":
                    result = new RadioButtonGroupBox();
                    if (!resource) {
                        resource = new RadioButtonGroupBoxResource(this);
                        resource.apply(result);
                    }
                    break;
                case "combobox":
                    result = new ComboBox();
                    if (!resource) {
                        resource = new ComboBoxResource(this);
                        resource.apply(result);
                    }
                    break;
                case "date":
                    result = new DateField();
                    if (formatString) (result as DateField).formatString =
                                                                  formatString;
                    break;
                case "datetime":
                    result = new DateTimeField();
                    if (formatString) (result as DateTimeField).formatString =
                                                                  formatString;
                    break;
                case "mask":
                    result = new MaskedInput();
                    break;
                }
            }
            if(result == null && formatString)
                result = guessControlFromFormat(formatString);
            if(result == null)
                result = new TextInput();
            return result;
        }

        protected function guessControlFromFormat(format:String):Object{
            var result:Object = null;
            if(format.toLowerCase().indexOf("currency") != -1)
                result = new NumericInput();
            else if(format.toLowerCase().indexOf("date") != -1){
                result = new DateField();
                (result as DateField).formatString = format;
            }
            else{
                result = new MaskedInput();
                (result as MaskedInput).inputMask = format;
            }
            return result;
        }
    }
}
You’ll see in the example code that you can use an instance of a
String, an Object, a class factory, or a UI control as an
itemEditor property of the DataFormItem. The function createChildren() adds event listeners for
CHANGE and VALUE_COMMIT events, and when any of these
events is dispatched, the dataChangeHandler() pushes the provided value
from the data attribute of the UI control used in the form item into the
data.dataField property of the object
in the underlying collection.
The resource setter allows
application developers to use resources the same way as was done with a
DataGrid earlier in this
chapter.
The function commitReadonly()
ensures that the readOnly property on
the form item can be set only after the item is created.
The function itemEditorFactory() supports creation of the
form item components from a resource based on the value of the variable
type. The guessControlFromFormat() is a function that
can be extended based on the application needs, but in the previous
code, it just uses a NumericInput
component if the currency format was requested and
DateField if the
date format has been specified. If an unknown
format was specified, this code assumes that the application developer
needs a mask; hence the MaskedInput
will be created.
Remember that Flex schedules a call to the function commitProperties() to coordinate modifications
to component properties when a component is created. It’s also called as
a result of the application code calling invalidateProperties(). The function commitProperties() checks whether the
itemEditor is defined. If it is not,
it’ll be created and the event listeners will be added. If the itemEditor exists, the code extracts from it
the UI control used with this form item.
Next, the data form item instantiates the validators specified by the application developers. This code binds all provided validators to the data form item:
for ( var i : int = 0; i < validators.length; i++) {
    var validator : Validator = validators[i] as Validator;
    validator.property = (_itemEditor as DataFormItemEditor).valueName;
    validator.source = control;
    if ( validator is ValidationRule && data)
        validator["data"]= data;
    validator.validate();
}
The next section discusses the benefits of hiding validators
inside the components and offers a sample application that shows how to
use them and the functionality of the ValidationRule class. Meanwhile, Example 70 demonstrates how
an application developer could use the DataForm, the DataFormItem, and resources. Please note that
by default, DataFormItem renders a
TextInput component.
<lib:DataForm dataProvider="employeeDAO">
    <mx:HBox>
        <mx:Form>
            <lib:DataFormItem dataField="EMP_ID" label="Emp Id:"/>
            <lib:DataFormItem dataField="EMP_FNAME" label="First Name:"/>
            <lib:DataFormItem dataField="STREET" label="Street:"/>
            <lib:DataFormItem dataField="CITY" label="City:"/>
            <lib:DataFormItem dataField="BIRTH_DATE" label="Birth Date:"
                                    formatString="shortDate"/>
            <lib:DataFormItem dataField="BENE_HEALTH_INS" label="Health:"
                    resource="{com.farata.resources.YesNoCheckBoxResource}"/>
            <lib:DataFormItem dataField="STATUS" label="Status:"
                    resource="{com.farata.resources.StatusComboResource}"/>
        </mx:Form>

        <mx:Form>
            <lib:DataFormItem dataField="MANAGER_ID" label="Manager Id:"/>
            <lib:DataFormItem dataField="EMP_LNAME" label="Last Name:"/>
            <lib:DataFormItem dataField="STATE" label="State:"
                    resource="com.farata.resources.StateComboResource"/>
            <lib:DataFormItem dataField="SALARY" label="Salary:"
                    formatString="currency" textAlign="right"/>
            <lib:DataFormItem dataField="START_DATE" label="Start Date:"
                    formatString="shortDate"/>
            <lib:DataFormItem dataField="BENE_LIFE_INS" label="Life:"
                    resource="{com.farata.resources.YesNoCheckBoxResource}"/>
            <lib:DataFormItem dataField="SEX" label="Sex:"
                    resource="{com.farata.resources.SexComboResource}"/>
        </mx:Form>

        <mx:Form>
           <lib:DataFormItem dataField="DEPT_ID" label="Department:"
             resource="{com.farata.resources.DepartmentComboResource}"/>
           <lib:DataFormItem dataField="SS_NUMBER" label="Ss Number:"
           itemEditor="{com.theriabook.controls.MaskedInput}" formatString="ssn"/>
           <lib:DataFormItem dataField="ZIP_CODE" label="Zip Code:"
                                                   formatString="zip"/>
           <lib:DataFormItem dataField="PHONE" label="Phone Number:"
          itemEditor="{com.theriabook.controls.MaskedInput}" formatString="phone">

        <lib:validators>
            <mx:Array>
                <mx:PhoneNumberValidator  wrongLengthError="keep typing"/>
            </mx:Array>
        </lib:validators>
         </lib:DataFormItem>
        <lib:DataFormItem dataField="TERMINATION_DATE"
                   label="Termination Date:" formatString="shortDate"/>
        <lib:DataFormItem dataField="BENE_DAY_CARE" label="Day Care:"
                  resource="{com.farata.resources.YesNoCheckBoxResource}"/>
        </mx:Form>
    </mx:HBox>
</lib:DataForm>
This code is an extract from the Café Townsend application (Clear
Data Builder’s version) from Chapter 1. Run the application
Employee_getEmployees_GridFormTest.mxml,
double-click on a grid row, and you’ll see the DataForm in action. In the next section of
this chapter, you’ll see other working examples of DataForm and DataGrid with validators.
Validation
Like data forms and components in general, the Flex Validator could use some enhancement to make it
more flexible for your application developers. In Flex, validation seems
to have been designed with an assumption that software developers will
mainly use it with forms and that each validator class will be dependent
on and attached to only one field. Say you have a form with two email
fields. The Flex framework forces you to create two instances of the
EmailValidator object, one per
field.
In real life, though, you may also need to come up with validating conditions based on relationships between multiple fields, as well as to highlight invalid values in more than one field. For example, you might want to set the date validator to a field and check whether the entered date falls into the time interval specified in the start and end date fields. If the date is invalid, you may want to highlight all form fields.
In other words, you may need to do more than validate an object
property. You may need the ability to write validation rules in a function
that can be associated not only with the UI control but also with the
underlying data, that is, with data displayed in a row in a DataGrid.
Yet another issue of the Flex Validator is its limitations regarding view
states of automatically generated UI controls. Everything would be a lot
easier if validators could live inside the UI controls, in which case they
would be automatically added to view states along with the hosting
controls.
Having a convenient means of validation on the client is an
important part of the enterprise Flex framework. Consider, for example, an
RIA for opening new customer accounts in a bank or an insurance company.
This business process often starts with filling multiple sections in a
mile-long application form. In Flex, such an application may turn into a
ViewStack of custom components with,
say, 5 forms totaling 50 fields. These custom components and validators
are physically stored in separate files. Each section in a paper form can
be represented as the content of one section in an Accordion
or other navigator. Say you have total of 50 validators, but
realistically, you’d like to engage only those validators that are
relevant to the open section of the Accordion.
If an application developer decides to move a field from one custom component to another, she needs to make appropriate changes in the code to synchronize the old validators with a relocated field.
What are some of the form fields that are used with view states? How
would you validate these moving targets? If you are adding three fields
when the currentState="Details", you’d
need to write AddChild statements
manually in the state section Details.
Say 40 out of these 50 validators are permanent, and the other 10 are used once in a while. But you don’t want to use even these 40 simultaneously; hence you need to create, say, 2 arrays having 20 elements each, and keep adding/removing temporary validators to these arrays according to view state changes.
Even though it seems that Flex separates validators and field to
validate, this is not a real separation but rather a tight coupling.
What’s the solution? For the customer accounts example, you want a
ViewStack with 5 custom components,
each of which has 1 DataForm whose
elements have access to the entire set of 50 fields, but that validates
only its own set of 10. In other words, all 5 forms will have access to
the same 50-field dataProvider. If
during account opening the user entered 65 in the field
age on the first form, the fifth form may show fields
with options to open a pension plan account, which won’t be visible for
younger customers.
That’s why each form needs to have access to all data, but when you
need to validate only the fields that are visible on the screen at the
moment, you should be able to do this on behalf of this particular
DataForm. To accomplish all this, we
created a new class called ValidationRule. Our goal is not to replace
existing Flex validation routines, but rather to offer you an alternative
solution that can be used with forms and list-based controls. The next
section demonstrates a sample application that uses the class ValidationRule. After that, you can
take a look at the code under the hood.
Sample Application: DataFormValidation
The DataFormValidation.mxml
application (Figure 34) has two DataForm containers located inside the
HBox. Pressing the Save button
initiates the validation of both forms and displays the message
regardless of whether the entered data is valid.

Example 71 shows the code of the DataFormValidation.mxml application that created these forms.
<?xml version="1.0" encoding="utf-8"?>
<mx:Application width="100%" height="100%" layout="vertical"
    xmlns:mx="http://www.adobe.com/2006/mxml"
    xmlns:fx="http://www.faratasystems.com/2008/components"
    creationComplete="onCreationComplete()"
    >
    <mx:VBox width="100%" height="100%" backgroundColor="white">
         <mx:Label text="Submit Vacation Request"
            fontWeight="bold" fontSize="16" fontStyle="italic"
            paddingTop="10" paddingBottom="5" paddingLeft="10"
            />

        <mx:HBox width="100%" height="100%" >
        <fx:DataForm id="left" width="100%" dataProvider="{vacationRequestDTO}">
          <fx:DataFormItem label="Employee Name: " fontWeight="bold"
             dataField="EMPLOYEE_NAME" required="true"
             validators="{[nameValidator, requiredValidator]}">
            <mx:TextInput  fontWeight="normal" />
          </fx:DataFormItem>
          <fx:DataFormItem label="Employee Email: " fontWeight="bold"
              dataField="EMPLOYEE_EMAIL" required="true"
              validators="{[emailValidator]}">
                <mx:TextInput   fontWeight="normal"/>
           </fx:DataFormItem>
           <fx:DataFormItem label="Employee Email: " fontWeight="bold"
               dataField="MANAGER_EMAIL" required="true"
               validators="{[emailValidator]}">
             <mx:TextInput   fontWeight="normal"/>
           </fx:DataFormItem>
           <fx:DataFormItem label="Department: " fontWeight="bold"
              dataField="DEPARTMENT" required="true"
              validators="{[requiredValidator]}">
             <fx:TextInput fontWeight="normal"/>
           </fx:DataFormItem>
           <mx:Spacer height="10"/>
           <fx:DataFormItem label="Description: " fontWeight="bold"
               dataField="DESCRIPTION">
            <mx:TextArea width="200"  height="80" fontWeight="normal" />
          </fx:DataFormItem>
        </fx:DataForm>

        <fx:DataForm id="right" width="100%" dataProvider="{vacationRequestDTO}">
            <fx:DataFormItem label="Start Date: " fontWeight="bold"
                dataField="START_DATE"  valueName="selectedDate" required="true">
                <mx:DateField fontWeight="normal"/>
            </fx:DataFormItem>
            <fx:DataFormItem label="End Date: " fontWeight="bold"
                 dataField="END_DATE" valueName="selectedDate" required="true">
                <fx:DateField  fontWeight="normal"/>
                  <fx:validators>
                    <mx:Array>
                      <fx:ValidationRule
                        rule="{afterStartDate}"
                         errorMessage="End Date ($[END_DATE]) must be later
                             than Start Date $[START_DATE]">
                    </fx:ValidationRule>
                    <fx:ValidationRule
                        rule="{afterToday}"
                         errorMessage="End Date ($[END_DATE]) must be later
                             than today">
                    </fx:ValidationRule>
                    </mx:Array>
                </fx:validators>
            </fx:DataFormItem>
            <fx:DataFormItem label="Request Status: " fontWeight="bold"
                      dataField="STATUS">
                <mx:Label  fontWeight="normal"/>
            </fx:DataFormItem>
           </fx:DataForm>
        </mx:HBox>
    </mx:VBox>
    <mx:Button label="Save" click="onSave()"/>

    <mx:Script>
        <![CDATA[
            import com.farata.datasource.dto.VacationRequestDTO;
            import mx.utils.UIDUtil;

            [Bindable] private var vacationRequestDTO:VacationRequestDTO ;
            private function afterToday( val: Object) : Boolean {
                var b : Boolean = val.END_DATE > new Date();
                return b;
            }
            private function afterStartDate( val: Object) : Boolean {
                var b : Boolean = val.END_DATE > val.START_DATE;
                return b;
            }

            private function onCreationComplete():void {
                // create a new vacation request
                vacationRequestDTO = new VacationRequestDTO;
                vacationRequestDTO.REQUEST_ID = UIDUtil.createUID();
                vacationRequestDTO.STATUS = "Created";
                vacationRequestDTO.START_DATE =
                              new Date(new Date().time + 1000 * 3600 * 24);
                vacationRequestDTO.EMPLOYEE_NAME = "Joe P";
                vacationRequestDTO.EMPLOYEE_EMAIL = "[email protected]";
                vacationRequestDTO.VACATION_TYPE = "L"; //Unpaid leave - default
            }

            private function onSave():void    {
                if (isDataValid()) {
                    mx.controls.Alert.show("Validation succeeded");
                } else {
                    mx.controls.Alert.show("Validation failed");
                }
            }

            private function isDataValid():Boolean {
                var failedLeft:Array = left.validateAll();
                var failedRight:Array = right.validateAll();
                return ((failedLeft.length == 0)&&(failedRight.length == 0));
            }
        ]]>
    </mx:Script>

    <mx:StringValidator id="nameValidator" minLength="6"
                  requiredFieldError="Provide your name, more than 5 symbols" />
    <mx:EmailValidator id="emailValidator"
                  requiredFieldError="Provide correct email" />
    <mx:StringValidator id="requiredValidator"
                  requiredFieldError="Provide non-empty value here" />
</mx:Application>
On the creationComplete event,
this application creates an instance of the vacationRequestDTO that
is used as a dataProvider for both
left and right data forms.
This code uses a mix of standard Flex validators (StringValidator, EmailValidator) and subclasses of ValidatorRule. Note that both email fields use
the same instance of the EmailValidator, which is not possible with
regular Flex validation routines:
<fx:DataFormItem label="Employee Email: " fontWeight="bold"
              dataField="EMPLOYEE_EMAIL" required="true"
              validators="{[emailValidator]}">
                <mx:TextInput   fontWeight="normal"/>
           </fx:DataFormItem>
           <fx:DataFormItem label="Employee Email: " fontWeight="bold"
               dataField="MANAGER_EMAIL" required="true"
               validators="{[emailValidator]}">
             <mx:TextInput   fontWeight="normal"/>
           </fx:DataFormItem>
Notice that these validators are encapsulated inside the DataFormItem. If application programmers
decide to add or remove some of the form item when the view state
changes, they don’t need to program anything special to ensure that
validators work properly! The form item end date
encapsulates two validation rules that are given as the closures
afterStartDate and afterToday:
<fx:DataFormItem label="End Date: " fontWeight="bold"
                 dataField="END_DATE" valueName="selectedDate" required="true">
                <fx:DateField  fontWeight="normal"/>
                  <fx:validators>
                    <mx:Array>
                      <fx:ValidationRule
                        rule="{afterStartDate}"
                         errorMessage="End Date ($[END_DATE]) must be later
                             than Start Date $[START_DATE]">
                    </fx:ValidationRule>
                    <fx:ValidationRule
                        rule="{afterToday}"
                         errorMessage="End Date ($[END_DATE]) must be later
                             than today">
                    </fx:ValidationRule>
                    </mx:Array>
                </fx:validators>
            </fx:DataFormItem>

...

private function afterToday( val: Object) : Boolean {
    var b : Boolean = val.END_DATE > new Date();
    return b;
}

private function afterStartDate( val: Object) : Boolean {
    var b : Boolean = val.END_DATE > val.START_DATE;
    return b;
}
The example code does not include standard Flex validators inside
<fx:validators>, but this is
supported, too. For example, you can add the following line in the
validators section of a DataFormItem right under the <mx:Array> tag:
<mx:StringValidator id="requiredValidator"
                  requiredFieldError="Provide non-empty value here" />
If you do it, you’ll have three validators bound to the same form
item, End Date: one standard Flex
validator and two functions with validation rules.
From the application programmer’s perspective, using such validation rules is simple. It allows reusing validators, which can be nicely encapsulated inside the form items.
For brevity, the function onSave() just displays a message box stating
that the validation failed:
mx.controls.Alert.show("Validation failed");But if you run this application through a debugger and place a
breakpoint inside the function isDataValid(), you’ll see all validation
errors in the failedLeft and failedRight arrays (Figure 35).

The ValidationRule Class Explained
Enhancing the original Flex validators, the new ValidationRule extends the Flex Validator and is known to clear.swc’s UI controls. With it, developers
can attach any number of validation rules to any field of a form or a
list-based component. This means you can attach validation rules not
only on the field level, but also on the parent level, such as to a
specific DataGrid column or to an
entire row.
When we designed the class, our approach was to separate (for
real) validation rules from the UI component they validate. We also made
them reusable to spare application developers from copy/pasting the same
rule repeatedly. With the ValidationRule class, you can instantiate each
rule once and reuse it across the entire application. Our goal was to
move away from one-to-one relationships between a validator and a single
property of a form field, to many-to-many relationships where each field
can request multiple validators and vice versa.
If you don’t need to perform cross-field validation in the form,
you can continue using the original Flex validator classes. If you need
to validate interdependent fields—if, say, the amount field has a value
greater than $10K, and you need to block overnight delivery of the order
field until additional approval is provided—use our more flexible
extension, ValidationRule.
We still want to be able to reuse the validators (EmailValidator, StringValidator, etc.) that come with Flex,
but they should be wrapped in our ValidationRule class. On the other hand, with
the ValidationRule class, the
application developers should also be able to write validation rules as
regular functions, which requires less coding.
The source code of the ValidationRule class that supports all this
functionality is listed in Example 72.
package com.farata.validators{
    import mx.controls.Alert;
    import flash.utils.describeType;

    import mx.events.ValidationResultEvent;
    import mx.validators.ValidationResult;
    import mx.validators.Validator;

    public class ValidationRule   extends Validator{
        public var args:Array = [];
        public var wrappedRule:Function ;
        public var errorMessage : String = "[TODO] replace me";
        public var data:Object;

        public function ValidationRule() {
            super();
            required = false;
        }
        private function combineArgs(v:Object):Array {
                var _args:Array = [v];
                if( args!=null && args.length>0 )
                    _args["push"].apply(_args, args);
                return  _args;
        }

        public function set rule(f:Object) : void {
              if (!(f is Function)){
                Alert.show(""+f, "Incorrect Validation Rule" );
              return; // You may throw an exception here
           }

              wrappedRule = function(val:Object) :Boolean {
             return f(val);
              }
       }

        private function substitute(...rest):String {
             var len:uint = rest.length;
            var args:Array;
            var str:String = "" + errorMessage;
            if (len == 1 && rest[0] is Array){
                args = rest[0] as Array;
                len = args.length;
            }
            else{
                args = rest;
            }

            for (var i:int = 0; i < len; i++){
                str = str.replace(new RegExp("\$\["+i+"\]", "g"), args[i]);
            }
            if ( args.length == 1 && args[0] is Object) {
                var o:Object = args[0];
                for each (var s:*  in o){
                    str = str.replace(new RegExp("\$\["+s+"\]", "g"), o[s]);
                }

                var classInfo:XML = describeType(o);
                // List the object's variables, their values, and their types.
                for each (var v:XML in classInfo..variable) {
                    str = str.replace(new RegExp("\$\["+v.@name+"\]", "g"),
                                                                    o[v.@name]);
                }

            // List accessors as properties
                for each (var a:XML in classInfo..accessor) {
                // Do not get the property value if it is write-only
                    if (a.@access != 'writeonly') {
                         str = str.replace(new RegExp("\$\["+a.@name+"\]",
                                                            "g"), o[a.@name]);
                    }
                  }
            }
            return str;
        }

    override protected function doValidation(value:Object):Array{
              var results:Array = [];

            if (!wrappedRule(data))
               results.push(new ValidationResult(true, null, "Error",
                       substitute(combineArgs(data))));

            return results;
        }
       override public function validate(value:Object = null,
                   suppressEvents:Boolean = false):ValidationResultEvent{
        if (value == null)
            value = getValueFromSource();

        // If the required flag is true and there is no value,
        // we need to generate a required field error
        if (isRealValue(value) || required){
            return super.validate(value, suppressEvents);
        }
        else {
            // Just return the valid value
            return new ValidationResultEvent(ValidationResultEvent.VALID);
        }
      }
    }
}
The superclass Validator has
two methods that will be overridden in its descendants: doValidation(), which initiates and performs
the validation routine, and the function validate(), which watches required arguments
and gets the values from the target UI control.
Notice that this code fragment from the DataFormValidation.mxml application:
<fx:ValidationRule rule="{afterStartDate}"
 errorMessage="End Date ($[END_DATE]) must be later than Start Date $[START_DATE]">
</fx:ValidationRule>
mentions the name of the function afterStartDate that alternatively could have
been declared inline as a closure. The function ensures that the date
being validated is older than the END_DATE:
private function afterToday( val: Object) : Boolean {
    var b : Boolean = val.END_DATE > new Date();
    return b;
}
In this code, val points at the
dataProvider of the form, which, in
the sample application, is an instance of the vacationRequestDTO. An important point is that
both the DataForm and the ValidationRule see the same dataProvider.
The value of the errorMessage
attribute includes something that looks like a macro language: ($[END_DATE]). The function substitute() finds and replaces via regular
expression the specified name (e.g., END_DATE) in all properties in the dataProvider with their values.
If dataProvider is a dynamic
object, the function ValidationRule.substitute() enumerates all its
properties via a for each loop. For
regular classes, Flex offers a reflection mechanism using the function
describeType(); give it a class name
and it’ll return a definition of this class in a form of XML. Then the
function substitute() gets all class
variables and accessors (getters and setters) and
applies the regular expression to the errorMessage text.
For example, if you deal with a dynamic object o that has a property END_DATE, the following line will replace
($[END_DATE]) in the error text with
the value of this property o[s]:
str = str.replace(new RegExp("\$\["+s+"\]", "g"), o[s]);The method substitute() is
called from doValidate(), and if the
user enters invalid dates (for example, if the start date is 12/10/2008
and the end date 12/06/2008), the validator will find the properties
called END_DATE and START_DATE and turn this error text:
"End Date ($[END_DATE]) must be later than Start Date $[START_DATE]"
into this one:
"End Date (12/06/2008) must be later than Start Date 12/10/2008"
In Chapter 2, you learned how to
write class factories that can wrap functions and return them as
objects. This technique is applied in the ValidationRule class, too, which supports
functions as validators. If the application code uses the setter
rule, the function with
business-specific validation rules is expected.
The class ValidationRule has
this setter:
public function set rule(f:Object) : void {
            if (!(f is Function)){
               Alert.show(""+f, "Incorrect Validation Rule" );
            return;
         }

            wrappedRule = function(val:Object) :Boolean {
        return f(val);
            }
}
In the application DataFormValidation.mxml,
you can easily find that this setter has been used (we already discussed
the function afterStartDate
earlier):
<fx:ValidationRule
    rule="{afterStartDate}"
    errorMessage="End Date ($[END_DATE]) must be later
                    than Start Date $[START_DATE]">
</fx:ValidationRule>
We hope you like the simplicity that ValidationRule offers to application
developers who have to validate forms. The next section examines a
sample application that demonstrates the use of this class in a DataGrid control.
Embedding Validation Rules into a DataGrid
As opposed to component libraries, classes in a framework depend
on each other. In this context, this means that the ValidationRule class requires an enhanced
DataGrid component.
Note
Please note that the sample application shown next uses DataGrid and DataGridItem from a different namespace.
These classes are included in the clear.swc library and come with the source
code accompanying the book, but due to space constraints, we won’t
include the source code of these objects here.
This example is yet another version of the Café Townsend application from Chapter 1. For simplicity, the employee data hardcoded, and to run this application you don’t need to do any server-side setup.
This application is an example of a master/detail window with
validators embedded inside a data grid. Figure 36 shows the phone number
having the wrong number of digits in the first row of our DataGrid component. The embedded validation
rule properly reports an error message that reads, “Wrong length, need
10 digit number.”

You can also assign validation rules to the form items that show details of the selected row. In Figure 37 you can see a validation error message stating that “Salary (9.95) is out of reasonable range.” All fields that have invalid values have red borders. While examining the source code, please note that the drop-down box “Department” was populated using a resource file.

The version of the Café Townsend application in Example 73 uses the custom
object Employee_getEmployees_gridFormTest.
<?xml version="1.0" encoding="UTF-8"?>
<mx:ViewStack height="100%" width="100%" xmlns:mx="http://www.adobe.com/2006/mxml"
xmlns:fx="http://www.faratasystems.com/2008/components" creationPolicy="all"
creationComplete="fill_onClick()">
<fx:DataCollection id="collection" destination="com.farata.datasource.Employee"
method="getEmployees" collectionChange="trace(event)"
fault="trace(event)" />
<mx:Canvas height="100%" width="100%">
<mx:Panel title="Employee List" width="100%" height="100%">
<fx:DataGrid id="dg"
itemRenderer="{new
UIClassFactory(com.farata.controls.dataGridClasses.DataGridItemRenderer)}"
horizontalScrollPolicy="auto" width="100%" dataProvider="{collection}"
editable="true" height="100%" rowHeight="25">
<fx:columns>
<fx:DataGridColumn dataField="EMP_FNAME" headerText="First Name"/>
<fx:DataGridColumn dataField="EMP_LNAME" headerText="Last Name"/>
<fx:DataGridColumn dataField="DEPT_ID" editable="false"
headerText="Department"
resource="{com.farata.resources.DepartmentComboResource}"/>
<fx:DataGridColumn dataField="STREET" headerText="Street"/>
<fx:DataGridColumn dataField="CITY" headerText="City"/>
<fx:DataGridColumn dataField="STATE" editable="false"
headerText="State"
resource="{com.farata.resources.StateComboResource}"/>
<fx:DataGridColumn dataField="ZIP_CODE" headerText="Zip Code"
formatString="zip" >
<fx:validators>
<mx:ZipCodeValidator />
</fx:validators>
</fx:DataGridColumn>
<fx:DataGridColumn dataField="PHONE" headerText="Phone Number"
formatString="phone" >
<fx:validators>
<mx:Array>
<mx:PhoneNumberValidator wrongLengthError="Wrong
length, need 10 digit number"/>
</mx:Array>
</fx:validators>
</fx:DataGridColumn>
<fx:DataGridColumn dataField="STATUS" headerText="Status"/>
<fx:DataGridColumn dataField="SS_NUMBER" headerText="Ss Number"
formatString="ssn" >
<fx:validators>
<mx:SocialSecurityValidator/>
</fx:validators>
</fx:DataGridColumn>
<fx:DataGridColumn dataField="SALARY" headerText="Salary"
formatString="currency(2)">
<fx:validators>
<mx:Array>
<fx:ValidationRule
rule="{function(data:Object):Boolean
{ return (data &&data.SALARY > 10000
&& data.SALARY < 500000);}}"
errorMessage="Salary ($[SALARY]) is out of reasonable
range"/>
</mx:Array>
</fx:validators>
</fx:DataGridColumn>
<fx:DataGridColumn dataField="START_DATE" headerText="Start Date"
itemEditor="mx.controls.DateField" editorDataField="selectedDate"
formatString="shortDate"/>
<fx:DataGridColumn dataField="TERMINATION_DATE"
headerText="Termination Date" itemEditor="mx.controls.DateField"
editorDataField="selectedDate" formatString="shortDate">
<fx:validators>
<fx:ValidationRule
rule="{afterStartDate}"
errorMessage="End Date ($[TERMINATION_DATE]) must be
later than Start Date $[START_DATE]">
</fx:ValidationRule>
</fx:validators>
</fx:DataGridColumn>
<fx:DataGridColumn dataField="BIRTH_DATE" headerText="Birth Date"
itemEditor="mx.controls.DateField" editorDataField="selectedDate"
formatString="shortDate"/>
<fx:DataGridColumn dataField="BENE_HEALTH_INS" headerText="Health"
resource="{YesNoCheckBoxResource}" rendererIsEditor="true"/>
<fx:DataGridColumn dataField="BENE_LIFE_INS" headerText="Life"
resource="{YesNoCheckBoxResource}" rendererIsEditor="true"/>
<fx:DataGridColumn dataField="BENE_DAY_CARE" headerText="Day Care"
resource="com.farata.resources.YesNoCheckBoxResource"
rendererIsEditor="true"/>
<fx:DataGridColumn dataField="SEX" headerText="Sex"
resource="{SexRadioResource}" rendererIsEditor="true"/>
</fx:columns>
</fx:DataGrid>
<fx:DataForm dataProvider="{dg.selectedItem}">
<mx:HBox>
<mx:Form>
<fx:DataFormItem dataField="EMP_ID" label="Emp Id:"/>
<fx:DataFormItem dataField="EMP_FNAME" label="First Name:"/>
<fx:DataFormItem dataField="STREET" label="Street:"/>
<fx:DataFormItem dataField="CITY" label="City:"/>
<fx:DataFormItem dataField="BIRTH_DATE" label="Birth Date:"
formatString="shortDate" required="true"/>
<fx:DataFormItem dataField="BENE_HEALTH_INS" label="Health:"
resource="{com.farata.resources.YesNoCheckBoxResource}"/>
<fx:DataFormItem dataField="STATUS" label="Status:"
resource="{com.farata.resources.StatusComboResource}"
required="true"/>
</mx:Form>
<mx:Form>
<fx:DataFormItem dataField="MANAGER_ID" label="Manager Id:"/>
<fx:DataFormItem dataField="EMP_LNAME" label="Last Name:"/>
<fx:DataFormItem dataField="STATE" label="State:"
resource="com.farata.resources.StateComboResource"/>
<fx:DataFormItem dataField="SALARY" label="Salary:"
formatString="currency" textAlign="right">
<fx:validators>
<fx:ValidationRule rule="{function(data:Object):Boolean {
return (data &&data.SALARY > 10000 &&
data.SALARY < 500000);}}"
errorMessage="Salary ($[SALARY]) is out
of reasonable range"/>
</fx:validators>
</fx:DataFormItem>
<fx:DataFormItem dataField="START_DATE" label="Start Date:"
formatString="shortDate"/>
<fx:DataFormItem dataField="BENE_LIFE_INS" label="Life:"
resource="{YesNoCheckBoxResource}"/>
<fx:DataFormItem dataField="SEX" label="Sex:"
resource="{SexRadioResource}"/>
</mx:Form>
<mx:Form>
<fx:DataFormItem dataField="DEPT_ID" label="Department:"
resource="{DepartmentComboResource}"/>
<fx:DataFormItem dataField="SS_NUMBER" label="Ss Number:"
itemEditor="{com.farata.controls.MaskedInput}"
formatString="ssn">
<fx:validators>
<mx:SocialSecurityValidator/>
</fx:validators>
</fx:DataFormItem>
<fx:DataFormItem dataField="ZIP_CODE" label="Zip Code:"
formatString="zip">
<fx:validators>
<mx:ZipCodeValidator />
</fx:validators>
</fx:DataFormItem>
<fx:DataFormItem dataField="PHONE" label="Phone Number:"
itemEditor="{com.farata.controls.MaskedInput}"
formatString="phone">
<fx:validators>
<mx:PhoneNumberValidator
wrongLengthError="keep typing"/>
</fx:validators>
</fx:DataFormItem>
<fx:DataFormItem dataField="TERMINATION_DATE"
label="Termination Date:" formatString="shortDate">
<fx:validators>
<fx:ValidationRule
rule="{afterStartDate}"
errorMessage="End Date ($[TERMINATION_DATE]) must be
later than Start Date $[START_DATE]">
</fx:ValidationRule>
</fx:validators>
</fx:DataFormItem>
<fx:DataFormItem dataField="BENE_DAY_CARE" label="Day Care:"
resource="{YesNoCheckBoxResource}"/>
</mx:Form>
</mx:HBox>
</fx:DataForm>
</mx:Panel>
<mx:HBox horizontalScrollPolicy="off" verticalAlign="middle" height="30"
width="100%">
<mx:Spacer width="100%"/>
<mx:VRule strokeWidth="2" height="24"/>
<mx:Button enabled="{dg.selectedIndex != -1}"
click="collection.removeItemAt(dg.selectedIndex)" label="Remove"
icon="@Embed('/assets/delete_16x16.gif')"/>
<mx:Button click="addItemAt(Math.max(0,dg.selectedIndex+1)) " label="Add"
icon="@Embed('/assets/add_16x16.gif')" />
<mx:Label text="Deleted: {collection.deletedCount}"/>
<mx:Label text="Modified: {collection.modifiedCount}"/>
</mx:HBox>
</mx:Canvas>
<mx:Script> <![CDATA[
import com.farata.controls.dataGridClasses.DataGridItemRenderer;
import com.farata.core.UIClassFactory;
import com.farata.collections.DataCollection;
import mx.collections.ArrayCollection;
import mx.controls.dataGridClasses.DataGridColumn;
import mx.events.CollectionEvent;
import com.farata.datasource.dto.EmployeeDTO;
import com.farata.resources.*;
import mx.validators.*;
private var linkage:EmployeeDTO = null;
private function fill_onClick():void {
collection.source = Test.data;
dg.selectedIndex=0;
}
private function addItemAt(position:int):void {
var item:EmployeeDTO = new EmployeeDTO();
collection.addItemAt(item, position);
dg.selectedIndex = position;
}
import com.farata.resources.*;
import com.farata.controls.*;
private function afterStartDate( val: Object) : Boolean {
return !val.TERMINATION_DATE || val.TERMINATION_DATE > val.START_DATE;
}
]]>
</mx:Script>
</mx:ViewStack>When you review the code in Example 73, you’ll find
different flavors of validation rules inside the data grid columns in
this implementation of the Café Townsend application. For example, the
following rule is defined as an anonymous function for the data grid
column SALARY:
<fx:DataGridColumn dataField="SALARY" headerText="Salary"
formatString="currency(2)">
<fx:validators>
<mx:Array>
<fx:ValidationRule
rule="{function(data:Object):Boolean
{ return (data &&data.SALARY > 10000
&& data.SALARY < 500000);}}"
errorMessage="Salary ($[SALARY]) is out of reasonable
range"/>
</mx:Array>
</fx:validators>
</fx:DataGridColumn>If the data grid is populated and the salary in a particular cell
does not fall into the range between 10,000 and 500,000, this function
returns false and this data value is
considered invalid. Such cell(s) will immediately get the red border,
and the error message will report the problem in the red error tip right
by this cell.
Some of the validation rules were repeated both in the DataGrid and DataForm, but this doesn’t have to be the
case. The same instances of the ValidationRule class can be reused as in the
DataFormValidation
application.
The data for this sample application is hardcoded in Test.as, which starts as follows:
public class Test{

        public function Test(){
        }
        static public function get data() : Array {
            var e : EmployeeDTO = new EmployeeDTO;
            e.EMP_FNAME = "Yakov";
            e.EMP_LNAME = "Fain";
            e.BENE_DAY_CARE = "Y";
            e.BENE_HEALTH_INS = "Y";
            e.BENE_LIFE_INS = "N";
               ...
If you’d like to have a deeper understanding of how <fx:DataGridColumn> works with embedded validators, please examine
the source code of the classes com.farata.controls.dataGridClasses.DataGridItem
and com.farata.controls.DataGrid that
are included with the source code accompanying this chapter.
We had to jump through a number of hoops to allow Flex validators
to communicate with the DataGrid, as
the Validator class expects to work
only with subclasses of the UIComponent that are focusable controls with
borders. It’s understandable—who needs to validate, say, a Label?
But we wanted to be able to display a red border around the cell
that has an invalid value and a standard error tip when the user hovers
the mouse pointer over the DataGrid cell. Hence we had to make
appropriate changes and replace the original DataGrid.itemRenderer with our own, which
implements the IValidatorListener
interface. An itemRenderer on the
DataGrid level affects all its
columns:
<fx:DataGrid id="dg"
    itemRenderer="{new UIClassFactory(
com.farata.controls.dataGridClasses.DataGridItemRenderer)}"
We’ve included this replacement of the DataGridItemRenderer in the demo application
just to show that you can substitute the base classes from the Flex
framework with your own. But as a developer of a business framework, you
should hide such code in the base components, which in this case would
have been a constructor of your enhanced DataGrid.
Besides validation rules, it is worth noting how master/detail relationships are implemented with just one line:
<fx:DataForm dataProvider="{dg.selectedItem}">A selected row in a DataGrid
(master) is a dataProvider for a
DataForm (detail). With original Flex
DataGrid and Form components, it would take a lot more
coding to properly rebind the object representing a selected row that
changes whenever the user selects a different one.
Once again, a well-designed framework should allow application
developers to write less code. The code of this version of Café Townsend
is an example of what can be done in only about 160 lines of code. It
implements master/detail relationships, performs a lot of custom
validations, and uses Business Style Sheets. Adding a couple dozen lines
of code can turn this application into a CRUD built on the powerful
DataCollection class that will be
discussed in Chapter 6.
Minimizing the Number of Custom Events
Until now, you’ve concentrated on building rich components for a business framework. We Flex architects also recommend some coding techniques that serve the same goal as these components: enabling application developers to write less code. In this section, you’ll see how to minimize the number of custom event classes in any application.
Flex is all about event-driven development. Create loosely coupled
custom components and let them send events to each other, as in the
mediator pattern example from Chapter 2.
You can create new events for every occasion. If an event does not need to
carry any additional data, just give it a name, specify its type as
flash.events.Event, and define the meta
tag to help Flash Builder list this event in its type-ahead prompts and
dispatch it when appropriate. If your new event needs to carry some data,
create an ActionScript class extending flash.events.Event, define a variable in this
subclass to store application data, and override the method clone().
Currently, for a midsize Flex application that includes about 30 views, where each view has two components that can send/receive just one custom event, for example, you face the need to write 60 custom event classes that look pretty much the same. We’ll show you how to get away with just one custom event class for the entire application.
To illustrate the concept, we’ve created a simple application that
defines one event class that can serve multiple purposes. This application
consists of two modules (GreenModule, shown in Figure 38, and RedModule) that are loaded in the same area of
the main application upon the click of one of the load buttons. It also
has one universal event class called ExEvent.

Clicking any Send button creates an instance of this event that’s
ready to carry an application-specific payload: a DTO, a couple of
String variables, or any other
object.
Figure 38’s example uses an
ActionScript class called GirlfriendDTO. No Cairngorm-style mapping is
required between the event being sent and the modules. For example, if you
send a Green event to the RedModule, nothing happens, as the latter is not
listening to the Green event.
This application and its source code are deployed at http://tinyurl.com/5n5qkg.
Flash Builder’s project has a folder called modules that contains two modules: RedModule
and GreenModule. The red one is
listening for the arrival of the girlfriend’s first and last name,
packaged in our single event class as the two separate strings listed in
Example 74.
<?xml version="1.0" encoding="utf-8"?>
<mx:Module xmlns:mx="http://www.adobe.com/2006/mxml" layout="absolute"
    width="100%" height="100%" creationComplete="onCreationComplete(event)">
    <mx:TextArea id="display" backgroundColor="#FF4949"  width="100%" height="100%"
                                                      fontSize="28"/>
    <mx:Script>
    <![CDATA[
    private function onCreationComplete(evt:Event):void{
        this.addEventListener("RedGirlfriend", onRedGirlfriend);
    }

    private function onRedGirlfriend(evt:ExEvent):void{
        display.text="My girlfriend is "+ evt.fName+ " " + evt.lName ;
    }
    ]]>
    </mx:Script>
</mx:Module>
The green module (Example 75) expects the
girlfriend’s name in the form of GirlfriendDTO (Example 76).
<?xml version="1.0" encoding="utf-8"?>
<mx:Module xmlns:mx="http://www.adobe.com/2006/mxml" layout="absolute"
   width="100%" height="100%" creationComplete="onCreationComplete(event)">
    <mx:TextArea id="display" backgroundColor="#9CE29C" width="100%"
                   height="100%" color="#070707" fontSize="28"/>
    <mx:Script>
        <![CDATA[
        import dto.GirlfriendDTO;

        private function onCreationComplete(evt:Event):void{
          this.addEventListener("GreenGirlfriend", onGreenGirlfriend);
        }

        private function onGreenGirlfriend(evt:ExEvent):void{
         var myGirlfriend:GirlfriendDTO=evt["girlfriend"];

         display.text="My girlfriend is "+ myGirlfriend.fName+ " " +
                                                 myGirlfriend.lName ;
         }
        ]]>
    </mx:Script>
</mx:Module>
The GirlfriendDTO is pretty
straightforward, too, as Example 76 shows.
package dto
/**
 * This is a sample data transfer object (a.k.a. value object)
 */
{
    public class GirlfriendDTO {
         public var fName:String; // First name
         public var lName:String; // Last name
    }
}
The next step is to create a single but universal event class. It
will be based on the DynamicEvent
class, which allows you to add any properties to the event object on the
fly. For the example, GirlfriendDTO is
the object. Here’s how a dynamic event can carry the GirlfriendDTO:
var myDTO:GirlfriendDTO=new GirlfriendDTO();
myDTO.fName="Mary";
myDTO.lName="Poppins";

var greenEvent:ExEvent=new ExEvent("GreenGirlfriend");
greenEvent.girlfriend=myDTO;
someObject.dispatchEvent(greenEvent);
Sending any arbitrary variables with this event will be straightforward:
var redEvent:ExEvent=new ExEvent("RedGirlfriend");

redEvent.fName="Mary";
redEvent.lName="Poppins";
someObject.dispatchEvent(redEvent);
The ExEvent is a subclass of
DynamicEvent, which has a little
enhancement eliminating manual programming of the property Event.preventDefault:
package{
    import mx.events.DynamicEvent;
    public dynamic class ExEvent extends DynamicEvent{
        private var m_preventDefault:Boolean;

        public function ExEvent(type:String, bubbles:Boolean = false,
                                          cancelable:Boolean = false)     {
            super(type, bubbles, cancelable);
            m_preventDefault = false;
        }

         public override function preventDefault():void         {
            super.preventDefault();
            m_preventDefault = true;
        }

        public override function isDefaultPrevented():Boolean     {
            return m_preventDefault;
        }
    }
}
The function preventDefault() is
overridden, because the class DynamicEvent does not automatically process
preventDefault in cloned events.
The code of the following test application loads modules, and then the user can send any event to whatever module is loaded at the moment. Of course, if the currently loaded module does not have a listener for the event you’re sending, tough luck. But the good news is that it won’t break the application either, as shown in Example 77.
<?xml version="1.0" encoding="utf-8"?>
<mx:Application xmlns:mx="http://www.adobe.com/2006/mxml" layout="vertical"
viewSourceURL="srcview/index.html">
 <mx:HBox>
    <mx:Button label="Load the Green Module"
          click="loadMyModule('modules/GreenModule.swf')"/>
    <mx:Button label="Load the Red module"
          click="loadMyModule('modules/RedModule.swf')"/>
    <mx:Button label="Send Green Event with Object" click="sendGreen()"/>
    <mx:Button label="Send Red Event Event with two strings" click="sendRed()"/>

 </mx:HBox>

<mx:Panel width="100%" height="100%" title="A module placeholder"
                                                    layout="absolute">
  <mx:ModuleLoader id="theModulePlaceholder" width="100%" height="100%"/>
</mx:Panel>
<mx:Script>
    <![CDATA[
        import dto.GirlfriendDTO;
        //Load the module specified in the moduleURL
        private function loadMyModule(moduleURL:String):void{
            theModulePlaceholder.url=moduleURL;
            theModulePlaceholder.loadModule();
        }

        // Sending generic ExEvent, adding an object that contains
        // the name of the girlfriend
        private function sendGreen():void{

            // Strongly typed DTO - better performance and readability,
            // but its structure has to be known for both parties -
            // the main application and the module
            var myDTO:GirlfriendDTO=new GirlfriendDTO();
            myDTO.fName="Mary";
            myDTO.lName="Poppins";

            if (theModulePlaceholder.child !=null){
                var greenEvent:ExEvent=new
                                          ExEvent("GreenGirlfriend");
                greenEvent.girlfriend=myDTO;

                theModulePlaceholder.child.dispatchEvent(greenEvent);
            }
        }

    // Sending a generic ExEvent that holds the name of the girlfriend
    // as two separate variables
        private function sendRed():void{
                var redEvent:ExEvent=new ExEvent("RedGirlfriend");

                redEvent.fName="Angelina";
                redEvent.lName="YouKnowWho";

                if (theModulePlaceholder.child !=null){
                theModulePlaceholder.child.dispatchEvent(redEvent);
                }
        }
    ]]>
</mx:Script>
</mx:Application>
The function sendGreen() sends an
instance of ExEvent, carrying the DTO
inside. The sendRed() function just
adds two properties, fName and lName, to the instance of ExEvent.
Instead of using a DTO, you could’ve used a weakly typed data transfer object:
var myDTO:Object={fname:"Mary",lname:"Poppins"};But this approach might result in a slightly slower performance and the code would be less readable. On the plus side, there would be no need to explicitly define and share the class structure of the DTO between the application (the mediator) and the module. You can use this technique for creating quick-and-dirty prototypes.
To summarize, using a single dynamic event spares you from the
tedious coding of dozens of similar event classes. On the negative side,
because this solution does not use the meta tag Event declaring the names of the events, Flash
Builder won’t be able to help you with the name of the event in its
type-ahead help.
In the vast majority of RIAs, you can afford to lose a couple of milliseconds caused by using a dynamic event. Using a single dynamic event is one more step toward minimizing the code to be written for your project.
Summary
In this chapter, you learned by example how to start enhancing the
Flex framework with customized components and classes, such as CheckBox, ComboBox, DataGrid, DataForm, DataFormItem, and ValidationRule. You also saw how to use these
components in your applications. The source code for this chapter comes as
two Flash Builder projects—the Business Framework, which includes the
sample applications discussed in this chapter, and the Business Framework
Library, which includes a number of enhanced Flex components (some of them
were shown here in simplified form) that can be used in your projects as
well.
The clear.swc component library is offered for free under the MIT license as a part of the open source framework Clear Toolkit—just keep the comments in the source code giving credit to Farata Systems as the original creator of this code. You can find the up-to-date information about all components included in Clear Toolkit by visiting the popular open source repository SourceForge, or, to be more specific, the following URL: https://sourceforge.net/projects/cleartoolkit. Make sure that you’ve tested these components thoroughly before using them in production systems.
In this chapter, we reviewed and explained why and how we extended
several Flex components. We started with simpler CheckBox and ComboBox components, just because it was easier
to illustrate the process of extending components. But then we did some
heavy lifting and extended such important components as Form and Validator. You’ve seen a working example
application that would integrate validators into DataForm and DataGrid components.
Besides extending components, we’ve shown you some best practices
(using resources and writing applications) that use only one
event class and thus greatly minimize the amount of
code that Flex developers have to write.
You’ll see more of extended components in Chapters 6, 9, and 11. Next we’ll discuss convenient third-party tools that can be handy for any Flex team working on an enterprise project.