
If you're new to Microsoft Windows Vista, you need to know a few things about the Vista user interface. Although this appendix doesn't reveal anything earthshaking, it does provide a quick-and-dirty overview of what you need to know to get around.
If you've used other Windows applications, you probably don't need to read this appendix because you already know the material it covers.
I won't bore you with technical details. The information here, though, will enable you not only to operate Quicken but also to converse easily about the newest versions of Windows at cocktail parties, over lunch, or with the guy at the computer store.
If you want more information, you may want to read a book such as Windows Vista For Dummies or Windows 7 For Dummies, both by Andy Rathbone (Wiley).
Tip
If you're working with Windows XP or Windows 7, much of what this appendix talks about will also apply to your use of Quicken 2010. (Windows 7 was not yet released at the time of this writing.)
Vista — and when I use the term Vista here, again, I mean any version of Microsoft Windows Vista — is an operating environment that manages your system resources (things like memory, your monitor, your printer, and so on).
Applications (programs such as Quicken) run on top of Vista. In other words, you first start Vista by turning on your personal computer (PC). Then, after Vista is running, you can start applications, such as Quicken.
Vista provides a standard graphical interface. In English, Vista provides a common approach for using visual elements — icons, buttons, check boxes, and so on. (This appendix describes how the major pieces of this graphical interface work.)
Vista enables you to run more than one application at a time. You may, for example, run Quicken, a tax preparation package, and even a Windows accessory program, such as the Calculator.
Starting Vista is easy. You just turn on your personal computer (PC). If you can find the on-off switch, you're set.
If you can't find the on-off switch or it doesn't seem to work, don't feel silly. Ask someone who has used that computer. Sometimes the on-off switch is on the front of the computer and is labeled On-Off (which makes good sense, of course). Sometimes, I'm afraid, manufacturers stick the on-off switch on the back of the computer or label the switch something really stupid, such as 0 and 1. Sometimes, too, people plug a computer and all its peripherals (printers, modems, and all that junk) into a power strip that needs to be turned on to turn on the computer. So just ask someone. (If you bought the computer, of course, you can just telephone the place you bought it from.)
Just so you don't feel like a complete imbecile, I have to tell you something. I once had to call someone to learn how to click the stupid mouse that I got with my laptop computer.
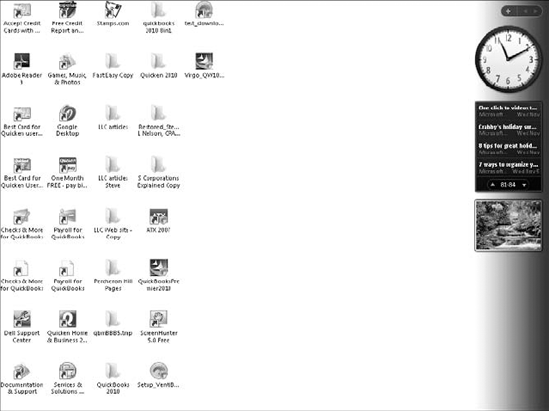
Figure A-1 shows a typical Vista desktop. The desktop is what you see after Vista starts. Other Windows desktops look similar.
To start a program like Quicken, you click the Start button (the round Windows button in the lower-left corner of the screen) so that Vista displays the Start menu. Then you choose the All Programs menu option so that Vista lists all the programs that you, Vista, or someone else has installed. And then you click one of the listed programs to start that program.
Some programs — such as Quicken — don't appear as options on the All Programs menu. They appear on submenus. If you click Start and then choose the All Programs menu, you'll see a Quicken item, for example. (Pointing to some object like the Start button and then pressing the mouse's left button is called clicking the object.) Choosing the Quicken item from the All Programs menu displays the Quicken submenu, which lists a bunch of different options (which depend on the version of Quicken you've installed). To start Quicken, you choose All Programs
To practice this starting business, try starting the WordPad application that comes with Vista by following these steps:
Click the Start button.
Choose All Programs

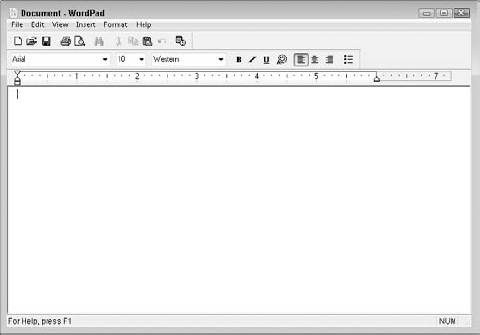
Vista opens the WordPad program. Figure A-2 shows the WordPad program window. (A program window is just the window that a program like WordPad or Quicken displays.)
To set something in motion in Vista, you usually need to choose commands from menus.
I don't know why they're called commands. Perhaps because you often (but not always) use them to command Vista and applications to do things. "Hello, Vista? I command thee to start this application," or "Quicken, I command thee to print this report."
Most application windows have a menu bar — a row of menus across the top of the window. Predictably, not every menu bar contains the same menus, but they're often darn similar. Some of the commands on the Quicken menus, for example, mirror commands on the WordPad menus.
This menu similarity isn't some nefarious conspiracy. The common command sets make things easier for users.
If you choose to read the next section, don't worry about what particular commands or menus do. Just focus on the mechanics of choosing commands.
I think that the easiest way to choose a command is to use the mouse.
To select one of the menus by using a mouse, move the mouse pointer — the small arrow that moves across your screen as you physically roll the mouse across your desk — so that it points to the name of the menu that you want to select. Then click the mouse's left button: Vista or the application program displays the menu. Now click the command that you want to choose.
If you inadvertently display a menu, you can deselect it (that is, make it go away) by clicking anywhere outside the menu box.
Another way to choose a command is to use an Alt key (cleverly labeled Alt, these keys are usually at either end of the spacebar):
Press the Alt key.
Doing so tells Vista or the application that you want to choose a command.
Press the underlined letter of the menu that you want to choose.
Doing so tells Vista or the application program which menu contains the command you want.
Press the underlined letter of the command you want to choose.
Each command on a menu is usually underlined, too, so that you can tell the program which command you want to choose by pressing the underlined letter of that command. For example, if you've chosen the File menu, you can choose the last option, Exit, by pressing the letter X. (You can try choosing Exit if you want, but then restart WordPad so that you can continue to follow along, okay?)
Note
Some Vista programs, Quicken included, don't show you the underlined letter that chooses menus and menu commands until you press the Alt key. Weird, huh?
Vista and Vista applications offer yet another way to choose menu commands. After you press the Alt key, use the left- and right-arrow keys to highlight the menu that you want. Then press Enter. Vista or the Vista application displays the menu. Use the up- and down-arrow keys to highlight the command that you want to choose. Then press Enter.
For example, press Alt to activate the menu bar. Press the right-arrow key to highlight the Edit menu. Press Enter to display the Edit menu of commands (shown in Figure A-3). Press the down-arrow key seven times to highlight the Find command. Then press Enter.

If you want to deselect a menu but still leave the menu bar activated, press the Esc key once. To deselect the displayed menu and, at the same time, deactivate the menu bar, press the Esc key twice.
For many menu commands, Vista and Vista applications offer shortcut-key combinations. When you press a shortcut-key combination, Vista or the Vista application program simultaneously activates the menu bar, chooses a menu, and chooses a command.
Vista (and application programs, such as WordPad and Quicken) displays the shortcut-key combination that you can use for a command on the menu beside the command.
By using one of the menu selection techniques that I describe earlier, activate the Edit menu (refer to Figure A-3). Do you see the rather cryptic codes, or whatever, that follow the command name? Following the Undo command, for example, you can just barely make out the code Ctrl+Z. And following the Paste command, you can see the code Ctrl+V. These are the shortcut-key combinations. If you simultaneously press the two or three keys listed — the Ctrl key and the Z key, for example — you choose the command. (Shortcut-key combinations often use funny keys — such as Ctrl, Alt, and Shift — in combination with letters or numbers. If you're not familiar with some of these keys' locations, check your keyboard.)
Oh, jeepers. I almost forgot to tell you something. Not every menu command makes sense in every situation. So Vista and Vista applications disable commands that would be just plain kooky to choose. To show you when a command has been disabled, the program displays disabled commands in gray letters. In comparison, commands you can choose show up in black letters. Take another look at Figure A-3. Several of the commands on that menu are disabled. That's why you can barely read some of their names.
Let me make one other point about choosing commands in the Vista environment. Vista, as the screen shots in this book show, makes your computing experience as visual and graphical as possible. Accordingly, if Vista or a program designed for Vista can replace a boring old menu command with a clickable picture or icon, that's how it appears.
The WordPad program shown in Figures A-2 and A-3 doesn't do this much. About the only clickable icons are those buttons you see in a row beneath the menu bar. Furthermore, Quicken doesn't yet make fetish-like use of command icons. If you poke around Vista much or if you work with other Microsoft programs, such as Office 2007 or Office 2010, you'll see what I mean. Oh, baby, will you see what I mean.
Vista (and application programs like Quicken) uses a special type of window, called a dialog box, to communicate with you. In fact, after you choose a command, Vista and application programs often display a dialog box to get the information they need to carry out the command.
Dialog boxes have these unique design elements: text boxes, check boxes, tabs, radio buttons (also called option buttons), command buttons, and list boxes.
Text boxes provide a space into which you can enter text. To see what a text box looks like, start WordPad (if you haven't already), type Semper fidelis, and then choose Edit
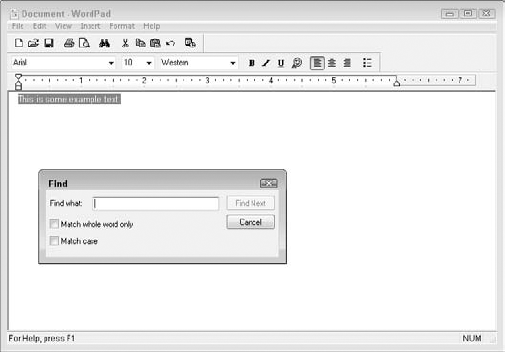
If the selection cursor — the flashing line or outline that selects the active element of a dialog box — isn't already in the text box, you need to move it there by clicking in the text box. Then type in the text. If this "active element" mumbo jumbo seems too technical, just press Tab a bunch of times and watch the dialog box. See that thing that moves around from box to button to box? It selects the active element.
You can move the selection cursor several ways:
Click in the text box.
Press Tab or Shift+Tab until the selection cursor is in the text box. (Pressing Tab moves the selection cursor to the next element; pressing Shift+Tab moves the selection cursor to the preceding element.)
Press the Alt+key combination. For example, press Alt+N to move the selection cursor to the Find What text box.
If you make a typing mistake in the text box, use the Backspace key to erase incorrect characters. Other editing tricks are available, but I don't describe them here. (After all, this chapter is just a quick-and-dirty overview of Vista.)
You also can move the insertion bar — the vertical line that shows where what you type gets placed — by using the left- and right-arrow keys. The left-arrow key moves the insertion bar one character to the left without deleting any characters. The right-arrow key moves the insertion bar one character to the right without deleting any characters.
Check boxes work like on-off switches. A check box is "on" if the box is selected with a check mark. A check box is "off" if the box is empty. Figure A-4 shows the Match Case check box turned off, whereas Figure A-5 shows the Options dialog box with the Automatic Word Selection check box turned on. (WordPad displays the Options dialog box when you choose its View

To turn a check box on or off with the mouse, click the check box. If the check box is on, your click turns off the check box. If the check box is off, your click turns on the check box.
You also can use the spacebar to select and deselect a check box. After you move the selection cursor to the check box, press the spacebar to alternatively select and deselect the check box. Toggle, toggle, toggle.
You frequently see tabs in dialog boxes. Take another look at Figure A-5. See how the Options dialog box actually supplies several tabs of information, including the Options tab shown. To see another tab, you click it. For the Options dialog box shown in Figure A-5, for example, you can move to the Text tab by clicking the word Text, which marks the Text tab.
Option buttons (or radio buttons) are sets of buttons representing mutually exclusive choices. The Options dialog box, which appears when you choose WordPad View
You can select only one option button in a set. Vista or the Vista application identifies the selected button by putting a bullet, or darkened circle, inside the button. In Figure A-5, for example, the Inches option button is selected. The easiest way to select an option button is to click the option button you want.
Every dialog box has command buttons. Command buttons tell Vista or an application program what you want to do after you finish with a dialog box.
Figure A-5, for example, shows command buttons labeled OK and Cancel. If you use the Options dialog box to make some changes, you click OK after completing the rest of the dialog box. If you don't want to use the Options dialog box after all, you click Cancel.
To choose a command button, either click it or move the selection cursor to a command button, and then press Enter.
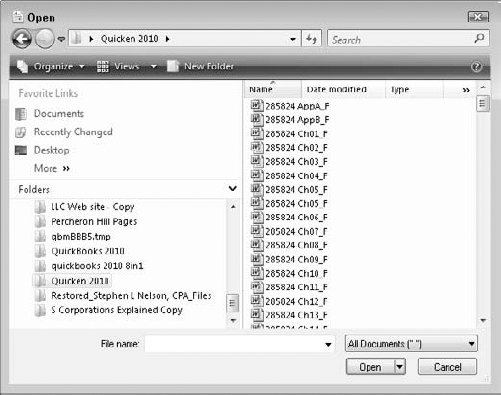
List boxes list a series of possible choices. To see an example of a list box in WordPad, for example, choose the File
Vista and Vista applications use two types of list boxes: a regular list box (which is always displayed) and a drop-down list box (which Vista won't display until you tell it to).
Regular list boxes show you a bunch of choices, and you make your choice by clicking one of the items listed. The big open area shown in Figure A-6, for example, is a regular list box. You can select any of those things listed (files in this case) by clicking.
Drop-down list boxes look like text boxes with a down-arrow button at the right end of the box. To open a drop-down list box — such as the Files Of Type list box shown in Figure A-6 — click the down-arrow button. (The unlabeled Files Of Type list box appears to the right of the File Name text box.)
After it's opened, a drop-down list box works the same as a regular list box. After you select an item from the list box (by using the mouse or the arrow keys), press Enter.
Unfortunately, a list is sometimes too long for the list box to completely display. When this minor tragedy occurs, you can use the PgUp and PgDn keys to page through the list.
You also can use the scroll bar — the vertical bar with arrows at either end. Just drag the square scroll bar selector up or down. You also can click the arrows at either end of the scroll bar, or you can click the scroll bar itself. (This last trick moves the scroll bar selector toward the place where you clicked.)
To stop an application program like Quicken, either click the application's Close box — the button with the X in it that appears in the top-right corner of the application window — or choose File
Help, a separate application within Vista, has powerful tools to help you learn about Vista and application programs, such as WordPad and Quicken. To access Help, select the Help menu or click the ? icon.
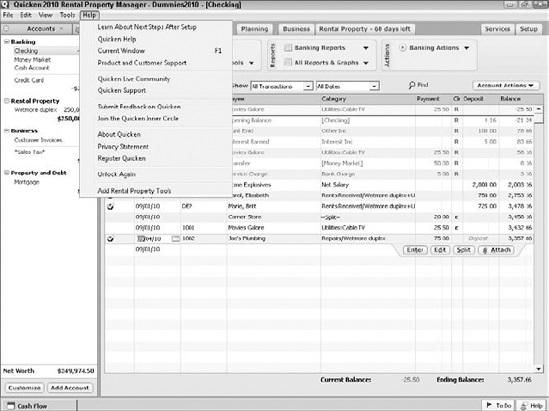
The Quicken 2010 Help menu (see Figure A-7) lists as many as 13 commands: Learn About Next Steps After Setup, Quicken Help, Current Window, Product And Customer Support, Quicken Live Community, Quicken Support, Submit Feedback On Quicken, Join The Quicken Inner Circle, About Quicken, Privacy Statement, Register Quicken, Unlock Again, and Add Rental Property Tools. Different versions of Quicken have different Help menus and supply different commands. For the most part, they all work pretty much in the same way. So in the following paragraphs, I briefly describe how each command shown in Figure A-7 works.
The Learn About Next Steps After Setup command displays windows that list Quicken Help topics related to getting the Quicken program set. The windows also provide hyperlinks you can use to find out about setting up Quicken.
If you choose Help

The Contents tab lists some of the major Help topic categories. To display the topics within a particular category, double-click the Help topic category. Help expands the list shown so that it shows the topics within each category. Double-click the topic to display the Help information on that topic.
You can click the Search Quicken Help tab (shown in Figure A-9) to search through the Help topics. To use the Search tab, enter your search words, or keywords, into the first text box, and then select the Help topic from the last list box.

You can also get Help information specifically related to the active window (the window that appears on top of any others). To do so, either press F1 or choose the Help
The Product And Customer Support command displays a dialog box that describes the various ways that you can get help from Intuit, including the Quicken troubleshooting feature, Intuit's Worldwide Web support, and fax support. Basically, I guess, the folks at Intuit are looking for some way to give you help but without actually having to talk to you in person. (This practice sounds terrible, but if you end up having to talk with someone, Intuit will probably spend more money paying people to talk to you than it will make from your purchase.)
The Quicken Live Community command connects you to an Intuit-sponsored Quicken support forums Web site (https://qlc.intuit.com) so that you can discuss Quicken problems and solutions with other Quicken users.
The Quicken Support command opens a Web page at Intuit's product support Web site for Quicken. There's lots of good information here.
The Submit Feedback On Quicken command opens a Web page that you can use to submit suggestions, share comments, or report bugs. If you have something you need to say, this is the way you do it.
The Join The Quicken Inner Circle command lets you sign up with Intuit, Inc. to participate in customer feedback programs where you can share comments with the Quicken product managers, marketers, and developers.
The About Quicken command displays a dialog box that gives the application's complete name, for example, Quicken 2010 Premier. To remove this dialog box from the screen, click OK.
This command displays information about the ways Intuit attempts to keep your financial data secure and about the business practices that Intuit employs.
The Register Quicken command helps you start the process of registering the Quicken software with Intuit. Just choose the command and follow the online screen instructions.
The Unlock Again command (which is also called Enter Unlock Code in some versions of Quicken) isn't really a Help command. What this command does is walk you through the steps for accessing a more powerful version of Quicken, such as Quicken Premier Home & Business. (Essentially, you pay an unlock fee, and Intuit supplies an unlock code.)
Figure A-7 shows a Help menu that includes an Add Rental Property Tools command. This command, available in the Quicken Home & Business version of Quicken 2010, lets the user upgrade automatically to the Rental Manager version of Quicken. Note that in other versions of Quicken, you might not see this command on the Help menu — though you might have another command in its place that lets you upgrade to some other version of Quicken.