Architecture and interior photography
Black-and-white photography
Business photography
Candid photography
Child photography
Commercial assignment photography
Editorial photography and photojournalism
Environmental portrait photography
Event photography
Fine-art photography
Flower and macro photography
Food photography
Landscape and nature photography
Night, evening, and low-light photography
Panoramic photography
Pet and animal photography
Portrait photography
Still-life and product photography
Stock photography
Street photography
Sunset and sunrise photography
Travel photography
Weather and seasonal photography
Wedding photography
In this section of the book, you can explore a wide variety of photography specialty areas and subjects and see real examples of how the EOS 30D performs in the field with each subject.
With a burst rate of between approximately 30 and 11 frames with smart buffering in High-speed Continuous Drive mode, the 30D allows for fast-action shooting, and the focal length multiplication factor of 1.6x brings the action close in with telephoto lenses. For example, using the Canon EF 70–200mm f/2.8L IS USM lens effectively provides a 112–320mm equivalent focal length. And with shutter speeds ranging from 1/8000 to 30 sec., the camera offers ample opportunity to either freeze or show action.
Of course, the difference in technique is primarily a result of shutter speed. Fast shutter speeds freeze motion, and slow shutter speeds show motion as a blur. In addition, with a slow shutter speed, if you move or pan the camera to follow the subject, you can blur background elements while keeping part of the subject in reasonably good focus.
Sports photography encompasses the entire range of sports activities from volleyball and skiing to car racing. Action subjects cover an even broader range — everything from children playing to puppies romping in the yard to people walking on the street.
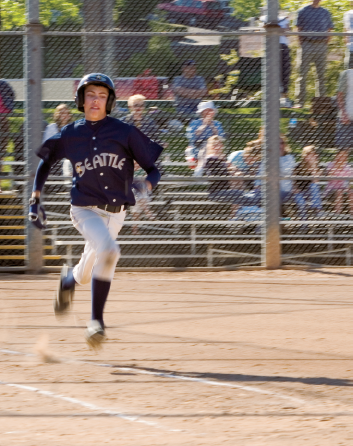
Figure 7.1. For this shot, a relatively slow shutter speed shows blurred motion. Taken at ISO 100, f/11 at 1/60 sec. using Standard Picture Style and Aperture-priority mode with a Canon EF 70–200mm f/2.8L IS USM set to 200mm.

Figure 7.2. The juxtaposition of players running in different directions plays off the static baseman to the left of the frame. Taken at ISO 100, f/11 at 1/50 sec. using Normal Picture Style and Aperture-priority mode with a Canon EF 70–200mm f/2.8L IS USM set to 200mm.
As you take sports and action photos, it's important to master the techniques of freezing or showing blurred motion and capture the emotion and sense of being "in the moment."
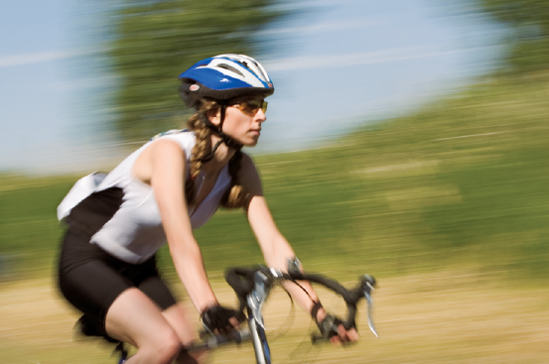
Figure 7.3. Panning, used here, is a technique that is often effective to enhance the sense of speed and motion.
Table 7.1. Action and Sports Photography
Setup | In the Field: The image in figure 7.3 was taken at a bike trail. I set the camera on High-speed Continuous Drive mode to help ensure that I got the fastest frame rate possible. |
Additional Considerations: Find a good shooting position with a colorful, non-distracting background. If you are shooting athletes, set up the camera and pre-focus on a spot where they will pass. Then as the athletes enter the frame, press the shutter button. Or you can pan, or move, the camera with the athlete's motion to blur the background. In bright light, setting a negative exposure compensation of −1 or −2 Exposure Values (EV) can help avoid blowing detail from highlight areas in the image. | |
Lighting | In the Field: This was taken in late afternoon sunlight with a narrow aperture and slow shutter speed to blur motion. |
Additional Considerations: Moderate light is ideal for showing action blur, although motion blur shows in bright light as well. | |
Lens | In the Field: Canon EF 70–200mm f/2.8L IS USM lens set to 70mm. |
Additional Considerations: The lens you choose depends on the subject you're shooting. If a telephoto lens is appropriate for the shot, it provides a greater softness to the background and to the blur if you're panning. | |
Camera Settings | In the Field: RAW capture, Aperture-priority AE mode with the white balance set to Daylight, High-speed Continuous Drive mode. |
Additional Considerations: To control shutter speeds, use Shutter-priority AE mode and set it to 1/30 second or slower. In mixed-light situations, I recommend using AWB or setting a custom white balance for venues such as stadiums you shoot in frequently, or shooting a gray card and for RAW capture, and balancing the image series from the gray card. | |
Exposure | In the Field: ISO 100, f/25, 1/25 sec., Aperture-priority AE mode. |
Additional Considerations: You may need to experiment to get the shutter speed that shows motion blur and the f-stop that gives you the depth of field you want. You can generally show motion blur at 1/30 second and slower shutter speeds. | |
Accessories | At slower shutter speeds a tripod or monopod ensures that the subject is sharp. |
Capture the thrill. Regardless of the technique you choose to shoot action photos, set a goal of showing the emotion, thrill, speed, or excitement of the scene in your pictures. You want the kind of picture where people look at it and say, "Wow!"
Take a high shooting position. Move back to the fourth or fifth row at sporting events, and use the additional height to your advantage. Leave room enough for your monopod or tripod. If you have a lens extender, take a few test shots with and without the extender to see whether the loss of light is worth the extended focal length (for example, a 2x extender costs you two f-stops). This loss of light may mean that you can't get a fast enough shutter speed to freeze motion.
Find a well-lit spot and wait. If lighting varies dramatically across the sports field and you find it difficult to continually change the exposure or white balance, find the best-lit spot on the playing field or court, set the exposure for that lighting, and then wait for the action to move into that area.
Experiment with shutter speeds. To obtain a variety of action pictures, vary the shutter speed between 1/30 and 1/1000 second. At slower shutter speeds, part of the subject will show motion, such as a player's arm swinging.
Shoot locally. If you're new to shooting sports, consider photographing high school and local amateur events. These are good places to hone your reflexes and composition. And usually you will be under fewer restrictions, be able to get closer to the athletes, and have fewer fans to contend with.
Architecture mirrors the culture and sensibilities of each generation. New architecture reflects the hopeful aspirations of the times, while older structures often are valued for the nostalgic memories they evoke. For photographers, photo-graphing both new and old architecture provides rich photo opportunities to update portfolios and as a specialty area for commercial work.
Architectural photography is photographing a sense of place and space. The challenge with the EOS 30D, given the smaller sensor size, is getting the scope of the exterior or interior. Canon offers a range of wide-angle lenses, including the ultra-wide 14mm prime lens, which gives the equivalent of approximately 22mm on the EOS 30D to wide-angle zoom lenses such as the EF-S 10–22mm f/3.5-4.5 USM designed for the smaller sensor size, or the L-series 16–35mm f/2.8 USM, which is equivalent to 25–56mm on the EOS 30D. Edge sharpness is always important to watch for, so if you routinely allow extra space on the left and right edges, the widest angle prime and zoom lenses are the best choices for architectural and interior photography.
Tip
When foreground elements mirror the architecture, be sure to include them in the composition. For example, if a nearby metal sculpture echoes the glass and steel design of the building, include all or part of the sculpture for foreground interest.
If you're new to architectural shooting, choose a building and spend time studying how light at different times of the day transforms the character of the building. Look for structural details and visual spaces that create interesting shadow plays, reflections, and patterns as they interact with other subsections of the structure. Most importantly, architectural photographers must play well with the marketing team and deliver images that visually communicate the client's message and goal.
Most buildings are built for people, and people contribute to the character of the building. In a compositional sense, people provide a sense of scale in architectural photography, but more importantly, they imbue the building with a sense of life, motion, energy, and emotion.
Figure 7.4. This is one of a series of exterior and interior shots of a newly constructed city hall. Taken at ISO 100, f/8 at 1/50 sec., Normal Picture Style using Aperture-priority AE mode and the Canon EF 16–35mm f/2.8L lens set to 16mm (equivalent to 25.6mm).
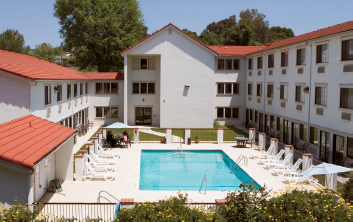
Figure 7.5. Using bright midday sun at this California hotel, I took a high shooting position to get the broad sweep of the hotel and kept the camera level with the building to avoid distortion. Taken at ISO 100, f/16 at 1/125 sec. using Aperture-priority AE mode and the Canon EF 24–70mm f/2.8L USM lens set to 25mm.
The umbrella of architectural photography includes interior photography of both commercial and private buildings and homes. Light also plays a crucial role in creating compelling interior images. Portable strobe packs and multiple wireless flash units can supplement interior lighting. It's also possible to get pleasing interior shots by using existing room lighting and window lighting.
Go inside buildings and look for interior design elements that echo the exterior design. Then create a series of pictures that explain the sense of place and space. Find old and new buildings that were designed for the same purposes — courthouses, barns, cafes and restaurants, libraries, or train stations, for example. Create a photo story that shows how design and use have changed over time. As you shoot, study how the building interacts with surrounding structures. See if you can use juxtapositions for visual comparisons and contrasts.

Figure 7.6. I used the stone features in this waiting area as a thematic element throughout a series of images on this building. Taken at ISO 100, f/2.8 at 1/15 sec. using Aperture-priority AE mode and a Canon EF 16–35mm f/2.8L USM lens set to 16mm.
As you consider buildings and interiors, always try to verbalize what makes the space distinctive. When you can talk about the space, you can begin to think about ways that will translate your verbal description into visual terms. Many new structures include distinctive elements such as imported stone, crystal abstract displays, and so on. Be sure to play up the unique elements of exteriors and interiors. Very often, you can use these features as a theme that runs throughout a photo story.

Figure 7.7. This shot of the new Redmond, WA City Hall served as an establishing shot for a series of interior and exterior images of the building.
Table 7.2. Architectural and Interior Photography
Setup | In the Field: One of the compelling architectural elements of the city hall building shown in figure 7.7 is the imported granite that comprises one side of the building. The other side is contrasted by a reflecting pool with large crystals suspended over the pool. The granite wall is the most compelling feature, so I concentrated my main shots on the granite wall. |
Additional Considerations: Study the building or space and look for the best details. Will details be best pictured straight on or from the side? Can you isolate repeating patterns that define the style? Consider contrasting ultra-modern buildings with older, nearby buildings. Frame architectural images carefully to include only the detail or structures that matter in the image. | |
Lighting | In the Field: Scheduling considerations put the shooting at midday — not the best time to show off the warm tones of the granite. However, the light emphasized the oblique angles of the building — part of its distinctive design. A warming filter can also be added in Photoshop to warm the cool shadows of the granite. |
Additional Considerations: Older buildings often look especially good photographed in golden late-afternoon light, but you can also take advantage of sunny weather to show off the bold details and angular design of modern buildings. For mirrored buildings, reflections cast by nearby sculptures, passing clouds, and passing people can sometimes add interest. | |
Lens | In the Field: Canon EF-S 18–55mm lens zoomed to 16mm. |
Additional Considerations: Zoom lenses are helpful in isolating only the architectural details that you want while excluding extraneous objects such as street signs. If you use a wide-angle lens and want to avoid distortion, keep the camera on a level plane with the building and avoid tilting the camera up or down. Alternately, you can use a tilt-and-shift lens, or you can correct lens distortion in Adobe Photoshop. | |
Exposure | In the Field: ISO 100, f/11, 1/100 sec., Aperture-priority mode, Standard Picture Style, RAW capture mode. |
Additional Considerations: In high-dynamic range scenes, try multiple exposures using either bracketing or by metering and capturing separate images for highlights, midtones, and shadows, and then composite the images in Photoshop to get a greater dynamic range than the sensor can provide. If you use this technique, be sure to use a tripod and keep the camera in the exact same position throughout the bracketed shots. Otherwise, the three images will not register when you combine them in Photoshop. | |
Accessories | A polarizing filter is an excellent way to reduce or eliminate glare from glass and mirrored building surfaces. In addition, it also enhances color contrast. |
Emphasize color and lines. If the building you're photographing features strong, vivid colors, emphasize the colors by shooting in bright midday sunlight. Find a shooting position that allows you to show off the dynamic lines and shapes of the building or interior.
Use surrounding elements to underscore the sense of place and space. For example, a university building's design that incorporates gentle arches might be photographed through an archway leading up to the entrance. Or if the area is known for something such as an abundance of dogwood trees, try including a graceful branch of blossoms at the top and side of the image to partially frame the structure. Keep surrounding elements to a minimum to avoid distraction from the main subject.
Try A-DEP mode. If your photograph shows a succession of buildings from an angle that puts them in a stair-stepped arrangement, use A-DEP mode to get the optimal depth of field.
For low-light and night exterior and interior shots, turn on long-exposure noise reduction using C.Fn-02. Immediately after the initial exposure, the camera creates a dark frame to reduce noise. Using this feature slows down the shooting process, but it provides the best insurance against objectionable levels of digital noise in images.
Check out the American Society of Media Photographers Web site at
www.asmp.org. The ASMP has a special interest group for architectural photography that includes a guide for working with architectural photographers.
In 100-plus-year-old tradition, black-and-white photography remains one of the most popular renderings for images, whether film or digital. Whether you work in fine-art, wedding, or portraiture photography, clients will inevitably want black-and-white images, and as an artist, the draw of black-and-white is compelling for photographers as well.
For the uninitiated, creating black-and-white photos would seem to be as easy as desaturating a color image. However, creating black-and-white images requires a different way of viewing a scene. Instead of looking at color contrast, the photographer who aims for classic black-and-white images must judge scenes in terms of textures, tonal ranges, forms, and shapes and remain oblivious to the distraction of colors. And in the studio, lights become brushes to heighten or subdue the form, shape, and substance of the subject by controlling the levels of contrast with light.

Figure 7.8. This image of a black-and-silver miniature Schnauzer was converted to black and white in Canon Digital Photo Professional. Taken at ISO 100, f/22, 1/125 sec using a Canon Ef 50mm, f/1.4 lens.
Thanks to RAW processing, you can create extremely high-quality black-and-white images using conversion programs such as Canon's Digital Photo Pro or Adobe Camera Raw. And in the process, you can apply the look of traditional filters such as red, yellow, orange, green, and blue to enhance and distinguish among colors in the image. For example, using a green filter lightens green in the image.
Note
For more information on using color filters with black-and-white images, see Chapter 2.
The Canon EOS 30D offers a Monochrome Picture Style with the option to apply color filter effects to the image. And if you are accustomed to using Deep Red or Deep Yellow color filters, you can set a plus contrast setting for the Picture Style to increase the effect of the filter.
If you shoot RAW images, you can convert to the Monochrome picture style during the conversion and apply the filter effects or toning effects at the same time.
Note
When you shoot RAW images in Monochrome Picture Style, you can convert them to color using the program supplied on the Canon installation disk. However, you cannot convert JPEG images captured in Monochrome Picture Style after capture.
If you want to emphasize the impression of texture, be certain that the focus is tack sharp by using a narrow aperture and a tripod. To emphasize contrast in black-and-white images, look for scenes where there is excellent tonal contrast between the subject and the background.
In black-and-white photography, you can't rely on color to create the mood of an image. Instead rely on strong lighting and control over the tonal range. Black-and-white photography is uniquely suited for rendering both high-key and low-key images with stunning effect. High-key images have the majority of tones at the light end of the gray scale and the background, props, and clothing are light and bright, and vice versa for low-key images.


Table 7.3. Black-and-White Photography
Setup | In the Field: The scene for figure 7.10 was a California wedding held outdoors in bright afternoon sunlight. The bride requested that a portion of the images be presented in black-and-white. |
Additional Considerations: Consider carefully the specific challenges of a venue. For example, this area had an unattractive fence in the near background that had to be avoided in the formal shots. You can use a wide aperture to blur the background while maintaining reasonable sharpness. | |
Lighting | In the Field: Bright dappled light on the faces of the children and deep shadows made this a difficult exposure. During the recessional, I knew that the flash likely would not recharge fast enough to use fill flash, so I worked to keep detail in the highlights as the subjects moved through a range of dappled lighting. Later, in Photoshop, I used the Shadow/ Highlight feature to lessen deep shadows on the faces. |
Additional Considerations: Take a meter reading on the brightest highlights in the scene, and then use the same minus exposure compensation to shoot later. Some images may be underexposed, but in a situation like a wedding, there isn't time to take three bracketed shots or to change exposure on the fly. | |
Lens | In the Field: Canon EF 24–105mm f/4L IS USM set to 105mm. |
Additional Considerations: A zoom lens is indispensable for action shots where you need to change the zoom setting as the subject moves. The Canon EF 24–105mm f/4L IS USM lens offers a great range for wedding action such as this, and it offers a great focal range for an everyday walk-around lens. | |
Camera Settings | In the Field: RAW capture, Aperture-priority AE mode with the white balance set to Daylight. I converted the RAW image using the Monochrome Picture Style with an orange filter. Deciding which color filter provides the best rendering on the computer after capture is easy. |
Additional Considerations: Many photographers agree that capturing images in color and rendering them as black-and-white in either a RAW conversion program or in Photoshop provides the highest resolution final image. RAW offers the flexibility to render the images however the client prefers after capture. | |
Exposure | In the Field: ISO 100, f/8, 1/320 second. |
Additional Considerations: In the best of cases, the photographer should be able to work with the bride and the wedding coordinator to plan the location and time for the ceremony to help provide the best lighting and space. That wasn't possible for this wedding, so the best approach was to expose to save highlight detail, keeping in mind the half- to full-stop of highlight recovery possible during RAW conversion. |
Natural forms, including the human body, lend themselves well to black-and-white photography. The abstractness of these subjects allows a great deal of latitude in creative lighting approaches, viewpoints, and framing.
For striking black-and-white images, look for scenes that have a strong division of tones.
To emphasize texture in a monochrome image, shoot into the light. Because this technique produces underexposure in shadow areas, you can make two images, one exposed for the highlights and another exposed for the shadows, and then composite the images in Photoshop.
Given a choice between reading business correspondence that is a solid block of text or reading correspondence that includes illustrative photos, most people would choose the correspondence with photos, and with good reason. Well-placed photos not only illustrate and explain the text, but they also lend credibility and interest to many types of business documents.
Photos that represent a company's branding or those used in advertising are best made by a professional photographer. But routine business correspondence benefits from the addition of clean, well-lit images.

At the office, photograph new employees; employee milestone events such as anniversaries and retirements; informal company parties; products or projects for internal or external newsletters; and new business or internal project proposals. You can also use pictures to illustrate employee-training materials.
If you are in sales, you can photograph customers with a product they purchased, and then use the image in thank-you promotion pieces such as calendars or cards. Small businesses can use and reuse product images for print and Web promotions, as well as for documenting processes such as product manufacturing.
The most important aspect of business photography is to get a clean, uncluttered shot that shows the subject, whether it is a person or a product, in the best light and with true-to-life color. For small object backgrounds, you can buy folding poster boards at a craft store and set them up on a desk or conference table. For images of people and large objects, find a neutral-color wall with enough space to move the subject 5 to 6 feet away from the wall. This helps lessen dark background shadows if you use the built-in flash.


Figure 7.13. The image here was a product shot for a small business that was launching Web-based sales.
Table 7.4. Business Photography
Setup | In the Field: A white seamless background in figure 7.13 allows the client to expand the background to include text and logos for either print or online use. In most cases, it's a good idea to shoot both vertical and horizontal orientations so that clients have a choice based on how they want to use the images. |
Additional Considerations: Simple setups and compositions are the best place to start with business images. You can't go wrong with white, black, or backgrounds for small objects such as this. Be sure to ask your clients if they need space at the top, bottom, or sides of the frame to insert text and other graphics, and then shoot accordingly. | |
Lighting | In the Field: This shot was lit by four Photogenic Studio Max II strobes; two 320s lit the subject and two 160s, one with a silver umbrella, lit the background. A large silver reflector to camera right filled in the shadows. |
Additional Considerations: Watch for lighting that is too contrasty and could be softened by using a softbox on the main light. For a warmer effect, a gold umbrella or gold reflector on the right would be effective. | |
Lens | In the Field: Canon EF 50 mm f/1.4 lens. I chose this lens for its excellent contrast and sharpness. |
Additional Considerations: Your lens choice depends on the subject. For small objects, a normal lens is a good choice, such as the EF-S 60mm f/2.8 Macro USM. If you want to blur the background, choose a telephoto lens, and for large displays, use a wide-angle lens. If you photograph a group of objects or a production process, consider a medium wide-angle lens such as the Canon EF 24–70mm f/2.8L USM lens. For portraits, a short telephoto lens such as the Canon EF 100mm f/2.8 Macro USM gives you a nice head-and-shoulders shot. | |
Camera Settings | In the Field: RAW capture, Manual mode with a custom white balance. |
Additional Considerations: In the studio, you want to control the depth of field, so choose Aperture-priority AE mode and set the white balance to the type of light in the scene. | |
Exposure | In the Field: ISO 100, f/22, 1/125 sec. |
Additional Considerations: In the studio, Manual mode and a strobe synch light meter provide the correct exposure settings, or you may already have a standard exposure for studio product shots that you can use. Outside the studio, set a narrow aperture such as f/8 or f/16 if you want front-to-back sharpness. If the background is distracting, use a wider aperture such as f/5.6 or f/4.0. Set the ISO to 100 or 200, depending on the amount of light available. | |
Accessories | Silver reflectors are invaluable, especially when you have limited options for controlling existing light. Affordable silver reflectors come in a variety of sizes. |
Fill shadows. If you're doing a head-and-shoulders shot of a person, such as a new employee, ask the subject to hold a silver reflector at waist level and tilted to throw light upward slightly to fill in shadows created by overhead lighting. Ask the subject to adjust the reflector position slightly, and watch for the position that best fills shadow areas under the person's eyes, nose, and chin.
Adjust the setup for the photograph based on its intended use. For example, if you're taking photos to use on a Web site, keep the composition and the background simple to create a photo that is easy to read at the small image sizes used on the Web. Brighten small-size images just slightly for use on the Web.
Maintain the same perspective in a series. In a series of photos, be sure to keep the perspective the same throughout. For example, if you are photographing several products, set up the products on a long table and use the same lens and shooting position for each shot. Also be sure to keep lighting consistent through the succession of shots.
Look at the colors as a group. As you set up a photo, consider all the colors in the image. If they do not work well together, change backgrounds or locations to find a better background color scheme for the subject or use a neutral-color background such as a white wall or a poster board.
Turn off the flash. If you're photographing small objects, turn off the flash. It is very difficult to maintain highlight detail at close working ranges using a flash. You can supplement light on the object with a desk lamp, if necessary.
Few photographers can resist the urge to capture pictures of people just as they are — unposed and acting natural. Good candid pictures often become the prize images in your portfolio because, unlike posed portraits, you catch subjects unaware, preoccupied with their private world of thoughts and activities and without their "camera" faces. Capturing candid photos means that you need to fade quietly into the background.
To disappear into the surroundings, you need a lens — preferably a zoom lens — that allows you to change focal length while maintaining your distance. You also need to be able to shoot quickly to capture the subject's expression or activity as it changes. Therein lays the importance of being prepared and patiently staying with the subject to capture the truest expressions and reactions.

Figure 7.14. This is an outtake image from an editorial shoot showing a nursery manager caring for plants during a normal workday. The image captures her relaxed and caring around the plants that she loves. Taken at ISO 100, f/5.6, 1/100 sec. in overcast light using a Canon EF 24–105mm, f/4.0L USM lens set to 40mm.
Note
When shooting on assignment or when shooting a wedding or event, look for unstaged shots that provide more context or detail for the story. Often, these images reveal the nature and character of the event or subject, and they can provide behind-the-scenes insights that staged images typically do not show.
Downtown streets filled with people going about their daily routines also offer endless opportunities for candid photography. Other excellent opportunities can be found at concerts, parades, airports, and parks.

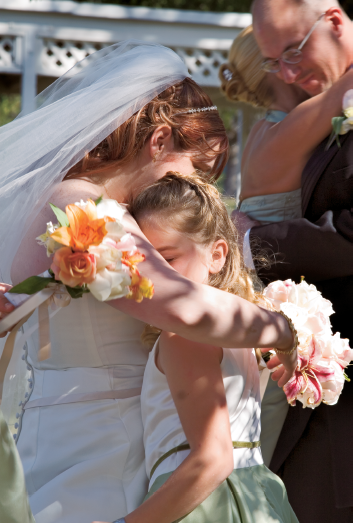
Figure 7.16. This photo illustrates an unstaged shot that captures both the bride and the groom interacting with their family members after the wedding ceremony.
Table 7.5. Candid Photography
Setup | In the Field: During a wedding, there are few chances for a photographer to take a breath even after the recessional shots are completed. In this case, I turned the camera to follow the bride and groom as they greeted the wedding party after the recessional. The quick shot in figure 7.16 shows both the bride and groom in a completely unstaged way interacting with the family. |
Additional Considerations: If possible, choose a shooting position that provides a clean background, or shoot using a wide aperture to blur background distractions or frame tightly. If you must change positions, be quiet to avoid distracting the subject or giving away your candid shooting. | |
Lighting | In the Field: Bright dappled sunlight provided its own set of challenges for this scene. In some cases, you have to accept the lighting and do the best you can to hold detail in important areas of the subject/scene. |
Additional Considerations: Lighting for candid shots can run the gamut. Watch for highlight areas on the subject's face, and use Auto-Exposure Lock to ensure that highlights are not blown out if there's time to use it without missing the shot. | |
Lens | In the Field: Canon EF 24–105mm f/4L IS USM with the lens set to 100mm. |
Additional Considerations: A zoom lens is indispensable for candid shots. Typically, a telephoto zoom offers the focal range necessary for you to remain at a distance yet fill the frame with the subject. | |
Camera Settings | In the Field: RAW capture, Aperture-priority AE mode with white balance set to Daylight. |
Additional Considerations: Try controlling the depth of field by choosing Aperture-priority AE mode. If the light is low, switch to Shutter-priority AE mode and keep the shutter speed at 1/30 second or faster. Be sure to set the white balance to match the type of light in the scene. | |
Exposure | In the Field: ISO 100, f/8, 1/100 sec. |
Additional Considerations: In low-light scenes, switch to Shutter-priority AE mode and set the shutter to 1/30 or 1/60 second. At 1/30 second, you may get some blur if the subject moves, which can add interest to the image. In good light, switch to Aperture-priority AE mode, set the ISO at 100, and select a moderate to wide aperture. |
Be patient and be prepared to shoot quickly. Patience is a hallmark of candid photography. And, be sure to carry a spare, charged battery with you.
Change lenses as you watch and wait to survey the overall look of the scene. Have alternate lenses nearby and easy to grab for quick lens changes.
Because using a flash gives away your candid shooting, try switching to wide apertures in low-light scenes. Set the camera to Aperture-priority AE mode, and turn the Main dial to set the aperture at f/3.5 or f/2.8.
Perhaps no specialty area is as satisfying and challenging as child photography. It is satisfying because it is a singular opportunity to capture the innocence, fun, and curiosity of unspoiled (so to speak) kids, and it is challenging because success depends on engaging the child so that you can reveal the child's sense of innocence, fun, and curiosity. Even more important than having the right camera is having the right props, toys, personality, and patience — all of which are key to making a location or studio session successful.
Lighting can range from simple natural outdoor lighting or window light to more complex studio light. In either case, the goal is to wrap the child in soft, open light that also provides the shadow necessary for modeling of the face. Lateral lighting from an outdoor setting or a window light works well, and then you can add a fill light via either an off-camera flash or portable strobe on the shadow side of the subject. High-key lighting is effective for both babies and young children as well as for mother-baby portraits.
Child photography is one of the areas where you can let the child inspire you. Because so much of the session depends on the disposition of the child, if you can establish a good rapport with the child and allow yourself to go with the flow of the child's activity, you can often get much better images than if you try to pose him or her. In other words, let the child do what comes naturally as long as he or she remains safe.
Figure 7.17. In addition to traditional portraits, you can get excellent candid shots of children either during a shooting session or at events such as weddings. Taken at ISO 100, f/2.8, 1/750 sec. using a Canon EF 24–70mm f/2.8L USM lens set to 70mm.
Not all child portraits have to show a sunny, smiling child, although at least some should. Emotions can also make compelling images that parents can identify with and cherish in years to come.
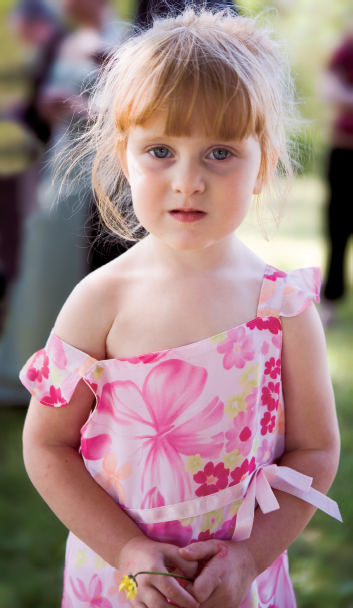
Figure 7.19. A cute little girl with a wilted dandelion that she had faithfully carried in her hand all afternoon creates a simple but poignant portrait.
Table 7.6. Child Photography
Setup | In the Field: The image in figure 7.19 was set up when the child stopped me and asked me to take her picture. How could I say no? The background was distracting with people milling about. Even a wide aperture wouldn't blur them enough, so I counted on post-capture editing to blur the background more. |
Lighting | In the Field: Very late afternoon light filtered from the side lit this scene. |
Additional Considerations: Regardless of where you photograph kids, be sure they have room to move and interact with parents and with you. When shooting in a studio, be sure that all lighting stands and gear are secured with sandbags or on an overhead railing. Ground-level lights are, from a child's point of view, fair game for playing hide-and-seek, doing acrobatics, and engaging in other activities that only young minds can dream up. | |
Lens | In the Field: Canon EF 24–70mm f/2.8L USM lens. |
Additional Considerations: In the studio and in some outdoor locations, a long lens and wide aperture provide the soft background that you want. The versatile Canon EF 70–200mm f/2.8L IS USM is a perennial favorite. The Canon EF 100mm f/2.8 Macro USM and the EF 85mm f/1.2 II USM lenses are also good candidates for kid and adult portraiture. | |
Camera Settings | In the Field: RAW capture, Aperture-priority AE mode with the white balance set to AWB. |
Additional Considerations: As the light fades, switch to Shutter-priority AE mode to help ensure subject sharpness. Image stabilization (IS) lenses give you approximately one additional f-stop latitude than non-IS lenses, and that f-stop is worth the price, especially at weddings. | |
Exposure | In the Field: ISO 100, f/2.8, 1/250 sec. |
Additional Considerations: As with all portraits, control the depth of field to suit the rendering that you want. Very fast lenses such as the EF 50mm f/1.4 USM and the EF 85mm f/1.2 II USM are ideal when you can't control background distractions. |
Less direction is best. Gaining a child's cooperation can be tricky, and if the child feels over manipulated, you can lose the child's good humor. Set up a sense of give-and-take with you giving the most so that the child continues to enjoy the shooting session.
Have an assistant or baby/child wrangler. Any photographer who has shot child portrait sessions alone has likely had the sense that sessions often teeter on the edge of chaos. Having an assistant behind the camera to interact with the child and chat with the parents allows you to concentrate on lighting, composition, and changing camera position.
Plan before the session. Be sure to talk to the parents about the clothing that the child will wear and how many changes they want during the session. Then you can plan for backgrounds and props that work well with the clothing, if you're shooting in the studio. Or if you're shooting outdoors, the clothing should be appropriate for the setting. Also, learn as much as you can about the child's interests before the session so that you can more quickly engage the child with subjects, toys, or props that interest him.
This broad category encompasses images used for all types of commercial applications and shot on contract by a photographer including catalog work, fashion, advertising, corporate, industrial, public relations, and promotional assignments. And within this broad category, a range of skills from conceptual, photojournalism, still-life, portraiture, to studio and location are required. Of all the photographic specialty areas, this is the area in which photographers stand to earn the highest fees, but the field is also highly competitive with some of the best shooters in the world specializing in this work.
Getting a good portfolio or book of commercial images requires imagination and creativity, and a distinctive shooting style. Know what kinds of commercial work most appeal to you, and create a book of images that display your shooting style. The days when agencies looked for generalists — photographers who could shoot a range of subjects — are gone. Instead, clients and agencies look for a unifying photographic vision that defines the photographer's style and can be applied with consistency to a range of subjects.
Figure 7.20. My approach to commercial assignment shots tends to be simple and graphic. The exposure was ISO 100, f/18, 1/125 sec. using a Canon EF 24–105mm, f/4.0L USM lens set to 75mm and four studio strobes.
Note
Design agencies and clients often need larger images, so at 8.2 megapixels, your 30D is competitive for some, but not all, commercial applications. The maximum high-resolution output size of images is approximately 7.5" × 11.5" at 300 ppi. Depending on the size of the publication, this resolution is often adequate for a double-page spread.
If you want to break into commercial assignment shooting, consider shooting for small, locally based companies that need images for brochures, audio-visual programs, and in-house publications, or by shooting exec-utive portraits for public relations agencies. The key to getting repeat business and growing a client list is to demonstrate versatility and creativity that meet or exceed the client or agency's expectations for the assignment.
As Selina Oppenheim states in her book, Portfolios That Sell, "The reality of assignment photography is that clients buy up. In order to get good assignments you must show great work. The first step to great work is defining your vision."

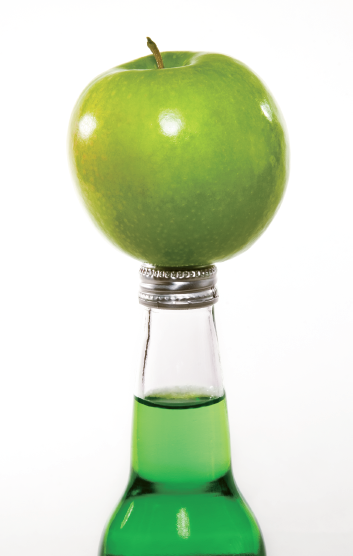
Figure 7.22. Simple setups such as this are easy and quick to create, and with them you can create clean images of products for promotions on a Web site.
Table 7.7. Commercial Assignment Photography
Setup | In the Field: In figure 7.22, I tried several setups to illustrate the idea of green apple soda, and settled on this as one of the final images in the series. |
Additional Considerations: Most often in assignment photography, the shooting specification dictates the setup and other details for the shot. Portfolio shooting, however, allows you to incorporate your creative take and personal shooting style for commercial images. | |
Lighting | In the Field: This shot was lit by four Photogenic Studio Max II strobes; two 320s lit the subject and two 160s, one with a silver umbrella, lit the background. A large silver reflector to camera right filled the shadow side of the subject. In this case, I wanted relatively contrasty light to create strong shadow regions to outline the elements in the image. |
Additional Considerations: The lighting should underscore the message the client wants for the image, so a softbox or location shooting may be best depending on the requirements. | |
Lens | In the Field: Canon EF 100mm f/2.8 Macro USM lens. |
Additional Considerations: Your lens choice depends on the subject. For small objects, a normal lens is a good choice, such as the EF-S 60mm f/2.8 Macro USM. If you want to blur the background, choose a telephoto lens, and for large displays, use a wide-angle lens. If you photograph a group of objects or a production process, consider a medium wide-angle lens. | |
Camera Settings | In the Field: RAW capture, Manual mode with a custom white balance. Because the green apple was not exactly the same color as the soda, I was able to bring both of them to the same color using a green gradient in Photoshop CS2. |
Additional Considerations: Settings depend, of course, on the location for the shoot and your objectives for rendering the subject. | |
Exposure | In the Field: ISO 100, f/22, 1/125 sec. |
Additional Considerations: Exposure considerations run the gamut depending on whether the shoot is outdoors, indoors, or in the studio. The best advice is to be prepared with extra lights and strobes if they are part of the lighting, and to use an incident meter for challenging lighting scenarios. | |
Accessories | For indoor, outdoor, and studio shooting, silver reflectors are invaluable, especially when you have limited options for controlling existing light. Affordable silver reflectors come in a variety of sizes. |
Hone your teamwork skills. Most commercial assignments involve working with a team of professionals ranging from the art director to makeup and set stylists. Talking to all team members is critical to ensure that everyone has a clear understanding and is working toward the same goals.
Maintain the same perspective in a series. In a series of photos, such as a series of product shots for a catalog, keep the perspective the same throughout. For example, if you are photographing several new food dishes, set up the dishes on a long table and use the same lens and shooting position for each shot. Also be sure to keep lighting consistent through the succession of shots.
Look at the colors as a group. As you set up a photo, consider all the colors in the image. If they do not work well together, change backgrounds or locations to find a better background color scheme for the subject or use a neutralcolor background such as a white wall or a poster board.
Turn off the flash. If you're photographing small objects, set the camera to Flash Off mode. Maintaining highlight detail at close working ranges using a flash is very difficult. You can supplement with strobes or reflectors, if necessary.
Many people think that editorial shooting and photojournalism is a specialty reserved for working journalists. But the genre of editorial and photojournalism photography has become the style de jour for other specialties including weddings and high-school senior photography. The appeal lies in the documentary aspect of capturing life and events as they happen. There is an essential element of the narrative — visually telling the story as it unfolds in real time with no posing or fabrications in most cases.
Editorial and photojournalistic style includes elements from other types of photography including environmental portraiture, street, action and sports, and documentary, but with an emphasis on a visual narrative that often supports accompanying text.
Unlike with most photojournalism, editorial assignments can be planned, scouted ahead of time, and shot at a somewhat slower pace. Editorial shooting ranges from reporting on people, celebrities, and events, to creating illustrative concept shots for feature articles on general interest topics, book covers, posters, and photo illustrations. In either case, getting shots that define the spirit and character of the person or event goes to the heart of this photographic specialty — all without posing or staging the scene. To get defining shots, you need to understand the event or person, which means that you need to be there, in position, and ready to shoot when a defining moment happens.
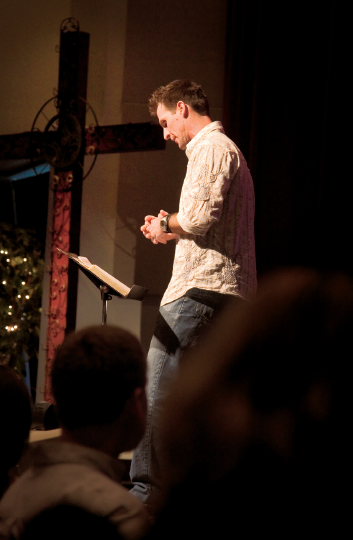
Figure 7.23. The softly illuminated cross to the left of the pastor, as well as the shadowy audience figures in the foreground provide the context for this image. Taken at ISO 1600, f/4.0, 1/4 sec. with the Canon EF 24–105mm f/4L IS USM lens set to 98mm.
Styles in both specialty areas change over time. And depending on the style in vogue, editorial photographers and photojournalists may be assigned to produce the classic photo story comprised of a series of photos that tells the story of the person or event, or they may be asked to distill the essence of the story in one or two shots. In the field, the EOS 30D is a quick response, capable camera that has a relatively quiet shutter.
If you're new to the field, you may be able to break in as a freelance photographer for local metropolitan newspapers, local magazines, and through resources found in the Photographer's Market, a book published annually that lists contacts for magazines, book publishers, and stock agencies.
Note
The 30D is a durable camera, but it does not have weather-sealing of some higher-end cameras. So, use caution when using it repeatedly in inclement weather and with rough handling. However, if precautions are taken to keep it dry and it is treated well, the EOS 30D will serve the editorial photographer and photojournalist well.
Look for opportunities to hone your photojournalism shooting skills at local rallies, political gatherings, conventions, marches, protests, and elections. Often, you can find local news that has national implications and interest a national publication in a photo story on the news item. Because the human impact is important in any editorial or photojournalism piece, consider covering a news event or event of interest from the point of view of a person or family that the event directly affects.
Many photographers have broken into this field by spending hours of their own time developing photo stories on subjects about which they are passionate with the hope that they can later sell the story to a publication.

Figure 7.25. This is one in a series of images documenting the work of a local, fast-growing nursery business. The woman in this image is a production manager with the company.
Table 7.8. Editorial Photography and Photojournalism Photography
Setup | In the Field: For most photojournalism assignments, setups are not used unless the objective of the assignment is a formal portrait. For the image in figure 7.25, I followed the subject as she went about her day's work. I watched to try to get a clean background, which was a challenge at this location. After capturing the image, I darkened part of the background to subdue a distracting wire screen. |
Additional Considerations: For editorial shots, you may commonly work with positioning, lighting, and posing, but all toward the goal of accurately representing the subject. For breaking-news shooting, the best strategy is to find an unobstructed view of the unfolding story and stay out of the way of people in the scene. | |
Lighting | In the Field: This image was taken on an overcast day and there was plastic sheeting over the nursery area. The result is soft, pleasing light appropriate for this portrait. |
Additional Considerations: In low-light scenes or indoors, and if you're reasonably close, you can use the built-in or an accessory flash — provided that flash photography is allowed and does not disrupt the proceedings. A reflector is also a handy accessory. | |
Lens | In the Field: Canon EF 100mm f/2.8 Macro USM lens. I used the 100mm lens because I knew that a series of portraits would be required for the project. |
Additional Considerations: A fast telephoto zoom lens, such as the Canon EF 70–200mm f/2.8L IS USM, is ideal for photojournalism and editorial shooting because in many scenes, you cannot get close to the subject. For weather-related photojournalism pictures, a wide-angle lens is ideal to include the context of bad weather surrounding a person or group coping with the weather. | |
Camera Settings | In the Field: Aperture-priority AE. Because I was shooting RAW files, I could set the white balance during RAW image conversion by clicking a white element in the photo. |
Additional Considerations: Always shoot at the highest resolution setting on the camera and maintain high resolution through the editing process so that the image looks good if the editor wants to use it in a large size. | |
Exposure | In the Field: ISO 100, f/6.3, 1/50 sec. |
Additional Considerations: Use wide apertures of f/3.5 or f/2.8 to blur distracting backgrounds. If the background adds context to the scene, stop down to f/8 or f/11 if the light allows. |
If you're new to editorial and photojournalism shooting, review current news images to get a feel for photojournalism. Although everyone has grown up seeing news photos, few study them closely. Take time to carefully study photos in newspapers, news magazines, and consumer magazines to see how the photographers encapsulate the defining moments of a story and its background details through images.
Shoot for the publication's format. In many editorial and photojournalism images, the publication runs text and headlines across the image. Leave space at the top, bottom, or sides of the image where the designer can easily insert headlines, subheads, and text. If your work is for a magazine, shooting in a vertical format for cover images and full-page interior images is a good idea.
Capture the defining moment. Before you begin, think about what the defining moment might be in the scene that you're shooting. You may miss capturing the defining shot by not knowing in advance what it might be. Of course, as the scene develops, the defining shot may change. Be prepared to keep up with the flow of events and anticipate events so that you can be in a good position to get the best pictures.
Have plenty of power. Often, you can't tell how long breaking news or an editorial shoot will last. For this reason, I recommend buying the accessory battery grip so that you have battery power to last the duration.
Get permission. Be very cautious when photographing private events, and always ask the event organizers for permission to photograph the event if you aren't carrying press credentials. And even if you are carrying credentials, check in with authorities or event planners.
An environmental portrait, or a portrait taken of a subject in work or leisure-time surroundings, offers several advantages over traditional portraits. With environmental portraits, the work area adds context that helps to reveal more about the subject than is shown in traditional portraits. In addition, the subject is often more comfortable in familiar surroundings, and the work or interest area also gives ample fodder for conversation during the shooting, both of which help the subject to feel relaxed and comfortable.
Environmental portraits borrow elements from both photojournalism and portraiture. With a successful merger of the two, environmental portraits offer insight into the subject that is often associated with photojournalism and the techniques that are associated with portraits. Because environmental portraiture offers a refreshing and adaptable approach to portraiture, it can become a lucrative specialty area for new and experienced photographers.
Tip
In portraits, be sure that the subject's eyes are in sharp focus. You can ensure this focus by using Auto Focus lock. Position the autofocus point in the viewfinder on the subject's eyes, and press the Shutter button halfway down. When the camera beeps to confirm focus, continue to hold the Shutter button as you move the camera to recompose the image. Then take the picture.
If you want to chalk up experience shooting environmental portraits, look for opportunities anywhere people are in their work or leisure-time surroundings, whether that's in an office, garage, or studio.
Environmental portraits are not limited to assignment images. The concepts of this technique can be successfully applied to many types of portraiture, senior, and family photography. For example, you might consider making an environmental portrait of a mother or grandmother in the kitchen or gym depending on the person's interests, a high-school senior proudly posing with a first car, or a football player leaning against a goal post.

Figure 7.27. Part of a new local ice cream manufacturer business is a café that features ice cream, light meals, and coffee drinks. The company's marketing and sales manager is shown here.
Table 7.9. Environmental Portrait Photography
Setup | In the Field: Taken in the company's new café, I chose the location in figure 7.27 for the warmth of the wall color and contrast offered by the dark wood table and chairs. The coffee was added as an element for which the café is known. |
Additional Considerations: Get to know the subject to find out what elements play an important role in his work or avocation. Then set up the scene with some of those elements as part of the composition. When framing environmental portraits, use discretion about how much of the scene you include to avoid getting a cluttered look. Ultimately, you want the image to be informative, but also easy for viewers to understand. | |
Lighting | In the Field: For this image, I took advantage of ceiling-mounted spotlights in the café area. There was a large window behind the camera that provided a small amount of natural light from an overcast day. |
Additional Considerations: Light from nearby windows can provide soft and flattering light. You can use an accessory flash and bounce the flash off a wall or ceiling to provide more attractive lighting. Experiment with different levels of flash compensation to get just the right amount of illumination. If you're shooting outdoors, open shade or the light on an overcast day is ideal. | |
Lens | In the Field: Canon EF 24–105mm f/4L IS USM lens set to 28mm. |
Additional Considerations: Shorter focal lengths, 28 to 35mm, are ideal when you want to include environmental elements in portraits. In addition, they provide extensive enough depth of field to make contextual elements visually distinct without competing with the subject. To avoid wide-angle distortion, do not have the subject close to the camera. You can use a normal or short telephoto lens as well. Just step back a little to include environmental elements. | |
Camera Settings | In the Field: RAW capture, Aperture-priority AE mode. |
Additional Considerations: To control the depth of field, choose Aperture-priority AE mode to let the background be either soft (wide aperture) or sharply defined (narrow aperture). If you're working in mixed light, this is a great time to set a custom white balance or shoot RAW images and then correct the color by click-balancing on a white or gray card that you shot under the scene lighting. | |
In the Field: ISO 100, f/4.0, 1/10 sec. | |
Additional Considerations: Use as low an ISO setting as possible to avoid introducing digital noise in the image, such as 100 or 200. If the light is low, use an accessory flash and bounce the flash off a wall or ceiling. On the EOS 30D, use flash exposure compensation to get a natural-looking level of illumination. | |
Accessories | A tripod is always a good accessory to ensure sharpness when taking portraits. |
Use a shorter focal length. Normally, a medium telephoto lens is the choice for portraits, but with environmental portraits, a shorter focal length allows you to include surroundings that provide context. For example, if you're using the Canon EF 24–70mm f/2.8L USM lens, a 24 or 35mm setting is a good choice. If you use a wide-angle lens, be sure that the subject is not close to the camera because facial features can be distorted in very unflattering ways.
Develop a rapport. Develop a rapport with your subjects to make them feel more comfortable. The most important ingredient for any portrait is the connection the photographer establishes with the subject. And in an environmental situation, ask the subject to show you what her work involves. As she gets involved in telling you about her work, she becomes less self-conscious and that's when you're most likely to capture her as she is in her work environment.
Scout locations that offer flattering light. Natural light is always a good choice, especially gentle light filtering into the room from a nearby window. You can set up a silver reflector on the opposite side of the subject to reflect light into the shadow areas.
Identify poses. Because people quickly tire of posing, discuss poses with your subject before you begin shooting. Have a list of poses and go over them with the subject so that he feels comfortable and can respond to your direction. Or provide minimal posing direction and go for more natural unposed shots. Also provide breaks during which the subject can go about his work or play. The distraction of the activity provides countless opportunities for additional shots.
Perhaps no other area presents as many varied photo opportunities as events such as parades, fairs, festivals, races, and traveling exhibits. Everything from Mardi Gras to a local county fair is a candidate for your photographic prowess and for additional stock or direct sales income.
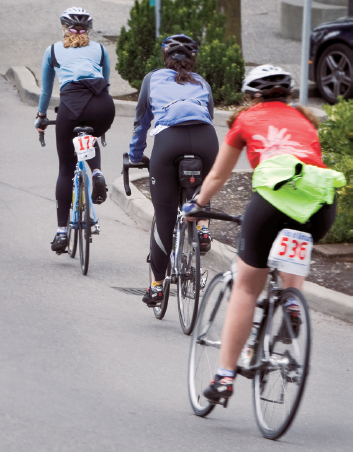
Figure 7.28. A holiday bicycle race provided colorful images of the event including this one of riders coming into a rest stop. Taken at ISO 100, f/11, at 1/60 sec. using the Canon EF 70–200mm f/2.8L IS USM lens set to 140mm.
Before you go to the event, think about photographing the event as a story that identifies the theme and provides detailed context to give viewers a true sense of being there. You can include overall shots of the venue to give a sense of the number of visitors as well as close-up shots of visitors in traditional, comical, and poignant situations.
Planning is important. If you're shooting a parade, for example, walk the parade route the day before at the same time of day that the parade will occur. Note areas where you might encounter lighting challenges from the shadows of tall buildings or backlighting.
For festivals, fairs, and other events, check the sponsor's Web site to get a schedule of events a day or two beforehand. Also, get a program or map of the event so that you know where the most interesting booths or exhibits are located, and where and when awards or music events will be held. Many event organizers hire photographers long before the event to take shots that will be used for the next year's event promotions. You can usually do a Web search to find the event planners or sponsors to contact about shooting the activity. In addition, some event shots have resale potential as stock photography images.
If the event is held indoors, check ahead of time to see if there are restrictions on using flash. And, even if the event is outdoors, chances are good that some pictures will be in deep shade and require slow shutter speeds. Plan ahead whether you will use a flash or need to carry a monopod or tripod, especially for late-day and evening shooting.
In a larger sense, popular public events reflect our culture, the fads and fashions of the time. Consider how the series of photos you take at an event can become a record of current culture. In the photos, include popular icons that will eventually reflect the era. Fashion, popular foods and activities, cars, and even cellphones are all possibilities. Be sure to include people in typical situations, such as a child holding onto a parent's leg or crying from exhaustion, or adults catching a short nap on the grass.

Figure 7.29. Indoor and outdoor events offer opportunities to show both the ambiance of event lighting and the motion of the performance as a creative alternative. Taken at ISO 1250, f/4.0 at 1/15 sec. using the Canon EF 24–105mm f/4L IS USM lens set to 105mm.
To capture the ambience of the event, consider close-up and medium-wide portraits of visitors interacting with performers, with vendors, and with each other. If the event is fast-paced and lively, you can use slow shutter speeds to capture motion as a blur.
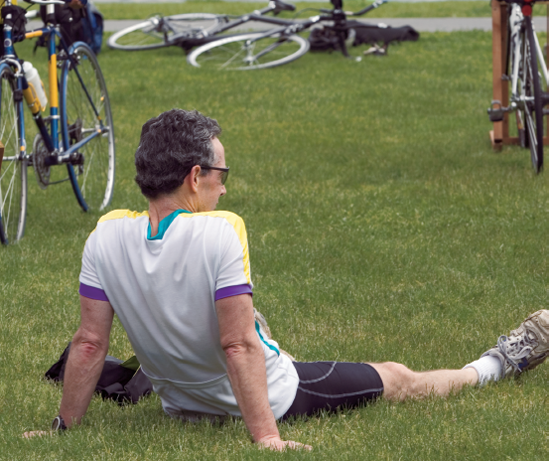
Figure 7.30. Sometimes the pinnacle of an event is its completion and taking a breather, as this biker is doing after a seven-hills competition.
Table 7.10. Event Photography
Setup | In the Field: The event shown in figure 7.30 included a proliferation of bicycles, gear, and prizes. The trick was to find a shooting position that offered the context of the competition with this rider who had completed the race without the background becoming too busy. |
Additional Considerations: Look for shooting positions that offer the cleanest background possible, or choose a wide aperture to blur the background. Experiment with both high and low shooting positions to offer unique perspectives on the event. Be sure to take overall crowd shots as well as detail shots of the event. | |
Lighting | In the Field: This was taken on an overcast day, which provided good color saturation and nice skin tones. |
Additional Considerations: Lighting for events can obviously run the gamut. In bright, contrasty light, shoot in open shade areas to lessen deep shadows and too-bright highlights. This can be a good time to use fill-flash, especially for people shots, to fill in dark shadows under the eyes, nose, and chin. | |
Lens | In the Field: Canon EF 70–200mm f/2.8L IS USM lens set to 135mm. |
Additional Considerations: Both wide-angle and telephoto zoom lenses are good choices for event photography. Zoom lenses are indispensable because they allow you to change focal length on the fly. | |
Camera Settings | In the Field: RAW capture, Aperture-priority AE mode. |
Additional Considerations: To control the depth of field switch to Aperture-priority AE mode and set the white balance to the type of light in the scene. If the light is low, switch to Shutter-priority AE mode and set the shutter to 1/30 second or faster. | |
Exposure | In the Field: ISO 100, f/8, 1/200 sec. |
Additional Considerations: In good light, choose ISO 100. In lower light scenes, choose ISO 200, 400, or even 1600 to get faster shutter speeds. At music concerts or events in low light, it's often effective to allow blur of the performers to show in the image as well as at other events. Experiment with different shutter speeds to get a variety of shots that reflect the pace and mood of the event. | |
Accessories | Using a polarizer on the lens helps deepen the colors and increases the saturation of color throughout the image for outdoor events. |
Choose multiple location options. For parades, locate at least two shooting positions — one at street-level and the other from a higher view. Then use the high vantage point to record overall crowd scenes with a wide-angle lens, and use both the wide-angle and a telephoto lens from the street-level shooting position.
Try creative shooting positions at events. Don't be afraid to kneel down or even lie down and shoot up. This shooting position makes the subject appear more powerful.
Ask for permission before photographing children. Always ask permission from a parent or guardian before photographing a child.
Plan some shots for the best hours of light. For most outdoor events, this will be late afternoon through sunset. Also stake out a shooting position that allows you to take the best advantage of the golden light.
Arrive early at popular events. Because crowds gather quickly, an early arrival allows you to record pictures of people preparing race cars, musical instruments, booths, or floats. It also allows you to photograph crowds as they begin coming into the event.
The defining criteria for fine-art photography is the classic, inspiring, or iconic subject, the artistic rendering of a subject, and the extraordinary inner vision that draws curators, collectors, and art aficionados to a photographic series. In many ways, fine-art photographers are the keepers of a vision that reveals life in ways we would otherwise overlook.

Figure 7.31. Virtually any subject can become a good subject for fine-art work. For this image, I applied a soft focus effect and gradient during image editing in Adobe Photoshop CS2. Taken at ISO 100, f/8, 1/125 sec., using the Canon EF 100mm f/2.8 Macro USM lens.
Fine-art photography often crosses traditional lines. For example, the spectacular landscapes of MacDuff Everton, the classic still-life images of Irving Penn, and the street photography and portraits of Henri Cartier Bresson cross into the world of fine-art photography.
As a tool for the fine-art photographer, the 30D offers all the creative options required to render subjects with the vision you have in mind. While gallery images are often thought of as being extreme enlargements, the images from the 30D can be upsampled to produce larger prints for gallery exhibitions. Many galleries now accept smaller image sizes, so that prints at the camera's native resolution make it a contender in the fine-art arena.
If you're new to fine-art photography, visit local galleries to see what curators and gallery managers are selecting for exhibition.
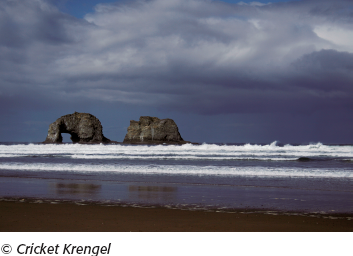
Figure 7.32. This image of a stormy sea and sea stacks off the coast of Oregon represents the evocative nature of fine-art photography. Taken at ISO 100, f/7.1, 1/2000 sec. using the Canon EF-S 18–55mm f/3.5-5.6 USM lens set to 55mm.
Although many subjects are appropriate for fine-art photography, the most important criterion is your artistic vision. Finding and refining your way of seeing the world so that it inspires others and creates a sense of awe is the foundation of most fine-art photography.
For inspiration, review the classic masters of art. Read the classic and contemporary books to find passages that resonate with you, and then translate the words and concepts into inspiring images. Because other photography specialty areas cross over into fine art, study the latest trends in graphic and industrial design for themes and approaches that inspire you visually.
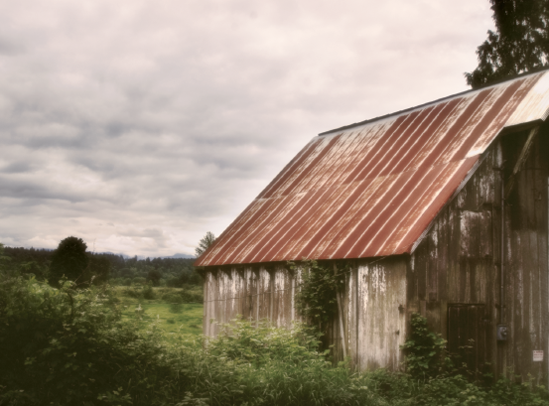
Figure 7.33. This image of an old barn with a rusty roof provided a good subject for post-capture manipulation in Photoshop CS2.
Table 7.11. Fine-Art Photography
Setup | In the Field: The juxtaposition of the old barn and the light in the background meadow in figure 7.33 leaves room for one of many possible stories. |
Additional Considerations: Fine-art photography leaves much open for viewers to fill in from their imaginations. Artful post-processing is useful, but the importance of getting a good image in the camera is equally important. | |
Lighting | In the Field: The light cutting through the overcast sky initially drew my attention to this scene. The difference between the shaft of light and the darkness of the barn provided nice lighting contrast. |
Additional Considerations: For fine-art images, lighting that is moody and evocative is excellent, and in image editing, the mood can be heightened. | |
Lens | In the Field: Canon EF 24–105mm f/4L IS USM set to 24mm. |
Additional Considerations: The lens that you choose will depend on the scene, of course. | |
Camera Settings | In the Field: RAW capture, Aperture-priority AE mode with white balance set to auto (AWB). The picture style was set to Standard. |
Additional Considerations: Many fine-art images offer a good opportunity to try the different Picture Styles, toning effects in the camera, and to experiment with filters and changes to image saturation in an image-editing program. | |
Exposure | In the Field: ISO 100, f/11, 1/125 sec. |
Additional Considerations: For images with a high dynamic range, many photographers prefer to take two or three images, one exposed for highlights, one for midtone, and one for shadows, and then composite them in Photoshop to get a final image at a higher dynamic range than the camera can deliver. | |
Accessories | If you choose to shoot multiple images, a tripod is essential. |
Build a series of images. As with other areas of photography, curators and gallery managers look for a unified series of images on specific subjects that reveal your artistic vision.
Explore alternative digital processing techniques. Unlike other areas of photography where a traditionally processed print is the expectation, in fine-art photography, you can exercise creative freedom in processing and rendering images.
If you are upsampling images to make very large gallery prints, upsample in a RAW conversion program or upsample incrementally. Upsampling, or increasing an image beyond its native resolution, allows you to print EOS 30D images at larger sizes. Upsampling can be done in Adobe Camera Raw in the Workflow Options section, or it can be done in Photoshop in the Image/Image Size dialog box using Bicubic interpolation. Most photographers agree that if you upsample in Photoshop, you should do so in successive increments of approximately 10 percent, until you arrive at the size print that you need.
If you shoot black-and-white, take advantage of Canon's Monochrome Picture Style and filters. Canon's Monochrome Picture Style offers color filter effects that simulate traditional color filters for black-and-white photography. Or you can also get similar effects in Adobe Camera Raw by using the Calibrate tab sliders to adjust tint and saturation for individual color channels.
Rarely can a photographer resist the temptation to photograph flowers, exotic plants, and gardens. The enticements include the riot of colors, the allure of symmetry and textures, and intricate design variations. Flowers and gardens offer an appeal that transcends cultural and language barriers, making them a truly universally captivating subject. Many people think macro photography when they think about shooting flowers. Certainly macro lenses are ideal for flowers as well as for extreme close-up images of a variety of subjects.
The following guidelines will help you capture the best images when photographing flowers and gardens. If the garden is a popular attraction for tourists, it is probably designed with several "best" ways to view it; for example, it may contain arbors, topiaries, fountains, or statues. Get a map at the visitor's center, and look for tips on the best vantage points for the main areas of the garden. Take some overall "establishing" shots of the garden from each main vantage point, and then switch to isolating specific areas of the garden as individual compositions using both macro and non-macro lenses.

Figure 7.34. Delicate structures, grace, and stunning beauty are only a few of the enticements of photographing flowers and plants. Taken at ISO 100, f/9, 1/200 sec. using the Canon EF 100mm f/2.8 Macro USM lens.
Of course, flower and garden images are strongest when they factor in the principles of good composition. The image should have a clear subject, and the composition should lead the viewer's eye to the main subject and then through the rest of the image. Experiment with compositional elements such as color, shape, texture, lines, and selective focus to create the composition.
Employing a little anthropomorphism is helpful as well. In portraiture, the goal is to capture the subject's personality; the same technique can be used in flower photography to capture the personality of individual blossoms.
Take the idea of anthropomorphism a step further by ascribing human characteristics to flowers, and see where it leads creatively. For example, asking questions such as whether flowers have bad-hair days can help you look at flowers differently. How do flowers handle the problem of overcrowding? Consider the implied hierarchy in the scene or arrangement, and try to isolate it as the subject. Can you use color to convey your interpretation of the flower or garden as being strong, weak, vibrant, or subdued? What photographic techniques can you use to emphasize the grace, beauty, and tranquility of the garden or flower?
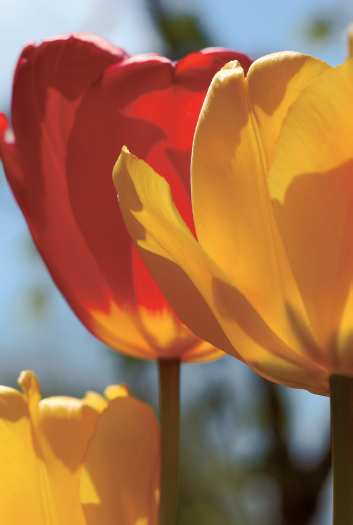
Figure 7.35. A low shooting position and backlighting provided vibrant color and contrast for this image. Taken at ISO 100, f/5.6, 1/1000 sec. using a Canon EF 100mm f/2.8 Macro USM lens.
Macro lenses reveal the hidden structures and beauty of everything from flowers to insects and small animals. A single drop of water bouncing up from a pool, or the reflections of a garden in a water droplet on a flower petal provide endless creative opportunities for macro images.

Figure 7.36. You would typically look for perfect blossoms, but sometimes an imperfect blossom provides added interest, as this one does.
Table 7.12. Flower and Macro Photography
Setup | In the Field: I took the picture in figure 7.36 at a nursery. With the Canon EF 100mm f/2.8 Macro USM lens, it was fairly easy to isolate the single flower from among the dozens crowding the area. |
Additional Considerations: Flowers and plants in outdoor light offer ready-made setup and lighting. If you don't have a garden, local nurseries and greenhouses offer plentiful subjects. Indoors, a simple single blossom or bouquet makes a good subject as well. You can compose images ranging from large fields of flowers to smaller groupings and single stems. Outdoors, you can take a low shooting position, and then shoot upward to use the blue sky as a beautiful backdrop. | |
Lighting | In the Field: Diffuse light from both an overcast day and the plastic nursery roof provided even light overall for this image. |
Additional Considerations: Outdoor light ranging from overcast conditions to bright sunshine are suitable for photos. Try using reflectors to direct light toward a small group or blossom. Fill-flash is sometimes helpful to give slightly more color pop. | |
Lens | In the Field: Canon EF 100mm f/2.8 Macro USM lens. |
Additional Considerations: For large areas of blossoms or plants or gardens, use a 24 to 35mm lens. For small groupings and single stems, consider a normal focal length or short telephoto lens. Or you can use the EF-S 60mm f/2.8 Macro USM or the venerable EF 100mm f/2.8 Macro USM lens. Of course, a long telephoto is useful for isolating small groupings in a large collection of flowers. | |
Camera Settings | In the Field: RAW capture, Aperture-priority AE. |
Additional Considerations: Decide on the best depth of field for the scene you're shooting, and use Aperture-priority AE mode to set the f-stop. To blur the background, start with an f/5.6 aperture. For extensive depth of field, set an f/11 or narrower aperture. | |
Exposure | In the Field: ISO 100, f/5.6, 1/125 sec. |
Additional Considerations: For large fields of flowers or plants, set a narrow aperture such as f/11 or f/16 to ensure maximum sharpness throughout the image. To isolate details of a single stem using selective focus, choose a wide aperture such as f/5.6. And if you want maximum depth of field with a macro image at close focusing range, choose a narrow aperture of f/16 or f/22 and use a tripod. | |
Accessories | A tripod is always a good precaution when you're taking close-up or macro shots and when using a telephoto lens. You can also buy plant holders that do not damage the plant, but hold it steady against outdoor breezes. |
Try a high position. When photographing large gardens, try shooting from a high position. You can even shoot from a ladder to show the overall scope and color patterns of the garden.
Ensure precise focus for floral shots. Anything short of razor-sharp detail detracts from floral images. If necessary, switch to manual focus by moving the switch on the Canon lens to the Manual setting. Then you can tweak the final focus to perfection.
Enhance color. In outdoor pictures, use a polarizer to enhance color saturation of the flower colors and the sky.
Use the sky as a backdrop. To create striking images, use a low shooting position and tilt the camera up to isolate the flower against a deep blue sky.
Use lighting to your advantage. Many flower petals are transparent, and with backlighting, the delicate veins of the petals are visible. The same is true for many plant leaves. Watch for backlighting to create compelling and very graphic images of flowers and plants.
Photographing food looks easy, but this lucrative niche of the photography business is more demanding than it may appear at first glace. Food photography, along with other photographic specialties, often requires the services of a stylist, as well as multiple versions of the same dish so that new dishes can be swapped in when the current dish has lost its peak of visual/photographic appeal.
The area of food photography encompasses not only specific dishes, but also conceptual shooting for magazines and books that show food groups, recipe ingredients, nutritional components, and so on. Lighting is set up to give maximum visual appeal to the food. It's not uncommon when shooting a vegetable or group of vegetables, for example, to use lighting patterns similar to those used in portrait photography. This specialty area also borrows from skills, compositional techniques, and natural lighting used in still-life and some product photography.
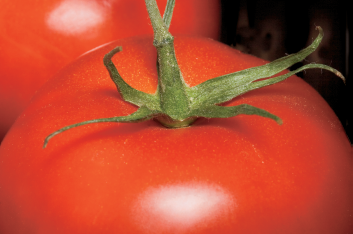
Figure 7.37. Color and visual appeal are primary factors in photographing food. Taken at ISO 100, f/14, 1/125 sec. using a Canon EF 100mm f/2.8 USM lens.
As in other areas, food photography follows current trends that range from extremely shallow depth of field, backlighting, extreme close-ups, and natural lighting to extensive depth of field with elaborate setups and extensive studio lighting. In some cases, prime specimens are flown in from exotic locations especially for photo shoots.
With wide-angle shots, the 30D produces good edge sharpness with L-series lenses, and for close-up shots with shallow depth of field, the EF100mm f/2.8L USM and EF 180mm f/2.8L Macro USM, as well as the tilt and shift lenses are good candidates for food photography. The telephoto lenses also produce beautiful bokeh, the way the lens renders the out-of-focus area of the image.
Most types of food have emotional con-notations associated. As you set up food shots, think of the emotion associated with the particular food and set out to capture it in the image. Certain foods are iconic either as foods that everyone enjoys (guilty pleasures), as being healthy (apples, carrots, spinach, etc.), or as being associated with an event (hotdogs at baseball game). These types of images make good stock shots, and for those new to shooting food, they provide practice for assignment shooting.


Figure 7.39. Although a food stylist is the best option for setting up shots, you can produce appealing images by keeping the set simple.
Table 7.13. Food Photography
Setup | In the Field: For most food photography, plain dishes such as white or black offer excellent contrast with the colors of food, and they don't distract from the food itself as shown in figure 7.39. |
Additional Considerations: A small collection of bowls, saucers, plates, placemats, and utensils is all you need to begin shooting portfolio pieces. Also monitor the current trends in food photography. Currently it is close-up shots with simple setups. The trends, of course, are subject to change, but it's easy enough to keep tabs on trends by checking newsstand magazines periodically. | |
Lighting | In the Field: This image was shot in the studio using four Photogenic strobes: two 320s and two 160s with a large silver reflector to camera right. Two strobes lit the white seamless background, one strobe was to camera left and another above the dish. |
Additional Considerations: Many of the current food shots utilize either natural lighting or studio lighting that is set up to simulate natural window lighting. For shots lit with studio strobes, you can often avoid getting specular highlights on the subject by using a softbox on the main light. This approach also supports the currently popular trend of soft, uniform light throughout the subject for images of entrees, for example, although the style varies to harder lit scenes as well. | |
Lens | In the Field: Canon EF 100mm f/2.8 Macro USM lens. |
Additional Considerations: Your lens choice depends on what you want to achieve in the photo. For a soft background, use a telephoto lens; for close-ups with minimal depth of field, the EF 100mm f/2.8 Macro USM and the EF 180mm f/2.8L Macro USM lenses are good choices. | |
Camera Settings | In the Field: RAW capture, Manual mode, with a custom white balance. |
Additional Considerations: If you're shooting a series of dishes under the same light, you'll save time by setting a Custom white balance before you start shooting. Whether you're shooting food on assignment, for portfolio work, or for stock, set the camera at the highest resolution so that you can offer the client or agency the highest resolution possible for the largest possible reproduction size. | |
Exposure | In the Field: ISO 100, f/18, 1/125 sec. |
Additional Considerations: High image quality is a paramount requirement in food photography. For minimal digital noise, use ISO 100 or 200. In lower-light venues, use a tripod as well. Depending on how much of the subject you want in sharp focus, an aperture of f/5.6 is a good starting point for close-up shots and for food shots that show table settings and people blurred in the background. | |
Accessories | Regardless of how softly lit and shallow the depth of field is in popular trends for food photography, sharpness is still essential. For that reason, be sure to use a tripod. |
In a series of shots, establish a uniform shooting position. If you're shooting a series of dishes, establish an appealing shooting position and maintain it throughout the series by setting the tripod to that position and moving the tripod down the table of prepared dishes or by moving the dishes to the tripod/camera position.
Maintain the ambience. The warmth of tungsten (ordinary household) lighting adds an appeal to food because it recalls the warmth and fun of eating at home, while window light adds a sense of realism and freshness. Use natural and artificial light to your advantage to make the food warm and inviting, and to evoke the natural associations that we have with the food.
Light for the subject. While a good interplay of highlight to shadow gives the image depth, be sure to use the lighting setup so that it spotlights the main subject of the image and not the background or supporting elements. Many food shots fail to throw light in front of the dish putting the main subject in light to medium shadow. This can happen with high-side lighting. Adding a small reflector to the shadow side so that the main dish receives a small but important kick of light helps keep the food well lit and in the forefront of the image.
Keep the setup simple, and use a coordinated color palette. Setups can be as simple as a bowl on a placemat, but generally the contents of the bowl, the color of the bowl, and the color of the placemat should be complimentary.
Get accurate color. Setting a custom white balance is the best way to ensure color accuracy for a single dish or a series of food dishes.
With breath-taking vistas of forests, mountains, and expanse of sky, God's handiwork remains a favorite subject of photographers. From dawn to dusk and sometimes beyond, our environment provides an endless source of inspiration for lovely images. And you don't have to go far. You can choose a single location and return day after day to take entirely different pictures. Seasonal changes to flora and fauna, passing wildlife, rain, sunshine, fog, and snow all contribute to nature's ever-changing canvas.
Photographing landscapes and nature requires high levels of both creative and technical skills to create compositions that are dynamic and evocative of the mood of the scene, and that adequately capture the extremes of light and shadow.
Tip
The image histogram is a great tool for evaluating whether the camera has successfully captured detail in both light and dark areas. If the histogram shows pixels crowded against the left, right, or both sides of the histogram, the camera wasn't able to maintain detail in one or both areas. Filters, such as a graduated neutral-density (NDGrad) filter, can help balance the exposure for bright sky areas and darker foreground areas allowing the sensor to hold detail in both areas.
The challenge of outdoor photography is in capturing the essence of a scene without the aid of chirping birds, the smell of clover, and the warm breeze of a late spring day. Compositional techniques including identifying a center of interest, using leading lines, framing, and placing the line of the horizon off-center go a long way in creating interesting nature pictures that help convey the sense of grandeur and beauty that you sense when the scene catches your eye.
The quality of light plays a starring role in nature photography. The low angles of the sun at sunrise and sunset create shadows that add a sense of depth to landscapes not to mention the beautifully rich hues these times of day add. Fog adds a sense of mystery, overcast light enriches colors, and rain dapples foliage with fascinating patterns of water droplets.
You can set the Picture Style to Landscape to achieve vivid blues and greens with a boost to contrast and sharpness. If you're shooting JPEG images, you can set the Picture Style so that it's applied in the camera, and you can adjust the sharpness, contrast, color saturation, and color tone to your liking. Or if you're shooting RAW, you can apply the style and adjust contrast and sharpness using Canon's Digital Photo Professional conversion program.
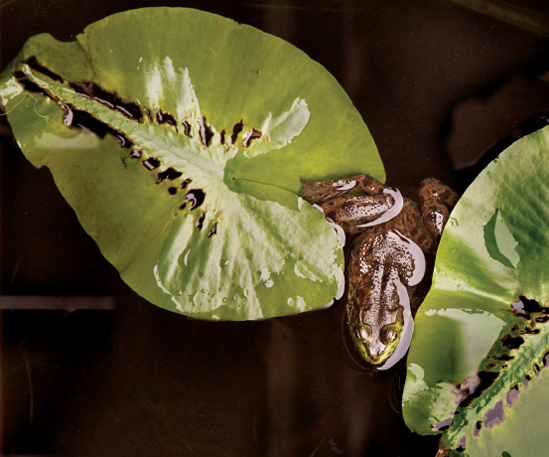
Figure 7.40. Whether it's a frog hanging out on a lily pad, or a bird soaring through the air, nature is filled with intriguing photographic opportunities. Taken at ISO 100, f/4, 1/50 sec. using a Canon EF 24–105mm f/4L IS USM lens set to 105mm.
Tip
One of the best tools an outdoor photographer can have is a polarizing filter that not only reduces glare and reflections, but also increases color saturation in the sky.
Choose a place that gives you a unique sense of, say, tranquility. Try different positions, focal lengths, and foreground elements to help capture the sense of tranquility. As you take pictures, look both at the overall scene and the components that make it compelling. Isolate subscenes that make independent compositions or can be used as a center of interest for the overall scene.
As you look around, ask yourself questions such as whether including more or less of the sky will enhance the scene and the composition. Generally, a gray, cloudless sky adds no value to the image; in these conditions, including less of the sky is a better choice. Stormy skies, on the other hand, can add drama as well as beautiful color to outdoor images.
Watch for naturally occurring elements such as an old wooden fence, a winding road, or a decaying archway to create classic compositions.

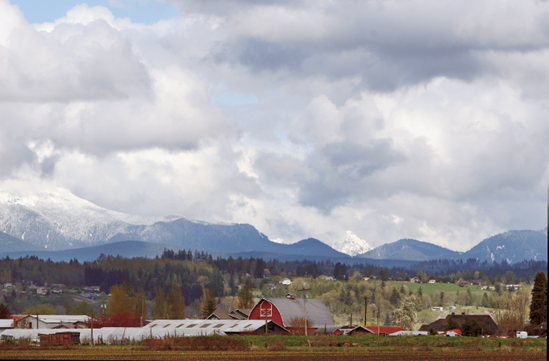
Figure 7.42. Expansive mountains, the clouds, and the farming area made this a must-capture scene in Snohomish, WA.
Table 7.14. Landscape and Nature Photography
Setup | In the Field: In figure 7.42, the dramatic clouds contrasted beautifully with the mountains and farming area in the foreground. To avoid getting ground-level weeds, I stood on the running board of my truck to get a slightly higher shooting position. |
Additional Considerations: Because such a wide variety of scenes is possible with landscapes and nature, the best advice is to trust your eye to set up and compose images. Try to exclude distracting high-line wires, road signs, and trash within the scene. Shoot from a variety of low, high, and eye-level positions. For sweeping scenes, include a foreground object such as a person, a rock, or a fence to give a sense of scale. As you look through the viewfinder, consider how the elements in the frame will direct the viewer's eye in the final picture. | |
Lighting | In the Field: The overcast lighting reduced the dynamic range of this scene enough that I was able to capture detail in the highlights and open up shadows during RAW conversion. |
Additional Considerations: A variety of lighting conditions is inherent in landscape and nature photography. Often, the best light is during and just after or before sunrise and dawn when the low angle of the sun creates long shadows and enhances the colors of flora and fauna. | |
Lens | In the Field: Canon EF 70–200mm f/2.8L, IS USM lens set to 145mm. |
Additional Considerations: Both wide-angle and telephoto zoom lenses are good choices for landscape and nature photography. For distant scenes, a wide-angle lens renders some elements too small in the frame. Use a telephoto lens to bring them closer. | |
Camera Settings | In the Field: Aperture-priority AE mode with white balance set to Daylight. |
Additional Considerations: Aperture-priority AE mode with white balance set to match the light is a favorite choice. Because some landscape images look better with deeper color, you can set Exposure Compensation to −1/2 or −1/3 stop. Just press the +/− Exposure compensation button on the back of the EOS 30D, and dial in the amount of compensation you want. | |
Exposure | In the Field: ISO 100, f/9, 1/400 sec. |
Additional Considerations: Use the lowest ISO possible to avoid digital noise. In most landscape and nature photos, extensive depth of field is the best choice. Meter for the most important element in the scene, and bracket to ensure that at least one frame does not have blown-out highlights. |
Position yourself to take advantage of the sky as a backdrop. For pictures of foliage, flowers, and colorful seasonal trees, use a low shooting position and shoot upward if you have a deep blue sky as the backdrop for the subject.
Get extensive depth of field. To get extensive depth of field, set the EOS 30D to Aperture-priority AE mode, and choose a narrow aperture such as f/11 or f/16. Then focus the camera one-third of the way into the scene, lock the focus, recompose, and take the picture.
Don't always default to using a wide-angle lens. Many people associate landscape photography with wide-angle lenses. However, telephoto lenses are indispensable in all types of outdoor photography, and they are very useful for isolating a center of interest in a wide-ranging vista.
When you shoot landscapes, include a person or object to help provide scale. For example, to bring home the massive size of an imposing mountain range, include a hiker in the foreground or midground to give the viewer a scale of reference.
Look for details that underscore the sense of the place. A dilapidated fence or a rusted watering trough in a peaceful shot of a prairie helps convey how the land was used.
Look for interesting light. For example, when you shoot in a forest or shaded area, look to include streaming shafts of light coming through the trees or illuminating a single plant.
Use exposure compensation in scenes with large areas of light colors. Large areas of light or white such as snow scenes or white sandy beaches can fool the camera meter into underexposing the image. To ensure that the snow or sand appears white in the final image, set exposure compensation on the EOS 30D to +1 or +2.
Look for different ways to frame the scene. Try using a tree as a frame along one side of the frame or a break in the foliage that provides a natural window that reveals a longer view of the scene.
If you're ready to challenge your photography skills, shooting low-light and nighttime images is a great way to do it. Evening and night images not only expand your understanding of exposure, but they also open a new world of creative challenge, enjoyment, and the potential for lovely results. Some event assignments and stock photography also require you to shoot in low-light scenes and at evening and nighttime, so having a good understanding of how to get good results without excessive digital noise is important.
Sunset and twilight are magical photography times for shooting of subjects such as city skylines, harbors, and downtown buildings. During twilight, the artificial lights in the landscape, such as street and office lights, and the light from the sky reach approximately the same intensity. This crossover lighting time offers a unique opportunity to capture detail in a landscape or city skyline, as well as the sky.
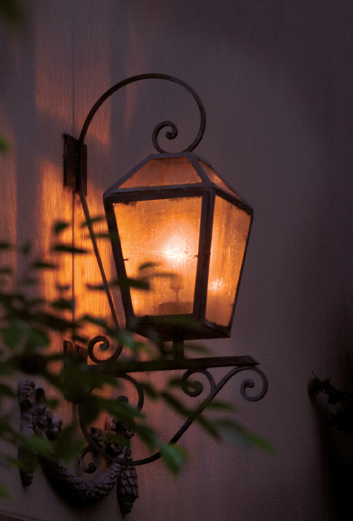
Figure 7.43. The lure of light against the darkness of evening is always appealing. This lamp post was no exception. Taken at ISO 100, f/4.5, 1/100 sec. using a Canon 70–200mm f/2.8L IS USM lens set to 145mm.
Fireworks Photography
If you want to capture the rocket's red glare, you can use lenses in the range of 28–100mm. Choose an ISO from 200 to 400. Because the camera may have trouble focusing on distant bursts of light, you can pre-focus manually on infinity and get good results. I also recommend using a tripod or setting the camera on a solid surface to ensure sharp images. If you want to keep it simple, you can set the camera to Full Auto and then just point and shoot.
If you want to have more creative control, you should know that capturing fireworks is an inexact science at best. I usually set the camera to ISO 200, use Manual mode, set the aperture to f/11 or f/16, and set the shutter on Bulb, which allows you to keep the shutter open as long as the shutter button is depressed. You can experiment to find the best time, usually between one and two seconds. Check the results on the LCD and adjust the time as necessary. The goal is to get a long enough exposure to record the full burst without washing out the brightest colors.

The different bursts of fireworks composited here were taken at ISO 200, f/11, 1/3 sec. with the Canon EF 70–200mm f/2.8L IS USM lens and a tripod. I merged them using Adobe Photoshop CS2.
Don't worry if you miss some good displays at the beginning of the fireworks show because the finale usually offers the best photo opportunities. During the early part of the display, get your timing perfected and be ready to capture the finale.
Low-light and night photos are a great chance to use Manual mode on the EOS 30D. Sample starting metering recommendations are provided in Table 7.15.
Table 7.15. Ideal Night, Evening, and Low-Light Exposures
Subject | ISO | Aperture | Shutter Speed |
|---|---|---|---|
City skylines (shortly after sunset) | 100 [400] | f/4 [f/8] | 1/30 second |
Full moon | 100 | f/11 | 1/125 second |
Campfires | 100 | f/2.8 | 1/15 to 1/30 second |
Fairs, amusement parks [1/30-1/60] | 100 [400] | f/2.8 | 1/8 to 1/15 second |
Lightning | 100 | f/5.6 [f/8] | Bulb; keep shutter open for several lightning flashes |
Night sports games | 400 to 800 | f/2.8 | 1/250 second |
Candlelit scenes | 100 [200] | f/2.8 [f/4] | 1/4 second |
Neon signs | 100 [200] | f/5.6 | 1/15 second [1/30] |
Freeway lights | 100 | f/16 | 1/40 second |
Try shooting city skyline shots in stormy weather at dusk when enough light remains to capture compelling colors in the sky. Busy downtown streets as people walk to restaurants, cafés, and diners; gasoline stations; widely spaced lights on a lonely stretch of an evening highway; the light of a ship coming into a harbor; or an outdoor fountain or waterfall that is lit by nearby streetlights are all potential subjects for dramatic pictures, as are indoor events such as concerts and recitals.

Figure 7.44. Waiting for the sky to get just the right amount of deep sapphire blue with a tinge of gold from the sunset meant waiting until almost 10 p.m. to capture this view of the Seattle skyline across Lake Washington. Taken at ISO 100, f/8, 1/6 sec. using a Canon EF 70–200mm f/2.8L IS USM lens set to 173mm and a sturdy tripod.
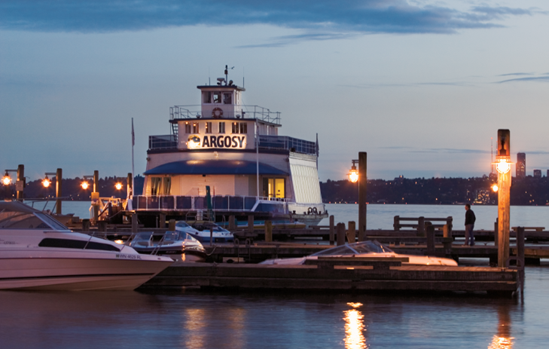
Figure 7.45. Dusk on a spring evening provided lovely classic low light for this scene of a popular dinner ship in the Seattle area.
Table 7.16. Night, Evening, and Low-Light Photography
Setup | In the Field: The primary setup for figure 7.45 was to wait for the right light and position myself on the pier to avoid people who were leaving the dinner ship that evening. |
Additional Considerations: If you are photographing a busy area, find a location that is away from pedestrian traffic and is unaffected by the vibration of passing cars. Ensure that your composition has a clear message and isn't visually confusing by including too much in the frame. Be aware that passing cars and nearby lights can influence the meter reading on the camera. If it interferes, change your shooting position if possible. | |
Lighting | In the Field: This image was taken while there was still clarity in the blue of the evening sky, but also late enough that the pier lights were visible against the darkening sky. |
Additional Considerations: To photograph scenes with floodlit buildings, bridges, or other night scenes, begin shooting just after sunset so that the buildings stand out from the surroundings. Check the image histogram on the LCD by pressing the INFO button to display the histogram. | |
In the Field: Canon EF 70–200mm f/2.8L IS USM lens set to 78mm. | |
Additional Considerations: A wide-angle zoom lens set to 18mm or 24mm allows you to get a broad expanse of night and evening scenes. Telephoto lenses, of course, are great for bringing distant scenes closer, but at this time of day, a tripod is a requirement especially if you use a long lens. | |
Camera Settings | In the Field: Aperture-priority AE with white balance set to auto (AWB). |
Additional Considerations: Assuming that you have the camera on a tripod or on a solid support, Aperture-priority AE mode gives you control over the depth of field. In Basic Zone mode, you can turn off the flash and use Landscape mode. | |
Exposure | In the Field: ISO 100, f/4.5, 1 sec. |
Additional Considerations: Just past sunset, you can usually rely on the meter to give a good exposure, but you may choose to bracket exposures at 1-stop intervals. However, if bright lights surround the scene, the meter can be thrown off. Use a lens hood and check the image histograms often in the LCD. To keep exposure time down, you can increase the ISO up to 400 or even 800. | |
Accessories | A tripod or setting the camera on a solid surface is essential in low-light scenes. |
Be safe and use common sense. Night shooting presents its own set of photography challenges, including maintaining your personal safety. Always follow safety pre-cautions when shooting during nighttime. Be sure to wear reflective tape or clothing, carry a flashlight, and carry a charged cellphone with you.
Use a flashlight to focus. If the camera has trouble focusing, train your flashlight on the subject long enough to focus manually or automatically, and then turn off the flashlight before you take the picture.
Use a level when using a tripod. A small bubble level designed to fit on the flash hot shoe mount is an indispensable piece of equipment for avoiding tilted horizon shots.
Try the Self-timer mode. You can, of course, negate the advantage of using a tripod by pressing the shutter release button with your finger. Just pressing the shutter button your finger can cause noticeable loss of sharpness. A better solution is to use the Self-timer mode.
When the full, glorious sweep of a scene takes your breath away and makes you wish that you could capture it end to end, then the scene is a good candidate for panoramic photography. In traditional photography, a panoramic photo is longer and narrower than traditional photos, and it is taken with a panoramic camera. Panoramic cameras vary from those that scan and gradually record the entire scene to others that capture the scene all at once.
With digital photographs and the PhotoStitch program, software that precisely aligns a series of photos side to side or top to bottom that comes with the EOS 30D, you can easily create panoramic photos.
The technique of taking a series of pictures for a panorama is to shoot successive images of a scene from left to right or top to bottom. To make the images consistent, keep the camera exposure and settings the same and keep the camera level across all pictures. Each successive image should include some overlap with the previous image. The overlap helps later when you align the images.
Note
Programs such as PhotoStitch help you merge two or more pictures into a panorama and print the merged images. If you're so inclined, you can create images with a 360-degree wrap-around view. And you can shoot images for the panorama in vertical or horizontal format. The program also automatically adjusts for differences in brightness and color. Because the final image is a combination of multiple single images, the file size of panoramic images is very large.
Panoramic photography is most often associated with landscape subjects, but residential and commercial interiors, city skylines, and gardens are good subjects as well. Look for sweeping scenes that have visual beginning and end points and a strong subject or center of interest. Dramatic lighting, clouds, and repeating patterns are good candidates for panoramas.

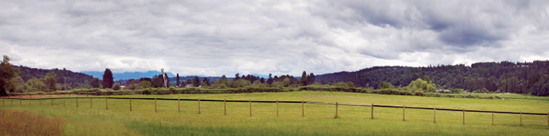
Figure 7.47. This panoramic was stitched together from five images of a farming community in the shadow of the mountains near Carnation, Washington.
Table 7.17. Panoramic Photography
Setup | In the Field: As I looked at the scene in figure 7.47, I determined how much of it that I wanted in the final combined image. Then I started shooting from left to right leaving about a 25-percent overlap in each subsequent shot. |
Additional Considerations: Identify the composition that you want in advance of shooting. The composition should include a center of interest and follow the traditional composition guidelines. Moving objects such as birds and planes are not good to include in panoramas. Their movement and position through the series of images can make subsequent image stitching more difficult. Technique is also important: Keep the camera level across the series of images. | |
Lighting | In the Field: The day was cloudy and the cloud formations provided another point of reference for stitching together the images. To lessen the deep shadow areas, I used Photoshop's Curves and Shadow/Highlight command to open up shadow areas during image editing. |
Additional Considerations: Choose a time of day when the lighting remains constant. If you include the sun, try to keep it entirely within one of the images, rather than partly in two or more images to make stitching easier. | |
Lens | In the Field: Canon EF 16–35mm f/2.8L USM lens set to 24mm. |
Additional Considerations: The final panoramic here measures 25 inches wide at 300 dpi. You can make nice panoramas from as few as two images or as many as five, but keeping images to a reasonable number, say three, makes stitching much easier. And images taken with telephoto lenses are often easier to stitch than those taken with wide-angle lenses. | |
In the Field: RAW capture, Aperture-priority AE mode with the white balance set to Daylight. | |
Additional Considerations: Because you want the same exposure for all images in the same panorama, Manual mode may be the best mode; if you use auto exposure, the difference between sections of the panorama may vary making it more difficult to achieve an even exposure across images. Good depth of field is preferable with panoramic images. A panorama need not be horizontal. You can also shoot vertical panoramic images. The more the images overlap, the easier it is for the stitching program to combine them seamlessly. | |
Exposure | In the Field: ISO 100, f/11, 1/125 sec. |
Additional Considerations: To maintain extensive depth of field, set the aperture to f/8 or f/11. This is also a situation where you want to avoid unnecessary digital noise by setting the ISO to 100 or 200. | |
Accessories | Definitely use a tripod to keep the camera level across the series of shots. |
Use polarizing filters with caution. Because the angle of light changes as you take images across the scene, a polarizing filter can cause problems in keeping the image saturation and color consistent across the series.
Have a composition in mind before you begin. This helps you determine where you want the center of interest in the final image. And with the final composition in mind, you can determine the starting and ending points.
Opt for extensive depth of field. The aperture you use should be as narrow as possible to ensure extensive depth of field.
Include large objects in a single frame. Try to have large foreground elements such as trees and buildings in a single frame rather than stitched across multiple frames. If this isn't possible, be very careful to keep the camera level and allow at least 25-percent overlap between frames.
Take several series of the same scene. Take a panoramic series more than once as insurance that one series will stitch together seamlessly.
Nothing gets an "awww" quicker than a cute pet or animal photo. Next to photographing people, pets and animals are some of the most appealing subjects in photography and can be a lucrative specialty area. And as with people photography, the goal is to convey the personality of the pet or animal. Of course, a major difference is that few if any pets and animals smile, so conveying the animal's mood hinges on eliciting its natural curiosity and interest, and then capturing the mood in the animal's eyes and actions.
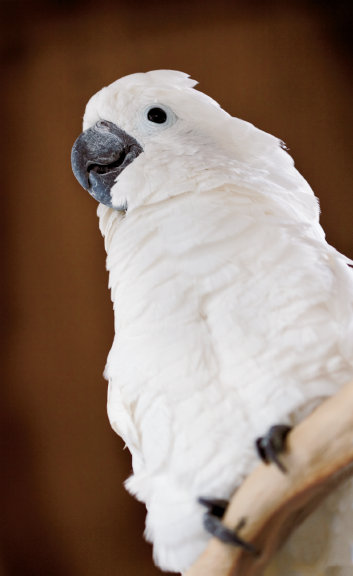
Figure 7.48. This image was taken in a store specializing in breeding exotic birds. The exposure for this image was ISO 100, f/2.8, 1/25 sec. with the camera handheld.

Figure 7.49. If you have a willing subject, there are endless ways to create humorous images. Snickers was raised in front of a camera, and for the promise of a biscuit, she wears almost anything I put on her. Taken at ISO 100, f/22, 1/125 sec. using a Canon EF 50mm f/1.4 USM lens.
Note
When you photograph pets and animals, keep the welfare of the animal in mind. Never put the animal in danger or expect more of the animal than it is capable of or willing to give.
Young, untrained pets and animals provide lots of appeal, but they can be harder to work with because they don't respond to verbal commands. In these situations, give the pet a large but confined area and go with the flow, using props, toys, and rewards to entice the behavior you want. Even with older pets that normally respond to verbal commands, don't be surprised if their response is less predictable when you're photographing them. After all, they can't see your face when it's behind the camera. Instead, establish eye contact with the animal as you set up the camera and talk to the animal throughout the photo session. And, of course, be patient with the animal and offer rewards and verbal encouragement.
If you choose an outdoor location, consider an area that limits the animal's ability to roam. Otherwise, you may find yourself trailing behind your pet trying to get a good shot when your pet would really rather be chasing birds in the yard. And, like people, pets quickly tire of having flash pictures taken, and some learn to look away from the camera. As an alternative to using a flash, photograph the animal outdoors or by the light of a nearby window. Continuous Drive mode is a good choice for taking successive shots.
Photo opportunities include any new experiences for the animal such as getting acquainted with another pet, the animal sleeping in odd positions or curled up with other pets, a pet watching out the window for kids to come home from school, racing after a ball or Frisbee, or performing in an arena.

Figure 7.50. Photographing trained pets in a studio is relatively easy. Here the pet is sitting on a table with white seamless paper as the background.
Table 7.18. Pet and Animal Photography
Setup | In the Field: I set up seamless paper on a stand for the background in figure 7.50 and positioned the Schnauzer on the table several feet in front of the background. |
Additional Considerations: Indoor pictures are relatively easy to set up for small pets and animals. If you include a favorite toy, be sure that it doesn't obscure the pet's face. Outdoor setups are easiest and provide a natural background for the animal, but often keeping the animal from wandering off is difficult. Find open areas where grass or natural foliage can be the background. Be sure to focus on the animal's eyes. | |
Lighting | In the Field: Four studio lights were used for this image: Two lights to light the background, a light in front of the Schnauzer, and one to the left shooting into a silver umbrella. A silver reflector to the right of the dog reflected light into the shadow side of the dog. |
Additional Considerations: Indoors, you can use the basic lighting setup described above, or you can use the light from a nearby window. Outdoors, late afternoon and sunset light provide beautiful light for animal pictures. | |
Lens | In the Field: Canon EF 50mm f/1.4 USM. This lens offers excellent contrast and sharpness. |
Additional Considerations: Your lens choice depends in part on whether you're taking a portrait or full-body picture and the size of the pet or animal. For large animals, the Canon EF 24–70mm f/2.8L USM lens is a good choice. | |
Camera Settings | In the Field: RAW capture, Aperture priority AE, with a custom white balance setting. |
Additional Considerations: For outdoor pet portraits, Aperture priority AE mode allows you to control the depth of field, but in lower light and if the animal is fidgety, Shutter priority AE mode may be the best choice to ensure that the shutter speed is fast enough to prevent blur. | |
Exposure | In the Field: ISO 100, f/16, 1/125 sec. |
Additional Considerations: If you use Aperture-priority AE mode, watch the shutter speed to ensure that it isn't slower than 1/30 second to avoid motion blur if the animal moves. In general, try to keep the shutter speed at 1/60 second or faster by choosing a wider aperture. If you fear that the animal will move, brighten the lights or add additional lights so that you can use a faster shutter speed. Or you can increase the ISO to 200, or use a wider aperture, such as f/5.6. | |
Accessories | For more traditional portraits of pets indoors, use a tripod. Outdoors, a tripod may not be practical, so be sure the shutter speed is fast enough to prevent motion blur. Also, have biscuits and toys available to attract the pet's attention. |
In most cases, shoot from the pet's eye level. Occasionally, a high shooting position is effective to show a young animal's small size, but generally you'll get the most expression when you are on the same eye level with the animal.
Entice the animal with a treat or toy. To get an animal to look in a particular direction, try holding a favorite toy or treat in your hand and move it in the direction that you want the pet to look.
Focus on the eyes. Always focus on the pet or animal's eye that is nearest to the camera. Depending on how you want to render the background, you'll want to have sharpness throughout the animal for more formal portraits.
Try other techniques. Use the techniques described in the earlier sections cover action and sports photography to photograph animals in action.
Portraiture is likely the most popular of photographic specialties, and high school seniors can provide a steady source of revenue for professional photographers and aspiring professionals as well. The goal of all portraiture is to reveal an individual's personality and spirit.
The following sections detail some of the key considerations involved in portraiture.
For head and head-and-shoulders portraits, normal to medium telephoto lenses ranging from 35mm to 100mm are excellent choices. With a characteristic shallow depth of field, telephoto lenses help blur the background to make the subject stand out. For full-length and environmental portraits, a moderate wide-angle lens is a good choice, provided that the subject is not close to the lens. A wide-angle lens distorts facial features in ways that the subject will not appreciate.

A portrait should make the subject the center of attention, and that's why a non-distracting or softly blurred background is important. Even if you have trouble finding a good background, you can de-emphasize the background by using a wide aperture such as f/4.0 or f/2.8. If you plan to use a flash, be sure to move the subject well away from the background to avoid dark shadows. Alternately, use harsh light and let deep shadows outline the subject. With seniors in particular, you can use props and locations that help show the senior's areas of interest. For example, a football field is as good a background for a star football athlete as studio muslin or white seamless. For a musician, the musical instrument can be incorporated into one or more of the images.
Lighting choices differ for portraits of men and women. For men and boys, a strong, directional daylight can be used to emphasize strong masculine facial features. For women and girls, soft, diffuse light streaming from a nearby window or the light on an overcast day is flattering. To control light, you can use a variety of accessories including reflectors to bounce light into shadow areas and diffusion panels to reduce the intensity of bright sunlight. These accessories are equally handy when using the built-in or an accessory flash for portraits. For the best exposure, take a meter reading from the highlight area of the subject's face, use Exposure Lock, and then recompose and take the picture.
The built-in flash produces nice images, especially with a negative flash compensation. However, you often have more flexibility when you use an accessory flash. With accessory flash units, you can soften the light by bouncing it off a nearby wall or ceiling. You can also mount one or more accessory flash units on light stands and point the flash into an umbrella to create studio-like lighting results on location. Inexpensive flash attachments such as diffusers and softbox-like attachments are also a great option for creating nice portrait lighting.
Tip
Use flash exposure compensation to dial back to the amount of light from the flash that you want.
Regardless of the light source, be sure that the subject's face is lit so as to bring it to the front of the image. The eyes should have catch-lights, or small, white reflections of the main light in the subject's eyes, and a 2 o'clock catch light position is classic. Light also affects the size of the subject's pupils — the brighter the light, the smaller the pupil size. A smaller pupil size is preferable because it emphasizes the subject's irises (color part of the eye), making the eyes more attractive.
Entire books are written on posing techniques for portraits. A quick guideline is that the best pose is the one that makes the subject look comfortable, relaxed, and natural. In practice, this means posing the subject in a comfortable position and in a way that emphasizes the attractive features while minimizing less-attractive features. Key lines are the structural lines that form the portrait. Posing the subject so that diagonal and triangular lines are formed by the legs, arms, and shoulders creates more dynamic poses. Also, placing the subject's body at an angle to the camera is often more flattering than a static pose that has the head and shoulders on the same vertical plane.
Today, seniors, and adults as well, expect multiple clothing changes for sessions. If you're shooting on location, consider bringing a relatively affordable popup changing booth, and at the studio, be sure to have a changing and makeup area. Discuss clothing changes with the subject beforehand to coordinate backgrounds with clothing.
Figure 7.52. Seniors are savvy about photography trends and often have their own ideas about what they want so it was no surprise that this young man also wanted to use this photo to promote his motocross riding. Taken at ISO 100, f/14, 1/125 sec. using the Canon EF 24–105mm f/4L IS USM lens set to 58mm.
Before you begin, talk to the senior or subject about his or her dreams and aspirations or interests. Then see if you can create setups or poses that play off of what you learn. Consider using props; for example, big, floppy hats for women can become inspiration improvisations. Alternately, play off the subject's characteristics. For example, with a very masculine subject, use angular props or a rocky natural setting that reflects masculinity.
When photographing senior portraits, be sure you're up on the latest fashion shooting trends and styles. For inspiration and ideas, browse the latest newsstand magazines and music CD covers.
Figure 7.53. Regardless of the variations that you take during a senior session, be sure to capture a traditional pose because it is often the pose that the parents, who pay for the session, will prefer.
Table 7.19. Portrait Photography
Setup | In the Field: For the picture in figure 7.53, Heath was on a posing stool several feet in front of a seamless white background. |
Additional Considerations: Uncluttered and simple backgrounds are effective for making the subject stand out from the background. If you don't have white paper or a large white poster board, use a plain, neutral-color wall and move the subject four to six feet from the background. Moving the subject away from the background and lighting the background separately helps reduce or eliminate background shadows. If you are just beginning, keep poses simple and straightforward, and allow the subject to assume a natural position, and then tweak the pose for the best effect. | |
Lighting | In the Field: This image was taken using four Photogenic Studio Max II strobes: two 320s and two 160s, and a large sliver reflector to camera right. Two strobes lit the seamless background, and two strobes were to camera left. A large silver reflector was placed to camera right. |
Additional Considerations: If you do location shooting, you can use multiple accessory flash units and a wireless transmitter to simulate studio or natural light effects. Otherwise, you can use window light alone or in combination with a silver reflector or two: For example, use one reflector to reflect window light onto shadow areas of the background and one to fill shadows on the subject. | |
Lens | In the Field: Canon EF 24–105mm f/4L IS USM lens set to 105mm. |
Additional Considerations: Most photographers prefer a focal length of 100mm to 105mm for portraits. Canon offers a variety of zoom lenses that offer a short telephoto focal length, such as the EF 24–105mm f/4L IS USM, and the EF 70–200mm f/2.8L IS USM lenses. Another lens to consider for excellent contrast in portraits is the renowned Canon EF 50mm f/1.4 USM lens (equivalent to 80mm on the EOS 30D). | |
Camera Settings | In the Field: Manual mode with a custom white balance. |
Additional Considerations: In the field, you want to control depth of field for portraits, so Aperture-priority AE mode gives the most control. | |
Exposure | In the Field: ISO 100, f/14, 1/125 sec. |
Additional Considerations: Avoid digital noise in shadow areas, particularly on portraits — choose the lowest ISO possible. To get a depth of field that ensures facial features that are reasonably sharp, set the aperture no wider than f/5.6 or f/8, depending on your distance from the subject. | |
Accessories | A tripod is a good accessory for portrait work, although it limits your ability to move around the subject quickly to get different angles. If the light permits, shooting off the tripod frees you to try more creative angles and shooting positions. |
Prepare a list of poses ahead of time. People often feel uncomfortable posing for the camera. Having a list of poses minimizes setup changes, and you can move through the pose list with good speed.
Flatter the subject. For adults, ask the subject to lift his or her head and move it forward slightly to reduce the appearance of lines and wrinkles. Watch the change to see if the wrinkles are minimized. If not, adjust the pose further.
Use natural facial expressions. It's always nice if the subject smiles, but portraits in which the subject is not smiling can be equally effective.
Pay attention to hands. If the shot includes the subject's hands, you can minimize the appearance of veins. You can do this by asking the subject to hold the hands with the fingers pointed up for a few minutes before you begin shooting.
Framing the subject: In general, keep the subject's head in the upper one-third of the frame unless you are going for a specific look
Focus. Always focus on the subject's eye that is nearest to the camera.
Always be ready to take a shot. When a good rapport is established between you and the subject, be ready to shoot spontaneously even if the setup isn't perfect. A natural, spontaneous expression from the subject is much more important than futzing to get a perfect setting.
Take several frames of key poses. It's entirely possible that something will be amiss with one or more frames. If you take only one picture, you won't have a backup shot of important poses.
Keep up the chitchat. Keep up a steady stream of conversation that includes friendly directions for adjusting poses. Friendly chitchat helps put the subject at ease and allows a natural way for you to provide direction during the session.
Poetic arrangements reminiscent of paintings are what jump to mind first when many people think of still-life photography. And, of course, artistic arrangements of pottery, flowers, fruit, and personal mementos are popular subjects. But still-life arrangements also can be found in existing scenes in old homes and buildings, along sidewalks, and in stores. Product photography incorporates many of the same aspects of composition, lighting, and exposure that still-life photography uses.
Although some photographers shy away from still-life and product photography because of its slower pace, both areas offer photographers a chance to expand their creative skills. And they offer ample opportunity to try varied techniques both in the camera and on the computer.
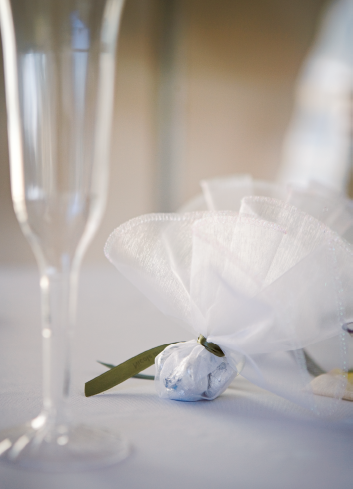
Figure 7.54. Almost any venue offers opportunities for still-life images, such as this image spotlighting wedding favors for guests. Taken at ISO 100, f/2.8, 1/500 sec. using a Canon EF 24–70mm f/2.8L USM lens set to 68mm.
Still-life and some product photography subjects invite you to experiment with dramatic lighting and to think of ways to modify existing light. The goal of lighting and light modification is to enhance the overall mood of the setup so that it complements the subject. For example, you might use a diffusion panel or a sheer curtain to modify incoming window light for a delicate floral arrangement or for hand-made soaps, giving either subject a soft, romantic look.
The choice of lenses for still-life photography depends, of course, on the subject. In general, normal, short telephoto zoom, or moderate wide-angle zoom lenses are ideal for most still-life subjects.
Traditional still-life subjects are a great way to start learning the art of still-life photography. Subjects include fruit, flowers, pottery, antiques, clothing, meal entrees, beverages, bottles, soaps, coins, watch and clock parts, and decorative holiday display items.
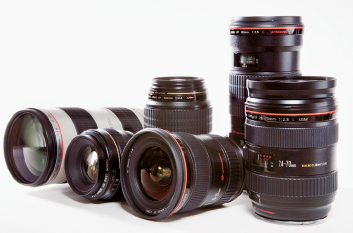
Figure 7.55. Product and catalog photography also falls into this category and offers creative opportunities. Taken at ISO 100, f/22, 1/125 sec. using a Canon EF 100mm f/2.8 Macro USM lens.
Almost anything that catches your eye for its beautiful form, texture, shape, and design is a good candidate for a still-life photo. And the same applies to product photography where you want to enhance the form, shape, and design of the product. Because the success of the image often depends on the setup and arrangement, study art and design books; publications can help spark ideas for creating your own setups.

Figure 7.56. Still-life images abound in nature and on the street. This image was taken at a suburban restaurant.
Table 7.20. Still-Life and Product Photography
Setup | In the Field: Figure 7.56 is a "found" image that required only thinking about how to frame the scene. |
Additional Considerations: You can find many existing still-life images around your home or outside the home. Just watch carefully for small, discrete settings that form a composition on their own. Like still-life, product photography can be shot in the context in which the product will be used, or in a studio setting with a plain background. Very often, designers require a plain background from the photographer so that they can later drop in color or a different background for the shot. | |
Lighting | In the Field: The lighting for this shot was moderate sunshine and some shade provided by the overhang of the restaurant roof. |
Additional Considerations: For small still-life and product shots that you set up on your own, the diffuse light from a nearby window is often the most attractive light. You can modify the existing light using silver reflectors to fill shadow areas, or you can use an inexpensive diffusion panel to reduce the harshness of bright light. | |
In the Field: Canon EF 100mm f/2.8 Macro USM lens. | |
Additional Considerations: Your lens choice depends on the scene you're shooting and your distance from it. Use a telephoto zoom lens to bring distant scenes closer and a wide-angle lens to capture larger scenes. For minimal product distortion, the Canon EF 50mm f/1.4 USM lens gives great contrast and no lens distortion. | |
Camera Settings | In the Field: RAW capture. Aperture-priority AE mode. |
Additional Considerations: To control the depth of field choose Aperture-priority AE mode and set the white balance to the type of light in the scene. If the light is low, switch to Shutter-priority AE mode. | |
Exposure | In the Field: ISO 100, f/2.8, 1/320 sec. |
Additional Considerations: If you want background objects to appear as a soft blur, choose a wide aperture such as f/5.6 or wider. This brings the focus to the main object in the scene. | |
Accessories | Silver reflectors and diffusion panels are handy accessories for still-life and product photography. |
Choose items with the most aesthetic appeal for still-life arrangements. If you're photographing fruit or food, spend time looking for the freshest and most attractive pieces of fruit, or the freshest plate of food. With other subjects, be sure that you clean, polish, or otherwise ensure that the subject is as clean and attractive as possible.
Try out the EOS 30D's various Picture Style options. For example, if you've set up a subject and you want a soft and subdued look, try the Portrait or Monochrome styles.
Experiment with focus. Either with a filter on the camera or later on the computer, try adding a soft-focus effect to your still-life shots.
Experiment with different backgrounds. A draped sheer curtain, a black poster board, or a rough adobe wall can make interesting backdrops.
At some point, almost everyone who has more than a passing interest in photography toys with the idea of making money from their images. And for those who do, their short-list of ideas includes stock photography near the top. Stock photos fill the pages of popular newsstand magazines and brochures, and grace posters in public places and billboards along the highways. Stock photography refers to existing images available for licensing by clients including advertising agencies, corporations, magazines, book publishers, and others. Existing images can be offered to clients by individual photographers, cooperatives of multiple photographers, or by stock photo agencies representing multiple photographers.
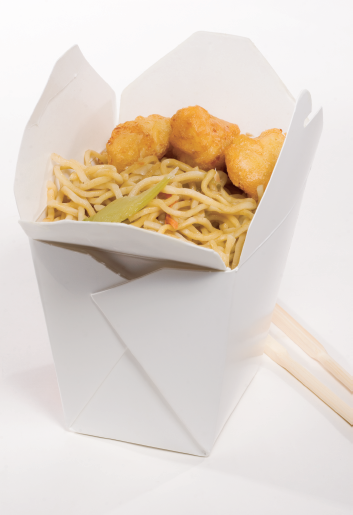
Figure 7.57. This type of image can be used by editors looking for an image illustrating fast food, by specialty magazines, and so on. Shot in vertical format, which is commonly preferred by publications, it leaves room at the bottom and top for headlines and subheads. Taken at ISO 100, f/18, 1/125 sec. using a Canon EF 100mm f/2.8 USM lens.
With more than 1,000 stock photography agencies and organizations to choose from — ranging from the leaders such as Getty and Corbis to grass-roots organizations such as Photographers Direct — it stands to reason that you can tap into additional income that can range from a few hundred or a few thousand dollars a year to a six-figure income.
Using a stock agency as an example, the agency markets the work of many photographers. They negotiate with and finalize licensing rights with clients, collect payment, and subsequently pay the photographer a percentage of the licensing price. The percentage split between the photographer and the agency varies, but a common split is 50/50: 50 percent goes to the photographer, and 50 percent stays with the agency. In turn, the agency takes over marketing and licensing tasks giving photographers more time to make pictures. And with the potential to license a single image multiple times, a photo marketed by an agency or cooperative can provide a continuing source of income for months or even years with no additional work on the photographer's part.

Figure 7.58. Lifestyle images have been the most in-demand images for several years, but images that evoke lifestyles are also popular. This image could be used by clients wanting a sense of peace, a spa-like environment, nature, water, and so on. Taken at ISO 100, f/7.1, 1/30 sec. using the Canon EF 100mm f/2.8 Macro USM lens.
Although there are many traditional and many new stock models, stock represents a potentially lucrative way to reuse existing imagery and a creative way to market new imagery. Currently, the hottest trends in stock are for lifestyle images that run the gamut of subject areas from dining to outdoor activities and sports.
Many agencies have a minimum resolution for stock images and ranges from 8″ × 10″ at 300 dpi to 11″ × 14″ at 300 dpi. Some stock agencies allow for upsampling to increase native resolution of images to larger printing sizes. If you're new to stock shooting, check the agency requirements for resolution before requesting a portfolio review.
Over the years, major stock agencies have acquired thousands of images so that now they have more specific subject needs. For photographers shooting on assignment or for pleasure, it pays to consider potential stock use as you work. For example, if you're shooting landscape images, you may veer slightly to shoot roads leading up to the area because design agencies often look for scenic road shots into which they drop the car of their client later.
Conceptual shooting is also a good area to consider. Themes such as "single," "breaking up," and the "tranquility of a spa" are examples of recent stock requests for existing imagery.

Figure 7.59. This simple image has a variety of potential uses including by clients wanting to illustrate weight loss, size, and sewing among others.
Table 7.21. Stock Photography
Setup | In the Field: For the image in figure 7.59, I used a white seamless background and created a dynamic position for the measuring tape. This is one of several variations in a series of this subject. |
Additional Considerations: White backgrounds are useful because clients often replace the background with a color or other background that fits their needs. Leaving space in the image composition for buyers to insert text and other graphics is also good. | |
Lighting | In the Field: This image was taken using four Photogenic Studio Max II strobes: two 320s, two 160s, and a large sliver reflector to camera right. Two strobes lit the seamless background, and two strobes were to camera left. A large silver reflector was placed to camera right. |
Additional Considerations: Bright, clean images are preferred by buyers, although stylistic variations can set your images apart from the multitudes of stock images. | |
Lens | In the Field: Canon EF 100mm f/2.8 Macro USM lens. |
Additional Considerations: Your lens choice depends on the scene you're shooting and your distance from it. Use a telephoto zoom lens to bring distant scenes closer and a wide-angle lens to capture breath-taking sweeps of landscape. | |
Camera Settings | In the Field: Manual mode with a custom white balance. |
Additional Considerations: Control the depth of field by choosing Aperture-priority AE mode. If the light is low, switch to Shutter-priority AE mode. Be sure to set the white balance to match the type of light in the scene. | |
Exposure | In the Field: ISO 100, f/22, 1/125 sec. |
Additional Considerations: Shoot many variations of stock images including some with extensive depth of field and some with selective focus. |
Study existing styles. Over the years, the quality of stock imagery has risen to some of the best to be found. Minimum expectations are excellent exposure, composition, and subject matter. But more important, agencies look for a personal style that sets imagery apart from the mass of images they have on hand. Study the images offered by top stock agencies, and determine how you can match and better what's currently being offered.
Captions and keywords. In most cases, photographers are responsible for providing clear and accurate captions. In fact, some buyers and photo researchers make go and no-go decisions based on the accuracy of captions.
Build a sizeable portfolio. Most stock photo agencies expect potential photographers to have a substantial body of work — images numbering in the hundreds if not thousands. This means that if you only have a dozen or so great images, chances are better than good that a traditional stock agency won't be interested.
Image content and marketability. Agencies look for a creative edge, if not creative genius, that makes images stand out. The "stand out" quality is, of course, judged through the dispassionate eye of a photo editor — someone who reviews hundreds of images from polished photographers every day, and someone who can quickly cull pedestrian images from star performers.
Henri Cartier-Bresson spoke eloquently and passionately of using the camera to tell picture stories. Making a picture story, in Cartier-Bresson's view, required that "the brain, the eye, and the heart" of the photographer work together to capture an unfolding process. For some photographers, the heart of photography exists most vibrantly in the picture stories that unfold every day on city streets. And street photography offers the singular ability to capture a broad sweep of our world in action.
Nothing is more important in street shooting than having an acute awareness of what's going on around you at all times. Certainly this awareness helps ensure your personal safety, but more important, it puts you in touch with the heartbeat of the city — that palpable throb of life in progress that makes street photography both compelling and addictive.
Many professional photographers began their careers by shooting on city or small-town streets. The street is an excellent venue to develop skill shooting in all sorts of lighting conditions and with a variety of subjects and scenes.
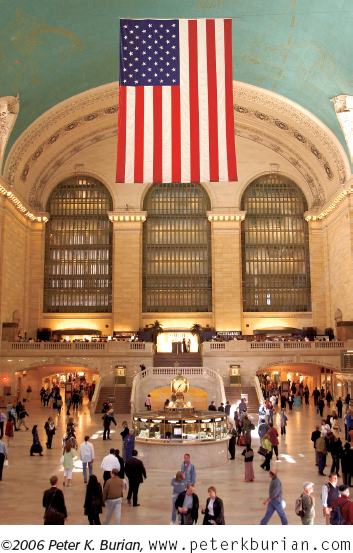
Figure 7.60. This image of Grand Central Station in New York City is a classic street shot that shows an iconic location with people going about their daily lives. Taken at ISO 800, f/4.0, 1/40 sec.
For flexibility, a fast telephoto zoom lens is ideal for street photography. It allows you to get in close to the scene while maintaining a distant, background shooting position. And because street shooting varies from bright sunlight to deep shade, a fast f/2.8 lens gives you a better chance of getting sharp handheld pictures in low-light scenes.
Street shooting is also a great way to hone your skill at composition and using selective depth of field. If you're new to street shooting, you'll find that your composition skills improve because you're continually evaluating what scene elements to include and exclude. Likewise, you're also forced to make quick decisions on choosing the aperture and camera-to-subject distance to control depth of field.
On the street, the initial impulse is to photograph everything you see. But as you become more selective in street shooting, try doing a thematic series. Potential subjects for thematic series abound. For example, you could do a study on how people react to the wait for a traffic light to change or do a photo series on a day in the life of a metropolitan bus terminal.
Or choose a spot that is slated for improvement. Assign yourself to document the reconstruction. You can photograph the area as it is now and capture the "life" of the area. Then you can follow up every week or so to see how the construction changes not only the look of the place, but also the sense of place.

Table 7.22. Street Photography
Setup | In the Field: The image in figure 7.61 was taken at night on Broadway. The photographer used a dynamic position to capture the vibrancy of nightlight in one of the world's most famous cities. |
Additional Considerations: Vary shots by taking a high or low shooting position. Watch for iconic shots that describe our life and culture. Street photography is also a great time to capture humorous scenes of people interacting or people juxtaposed with background billboards and signs. | |
Lighting | In the Field: Ambient street light provided the lighting for this image. |
Additional Considerations: Lighting for street photography can run the gamut. Watch for highlight areas on the subject and use negative exposure compensation or bracketing to ensure that highlights are not blown out. | |
Lens | In the Field: Canon EF 16–35mm, f/2.8L USM set to 17mm. |
Additional Considerations: A zoom lens is indispensable for street shots. Typically, a telephoto zoom offers the focal range necessary for you to remain at a distance yet bring the subjects close to fill the frame. | |
Camera Settings | In the Field: Aperture-priority AE mode. The white balance was set to Auto. |
Additional Considerations: To control the depth of field, choose Aperture-priority AE mode and set the white balance to the type of light in the scene. If the light is low, switch to Shutter-priority AE mode. | |
Exposure | In the Field: ISO 100, f/4.0. 1/200 sec. |
Additional Considerations: In low-light scenes, switch to Shutter-priority mode and set the shutter to 1/30 or 1/60 second. At 1/30 second, you may get some blur if the subject moves, which can turn out to make an effective image. If you want sharpness throughout the image to show the surroundings, set a narrow aperture such as f/8 or f/16, or to blur the background, choose a wide aperture such as f/5.6 or wider. |
Watch for photo "stories." Photo stories involve subjects and sequences that tell the story of a place, building, or group of people. Shoot the photo story sequence over time and edit images carefully to include only the photos that follow your story line.
Use light to your advantage. There's nothing like the warm light of sunset to make city streets and buildings glow. Set a narrow aperture, such as f/11 or f/8, to ensure extensive depth of field.
Always keep a spare memory card handy. If a drama unfolds suddenly on the street, you'll be glad you have an empty card that you can slip into the EOS 30D and know that you can continue shooting uninterrupted.
Pack wisely and travel light. Always carry a fully charged cellphone with you and carry only the lenses with which you plan to shoot. The lighter load gives you greater mobility and lessens the chance that equipment might be stolen.
The colorful drama that unfolds at the beginning and end of each day has inspired photographers to capture the images of sunrises and sunsets since the dawn of photography. At no other times of day does the sky offer such compelling color. Whether you shoot weddings, portraits, fashion, or commercial assignments, knowing how to shoot in the magical light of sunrise and sunset will net some of the best shots of the assignment or for your portfolio.
Tip
To protect your eyesight as well as the image sensor, don't point the EOS 30D directly at the sun. Instead, shoot the sun at a slight angle and be sure to use a lens hood to avoid flare (reduced contrast when light from outside the intended image strikes the lens).
Choosing a lens depends on the subject that you're shooting and how you want to show the sunrise or sunset within the context of the overall photo. If you're shooting for pleasure, a wide-angle lens provides a large sweep of sky that can lead the eye to the distant horizon, but it also reduces the apparent size of the sun to a small spec on the horizon. By contrast, a telephoto lens gives the sun a more prominent role so that you can isolate an object, such as a sailboat, as it passes in front of the sun.

Figure 7.62. In this image, the boat and the people on the pier are bathed in the golden light of sunset — a light that enhances any subject. Taken at ISO 100, f/8, 1/15 sec. using a Canon EF 70–200mm f/2.8L IS USM lens set to 140mm.
Because many sunrise and sunset images include the sun, it's important to preserve the color of the sun in the image. If you meter on the sky, the sun will be white — colorless and without detail — in the final image. For this reason (and because sunrise and sunset pictures look great with rich, deep color), use a −1 to −2-stop exposure compensation and also bracket the exposure to be safe. But for assignment images, obviously metering for the model or subject is the primary objective.
Note
For more information on exposure bracketing, see Chapter 1.
If you're shooting for pleasure, certainly sunrise and sunset photography is a popular genre. But to be successful, these pictures should have more interest than just the glorious colors of the sky. A foreground object or even a distant object can add context and symbolism that make the picture stand out from run-of-the-mill sunrise and sunset pictures.
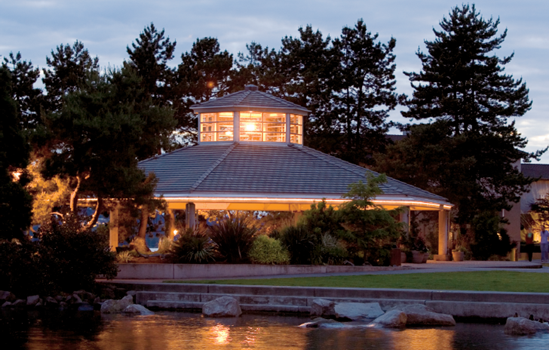
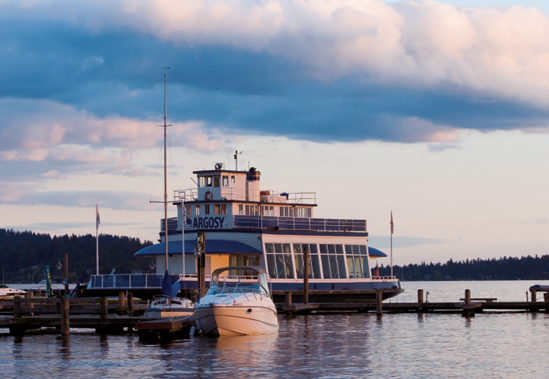
Figure 7.64. This image captures a popular dinner-cruise ship just before passengers begin boarding for the sunset cruise on Lake Washington.
Table 7.23. Sunset and Sunrise Photography
Setup | In the Field: The image in figure 7.64 is a reoccurring scene along Lake Washington in Kirkland, WA. I set up the tripod and waited for the best light to strike the dinner ship. |
Additional Considerations: To set your sunset pictures apart from others, compose the image so that the effect of the light is shown, such as on ripples on a lake. Add interest by including objects in the foreground or midground. For scenic, landscape, and seascape images, keep the horizon in the upper or lower third of the image. Sunrises and sunsets happen over a very few minutes of time. Be sure that you are in position well before the time of sunrise or sunset and ready to shoot. | |
Lighting | In the Field: Full sunset light provided superb color to the clouds, the ship, and the water. |
Additional Considerations: Sunrise and sunset happen within a few minutes of time, and the colors of the sky can change dramatically during those few minutes. The color temperature of sunrise is 3,100 to 4,300 degrees Kelvin, and sunset is 2,500 to 3,100 degrees Kelvin. Knowing these approximate temperature ranges allows you to fine-tune color when you shoot RAW images and process them in Digital Photo Professional. | |
Lens | In the Field: Canon EF 70–200mm f/2.8L IS USM lens set to 73mm. |
Additional Considerations: Your lens choice depends on the scene you're shooting and your distance from it. Use a telephoto zoom lens to bring distant scenes closer and a wide-angle lens to capture breath-taking sweeps of color. | |
Camera Settings | In the Field: RAW capture, Aperture-priority AE mode. The white balance was set to AWB and tweaked during RAW conversion. |
Additional Considerations: Aperture-priority AE mode is a good choice so that you can control the depth of field. If you want to shoot in a Basic Zone mode, Landscape is a good option. | |
Exposure | In the Field: ISO 100, f/9, 1/20 sec. using a tripod. |
Additional Considerations: Light fades quickly during sunrise and sunset. You can set the ISO to 100 to 400 and perhaps even switch from a lower ISO at the beginning of the light change to a higher ISO as the light fades. For expansive scenes, keep good depth of field by using f/8 or f/11. If the shutter speed drops below 1/60 or 1/30 second, set the camera on a solid surface or use a tripod. | |
Accessories | If you're shooting an assignment just before the golden light has begun, you can add simulate sunset light by using a gold reflector to reflect into the model or subject. |
Capture the full range of colors. The color of the sky before, during, and just after sunset and sunrise changes dramatically. Be sure to use all the time to capture the changes.
Get in position early. Be in place and have the camera set up 15 minutes or more before the sunset or sunrise begins. Once sunset or sunrise begins, you have only 10 minutes at most to capture the shots you want.
Use the sky to your advantage. Clouds help diffuse sunlight and create colorful and dramatic sunsets. On clear days, the best time to shoot is just before or just after the sun falls below the horizon.
A tripod or monopod is your friend. You'll get sharper images by using one.
The EOS 30D is lightweight, small, and extremely versatile, making it ideal for use when traveling. With a set of compact zoom lenses and plenty of memory cards, you'll have everything you need to take high-quality shots to document your travels and do travel assignments.
Before you begin any trip, carefully clean your lenses, check that the image sensor is free of dust, and ensure that the EOS 30D is in good working condition. Consider buying spare batteries and memory cards. If you're traveling by air, check the carry-on guidelines on the airline's site and determine if you can carry the camera separately or as part of your carry-on allowance. An advantage of being a digital photographer is there's no worry about film being fogged by the X-ray machines.
Another pre-trip task is to research the destination by studying brochures and books to find not only the typical tourist sites, but also favorite spots of local residents. When you arrive, you can also ask the hotel concierge for directions to popular local spots. The off-the-beaten-path locations will likely be where you get some of your best pictures.

Figure 7.65. This image from New York City captures one of the charms of the famous location. The exposure for this image was ISO 100, f/5.6, 1/200 sec. using a Canon EF 70–200mm, f/2.8L IS USM lens set to 88mm.
Here are some additional tips for getting great travel pictures:
Research existing photos of the area. At your destination, check out the postcard racks to see what the often-photographed sites are. Determine how you can take shots that offer a different or unique look at the site.
Include people in your pictures. To gain cooperation of people, always be considerate, establish a friendly rapport, and show respect for individuals and their culture. If you do not speak the language, you can often use hand gestures to indicate that you'd like to take a person's picture, and then wait for their positive or negative response.
Keep the composition simple with a clear center of interest. This is where a telephoto lens comes in handy. With it, you can eliminate distracting elements on either side of the subject or eliminate a dull overcast sky. In larger scenes, a wide-angle lens is the ticket.
Waiting for the best light pays big dividends. Sometimes this means that you must return to a location several times until the weather or the light is just right. And once the light is right, take many photos from various positions and angles.
Photographing people and landmarks. If you want to include family in a shot at a famous landmark, use Landscape or Aperture-priority AE mode with an aperture of f/8 or f/11 to keep the foreground and background sharp.
Add bold, bright color to your images. Look for colorfully painted storefronts, boats, gardens, cars, buses, apartment buildings, and so on to add interest to your pictures.
If the area turns out to have a distinctive color in the scenery or in architecture, try using the color as a thematic element that unifies the images you take in that area. For example, the deep burnt-orange colors of the southwest U.S. can make a strong unifying color for vacation images.
Watch for details and juxtapositions of people, bicycles, and objects with backgrounds such as murals and billboards. Also watch for comical or light-hearted encounters that are effective in showing the spirit of a place.


Figure 7.67. Colorful parades and demonstrations such as this one in Toronto, Canada, offer great photo opportunities during your travels.
Table 7.24. Travel Photography
Setup | In the Field: For the picture shown in figure 7.67, the objective was to find a shooting position that allowed the photographer to capture the colorful costumes without distracting background elements. |
Additional Considerations: In many cases, you want to choose locations that are iconic, or classic, and try different positions, angles, or framing to show the location to give a fresh perspective on a well-photographed area. Include people in your images to provide an essence of the location. Narrow the scope of your image so that you present a clear story or message. Always ask permission to photograph local people. Even if you don't speak the language, you can use gestures to indicate your intent and question. | |
Lighting | In the Field: This image was taken on a moderately sunny day. |
Additional Considerations: Inherently, light for travel photos runs the full range. The trick is to know when to shoot and when not to shoot. Ask yourself if the existing light is suited for the subject. If it isn't, wait for the light to change or come back at a different time of day when the light is more appealing. Often, just waiting for a cloud to pass by offers enough diffusion to make a better picture. | |
Lens | In the Field: Canon EF 24–105mm, f/4.0L set to 45mm. |
Additional Considerations: Your lens choice depends on the scene you're shooting and your distance from it. Use a telephoto zoom lens to bring distant scenes closer and a wide-angle lens to capture large scenes such as festivals and fairs or to include environmental context for people shots. | |
Camera Settings | In the Field: Aperture-priority AE mode. The white balance was set to Daylight. |
Additional Considerations: To control the depth of field, choose Aperture-priority AE mode and set the white balance to the type light in the scene. | |
Exposure | In the Field: ISO 100, f/13, 1/400 sec. |
Additional Considerations: Set the ISO as low as possible given the existing light. If you're photographing people of the area, use a wide aperture such as f/5.6 to blur the background without making it unreadable. Watch the shutter speed in the viewfinder to make sure it isn't so slow that subject or hand motion doesn't spoil the picture. |
Do your homework. The more study you do before you travel, the better understanding you'll have of the people and area, and the better your pictures will be.
Be cautious about deleting images. As your trip progresses and you fill your memory cards or portable storage unit, you may be tempted to delete pictures to free up storage space. Be very careful in deleting pictures that you haven't seen at full size. You can easily delete images that could be the best of the trip with a little editing.
Keep an eye on your equipment. Digital cameras are extremely popular, which makes them a target for thieves. Be sure to keep the camera strap around your neck or shoulder and never set it down and step away. This sounds like common sense, but you can quickly get caught up in activities and forget to keep an eye on the camera.
Use reflectors. Small, collapsible reflectors come in white, silver, and gold, and they are convenient for modifying the color of the light. They take little space and are lightweight.
Don't take too much equipment. Carry just enough to fill your camera bag and ensure that the camera bag will pass airline requirements for carry-on luggage.
Just as with sunset and sunrise, weather and the events it brings create compelling photography subjects. Whether you photograph rain, snow, a stormy cloudscape, or fog, you can use the weather to set the mood of the image, to add streaks of falling rain or snow, and to show classic human and animal reactions to the weather.
A variety of techniques are effective in weather photos, but the first consideration is to protect the camera from moisture and dust. Many companies sell affordable weatherproof camera covers, and they are well worth the price. Or you can fashion your own covering from water-repellant fabric or from a large plastic bag. Keep the covering in your camera bag to use in case there's an unexpected shower or snowfall.
Many of the techniques covered in earlier sections in this chapter can be used when you're taking weather photos. The following sections detail some tips for shooting in specific types of weather.

Figure 7.68. Early spring fog set the scene for this image. Taken at ISO 100, f/10, 1/40 sec. using a Canon 24–105mm f/4.0L IS USM lens set to 105mm.
You can choose to freeze the motion created by falling rain or snow by using a fast shutter speed. Conversely, you can show the rain or snow as streaks by using a slow shutter speed of 1/30 second or slower. The slower the shutter speed is, the longer the streaks. Try to choose a medium to dark background to help show the rain or snow streaks best.
Fog adds a sense of mystery and intrigue to a scene, but because the moisture in the air decreases sharpness, it enhances the soft, mysterious atmosphere of the image. Fog varies in color from light gray to almost white. Exposing fog scenes can be tricky. Meter for the subject, and to ensure accurate color, try using a custom white balance.
Note
Custom white balance is a simple process of shooting a white object that fills the viewfinder, selecting the image so that its white balance data is imported, and then setting the camera for custom white balance. For more on setting a custom white balance, see Chapter 2.
Regardless of where you live, the first snow of the season has the magical quality that brings almost everyone outdoors to enjoy it. Snow, like large expanses of dark water, fools the camera meter. To get beautifully white snow, override the camera's tendency to underexpose the snow by setting a +1 to +2 exposure compensation.
Huge, heavy, looming clouds with deep, rich colors are a favorite subject of photographers everywhere. When storm clouds begin forming, grab the EOS 30D and head to your favorite shooting location with a wide-angle lens. Find a good foreground object and let the storm clouds lead the eye to the object. As the clouds grow darker, press the AE Exposure compensation button and turn the Main dial to −1/3 or −1/2 compensation to avoid overexposed images.
Although weather can often make a stand-alone subject, photographing how the weather affects people, plants, and animals is lots of fun. In rain scenes, look for people with umbrellas, wet animals, rain-beaded flora and fauna, or a farmer in a field looking up at the ominous clouds.
Also look for contrasts that underscore the weather. For example, you may find a pair of summer flip-flops frozen solidly to a deck or rain collecting on cacti.


Figure 7.70. Weather can be photographed in its own right, and it can become a dramatic backdrop for images.
Table 7.25. Weather and Seasonal Photography
Setup | In the Field: The image in figure 7.70 is one in a series of images that captured this cruise ship as it crossed Lake Washington. The dramatic line of clouds provided a nice backdrop that complimented the overcast conditions and rough lake conditions. |
Additional Considerations: Watch the weather forecast to get a sense of when good weather photos might happen. Then watch the skies for dramatic cloud formations. Show images of how the weather affects people, buildings, and the flora and fauna. | |
Lighting | In the Field: This image was taken in overcast light. |
Additional Considerations: Extremes in light characterize weather and seasonal photography and can provide priceless opportunities as shafts of light break through forested hillsides, fog-covered landscapes, and, of course, illuminate rainbows. Watch carefully for the best opportunities to capture scenes with spectacular light. | |
Lens | In the Field: Canon EF 70–200mm f/2.8L IS USM lens set to 170mm. |
Additional Considerations: Your lens choice depends on the scene you're shooting and your distance from it. Use a telephoto zoom lens to bring distant scenes closer and a wide-angle lens to capture expansive scenes. | |
Camera Settings | In the Field: Aperture-priority AE mode. The white balance was set to auto (AWB). |
Additional Considerations: You want to control the depth of field, so choose Aperture-priority AE mode and set the white balance to the type light in the scene. | |
Exposure | In the Field: ISO 100, f/11, 1/250 sec. |
Additional Considerations: For most weather photos, an extensive depth of field is the ticket. Set the aperture at f/8 or f/11, and use a tripod if the shutter speed is slower than say 1/30 second. | |
Accessories | Having a tripod handy is a good idea for weather photos. Light can vary tremendously, and in lower light scenes, a tripod is necessary for slower shutter speeds. |
Use contrast to your benefit. Take advantage of the extra-saturated color that overcast and rainy weather provides by including color-saturated flowers and foliage in your weather images.
Get the best color from your image. To photograph a rainbow, set the EOS 30D to ISO 100, press the AE Exposure compensation button, and set a −1 to −1.5 compensation to deepen the colors.
Know your weather. Veteran storm chasers and weather photographers emphasize the importance of learning as much as possible about weather and observing how the sun strikes different types of clouds.
Don't put the camera away when the weather clears. Use the time after a rain shower to capture the sparkle on freshly washed streets and buildings.
Today's wedding photographer is more likely to be an ace at applying a photojournalistic shooting style coupled with a little cutting-edge fashion shooting — all mixed with a little traditional portraiture for good measure. And, for some of the top wedding photographers, the goal of every wedding is to produce fine-art imagery that will stand on its own years from now as a classic fine-art photograph.
These are lofty goals for a shooting specialty that can be marked with the height of human stress compressed in a small but charged space, and holds the potential for every heart-stopping disaster that can happen in photography from malfunctioning gear to a missing or inebriated bride or groom.
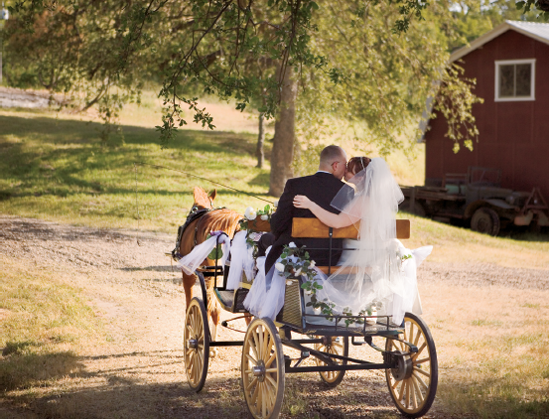
Figure 7.71. A late afternoon carriage ride made a great photo opportunity to round off this couple's wedding images. Taken at ISO 100, f/2.8, 1/1500 sec. using a Canon EF 24–70mm, f/2.8L USM lens set to 70mm.

Figure 7.72. The 30D's focal length multiplication factor brings the couple close. The exposure for this image was ISO 100, f/8, 1/80 sec. using a Canon 24–105mm f/4L IS USM lens set to 105mm.
Despite any wedding or equipment snafus, the wedding photographer has to put on a smiling face and roll with the flow. And the bulk of wedding work happens after the couple has flown away to an exotic location for their honeymoon. It's then that the wedding photographer processes and edits the images, creates the first-cut selections, and compiles the proof books. Many wedding photographers laugh when people assume that they work only on weekends because they know that not only do they put in 6- to 12-hour days on every weekend, but they also spend days afterward sorting and preparing images for the couple to review.
Following the advice of top wedding photographers such as Meg Smith, think of making every wedding image strong — not just as a wedding image in the traditional sense, but as a strong photograph. As with other specialty areas, think through what your voice and look is or would be for wedding photography.

Figure 7.73. Detail shots such as this are an important part of the wedding book. Taken at ISO 100, f/2.8, 1/180 sec. using a Canon 24–70mm f/2.8L USM lens set to 72mm.
Think of how you can incorporate themes into the wedding that tie in with either decorations or the couple's interests.
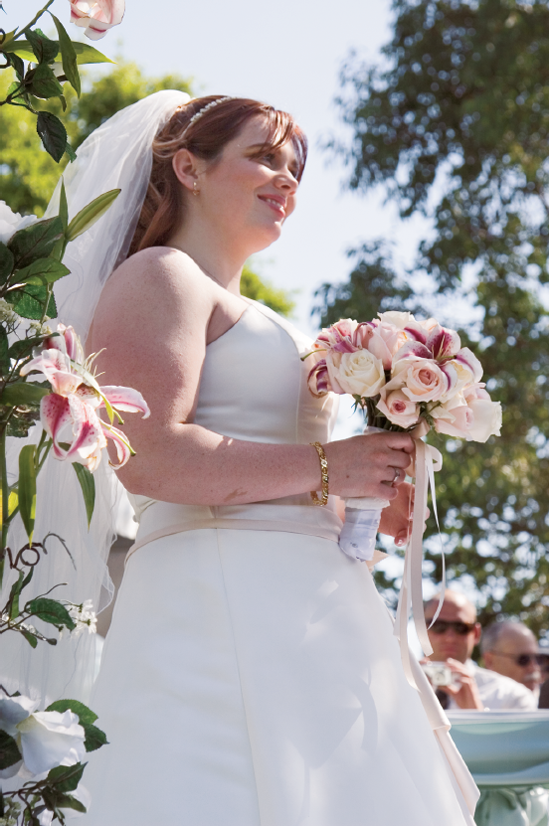
Table 7.26. Wedding Photography
Setup | In the Field: Due to limited shooting positions as the couple waited for the ceremony to begin, I took a low shooting position to stay out of sight of guests as shown by the angle of figure 7.74. |
Additional Considerations: Before the ceremony begins, scout out shooting positions and leave something on a seat to reserve it. Some couples do not want the ceremony photographed and others want it photographed but without the use of flash. Be sure you know the couple's wishes and requirements before the ceremony begins. | |
Lighting | In the Field: Bright mid-afternoon sunlight was the rule of the day for this wedding. |
Additional Considerations: If possible, work with the bride and bridal consultant during the early planning stages to plan where the wedding party will stand, in an outdoor venue, for example, so that the light is optimal for images. | |
Lens | In the Field: Canon EF 24–105mm f/4L IS USM set to 67mm. |
Additional Considerations: Your lens choice depends on the scene you're shooting and your distance from it. Use a telephoto zoom lens to bring distant scenes closer and a wide-angle lens to capture expansive scenes. | |
Camera Settings | In the Field: RAW capture, Aperture-priority AE mode. |
Additional Considerations: You want to control the depth of field, so choose Aperture-priority AE mode and set the white balance to the type light in the scene. | |
Exposure | In the Field: ISO 100, f/5.6, 1/500 sec. |
Additional Considerations: In most wedding venues, sections of the wedding such as the ceremony, the dinner, and the dance occur in lighting that is consistent for the duration of the event. As a result, you can often set the exposure and shoot with it throughout the event, unless you want to change the depth of field for specific images. | |
Accessories | Having a tripod handy is a good idea for wedding photos, but a tripod limits your ability to move quickly, and it requires more shooting space that may not be readily available. A monopod is another good option. |
Look at the big picture, and understand what you are getting into. Take wedding photography very seriously. In many ways, this is the most important day of someone's life.
Always have backup gear. Most wedding photographers not only carry two bodies as they work, but also in the gear bag are duplicates of critical pieces of equipment so that they can keep shooting regardless of breakdowns. Renting spare camera bodies, lenses, flash units, and tripods is often the most economical strategy.
Plan for the worst. Ask exhaustive questions ahead of time such as whether the church or location allows flash or whether the couple wants flash for certain parts of the wedding festivities. If the wedding is outdoors, ask what alternate location the couple will use if the weather turns bad, and plan for lighting in both locations. The list of questions is almost endless, but pre-planning pays big dividends on the day of the ceremony.
Hone your amateur psychologist skills. You may need to be a good amateur psychologist as well as a good photographer, especially when dealing with disgruntled or divorced parents or an unhappy bride.