Lesson Files | Lessons > Lesson_12 > 12Academic Certificate FINAL.pages Lessons > Lesson_12 > 12Butterfly Garden Poster_FINAL.pages Lessons > Lesson_12 > 12Club_Roster.numbers Lessons > Lesson_12 > Monarch.jpg Lessons > Lesson_12 > Butterfly Photos |
Time | This lesson takes approximately 90 minutes to complete. |
Goals | Work with Poster and Certificate templates in Pages Add and subtract elements in a template layout Format and replace placeholder text Add project photos to your iPhoto library Adjust images for optimum appearance using iPhoto Send a Pages document via email Address multiple certificates using the Mail Merge command and a Numbers spreadsheet |
The classroom is a great place to integrate visually rich documents to help communicate with students. By harnessing Pages, an educator can quickly make posters, certificates, lab notes, and quizzes. Students can also use Pages for many word processing tasks, from simple essays to complex reports.

In this lesson, you will use two template projects for two typical classroom tasks: making a poster and generating a certificate for a school’s science club. You’ll also use iPhoto to refine and repair photos for use on the page. Even if you don’t need to make classroom materials, you will still explore useful page layout features in this lesson that allow you to create a variety of highly visual posters and documents.
Pages includes 11 Apple-designed poster templates, many of which are specifically intended for use in school-oriented activities. You’ll find starter templates for events like musicals, sporting events, science fairs, and community projects. These templates can be modified using your own photos and text. Let’s explore making a poster for a community project.
The Template Chooser is a great tool you can use to start your project by choosing a poster template that closely matches your needs. With a proper template in hand, you can choose the correct page size for your project and customize other print and design options. Let’s choose a starting template for your poster project.
If the Template Chooser is not already open, choose File > New from Template Chooser.
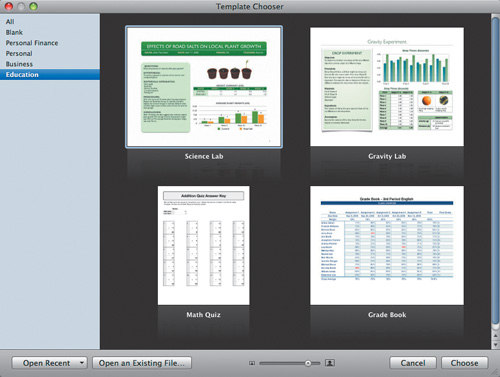
In the Template Chooser, from the Page Layout group, choose the Posters category.
Pages includes 11 starting projects in two sizes: small and large. If you’re working in inches, a small poster is 8.5 by 11 inches, the standard print size. Larger posters use tabloid-sized paper, measuring 11 by 17 inches. You can always modify the page size by opening the Document inspector and clicking the Page Setup button.
Click the Garden Project Poster Large thumbnail, and click Choose.
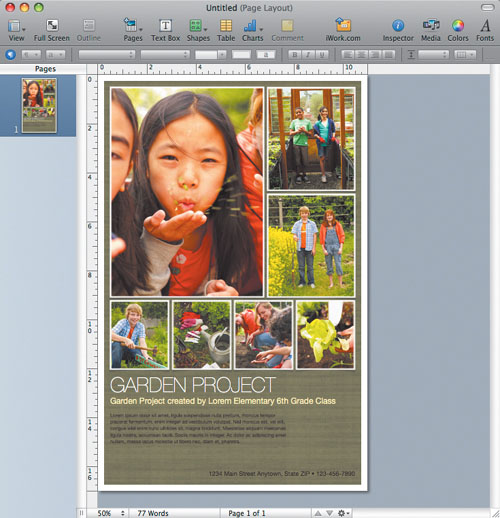
The poster opens, and some of its information, such as the address field, is already entered, based upon the default card in your Address Book.
Let’s see the entire document onscreen at once.
Click the View pop-up menu and choose Fit Page.

The entire page shrinks so it can fit in the Canvas window.
Now that you’ve opened the starting template, you can populate it with your own content. You’ll notice that the placeholder uses a standard text called “Lorem ipsum,” which uses several Latin words that are only there for layout purposes. This placeholder text is meant to give you a good idea of how the finished text will appear. You’ll want to fill in the document with your own information to customize it for your event.
Double-click the poster title (Garden Project) and replace the text with Butterfly Garden.
Replace the poster’s subtitle by clicking to highlight it, then typing Garden Project created by Lincoln High Science Club.

Now that the title and subtitle are suitable for your project, let’s fill in a few details about the event.
Double-click the large text box to select the entire placeholder text.
Type the following information into the poster template:
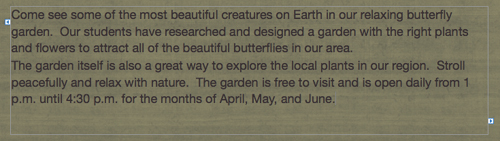
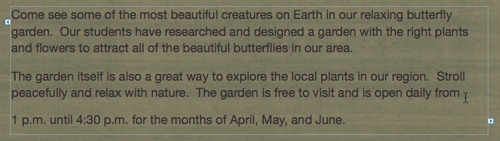
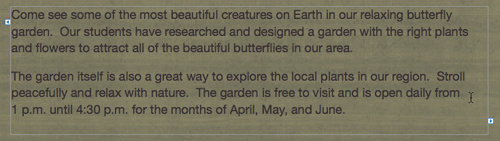
Come see some of the most beautiful creatures on Earth in our relaxing butterfly garden. Our students have researched and designed a garden with the right plants and flowers to attract all of the beautiful butterflies in our area.
The garden itself is also a great way to explore the local plants in our region. Stroll peacefully and relax with nature. The garden is free to visit and is open daily from 1 p.m. until 4:30 p.m. for the months of April, May, and June.
This text easily fits in the template but can be more attractively formatted. Let’s increase the spacing between the two paragraphs to fill up the text box and improve the separation between the two thoughts.
Press Command-A to select the text you just entered, then open the Text inspector and set the After Paragraph field to 12 pt.
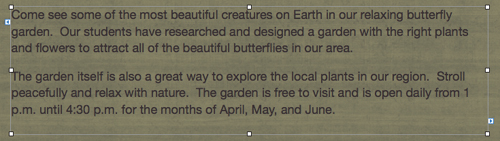
This automatically inserts 12 points of space between the two paragraphs. Let’s keep improving the text formatting. Look closely at how the time information is split across the last two lines. This makes the poster harder to comprehend at a quick glance.
In the second-to-last line, place the insertion point before the number 1.
Press Return to break the text to the next line.
Keeping the 1 and p.m. on the same line makes the text easier to read, but the extra space between the lines doesn’t look right.
Choose Edit > Undo to undo the previous step.
With the insertion point still located before the number 1, press Shift-Return to insert a line break.
The text is wrapped to the next line, and the correct spacing between lines is preserved.
Triple-click in the lower text box on the page to select all of the placeholder text.
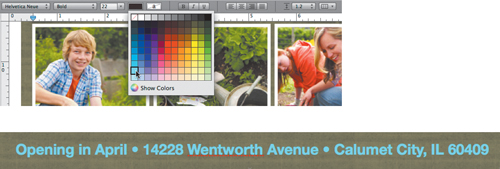
Enter the following information into the last field to indicate the address for the butterfly garden: Opening in April • 14228 Wentworth Avenue • Calumet City, IL 60409.

The text is looking good, but different formatting could help it to stand out.
Select all of the text in the address box.
In the format bar, click the Bold button to make the font bold.

In the format bar, click the Font Size field and enter 22 pt to enlarge the text.
Next to the Font Size field, click the Text Color well to change the text color. In the color matrix, choose a bright blue to make the text stand out more clearly.
Choose File > Save and name the poster Butterfly Garden Poster.pages.
You have finished adjusting the text in your poster. You’ll find that modifying text in future posters will be just as easy.
The current poster has several photos already placed in the layout. While you could use these pictures in your final poster, you’ll usually want to replace most media placeholders with your own photos.
This poster contains seven placeholder images. For this poster, you have only six photos you’ll want to use, so let’s adjust the layout.
Select the photo of the two children with the pitchfork.

Press Delete to remove the image.
The seventh photo is removed from the layout, but the deletion leaves a large gap in the layout that should be corrected.
Select the photo of the two children inside the greenhouse.
You can easily adjust the mask of the media placeholder to accommodate a different layout. Let’s make this photo tall and skinny to fill in the right edge of the poster.
Click the Edit Mask button.

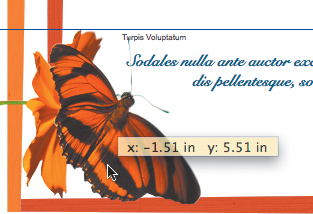
Click in the middle of the mask’s bottom edge and drag the selection handle down.
Size the mask so that it is 8.5 inches tall and matches the height of the largest image on the page.
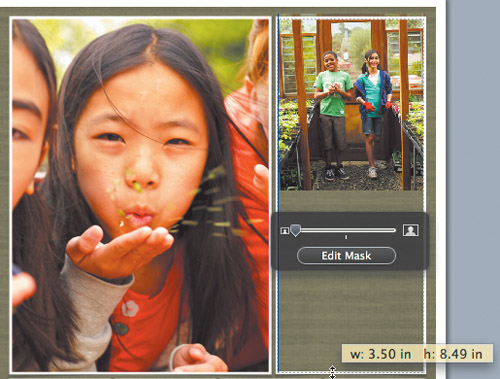
Drag the resize slider for the photo to make it larger, and then drag the image inside the masked area until it fills the frame.

Click the Edit Mask button to apply the mask.
Choose File > Save to save your progress.
You have successfully adjusted the page layout and are ready to insert your own photos.
One way to store images for use in Pages is to add them to your iPhoto library. iPhoto provides easy, flexible image-management tools. Let’s add your butterfly photos to iPhoto.
In the Finder, open the Lesson_12 folder.
Drag the Butterfly Photos folder onto the iPhoto icon in your Dock.
If it’s not open already, iPhoto opens. The photos are automatically loaded to an Event called Butterfly Photos.
Carefully examine all six photos for improvements that can be made.

You should notice that the first photo looks a little bright, the fourth looks too dark, and all of them are a little washed-out. You can use iPhoto to touch up all of your images.
Taking Pictures with the iSight Camera
In a classroom, you’ll often use a lot of photos. Conveniently, your Mac is a flexible tool that allows you to import photos from digital cameras or to digitally capture printed images with a scanner. Additionally, you can also locate websites that offer royalty-free photos for classroom use. What many users forget, however, is that computers like the iMac include a built-in iSight camera that can be used to capture photos.

If you are using an iMac or a Mac laptop, it probably has a built-in iSight camera. While the most common use for this camera is iChat video conferencing, it can also be used to take pictures. Using the Photo Booth application, you can easily capture still photos with the iSight or any digital video camera connected to your Mac.
In your Applications folder, open Photo Booth.
Choose the type of snapshot you want to take by selecting one of three buttons at the bottom of the Preview window:
Still Picture
Four Quick Snapshots
Movie Clip (which can be used in Keynote)
When you are ready to take a photo (or record a movie), click the red shutter button below the preview image.
Photo Booth performs a three-second countdown. If you’re taking a picture of a person, it’s time for him or her to smile. Otherwise, hold the object you want to shoot in front of the camera.
The screen flashes when Photo Booth takes the picture. If you’re recording a movie, be sure to click the Stop button to end the recording.
A thumbnail of the image is added to the bottom of the window.
You photos are automatically stored in a folder named Photo Booth, located in your Pictures folder in your home folder. You can open the folder by selecting a thumbnail and choosing File > Reveal in Finder. To delete a photo, select a thumbnail and press the Delete key.
When you’re finished, close Photo Booth.
Your pictures will automatically appear in the Media Browser. This method makes it easy to add an image to any Pages (or Numbers or Keynote) document. The pictures are not high-resolution images, so you should keep them small if you intend to print your document.
If a photo is shot in very bright conditions or with the lens pointed into a bright sky, the image may become overexposed. iPhoto can fix these problems with just a few clicks.
In iPhoto, select the first butterfly photo.
Click the Edit button.

The image opens to fill the window and is ready to be edited.
Click the Adjust button to open the Adjust window.
Drag the Exposure slider to the left to decrease the overexposed areas.
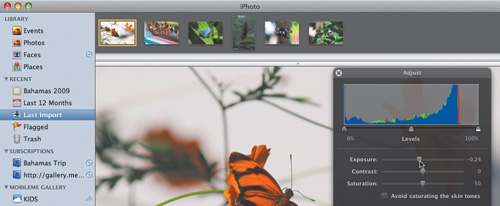
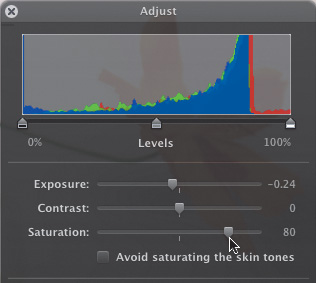
A value of approximately –0.25 works well for this image.
Drag the Saturation slider to the right to boost the color vibrancy in the image. Use a value of 80.
The image now has increased color intensity but lacks detail.
Select the “Avoid saturating the skin tones” checkbox to protect the reds from becoming oversaturated.
Note
This option is really designed to avoid saturation in skin tones. In this photo, the option works well because of the reddish-orange in the butterfly’s wings.
The image color looks good, but the image itself could be a little sharper. To fix this, iPhoto provides two types of commands.
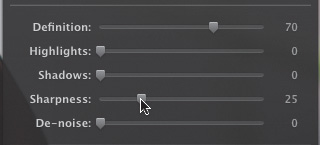
First, drag the Definition slider to the right to a value of 70.
The Definition command can improve clarity and reduce haze in your photos without adding too much contrast. Now let’s sharpen the image. Sharpening works best when you are viewing the image more closely.
Press the 1 key to view your photo at 100 percent.
A Navigation window opens to make it easier to view your image.
Drag the small rectangle so that you can see the butterfly centered in the window.
In the Adjust window, drag the Sharpness slider to the right until the image looks crisp. For this image, try using a value near 25.
Tip
If you want to compare the before and after states while sharpening, hold down the Shift key to see the original image. When you release the Shift key, you can see the adjusted image.
Congratulations! You have successfully enhanced the first photo, so let’s tackle another problem.
If a photo is shot in low light, you may find that it is underexposed. The best way to prevent this is to use a flash when taking photos. However, if you choose to fix underexposure after the fact, iPhoto can help.
Click the thumbnail of the butterfly and red flower.

This picture is too dark. Let’s correct its exposure.
In the toolbar, click the Enhance button to have iPhoto attempt to automatically fix the image.

In the Adjust window, you’ll see that the Levels, Saturation, and Temperature values have been adjusted for the image.
Drag the middle slider of the Levels controls to the left to increase the brightness of the image’s middle tones.
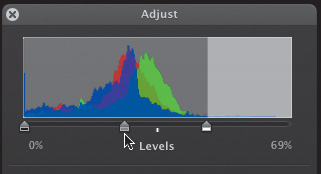
Adjusting the mid-tones makes an image appear brighter without washing out the dark areas or over-brightening the light areas.
Adjust the Definition and Sharpness controls using the techniques you learned in the previous exercise.
This photo’s exposure balance now looks much better, so let’s enhance the remaining images.
You can view more than one photo at a time in edit view, which makes it easier to compare images when making an adjustment.
Select the second photo thumbnail.
You’ll want to compare this with the three remaining photos.
Command-click the thumbnails for images 3, 5, and 6 to add them to edit view.

All four images now appear in edit view. The white outline indicates the photo currently being edited.
Click the first image in the upper left corner.
Click the Enhance button to automatically fix the photo.
Make any additional adjustments you desire using the tools in the Adjust window.
Click each of the remaining images and repeat steps 4 and 5 until you are happy with the photos’ appearance.
When finished, click the Done button to close edit view.
Choose iPhoto > Quit to close iPhoto and return to Pages.
Now that you have imported, organized, and enhanced your photos, you can add them to your layout. In iWork, you can access all of your iLife content using the Media Browser, including photos from iPhoto, movies from iMovie, and audio from GarageBand.
Note
If you choose not to fix your photos in iPhoto, you can make several essential adjustments within Pages in the Adjust Image window.
Let’s add your butterfly photos to your layout.
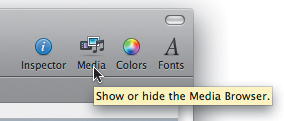
Click the Media button (or choose View > Show Media Browser) to open the Media Browser.
Click the Photos button to find photos.
In the Source list, click the disclosure triangle next to iPhoto to view all albums and Events.
Click Events to display only iPhoto Events.
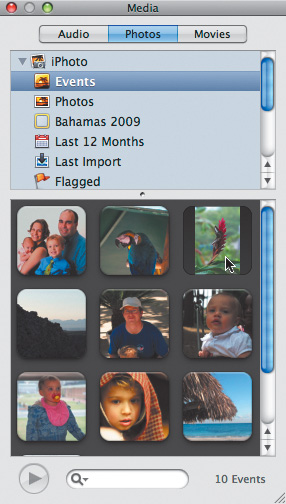
Double-click the Butterfly Event to open it and see only the butterfly images.
Drag the six images into the media placeholder areas one at a time.
Use butterfly photos 1 and 2 for the top two images; then use photos 3–6 for the bottom row. You can use the following figure as a guide.

After the photos are added, you can adjust the images’ masking and positioning to improve the layout.
Double-click the large butterfly photo.
Drag the slider above the Edit Mask button to enlarge the photo within the mask.
Click the image inside the mask and drag to reposition the photo within the mask’s edges. Use the following figure as a guide.

Adjust the five other images using the following figure as a guide.

Press Command-S to save your progress.
Congratulations—the poster is complete! In the next exercise, you’ll send the document to a local printing facility to create multiple copies.
Now that the poster is complete, you can distribute it via email. You might want to email it to multiple recipients so that they can print their own copies as needed. However, you might find that it is less expensive to use a dedicated printing facility or copy shop if lots of color copies are required. Fortunately, Pages helps you email the document as a high-quality, print-ready PDF.
Choose Share > Send via Mail > PDF.
A dialog may ask you to confirm the attachment of a large file.
Click Proceed to continue.
A PDF file is created in the background while Mail opens.
The new PDF file is attached to a blank message and is ready to send.

Address your message, and add a short note describing the document and providing any other appropriate information for the printer.
When you’re ready to deliver your message, click the Send button.
Awarding certificates to students is an excellent way to mark their progress toward an educational goal or to recognize a significant contribution of time or effort. Pages offers two templates that can be easily customized. In this lesson, you’ll design a certificate to honor the students who made outstanding contributions to the butterfly garden activity.
You can customize your certificate to tie it to the butterfly garden activity. By removing some template elements and adding others, you’ll create a themed certificate that commemorates a student’s participation in the program.
In Pages, choose File > New to open the Template Chooser.
In the Page Layout group, select the Certificates category.
Click the thumbnail for the Student Certificate template, and click the Choose button.

A new document based on the Student Certificate template opens. Let’s remove some unnecessary template elements.
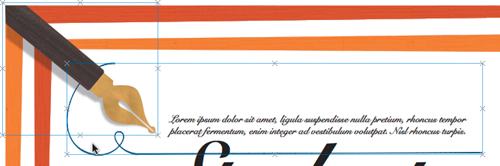
Click the pen graphic; then Shift-click the left edge of the line graphic, being careful not to select the text box.
The graphic items are selected, but they display X’s instead of the expected selection handles. This is because the elements have been locked to prevent accidental movement or deletion. To modify these elements, you must unlock them.
Choose Arrange > Unlock to release the selected elements for editing.
Press Delete to remove the elements from the certificate.
Above the word student, select the text box and press Delete to remove it.

Now that you’ve removed the unnecessary template elements, you will customize the page with new artwork.
Choose Insert > Choose.
Navigate to the Lesson_12 folder. Select the file Monarch.jpg and click Insert.

A butterfly image is added to the center of the page but covers part of the certificate. You can remove the white background so that the certificate can be seen using Pages’ Instant Alpha tool.
Select the monarch image, and choose Format > Instant Alpha.
Click the white background that you want to make transparent, and then drag slowly over it.

As you drag, the selection grows to include adjacent colors. You can control how much of the area is selected by dragging less or more.
Repeat the drag process as many times as necessary to remove all of the white background from the monarch image.
Press Return to apply the Instant Alpha effect.
Drag the selection handle to make the butterfly smaller, and position it in the lower left corner of the page. Use the following figure as a guide.
Choose File > Save to capture your progress so far. Name the document Academic Certificate.pages and save it to the Lesson_12 folder.
Now that your certificate has the correct look for your event, you can further customize it by replacing the placeholder text with your own text, working your way from top to bottom.
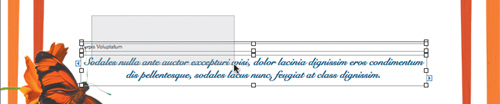
Select the Student of the Month text box and drag it up toward the top of the page.
Use the following figure as a guide for positioning. The goal is to balance the design across the certificate’s height.

Now widen the text box so that it can accommodate more text.
Option-drag the selection handle at the side of the text box until the box is as wide as the image frame.
Holding down the Option key while dragging scales the box in both directions at the same time. This keeps the box centered as you resize it.
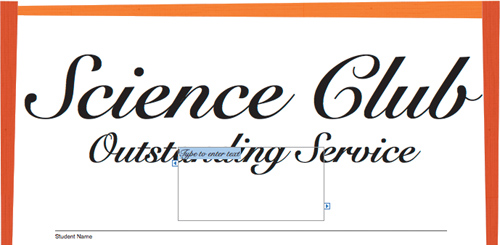
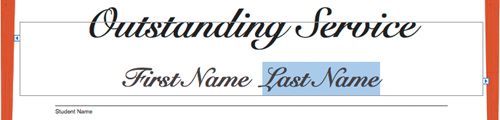
Replace the word Student with Science Club; then replace the words of the Month with Outstanding Service.

Click in an empty area of the certificate; then drag to select the next three elements (two text boxes and a line).
If you click incorrectly on an element, you can Command-click a single element to add it to, or remove it from, your selection.
Press Shift–Up Arrow to implement a supershift that moves the selected items up 10 pixels at once.
Press Shift–Up Arrow three more times to nudge the items up.
Select the text and the line next to the date, and press Delete to remove them.

Click the date field to select it and display the selection handles.
Drag the selection handle to the left to increase the size of the date field.

Double-click the date text to select it. In the format bar, click the Right alignment button.
The text now stays aligned with the right edge of the text box. You can set the date field to insert the current date whenever the document is opened. The current date will be automatically added whenever the certificates are printed.
With the placeholder date selected, choose Insert > Date and Time.
The current date is added to the text box.
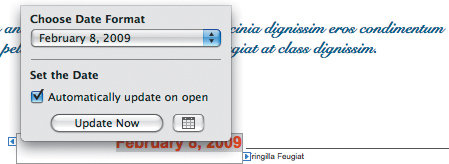
Double-click to select the date.
The Date Format window opens.
From the Choose Date Format pop-up menu, choose the Month, Day, Year format and select the “Automatically update on open” checkbox.
You’re almost done—your last task is to adjust the remaining placeholder text.
Double-click the first placeholder text (Turpis Voluptatum) to select it, and type Student Name.
Double-click the large box of blue cursive text to select it, and type For outstanding service and leadership, as shown in the development of Lincoln High School’s Butterfly Garden project.

The text looks good, but the school’s name breaks across two lines, which doesn’t look as professional as it might.
Place the insertion point before the word Lincoln and then press Shift-Return to add a line break.

Double-click the first placeholder text (Fringilla Feugiat) to select it, and type Faculty Advisor.
Choose File > Save to save your progress.
Now that the certificates are designed, let’s add the students’ names. Instead of addressing the certificates one at a time, you can perform a mail merge to customize the name line. In Lesson 9, “Building a Report,” you performed a merge using the Address Book application. In this lesson, you’ll merge information from a Numbers spreadsheet containing the roster of the Lincoln High School Science Club.
Your first step is to add a text box that will contain the name of each student.
In the toolbar, click the Text Box button to add a new placeholder text box to the page.
Format the text box so that it matches the rest of your certificate.
In the format bar, click the Bold button and change the point size to 36 pt. Then click the Center alignment button.
The text box must be resized.
Click outside the text box to deselect the placeholder text; then click the box to select it.
Drag the selection handles so that the text box matches the width of the student name line.
Open the Text inspector and click the Bottom alignment button.
Let’s add two merge fields to use when addressing the certificates.
Double-click the placeholder text and press Delete to remove it.
Choose Insert > Merge Field > Name > First Name.

Pages adds a special text field that can merge data from a Numbers spreadsheet or Address Book.
Press the Right Arrow key to deselect the merge field; then press the Spacebar twice to add spaces between the first and second text fields.
Choose Insert > Merge Field > Name > Last Name.
You are now ready to complete the merge. Let’s first explore the Numbers document.
Go to the Finder and open the Lesson_12 folder.
Double-click the file 12Club_Roster.numbers to open the Science Club’s membership roster.
Numbers opens, along with the roster spreadsheet.

Closely examine the spreadsheet, especially the First Name and Last Name columns.
It is essential to keep the first names and last names in separate fields for easy sorting.
Close the spreadsheet and return to Pages.
Choose Edit > Mail Merge to perform the merge.
Choose Numbers Document.
The file-browser window opens.
Navigate to the Lesson_12 folder and select the file 12Club_Roster.numbers and click Open.
Click the disclosure triangle next to Merge Fields, and verify the Merge Field and Target Name pairings.

Pages correctly matches the Merge Fields and Target Name pairings because the Numbers dialog uses an identical format.
In the “Merge to” pop-up menu, choose Send to Printer to print a certificate for each student.
Click Merge to open the Print dialog.
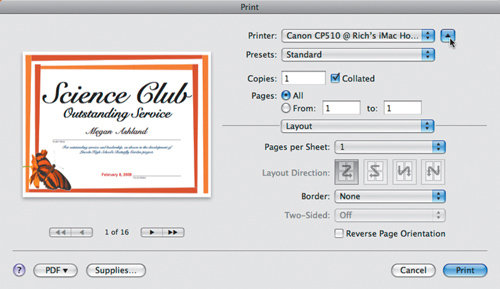
Click the disclosure triangle near the Printer pop-up menu to display advanced printing controls.
Pages indicates that it will create 16 certificates.
Click the next arrow to preview each certificate that will be printed.
If you were ready to print, you’d click the Print button. Because this is a practice exercise, you probably don’t want to print 16 copies of the certificate.
Click Cancel to cancel the printing process; then click Cancel again.
Close the document and save your progress.
Other Classroom Options
Both Pages and Numbers offer additional timesaving templates. Be sure to explore the following templates and categories in each application.
<division> <title>Pages</title>The following Pages templates are useful in the classroom:

Reports—. Students can create reports that combine text and graphics.
Word Processing Miscellaneous—. Teachers will find two templates in the Word Processing Miscellaneous category: The Evaluation and Quiz templates can be used to help assess student performance.
Page Layout Miscellaneous—. The Miscellaneous category for Page Layout offers Lab Notes and Scrapbook templates for collecting data and memorabilia, respectively.
Flyers and Posters—. Several more templates are available, including flyer and poster templates suitable for promoting school events.
The following Numbers templates are useful in the classroom:
Personal—. In the Personal category, you’ll find several templates for comparing and organizing data. Try using the Team Organization template to track a school sports team. The Comparison template is a great way for students to compare two items in a personal finances exercise.
Education—. Numbers offers four templates specifically intended for classroom use. Two templates are useful for tracking lab experiments. The Math Quiz template can quickly create quizzes for addition, subtraction, multiplication, or division, and assign higher or lower point values for each problem. The quiz also generates an answer key for quick grading. The Grade Book template is ideal for tracking student performance and progress.