Lesson Files | Lessons > Lesson_11 > 11Catering_Menu Start.pages. Lessons > Lesson_11 > New Menu Items.pages Lessons > Lesson_11 > 11Band_Flyer Start.pages Lessons > Lesson_11 > Food Shots Lessons > Lesson_11 > The Nadas |
Time | This lesson takes approximately 60 minutes to complete. |
Goals | Add assets to the Media Browser Modify masked images Group and edit objects Format hyperlinks Link text boxes Wrap text around an object Add connection lines between two objects Add sound files to a Pages document Save a flyer as a template |
One of the major benefits of Pages is its design flexibility. Supporting a wide range of graphic formats and Apple-designed templates, Pages makes it easy to create and customize media-rich content, such as marketing brochures and flyers.
Brochures are a convenient medium for conveying a lot of information in a well-organized layout. They are also relatively inexpensive to manufacture because they often use common paper sizes. Flyers, on the other hand, tend to display less information, but do so in a highly visual manner. Flyers are meant to quickly catch the eye and entice the viewer to action.
In this lesson, you’ll complete the designs for a marketing brochure and flyer using several advanced controls in Pages. You will learn how to build your own library of assets and will design professional-looking printed marketing items.
One way to speed up the Pages design process is to gather the images you’ll use and place them close at hand. By default, the Media Browser provides access to all the media files in your iPhoto library, your iTunes library, your Aperture library, and your Movies folder.
Although the default media libraries on your Mac are readily available, you can customize the Media Browser to temporarily add a folder of project media from your hard drive without importing the images. By adding a folder to the Media Browser, you can use drag and drop within Pages.
Choose View > Show Media Browser to open the Media Browser.
As you are customizing the Media Browser, you’ll want to precisely arrange the windows to suit your workflow.
Switch to the Finder and select the Lesson_11 folder.
Position the folder so that it is not obscured by the Pages application.
Return to Pages.

In the Media Browser, click the Photos button and then drag the Lesson_11 folder from the Finder into the Media Browser.

Two folders of images are added to the Media Browser. Let’s add some audio files that you’ll use later in the lesson.
In the Media Browser, click the Audio button and drag the Lesson_11 folder from the Finder into the Media Browser.
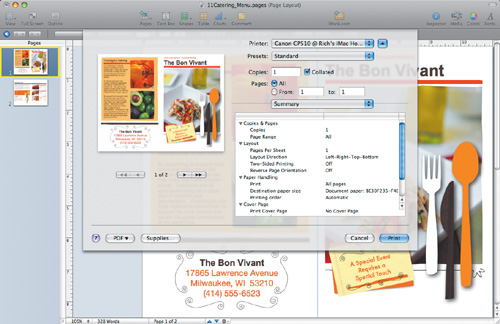
Brochures can be printed inexpensively and then left on counters or packed with purchases. The brochure is a popular and affordable tool for explaining services or products to your customers. Pages includes several brochure templates. In the next exercise, you’ll start your brochure with a partially built document.
In this brochure, you’ll find several images with custom masks. The original designer drew a custom shape and then used that shape to mask the photo. A great feature of Pages is that the custom masks remain editable, so you can further modify their appearance. Let’s add an image to the layout and give it a unique border.
Click the thumbnail for page 1 to select it.
Click the pepper image on the left-hand page to select it.
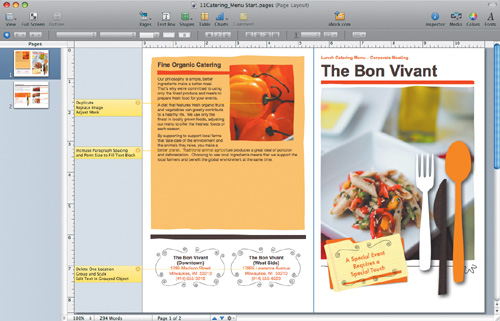
Let’s create a duplicate of the image to fill out the page.
Option-drag a duplicate of the pepper image directly below the first. Use the alignment guides to help you align the duplicate with the original image.

A duplicate that can be customized is placed on the page.
In the Media Browser, click Photos and select the Food Shots folder. Select the image Back Cover 2.jpg (a picture of avocados) and drag it onto the second peppers image.
Now that the avocados image is placed, you can modify its mask so that it looks different from the image above.
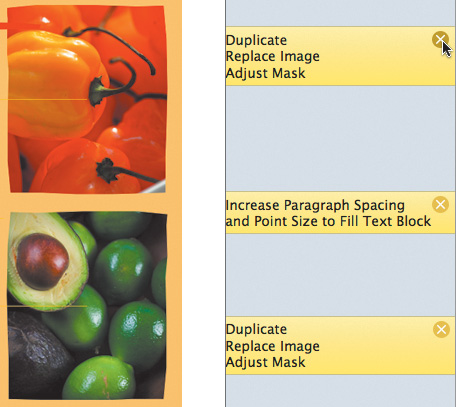
Click the Edit Mask button. Pages displays the mask as a series of red dots that indicate the points drawn with the custom shape tool.
These points can be dragged to new positions if you’d like, but they can also be quickly modified using the Metrics inspector.
Open the Metrics inspector.
Click the Flip Horizontal button to create a mirror image of the mask.

Now let’s rotate the mask 180 degrees so that it looks even more different. The current mask already is rotated 90 degrees, so the new value is 180 degrees plus 90 degrees, for a total of 270 degrees.
Enter 270 into the Angle field.
The custom mask now looks substantially different.
Click the Edit Mask button to stop editing the mask.
Close the two comments with the instructions about modifying the images.
Name the file 11Catering_Menu.pages and save it to the Lesson_11 folder.
One objective of professional design is to have a clean layout of text without any extraneous space. The current page looks good, but filling out the text box would make the page more balanced. Instead of adding more words, let’s format the text to improve its readability.
First, adjust the size of the text.
Double-click in the large text box on the first page.
Press Command-A to select all of the text.
A blue highlight indicates all of the selected text. Let’s make the text bigger.
Press Command-+ (plus sign) two times to increase the size of the text by 2 points.

The text almost fills the box. You can now adjust the space between each paragraph to further refine the layout of the text box.
Increase the space between paragraphs by entering 12 in the After Paragraph field and press Return.

The text now fills the text box properly.
Close the comment about the text box.
Choose File > Save to save your work.
If you have a complex layout comprising several objects, grouping can make them easier to handle. In this document, you’ll see two sets of addresses at the bottom of the first page as well as several graphic flourishes. The restaurant has stopped offering catering at the Madison Street location, so let’s modify the brochure to remove that address.
Click at the top of the left address and drag on the canvas to select all of its elements.

Press Delete to remove the address and its graphics.
Now that the one address is gone, the other should be scaled and modified to balance the page design. By grouping the floating objects together, you’ll find it easier to move and resize the address as a single object.
Click at the top of the address and drag on the canvas to select all of its elements.

Choose Arrange > Group to combine the objects into a single, editable object.
Drag the selection handles to scale the image to a height of 2.00 inches. Position the object so that it is centered horizontally on the page. You can use the alignment guides for assistance.

The size looks better, but the text is now too small to properly match the graphic flourishes. The text also should be edited. Fortunately, you can edit text inside a group without ungrouping it.
Click within the grouped object to edit the text.
Delete the text (West Side) from the text box. Be sure to remove the empty line break.
Press Command-A to select all the text in the block.
Press Command-+ (plus sign) to increase the point size 1 point for each press. Press the key combination nine times to achieve the desired effect and complete the first page.

Choose File > Save to save your work.
You have completed the first page of your brochure layout. By combining the controls of the inspector with advanced commands, you precisely edited the content on the page. Let’s switch to the second page to finish your brochure.
When designing page layout documents, it is common for text to flow from one area of the page to another (or even onto a second page) to accommodate a long story or a design objective. If you have more text than will fit in a single floating text box, you can create a linked text box and configure text to flow from one text box to the next. The advantage of using this technique is that you can easily edit the text in all of the boxes at one time.
Your brochure design has three featured items on the right of page two. Every time the menu is updated, different items are added. The photos have already been placed, so let’s quickly add the text to all the boxes at one time.
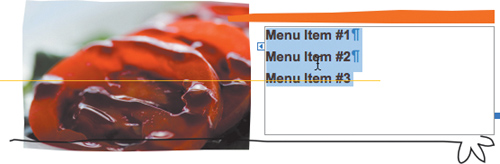
Click the thumbnail for page 2 to select it, then click in the first text box (containing Menu Item #1) to select it.
Let’s link to the next text box.
Click the blue square on the right side of the text box.

The pointer changes to a plus symbol and prompts you to click another text box on the page.
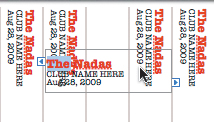
Click the next text box on the page for Menu Item #2.

Pages shows a blue connection line to indicate that the boxes have been linked.
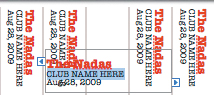
Let’s connect the third text box.
Click the blue square on the right side of the second text box; then click the third text box (labeled Menu Item #3).
Now that the text boxes are linked, let’s insert the menu descriptions.
Double-click the first linked text box and press Command-A to select all the text.
Press Delete to remove the placeholder text.
Note
To break a connection between linked text boxes, choose Format > Text Box > Break Connection into Text Box, or Format > Text Box > Break Connection out of Text Box. You can also drag the connection line from the blue square to break the link.
Let’s add more text.
From the Lesson_11 folder, open New Menu Items.pages.
Select all of the text in the document and choose Edit > Copy.
Return to the catering menu.
Click in the first text box and choose Edit > Paste.

The added text automatically flows from the first text box through the other linked text boxes.
Delete the comment about linking text boxes.
Choose File > Save to capture your work.
Note
You can link text boxes at any time. If a plus symbol appears at the bottom of a text box, it means you have overflow text. You can choose to expand the current text box or to link it to another text box. Linking is a great way to solve layout problems as it lets you continue to overflow text to another part of the page or to another page altogether.
Your brochure is almost finished,—all that is left is to format an email address to make it interactive in its PDF version.
One way to make a brochure drive customers to your business is to add interactive links. When you save a brochure as a PDF, you can include web links or email addresses that allow clickable action. To do this, you’ll use the Link inspector.
In the leftmost page, locate the email address [email protected].
Select the full email address.

Open the Link inspector.
Select the “Enable as hyperlink” checkbox.
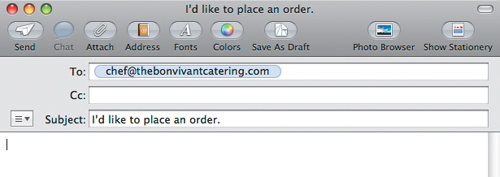
The inspector automatically sets the Link To pop-up menu to Email Message and addresses the To field because you highlighted a properly formatted email address.
In the Subject field, enter I’d like to place an order.

Now, when a customer clicks the link, her email program will open and create a new message addressed to the catering department with a complete email address and subject line.
Delete the final comment.
Press Command-S to capture your work.
You can compare your work to the file 11Catering_Menu End.pages.
Close the brochure document.
A flyer is a common promotional tool that provides a cost-effective way to promote an event, cause, or product. Flyers are best used when promoting a single item because they are most often only quickly glanced at.
Tip
Pages includes pull-tab flyer templates, which feature removable tabs along the bottom. After printing, you should cut a short distance vertically (use the thin line for guidance). This makes the pull tabs easier to rip off. A pull tab is a great way to let a passerby get a phone number or web address for future follow-up.
You will use Pages to create a flyer to promote a band called the Nadas. The flyer is partially designed but could use some additional work. When the flyer is complete, you can save it as a template so that it can be quickly updated in the future.
Choose File > Open.
Navigate to the Lesson_11 folder.
Select the file 11Band_Flyer Start.pages.
Click Open.

Pages opens the mostly completed flyer.
When you add an image to a page, you can choose to flow text around the object. Let’s add the CD cover for the band’s latest release to the page.
In the Media Browser, select the Lesson_11 folder.
Select the image Almanac_Cover.jpg.
Drag the CD cover to the page near the bottom right corner of the bulletin board.

The photo is added to the page. Let’s adjust it so that the text wraps around the cover image.
In the format bar, click the Wrap button and choose the first wrap option.
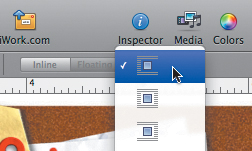
The text wraps around the top, bottom, and left edges of the object.
In the Metrics inspector, enter a width of 2.5 in (inches) to precisely size the cover image.
Position the image on the page so that it fits in the right corner, without affecting any of the pull tabs.

Let’s add and format a picture frame so that the CD cover looks like another item on the bulletin board.
In the format bar, click the Line Style button and choose the pushpin-style frame.
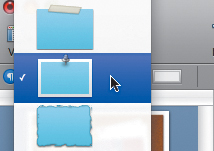
It looks right stylistically, but the border is a bit thick and the pushpin is too large compared with the other pin on the board.
Open the Graphic inspector.
Drag the scale slider to 50% to shrink the border and the pushpin. Your CD cover is almost complete. Let’s help it stand out a bit so that the white border and white paper are separated.
In the Graphic inspector, select the Shadow checkbox.
In the Metrics inspector, rotate the image to 354° so that the picture looks angled like others on the bulletin board.
Reposition the album cover if necessary.

Choose File > Save As.
Name the file 11Band_Flyer.pages and save it to the Lesson_11 folder.
Your final design is under way. Let’s connect the album cover with the callout for the iTunes store.
If you want to place a line between floating objects, iWorks offers an easy way to do so called a connection line. The new line stretches between the objects even if you reposition them. Additionally, the line can be stylized to make it appear as a hand-drawn element on the page.
Let’s connect the album cover to your “call to action” graphic.
Verify that the album cover is still selected.
Command-click the tag graphic at the top of the page.
When both objects are selected, choose Insert > Connection Line to add the connection line.
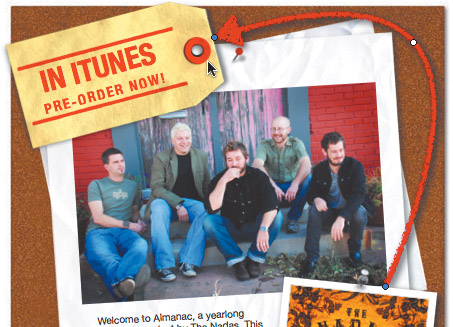
Pages adds a thin black line between the objects. Let’s modify it to match other elements in the flyer. First, curve the line so that it arcs around the photo of the band.

Drag the white editing point near the center of the line to the right, using the preceding figure as a guide. Now that the line is curved around the photo, let’s stylize it to match the flyer design.
In the format bar, click the line style button and choose the first rough stroke.

In the format bar, change the line width to 10 pt.
Change the line color to red.
Tip
You can use the magnifying glass in the Colors window to choose a shade of red already present on the flyer.
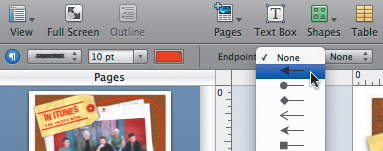
Let’s add an arrowhead to guide the reader’s eyes.
In the format bar, click the first Endpoints pop-up menu and choose the first arrowhead. If you want, you can drag the blue dot at the end of the line to offset the arrowhead.
Let’s make the arrow stand out a bit more dimensionally.
Select the Shadow checkbox to add a drop shadow to the line.
Choose File > Save to save your work.
The flyer is almost complete. Let’s make just two small enhancements.
When designing marketing materials, you will often want to perform small updates to text (such as a time, location, or date). Pages makes it easy to insert placeholder text that can be easily replaced or updated.
Double-click the center pull tab to edit its text. The text box rotates 90 degrees for editing.
Highlight the second line of text.
Choose Format > Advanced > Define as Placeholder Text.
The text can now be easily replaced just like the placeholder text you worked with in a Pages template. Let’s format the date to automatically update when the document is opened.
Double-click the date located on line three of the pull tab.

In the date format window, select the “Automatically update on open” checkbox.
The date will now change to the current day when the document opens. Let’s copy the text in this pull tab and use it to replace the others.
Click inside the current text box and press Command-A to select all the text.
Choose Edit > Copy.
Double-click in the first text box and press Command-A to select all the text.
Press Command-V to paste the text from your Clipboard.
Repeat steps 8 and 9 for each text box in the pull-tab section.
When finished, choose File > Save to capture your work.
You have updated the text in your flyer. Let’s add a few media files to complete the project.
A little-known feature of Pages is its support for movie and sound files. These files are playable only inside of Pages, but they are still worth exploring. For instance, you might choose to include a media file as inspiration or reference in a design document.
In the case of your band flyer, you can include music tracks that could serve as an incentive for fans to download the Pages document to print and display in their neighborhood. Let’s explore how you add audio media to a Pages document.
Open the Media Browser, click the Audio tab, and navigate to Lesson_11 > The Nadas.
Click 02 Blue Lights.mp3.
Shift-click 09 Feels Like Home.mp3 to select all three media files.
Drag the three media files to the canvas.
Pages adds three partially transparent speaker icons to the canvas. Each icon represents a sound file. These icons are visible only inside Pages and will not print or show up in an exported document.
Adjust the speaker icons so that they are in a single row. Use the alignment guides to help with alignment and distribution.

Double-click a speaker icon to play the song. Click the icon again to pause playback.
Choose File > Save to save your work.
Your flyer is finished. In this exercise, you’ll create a web-ready version that you can print or electronically distribute. You’ll also save your file as a template so that you can reuse it to create other flyers. Any document that you’ll want to update frequently with new information (such as venues and performance dates) should be saved as a template.
Choose File > Save as Template.
Name the template Nadas Flyer.template and select the “Include preview in document” checkbox. The preview makes it easier to look at the document using Mac OS X v10.5 and its QuickView feature.
Choose Save.
Note
Be sure to save to the default location that Pages chooses so that your template will appear in the Template Chooser.
Now that your flyer is saved as a template, let’s make sure it is stored correctly.
Choose File > New to create a new document and access the Template Chooser.
The new template appears in the My Templates section.

Because you’re not going to create a new document at this time, click Cancel.
Now publish the Pages file to an iWeb page to share with others.
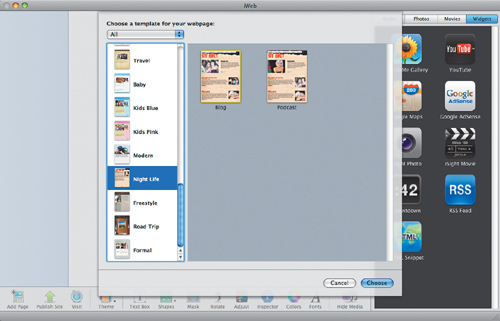
Choose Share > Send to iWeb > Pages.
iWeb opens and prompts you to choose a page type. You will not need to create an actual website in this lesson, but you can explore iWeb on your own.
Tip
You can use iWeb to create a website for sharing your Pages documents. When you offer the poster file for download, multiple users (such as a street team) can customize it as necessary.
Close iWeb and return to Pages.
Save and close your flyer document.