Lesson Files | Lessons > Lesson_03 > 03_Superbike_Start.key Lessons > Lesson_03 > 03_Superbike_End.key Lessons > Lesson_03 > Apparel_Photos Lessons > Lesson_03 > Ducati_Evolution.mov |
Time | This lesson takes approximately 75 minutes to complete. |
Goals | Create builds to reveal text or objects on a slide Create interleaved builds to reveal slide elements concurrently Create a Smart Build to add animation to a slide Add transitions between slides Configure preferences for smooth playback of a presentation Run a presentation |
Now that we’ve built a presentation, the next step is to add some motion—namely, video and animation. Adding movement to your slides doesn’t just keep your audience’s attention, it transforms a static presentation into a compelling and persuasive display piece.
Keynote offers a robust engine for playing video within slides. And it lets you create several types of slide animation, including builds—elements that animate one at a time onto a slide—and cool transitions between slides that go far beyond the simple transition we just used in Lesson 2.

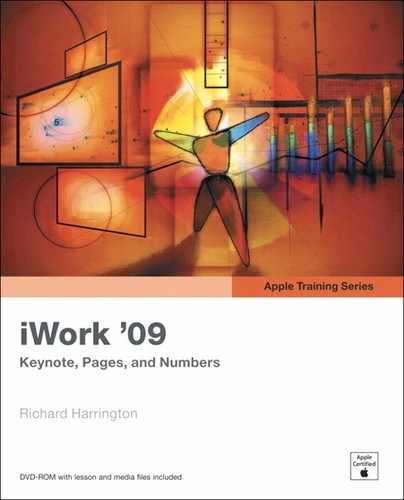
In this lesson, you’ll enhance a marketing presentation for Ducati, an Italian motorcycle manufacturer, by adding video, builds, and transitions. The subject matter is dynamic, and your slides should be, too. So let’s add some motion to accelerate the show!
The most common style of animation on a slide is a build, an animation that sequentially reveals the slide content.
When used appropriately, builds can focus your audience’s attention on the current topic. Objects that zoom into place or change position when selected attract much more attention than items that sit motionless on a slide.
Builds are often used to reveal lines of text as you click. Some effects animate the entire text box at once; others break up the text by word or character before animating. All text animation is controlled within the Inspector window.
In this exercise, we’ll animate a set of bullet points so they are revealed one at a time. This helps control the flow of information by preventing your audience from reading ahead. It also adds visual pop to reinforce each bullet point.
From the Lesson_03 folder, open the file 03_Superbike_Start.key.
In the slide navigator, click slide 7 to select it.
This slide contains a text box with several bullets; let’s animate those bullet points to reveal them one at a time.
Open the Build inspector.
Click the box of bulleted text to select it.
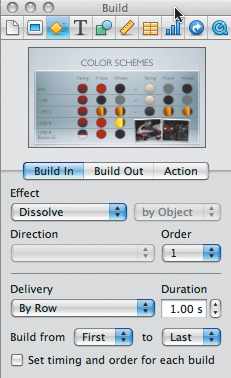
In the Build inspector, click Build In. Then configure the following options:
Effect—Dissolve by Word
Direction—Forward
Add slow fade
Delivery—By Bullet
Duration—1.00 s
Tip
To preview the animation, click the thumbnail image in the inspector. As you change each option, the thumbnail will reflect the new animation.
Let’s adjust the timing so that the first bullet automatically animates when the slide initially appears.
Near the bottom of the Build inspector, click the More Options button. The Build Order drawer opens. You’ll adjust the animation timings here.
Click object 1, First Bullet.
Set the Start Build pop-up menu to “Automatically after transition.” The animation will now occur immediately after the slide appears.

In the Build inspector, click the thumbnail and preview the build animation.
This style of animation is clean and professional; let’s copy and apply it to the bullet points in your next two slides.
Choose Format > Copy Animation to copy the animation in the selected text box.
Switch to slide 8 and select the bulleted text box.
Choose Format > Paste Animation to add the same animation to the bulleted text.
Repeat steps 11 and 12 for slide 9.
Press Command-S to save your work. You now have animated bullet points on your slides.
Beyond text, Keynote offers flexible build options for other elements in your presentation. For example, applying a build to a table can help make your data more accessible for an audience. By revealing table information in stages—as you previously did with slide bullet points—you can guide viewers through your data.
In the slide navigator, click slide 11 to select it.
This slide contains a table.
On the slide canvas, click the table.
In the Build inspector, click Build In. Then choose the following options:
Effect—Dissolve
Delivery—By Row (to reveal information one row at a time)
Duration—1.00 s
Tip
To animate objects entering the slide, choose Build In. To animate objects leaving the screen, choose Build Out.
Let’s animate both of the photos in the lower right corner so they zoom into place.
Click the first photo; then Command-click the second to select both.

In the Build inspector, choose the following options:
Effect—Scale
Direction—Down
Duration—1.00 s
Choose File > Save to save your work.
The photos in your slide animate nicely, but they do so after the text has appeared, which diminishes the slide’s impact. The slide would be clearer if the text and related photo animations occurred at the same time. In Keynote, you can interleave animation elements, so that multiple events take place concurrently.
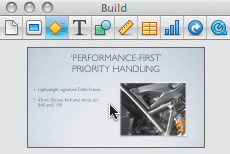
In this exercise, you have a table about color choices for motorcycles and two photos that relate to the contents of that table. By creating an interleaved build, you can reveal a bullet point and animate your photos at the same time.
Verify that slide 11 is selected.
Open the Build inspector, if necessary.
To create the interleaved builds, you’ll need precise control over each individual build.
In the Build inspector locate the Build Order drawer and select object 1, which is Table First Row.
Select the box next to “Set timing and order for each build.”
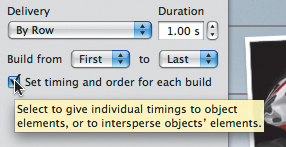
You can now precisely control every build for the text box. Let’s integrate the photo animation so that it occurs during the text animation.
At the lower right of the slide, select the photo of two motorcycles. Its name is highlighted in the Build Order drawer.
Drag item 8 so that it is placed immediately after item 5 (Row 5).

The photo now animates after row 5 of the table and before row 6.
From the Start Build pop-up menu, choose “Automatically with build 5.”

The two objects will appear at the same time. If you want a small delay to occur between the objects’ appearances, specify the length of time in the Delay field. The two builds must occur consecutively in the Build Order list.
In the Build Order drawer, select object 8. In the Start Build pop-up menu, choose “Automatically with build 7.”
Choose File > Save to save your work.
You can use builds for much more than text or tables. Let’s take a moment to apply builds to several other types of graphic objects.
In the slide navigator, click slide 1 to select it.
This slide contains a Ducati logo. Let’s reveal it in a dramatic fashion at the start of the presentation.
On the canvas, select the logo.
In the Build inspector, choose Build In. Then set the following options to make the slide appear as it does in the following figure:
Effect—Lens Flare
Direction—Left to Right
Duration—2.00 s

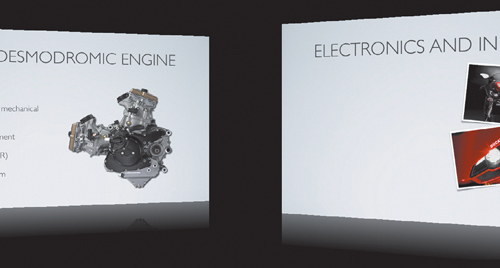
Charts can be animated like any other element in Keynote. For example, you can make charts appear or disappear one bar or wedge at a time. Additionally, six special builds specifically designed for 3D charts are quite impressive. Preview the builds in slides 17 and 18 to see two of these chart animations at work.
Note
You’ll work with charts more extensively in Lesson 5.

Rotate & Grow

Z Axis
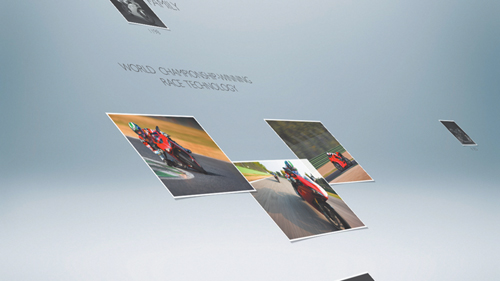
If you want to show several images within one slide—a sort of “in-slide slideshow”—that’s the time to use Smart Builds, which let you animate multiple images with drag-and-drop ease. It’s a huge space-saver, because you can show multiple images without having to add a slide for each image.
In this exercise, we’ll add a Smart Build to one of the slides to show off several items of motorcycle clothing and gear.
In the slide navigator, select slide 13.
Choose Insert > Smart Build > Revolve.
An empty Smart Build is added to the slide, and the Smart Build editor opens to control the effect. Let’s scale up the Smart Build.
Option-drag a selection handle and resize the Smart Build to 1280 px (pixels) wide (the width of the slide) by 480 px tall.
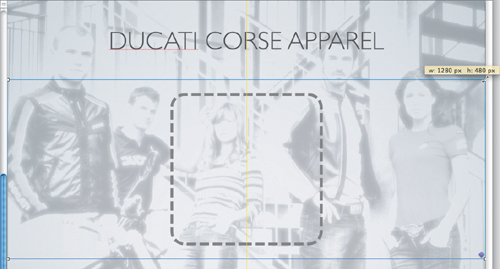
The images will display larger. Let’s add some photos.
Switch to the Finder and navigate to the Lesson_03 > Apparel_Photos folder.
Select all of the photos in the folder.
Drag the seven photos onto the Smart Build to add them to the build.

The seven photos become an animated presentation within the slide. If you’d like to preview the effect, click the thumbnail image in the Build inspector. While in the inspector, you can modify the Smart Build animation.
In the Build inspector, click Action and change Duration to 1.50 s.
From the Direction pop-up menu, choose Alternating Horizontal to add a little variety to the animation.
Choose File > Save to save your work.
To check your work, you can compare your presentation with the file 03_Superbike_Stage2.key in the Lesson_03 folder.
So far, we’ve used animated builds that are included with Keynote. These preset options are easy to use and create compelling animation.
But if you want more control, Keynote also lets you make custom animations by creating action builds. These let you take precise control over the way objects rotate, change opacity, move position, and scale in size. Let’s create a custom action build to reveal the logo on the final slide.
In the slide navigator, click slide 20 to select it.
This slide contains a Ducati logo and a motorcycle. Let’s animate the motorcycle “changing lanes” to reveal the logo, then have it drive off the screen. The logo already has a vertical wipe applied to it, so let’s animate the motorcycle moving from left to right to coincide with that wipe.
On the canvas, select the motorcycle.
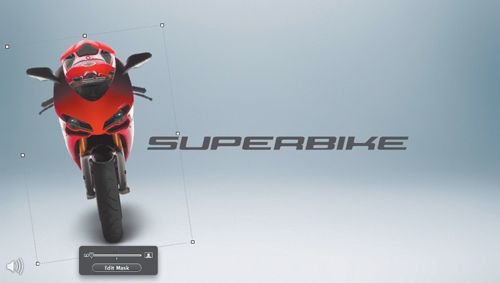
Open the Build inspector.
In the Build inspector, click Action.
From the Effect pop-up menu, choose Move.
On the slide canvas, Keynote shows a red line connected to a “ghosted” image of the object. This transparent image shows the object’s destination.
Drag the ghosted object to the right until it just covers part of the letter E in the logo. You can use the following figure for guidance.

As the bike moves, let’s bank it in the direction in which it’s moving (just as a real rider would steer the bike).
Move the pointer to the upper left selection handle. Hold down the Command key and the pointer turns into a curved-arrow cursor to indicate that you can rotate the object.
Drag the cursor to rotate the bike to approximately 12 degrees using the following figure as a guide.
The ghosted image updates to show its final position.

In the inspector, click the thumbnail image to see the animation.
It looks good, but let’s set the two animations so that they start at the same time.
In the Build inspector, click the Start Build pop-up menu and choose “Automatically with prior build.”
In the inspector, click the thumbnail image to see the animation.
The two animations start at the same time but have different durations. The wipe on the logo is 1.50 s, while the action build is only 1.00 s.
Change the Duration for the action build to 1.60 s and preview the animation.
You’re just about there. By moving the bike a little more slowly, you make sure that it doesn’t drift ahead of the logo wipe. Let’s have the motorcycle get larger so that it appears to approach us and drive off the screen. First, you’ll want to see some additional empty area around the canvas.
Resize your canvas window so that it fills your entire computer screen.
From the View pop-up menu, choose 75% or 50% magnification so that you can see some of the empty area around the slide canvas. Now you’re ready to add another move.
Click the + (plus sign) in the red diamond to add another action build. Press Tab to switch to the new action build.
Drag the corner selection handle to make the bike bigger. A height of 1000 px should work well.
Command-drag to rotate the bike so that it leans slightly back toward the left.
Drag the bike so that it moves completely off the canvas.

In the Build Order list, select only object 4 and choose “Automatically after build 3.”
In the inspector, click the thumbnail image to see the animation.
Your action build looks great, but you can also make it sound great. Let’s add some audio to amp up your big finish.
You may have noticed a speaker icon on the page. This is a sound file that was added to the canvas by the original slide designer.
More Info
This sound effect was made using GarageBand. To read more about GarageBand, see Apple Training Series: iLife ’09 (Peachpit Press, 2009).
Click the speaker icon to select it.
Let’s configure the sound so that it will start with a mouse click.
In the Build inspector, choose Build In. Then, from the Effect pop-up menu, choose Start Audio.
Now, let’s choose when the audio will play.
Drag the Cycle Pull object to the top of the Build Order list.
Click the second item (Group) and from Start Build pop-up menu, choose “Automatically with build 1.”

In the toolbar, click the Play button.
Keynote plays your presentation at the current slide.
Press the Spacebar to trigger all of the animation.
You should hear the roar of the engine and see the motorcycle animate across the screen, then pull away and out of the slide.
Choose File > Save to save your work.
Up to this point, we’ve used builds to control animation on a slide. Keynote offers another category of animations called transitions, such as the simple transition we added between our slides in Lesson 2.
Transitions are meant to signify a change in topic for your audience. Although Keynote offers several transition options, good design practices call for using the right transition mix in a presentation. Learning how (and when) to add transitions can liven up and clarify your presentation.
Keynote includes some great 2D and 3D effects that can add cinema-quality pizzazz to your presentation. Keynote ’09 also adds new transition options that work with the text or objects on two slides.
It’s easiest to set transitions when you can see all your slides, so we’ll start by switching to light table view.

The most common transitions you’ll use on slides are the 2D and 3D effects. These are used to move one slide off the screen as the next slide moves on.
In the slide navigator, select slide 7.
Select the Slide inspector and click Transition. Then set the following options:
Effect—3D Effects > Swap
Duration—1.50 s
Direction—Right
Note
The appearance of a triangle in the lower right corner of a slide’s thumbnail in the slide navigator indicates that you have added a transition to that slide.
Let’s add a lightly modified version of the same transition to slide 8.
In the slide navigator, select slide 8.
In the Slide inspector, set the following options:
Effect—3D Effects > Swap
Duration—1.50 s
Direction—Left
You can simultaneously add transitions to multiple slides to speed up the process.
In the slide navigator, select slide 13. Command-click slides 15, 18, and 19 to select all four slides.

Slides 13, 15, 18, and 19 are highlighted in yellow to show that they are selected.
In the Slide inspector, set the following options:
Effect—3D Effects > Reflection
Duration—2.00 s
Direction—Left
Tip
To keep the build and transition choices from becoming unwieldy, Keynote ’09 has pruned some lesser-used effects from its interface. These effects are still available, however, if you’d like to use them. Choose Keynote > Preferences and select the “Include obsolete animations in choices” checkbox.
Choose File > Save to save your work.
Now let’s explore some transition types that create animation based on slide content.
If your slides have a lot of content, such as photos or text, Keynote offers a specialized transition category called object effects. These effects are best used between two slides with very prominent graphic elements. When used at the right time, object effects provide visually dramatic 3D transitions that can capture the audience’s attention.
Let’s try out a few object effects transitions.
In the slide navigator, select slide 1.
In the Slide inspector, click Transition. Then choose the following options:
Effect—Object Effects > Object Zoom
Duration—1.50 s
In the inspector, click the thumbnail image to see the animation.
Each individual object between the two slides zooms independently as part of the transition. This is different from the 3D Effect Zoom, which zooms the entire slide at once.
In the slide navigator, select slide 2.
In the Slide inspector, click Transition. Then choose the following options:
Effect—Object Effects > Perspective
Duration—1.50 s
The objects on the slide rotate and move in 3D space.
In the slide navigator, select slide 3.
In the Slide inspector, click Transition. Then choose the following options:
Effect—Object Effects > Object Push
Duration—1.50 s
Direction—Right to Left
In the slide navigator, select slide 4.
In the Slide inspector, click Transition. Then choose the following options:
Effect—Object Effects > Object Push
Duration—1.50 s
Direction—Left to Right
The individual objects are pushed between slides during the transition.

There’s one object effects transition that you haven’t tried; let’s apply it to a few other slides in the presentation.
In the slide navigator, select slide 6, and then Command-click slides 10 and 12.
In the Slide inspector, choose the following options:
Effect—Object Effects > Revolve
Duration—1.50 s
Direction—Simultaneous
In the inspector, click the thumbnail image to see the animation.
Let’s apply another transition effect to more slides that are similarly designed.
In the slide navigator, select slide 5, and then Command-click slides 9 and 11.
In the Slide inspector, choose the following options:
Effect—Object Effects > Perspective
Duration—1.50 s
Click the thumbnail image in the inspector to see the animation.
Choose File > Save to save your work.
The text effects transitions in Keynote are similar to object effects in that they create animation between two slides based upon their contents. Text effects work best when used for transitioning between two slides with prominent text.
Let’s give text effects a try between two slides with similar layouts.
In the slide navigator, select slide 17.
In the Slide inspector, choose the following options:
Effect—Text Effects > Anagram
Duration—2.00 s
Direction—Straight Across

Click OK to accept the instructions for using the Anagram transition.
The Anagram transition retains letters that are identical between the two slides and moves them into their new positions while dissolving in the new letters and elements.
The Magic Move transition is a unique animation tool that essentially creates an automated transition between objects that appear on two consecutive slides. You can move, scale, rotate, and fade the object with Magic Move.
Note
The Magic Move transition works only when you use an identical image, shape, or text box at a different location or size on the second slide. Magic Move will not work with tables, charts, or movies.
The easiest way to understand the Magic Move effect is to try it out. Slide pairs 14 and 15, and 16 and 17, are ready for the Magic Move transition.
In the slide navigator, select slide 14 and double-click to edit it.
This slide contains a photo in the apparel section of the presentation. Let’s perform a slow zoom and pan on the photo. The photo was copied from slide 14 and pasted into 15. It has already been sized to save you time.
In the Slide inspector, choose the following options:
Effect—Magic Move
Duration—10.00 s
Click OK to accept the tip on using Magic Move. Let’s see the animation full screen.
Click the Play button, wait a few seconds for the animation to cache, and then press the Spacebar.
You’ve created a move on the photo that is similar to the Ken Burns effect in iMovie.

You can create zooms and pans with photos using Magic Move.
If you want to review the animation a second time, press the Left Arrow key followed by the Spacebar.
Press Esc to return to the presentation.
You have one more opportunity to use Magic Move. Let’s animate the motorcycle between slides.
In the slide navigator, select slide 16.
In the Slide inspector, choose the following options:
Effect—Magic Move
Duration—2.00 s
In the toolbar, click the Play button.

Magic Move automates animation tasks and saves you time.
Choose File > Save to save your work.
You can compare your presentation with the file 03_Superbike_Stage3.key in the Lesson_03 folder.
Your entire presentation is now enhanced with animated builds and transitions. You are almost done with your presentation. To wrap up, you’ll add some video and tweak the playback settings to realize the smoothest animation and video.
Integrating video is a powerful way to communicate your ideas to the audience. Video can both educate and entertain your audience, and express a lot of information in a short period of time.
In this presentation, let’s add a Ducati promo video that showcases the new motorcycle.
Placing video on a slide is similar to adding a photo. You just navigate to the file and drag the video onto a slide.
Select slide 19 in your presentation.
Choose Insert > Choose.
Navigate to the Lesson_03 folder and choose Ducati_Evolution.mov.
Click Insert to add the movie.
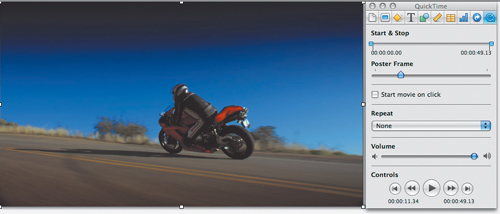
Keynote centers the movie on your slide. The video fades up from black, so the first frame looks pretty empty at present. In the next exercise, you’ll adjust the QuickTime settings to change that.
Keynote gives you precise control over audio and video files in the QuickTime inspector. You can make important changes to the way content plays without ever leaving Keynote.
Open the QuickTime inspector.
Drag the Poster Frame slider to choose which image is displayed before the movie plays. Choose a shot that clearly shows the motorcycle.
Let’s lower the clip volume a bit so that the presenter can be heard over the movie soundtrack.
Drag the Volume slider a little to the left to lower the volume.
Select the “Start movie on click” checkbox to enable the presenter to control when the movie plays.
Optimizing a Video for Playback
Video files can be quite large. To ensure smooth video performance during your presentation, the video should be optimized. The key is to create a high-quality, compressed video file that your Mac can play without skipping frames.
The best way to achieve this is to create an H.264 file. If the video is correctly optimized, Keynote can play HD video files in full screen. Here’s how to encode video in iMovie and iTunes.
iMovie ’09
After you’ve edited your movie in iMovie, you can choose to publish it to your Media Browser, which makes it easy to access in Keynote.
Choose Share > Media Browser to create a movie file.
The Publish pane opens.
Select the checkbox for “Medium for Standard Definition video” or “Large for High Definition video,” depending on the resolution you desire.
Click Publish.
The movie file is published to your Media Browser. Depending upon your machine speed, the process may take a few minutes to finish encoding the file.
When it’s finished, choose iMovie > Quit iMovie to close the application.
iTunes
In iTunes, it’s easy to build a media library of video podcasts and movies, including your own movie content. One benefit of using iTunes with Keynote is that its playlist makes it easy to organize presentation content. You have all your videos on one list, so you can manage them easily in the Media Browser.
Another, lesser-known benefit is that iTunes can encode and optimize video files.
Select a movie in your iTunes library.
Choose Advanced > Create Apple TV Version.
iTunes encodes the video as an H.264 compressed file according to the Apple TV specifications.
You should add the newly compressed file to a playlist so it is easier to find in the Media Browser.
When finished, choose iTunes > Quit iTunes to close the application.
Factors such as the quality of your graphics card and display (or projector) resolution can greatly affect the playback quality of your presentation. Before running your presentation, you may want to tweak a few preferences to optimize its playback.
Before giving a presentation, close any applications that are not necessary to your presentation. Doing so will make most of your computer’s RAM available to Keynote and reduce playback hiccups.
Often, your slideshow resolution does not match your playback device’s resolution, resulting in a black border surrounding your presentation (because not enough slide information exists to fill the screen).
To solve this problem, you can temporarily fit the presentation to the display during playback.

Generally, your pointer shouldn’t appear onscreen during a presentation, except when you’re clicking a hyperlink or controlling a movie. In Keynote ’09 you can set preferences to display the pointer only when slides contain hyperlinks or when the mouse is moved.
Choose Keynote > Preferences.
Click the Slideshow button.
Select one of the “Show pointer” options:
Show pointer only on slides with hyperlinks or movies—A good choice if you are using a mouse to advance your slides and you don’t want to accidentally activate the pointer.
Show pointer when the mouse moves—Gives you maximum control and makes the pointer visible when it is needed.
Make sure the “Show playback controls when pointer is over a movie” checkbox is selected.

Close the Slideshow Preferences window to apply the change.
In Mac OS X, Exposé allows you to quickly view all open windows, and Dashboard provides widgets that you can customize for specialty tasks and desktop activities. Some users decide to turn these off so they don’t trigger them unintentionally during a slideshow.
Now that your system is configured, it’s time to test-run your presentation. This will give you a chance to see all of your work in action.
If you followed all the exercises in this lesson, your presentation is ready to go. If you skipped some steps, open 03_Superbike_End.key from the Lesson_03 folder to access a completed version of the slideshow.
In Lesson 7, we’ll explore the use of a second display or a projector in your presentation. For this exercise, we’ll focus on playback commands that work regardless of your display devices.
In the toolbar, Option-click the Play button.
This plays the presentation from the first slide.
Press the Spacebar or click your mouse to advance slides.
Along the way, try out the following keyboard shortcuts:
To advance a slide, you can press either Return, N, Down Arrow, Page Down, or Right Arrow.
To advance to the next slide (regardless of whether stages remain to be seen in the build), press either ] (right bracket), Shift–Page Down, or Shift–Down Arrow.
To back up one slide, press either P, Left Arrow, Up Arrow, Shift–Up Arrow, Page Up, or Delete.
After testing a few slides, let’s skip forward in the presentation.
Press the = (equal sign) key on your keyboard to open the slide switcher.

You can use several keyboard shortcuts to interact with the slide switcher:
You can scroll left or right or click a desired slide to go directly to that slide.
To go to the next slide in the slide switcher, press + (plus sign) or = (equal sign).
To return to the previous slide, press – (minus sign).
To go to a selected slide and close the slide switcher, press either Return or Enter.
Close the slide switcher (without changing slides) by pressing Esc.
Press Esc to return to the current slide.
Continue advancing through your remaining slides and builds until you reach the end of your presentation.
To exit the slideshow, press Esc.
You did it! You’ve created and viewed an elaborate presentation with audio and video. You’ve also created builds and transitions to control the flow of information.
You’ll often want to switch gears during a presentation. For instance, you may want to switch to another application to show off a document or to access a file with the Finder. Keynote offers several ways to pause a presentation:
To pause a presentation and display the current slide, press F (as in freeze). To resume the presentation, press F or the Spacebar.
To pause a presentation and display a black screen, press B. To resume the presentation, press B or the Spacebar.
To pause a presentation and display a white screen, press W. To resume the presentation, press W or the Spacebar.
To pause the presentation and hide Keynote, press H. To resume the presentation, click the Keynote icon in the Dock. This works very well if you want to switch to Safari to open a web link or show material in another application.

Most likely, the presentation ran perfectly on your computer—the video played back smoothly and all builds worked properly. The following information is offered in case you hit a snag or if you are presenting on a different machine from the one you used to build the presentation. We hope you won’t need this information, but it’s still good to have it.
If your slideshow stutters or if artifacts appear, be sure that all media is running from a hard drive and is not located on removable media such as a DVD or USB thumb drive. If media access speed is not the issue, the problem could be insufficient VRAM (video RAM), projector setup issues, or an improper screen refresh rate.
If your computer has less than 32 MB of VRAM and your slideshow has a playback issue, you may be able to improve performance by modifying your computer’s display settings. From the Apple menu, choose System Preferences, click the Displays button, and try the following:
Turn on video mirroring.
Set your displays to a lower resolution. Lower screen resolutions use less VRAM.
Set your displays to use fewer colors. You can use Thousands instead of Millions as a last-effort solution.