
9. Tracking Time
What You’ll Do
Export Information to the Timer
Import Timer Data to QuickBooks
Invoice the Customer for Timer Activities
Introduction
All the QuickBooks editions (for Windows) provide access to the QuickBooks Timer. The timer enables QuickBooks users to use the computer like a time clock, tracking time spent and assigning that time to customers and jobs. In addition to using the time clock features, you can use the timer to record a description of the work you performed and the amount of time you spent.
You can transfer information recorded in the timer directly to your company payroll if you use QuickBooks for preparing your payroll. You can also transfer time charged to a job directly to a customer invoice to expedite invoicing and avoid errors.
The timer works on any computer. The owner of the QuickBooks program can provide employees and contractors with a copy of the timer program, loaded with company, customer, and job names as well as designated tasks, and the worker can record time spent and then export the information back to the company file, saving time and paperwork.
Setting Time Tracking Preferences
Setting time tracking preferences is as simple as turning on the feature. That, along with designating the first day of your work week, is all you need to do to activate this feature.
![]() Select Edit, Preferences.
Select Edit, Preferences.
![]() Click Time and Expenses.
Click Time and Expenses.
![]() Click the Company Preferences tab.
Click the Company Preferences tab.
![]() Click Yes to turn on time tracking.
Click Yes to turn on time tracking.
![]() Select the first day of your work week from the drop-down list.
Select the first day of your work week from the drop-down list.
![]() Place a check mark next to Create Invoices from a List of Time and Expenses.
Place a check mark next to Create Invoices from a List of Time and Expenses.
![]() Select Track Reimbursed Expenses as Income (if this isn’t selected, reimbursed expenses will be a negative cost in your expense account).
Select Track Reimbursed Expenses as Income (if this isn’t selected, reimbursed expenses will be a negative cost in your expense account).
![]() Optionally set a Default Markup Percentage.
Optionally set a Default Markup Percentage.
![]() From the drop-down menu, select the Default Markup Account.
From the drop-down menu, select the Default Markup Account.
![]() Click OK.
Click OK.

Installing the Timer
Install the timer so you can begin using the time tracking features of QuickBooks. When you install the timer, you can track time on your computer and use the timer to bill time to clients and record time for payroll purposes. You can also install the timer on computers that aren’t running QuickBooks.
You can download the timer program or find it on the QuickBooks program disk. You won’t need any password or registration number to install the timer program on any computer.
![]() Type the link to download the QuickBooks Pro Timer into your browser: https://intuitcorp.quickbase.com/db/bbquycnah.
Type the link to download the QuickBooks Pro Timer into your browser: https://intuitcorp.quickbase.com/db/bbquycnah.
![]() Scroll down to the section for QuickBooks Timer.
Scroll down to the section for QuickBooks Timer.
![]() Click the link for the appropriate QuickBooks Timer.
Click the link for the appropriate QuickBooks Timer.

![]() Click the link to download the file.
Click the link to download the file.

![]() Using Windows Explorer find your download folder. Click the QBTimer zip file to select it. Click Extract and Extract All. (You can use the default location. This step is not shown.)
Using Windows Explorer find your download folder. Click the QBTimer zip file to select it. Click Extract and Extract All. (You can use the default location. This step is not shown.)
![]() Double-click Setup application. Follow the onscreen installation instructions, accepting the default choices for file locations and options and clicking Next and Install to continue through the installation process (not shown).
Double-click Setup application. Follow the onscreen installation instructions, accepting the default choices for file locations and options and clicking Next and Install to continue through the installation process (not shown).
![]() For future reference, make a note of the name of the folder into which the timer is installed.
For future reference, make a note of the name of the folder into which the timer is installed.
Did You Know?
You can install the timer repeatedly. There is no limit to the number of computers on which you can install the QuickBooks Timer.
Getting Your Employees Up to Speed with the Timer
![]() Remember that you are providing your employees with data from the QuickBooks Customer & Jobs list that they need to import onto their computers before they can start time tracking. Point out that this data is in the form of an .iif file, and direct them to install it in the same directory (or folder) as the QuickBooks Timer. The default timer folder is C:Program FilesIntuitQuickBooksQuickBooks Pro Timer.
Remember that you are providing your employees with data from the QuickBooks Customer & Jobs list that they need to import onto their computers before they can start time tracking. Point out that this data is in the form of an .iif file, and direct them to install it in the same directory (or folder) as the QuickBooks Timer. The default timer folder is C:Program FilesIntuitQuickBooksQuickBooks Pro Timer.
![]() Discuss any sensitive issues about security and the privacy of the information in the Customer & Jobs list.
Discuss any sensitive issues about security and the privacy of the information in the Customer & Jobs list.
![]() Tell employees that they have to name and create a QuickBooks Timer file.
Tell employees that they have to name and create a QuickBooks Timer file.
![]() After the timer file is created, employees must import the .iif file. Then they can begin recording timed activities.
After the timer file is created, employees must import the .iif file. Then they can begin recording timed activities.
![]() Acquaint employees with the drop-down menu system of selecting their own name, customer, job, and services before actually clicking the Start button to begin time tracking.
Acquaint employees with the drop-down menu system of selecting their own name, customer, job, and services before actually clicking the Start button to begin time tracking.
![]() Provide your employees with a brief training session on recording time and transferring that time back to the QuickBooks program.
Provide your employees with a brief training session on recording time and transferring that time back to the QuickBooks program.
![]() When companies know how long it takes to do a particular job, they can determine when a job will be completed.
When companies know how long it takes to do a particular job, they can determine when a job will be completed.
![]() Companies compare the length of time different workers take to complete the same work to determine how to place workers in positions where they will be most useful and efficient.
Companies compare the length of time different workers take to complete the same work to determine how to place workers in positions where they will be most useful and efficient.
![]() If a company pays or charges by the hour for services, the company needs to know how much time is spent on a job to assess the cost of the job.
If a company pays or charges by the hour for services, the company needs to know how much time is spent on a job to assess the cost of the job.
![]() Nonsalaried workers who are paid by the hour must keep track of time so that they can be paid.
Nonsalaried workers who are paid by the hour must keep track of time so that they can be paid.
![]() Knowing the amount of time a job has taken in the past helps a company estimate the amount of time a similar job will take in the future.
Knowing the amount of time a job has taken in the past helps a company estimate the amount of time a similar job will take in the future.
Exporting Information to the Timer
The timer uses information from your QuickBooks file to enable your employees and contractors to charge time to customers and jobs. Employee names; descriptions of payroll items such as salary, hourly, overtime, and so on (not amounts, just the names of these items); names of customers and related jobs; and classes (if applicable) all are fed into the timer. Then an employee or a contractor simply uses the timer like a stop watch to record time spent on a project. The total time for the project can also be entered directly into the timer. This information must be exported to the timer before your employees or contractors can start using the timer.
![]() Open QuickBooks and select File, Utilities, Export, Timer Lists.
Open QuickBooks and select File, Utilities, Export, Timer Lists.
![]() You see a graphic illustration of how the timer works. Click OK.
You see a graphic illustration of how the timer works. Click OK.

![]() Enter a filename for the timer file, preserving the .IIF file extension QuickBooks supplies.
Enter a filename for the timer file, preserving the .IIF file extension QuickBooks supplies.
Important
You need to provide this file to others. Remember the folder where this file is saved because you will need to copy this file for any employees or contractors who are using the timer on another computer. Keep in mind that, in addition to those who use desktop models, employees and contractors using laptop computers can also take advantage of the timer feature.
![]() Click Save.
Click Save.

![]() Click OK.
Click OK.

Creating a New Timer File
When using the timer—whether on your computer, as illustrated here, or on someone else’s computer where you have installed the program—you don’t need to have your QuickBooks program open. The timer works independently of QuickBooks, which is why you can provide the timer to others who aren’t using your computer. You record time and activities in the timer and use the memo area to describe the work you do.
![]() Click the Start button; then select All Programs, QuickBooks Timer, QuickBooks Pro Timer.
Click the Start button; then select All Programs, QuickBooks Timer, QuickBooks Pro Timer.
![]() For this example, we assume you haven’t used the timer before. Click Create New Timer File.
For this example, we assume you haven’t used the timer before. Click Create New Timer File.
![]() Click OK.
Click OK.

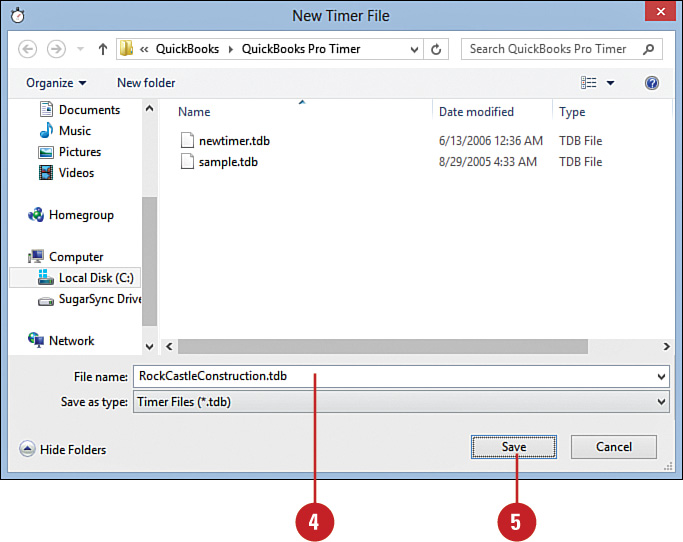
![]() Give your timer file a name.
Give your timer file a name.
![]() Click Save.
Click Save.
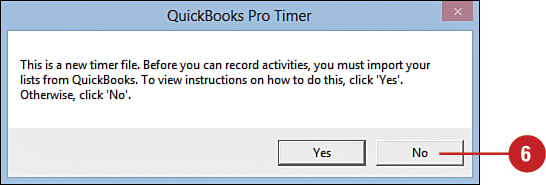
![]() You are reminded that you need to import the timer information. Click No to continue to the import session.
You are reminded that you need to import the timer information. Click No to continue to the import session.
![]() In the Timer program, select File, Import QuickBooks Lists from the menu.
In the Timer program, select File, Import QuickBooks Lists from the menu.

![]() Click Continue on the Import QuickBooks Lists window.
Click Continue on the Import QuickBooks Lists window.

![]() Click on the filename where your timer data was exported from QuickBooks.
Click on the filename where your timer data was exported from QuickBooks.
![]() Click Open.
Click Open.

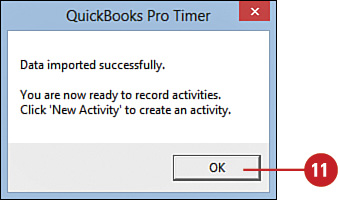
![]() Click OK.
Click OK.
Creating a Timer Activity
Before you can begin clocking your time, you must indicate the type of activity you are performing, the name of the customer or job to which this activity applies, and the class (if applicable). You might want to include a brief description of the exact work you are performing and indicate whether this time is directly billable to the customer. You don’t have to enter this information each time you use the timer for the same job. Once entered, the job information will be accessible in the future.
![]() With the timer open, click the New Activity button in the timer window.
With the timer open, click the New Activity button in the timer window.
![]() Enter the date. The timer defaults to today’s date; you might need to enter a different date, particularly if you are entering time for work that was performed at an earlier date.
Enter the date. The timer defaults to today’s date; you might need to enter a different date, particularly if you are entering time for work that was performed at an earlier date.
![]() Select your name (or the name of the person who is using the timer) from the drop-down menu.
Select your name (or the name of the person who is using the timer) from the drop-down menu.
![]() Select a customer and job from the Customer:Job drop-down menu.
Select a customer and job from the Customer:Job drop-down menu.
![]() Make a selection in the Service Item drop-down menu.
Make a selection in the Service Item drop-down menu.
![]() If your company uses classes, make a selection in the Class drop-down menu.
If your company uses classes, make a selection in the Class drop-down menu.
![]() Enter optional memorandum information that describes the work in the Notes field.
Enter optional memorandum information that describes the work in the Notes field.
![]() Indicate whether this time is to be billed to the customer by checking or unchecking the Billable box.
Indicate whether this time is to be billed to the customer by checking or unchecking the Billable box.
![]() Click OK.
Click OK.

![]() Repeat these steps to create more timed activities.
Repeat these steps to create more timed activities.
Did You Know?
The name you enter must be on the list that was imported from QuickBooks. If the name you want to use doesn’t appear on the list, you need to first enter the name as an employee or a vendor in QuickBooks and then re-export the files from QuickBooks to the timer. The same goes for the other timer information that needs to be entered from drop-down lists.
Using the Timer
After you set up at least one timed activity in your timer, you can use the timer to record your time on the activity. You have the choice of actually using the timer as a stop watch or entering your total time for a project.
![]() Click the Start button on your taskbar. Then select Programs, QuickBooks Timer, QuickBooks Pro Timer.
Click the Start button on your taskbar. Then select Programs, QuickBooks Timer, QuickBooks Pro Timer.
![]() Select an activity from the Current Activity drop-down list.
Select an activity from the Current Activity drop-down list.
![]() Click Start and begin working.
Click Start and begin working.

![]() When you have finished working and are ready to stop the clock, click Stop.
When you have finished working and are ready to stop the clock, click Stop.
![]() The Stop button changes to Resume, and you can click Resume to continue running the timer (not shown).
The Stop button changes to Resume, and you can click Resume to continue running the timer (not shown).
![]() To enter your time directly into the timer instead of running the stop watch, click Edit Activity.
To enter your time directly into the timer instead of running the stop watch, click Edit Activity.

![]() Enter the correct time in the Duration field.
Enter the correct time in the Duration field.
![]() Click OK.
Click OK.

![]() When you are finished recording your time, select File, Exit from the menu in the Timer program (not shown).
When you are finished recording your time, select File, Exit from the menu in the Timer program (not shown).
Sending Timer Data to QuickBooks
After recording information in the timer, you need to send the data back to be incorporated into your company’s QuickBooks file. This is a reverse of the export/import process you used when you sent employee and job data to the timer from QuickBooks. When timer data has been returned to QuickBooks, you can bill the time to clients and link it to the payroll program.
![]() In the Timer program, select File, Export Time Activities from the menu.
In the Timer program, select File, Export Time Activities from the menu.
![]() Click Continue.
Click Continue.

![]() Enter the date through which timer activities should be exported to QuickBooks.
Enter the date through which timer activities should be exported to QuickBooks.
![]() Click OK.
Click OK.

![]() Enter a filename for your export file. The user’s name (Dan Miller) and date of the export have been used as the filename in this example.
Enter a filename for your export file. The user’s name (Dan Miller) and date of the export have been used as the filename in this example.
![]() Click Save.
Click Save.

![]() Click OK.
Click OK.

![]() You can now close the timer program.
You can now close the timer program.
Did You Know?
Exported time stays in the timer. When you export time data to QuickBooks, the data is not removed from the timer. At some future date, if you need to refer to the time you entered in the timer, you can do so.
Importing Timer Data into QuickBooks
QuickBooks imports data from the timer directly into the employee or subcontractor time sheets. After the data is imported, you can pay employees with the data from the timer and bill time to your customers.
![]() In your QuickBooks program, select File, Utilities, Import, Timer Activities.
In your QuickBooks program, select File, Utilities, Import, Timer Activities.
![]() Click OK.
Click OK.

![]() In the Import window that displays, locate and click the file.
In the Import window that displays, locate and click the file.

![]() Click Open (not shown).
Click Open (not shown).
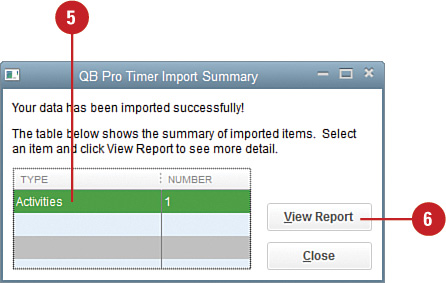
![]() Click the name of the report you want to view.
Click the name of the report you want to view.
![]() Click View Report to see the details of the imported activities.
Click View Report to see the details of the imported activities.
![]() When the report displays, double-click any activity to see that the activity has been entered in the Time/Enter Single Activity window of your company’s payroll system (not shown).
When the report displays, double-click any activity to see that the activity has been entered in the Time/Enter Single Activity window of your company’s payroll system (not shown).
![]() Click the Timesheet button to view the complete time record for this employee.
Click the Timesheet button to view the complete time record for this employee.

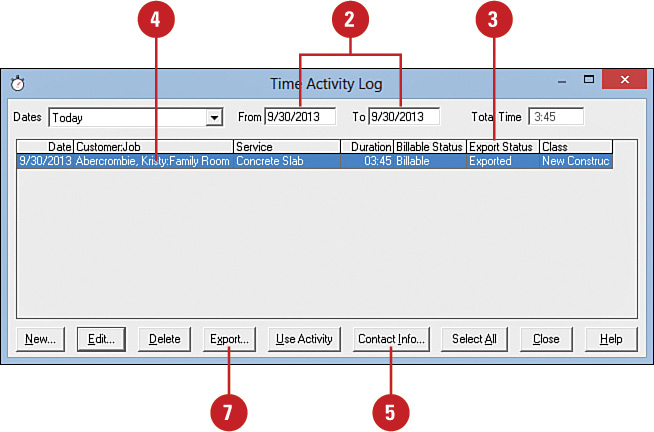
Viewing Timer Transactions
In your timer program, you can view all the timer activities, even the ones that have been exported. This task shows you how to view timer transactions.
![]() With the timer open, select View, Time Activity Log from the menu.
With the timer open, select View, Time Activity Log from the menu.

![]() Enter the date or date range for which you want to view timer activity.
Enter the date or date range for which you want to view timer activity.
![]() Note whether activities have been exported.
Note whether activities have been exported.
![]() Double-click any activity to open the activity and edit it (see the next task for an example of editing a timed activity).
Double-click any activity to open the activity and edit it (see the next task for an example of editing a timed activity).
![]() Click any activity once; then click the Contact Info button to view detailed contact information about the customer or client.
Click any activity once; then click the Contact Info button to view detailed contact information about the customer or client.
![]() Limit the number of timed activities that are exported to QuickBooks by holding down the Ctrl key while clicking to select certain activities in the log.
Limit the number of timed activities that are exported to QuickBooks by holding down the Ctrl key while clicking to select certain activities in the log.
![]() Click Export to export all selected activities.
Click Export to export all selected activities.
Did You Know?
Customer contact information might not be available. Only the contact information that was exported from QuickBooks to the timer displays here. If the contact information was never entered in QuickBooks, it doesn’t appear in the timer.
Editing Timer Transactions
You can change information that has been recorded in the timer by editing transactions. If the information has already been exported to QuickBooks, make sure you inform the QuickBooks administrator of the changes that need to be made so the exported information can be corrected.
![]() With the timer activity log open (see the previous task), double-click any timer activity to edit it.
With the timer activity log open (see the previous task), double-click any timer activity to edit it.
Important
If you attempt to edit a timer transaction that has previously been exported, you will receive an alert message advising you that the activity has already been exported. Click Yes to change the transaction’s status to Unexported, or click No to leave the status as Exported. Click Cancel if you have decided not to edit this transaction after all.
![]() Change the Customer:Job information if necessary.
Change the Customer:Job information if necessary.
![]() Adjust the amount of time if necessary.
Adjust the amount of time if necessary.
![]() Correct the detailed text description if necessary.
Correct the detailed text description if necessary.
![]() Click OK when you are finished making changes.
Click OK when you are finished making changes.

Did You Know?
Editing is handy when you make a mistake. Maybe you entered the wrong job name, maybe you left the clock running while you took your lunch break, or perhaps you forgot to enter a detailed description of the work you performed. The edit feature lets you correct your entries.
Invoicing the Customer for Timer Activities
When you enter time that is allocated to a customer or job in the timer, the information carries over directly to that customer when the time is imported into QuickBooks. See how to apply that time to a customer invoice.
![]() Import time from the timer, as shown earlier in the chapter in the task “Importing Timer Data into QuickBooks.”
Import time from the timer, as shown earlier in the chapter in the task “Importing Timer Data into QuickBooks.”
![]() Select Invoice for Time and Expenses from the Customers menu. (If you do not have this menu, skip to the next step.) Select a date range for costs you want to include on the invoice (not shown).
Select Invoice for Time and Expenses from the Customers menu. (If you do not have this menu, skip to the next step.) Select a date range for costs you want to include on the invoice (not shown).
![]() Select the customer you want to bill and click Create Invoice (not shown).
Select the customer you want to bill and click Create Invoice (not shown).
![]() Optionally select Select the Outstanding Billable Time and Costs to Add to This Invoice.
Optionally select Select the Outstanding Billable Time and Costs to Add to This Invoice.
![]() Click the Add Time/Costs tab.
Click the Add Time/Costs tab.
![]() Click to check each item you want to include on this invoice, or click Select All to choose all items.
Click to check each item you want to include on this invoice, or click Select All to choose all items.
![]() Check the Print Selected Time and Costs as One Invoice Item box if you want all time to be displayed as one item on the invoice.
Check the Print Selected Time and Costs as One Invoice Item box if you want all time to be displayed as one item on the invoice.
![]() Click OK.
Click OK.
![]() Click one of the Save buttons to save the invoice.
Click one of the Save buttons to save the invoice.

