
12. Slideshow App
Objectives
In this chapter you’ll:
• Use Intents and content providers to allow the user to select pictures and music from a device’s Gallery and media library, respectively.
• Launch Intents that return results.
• Use a MediaPlayer to play music from the device’s media library during the slideshow.
• Customize a ListActivity’s layout.
• Use the view holder pattern to improve performance when using complex ListView-item layouts.
• Create a custom GUI for an AlertDialog to allow a user to enter information,
• Load images as Bitmaps using a BitmapFactory.
• Use a TransitionDrawable to gradually transition between two BitmapDrawables that contain images.
12.2 Test-Driving the Slideshow App
12.4 Building the GUI and Resource Files
12.4.2 Using Standard Android Icons in the App’s GUI
12.4.4 Layout for ListView Items in the Slideshow ListActivity
12.4.5 Slideshow ListActivity’s Menu
12.4.6 Layout for the EditText in the Set Slideshow Name Dialog
12.4.7 Layout for the SlideshowEditor ListActivity
12.4.8 Layout for ListView Items in the SlideshowEditor ListActivity
12.4.9 Layout for the SlideshowPlayer Activity
12.5.2 Slideshow Subclass of ListActivity
12.5.3 SlideshowEditor Subclass of ListActivity
12.5.4 SlideshowPlayer Subclass of ListActivity
Self-Review Exercises | Answers to Self-Review Exercises | Exercises
12.1. Introduction
The Slideshow app allows the user to create and manage slideshows using pictures and music from the phone’s Gallery and music library. Figure 12.1 shows the app after the user added several slideshows. Each slideshow’s title and first image are displayed in a ListView along with three Buttons. Touching a slideshow’s Play Button plays that slideshow. Each image displays for five seconds, while a user-chosen song (if any) plays in the background. The images transition by cross fading to the next image. Touching a slideshow’s Edit Button displays an Activity for selecting images and music. Touching the Delete Button removes the corresponding slideshow. This version of the app does not save slideshows when the user closes the app—we add this capability in Chapter 13’s Enhanced Slideshow app.

Fig. 12.1. List of slideshows that the user has created.
When the app first loads, the list of slideshows is empty. Touching the device’s menu button displays the New Slideshow menu item (Fig. 12.2(a)) and touching that menu item displays the Set Slideshow Name dialog (Fig. 12.2(b)) for naming the new slideshow. If the user touches the dialog’s Set Name button, a new slideshow is created and the Slideshow Editor Activity is displayed (Fig. 12.3).

Fig. 12.2. Adding and naming a new slideshow.

Fig. 12.3. Slideshow Editor Activity before any images are added to the slideshow.
When the user touches Add Picture, the device’s Gallery app is displayed (Fig. 12.4(a)) so that the user can select an existing image or take a new picture with the device’s camera. Touching a photo adds that photo to the slideshow. Figure 12.4(b) shows the Slideshow Editor Activity after several images have been added to the slideshow. The dark bars at the ListView’s top and bottom indicate that there are more items than can be displayed and the user can scroll up and down to see the others. The Delete Button next to each image allows the user to remove that image from the slideshow.

Fig. 12.4. Gallery for selecting images and Slideshow Editor Activity after several images are selected.
When the user touches the Add Music button, Android displays the list of apps from which the user can select music. On a typical device, the user sees the options Select music track and Sound Recorder (Fig. 12.5) in a dialog. Choosing Select music track displays a list of the music on the device. Choosing Sound Recorder launches the Sound Recorder app and allows the user to make a new recording to use during slideshow playback. If the user makes a new recording, it will also appear in the device’s music list the next time the list is displayed. The user can view the slideshow being edited by pressing the Play button in the Slideshow Editor (or in the main slideshow list). Figure 12.6 shows one image in a slideshow that’s currently playing.
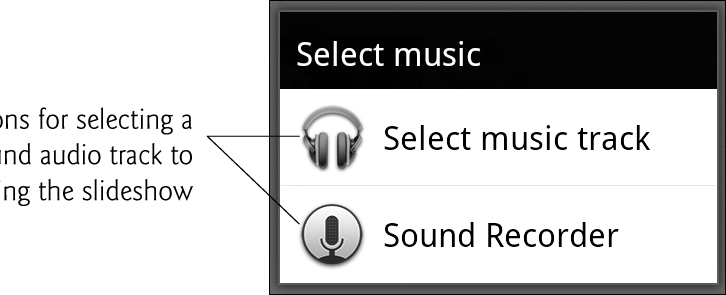
Fig. 12.5. Activity-chooser dialog displayed by Android to let the user select where the media clip will come from—on this device, the user can Select music track or use the Sound Recorder to record a new track.

Fig. 12.6. An image displayed during slideshow playback.
12.2. Test-Driving the Slideshow App
Opening and Running the App
Open Eclipse and import the Slideshow app project. To import the project:
1. Select File > Import... to display the Import dialog.
2. Expand the General node and select Existing Projects into Workspace, then click Next >.
3. To the right of the Select root directory: textfield, click Browse..., then locate and select the Slideshow folder.
4. Click Finish to import the project.
Right click the app’s project in the Package Explorer window, then select Run As > Android Application from the menu that appears.
Transferring Music and Photos to an AVD
You can add images and music to an AVD for testing the Slideshow app by placing them on the AVD’s SD card, which you configured when you set up the AVD. To do so:
1. Launch your AVD using the Android SDK and AVD Manager.
2. In Eclipse, use Window > Open Perspective to open the DDMS perspective.
3. In the DDMS perspective, select your AVD in the Devices list.
4. At the right side of the DDMS perspective, select the File Explorer tab to display the AVD’s file system.
5. Navigate to /mnt/sdcard, then drag your images and music into that folder.
6. Shut down your AVD and restart it without Launch from snapshot checked. This will enable AVD to scan the SD card for the new images and/or music.
We provided several sample flower images in the images folder with the book’s example code. Many online sites provide downloadable music files that you can use for testing—any MP3 file will suffice.
Adding a New Slideshow
Touch the device’s menu button, then touch the New Slideshow Button to view the Set Slideshow Name dialog. Name the slideshow, then touch Set Name to create the new slideshow and display the Slideshow Editor.
Editing the New Slideshow
Touch the Add Picture Button to view the device’s Gallery. Touch a photo in the Gallery to add it to the slideshow. Repeat this process for each image you wish to add. If you touch the device’s back button before touching a photo, you’ll be returned to the Slideshow Editor without adding a photo. If you wish, touch the Delete Button next to a picture to remove it from the slideshow.
Touch the Add Music Button to select background music. When presented with the options Select music track and Sound Recorder, choose Select music track to select an existing music file or Sound Recorder to record your own sound. After selecting your music, you’ll be returned to the Slideshow Editor.
Playing a Slideshow
There are two ways to play a slideshow:
1. In the Slideshow Editor, you can touch the Play Button.
2. You can touch the Done Button in the Slideshow Editor to return to the list of slideshows, then press the Play Button next to the slideshow you wish to play.
In either case, the slideshow’s images are displayed on the screen, with each image cross fading into the next after five seconds. Your chosen music plays in the background. If the music is too short to play for the slideshow’s duration, the music loops. You can rotate the phone to view the slideshow in either landscape or portrait orientations. (In the emulator, you can do this by typing Ctrl + F11 and Ctrl + F12 to toggle the rotation.) When the slideshow completes execution, or if you touch the device’s back button during playback, you’ll be returned to the screen from which you played the slideshow.
Editing and Deleting a Slideshow
To edit an existing slideshow, touch its Edit Button. You can then add or delete photos as you did previously. Choosing a new song replaces the previous one. Touch a slideshow’s Delete Button to erase it from the app.
12.3. Technologies Overview
This section presents the new technologies that we use in the Slideshow app.
Launching Intents That Use Built-In Content Providers
Android does not provide storage that can be shared by all applications. Instead, it uses content providers that enable apps to save and retrieve data and to make data accessible across applications. You used this in Chapter 9 to save your drawings from the Doodlz app into the device’s Gallery.
Several content providers are built into Android for access to data such as images, audio, video, contact information and more. See the list of classes in the package android.provider for a complete list of built-in content providers:
developer.android.com/reference/android/provider/
package-summary.html
In this app, we’ll use built-in content providers to allow the user to select images and audio stored on the device for use in the slideshow. To do this, we’ll launch Intents for which we specify the MIME type of the data from which the user should be able to select (Section 12.5.3). Android will then launch an Activity that shows the specified type of data to the user or will display an Activity-chooser dialog from which the user can select the Activity to use. For example, Fig. 12.4(a) shows the Activity that allows the user to select an image from the device’s Gallery, and Fig. 12.5 shows the Activity-chooser dialog that allows the user to decide whether to select existing music from the device or to record a new audio using the Sound Recorder. For more information on content providers, visit:
developer.android.com/guide/topics/providers/content-providers.html
Specifying the GUI for an AlertDialog
You can use an AlertDialog to obtain input from the user by specifying your own View for the dialog. The Slideshow app obtains a slideshow’s name from the user by displaying an AlertDialog that contains an EditText (discussed in Sections 12.4.6– and 12.5.2).
Customizing the Layout for a ListActivity
The Address Book app in Chapter 10 introduced ListActivity and ListView. In that app, we used the ListActivity’s default layout and built-in ListView. This app’s SlideshowEditor ListActivity uses a custom layout (Section 12.4.7). When replacing a ListActivity’s default layout, you must define a ListView in the layout and you must assign its android:id attribute the value "@android:id/list".
Launch an Intent That Returns a Result
In earlier apps, we’ve used Intents to launch the device’s Browser (Favorite Twitter® Searches, Chapter 5) and to launch another Activity in the same app (Address Book, Chapter 10). In both cases, we used Activity method startActivity to launch the Activity associated with each Intent. In the Favorite Twitter® Searches app, the user could return to the app from the Browser by pressing the device’s back button. In the Address Book app, when the launched Activity completed, the user was automatically returned to the app’s main Activity. In this app, we introduce Activity method startActivityForResult, which enables an Activity to be notified when another Activity completes execution and to receive results back from the completed Activity. We use this to:
• refresh the Slideshow Activity’s ListView after the user edits a slideshow,
• refresh the SlideshowEditor Activity’s ListView after the user adds a new image to the slideshow and
• get the location of an image or music track the user added to a slideshow.
ArrayAdapter for a ListView
As you learned in Chapter 10, you use an adapter to populate a ListView. You used a SimpleCursorAdapter to populate a ListView from data in a database. In this app, we extend ArrayAdapter (package android.widget) to create objects that populate ListViews with custom layouts using data from collection objects (Sections 12.5.2– and 12.5.3).
View-Holder Pattern
Creating custom ListView items is an expensive runtime operation, especially for large lists with complex list-item layouts. When you scroll in a ListView, as items scroll off the screen, Android reuses those list items for the new ones that are scrolling onto the screen. You can take advantage of the existing GUI components in the reused list items to increase a ListView’s performance of your ListViews. To do this, we introduce the view-holder pattern. You can use a View’s setTag method to add any Object to a View. This Object is then available to you via the View’s getTag method. We’ll specify as the tag an object that holds (i.e., contains references to) the list item’s Views (i.e., GUI components). Using a View’s tag in this manner is a convenient way to provide extra information that can be used in the view-holder pattern or in event handlers (as we’ll also demonstrate in this app).
As a new ListView item scrolls onto the screen, the ListView checks whether a reusable list item is available. If not, we’ll inflate the new list item’s GUI from scratch, then store references to the GUI components in an object of a class that we’ll call ViewHolder. Then we’ll use setTag to set that ViewHolder object as the tag for the ListView item. If there is a reusable item available, we’ll get that item’s tag with getTag, which will return the ViewHolder object that was previously created for that ListView item. Regardless of how we obtain the ViewHolder object, we’ll then configure the various GUI components that the ViewHolder references.
Notifying a ListView When Its Data Source Changes
When the ArrayAdapter’s data set changes, you can call its notifyDataSetChanged method (Sections 12.5.2– and 12.5.3) to indicate that the Adapter’s underlying data set has changed and that the corresponding ListView should be updated.
Adding Data to a GUI Component for Use in an Event Handler
The Slideshow and SlideshowEditor classes (Sections 12.5.2– and 12.5.3) use setTag and getTag to add extra information to GUI components for use in their event handlers. In class Slideshow, we add a String to the Play and Edit Buttons to specify the name of the slideshow to play or edit. We add a SlideshowInfo object to the Delete Button to specify which one to remove from the List of SlideshowInfo objects that represents all the slideshows.
Playing Music with a MediaPlayer
A MediaPlayer (package android.media, Section 12.5.4) enables an app to play audio or video from files stored on the device or from streams over a network. We’ll use a MediaPlayer to play the music file (if any) that the user selects for a given slideshow.
Loading Images with BitmapFactory
A BitmapFactory (package android.graphics) creates Bitmap objects. We use one in this app to load images from the device for use as thumbnail images (Sections 12.5.2– and 12.5.3) and for display during slideshow playback (Section 12.5.4). We use an object of the nested static class BitmapFactory.Options to configure the Bitmaps created using BitmapFactory. In particular, we use this to downsample the images to save memory. This helps prevent out-of-memory errors, which can be common when manipulating many Bitmaps.
Cross Fading Between Images with TransitionDrawable and BitmapDrawable
When a slideshow is playing, every five seconds the current image fades out and the next image fades in. This transition is performed by displaying a TransitionDrawable (Section 12.5.4), which provides a built-in animation that transitions between two Drawable objects. TransitionDrawable is a subclass of Drawable and, like other Drawables, can be displayed on an ImageView. In this app, we load the images as Bitmaps, so we create BitmapDrawables for use in the transition. TransitionDrawable and BitmapDrawable are located in the android.graphics.drawable package.
12.4. Building the GUI and Resource Files
In this section, we discuss the Slideshow app’s resources and GUI layouts. You’ve already seen the GUI components and layouts used in this app and you’ve defined String resources in every app, so we do not show most of the layout files or the strings.xml resource file. Instead, we provide diagrams that show the names of GUI components, because the components and layouts used have been presented in earlier chapters. You can review the contents of the resource and layout files by opening them in Eclipse.
12.4.1. Creating the Project
Begin by creating a new Android project named Slideshow. Specify the following values in the New Android Project dialog, then press Finish:
• Build Target: Ensure that Android 2.3.3 is checked
• Application name: Slideshow
• Package name: com.deitel.slideshow
• Create Activity: Slideshow
• Min SDK Version: 8
12.4.2. Using Standard Android Icons in the App’s GUI
You learned in Chapter 10 that Android comes with standard icons that you can use in your own apps. Again, these are located in the SDK’s platforms folder under each platform version’s data/res/drawable-hdpi folder. Some of the icons we chose to use in this app are not publicly accessible—this means that they’re not guaranteed to be available on every Android device. For this reason, we copied the icons that we use into this app’s res/drawable-hdpi folder. Expand that folder in Eclipse to see the specific icons we chose.
12.4.3. AndroidManifest.xml
Figure 12.7 shows this app’s AndroidManifest.xml file. There are several key features in this manifest that we’ve highlighted. In particular, the Slideshow and SlideshowEditor activity elements indicate that each Activity is always displayed in portrait mode (lines 10 and 20). Also, we’ve set the Slideshow and SlideshowPlayer themes (lines 11 and 24), with the latter using one that does not show a title bar. This provides more room for displaying the slideshow’s images.
1 <?xml version="1.0" encoding="utf-8"?>
2 <manifest xmlns:android="http://schemas.android.com/apk/res/android"
3 package="com.deitel.slideshow" android:versionCode="1"
4 android:versionName="1.0">
5 <application android:icon="@drawable/icon"
6 android:label="@string/app_name"
7 android:debuggable="true">
8 <activity android:name=".Slideshow"
9 android:label="@string/app_name"
10 android:screenOrientation="portrait"
11 android:theme="@android:style/Theme.Light">
12 <intent-filter>
13 <action android:name="android.intent.action.MAIN" />
14 <category android:name="android.intent.category.LAUNCHER" />
15 </intent-filter>
16 </activity>
17
18 <activity android:name=".SlideshowEditor"
19 android:label="@string/slideshow_editor"
20 android:screenOrientation="portrait"></activity>
21
22 <activity android:name=".SlideshowPlayer"
23 android:label="@string/app_name"
24 android:theme="@android:style/Theme.Light.NoTitleBar"></activity>
25 </application>
26 <uses-sdk android:minSdkVersion="8" />
27 </manifest>
Fig. 12.7. AndroidManifest.xml.
12.4.4. Layout for ListView Items in the Slideshow ListActivity
Figure 12.8 diagrams the layout for the ListView items that are displayed in the Slideshow ListActivity. The layout—defined in slideshow_list_item.xml—is a vertical LinearLayout that contains a TextView and a nested horizontal LinearLayout. The horizontal LinearLayout contains an ImageView and three Buttons. Each Button uses one new feature—the android:drawableTop attribute displays a Drawable above the Button’s text. In each case, we use one of the standard Android icons. For example, in the XML layout file, the playButton specifies:
android:drawableTop="@drawable/ic_menu_play_clip"

Fig. 12.8. Layout for ListView Items in the Slideshow ListActivity—slideshow_list_item.xml.
which indicates that the image in the file ic_menu_play_clip.png should be displayed above the Button’s text. There are also android:drawableLeft, android:drawableRight and android:drawableBottom attributes for positioning the icon to left of the text, right of the text or below the text, respectively.
12.4.5. Slideshow ListActivity’s Menu
Figure 12.9 shows the layout for the Slideshow ListActivity’s menu. We use the standard ic_menu_slideshow.png image as the menu item’s icon (line 5).
1 <?xml version="1.0" encoding="utf-8"?>
2 <menu xmlns:android="http://schemas.android.com/apk/res/android">
3 <item android:id="@+id/newSlideshowItem"
4 android:title="@string/menuitem_new_slideshow"
5 android:icon="@drawable/ic_menu_slideshow"
6 android:titleCondensed="@string/menuitem_new_slideshow"
7 android:alphabeticShortcut="n"></item>
8 </menu>
Fig. 12.9. Slideshow ListActivity’s menu—slideshow_menu.xml.
12.4.6. Layout for the EditText in the Set Slideshow Name Dialog
Figure 12.10 shows the Set Slideshow Name dialog that enables the user to enter the slideshow’s name in an EditText. We nested the nameEditText in a LinearLayout so we could set its left and right margins with the attributes android:layout_marginLeft and android:layout_marginRight, respectively. We also set the android:singleLine attribute to true to allow only a single line of text for the slideshow name.
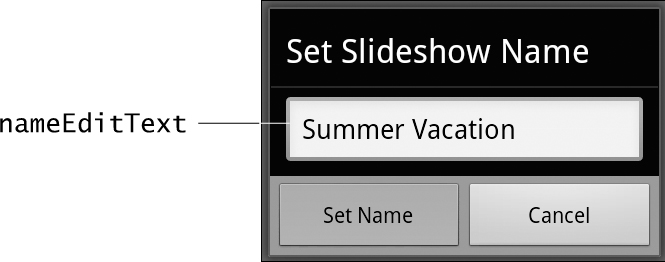
Fig. 12.10. Set Slideshow Name AlertDialog with custom GUI for user input—shown after the user has entered a slideshow name and with the Set Name Button touched.
12.4.7. Layout for the SlideshowEditor ListActivity
Figure 12.11 diagrams the layout for the SlideshowEditor ListActivity. Because this ListActivity uses a custom layout (defined in slideshow_list_item.xml), we must define a ListView in the layout with the android:id set to "@android:id/list". This is the ListView that will be returned by the ListActivity’s getListView method. The layout defined in slideshow_editor.xml is a vertical LinearLayout that contains a nested horizontal LinearLayout and a ListView. The horizontal LinearLayout contains the four Buttons.

Fig. 12.11. Layout for the SlideshowEditor ListActivity—slideshow_editor.xml.
12.4.8. Layout for ListView Items in the SlideshowEditor ListActivity
Figure 12.10 diagrams the layout for the ListView items that are displayed in the SlideshowEditor ListActivity. The layout defined in slideshow_edit_item.xml consists of a horizontal LinearLayout that contains an ImageView and a Button.

Fig. 12.12. Layout for ListView Items in the SlideshowEditor ListActivity—slideshow_edit_item.xml.
12.4.9. Layout for the SlideshowPlayer Activity
Figure 12.13 diagrams the layout for the SlideshowPlayer Activity. The layout defined in slideshow_edit_item.xml is a horizontal LinearLayout containing an ImageView that fills the entire LinearLayout.
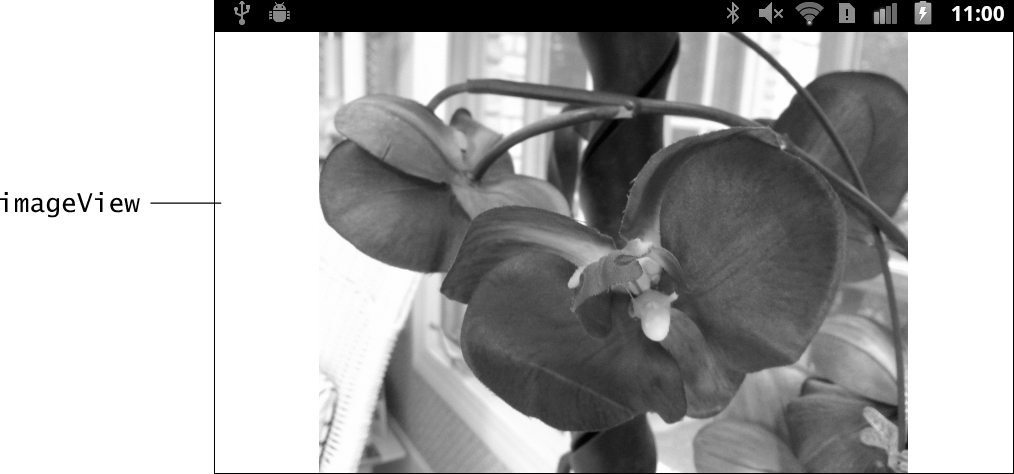
Fig. 12.13. Layout for the SlideshowPlayer ListActivity—slideshow_player.xml.
12.5. Building the App
This app consists of classes SlideshowInfo (Fig. 12.14), Slideshow (a ListActivity subclass, Figs. 12.15–12.24), SlideshowEditor (a ListActivity subclass, Figs. 12.25–12.33) and SlideshowPlayer (Figs. 12.35–12.39). This app’s main Activity, Slideshow, is created when you create the project, but you must change its superclass to ListActivity, then add the other classes to the project’s src/com.deitel.slideshow folder.
1 // SlideshowInfo.java
2 // Stores the data for a single slideshow.
3 package com.deitel.slideshow;
4
5 import java.util.ArrayList;
6 import java.util.List;
7
8 public class SlideshowInfo
9 {
10 private String name; // name of this slideshow
11 private List<String> imageList; // this slideshow's images
12 private String musicPath; // location of music to play
13
14 // constructor
15 public SlideshowInfo(String slideshowName)
16 {
17 name = slideshowName; // set the slideshow name
18 imageList = new ArrayList<String>();
19 musicPath = null; // currently there is no music for the slideshow
20 } // end SlideshowInfo constructor
21
22 // return this slideshow's name
23 public String getName()
24 {
25 return name;
26 } // end method getName
27
28 // return List of Strings pointing to the slideshow's images
29 public List<String> getImageList()
30 {
31 return imageList;
32 } // end method getImageList
33
34 // add a new image path
35 public void addImage(String path)
36 {
37 imageList.add(path);
38 } // end method addImage
39
40 // return String at position index
41 public String getImageAt(int index)
42 {
43 if (index >= 0 && index < imageList.size())
44 return imageList.get(index);
45 else
46 return null;
47 } // end method getImageAt
48
49 // return this slideshow's music
50 public String getMusicPath()
51 {
52 return musicPath;
53 } // end method getMusicPath
54
55 // set this slideshow's music
56 public void setMusicPath(String path)
57 {
58 musicPath = path;
59 } // end method setMusicPath
60
61 // return number of images/videos in the slideshow
62 public int size()
63 {
64 return imageList.size();
65 } // end method size
66 } // end class SlideshowInfo
Fig. 12.14. Stores the data for a single slideshow.
1 // Slideshow.java
2 // Main Activity for the Slideshow class.
3 package com.deitel.slideshow;
4
5 import java.util.ArrayList;
6 import java.util.List;
7
8 import android.app.AlertDialog;
9 import android.app.ListActivity;
10 import android.content.ContentResolver;
11 import android.content.Context;
12 import android.content.DialogInterface;
13 import android.content.Intent;
14 import android.graphics.Bitmap;
15 import android.graphics.BitmapFactory;
16 import android.net.Uri;
17 import android.os.AsyncTask;
18 import android.os.Bundle;
19 import android.provider.MediaStore;
20 import android.view.Gravity;
21 import android.view.LayoutInflater;
22 import android.view.Menu;
23 import android.view.MenuInflater;
24 import android.view.MenuItem;
25 import android.view.View;
26 import android.view.View.OnClickListener;
27 import android.view.ViewGroup;
28 import android.widget.ArrayAdapter;
29 import android.widget.Button;
30 import android.widget.EditText;
31 import android.widget.ImageView;
32 import android.widget.ListView;
33 import android.widget.TextView;
34 import android.widget.Toast;
35
36 public class Slideshow extends ListActivity
37 {
38 // used when adding slideshow name as an extra to an Intent
39 public static final String NAME_EXTRA = "NAME";
40
41 static List<SlideshowInfo> slideshowList; // List of slideshows
42 private ListView slideshowListView; // this ListActivity's ListView
43 private SlideshowAdapter slideshowAdapter; // adapter for the ListView
44
Fig. 12.15. package and import statements, and instance variables for class Slideshow.
12.5.1. SlideshowInfo Class
Class SlideshowInfo (Fig. 12.14) stores the data for a single slideshow, which consists of:
• name (line 10)—the slideshow name, which is displayed in the app’s slideshow list
• imageList (line 11)—a List of Strings representing the image locations
• musicPath (line 12)—a String representing the location of the music, if any, that should play in the background during the slideshow
The constructor creates imageList as an ArrayList<String>.
12.5.2. Slideshow Subclass of ListActivity
Class Slideshow (Figs. 12.15–12.23) is the app’s main Activity class. The class extends ListActivity, because this Activity’s primary purpose is to display a ListView.
package and import Statements, and Fields
The Slideshow subclass of ListActivity (Fig. 12.15) is the app’s main Activity. It displays a ListView of all previously created slideshows. We’ve highlighted the import statements for the new classes and interfaces discussed in Section 12.3 and throughout this section. The List of SlideshowInfo objects (line 41) contains the information for all of the user-created slideshows. This List is declared static so that it can be shared among the app’s activities. The SlideshowAdapter (line 43) is a custom ArrayAdapter that displays SlideshowInfo objects as items in the ListView.
Overriding Activity Method onCreate
Slideshow’s onCreate method (Fig. 12.16) gets the ListView that displays the user-created slideshows (line 50), then creates the slideshowList and slideshowAdapter, and sets the slideshowListView’s adapter to slideshowAdapter. This allows the slideshowListView to display each slideshow’s name, first thumbnail and Play, Edit and Delete Buttons using the layout defined in slideshow_list_item.xml (Section 12.4.4). Lines 58–62 create and display an AlertDialog telling the user how to get started with the app.
45 // called when the activity is first created
46 @Override
47 public void onCreate(Bundle savedInstanceState)
48 {
49 super.onCreate(savedInstanceState);
50 slideshowListView = getListView(); // get the built-in ListView
51
52 // create and set the ListView's adapter
53 slideshowList = new ArrayList<SlideshowInfo>();
54 slideshowAdapter = new SlideshowAdapter(this, slideshowList);
55 slideshowListView.setAdapter(slideshowAdapter);
56
57 // create a new AlertDialog Builder
58 AlertDialog.Builder builder = new AlertDialog.Builder(this);
59 builder.setTitle(R.string.welcome_message_title);
60 builder.setMessage(R.string.welcome_message);
61 builder.setPositiveButton(R.string.button_ok, null);
62 builder.show();
63 } // end method onCreate
64
Fig. 12.16. Overriding Activity method onCreate in class Slideshow.
Overriding Activity Methods onCreateOptionsMenu, onOptionsItemSelected and onActivityResult
Method onCreateOptionsMenu (Fig. 12.17, lines 66–73) inflates the Activity’s menu from the file slideshow_menu.xml (Section 12.4.5). When the user touches the New Slideshow menu item, method onOptionsItemSelected (lines 79–132) displays a dialog with a custom GUI in which the user can enter the slideshow’s name. To display an EditText in the dialog, we inflate the layout in slideshow_name_edittext.xml (line 87) and set it as the View for the dialog (line 93). If the user touches the OK button in the dialog, method onClick (lines 99–124) gets the name from the EditText, then creates a new SlideshowInfo object for the slideshow and adds it to the slideshowList. Lines 110–112 configure an Intent to launch the SlideshowEditor Activity. Then, line 113 launches the Intent using the startActivityForResult method. The first argument is the Intent representing the sub-Activity to launch. The second is a non-negative request code that identifies which Activity is returning a result. This value is received as the first parameter in method onActivityResult (lines 135–141), which is called when the sub-Activity returns so that this Activity can process the result. If your Activity can launch multiple other ones, the request code can be used in onActivityResult to determine which sub-Activity returned so that you can properly handle the result. Since we launch only one sub-Activity from this Activity, we used the value 0 (defined as the constant EDIT_ID in line 76) for the second argument. Using a negative result code causes startActivityForResult to operate identically to startActivity. If the system cannot find an Activity to handle the Intent, then method startActivityForResult throws an ActivityNotFoundException. [Note: In general, you should wrap calls to startActivity and startActivityForResult in a try statement, so you can catch the exception if there is no Activity to handle the Intent.]
65 // create the Activity's menu from a menu resource XML file
66 @Override
67 public boolean onCreateOptionsMenu(Menu menu)
68 {
69 super.onCreateOptionsMenu(menu);
70 MenuInflater inflater = getMenuInflater();
71 inflater.inflate(R.menu.slideshow_menu, menu);
72 return true;
73 } // end method onCreateOptionsMenu
74
75 // SlideshowEditor request code passed to startActivityForResult
76 private static final int EDIT_ID = 0;
77
78 // handle choice from options menu
79 @Override
80 public boolean onOptionsItemSelected(MenuItem item)
81 {
82 // get a reference to the LayoutInflater service
83 LayoutInflater inflater = (LayoutInflater) getSystemService(
84 Context.LAYOUT_INFLATER_SERVICE);
85
86 // inflate slideshow_name_edittext.xml to create an EditText
87 View view = inflater.inflate(R.layout.slideshow_name_edittext, null);
88 final EditText nameEditText =
89 (EditText) view.findViewById(R.id.nameEditText);
90
91 // create an input dialog to get slideshow name from user
92 AlertDialog.Builder inputDialog = new AlertDialog.Builder(this);
93 inputDialog.setView(view); // set the dialog's custom View
94 inputDialog.setTitle(R.string.dialog_set_name_title);
95
96 inputDialog.setPositiveButton(R.string.button_set_slideshow_name,
97 new DialogInterface.OnClickListener()
98 {
99 public void onClick(DialogInterface dialog, int whichButton)
100 {
101 // create a SlideshowInfo for a new slideshow
102 String name = nameEditText.getText().toString().trim();
103
104 if (name.length() != 0)
105 {
106 slideshowList.add(new SlideshowInfo(name));
107
108 // create Intent to launch the SlideshowEditor Activity,
109 // add slideshow name as an extra and start the Activity
110 Intent editSlideshowIntent =
111 new Intent(Slideshow.this, SlideshowEditor.class);
112 editSlideshowIntent.putExtra("NAME_EXTRA", name);
113 startActivityForResult(editSlideshowIntent, 0);
114 } // end if
115 else
116 {
117 // display message that slideshow must have a name
118 Toast message = Toast.makeText(Slideshow.this,
119 R.string.message_name, Toast.LENGTH_SHORT);
120 message.setGravity(Gravity.CENTER,
121 message.getXOffset() / 2, message.getYOffset() / 2);
122 message.show(); // display the Toast
123 } // end else
124 } // end method onClick
125 } // end anonymous inner class
126 ); // end call to setPositiveButton
127
128 inputDialog.setNegativeButton(R.string.button_cancel, null);
129 inputDialog.show();
130
131 return super.onOptionsItemSelected(item); // call super's method
132 } // end method onOptionsItemSelected
133
134 // refresh ListView after slideshow editing is complete
135 @Override
136 protected void onActivityResult(int requestCode, int resultCode,
137 Intent data)
138 {
139 super.onActivityResult(requestCode, resultCode, data);
140 slideshowAdapter.notifyDataSetChanged(); // refresh the adapter
141 } // end method onActivityResult
142
Fig. 12.17. Overriding Activity methods onCreateOptionsMenu, onOptionsItemSelected and onActivityResult.
Overridden Activity method onActivityResult (lines 135–141) is called when another Activity returns a result to this one. The requestCode parameter is the value that was passed as the second argument to startActivityForResult when the other Activity was started. The resultCode parameter’s value is:
• RESULT_OK if the Activity completed successfully
• RESULT_CANCELED if the Activity did not return a result or crashed, or if the Activity explicitly calls method setResult with the argument RESULT_CANCELED
The third parameter is an Intent containing data (as extras) returned to this Activity. In this example, we need to know simply that the SlideshowEditor Activity completed so that we can refresh the ListView with the new slideshow. We call SlideshowAdapter’s notifyDataSetChanged method to indicate that the adapter’s underlying data set changed and refresh the ListView.
SlideshowAdapter: Using the View-Holder Pattern to Populate a ListView
Figure 12.18 defines the private nested classes ViewHolder and SlideshowAdapter. Class ViewHolder simply defines package-access instance variables that class SlideshowAdapter will be able to access directly when manipulating ViewHolder objects. When a ListView item is created, we’ll create an object of class ViewHolder and associate it with that ListView item. If there is an existing ListView item that’s being reused, we’ll simply obtain the ViewHolder object that was previously associated with that item.
143 // Class for implementing the "ViewHolder pattern"
144 // for better ListView performance
145 private static class ViewHolder
146 {
147 TextView nameTextView; // refers to ListView item's TextView
148 ImageView imageView; // refers to ListView item's ImageView
149 Button playButton; // refers to ListView item's Play Button
150 Button editButton; // refers to ListView item's Edit Button
151 Button deleteButton; // refers to ListView item's Delete Button
152 } // end class ViewHolder
153
154 // ArrayAdapter subclass that displays a slideshow's name, first image
155 // and "Play", "Edit" and "Delete" Buttons
156 private class SlideshowAdapter extends ArrayAdapter<SlideshowInfo>
157 {
158 private List<SlideshowInfo> items;
159 private LayoutInflater inflater;
160
161 // public constructor for SlideshowAdapter
162 public SlideshowAdapter(Context context, List<SlideshowInfo> items)
163 {
164 // call super constructor
165 super(context, -1, items);
166 this.items = items;
167 inflater = (LayoutInflater)
168 getSystemService(Context.LAYOUT_INFLATER_SERVICE);
169 } // end SlideshowAdapter constructor
170
171 // returns the View to display at the given position
172 @Override
173 public View getView(int position, View convertView,
174 ViewGroup parent)
175 {
176 ViewHolder viewHolder; // holds references to current item's GUI
177
178 // if convertView is null, inflate GUI and create ViewHolder;
179 // otherwise, get existing ViewHolder
180 if (convertView == null)
181 {
182 convertView =
183 inflater.inflate(R.layout.slideshow_list_item, null);
184
185 // set up ViewHolder for this ListView item
186 viewHolder = new ViewHolder();
187 viewHolder.nameTextView = (TextView)
188 convertView.findViewById(R.id.nameTextView);
189 viewHolder.imageView = (ImageView)
190 convertView.findViewById(R.id.slideshowImageView);
191 viewHolder.playButton =
192 (Button) convertView.findViewById(R.id.playButton);
193 viewHolder.editButton =
194 (Button) convertView.findViewById(R.id.editButton);
195 viewHolder.deleteButton =
196 (Button) convertView.findViewById(R.id.deleteButton);
197 convertView.setTag(viewHolder); // store as View's tag
198 } // end if
199 else // get the ViewHolder from the convertView's tag
200 viewHolder = (ViewHolder) convertView.getTag();
201
202 // get the slideshow the display its name in nameTextView
203 SlideshowInfo slideshowInfo = items.get(position);
204 viewHolder.nameTextView.setText(slideshowInfo.getName());
205
206 // if there is at least one image in this slideshow
207 if (slideshowInfo.size() > a)
208 {
209 // create a bitmap using the slideshow's first image or video
210 String firstItem = slideshowInfo.getImageAt(0);
211 new LoadThumbnailTask().execute(viewHolder.imageView,
212 Uri.parse(firstItem));
213 } // end if
214
215 // set tage and OnClickListener for the "Play" Button
216 viewHolder.playButton.setTag(slideshowInfo);
217 viewHolder.playButton.setOnClickListener(playButtonListener);
218
219 // create and set OnClickListener for the "Edit" Button
220 viewHolder.editButton.setTag(slideshowInfo);
221 viewHolder.editButton.setOnClickListener(editButtonListener);
222
223 // create and set OnClickListener for the "Delete" Button
224 viewHolder.deleteButton.setTag(slideshowInfo);
225 viewHolder.deleteButton.setOnClickListener(deleteButtonListener);
226
227 return convertView; // return the View for this position
228 } // end getView
229 } // end class SlideshowAdapter
230
Fig. 12.18. SlideshowAdapter class for populating the ListView.
In the AddressBook app, we created a SimpleCursorAdapter to display Strings (contact names) from a database. Recall that such an adapter is designed specifically to map Strings and images to TextViews and ImageViews, respectively. This app’s ListView items are more complicated. Each contains text (the slideshow name), an image (the first image in the slideshow) and Buttons (Play, Edit and Delete). To map slideshow data to these ListView items, we extend class ArrayAdapter so that we can override method getView to configure a custom layout for each ListView item. The constructor (lines 162–169) calls the superclass’s constructor, then stores the List of SlideshowInfo objects and the LayoutInflater for use in the getView method. The second superclass constructor argument represents the resource ID of a layout that contains a TextView for displaying data in a ListView item. In this case, we’ll set this ourselves later, so we supply -1 for that argument.
Method getView (lines 172–228) performs custom mapping of data to a ListView item. It receives the ListView item’s position, the View (convertView) representing that ListView item and that ListView item’s parent as arguments. By manipulating convertView, you can customize the ListView item’s contents. If convertView is null, lines 182–196 inflate the ListView-item layout slideshow_list_item.xml and assign it to convertView, then create a ViewHolder object and assign the GUI components that were just inflated to the ViewHolder’s instance variables. Line 197 sets this ViewHolder object as the ListView item’s tag. If convertView is not null, the ListView is reusing a ListView item that has scrolled off the screen. In this case, line 200 gets the tag of the ListView item and simply reuses that ViewHolder object. Line 203 gets the SlideshowInfo object that corresponds to the ListView item’s position.
Line 204 sets the viewHolder’s nameTextView to the slideshow’s name. If there are any images in the slideshow, lines 210–212 get the path to the first image then create and execute a new LoadThumbnailTask AsyncTask (Fig. 12.19) to load and display the image’s thumbnail on the viewHolder’s imageView.
231 // task to load thumbnails in a separate thread
232 private class LoadThumbnailTask extends AsyncTask<Object,Object,Bitmap>
233 {
234 ImageView imageView; // displays the thumbnail
235
236 // load thumbnail: ImageView and Uri as args
237 @Override
238 protected Bitmap doInBackground(Object... params)
239 {
240 imageView = (ImageView) params[0];
241
242 return Slideshow.getThumbnail((Uri) params[1],
243 getContentResolver(), new BitmapFactory.Options());
244 } // end method doInBackground
245
246 // set thumbnail on ListView
247 @Override
248 protected void onPostExecute(Bitmap result)
249 {
250 super.onPostExecute(result);
251 imageView.setImageBitmap(result);
252 } // end method onPostExecute
253 } // end class LoadThumbnailTask
254
Fig. 12.19. Class LoadThumbnailTask loads a thumbnail in a separate thread.
Lines 216–225 configure the listeners for the Play, Edit and Delete Buttons in this ListView item. In each case, the Button’s setTag method is used to provide some extra information (in the form of an Object) that’s needed in the corresponding event handler—specifically, the SlideshowInfo object representing the slideshow. For the playButton and editButton event handlers, this object is used as an extra in an Intent so that the SlideshowPlayer and SlideshowEditor know which slideshow to play or edit, respectively. For the deleteButton, we provide the SlideshowInfo object, so that it can be removed from the List of SlideshowInfo objects.
Nested Class LoadThumbnailTask
Class LoadThumbnailTask (Fig. 12.19) loads an image thumbnail in a separate thread of execution to ensure that the GUI thread remains responsive. Method doInBackground uses Slideshow’s static utility method getThumbnail to load the thumbnail. When that completes, method onPostExecute receives the thumbnail Bitmap and displays it on the specified ImageView.
OnClickListener playButtonListener Responds to the Events of the playButton of a Specific Slideshow
The OnClickListener playButtonLIstener (Fig. 12.20) responds to the playButton’s events. We create an Intent to launch the SlideshowPlayer Activity, then add the slideshow’s name as an Intent extra (lines 262–265). The arguments are a String to tag the extra data and the tagged value (the slideshow name). Line 265 uses the View argument’s getTag method to get the value that was set with setTag (i.e., the slideshow name) in line 216. Line 266 launches the Intent.
255 // respond to events generated by the "Play" Button
256 OnClickListener playButtonListener = new OnClickListener()
257 {
258 @Override
259 public void onClick(View v)
260 {
261 // create an intent to launch the SlideshowPlayer Activity
262 Intent playSlideshow =
263 new Intent(Slideshow.this, SlideshowPlayer.class);
264 playSlideshow.putExtra(
265 NAME_EXTRA, ((SlideshowInfo) v.getTag()).getName());
266 startActivity(playSlideshow); // launch SlideshowPlayer Activity
267 } // end method onClick
268 }; // end playButtonListener
269
Fig. 12.20. Event listener for the playButton’s click event.
OnClickListener editButtonListener Responds to the Events of the editButton of a Specific Slideshow
The OnClickListener editButtonLIstener (Fig. 12.21) responds to the editButton’s events. We create an Intent to launch the SlideshowEditor Activity, then add the slideshow’s name as an Intent extra (lines 277–280). Line 280 uses the View argument’s getTag method to get the value that was set with setTag (i.e., the slideshow name) in line 220. Line 281 launches the Intent with startActivityForResult, so this Activity’s ListView can be updated by onActivityResult—in case the user changes the first image in the slideshow while editing.
270 // respond to events generated by the "Edit" Button
271 private OnClickListener editButtonListener = new OnClickListener()
272 {
273 @Override
274 public void onClick(View v)
275 {
276 // create an intent to launch the SlideshowEditor Activity
277 Intent editSlideshow =
278 new Intent(Slideshow.this, SlideshowEditor.class);
279 editSlideshow.putExtra(
280 NAME_EXTRA, ((SlideshowInfo) v.getTag()).getName());
281 startActivityForResult(editSlideshow, 0);
282 } // end method onClick
283 }; // end playButtonListener
284
Fig. 12.21. Event listener for the editButton’s click event.
OnClickListener deleteButtonListener Responds to the Events of the deleteButton of a Specific Slideshow
The OnClickListener deleteButtonLIstener (Fig. 12.22) responds to the deleteButton’s events. We confirm that the user wants to delete the slideshow. If so, we use the View argument’s getTag method to get the SlideshowInfo object that was set with setTag in line 224, then remove that object from slideshowList. Line 304 refreshes the ListView by calling the slideshowAdapter’s notifyDataSetChanged method.
285 // respond to events generated by the "Delete" Button
286 private OnClickListener deleteButtonListener = new OnClickListener()
287 {
288 @Override
289 public void onClick(final View v)
290 {
291 // create a new AlertDialog Builder
292 AlertDialog.Builder builder =
293 new AlertDialog.Builder(Slideshow.this);
294 builder.setTitle(R.string.dialog_confirm_delete);
295 builder.setMessage(R.string.dialog_confirm_delete_message);
296 builder.setPositiveButton(R.string.button_ok,
297 new DialogInterface.OnClickListener()
298 {
299 @Override
300 public void onClick(DialogInterface dialog, int which)
301 {
302 Slideshow.slideshowList.remove(
303 (SlideshowInfo) v.getTag());
304 slideshowAdapter.notifyDataSetChanged(); // refresh
305 } // end method onClick
306 } // end anonymous inner class
307 ); // end call to setPositiveButton
308 builder.setNegativeButton(R.string.button_cancel, null);
309 builder.show();
310 } // end method onClick
311 }; // end playButtonListener
312
Fig. 12.22. Event listener for the deleteButton’s click event.
getSlideshowInfo Method
Figure 12.23 defines utility method getSlideshowInfo, which returns a specified SlideshowInfo object. This method simply iterates through the List of SlideshowInfo objects and compares name with the name stored in each. If the corresponding SlideshowInfo object is found, line 319 returns it; otherwise, line 321 returns null.
313 // utility method to locate SlideshowInfo object by slideshow name
314 public static SlideshowInfo getSlideshowInfo(String name)
315 {
316 // for each SlideshowInfo
317 for (SlideshowInfo slideshowInfo : slideshowList)
318 if (slideshowInfo.getName().equals(name))
319 return slideshowInfo;
320
321 return null; // no matching object
322 } // end method getSlideshowInfo
323
Fig. 12.23. Utility method getSlideshowInfo returns a SlideshowInfo object for the slideshow with the specified name.
getThumbnail Method
Figure 12.24 defines our utility method getThumbnail, which receives three arguments—a Uri representing the location of an image, a ContentResolver for interacting with the device’s file system and a BitmapFactory.Options object specifying the Bitmap configuration. Line 328 extracts from the Uri the id of the image for which we’d like to load a thumbnail. Lines 330–331 then use the Android MediaStore to get the corresponding thumbnail image. Class MediaStore.Images.Thumbnails provides its own utility method getThumbnail for this purpose. You provide as arguments the ContentResolver for interacting with the device’s file system, the image’s id, the type of thumbnail you wish to load and the BitmapFactory.Options specifying the Bitmap configuration. Line 333 then returns the Bitmap.
324 // utility method to get a thumbnail image Bitmap
325 public static Bitmap getThumbnail(Uri uri, ContentResolver cr,
326 BitmapFactory.Options options)
327 {
328 int id = Integer.parseInt(uri.getLastPathSegment());
329
330 Bitmap bitmap = MediaStore.Images.Thumbnails.getThumbnail(cr, id,
331 MediaStore.Images.Thumbnails.MICRO_KIND, options);
332
333 return bitmap;
334 } // end method getThumbnail
335 } // end class Slideshow
Fig. 12.24. Utility method getThumbnail loads an image’s thumbnail Bitmap from a specified Uri.
12.5.3. SlideshowEditor Subclass of ListActivity
Class SlideshowEditor (Figs. 12.25–12.33) allows the user to add images and a background audio clip to a slideshow. The class extends ListActivity, because this Activity’s primary purpose is to display a ListView of the images in the slideshow. As we discussed in Section 12.4.7, this ListActivity uses a custom layout.
1 // SlideshowEditor.java
2 // Activity for building and Editing a slideshow.
3 package com.deitel.slideshow;
4
5 import java.util.List;
6
7 import android.app.ListActivity;
8 import android.content.Context;
9 import android.content.Intent;
10 import android.graphics.Bitmap;
11 import android.graphics.BitmapFactory;
12 import android.net.Uri;
13 import android.os.AsyncTask;
14 import android.os.Bundle;
15 import android.view.LayoutInflater;
16 import android.view.View;
17 import android.view.View.OnClickListener;
18 import android.view.ViewGroup;
19 import android.widget.ArrayAdapter;
20 import android.widget.Button;
21 import android.widget.ImageView;
22
23 public class SlideshowEditor extends ListActivity
24 {
25 // slideshowEditorAdapter to display slideshow in ListView
26 private SlideshowEditorAdapter slideshowEditorAdapter;
27 private SlideshowInfo slideshow; // slideshow data
28
Fig. 12.25. package statement, import statements and instance variables for class SlideshowEditor.
package and import Statements, and Instance Variables of Class SlideshowEditor
Figure 12.25 begins the definition of class SlideShowEditor. We’ve highlighted the import statements for the new classes and interfaces discussed in Section 12.3 and throughout this section. SlideshowEditorAdapter (line 26) is a custom ArrayAdapter subclass used to display the images of the slideshow being edited in this Activity’s ListView. Each photo in the slideshow is displayed as a ListView item with a Delete Button that can be used to remove the image from the slideshow. The slideshow we’re editing is represented by the SlideshowInfo object declared in line 27.
Overriding Activity Method onCreate
Figure 12.26 overrides method onCreate which configures this Activity user interface. Line 34 sets this ListActivity’s layout to the one specified in slideshow_editor.xml. Line 37 gets the Intent that launched this Activity, then gets the String extra called Slideshow.NAME_EXTRA that was stored in the Intent’s Bundle. Line 38 uses class Slideshow’s static getSlideshowInfo method (Fig. 12.23) to get the SlideshowInfo object for the slideshow that’s being created for the first time or being edited. Lines 41–52 get references to the Buttons in the GUI and register their event handlers. Lines 55–56 create a new SlideshowEditorAdapter (Fig. 12.33) to display each item in this slideshow using the list-item layout defined in slideshow_edit_item.xml. We then set that SlideshowEditorAdapter as the ListView’s adapter.
29 // called when the activity is first created
30 @Override
31 public void onCreate(Bundle savedInstanceState)
32 {
33 super.onCreate(savedInstanceState);
34 setContentView(R.layout.slideshow_editor);
35
36 // retrieve the slideshow
37 String name = getIntent().getStringExtra(Slideshow.NAME_EXTRA);
38 slideshow = Slideshow.getSlideshowInfo(name);
39
40 // set appropriate OnClickListeners for each Button
41 Button doneButton = (Button) findViewById(R.id.doneButton);
42 doneButton.setOnClickListener(doneButtonListener);
43
44 Button addPictureButton =
45 (Button) findViewById(R.id.addPictureButton);
46 addPictureButton.setOnClickListener(addPictureButtonListener);
47
48 Button addMusicButton = (Button) findViewById(R.id.addMusicButton);
49 addMusicButton.setOnClickListener(addMusicButtonListener);
50
51 Button playButton = (Button) findViewById(R.id.playButton);
52 playButton.setOnClickListener(playButtonListener);
53
54 // get ListView and set its adapter for displaying list of images
55 slideshowEditorAdapter =
56 new SlideshowEditorAdapter(this, slideshow.getImageList());
57 getListView().setAdapter(slideshowEditorAdapter);
58 } // end method onCreate
59
Fig. 12.26. Overriding Activity method onCreate in class SlideshowEditor.
Overriding Activity Method onActivityResult
As you learned in Section 12.5.2, method onActivityResult (Fig. 12.27) is called when a sub-Activity started by the startActivityForResult method finishes executing. As you’ll see shortly, the SlideshowEditor launches one Activity that allows the user to select an image from the device and another that allows the user to select music. Because we launch more than one sub-Activity, we use the constants at lines 61–62 as request codes to determine which sub-Activity is returning results to onActivityResult—the request code used to launch an Activity with startActivityForResult is passed to onActivityResult as the first argument. The parameter resultCode receives RESULT_OK (line 69) if the returning Activity executed successfully. We process the result only if there has not been an error. The Intent parameter data contains the Activity’s result. Line 71 uses the Intent’s getData method to get the Uri representing the image or music the user selected. If onActivityResult was called after selecting an image (line 74), line 77 adds that image’s path to the slideshow’s list of image paths, and line 80 indicates that the SlideshowEditorAdapter’s data set has changed so the SlideshowEditor’s ListView can be updated. If onActivityResult was called after selecting music (line 82), then line 83 sets the slideshow’s music path.
60 // set IDs for each type of media result
61 private static final int PICTURE_ID = 1;
62 private static final int MUSIC_ID = 2;
63
64 // called when an Activity launched from this Activity returns
65 @Override
66 protected void onActivityResult(int requestCode, int resultCode,
67 Intent data)
68 {
69 if (resultCode == RESULT_OK) // if there was no error
70 {
71 Uri selectedUri = data.getData();
72
73 // if the Activity returns an image
74 if (requestCode == PICTURE_ID)
75 {
76 // add new image path to the slideshow
77 slideshow.addImage(selectedUri.toString());
78
79 // refresh the ListView
80 slideshowEditorAdapter.notifyDataSetChanged();
81 } // end if
82 else if (requestCode == MUSIC_ID) // Activity returns music
83 slideshow.setMusicPath(selectedUri.toString());
84 } // end if
85 } // end method onActivityResult
86
Fig. 12.27. Overriding Activity method onActivityResult.
OnClickListener doneButtonListener for doneButton’s Click Event
When the user touches the doneButton, the doneButtonListener (Fig. 12.28) calls Activity method finish (line 94) to terminate this Activity and return to the launching one.
87 // called when the user touches the "Done" Button
88 private OnClickListener doneButtonListener = new OnClickListener()
89 {
90 // return to the previous Activity
91 @Override
92 public void onClick(View v)
93 {
94 finish();
95 } // end method onClick
96 }; // end OnClickListener doneButtonListener
97
Fig. 12.28. OnClickListener backButtonListener responds to the events of the backButton.
OnClickListener addPictureButtonListener for addPictureButton’s Click Event
The addPictureButtonListener (Fig. 12.29) launches an external image-choosing Activity (such as Gallery) when the addPictureButton is clicked. Line 105 creates a new Intent with Intent’s ACTION_GET_CONTENT constant, indicating that the Intent allows the user to select content that’s stored on the device. Intent’s setType method is passed a String representing the image MIME type, indicating that the user should be able to select an image. The asterisk (*) in the MIME type indicates that any type of image can be selected. Intent method createChooser returns the specified Intent as one of type android.intent.action.CHOOSER, which displays an Activity chooser that allows the user to select which Activity to use for choosing an image (if more than one Activity on the device supports this). If there’s only one such Activity, it’s launched—for example, our test device allows us to choose images only from the Gallery app. The second argument to createChooser is a title that will be displayed on the Activity chooser.
98 // called when the user touches the "Add Picture" Button
99 private OnClickListener addPictureButtonListener = new OnClickListener()
100 {
101 // launch image choosing activity
102 @Override
103 public void onClick(View v)
104 {
105 Intent intent = new Intent(Intent.ACTION_GET_CONTENT);
106 intent.setType("image/*");
107 startActivityForResult(Intent.createChooser(intent,
108 getResources().getText(R.string.chooser_image)), PICTURE_ID);
109 } // end method onClick
110 }; // end OnClickListener addPictureButtonListener
111
Fig. 12.29. OnClickListener addPictureButtonListener responds to the events of the addPictureButton.
OnClickListener addMusicButtonListener for addMusicButton’s Click Event
The addMusicButtonListener OnClickListener (Fig. 12.30) launches an external music-choosing Activity to select the sound track for the slideshow. This event handler works just like the one in Fig. 12.29, except that the Intent uses the MIME type "audio/*" to allow the user to select any type of audio on the device. On a typical device, launching this Intent displays the chooser shown in Fig. 12.30, allowing the user to Select music track or record a new audio clip with the Sound Recorder.
112 // called when the user touches the "Add Music" Button
113 private OnClickListener addMusicButtonListener = new OnClickListener()
114 {
115 // launch music choosing activity
116 @Override
117 public void onClick(View v)
118 {
119 Intent intent = new Intent(Intent.ACTION_GET_CONTENT);
120 intent.setType("audio/*");
121 startActivityForResult(Intent.createChooser(intent,
122 getResources().getText(R.string.chooser_music)), MUSIC_ID);
123 } // end method onClick
124 }; // end OnClickListener addMusicButtonListener
125

Fig. 12.30. OnClickListener addMusicButtonListener responds to the events of the addMusicButton.
OnClickListener playButtonListener for PlayButton’s Click Event
The playButtonListener OnClickListener (Fig. 12.31) launches the SlideshowPlayer Activity when the user touches the Play Button. Lines 137–142 create a new Intent for the SlideshowPlayer class, include the slideshow’s name as an Intent extra and launch the Intent.
126 // called when the user touches the "Play" Button
127 private OnClickListener playButtonListener = new OnClickListener()
128 {
129 // plays the current slideshow
130 @Override
131 public void onClick(View v)
132 {
133 // create new Intent to launch the SlideshowPlayer Activity
134 Intent playSlideshow =
135 new Intent(SlideshowEditor.this, SlideshowPlayer.class);
136
137 // include the slideshow's name as an extra
138 playSlideshow.putExtra(
139 Slideshow.NAME_EXTRA, slideshow.getName());
140 startActivity(playSlideshow); // launch the Activity
141 } // end method onClick
142 }; // end playButtonListener
143
Fig. 12.31. OnClickListener playButtonListener responds to the events of the playButton.
OnClickListener deleteButtonListener for deleteButton’s Click Event
The deleteImage OnClickListener (Fig. 12.32) deletes the image corresponding to the Delete Button that was touched. Each Delete Button stores the path of its associated image as its tag. Line 152 gets the tag and passes it to the slideshowEditorAdapter’s remove method, which also updates the SlideshowEditor’s ListView because the data set has changed.
144 // called when the user touches the "Delete" Button next
145 // to an ImageView
146 private OnClickListener deleteButtonListener = new OnClickListener()
147 {
148 // removes the image
149 @Override
150 public void onClick(View v)
151 {
152 slideshowEditorAdapter.remove((String) v.getTag());
153 } // end method onClick
154 }; // end OnClickListener deleteButtonListener
155
Fig. 12.32. OnClickListener deleteButtonListener responds to the events of the deleteButton next to a specific image.
private Classes ViewHolder and SlideshowEditorAdaptor: Displaying Slideshow Images Using the View-Holder Pattern
As in Fig. 12.18, we used the view-holder pattern when displaying items in the SlideshowEditor’s ListView. Class ViewHolder (Fig. 12.33, lines 158–162) defines the two GUI components used in each ListView item. Class SlideshowEditorAdapter (lines 165–212) extends ArrayAdapter to display each image in the slideshow as an item in SlideshowEditor’s ListView. The items List, which is initialized in the constructor, holds Strings representing the locations of the slideshow’s images. The code for SlideshowEditorAdapter is similar to the SlideshowAdapter in Fig. 12.18, but this adapter uses the layout slideshow_edit_item.xml for the ListView’s items. For details on how we display each image, see the discussion for Fig. 12.18.
156 // Class for implementing the "ViewHolder pattern"
157 // for better ListView performance
158 private static class ViewHolder
159 {
160 ImageView slideImageView; // refers to ListView item's ImageView
161 Button deleteButton; // refers to ListView item's Button
162 } // end class ViewHolder
163
164 // ArrayAdapter displaying Slideshow images
165 private class SlideshowEditorAdapter extends ArrayAdapter<String>
166 {
167 private List<String> items; // list of image Uris
168 private LayoutInflater inflater;
169
170 public SlideshowEditorAdapter(Context context, List<String> items)
171 {
172 super(context, -1, items);
173 this.items = items;
174 inflater = (LayoutInflater)
175 getSystemService(Context.LAYOUT_INFLATER_SERVICE);
176 } // end SlideshoweditorAdapter constructor
177
178 @Override
179 public View getView(int position, View convertView, ViewGroup parent)
180 {
181 ViewHolder viewHolder; // holds references to current item's GUI
182
183 // if convertView is null, inflate GUI and create ViewHolder;
184 // otherwise, get existing ViewHolder
185 if (convertView == null)
186 {
187 convertView =
188 inflater.inflate(R.layout.slideshow_edit_item, null);
189
190 // set up ViewHolder for this ListView item
191 viewHolder = new ViewHolder();
192 viewHolder.slideImageView = (ImageView)
193 convertView.findViewById(R.id.slideshowImageView);
194 viewHolder.deleteButton =
195 (Button) convertView.findViewById(R.id.deleteButton);
196 convertView.setTag(viewHolder); // store as View's tag
197 } // end if
198 else // get the ViewHolder from the convertView's tag
199 viewHolder = (ViewHolder) convertView.getTag();
200
201 // get and display a thumbnail Bitmap image
202 String item = items.get(position); // get current image
203 new LoadThumbnailTask().execute(viewHolder.slideImageView,
204 Uri.parse(item));
205
206 // configure the "Delete" Button
207 viewHolder.deleteButton.setTag(item);
208 viewHolder.deleteButton.setOnClickListener(deleteButtonListener);
209
210 return convertView;
211 } // end method getView
212 } // end class SlideshowEditorAdapter
213
Fig. 12.33. private nested class SlideshowEditorAdapter displays the slideshow images in the SlideshowEditor’s ListView.
Nested Class LoadThumbnailTask
Class LoadThumbnailTask (Fig. 12.34) loads an image thumbnail in a separate thread of execution to ensure that the GUI thread remains responsive. Method doInBackground uses Slideshow’s static utility method getThumbnail to load the thumbnail. When that completes, method onPostExecute receives the thumbnail Bitmap and displays it on the specified ImageView.
214 // task to load thumbnails in a separate thread
215 private class LoadThumbnailTask extends AsyncTask<Object,Object,Bitmap>
216 {
217 ImageView imageView; // displays the thumbnail
218
219 // load thumbnail: ImageView, MediaType and Uri as args
220 @Override
221 protected Bitmap doInBackground(Object... params)
222 {
223 imageView = (ImageView) params[0];
224
225 return Slideshow.getThumbnail((Uri) params[1],
226 getContentResolver(), new BitmapFactory.Options());
227 } // end method doInBackground
228
229 // set thumbnail on ListView
230 @Override
231 protected void onPostExecute(Bitmap result)
232 {
233 super.onPostExecute(result);
234 imageView.setImageBitmap(result);
235 } // end method onPostExecute
236 } // end class LoadThumbnailTask
237 } // end class SlideshowEditor
Fig. 12.34. Class LoadThumbnailTask loads an image thumbnail in a separate thread.
12.5.4. SlideshowPlayer Subclass of ListActivity
Activity class SlideshowPlayer (Figs. 12.35–12.39) plays a slideshow specified as an extra of the Intent that launches this Activity.
1 // SlideshowPlayer.java
2 // Plays the selected slideshow that's passed as an Intent extra
3 package com.deitel.slideshow;
4
5 import java.io.FileNotFoundException;
6 import java.io.InputStream;
7
8 import android.app.Activity;
9 import android.content.ContentResolver;
10 import android.graphics.Bitmap;
11 import android.graphics.BitmapFactory;
12 import android.graphics.drawable.BitmapDrawable;
13 import android.graphics.drawable.Drawable;
14 import android.graphics.drawable.TransitionDrawable;
15 import android.media.MediaPlayer;
16 import android.net.Uri;
17 import android.os.AsyncTask;
18 import android.os.Bundle;
19 import android.os.Handler;
20 import android.util.Log;
21 import android.widget.ImageView;
22
23 public class SlideshowPlayer extends Activity
24 {
25 private static final String TAG = "SLIDESHOW"; // error logging tag
26
27 // constants for saving slideshow state when config changes
28 private static final String MEDIA_TIME = "MEDIA_TIME";
29 private static final String IMAGE_INDEX = "IMAGE_INDEX";
30 private static final String SLIDESHOW_NAME = "SLIDESHOW_NAME";
31
32 private static final int DURATION = 5000; // 5 seconds per slide
33 private ImageView imageView; // displays the current image
34 private String slideshowName; // name of current slideshow
35 private SlideshowInfo slideshow; // slideshow being played
36 private BitmapFactory.Options options; // options for loading images
37 private Handler handler; // used to update the slideshow
38 private int nextItemIndex; // index of the next image to display
39 private int mediaTime; // time in ms from which media should play
40 private MediaPlayer mediaPlayer; // plays the background music, if any
41
Fig. 12.35. package and import statements, and fields of class SlideshowPlayer.
package and import Statements, and Fields of Class SlideshowPlayer
Figure 12.35 begins the definition of class SlideShowPlayer. We’ve highlighted the import statements for the new classes and interfaces discussed in Section 12.3 and throughout this section. The String constant at line 25 is used for logging error messages that occur when attempting to play music in the background of the slideshow. The String constants in lines 28–30 are used to save state information in onSaveInstanceState and to load that information in onCreate in cases when the Activity goes to the background and returns to the foreground, respectively. The int constant at line 32 specifies the duration for which each slide is shown. Lines 33–40 declare the instance variables that are used to manage the slideshow.
Overriding Activity Method onCreate
Figure 12.36 overrides Activity method onCreate to configure the SlideshowPlayer. Line 49 gets SlideshowPlayer’s ImageView. Lines 51–68 determine whether the Activity is starting from scratch, in which case the savedInstanceState Bundle will be null (line 51), or the Activity is restarting (perhaps due to a configuration change). If the Activity is starting from scratch, line 54 gets the slideshow’s name from the Intent that launched this Activity, line 55 sets mediaTime to 0 to indicate that the music should play from its beginning, and line 56 sets nextItemIndex to 0 to indicate that the slideshow should start from the beginning. If the Activity is restarting, lines 61–67 set these instance variables with values that were stored in the savedInstanceState Bundle.
42 // initializes the SlideshowPlayer Activity
43 @Override
44 public void onCreate(Bundle savedInstanceState)
45 {
46 super.onCreate(savedInstanceState);
47 setContentView(R.layout.slideshow_player);
48
49 imageView = (ImageView) findViewById(R.id.imageView);
50
51 if (savedInstanceState == null)
52 {
53 // get slideshow name from Intent's extras
54 slideshowName = getIntent().getStringExtra(Slideshow.NAME_EXTRA);
55 mediaTime = 0; // position in media clip
56 nextItemIndex = 0; // start from first image
57 } // end if
58 else // Activity resuming
59 {
60 // get the play position that was saved when config changed
61 mediaTime = savedInstanceState.getInt(MEDIA_TIME);
62
63 // get index of image that was displayed when config changed
64 nextItemIndex = savedInstanceState.getInt(IMAGE_INDEX);
65
66 // get name of slideshow that was playing when config changed
67 slideshowName = savedInstanceState.getString(SLIDESHOW_NAME);
68 } // end else
69
70 // get SlideshowInfo for slideshow to play
71 slideshow = Slideshow.getSlideshowInfo(slideshowName);
72
73 // configure BitmapFactory.Options for loading images
74 options = new BitmapFactory.Options();
75 options.inSampleSize = 4; // sample at 1/4 original width/height
76
77 // if there is music to play
78 if (slideshow.getMusicPath() != null)
79 {
80 // try to create a MediaPlayer to play the music
81 try
82 {
83 mediaPlayer = new MediaPlayer();
84 mediaPlayer.setDataSource(
85 this, Uri.parse(slideshow.getMusicPath()));
86 mediaPlayer.prepare(); // prepare the MediaPlayer to play
87 mediaPlayer.setLooping(true); // loop the music
88 mediaPlayer.seekTo(mediaTime); // seek to mediaTime
89 } // end try
90 catch (Exception e)
91 {
92 Log.v(TAG, e.toString());
93 } // end catch
94 } // end if
95
96 handler = new Handler(); // create handler to control slideshow
97 } // end method onCreate
98
Fig. 12.36. Overriding Activity method onCreate in class SlideshowPlayer.
Next, line 71 gets the SlideshowInfo object for the slideshow to play, and lines 74–75 configure the BitmapFactory.Options used for downsampling the images that are displayed in the slideshow.
If music is associated with the slideshow, line 83 creates a MediaPlayer object to play the music. We call MediaPlayer’s setDataSource method (lines 84–85) with a Uri representing the location of the music to play. MediaPlayer’s prepare method (line 86) prepares the MediaPlayer for playback. This method blocks the current thread until the MediaPlayer is ready for playback. This method should be used only for music stored on the device. If playing a streaming media file, it’s recommended that you use the prepareAsync method, which returns immediately, instead; otherwise, prepare will block the current thread until the stream has been buffered. Method prepare will throw an exception if the MediaPlayer cannot be prepared—for example, if it’s currently playing a media clip. If an exception occurs, we log the error message (line 92). A detailed state-diagram for the MediaPlayer class can be found at
developer.android.com/reference/android/media/MediaPlayer.html
Line 87 calls MediaPlayer’s setLooping method with the argument true to loop playback if the music’s duration is shorter than the total slideshow duration. Line 88 calls MediaPlayer’s seekTo method to move the audio playback to the specified time in milliseconds—the argument will be 0 if this Activity is starting from scratch; otherwise, the argument will represent where playback last paused. Finally, line 96 creates the Handler that controls the slideshow.
Overriding Activity Methods onStart, onPause, onResume, onStop and onDestroy
Figure 12.37 overrides Activity methods onStart, onPause, onResume, onStop and onDestroy. Method onStart (lines 100–105) immediately posts the updateSlideshow Runnable (Fig. 12.39) for execution. Method onPause (lines 108–115) pauses the background audio by calling MediaPlayer’s pause method—this prevents the music from playing when the Activity is not in the foreground. Method onResume (lines 118–125) calls MediaPlayer’s start method, which starts the music, or restarts it if it was paused. Method onStop (lines 128–135) calls the handler’s removeCallbacks to prevent previously scheduled updateSlideshow Runnables from executing when the Activity is stopped. Method onDestroy (lines 138–145) calls MediaPlayer’s release method, which releases the resources used by the MediaPlayer.
99 // called after onCreate and sometimes onStop
100 @Override
101 protected void onStart()
102 {
103 super.onStart();
104 handler.post(updateSlideshow); // post updateSlideshow to execute
105 } // end method onStart
106
107 // called when the Activity is paused
108 @Override
109 protected void onPause()
110 {
111 super.onPause();
112
113 if (mediaPlayer != null)
114 mediaPlayer.pause(); // pause playback
115 } // end method onPause
116
117 // called after onStart or onPause
118 @Override
119 protected void onResume()
120 {
121 super.onResume();
122
123 if (mediaPlayer != null)
124 mediaPlayer.start(); // resume playback
125 } // end method onResume
126
127 // called when the Activity stops
128 @Override
129 protected void onStop()
130 {
131 super.onStop();
132
133 // prevent slideshow from operating when in background
134 handler.removeCallbacks(updateSlideshow);
135 } // end method onStop
136
137 // called when the Activity is destroyed
138 @Override
139 protected void onDestroy()
140 {
141 super.onDestroy();
142
143 if (mediaPlayer != null)
144 mediaPlayer.release(); // release MediaPlayer resources
145 } // end method onDestroy
146
Fig. 12.37. Overriding Activity methods onStart, onPause, onResume and onStop.
Overriding Activity Method onSaveInstanceState
Figure 12.38 overrides the onSaveInstanceState to allow the Activity to save the slideshow’s music playback position, current image index (minus one, because nextItemIndex actually represents the next image to display) and slideshow name in the outState Bundle when the device’s configuration changes. This information can be restored in onCreate to allow the slideshow to continue from the point at which the configuration change occurred.
147 // save slideshow state so it can be restored in onCreate
148 @Override
149 protected void onSaveInstanceState(Bundle outState)
150 {
151 super.onSaveInstanceState(outState);
152
153 // if there is a mediaPlayer, store media's current position
154 if (mediaPlayer != null)
155 outState.putInt(MEDIA_TIME, mediaPlayer.getCurrentPosition());
156
157 // save nextItemIndex and slideshowName
158 outState.putInt(IMAGE_INDEX, nextItemIndex - 1);
159 outState.putString(SLIDESHOW_NAME, slideshowName);
160 } // end method onSaveInstanceState
161
Fig. 12.38. Overriding Activity method onSaveInstanceState.
private Runnable updateSlideshow
Figure 12.39 defines the Runnable that displays the slideshow’s images. If the last slideshow image has already been displayed (line 168), lines 171–172 reset the MediaPlayer to release its resources and line 173 calls the Activity’s finish method to terminate this Activity and return to the one that launched the SlideshowPlayer.
162 // anonymous inner class that implements Runnable to control slideshow
163 private Runnable updateSlideshow = new Runnable()
164 {
165 @Override
166 public void run()
167 {
168 if (nextItemIndex >= slideshow.size())
169 {
170 // if there is music playing
171 if (mediaPlayer != null && mediaPlayer.isPlaying())
172 mediaPlayer.reset(); // slideshow done, reset mediaPlayer
173 finish(); // return to launching Activity
174 } // end if
175 else
176 {
177 String item = slideshow.getImageAt(nextItemIndex);
178 new LoadImageTask().execute(Uri.parse(item));
179 ++nextItemIndex;
180 } // end else
181 } // end method run
182
183 // task to load thumbnails in a separate thread
184 class LoadImageTask extends AsyncTask<Uri, Object, Bitmap>
185 {
186 // load iamges
187 @Override
188 protected Bitmap doInBackground(Uri... params)
189 {
190 return getBitmap(params[0], getContentResolver(), options);
191 } // end method doInBackground
192
193 // set thumbnail on ListView
194 @Override
195 protected void onPostExecute(Bitmap result)
196 {
197 super.onPostExecute(result);
198 BitmapDrawable next = new BitmapDrawable(result);
199 next.setGravity(android.view.Gravity.CENTER);
200 Drawable previous = imageView.getDrawable();
201
202 // if previous is a TransitionDrawable,
203 // get its second Drawable item
204 if (previous instanceof TransitionDrawable)
205 previous = ((TransitionDrawable) previous).getDrawable(1);
206
207 if (previous == null)
208 imageView.setImageDrawable(next);
209 else
210 {
211 Drawable[] drawables = { previous, next };
212 TransitionDrawable transition =
213 new TransitionDrawable(drawables);
214 imageView.setImageDrawable(transition);
215 transition.startTransition(1000);
216 } // end else
217
218 handler.postDelayed(updateSlideshow, DURATION);
219 } // end method onPostExecute
220 } // end class LoadImageTask
221
222 // utility method to get a Bitmap from a Uri
223 public Bitmap getBitmap(Uri uri, ContentResolver cr,
224 BitmapFactory.Options options)
225 {
226 Bitmap bitmap = null;
227
228 // get the image
229 try
230 {
231 InputStream input = cr.openInputStream(uri);
232 bitmap = BitmapFactory.decodeStream(input, null, options);
233 } // end try
234 catch (FileNotFoundException e)
235 {
236 Log.v(TAG, e.toString());
237 } // end catch
238
239 return bitmap;
240 } // end method getBitmap
241 }; // end Runnable updateSlideshow
242 } // end class SlieshowPlayer
Fig. 12.39. Runnable updateSlideshow displays the next image in the slideshow and schedules itself to run again in five seconds.
If there are more images to display, line 177 gets the next image’s path and line 178 launches a LoadImageTask to load and display the image. Class LoadImageTask (lines 184–220) loads the next image and transitions from the last image to the next one. First doInBackground calls getBitmap (defined in lines 223–240) to get the image. When the image is returned, onPostExecute handles the image transition. Lines 198–199 create a BitmapDrawable from the returned Bitmap (result) and set its gravity to center so the image is displayed in the center of the ImageView. Line 200 gets a reference to the preceding Drawable. If it’s a TransitionDrawable, we get the second BitmapDrawable out of the TransitionDrawable (so we don’t create a chain of TransitionDrawables and run out of memory). If there is no previous Drawable, line 208 simply displays the new BitmapDrawable. Otherwise, lines 211–215 use a TransitionDrawable to transition between two Drawable objects in an ImageView. Line 214 passes the TransitionDrawable to ImageView’s setImageDrawable method to display it on currentImageView. We create the TransitionDrawable programmatically, since we need to dynamically determine the previous and next images. TransitionDrawable’s startTransition method (line 215) performs the transition over the course of one second (1000 milliseconds). The transition automatically cross fades from the first to the second Drawable in the drawables array. Line 218 schedules updateSlideshow for execution five seconds in the future so we can display the next image.
Function getBitmap (lines 223–240) uses a ContentResolver to get an InputStream for a specified image. Then, line 232 uses BitmapFactory’s static decodeStream method to create a Bitmap from that stream. The arguments to this method are the InputStream from which to read the image, a Rect for padding around the image (null for no padding) and a BitmapFactory.Options object indicating how to downsample the image.
12.6. Wrap-Up
In this chapter, you created the Slideshow app that enables users to create and manage slideshows. You learned that Android uses content providers to enable apps to save data, retrieve data and make data accessible across apps. In addition, you used built-in content providers to enable the user to select images and audio stored on a device. To take advantage of these built-in content providers, you launched Intents and specified the MIME type of the data required. Android then launched an Activity that showed the specified type of data to the user or displayed an Activity-chooser dialog from which the user could select the Activity to use.
You used an AlertDialog with a custom View to obtain input from the user. You also customized a ListActivity’s layout by replacing its default layout with one that contained a ListView with its android:id attribute set to the value "@android:id/list". You also used subclasses of ArrayAdapter to create objects that populate ListViews using data from collection objects. When an ArrayAdapter’s data set changed, you called its notifyDataSetChanged method to refresh the corresponding ListView. You learned how to use the view-holder pattern to boost the performance of ListViews with complex list-item layouts.
You learned how to use an Intent to launch an Activity that returns a result and how to process that result when the Activity returned. You used a View’s setTag method to add an Object to a View so that Object could be used later in an event handler.
You used a MediaPlayer to play audio from files stored on the device. You also used a BitmapFactory to create Bitmap objects using settings specified in a BitmapFactory.Options object. Finally, you transitioned between images with a TransitionDrawable displayed on an ImageView.
In Chapter 13, you’ll build the Enhanced Slideshow app, which lets you use the camera to take pictures, lets you select video to include in the slideshow and lets you save slideshows to the device.
Self-Review Exercises
12.1. Fill in the blanks in each of the following statements:
a. Activity method __________ enables an Activity to be notified when another Activity completes execution and to receive results back from the completed Activity.
b. When the ArrayAdapter’s data set changes, you can call its __________ method to indicate that the Adapter’s underlying data set has changed.
c. You __________ images to save memory—this helps prevent out-of-memory errors, which can be common when manipulating many Bitmaps.
d. Intent with Intent’s ACTION_GET_CONTENT constant indicates that the Intent allows the user to select content that’s stored __________.
e. An Intent that uses the MIME type " __________ " to allows the user to select any type of audio on the device.
f. Method prepare will __________ if the MediaPlayer cannot be prepared—for example, if it’s currently playing a media clip.
g. Calling MediaPlayer’s __________ method moves the audio playback to the specified time in milliseconds.
12.2. State whether each of the following is true or false. If false, explain why.
a. Several BroadcastReceivers are built into Android for access to data such as images, audio, video, contact information and more.
b. Setting the android:singleLine attribute to false allows only a single line of text in an element.
Answers to Self-Review Exercises
a. startActivityForResult.
b. notifyDataSetChanged.
c. downsample.
d. on the device.
e. audio/*.
f. throw an exception.
g. seekTo.
a. False. Several content providers are built into Android for access to data such as images, audio, video, contact information and more.
b. False. Setting the android:singleLine attribute to true allows only a single line of text in an element.
Exercises
12.3. Fill in the blanks in each of the following statements:
a. Android uses __________ that enable apps to save and retrieve data and to make data accessible across applications.
b. When you scroll in a ListView, as items scroll off the screen, Android reuses those list items for the new ones that are scrolling onto the screen. You can take advantage of the existing GUI components in the reused list items to increase a ListView’s performance of your ListViews. To do this, use the __________ pattern.
c. A(n) __________ (package android.graphics) creates Bitmap objects.
d. In general, you should wrap calls to startActivity and startActivityForResult in a try statement, so you can catch the exception if there is no Activity to handle the __________.
e. State information is saved in onSaveInstanceState and loaded in __________ when the Activity goes to the background and returns to the foreground, respectively.
12.4. State whether each of the following is true or false. If false, explain why.
a. Creating custom ListView items is a cost-effective runtime operation, even for large lists with complex list-item layouts.
b. Method onActivityResult is called when a sub-Activity started by the startActivityForResult method finishes executing.
c. Calling MediaPlayer’s setLooping method with the argument true loops playback if the music’s duration is longer than the total slideshow duration.
d. Use the view-holder pattern to boost the performance of ListViews with complex list-item layouts.
12.5. (Enhancements to the Slideshow App) Make the following enhancements to the Slideshow app.
a. Allow the user to select several songs to play in sequence as the slideshow plays.
b. Allow the user to change the duration for which each individual slide is displayed or to specify the duration for all slides in the slideshow.
12.6. (Enhanced Favorite Twitter Searches App) Using the technologies you learned in this chapter, rebuild the Favorite Twitter Searches app using a subclass of ListActivity. The custom ListView items should each contain a search Button (that displays the tag for a search) and an Edit Button.
12.7. (Enhanced Doodlz App) The Doodlz app in Chapter 9 provides a simple color picker consisting of four SeekBars for setting the alpha, red, green and blue portions of a color. There are more robust color choosers available as apps that you can invoke via Intents. For example, http://www.openintents.org/en/colorpicker is a color chooser app that, if installed, you can launch via Activity method startActivityForResult and simply receive back the color selected by the user. Modify the Doodlz app to use this color picker (or any other that you choose).
12.8. (Enhanced Doodlz App) Using the custom AlertDialog technique we introduce in this chapter, enhance the Doodlz app to allow the user to specify the filename for an image being saved to the gallery.
12.9. (Enhanced SpotOn Game App) Using the custom AlertDialog technique we introduce in this chapter, enhance the SpotOn Game app to allow the user to enter a name to associate with a new top-five score. At the end of a game, display a dialog containing the top five scores in descending order with the appropriate name next to each score.
12.10. (Enhanced SpotOn Game App) Allow the user to choose the images that are used for the spots in the SpotOn game.
12.11. (Enhanced Cannon Game App) Using the custom AlertDialog technique we introduce in this chapter, enhance the Cannon Game app to allow the user to enter a name to associate with a new top-10 score. At the end of a game, display a dialog containing the top five scores in descending order with the appropriate name next to each score.
12.12. (Image Converter App) Create an app that allows the user to apply various image filters—photo negative, black and white or sepia—to a picture that the user choose from the device’s Gallery. Allow the user to save the modified image back to the Gallery.
12.13. (Random Interimage Transition App) If you’re displaying one image in a given area on the screen and you’d like to transition to another image in the same area, store the new screen image in an off-screen “buffer” and randomly copy pixels from it to the display area, overlaying the pixels already at those locations. When the vast majority of the pixels have been copied, copy the entire new image to the display area to be sure you’re displaying the complete new image. You might try several variants of this problem. For example, select all the pixels in a randomly chosen straight line or shape in the new image and overlay them above the corresponding positions of the old image.
12.14. (Scrolling Marquee Sign App) Create an app that scrolls dotted characters from right to left (or from left to right if that’s appropriate for your language) across a marquee-like display sign. As an option, display the text in a continuous loop, so that after the text disappears at one end, it reappears at the other.
12.15. (Scrolling-Image Marquee App) Create an app that scrolls a series of images across a marquee in a continuous loop.
12.16. (Automatic Jigsaw Puzzle Generator App) Create a jigsaw puzzle generator and manipulator. The user specifies an image. Your script loads and displays the image, then breaks it into randomly selected shapes and shuffles them. The user then drags the pieces around to solve the puzzle. Add appropriate audio sounds as the pieces are moved around and snapped back into place. You might keep tabs on each piece and where it really belongs—then use audio effects to help the user get the pieces into the correct positions.