
1. A Quick Tour of Photoshop Elements
Lesson Overview
This lesson provides an overview of Adobe Photoshop Elements 10.
The exercises will familiarize you with the Photoshop Elements workspace and with many of the tools and procedures you’ll use to capture, manage, and edit your digital images.
As you work through the exercises in this lesson you’ll be introduced to the following basic skills and concepts:
• Working with the Organizer and the Editor
• Creating and loading Catalogs
• Importing media
• Reconnecting missing files
• Reviewing and comparing photos
• Creating an Adobe ID
• Using Photoshop Elements Help
You’ll probably need between one and two hours to complete this lesson.

Welcome to Adobe Photoshop Elements! Take a quick tour and get to know the Photoshop Elements workspace. You’ll find all the power and versatility you’d expect from a Photoshop application in an easy-to-use, modular interface that will help you take your digital photography to a new level.
How Photoshop Elements works
Photoshop Elements has two primary workspaces: the Elements Organizer and the Editor. An easy way to understand these two components is to think of the Organizer as a library and browser for your photo collection, and the Editor as a darkroom and workshop.
You’ll work in the Organizer to locate, import, manage, and share your photos and media files, and then use the Editor to edit and adjust your images and to create presentations to showcase them.
Before you start working on this lesson, make sure that you’ve installed the software on your computer from the application CD (see the Photoshop Elements 10 documentation) and that you have correctly copied the Lessons folder from the CD in the back of this book onto your computer’s hard disk (see “Copying the Classroom in a Book files” on page 2).
The library catalog file
Photoshop Elements stores information about your images in a library catalog file, which enables you to conveniently manage all the photos and media files on your computer from within the Organizer. A new entry is created in the catalog file for each image you import. Whenever you tag, rate, sort, or group images, the catalog file is updated. All of your work in the Organizer is recorded in the catalog.
As well as digital photographs, a catalog can include video and audio files, scans, PDF documents, and any presentations and layouts you might create in Photoshop Elements, such as slide shows, photo collages, and CD jacket designs.
Creating a new catalog
The first time you launch Photoshop Elements, a default catalog file (named My Catalog) is automatically created on your hard disk. Although a single catalog can efficiently handle thousands of files, you can also establish separate catalogs for different purposes—if that’s the way you prefer to work. In this exercise you’ll create and load a new catalog specifically to handle the sample files used for the lessons in this book, making it easy to keep them separate from your own photos.
1. Start Photoshop Elements 10; then, click the Organize button in the Welcome screen to launch the Elements Organizer module. You don’t need to be concerned about the prompt to create an Adobe ID; this topic will be covered later in this lesson. If a welcome dialog box appears offering import options, click Cancel.

2. When the Organizer has opened, choose File > Catalog.
3. In the Catalog Manager dialog box, click New. Don’t change the location setting, which specifies who can access the catalog file and where it is stored.

4. Type CIB Catalog in the Enter A Name For The New Catalog dialog box. Disable the option Import Free Music Into This Catalog, if necessary, and then click OK.
Your new catalog is loaded in the Organizer. If you are ever unsure which catalog is currently loaded, you can always check the catalog name displayed in the lower left corner of the Organizer workspace.


Now that you have a catalog created specifically to manage the sample files that you’ll use for the lessons in this book, you’re ready to put some photos into it.
Importing media
Before you can view, organize, and edit your photos and other media files in Photoshop Elements, you first need to link them to your catalog by importing them into the Organizer. Bringing your digital files into Photoshop Elements is easy.
Getting photos from files and folders
You can bring photos into Photoshop Elements from a variety of sources and in a number of different ways.
If your image files are already on your computer hard disk—as is the case for the Classroom in a Book sample photos—you can either drag them directly into the Elements Organizer workspace from Windows Explorer or the Mac OS Finder, or import them from within Photoshop Elements by using a menu command.
1. Choose File > Get Photos And Videos > From Files And Folders.

2. In the Get Photos And Videos From Files And Folders dialog box, navigate to and open the Lessons folder inside your PSE10CIB folder. Click once to select the Lesson01 folder.
3. Make sure that the options Automatically Fix Red Eyes and Automatically Suggest Photo Stacks are disabled; then, click Get Media.

The Getting Media dialog box appears briefly as the photos are imported. Since the imported photos contain keyword metadata, the Import Attached Keyword Tags dialog box appears. You’ll learn more about keyword tags in Lessons 2 and 3.
4. In the Import Attached Keyword Tags dialog box, click Select All, and then click OK. Click OK to close any other alert dialog box.

Thumbnails of the imported photos appear in the Organizer’s Media Browser pane, marked with orange tags to indicate that the images have attached keywords.
The Organizer workspace
In the Organizer, the main work area is the Media Browser pane. This is where you sort, organize, and search your photos and media files, and preview the presentations that you create to showcase and share them. At the right of the Organizer window is the Task Pane, with tabs for the Organize, Fix, Create, and Share modes.

The Elements Organizer is an integral part of both Adobe Photoshop Elements and Adobe Premiere Elements video editing software. You can import, manage, and view both photos and video in the Elements Organizer, which serves as a hub, allowing seamless integration of the two editing applications.
The Media Browser pane can display a single photo or show thumbnails of the files in your catalog arranged in a variety of ways. You can view your images sorted by import batch, folder location, or keywords—or presented in a calendar format in the Date view. The Media Browser makes it easy to browse, preview, organize, and search all the files in your catalog in one comprehensive workspace.
On the Organize tab of the Task Pane are the panels you’ll use to sort, search and manage your photos by applying keyword tags and grouping them in albums.
The Fix tab offers tools for some of the most common editing tasks. For more sophisticated editing, you’ll switch to one of the three editing modes in the Editor.
On the Create tab you’ll find options and guidance for creating projects and presentations—from greeting cards to slide shows.
The Share tab offers a variety of options for sharing your files with your friends, family, clients, or the world at large by burning a CD or DVD, sending your photos as e-mail attachments or photo mail layouts, or publishing an online album.
1. Experiment with the Thumbnail Size slider above the Media Browser pane. Note that when you reduce the thumbnails to a very small size, the orange tags are no longer visible at the lower right of the image cells; reset the thumbnails to a large enough size to see the tags.

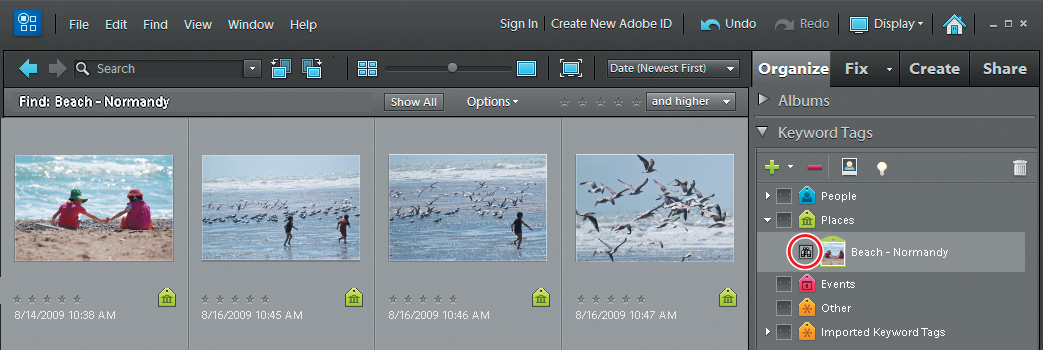
2. Hold the pointer over the orange tag below any of the images in the Media Browser; a tool tip appears to show that the image is tagged with the keyword Lesson 01. This is the tag that you enabled for import with the image in the last step of the previous exercise.

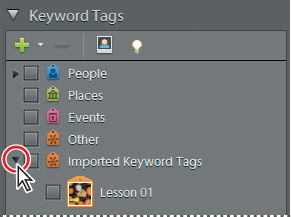
3. In the Keyword Tags panel to the right of the thumbnail view, click the small triangle to expand the Imported Keyword Tags category; you can see that the newly imported Lesson 01 tag is nested inside, and has been color-coded accordingly.
4. Double-click any thumbnail in the Media Browser. Use the arrow keys on your keyboard to cycle through the photos in the single photo view. When you’re done, double-click the enlarged image to return to the thumbnail grid view.

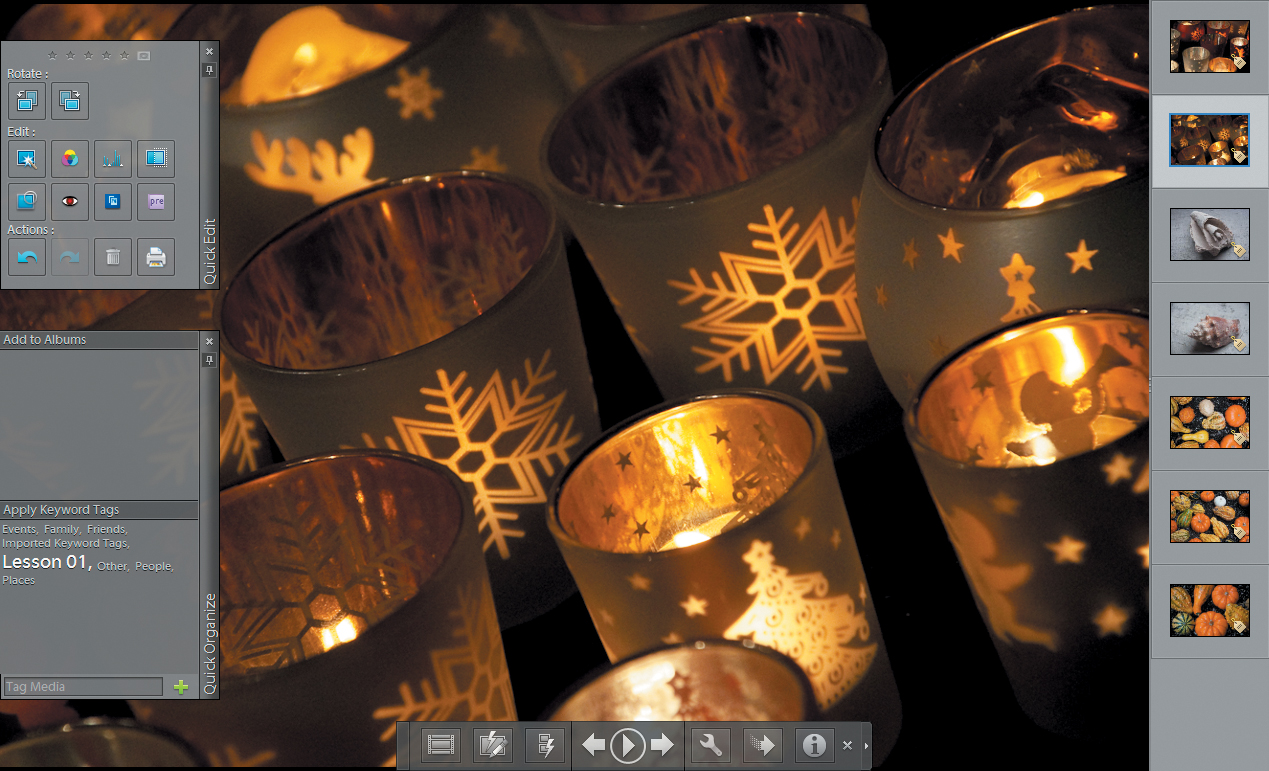
To switch to the single photo view, you can also press Ctrl+Shift+S (Windows) / Command+Shift+S (Mac OS). In single photo view, you can use the controls below the enlarged image to add either a text or audio caption to a photo.
Reviewing and comparing
Photoshop Elements provides several options for quickly and easily reviewing and comparing your images in the Elements Organizer. Use the Full Screen view to assess your photos in detail, or to effortlessly present a selection of images as an instant slideshow. The Side By Side viewing mode lets you keep one image fixed on one side of a split screen while you cycle through a selection of photos on the other—great for comparing composition and detail or for choosing the best of a series of similar shots. In both Full Screen and Side By Side viewing mode you can apply keywords, add photos to albums, and even perform a range of editing tasks.
Comparing photos side-by-side
The Side By Side View lets you compare photos at any level of magnification, without the distraction of interface items such as windows, menus and panels.
1. Press Ctrl+Shift+A / Command+Shift+A to ensure that no images are selected in the Media Browser.
2. Click the Display button (![]() ) near the upper right corner of the Organizer window, and choose Compare Photos Side By Side from the menu.
) near the upper right corner of the Organizer window, and choose Compare Photos Side By Side from the menu.

Because we made no selection in the Media Browser, the Organizer treats all the images visible in the Media Browser as the selection. The Film Strip at the right of the screen displays thumbnails of the photos in the selection.

By default, the photo on the left—image #1—is active, as indicated by the blue line surrounding the preview and the highlighted thumbnail in the Film Strip.
If you don’t see the Film Strip at the right of the screen, press Ctrl+F / Command+F on your keyboard or click the button at the left end of the control bar at the bottom of the screen. If you don’t see the control bar at the bottom of the screen, move the pointer; the control bar fades from view after a few seconds of inactivity.
3. With the photo on the left—image #1—still active, scroll down the Film Strip at the right of the screen and click another thumbnail. Your new choice becomes the #1 image in the Side By Side view.
4. Click image #2—the photo on the right of the split screen—to make it active. Click the forward and back navigation buttons in the control bar at the bottom of the screen, or use the arrow keys on your keyboard, to cycle the #2 preview through all the photos in the filmstrip, while the photo on the left of the screen remains fixed.
5. Click either image repeatedly to toggle between fit-to-view and 100% magnification. To compare detail at higher magnification, zoom in and out in the active image using the scroll-wheel on your mouse—or by pressing the Ctrl / Command key together with the plus (+) or minus (-) key. Drag the zoomed photo with the hand cursor to see a different portion of the image.

As well as the forward and back navigation buttons, the control bar contains buttons that let you show and hide the Film Strip, the Quick Edit pane and the Quick Organize pane, where you can perform common editing tasks and tag images or group them by adding them to an album.
You can sync panning and zooming in the #1 and #2 photos by clicking the chainlink icon at the right end of the extended control bar. If you don’t see the chain-link icon, click the triangle at the right end of the control bar to extend it.
6. If necessary, click the triangle at the end of the control bar to extend it. Click the triangle next to the Side By Side View button (![]() ) to switch the split-screen arrangement from Side By Side to Above And Below.
) to switch the split-screen arrangement from Side By Side to Above And Below.

7. Press the Esc key on your keyboard or click the Exit button (x) in the control bar to close the Side By Side view and return to the regular Organizer workspace.
Choosing files
In the Media Browser, you can select multiple images by simply dragging a selection marquee in the thumbnail view, but for better control, use your mouse together with a modifier key.
1. To select a series of four or five images that are in consecutive order, click the first photo in the series, and then hold down the Shift key as you click the last. All the photos in the range you Shift-clicked are selected.
2. Add three or four non-consecutive photos to the selection by holding down the Ctrl / Command key and clicking the thumbnails you wish to select. Keep your selection active for the next exercise.
Viewing photos at full screen
1. Click the View, Edit, Organize In Full Screen button, to the right of the Thumbnail Size slider in the bar above the thumbnails view.

2. Press the spacebar or the Play button in the center of the control bar to start the Full Screen view cycling through the selected images in slideshow mode. Experiment with the three buttons at the left of the control bar to show and hide the Film Strip and the Quick Edit and Quick Organize panels.
You can also access Full Screen view by choosing from the menu on the Display button, or by clicking the Full Screen View button on the control bar in Side By Side view. You’ll learn more about working in Full Screen view in the next lesson.
3. Try the two buttons to the right of the navigation controls to set Full Screen View and slideshow options and to choose a style for the transitions between slides. When you’re done, press the Esc key to return to the Organizer.
Reconnecting missing files to a catalog
When you bring a photo into Photoshop Elements, the name and location of the image file is recorded in the catalog. If you wish to move, rename, or delete a photo that has already been imported into your catalog, its best if you do it from within the Elements Organizer.
To avoid the problem of files missing from your catalog, use the Move and Rename commands from the File menu, and the Edit > Delete From Catalog command to move, rename, or delete files from within Photoshop Elements, rather than doing so outside the application.
If you move, rename, or delete a file in the Windows Explorer / Mac OS Finder after it has been added to the catalog, Photoshop Elements searches your computer for the missing file automatically, and will usually do a great job finding it—even when the file has been renamed; however, you need to know what to do if the automatic search fails. If a file cannot be located, the missing file icon (![]() ) appears in the upper left corner of its thumbnail in the Media Browser to alert you that the link between the file and your catalog has been broken.
) appears in the upper left corner of its thumbnail in the Media Browser to alert you that the link between the file and your catalog has been broken.
1. Switch to the Windows Explorer / Mac OS Finder by doing one of the following:
• On Windows, minimize the Elements Organizer by clicking the Minimize button (![]() ) at the right of the menu bar, or simply click the Elements Organizer application button on the Windows taskbar.
) at the right of the menu bar, or simply click the Elements Organizer application button on the Windows taskbar.
• On Mac OS, click the Finder icon in the Application Switcher (hold down Command; then press and release the Tab key) or the Dock.
2. Open an Explorer / Finder window, if there’s not one already available. Navigate to and open your Lessons folder. Drag the Lesson01 folder out of the Lessons folder to the Recycle Bin / Trash. Do not empty the Recycle Bin / Trash.
3. Switch back to the Organizer and choose File > Reconnect > All Missing Files. Photoshop displays a message to let you know it’s busy searching for the missing files. We don’t expect the files to be found in the Recycle Bin / Trash, so you can stop the automatic search by clicking the Browse button.
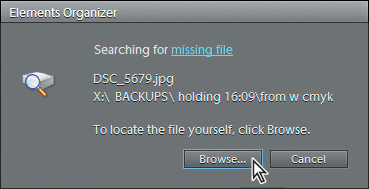
The Reconnect Missing Files dialog box opens, as it would have had you let the search run its course, and Photoshop Elements had not located the missing files.
4. For this exercise, you won’t follow the re-linking process through to completion, but you should take this opportunity to inspect the dialog box thoroughly (see the illustration on the next page).
At the upper left of the Reconnect Missing Files dialog box is a list of all missing files. Below the list, a preview displays a thumbnail of the currently selected missing file. To the right, you can browse the contents of your computer.
When you select a candidate file on the Browse tab, you’ll see a preview thumbnail adjacent to the missing file preview, enabling you to visually verify the photo as a match, even if its name has been changed.

5. Once you’ve verified a file or files to be reconnected, you can click the Reconnect button. For now, click Close to cancel the operation. Note that all of the thumbnails in the Media Browser now display the missing file icon (![]() ).
).
6. Switch back to the Explorer / Finder; then, drag the Lesson01 folder out of the Recycle Bin / Trash and return it to your Lessons folder.
7. Switch back to the Organizer and choose File > Reconnect > All Missing Files. Photoshop displays a message to let you know that there are no missing files to reconnect. Click OK to dismiss the message.
Switching between the Organizer and the Editor
Although the Fix tab in the Organizer offers one-step tools for some of the most common editing tasks, for more sophisticated editing you’ll switch to the Editor.
1. Select any two photos in the Media Browser.
2. Do one of the following:
• Choose Edit > Edit With Photoshop Elements Editor.
• Click the Fix tab in the Task Pane, and then click the Edit Photos button.
• Right-click / Control-click either of the selected images and choose Edit With Photoshop Elements Editor from the context menu.
Once both the Organizer and the Editor are open, you can move quickly between the two workspaces by using the task bar in Windows or the Dock in Mac OS.
The Editor workspace
The Editor is where you’ll edit, adjust and correct your images, and create projects and presentations to showcase them. You can choose between the default Full Edit mode, with a powerful set of tools for color correction, special effects, and image enhancement, the Quick Edit mode, with simple tools and commands for quickly fixing common image problems, and the Guided Edit mode, which provides easy step-by-step instructions for a range of editing tasks.

In the Editor, the main work area is the Edit pane. This is where you’ll work on your photos and the presentations that you create to showcase and share them. Below the Edit pane is the Project Bin, which provides easy access to the images you’re working with, no matter how many files you have open. The Edit pane is flanked by the tool bar on the left and the Panel Bin on the right. The Panel Bin has tabs for Edit, Create, and Share modes. At the top of the Edit tab in the Panel Bin, you’ll find buttons for switching between the three editing modes.
If you’re new to digital imaging, the Quick Edit and Guided Edit modes make a good starting point for fixing and modifying your photos, and provide a great way to learn as you work. The Full Edit mode provides a more powerful and versatile image editing environment, with commands for correcting exposure and color and tools for making precise selections and fixing image imperfections. The Full Edit tool bar also includes painting and text editing tools. You can arrange the flexible Full Edit workspace to suit the way you prefer to work by floating, minimizing, hiding and showing panels, or rearranging them in the Panel Bin.
1. In the Project Bin, double-click each of the thumbnails in turn to bring that photo to the front in the Edit pane, making it the active image.
2. Choose Preferences > General from the Edit / Photoshop Elements Editor menu. On the General tab of the Preferences dialog box, click the check box to activate the option Allow Floating Documents In Full Edit Mode. Click OK.
3. Drag whichever image is foremost by its name tab, away from its docked position to float above the Editor workspace.

Once you’ve activated the option to allow floating document windows, this becomes the default for any image opened in Full Edit mode. Throughout the rest of this book however, it will be assumed that you are working with tabbed image windows that are docked (consolidated) in the Edit pane, unless otherwise specified. When you complete this exercise you’ll disable floating document windows so that it’ll be easier for you to follow the exercise steps as written.
4. Explore the options for arranging image windows that are available from both the Window > Images menu, and from the menu on the Arrange button (![]() ) at the top of the Editor workspace to develop a feel for the way you prefer to work with your images. When you’re done, Choose Preferences > General from the Edit / Photoshop Elements menu and disable floating documents. Click OK.
) at the top of the Editor workspace to develop a feel for the way you prefer to work with your images. When you’re done, Choose Preferences > General from the Edit / Photoshop Elements menu and disable floating documents. Click OK.
Using panels and the Panel Bin
In the Full Edit workspace, the Panel Bin provides a convenient location to organize the panels you use most often. By default, the Effects, Content and Layers panels are docked in the Panel Bin; other panels can be opened from the Window menu. All panels can either be kept docked in the Panel Bin or dragged to float in a convenient position above your image as you work. It’s a good idea to familiarize yourself with organizing the Full Edit workspace so that you’ll always have the controls you need at your fingertips.
1. Try each of the following tips and techniques:
• To open a panel that you don’t see in the workspace, choose its name from the Window menu in the menu bar at the top of the workspace.
• To collapse an open panel so that you see only its header bar, choose its name from the Window menu or double-click its header bar.
• To float a panel above your image in the work area, drag it out of the Panel bin by its header bar. You can also float the Project Bin and the toolbox by dragging them away from their default positions.
• To return a floating panel to the Panel Bin, drag it into the Panel Bin and release the mouse button when you see a blue line indicating the new position. Place the panel between two others, or drag it onto another panel to create a tabbed panel group. Switch between grouped panels by clicking their name tabs. Drag the name tag to move a panel out of a group.

• To collapse a floating panel to an icon, click the two white triangles at the right of the header bar. You can collapse a group of floating panels that are snapped together in the same manner.
• To expand a single panel in a collapsed group, choose its name from the Window menu.
• To close a panel, drag it out of the Panel Bin and click the close button (x) in its header bar (at the right on Windows, at the left for Mac OS) or click the small menu icon at the right of the header and choose Close from the panel’s Options menu.
• To adjust the height of panels in the Panel Bin, drag the separator bars between panels up or down. To adjust the size of a floating panel, drag the panel’s lower right corner. (Some panels can not be resized.)
• To return the workspace to the default arrangement, you can either choose Window > Reset Panels or click the Reset Panels button (![]() ) at the top of the workspace.
) at the top of the workspace.
2. Choose File > Close All to close both of the open images. Close the Editor window by clicking the Close button (in the top right corner of the workspace on Windows, at the upper left on Mac OS).
Creating an Adobe ID
Photoshop Elements users in the U.S. can create an Adobe ID to register their software and sign up for a free Photoshop.com account. Creating an Adobe ID gives you access to Elements Membership services that are integrated with your software, enabling Organizer-based backup and sharing and other exciting Adobe-hosted services that extend the capabilities of your Photoshop Elements software.
With your free Basic Elements Membership you get your own storage space on Photoshop.com—with a personal Photoshop.com URL—where you can share and showcase your images, and access your photos from anywhere that you can connect to the Internet. You can use your Photoshop.com account to back up your catalog, and even to synchronize your photo library across multiple computers.
Basic membership also enables integrated access to the Inspiration Browser, which offers regularly updated tips, tricks and tutorials related to whatever you’re currently working on—providing a powerful way to advance your skill set and helping you to make the most of your photos and creations.
Upgrade to a Plus Membership to get more storage space, access to advanced tutorials in the Inspiration Browser, and regularly updated content—such as project templates, themes, backgrounds, frames, and graphics—delivered directly to your software to help you keep your projects fresh and appealing.
Signing up from the Welcome screen
1. Start Photoshop Elements or—if Photoshop Elements is already running—click the Welcome Screen button (![]() ) at the top right of the workspace.
) at the top right of the workspace.
2. In the Welcome screen, click Create Adobe ID. Enter your name, e-mail address and a password, type a name for your personal Photoshop.com URL, and then click Create Account. An e-mail message will be sent to you to confirm the creation of your account. Follow the instructions in the e-mail to activate your account. If you are asked whether you wish to activate backup and synchronization, click No; you’ll learn about using this feature in Lesson 5.
Signing up from the Organizer or Editor
1. In the Organizer or Editor, click the Create New Adobe ID link in the menu bar.

2. Enter your personal details in the Create Your Adobe ID dialog box, and then click Create Account. Follow the instructions in the confirmation e-mail to activate your account. Don’t activate backup and synchronization yet.
You don’t have to start from the Welcome screen to create an Adobe ID. Links for registering and signing in are conveniently located throughout the Photoshop Elements workspace.
Signing in to your Photoshop.com account
Once you’ve created an Adobe ID, you may still need to sign in if you or another user has signed out of your account.
1. Make sure your computer is connected to the Internet, and then start Adobe Photoshop Elements.
2. In the Welcome screen, enter your Adobe ID and password, and click Sign In.
If you didn’t sign in at the Welcome screen, you can always click the Sign In link at the top of either the Organizer or Editor workspace.
Using Help
Help is available in several ways, each one useful in different circumstances:
Help in the application The complete user documentation for Adobe Photoshop Elements is available from the Help menu, in the form of HTML content that displays in the Adobe Community Help application. This documentation provides quick access to information on using the various features in Photoshop Elements.
Help on the Web You can also access the most comprehensive and up-to-date documentation on Photoshop Elements via your default browser. Point your browser to http://help.adobe.com/en_US/photoshopelements/using/index.html
Help PDF Help is also available as a PDF document, optimized for printing; you can download the document by clicking the View Help PDF link in the top right corner of any Help page.
Links in the application Within the Photoshop Elements application there are links to additional help topics, such as the hot-linked tips associated with specific panels and tasks, and the tips and tutorials links that appear below the Task pane in both the Organizer and the Editor.
You must be connected to the Internet at least once to download the Help content to your computer. Once you’ve downloaded the Help content, you can access it even when you’re not connected to the Internet. However, with an active Internet connection, you can access the latest updates as well as community-contributed content.
Navigating Help
Depending on which module you’re working in, choose Help > Elements Organizer Help or Help > Photoshop Elements Help, or simply press the F1 key. Once you’ve downloaded the Help content the Adobe Community Help application will open to the front page of the respective Help documentation, even if you are not currently connected to the Internet.
If you search for a phrase, put quotation marks around the phrase. Make sure that your search terms are spelled correctly. If a search term doesn’t yield results, try searching a synonym; for example “photo” instead of “picture.”
Click a topic heading in the table of contents. Click the plus sign (+) to the left of a topic heading to see its sub-topics. Click a topic or sub-topic to display its content. In Community Help, choose View > Show Search Panel. Type a search term in the Search text box at the top of the Search panel, choose search options, and then press Enter on your keyboard.
Links to help in the application
You’ll find links to additional task-specific help at various places in the Photoshop Elements workspace. Clicking these links will either take you to the corresponding topic in Help or—in the case of the links shown here—open the Elements Inspiration Browser.

Hot-linked tips
Hot-linked tips, marked with a light bulb icon, are scattered throughout Adobe Photoshop Elements. These tips either display information in the form of a typical tip balloon or link you to the appropriate topic in Help.

Once you’ve created an Adobe ID, you can access tips and tutorials in the Inspiration Browser, which is regularly updated to help you expand your skills and to get the most out of Photoshop Elements, whatever your level of experience. To launch the Inspiration Browser, click one of the tips that appear in the status bar across the bottom of the workspace, or choose Help > Elements Inspiration Browser.
Additional resources
Adobe Photoshop Elements 10 Classroom in a Book is not meant to replace the documentation that comes with the program, nor to be a comprehensive reference for every feature. Additional resources are listed in detail at the end of the Getting Started chapter in this book; please refer to these resources for comprehensive information and tutorials about program features.
You’ve reached the end of the first lesson. Now that you know how to import photos, understand the concept of the catalog, and are familiar with the essentials of the Photoshop Elements interface, you’re ready to start organizing and editing your photos in the next lessons.
Before you move on, take a few moments to read through the review questions and answers on the next page.
Review questions
1. What are the primary workspaces and working modes in Adobe Photoshop Elements?
2. What is a catalog file?
3. What are keyword tags?
4. How can you select multiple thumbnail images in the Media Browser?
Review answers
1. Photoshop Elements has two primary workspaces: the Elements Organizer and the Editor. You’ll work in the Organizer to locate, import, manage, and share your photos, and use the Editor to adjust your images and to create presentations to showcase them. The Editor offers three editing modes: Full Edit, Quick Edit, and Guided Edit. Both the Organizer and the Editor provide access to the Create and Share modes.
2. A catalog file is where Photoshop Elements stores information about your images, enabling you to conveniently manage the photos on your computer from within the Organizer. For each image you import, Photoshop Elements creates a new entry in the catalog file. Whenever you assign a tag or a rating to a photo, or group images in an album, the catalog file is updated. All your work in the Organizer is recorded in the catalog.
As well as digital photographs, a catalog can include video and audio files, scans, PDF documents, and any presentations and layouts you might create in Photoshop Elements such as slide shows, photo collages, and CD jacket designs. A single catalog can efficiently handle thousands of files, but you can also create separate catalogs for different types of work.
3. Keyword tags are labels with personalized associations that you attach to photos, creations, and video or audio clips in the Media Browser so that you can easily organize and find them.
4. To select images that are in consecutive order in the Media Browser, click the first photo in the series, and then hold down the Shift key and click the last. All the photos in the range that you Shift-clicked will be selected. To select multiple non-consecutive files, hold down the Ctrl / Command key as you add files to the selection.