Lesson Files | Soundtrack Pro book files > 12_Projects&Media > 12 FCP, 12 Motion, 12 DVD Studio Pro |
Time | This lesson takes approximately 45 minutes to complete. |
Goals | Open an Audio File Project in Final Cut Pro |
Save Waveform Editor actions as an AppleScript | |
Send a Final Cut Pro sequence to a multitrack project | |
Work with an Audio File Project in Motion | |
Open DVD Studio Pro audio in the Editor |
Soundtrack Pro is one application in Apple’s Final Cut Studio. This is a brief lesson in integration that shows how easy it is to use exported Soundtrack Pro files with the rest of the Studio: Final Cut Pro, Motion, and DVD Studio Pro. You’ll also explore how to send audio from all three applications to Soundtrack Pro so that you can edit them destructively as audio files, or non-destructively as Audio File Projects in the Waveform Editor. If you have all of these applications, there are projects that you can open as examples of each form of integration. If you don’t have the other applications, you can still read along so you’ll be ready when you do get your hands on the other Final Cut Studio Applications.
There are three ways to move between Soundtrack Pro and Final Cut Pro (version 5 and higher). You can send an individual audio file from Final Cut Pro’s browser or Timeline to Soundtrack Pro to edit in the Waveform Editor. In this case, you can edit the file either non-destructively as an Audio File Project (.stap) or destructively by editing and saving the actual audio file (.aif).
If you particularly like a combination of adjustments in an Audio File Project, you can save it in the Waveform Editor as a Soundtrack Pro Script and then apply that script to multiple audio files in Final Cut Pro. You can also send an entire Final Cut Pro sequence to Soundtrack Pro as an Audio File Project for mixing.
If you have Final Cut Pro (version 5 or higher) you can open the project and follow along. If you don’t have the application, you can just follow the book.
Quit Soundtrack Pro and all other applications.
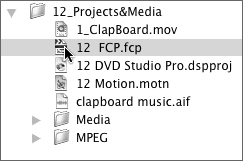
Go to the 12_Projects&Media folder in the Soundtrack Pro book files folder and double-click the 12 FCP project to open it in Final Cut Pro.
Choose File > Save Project As and save it to the My Soundtrack Pro projects folder.

Press the Home key and then the spacebar to play the project in the Timeline from the beginning.
The project is part of a short film called Same Conversation. The dialog includes an excessive amount of ambient sound. I intentionally used sound that needed a lot of work for this exercise, rather than using the clean microphone sound that was recorded during the taping of the scene. Chances are you’ll encounter noisy dialog sometime in your sound editing career, so now is a good time to learn a few tricks for dealing with it.
In this case, you’ll send the first clip to the Soundtrack Pro Waveform Editor, then adjust the amplitude and reduce the noise. To send an audio clip to Soundtrack Pro, you simply Ctrl-click the file and choose Send To > Soundtrack Pro Audio File Project. Let’s try it.
Ctrl-click the first clip in the Timeline and choose Send To > Soundtrack Pro Audio File Project.

Save the Audio File Project to the My Soundtrack Pro Projects folder on your computer.
The Audio File Project opens in the Soundtrack Pro Waveform Editor.

Choose Process > Adjust Amplitude and raise the volume level by 6 DB.

The overall waveform gets louder, including the noise and the dialog.

Select a section of the noise in the waveform that doesn’t contain any dialog and choose Process > Set Noise Print.
Clear the selection and choose Process > Reduce Noise.
Make adjustments to the Reduce Noise dialog to clean up some of the noise.
Note
This file is very noisy, so you won’t be able to clear it all up without compromising the dialog. Clear it up the best you can.
If you’re not sure which settings to use, try those in the following figure.

It still needs some audio tweaking, but let’s assume it’s good enough for now since this lesson is about integration and not tweaking.

Let’s pretend you want to apply these actions to the other clips in the scene back in the Final Cut Pro project. Any changes you make and save to an Audio File Project will automatically be updated in the Final Cut Pro project.
Press Cmd-S to save the changes to the Audio File Project.
Any changes you make and save to an audio file project will automatically be updated in the Final Cut Pro project.
If you’d like to take a crack at cleaning up the audio further, feel free to modify, add to, or delete and start fresh with the actions already applied to the audio file project. You can also try adding some real time effects by choosing Processs > Effects and selecting an effect from the submenus. Once you’re satisfied with the sound, move on to the next exercise to save it as an AppleScript. If you don’t want to make changes to the current actions, move on to the next exercise. If you do modify the audio file project, be sure to save the changes before continuing with the next exercise.
Let’s say you’ve found the magic combination of filters, processes, and effects to perfectly clean up or enhance an audio file. If other files in your Final Cut Pro project have the same issues, and were recorded at the same time, you could create an AppleScript that will automatically apply all of the same changes to any file that you send to the AppleScript. In this exercise you’ll create an AppleScript, and then see how to apply it to files in FCP.
In Soundtrack Pro, choose File > Save As AppleScript, or press Option-Cmd-S.

The Save As window opens with the Soundtrack Pro Scripts folder selected. It is very important that you do not change the location of the saved script. If you don’t save it to the Soundtrack Pro Scripts folder, you won’t be able to access the AppleScript in Final Cut Pro.
Type Same Conversation in the Save As field to name the script after the short file it will be applied to, then press Return.
That’s all there is to it. You’ve saved an AppleScript. You can now access the AppleScript in Soundtrack Pro’s AppleScript menu at the top of the interface between the Window and Help menus.
Tip
This AppleScript is very specific for the short film Same Conversation. However, if you work with music and have favorite combinations of actions or effects that you like to apply to particular instrument tracks or vocals, you can save those as AppleScript and name them for the sound or instrument.
Click the AppleScript menu to see the two options, Open Scripts Folder and the saved Same Conversation AppleScript.
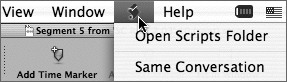
Choose Open Scripts Folder from the AppleScripts pop-up menu.
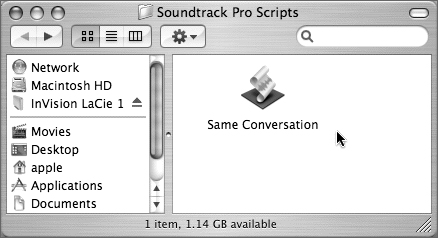
The Same Conversation AppleScript appears as a droplet in the folder. You can drag audio files to this droplet to automatically open them in the Waveform Editor and apply all of the actions to them.
Note
Applying AppleScripts to audio files in Final Cut Pro is destructive editing because the actions are applied and saved to the actual audio file. Destructive editing isn’t a bad thing. If the files need work, and you’re confident that the AppleScript will help, go for it. If you don’t like the idea of permanently changing the audio files, make a copy of them before applying the AppleScript.
Close the Soundtrack Pro Scripts folder,
Press Cmd-S to save the Audio File Project, then Press Cmd-Tab to switch from Soundtrack Pro to Final Cut Pro.
Cmd-Tab allows you to toggle between open applications on your computer. You can apply the AppleScript to a clip in Final Cut Pro’s Timeline or Browser by Ctrl-clicking the clip and choosing Send To > Soundtrack Pro Script > Same Conversation from the shortcut menu.

You don’t need to apply the AppleScript at this time. I just wanted to make sure you know how to create and apply AppleScripts in the future.
You’ve already seen that you can send an audio file to the Waveform Editor. You can also send an entire sequence to Soundtrack Pro as a multitrack project. This is often the last step in finishing a project, and is a one-way trip. Once you send a sequence to Soundtrack Pro, it won’t automatically update in Final Cut Pro. Instead, you can export the finished mix, or selected tracks or outputs, from Soundtrack Pro and import them into Final Cut Pro once they are finished. Of course, you don’t have to go back to Final Cut Pro when you finish the audio mixing in Soundtrack Pro. Instead, you can just export from Soundtrack Pro with Compressor, which will include the video and audio files together.
Let’s take a quick look at how easy it is to send a Final Cut Pro sequence to Soundtrack Pro.
Select the Same Conversation part sequence in the Browser and Choose File > Send To > Soundtrack Pro Multitrack Project. These options are also available from the shortcut menu if you Ctrl-click the sequence.

A Save As window opens.
Save the project to the My Soundtrack Pro projects folder. Make sure the Open in Soundtrack Pro Multitrack Editor and Include Background Video checkboxes are selected.
Those checkboxes ensure that the project opens as a Soundtrack Pro Multitrack Project, and that the video is included with the project.

A multitrack project opens with two audio tracks that include the audio clips from the project saved as stereo files, and one video clip.
Note
When sending a Final Cut Pro sequence to a Soundtrack Pro Multitrack project, it may take a few minutes to create a single QuickTime video file to use as a reference. Remember, Soundtrack Pro can only include one video clip. If the sequence consists of multiple clips, then they will be exported automatically as one clip for Soundtrack Pro. Also take into account if the project is unrendered, it will take time for the Final Cut Pro project to render before it can open in Soundtrack Pro.

Click the automation disclosure triangle on the A1 & A2 Same Conversation track to see the track’s envelopes.

Soundtrack Pro includes an envelope point at the beginning and end of each audio clip sent from Final Cut Pro to make it easier to adjust the levels on the envelope.
If the Final Cut Pro tracks included keyframes (FCP term for envelope points) for audio volume level or panning, they would be included automatically in the multitrack project.
Tip
If you wish to clear all of the envelope points that were automatically added from Final Cut Pro, select one envelope point, press Cmd-A (select all) to select all of them, and then press Delete.
Once you’ve sent a Final Cut Pro sequence to a Soundtrack Pro multitrack project, you can apply all of your new Soundtrack Pro skills to add and arrange additional audio files and effects, edit, mix, and output the final project.
Press Cmd-Q to quit Soundtrack Pro.
Press Cmd-Q to quit Final Cut Pro.
Now that you know how to integrate Final Cut Pro with Soundtrack Pro, let’s take a look at integration with Motion.
If you export a Motion project as a QuickTime file, you can import it into a Soundtrack Pro multitrack project. The animated clapboard that you worked with in Lessons 1, 2, and 10 was exported from Motion.
If a Motion project includes audio files, you can send them from Motion to the Soundtrack Pro Waveform Editor to edit either destructively or nondestructively. Once you save the modified file in Soundtrack Pro, it will automatically update in the Motion project.
If you have Motion (version 2 or higher), you can open the project and follow along. If you don’t have the application, you can just follow the book.
Quit all open applications.
Go to the 12_Projects&Media folder in the Soundtrack Pro book files folder, and double-click the 12 Motion project to open it in Motion.

Choose File > Save Project As and save it to the My Soundtrack Pro projects folder.
Press the spacebar to play the project.
The audio should sound familiar; you created it in Lesson 1, “Working with the Interface.” The video was just modified in Motion using the Replicator feature.
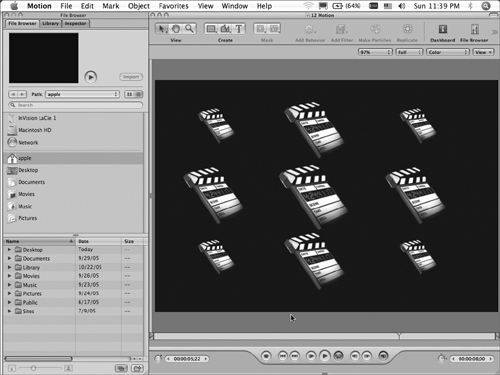
Select the Clapboard Music audio file on the Audio tab.

Choose Edit > Send Audio to Soundtrack Pro.
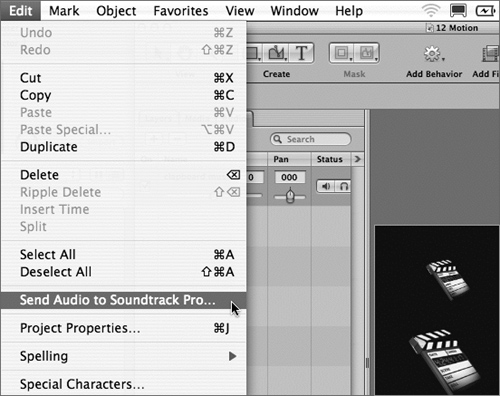
The Save As window opens. Save the file to the My Soundtrack Pro projects folder.
Click the Save as Soundtrack Pro Audio button.

Soundtrack Pro launches, and the clapboard music.aif (audio file) opens in the Waveform Editor as an Audio File Project (.stap).
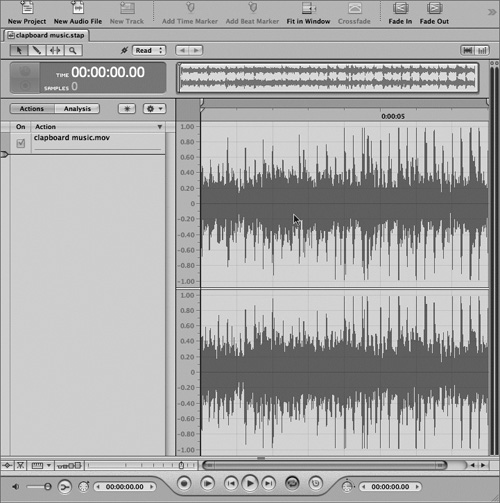
Any changes that you make and save to the Audio File Project will automatically update in the Motion project without reimporting the audio clip. The key to this integration is saving. If you don’t save the changes in the Audio File Project, it won’t update in Motion.
Quit Soundtrack Pro and Motion without saving the changes to the projects.
DVD Studio Pro is integrated with Soundtrack Pro in a way very similar to the integration with Motion. From DVD Studio Pro (version 4 or higher), you can open an audio file in Editor, which will automatically open it in the Waveform Editor. Let’s try it.
If you have DVD Studio Pro (version 4 or higher) with all of the templates installed to the default location, you can open the project and follow along. If you don’t have the application, you can just follow the book.
Quit all open applications.
Go to the 12_Projects&Media folder in the Soundtrack Pro book files folder, and double-click the 12 DVD Studio Pro project to open it in DVD Studio Pro.

Choose File > Save Project As and save it to the My Soundtrack Pro projects folder.
Press F2 to change the layout to the Extended configuration.
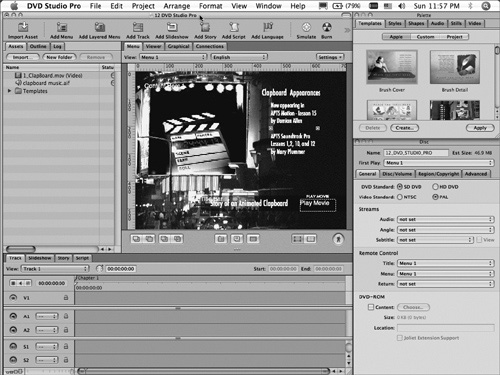
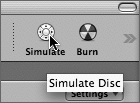
Click the Simulate button in the upper-right corner of the toolbar to simulate (preview) the DVD project.
Once again you’ll see the animated clapboard in action, and hear the familiar tune that you arranged in Lesson 1.
Press Cmd-W to close the Simulator.
Locate the clapboard music.aif file in the Assets tab in the upper-left corner of the interface.

Ctrl-click the clapboard music.aif file and choose Open In Editor from the shortcut menu.

Either the file opens in Soundtrack Pro or you may see a dialog box with two options for opening the file: you can choose Open Audio File, which allows you to open the audio file in the Waveform Editor and edit destructively, or you can choose Open Project to open the actual multitrack project that created the file.
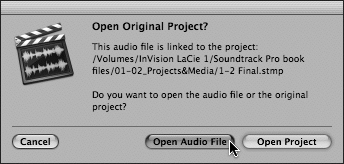
If you see the dialog, click the Open Audio File button to open the audio file in the Waveform Editor.
Once again, you can make changes to the file—just remember that these are destructive changes to the actual audio file. Once you save the changes, they will automatically update in DVD Studio Pro.
Press Cmd-Q to quit Soundtrack Pro.
Seeing is believing! You’ve now witnessed the integration between Soundtrack Pro and all of the Final Cut Studio Applications. Not only that, you’ve completed the last lesson in this book. Now it’s your turn to apply your new skills to your own projects to make them sound professional and acoustically interesting. You should also have all the tools to exercise your creativity in sound design, music arrangement, audio editing, and mixing. Just remember, if it sounds good, you know it. If you’re not sure, keep working on it. Also, save often (uncollected), and save collected when you’re finished with a project if you want to move it. And most important of all—have fun!
Answers