
Lesson Files | Soundtrack Pro book files > 01-02_Projects&Media > 1-2 Final, 2-2 Jazz Final files |
06_Projects&Media > 6-5 ADA PSA Final | |
08-09_Projects&Media > 9-5 Final FX | |
10_Projects&Media > 10-1 Reconnect, 10-2 Files | |
Time | This lesson takes approximately 60 minutes to complete. |
Goals | Export a song as a mixed audio file |
Export selected tracks | |
Export a project with Compressor | |
Save a project and its media collected | |
Reconnect media to a project | |
Export tracks as looping and non-looping files | |
Tag files in the Apple Loops Utility | |
Index tagged files in the Search database |
The fun is over. Now we get to the boring stuff—file management.
Actually, this chapter is necessary so that you can enjoy the fun stuff like sound design, scoring music, and mixing projects. In fact, there is a feeling of accomplishment when you’ve finished a project and are ready to prepare it for distribution. Think of file management as preventive maintenance or life insurance for your projects.
This lesson focuses on the different methods of exporting, saving, reconnecting, and managing files. You will also learn how to use the Apple Loops Utility to save and tag your own files and index them as part of your library. As you explore the different distribution options, you’ll work with a variety of projects from the previous lessons to keep things interesting.
Come to think of it, exporting a finished project and seeing the result after all of your hard work is quite rewarding, and may be the most fun of all!
You’ll begin this lesson by opening the finished project, 9-5 Final FX, from Lesson 9, “Working with Audio Effects and Finishing the Mix.”
Distributing Soundtrack Pro projects isn’t about starting your own record label and distribution company. Instead, it’s about remembering the big picture of what the project is for and figuring out the best way to get it there.
Once you have finished your project and created a final mix, you have several choices for distributing the tracks: as a project or customized mix, as individual tracks, or with Compressor.
Let’s try each of the three different ways to export a Soundtrack project, and also look at another option that lets you save your project and files together.
Exporting a project mix is the most common way to export audio from a multitrack project. When you export a mix, all of the project’s unmuted tracks are heard in the output file.
Soundtrack exports the mix as a stereo AIFF file, which can be imported into any of the Final Cut Studio applications. You can also convert it to an MP3 file to distribute over the Internet or play on an iPod.
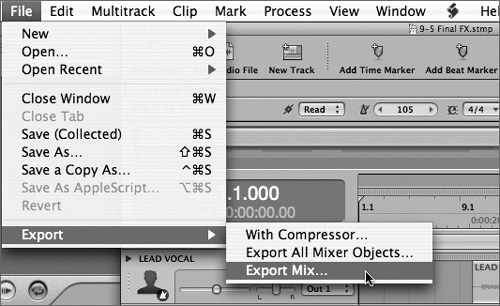
The different Soundtrack Pro export options are located under the File menu. In this exercise you’ll export the final mix of the beginning of the song “Something About You.”
Make sure that none of the tracks in the project 9-5 Final FX are soloed or muted.
Choose File > Export > Export Mix.
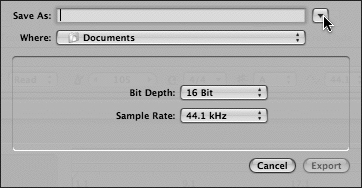
A Save As dialog opens to name the exported mix and determine where it will be saved. Before naming the file, let’s first expand the Save As dialog, and create a new folder on the desktop for all of the files you’ll export in this lesson.
Click the downward pointing triangle to expand the dialog window, if it is not already expanded.
Click the Desktop icon on the Sidebar of the expanded Save As dialog.
You’ve now selected the Desktop as the location for the saved file.
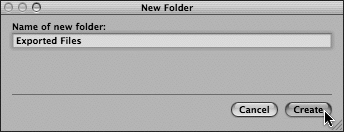
Click the New Folder button in the bottom-left corner of the dialog to create a new folder on the desktop.
A New Folder window appears.
In the Name of new folder field of the New Folder window, type Exported Files. Then click the Create button to create that folder.
The new folder has now been created and selected on the Desktop. Now that you’ve created a folder to store your exported files, you’ll need to name the file you’re about to export.
In the Save As field at the top of the dialog, type SomethingAboutYou-mix.
Tip
By creating file names without spaces, you can help keep down the number of characters and avoid excessively long file names.

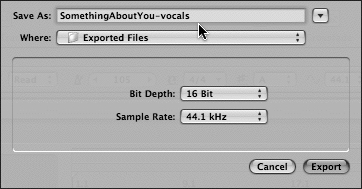
Notice the Bit Depth and Sample Rate pop-up menus near the bottom of the dialog.
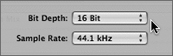
These allow you to export the mix at a Bit Depth of either 16 or 24 Bit, with a choice of Sample Rates: 32 kHz, 44.1 kHz, 48 kHz, or 96 kHz.
Since this multitrack project contains only music, and most professional music is burned to a CD, you’ll use the standard CD sample rate of 44.1 kHz.
Change the project sample rate to 44.1 kHz if that is not the current setting.
Click the upward pointing triangle to compress the dialog window.
Click the Export button to export the project.
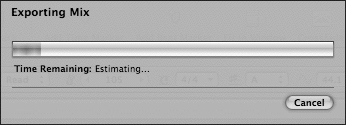
An Exporting Mix progress window appears to display the estimated time to export the file.
Voilà! You exported the project as a single mixed file.
Once you export the mixed version of the project, you may wish to export a few additional customized mixes. There are many different types of mixes. You may export a version that has heavier effects and EQ, and another with almost no effects at all. If you wish to exclude tracks from the mix, mute them before you export. For example, say you’re mixing music for a band that also plays live. You can make customized versions of the project for each band member to use for practice. Perhaps the lead singer wants to practice singing his part against the full song. You can mute the LEAD VOCAL track before exporting the mix. That way, the vocalist will have a karaoke version for rehearsing. Let’s try it.
Mute the LEAD VOCAL track.

Choose File > Export > Export Mix.
Name the file SomethingAboutYou-vocals in the Save As field.
In this file name, “-vocals” stands for minus the vocal tracks. If you prefer, you can call it “no vocals,” as well.
Click the Export button, or press Return to export the project.
When the project finishes exporting, you can take a look at both exported files.
Press Cmd-H to hide Soundtrack Pro.
Once you export a mix, you can determine in which application the file will open. If you want to hear the file, Ctrl-click the file and choose Open with QuickTime Player or Open with iTunes—or play it directly in the Preview column in the Finder column view. The last option is the easiest.
Double-click the Exported Files folder on your desktop to open the folder.
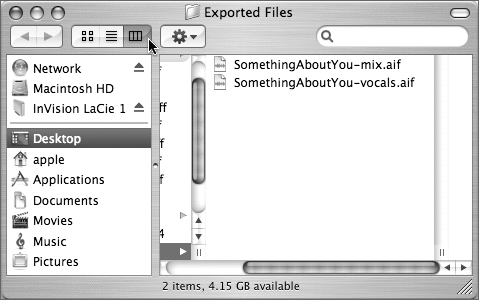
Change the finder to column view, if that isn’t the current view setting.
Select the SomethingAboutYou-vocals file to open it in the preview column, and then click the Play button to preview (listen to) the file.
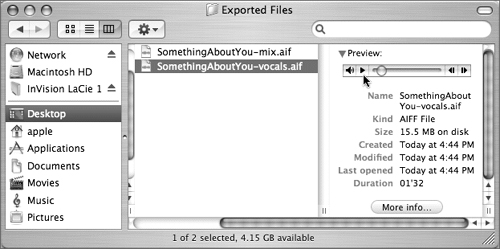
There you have it, a karaoke-friendly version and a full mix of the project.
Press and hold Cmd-Tab to see all open applications, and then repeatedly press the Tab key while holding Cmd until you select Soundtrack Pro.
You can also click the Soundtrack Pro icon in the Dock to show the application.
Unmute the LEAD VOCAL track, and then close the 9-5 Final FX project.
The middle option in the Export menu changes depending upon the selected tracks, busses, or outputs in the project. If nothing is selected, the export option is Export All Mixer Objects. If you select a track, the export option changes to Export Selected Track. This option is flexible enough to let you export an individual track, bus, or output, or multiple tracks, busses, and outputs to a stereo AIFF file with the same name as the Timeline track being exported. You can also export a track to dual mono files, one left (L) and one right (R). You would export the files this way if the final music score were going to be mixed or mastered at a professional studio using an application such as Logic or Pro Tools.
When you export a track, Soundtrack Pro combines all of the files in that track into one file that begins at the start of the Timeline, and ends after the last clip from the exported track.
You can export all of the multitrack project’s tracks this way, or just select the tracks you want to export. Muted tracks will not be exported.
To demonstrate this option, you’ll open the 2-2 Jazz Final project from the 01-02_Projects&Media folder.
Open the 2-2 Jazz Final project.
Play the project once for nostalgia’s sake.
You’ve learned a lot since you worked on this piece for Lesson 2 “Creating and Arranging a Multitrack Project.”
Select the Jazz Guitar Single Note Riff 13 track.
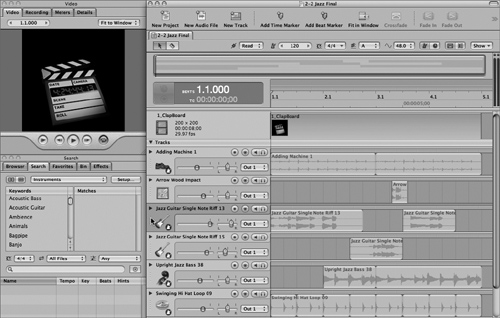
Keep in mind that the exported track will have the same name as the selected track. The track automatically took the name of the first clip that was added to it. That was fine when you were just learning the interface, but with all of your new Soundtrack Pro knowledge, you might consider renaming it something more refined like Jazz Guitar 1, and the track below Jazz Guitar 2. Come to think of it, that’s a fine idea. In fact, take a moment to rename all of the instrument tracks.
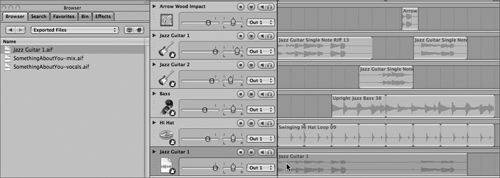
Rename the Jazz Guitar Single Note Riff 13 track Jazz Guitar 1.
Rename the Jazz Guitar Single Note Riff 15 track Jazz Guitar 2.
Rename the Upright Jazz Bass 38 track Bass.
Rename the Swinging Hi Hat Loop 09 track Hi Hat.
The new names are better for exporting the tracks and for mixing, should you ever decide to remix the project.
Save the project uncollected to the My Soundtrack Pro projects folder.
Select the Jazz Guitar 1 track, if it is not already selected.
Choose File > Export > Export Selected Track.

An Export window opens so that you can choose the location of the exported track.
Choose the Exported Files folder on the desktop, and then click the Export button.
Done. The exported track, Jazz Guitar 1.aif, should now be in the Exported Files folder.
Before you move on to the next section, let’s take a moment to create a new track and import the Jazz Guitar track to see what it looks like.
Press Cmd-T to create a new track at the bottom of the Timeline. Click the Browser tab in the Utility window. Navigate to the Exported Files folder on the Desktop. Drag the Jazz Guitar 1.aif file from the Browser to the beginning of the empty track in the Timeline.
Notice that the Jazz Guitar 1 file ends when the last clip in the exported track ends. Nice work. When you’re finished with the new track, press Shift-Cmd-T to delete it. The track was merely for educational purposes, and you won’t want it there for the next exercise.
Now you’ll try exporting all of the project’s tracks. To perform this export option, you can either select all of the tracks or simply deselect everything.
Click the video track header to deselect all of the Audio tracks.
Choose File > Export > Export All Mixer Objects.

Choose the Exported Files folder on the desktop if it is not already selected, then press Return.
An alert appears to warn you that one of the files (Jazz Guitar 1) is already in that location.
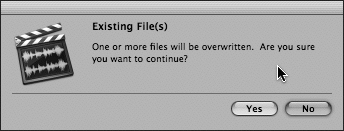
Click the Yes button to continue and overwrite the original Jazz Guitar 1 file with the new one you’re about to export.
Hide Soundtrack Pro and open the Exported Files folder on the desktop.
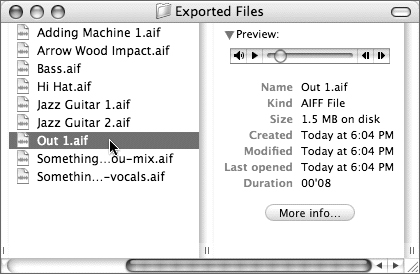
Interesting. Notice that not only did you export all of the individual tracks, but also the output (Out 1). If this was a cooking show, all of the individual tracks would be the measured ingredients, and the Out 1 file would be the finished baked dish. Since all of the tracks were assigned to the output Out 1 file, it was exported essentially as a mix of all the tracks and will sound the same as if you had exported a mix. The difference is that it will be named after the output, rather than a saved file name. If you’re exporting a project to send to another professional sound designer or engineer, this is an ideal method because you’ll supply all of the individual tracks as well as a mix (Out 1).
Select Out 1 and play it in the Preview column.
Press Cmd-Tab and show Soundtrack Pro again.
If you’d like to export audio combined with the project’s video clip, you can choose the export with Compressor option. You can also export with Compressor if you’d like to export an audio file as a different format, such as MP3.
Exporting with Compressor will create a copy of the original QuickTime movie file with your Soundtrack audio mixed into the movie’s audio track.
QuickTime movies can be self-contained, or they can reference media in another program like Final Cut Pro. All QuickTime movies exported from Soundtrack Pro are self-contained, which means they can be copied or moved to another computer without needing to reference other media.
Compressor also allows you to export in the original video format, or compress the file into another file, such as MPEG2 for DVD Studio Pro.
The final movie will be the same length as the original video clip, or the end of the last clip in the Timeline, whichever is longer. If the audio files are longer than the video clip in the Timeline, the finished video will be extended with a black screen (slug) at the end.
Choose File > Export > With Compressor.

The Save As window opens with Compressor controls in the lower half of the window. This handy feature allows you to utilize the power of Apple’s Compressor application, without the need to work directly in the Compressor interface.
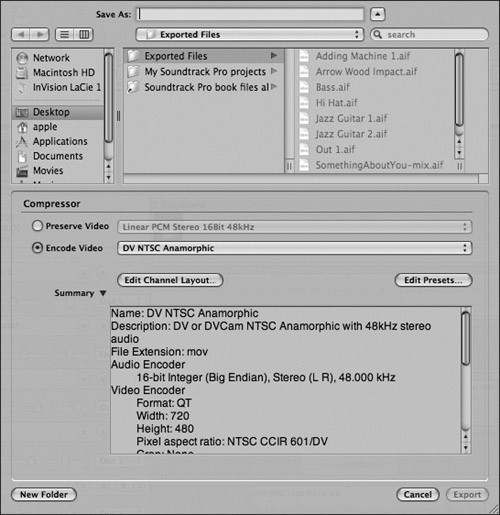
Select the Preserve Video radio button to export the audio and video without changing the video settings, such as frame size or file type.

In the Save As field, type Clapboard Final.
Make sure that the Exported Files folder is the selected location for the exported file.
Click the Export button, or press Return.
When the file finishes exporting with Compressor, close the 2-2 Jazz Final project.
Look for the exported movie in the Exported Files folder on the desktop.
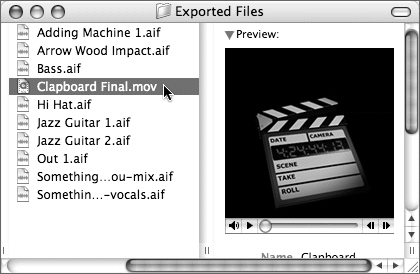
Play the exported movie in the Preview column of the Finder.
Double-click the Clapboard Final.mov file to open it in the QuickTime player and see a full-size version.
Play the file in the QuickTime player, then press Cmd-Q to quit.
You’ve successfully exported projects using all three different Soundtrack Pro methods. Now it’s your turn to export another project with Compressor. If you recall, the ADA PSA that you worked with in Lesson 6, “Modifying and Repairing Dialog in the Waveform Editor,” was an HDV project. Your goal in this practice exercise is to open the 6-5 ADA PSA Final project and export it with Compressor to the Exported Files folder. You’ll name the exported movie ADA PSA Final and preserve the video format as you export it. When you’re finished exporting, close the project, go to the desktop, and double-click the movie to open it. Since the file is widescreen HDV, it may not fit completely on your computer screen. If not, press Cmd-F to view it full screen in the QuickTime application. Have fun.
When you add files to a Soundtrack Pro project, you don’t actually add the file; you simply add a reference to it. The original file remains in its original location on the computer before you added it from the Browser or Search tabs. As long as you save a project uncollected (without selecting the Collect Audio Files checkbox in the Save As window), the project will continue to reference the original files in their original locations.
An uncollected project is dependent upon the original media files until you export it as a mix, as tracks, or with Compressor. Until that point, your project references the media files wherever you originally found them in the Media and Effects manager. An exported mix can be played with other applications; it is self-contained and not dependent upon any other files to play.
If you save a project collected with all of its media files, the project and a copy of every file included in the project will be saved together. You should only save a project collected if the project is finished and you’d like to save it with all the media in one convenient folder so that you can move it to a different computer, or save it to another storage medium that doesn’t require the full Soundtrack Pro loops library.
For this to make sense, let’s walk through the process together.
Open the 1-2 Final project, located in the 01-02_Projects&Media folder.
Notice that the project opened perfectly with all of the media, including the QuickTime video, intact.
Play the project once, and reminisce about your first Soundtrack Pro project from this book.
Currently the project and all of its media files are located in the 01-02_Projects&Media folder.
Your goal in this exercise is to save it collected to a new folder on the desktop.
Press Shift-Cmd-S, or choose File > Save As.
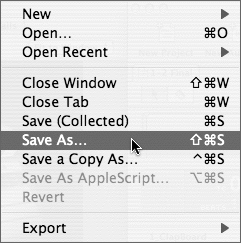
Notice that the normal Save feature shows (Collected) in parenthesis because the project was saved collected to the 01_02_Projects&Media folder.
In the Save As field, change the name to Clapboard Rock final.
Click the Desktop in the Sidebar, and then click the New Folder button to create a new folder on the desktop.
Tip
It’s important to save collected multitrack projects to a designated folder. Otherwise, the project and ALL of its files will populate whatever location you saved them to. Sure, that’s not a big deal with this little project that only includes 6 audio files and 1 video clip. Imagine a project with 200 or more audio files.
Name the new folder Clapboard Rock and click the Create button.
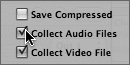
Make sure that both the Collect Audio Files and Collect Video File checkboxes are selected.
Close the project.
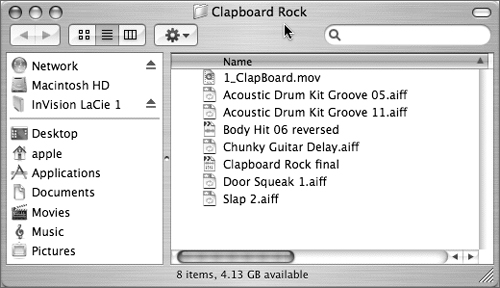
Locate the Clapboard Rock folder on the desktop, and open the folder.
Note
Don’t worry if the icons in your project look slightly different than the ones in these figures. The icons may vary depending on whether they were saved with file extensions showing and which applications are installed on your computer. Chances are, your audio files are tagged to open in QuickTime, instead of the Apple Loops Utility.
The Clapboard Rock folder includes the Clapboard Rock final project, as well as five audio files, one audio file project (Body Hit 06 reversed), and one video clip (1_ClapBoard.mov). You could move this folder to your laptop computer or another computer without needing to reference any other files.
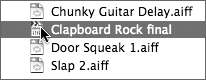
Double-click the Clapboard Rock final project to open it in Soundtrack Pro.
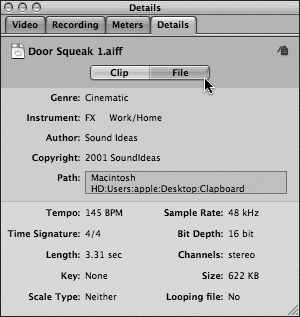
Select any of the Audio files in the project, then press Cmd-I to view the file’s details in the Details tab.
On the Details tab, click the File button to view the file details, including the file’s Path.
Your project opens perfectly and is no longer referencing the files in the 01-02_Projects&Media folder.
Why does it work? Because all the files it needs have been neatly packaged with it in the same folder. As you can see, this folder is all you need to take with you to open this project anywhere, anytime, on any computer (as long as the computer has Soundtrack Pro). I often find myself finishing projects on my laptop computer in airports, hotels, wherever. Saving files collected makes them very travel-friendly. In fact, the Projects&Media folders used for this book contain the collected files of all the projects for each lesson. However, so far in this book, when you’ve resaved the projects at the beginning of each lesson, you’ve been saving them uncollected by deselecting the collect audio files checkbox. The projects in the My Soundtrack Pro projects folder should all be uncollected projects that reference the media in the Projects&Media folders.
Press Cmd-1 to return the Utility window to the Video tab.
Save and Close the project.
What happens if you move a collected project to a location that doesn’t include the media? The 10-1 Reconnect project was originally saved collected into the 10 Media folder in the 10_Projects&Media folder. Then, for the purposes of this demonstration, I moved the file out of the folder. So, what do you anticipate will happen when you try to open the project? I could tell you, but it will be more fun to show you.
Open the 10-1 Reconnect project, located in the 10_Projects&Media folder.
An Alert window opens.
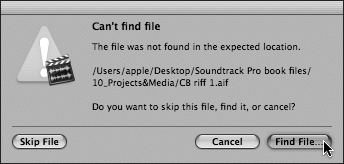
This alert gives you three choices: Skip File, Cancel, and Find File.
If you skip a file, the filename will still show up in the project, but the name will be in red, indicating that the file is offline—disconnected from the project.
Let’s use the Find File option.
Click the Find File button.
A new window of your file directory opens so you can direct the software to the correct file.
Navigate to 10_Projects&Media > 10 media.
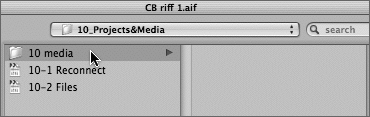
The file you’re looking for is displayed in the window’s title bar (CB riff 1.aif) and also at the bottom of the window in the Reconnecting path. The last part of the path is the name of the file you are looking for.
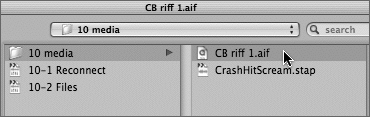
Select the CB riff 1.aif file in the 10 media folder.
Select the Use selected path to reconnect other missing files checkbox in the lower-left corner of the window, if it’s not already selected.

When you select this checkbox, the program will look for all of the other missing files in the same location. Otherwise, you will have to reconnect each file individually.
Click the Open button in the lower-right corner to reconnect the media file.
Done. The project opens containing two unrelated files. The first is a simple guitar riff recorded by a friend, Camillo Brena. The second file is the customized CrashHitScream file that was created in Lesson 5, “Designing Sound in the Waveform Editor.”
In the next exercise you’ll export both files—one as a file, the other as a loop. First, close the file without saving it so that it will need to be reconnected again next time you open it. If you save it after reconnecting, it will no longer need reconnecting.
Press Cmd-W to close the project.
A dialog window opens, asking if you want to save the changes.
Click the Don’t Save button to close the file without saving.
You can export recordings and other files as either looping or non-looping files. Once you’ve exported the files, you can tag them in the Apple Loops Utility and index them as part of your audio library.
You’ll work with the Apple Loops Utility soon; first you’ll need to export the files.
In this exercise you’ll export part of the guitar riff as a loop, then you’ll export the CrashHitScream file as a non-looping file. To export a file as a loop, you create a playback region that defines the loop and then export the file.
Open the 10-2 Files project.
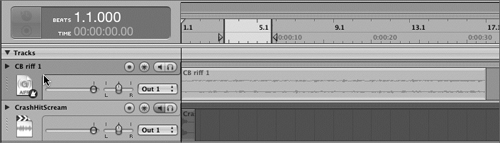
The project opens with a playback region already created. The guitar recording is on the first track, and the CrashHitScream is on the second.
Press Shift-Cmd-S and save the file uncollected in the My Soundtrack Pro projects folder.
Press End to move the playhead to the End of the playback region.
Press the spacebar to play the playback region.
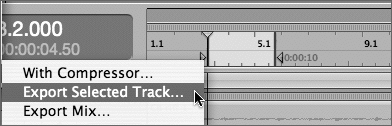
Select the CB riff 1 track, if it’s not already selected.
Pause playback, then choose File > Export > Export Selected Track.
To make it easier to locate and index your exported files, let’s make another folder on the desktop.
Click the Desktop icon in the window sidebar to choose the desktop.
Click the New Folder button, and name the new folder Files to Index.
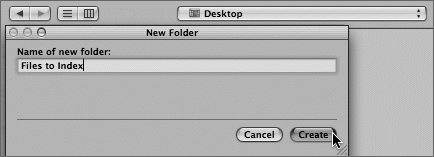
Click the Create button to create the folder on the desktop.
Click the Export button to export the CB riff 1 track.
Before you look at your newly exported loop, go ahead and export the sound effect first.
Clear the playback region.
Select and unmute the CrashHitScream track.
Choose File > Export > Export Selected Track.
Choose the Files to Index folder on the desktop, then click the Export button.
Take a moment to add the looped and non-looped files to the project to see how they turned out. Sure, there’s nothing that special about importing files, except that these files were freshly exported from the previous exercise.
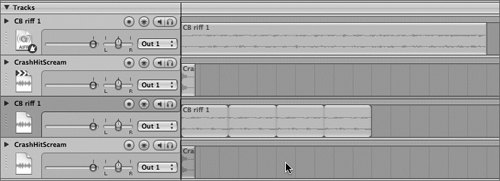
In the Browser, navigate to your Files to Index folder on the desktop. Drag the CB riff 1 file to Track 3 in the Timeline. Does it look like a loop? Drag the right edge to see if it extends like a loop. If so, extend it until it repeats three or four times. Next, add the CrashHitScream file to Track 4. Is it a looping or non-looping file?
Files that are exported with a playback region present are exported automatically as looping files. If you accidentally export a file as looping, you can always change it back to non-looping in the Details tab.
When you’re finished, save your project.
Knowing how to distribute files and how the files and projects relate to one another is incredibly important, especially when you start using Soundtrack Pro for real projects. Another important factor in managing your files is being able to find and use them again easily, a topic covered in the next section.
Have you ever wondered how Soundtrack Pro is able to match audio files from the Search tab or Browser to a specific project? Or how Soundtrack Pro’s search feature identifies audio files by keyword, refines searches, and performs matches? Or how Soundtrack Pro is able to change the clip speed or project tempo without changing pitch? The secret to Soundtrack Pro’s ability to perform these feats of audio magic can be found in the Apple Loops Utility.
The Apple Loops Utility is the companion software that comes with Soundtrack Pro, and it is used to tag audio files with information. You can add and change tags for up to 2000 files at a time.
You know how to build projects, and how to export projects as a mix or as individual tracks. In the next series of exercises, you’ll learn how to tag audio files with information so they can be indexed in Soundtrack Pro’s search database.
You can open files in the Apple Loops Utility from the hard drive, from within a Soundtrack Pro project, or directly in the Apple Loops Utility. Let’s start from within a Soundtrack Pro project.
In the 10-2 Files project, Ctrl-click the CB riff 1 loop on the third track from the top in the Timeline and choose Open in Apple Loops Utility from the shortcut menu.
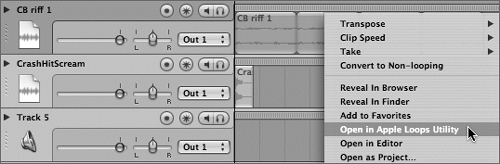
The Apple Loops Utility opens.
Don’t let all of the menus and radio buttons scare you. The Apple Loops Utility is really quite easy to use.
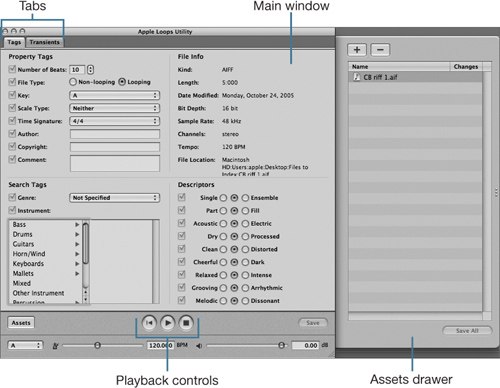
The Apple Loops Utility has one main window with two tabs and an Assets drawer.
The first tab in the main Apple Loops Utility window opens the Tags pane.
Tags are pieces of additional information (metadata) that you add to an audio file. A tag won’t change the way a file sounds, so if you recorded something out of tune, you can’t fix it in the Apple Loops Utility.
The second tab is the Transients Tab. Transients correspond to the peaks, or most pronounced changes in a sound’s waveform. The Transients tab contains a large waveform display and markers to indicate the position of transients. Transients are used when transposing or changing tempo of a loop.
The Assets drawer shows the files that are open in the Apple Loops Utility. You can have up to 2000 files open at a time. Let’s add another file to the Assets drawer.
Locate the Assets drawer to the right of the main window.
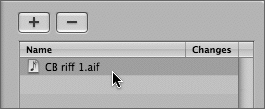
Your CB riff 1.aif file is the only name in the list.
Click the Add File button (+) located in the top-left corner of the Assets drawer.
A window opens for you to locate the file that you want to add.
Navigate to the Files to Index folder on your Desktop and select the CrashHitScream.aif file.
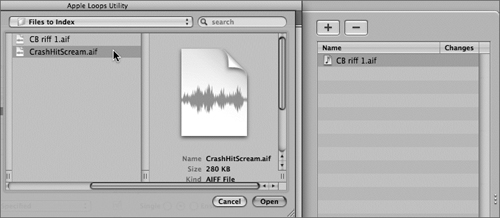
Click the Open button to open the file in the Assets drawer.
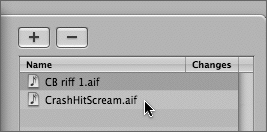
The CrashHitScream.aif file appears in the file list.
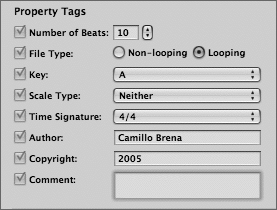
The Tags pane is divided into four quadrants: Property Tags, File Info, Search Tags, and Descriptor Tags.
Property tags identify the different properties of an audio file.
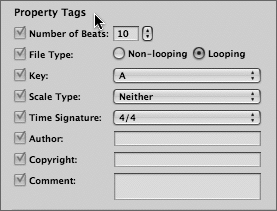
Number of Beats field: This field displays the number of beats in the audio file.
File Type buttons: These buttons set the audio file type, which is either Non-looping or Looping.
Key pop-up menu: This menu sets the key of the audio file. The default is A.
Scale Type pop-up menu: This menu sets the file’s scale type. The choices are Major, Minor, Good for Both, and Neither. These tags are unique to Soundtrack Pro and are very useful for working with guitar loops and with other instruments that use the major or minor scales. The default setting is Neither.
Time Signature pop-up menu: This menu sets the audio file’s time signature. The choices include: 3/4, 4/4, 5/4, 6/8, and 7/8. The default setting is 4/4.
Author field: This field displays the name of the audio file’s author. To enter a new name, type it in the field.
Copyright field: This field displays copyright data for the audio file. To enter new data, type it in the field.
Comment field: This field displays comments about the audio file. To enter new data, type it in the field.
Let’s set the relevant Property tags for the CB riff 1.aif file. Remember, this file was recorded by Camillo Brena, so give him proper credit in the Author and Copyright fields.
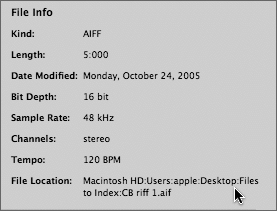
The File Info portion of the Tags pane includes information about the file. This information was determined when the file was recorded, and it can’t be altered in the Apple Loops Utility. If the file is exported as a track, it will use the multitrack project’s properties as the file info.
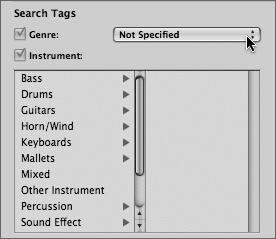
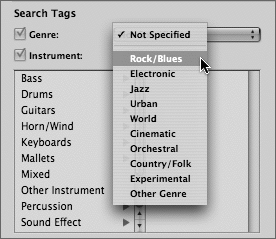
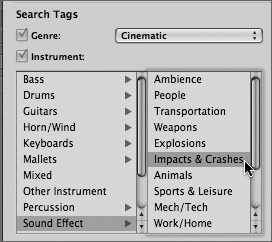
Search tags are used to find files within the massive Soundtrack Pro search database. How would you search for the CB riff 1.aif file if you were looking for it in the Soundtrack Pro Search pane? Let’s set the Search tags so that you—or anyone else—can find the CB riff 1.aif file in Soundtrack Pro.
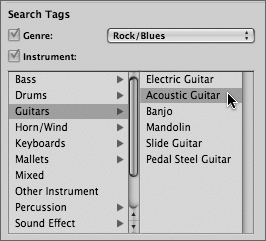
Descriptor tags are exactly what they sound like: tags that describe a particular file in greater detail. If the descriptors look familiar, they should. You have used them along with the Search tags almost every time you have searched for files in Soundtrack Pro. The Soundtrack Pro search database uses the Descriptor tags; you simply click the buttons or columns with the descriptors to guide the search. The Descriptor tags are used to refine the search beyond instruments or genre.
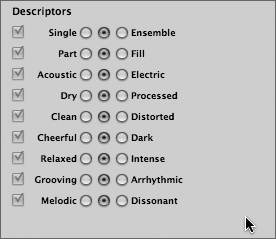
You can assign each descriptor one of three choices by selecting a circle. The left circle is for the choice on the left; the right circle is for the choice on the right; and the center circle, neither choice, means the descriptor is not included with the file. You may choose only one option for each descriptor.
Let’s select the descriptors for the CB riff 1.aif file.
Press the spacebar to play the file in the Apple Loops Utility, as a reminder of what it sounds like. Pause playback once your memory has been refreshed.
Click the radio button next to Single to indicate a single instrument.
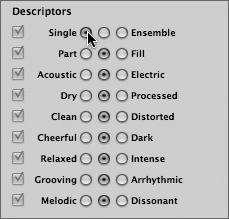
Clearly this was recorded by a single instrument (guitar). Ensemble usually means more than one different type of instrument.
Select the Acoustic, Clean, and Grooving radio buttons.
Clean refers to a recording without added effects.
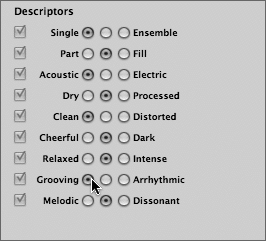
These are the only descriptors that apply to this file.
Once you have tagged your file, you will need to save the changes. Before you save the changes, let’s look at the Changes column in the Assets drawer.
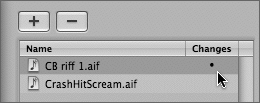
Notice the bullet in the Changes column of the CB riff 1.aif file. This indicates that you have made changes to the file and that they have not yet been saved.
Let’s save the changes to the file.
Now it’s your turn to tag the CrashHitScream file. Use your best judgment to assign appropriate tags. Remember, CrashHitScream was created by combining three different sound effects that come with Soundtrack Pro. Start by selecting the CrashHitScream file in the Assets drawer. Leave the Author and Copyright fields blank. Select the search tags that fit the sound effect, then save the changes to the file and quit the Apple Loops Utility.
Now that you have tagged both of the files in the Files to Index folder, you can add them to the Soundtrack Pro search database.
Click the Search tab in the Media and Effects manager of Soundtrack Pro.
Note
If the 10-2 Files project is not still open in Soundtrack Pro, go to the My Soundtrack Pro projects folder on your desktop and open the 10-2 Files project before continuing.
Since the CB riff 1 and CrashHitScream files are both in the Files to Index folder, you will index the entire folder.
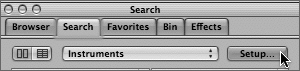
Click the Setup button in the upper-right corner of the Media and Effects Manager to see the Directories list.
Click the Add Directory button (+) to add a new directory.
An Open window appears.
In the Open window, locate the Files to Index folder on your hard drive, and select it; then click the Open button to add the folder.

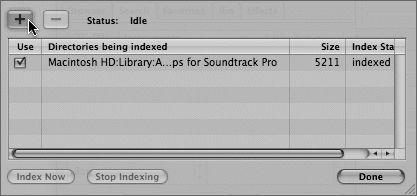
The folder is added to the Directories list, but you can see that it’s not indexed, so let’s do that next.

Making sure that the Files to Index folder is selected, click the Index Now button to start indexing the files within the folder.

The Directories list indicates that the two files have been indexed.
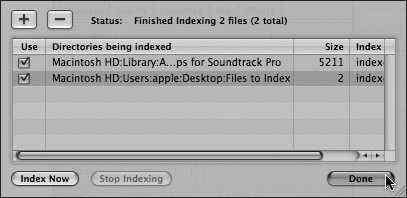
Click the Done button to close the Directories list.
Now let’s find your files in the database.
Change the Search tab to button view, if it is not already showing keyword buttons.
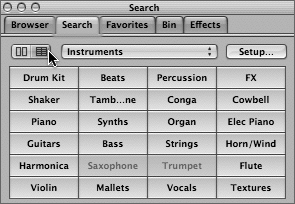
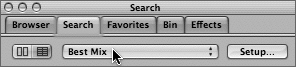
Change the Keyword Category pop-up menu to Best Mix.
Click the Guitars Keyword button in the Search pane.
There are over 500 Guitar files to choose from. Let’s narrow the search.
To choose more than one Keyword button, hold the Command key before clicking the additional buttons.
Cmd-click the Acoustic, Clean, Single, and Rock/Blues buttons to narrow the search.
There are now just over 100 choices.
Note
If you’ve indexed additional loops libraries, you may have more files in the search results. The numbers above are based upon the files that come with Soundtrack Pro. If you work with GarageBand, you can index the files in the Jam packs to use in Soundtrack Pro. The Jam Pack files will all be indexed as real instrument loops. There are also many loop libraries available through third-party companies. Soundtrack Pro will recognize WAV and ACID files. If you have a third-party loop library that you want to add to your Soundtrack Pro files, just add the directory to the search database using the search setup in the Media and Effects Manager.
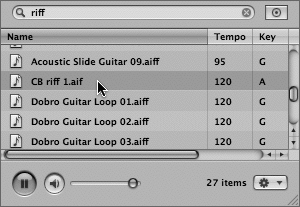
Type riff in the Refine Search field to find only files with the word riff in the name.
Scroll down through the search results list until you find the CB riff 1.aif file.
Note
If you don’t see the files right away in the Search tab, you may need to quit Soundtrack Pro, then reopen the 10-2 Files project and try the search again.
That’s all it takes. You can use these tagging techniques for all of your recorded files.
Your final challenge in this lesson is to locate the CrashHitScream file in the Search database. You can use either button or column view to locate the file. Just remember which descriptors you used. Happy hunting! When you’re finished, close the project.
Guess what? You made it through the distributing and managing Soundtrack Pro files lesson! Chances are you had a little fun along the way.
Answers