Lesson Files | Soundtrack Pro book files > 06_Projects&Media > 6-1 ADA PSA Start, 6-5 ADA PSA Final |
Time | This lesson takes approximately 1 hour and 35 minutes. |
Goals | Normalize voiceover and production sound |
Work with the Frequency Spectrum view | |
Select and set a noise print | |
Use the Reduce Noise feature | |
Analyze an audio file | |
Find and fix clicks and pops in the Analysis Pane | |
Use the Zoom tool | |
Adjust selections to zero crossing points | |
Set an ambient noise print | |
Add ambient noise to a selection |
Whether you’re working on a commercial, feature film, training video, or music video, dialog and vocals are usually the most important audio element of the project. Without spoken words, the characters have no voice, the narrator has no story, the vocalist has no song.
Audiences don’t know your production budget or what equipment you used, only what they see and hear when they watch the final project. As the sound editor, it’s your job to make everything sound as professional as possible by cleaning up the audible glitches, pops, clicks, distracting noises, erratic levels, overpowering ambience, or distorted dialog. Fortunately, the Waveform Editor comes equipped with all of the tools you’ll need to fix these problems and repair your dialog tracks.
In Lesson 5, “Designing Sound in the Waveform Editor,” you learned how to modify sound effects. In this lesson you’ll work with the dialog tracks of a real-world Public Service Announcement (PSA) for the American Diabetes Association (ADA). You’ll also learn some new shortcuts and tricks for enhancing dialog that you can apply to your own projects.
Begin by opening and playing the 6-1 ADA PSA Start project located in the 06 Projects&Media folder. Once you’ve seen and heard the starting project, you will save it to the My Soundtrack Pro projects folder on your desktop.
Quit all open applications, except for Soundtrack Pro.
Close any open Soundtrack Pro projects.
Open the multitrack project 6-1 ADA PSA Start, if it’s not already open.
Save the project uncollected to the My Soundtrack Pro projects folder on your desktop.
Play the 6-1 ADA PSA Start project once.
As the project plays, notice the different types of dialog that you hear, as well as any distracting sounds that may detract from the overall project.

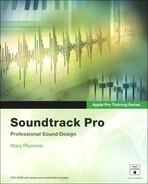
This project is an actual PSA for the ADA’s Tour de Cure event. The project was taped using HDV format at 23.98 fps and edited in Final Cut Pro. The finished video edit was then sent to Soundtrack Pro for final sound editing and mixing. The music tracks were created in a separate Soundtrack Pro multitrack project, then mixed down and exported for this PSA. You can find the diabetes mix project in the 6 PSA_MUSIC folder located in the 06 Projects&Media folder.
Note
HDV requires a lot of processor speed to play. If you’re working on a laptop or slower computer, you may see a slight stutter in the video as you watch it in Soundtrack Pro. The final video will play perfectly when exported from Soundtrack Pro through compressor, which you’ll do in Lesson 10, “Exporting, Managing Media, and Preferences.” Some of the sound issues that you’ll be working on in this lesson were added to the project for the purposes of the exercises and were not actually part of the original recordings.
Generally, the best quality recordings that you’ll work with are those made in a controlled environment. Audio recorded in a sound booth isn’t contaminated with external ambient noise or sounds such as car horns, cell phones, or dogs barking, so the biggest issue you’ll face when editing professionally recorded voiceover is the audio levels. If you’ve never worked with professional voiceover recordings, here’s your chance. The real-world voiceover recordings you’ll work with in this lesson were professionally recorded with a voiceover artist.
Over the next series of exercises you’ll open a voiceover clip as an audio file project. Then you’ll silence the portions of the waveform that don’t include dialog and normalize the dialog levels. Finally, you’ll double the audio by converting it to stereo. To make the projects in this lesson easier to find, each has been marked with a green time marker. The audio file project you’ll be starting with is called TAKE_6 TDC and is located on the fourth track from the top.
Press Return to move the playhead to the beginning of the project.
Press Shift-M to move to the make clean & stereo VO marker (2; 12).

Double-click the TAKE_6 TDC clip at the playhead position on the fourth track to open the audio file project.
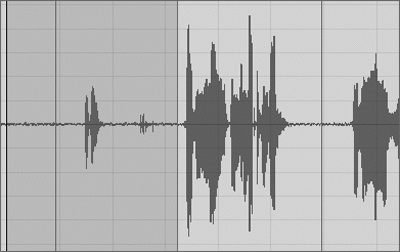
The audio file project opens in the Waveform Editor. The section of waveform between the gray markers is the portion showing in the Timeline clip.
You could use the Razor tool to split the clip and delete the portion with the unwanted noise, or you could simply silence it in the Waveform Editor, which you’ll try now. As you learned in the previous lesson, you can silence a selection by either choosing Process > Silence, or pressing the shortcut Cmd-Delete. Here’s your chance to practice.
First, let’s determine what needs to be silenced, then select it and apply the Silence process. You only need to modify the waveform between the gray markers, since that is the only portion that will be audible in the Timeline.
Double-click the display area between the gray markers to select the entire waveform in that section of the Timeline.

Press the spacebar to play the selection and listen to the voiceover segment.
It’s nearly perfect, except for the talent clearing his throat before he speaks.
Move the playhead to the beginning of the first word of dialog in the waveform display area (07;09).
Press the up arrow key several times to zoom in for a closer look at the beginning of the dialog waveform at the playhead position.
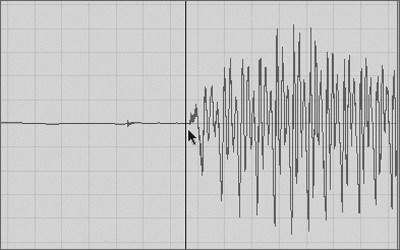
It’s important that the playhead is positioned before the dialog begins. That way you won’t have to worry about accidentally silencing part of the dialog by mistake. This playhead position is fine, and you can clearly see that it is before the dialog waveform starts.
Press the down arrow key to zoom out until you can see the gray marker at the left of the playhead.
Press Shift–left arrow several times to move left until the gray marker is included in the selection.
Choose Process > Silence or press Cmd-Delete to silence the selection.
The waveform with the selection becomes a flat line to indicate total silence.
Press Cmd-S to save your progress.
Since you silenced the waveform in front of the voiceover, it’s a good idea to also silence the end of the waveform for consistency.
Now it’s your turn to hone your selection and silencing skills. Move the playhead to the end of the dialog (09;09) and create a selection from the playhead through the gray marker at the right of the waveform. Silence the selection and save your progress.
A conversation that starts soft and quiet but ends up in a heated debate will have radically different volume levels. Maintaining that dynamic range is important for the reality of the scene. Voiceover dialog, on the other hand, is very consistent and needs to be the strongest and clearest audio in the project, making it ideal for the normalization process.
Normalization raises the maximum level of a digital signal to a certain amount—typically to its highest possible level without introducing distortion. How? Soundtrack Pro’s Waveform Editor finds the point with the highest volume in audio and determines how far it is from the maximum possible level. The entire level of the selection is then raised by this amount so that the dynamic balance remains unaltered—it merely gets louder.
Although the levels in the current project are good, they have room for more amplitude without exceeding the maximum level of 0 dB. Let’s try normalizing them.
Double-click between the two gray markers to select that section of the waveform.
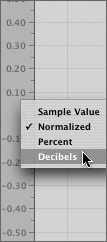
Ctrl-click the Sample Value ruler at the left of the display area and choose Decibels from the shortcut menu as the display units.
Notice where the highest and lowest peaks of the waveform are on the decibel scale.

Choose Process > Normalize or press Cmd-L.
The Normalize dialog opens. For this exercise, you’ll use the default level, 0.000 dB. In digital audio, 0 dB is the maximum level you can set without causing distortion (also known as clipping). When you normalize a waveform to 0 dB, you’re increasing the amplitude of the entire waveform so that the highest and lowest peaks are just below 0 dB.
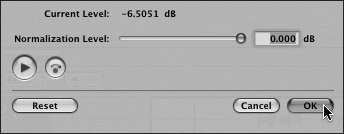
Click OK to normalize the waveform.
The amplitude (height) of the waveform increases until the highest or lowest peaks reach 0 dB.
Save your progress.
Just as you doubled the music clips in Lesson 4, “Building Suspense with Editing Techniques,” to fatten the track, the same process works to make the dialog sound stronger. Video editors often double the dialog while editing either by duplicating the clips in the Timeline or doubling mono dialog within a clip and converting it to stereo.
For this exercise, you’ll convert the waveform from mono to stereo in order to double the audio within the clip. But first, let’s take a look at the multitrack project to see what doubling techniques are already present in the Timeline.
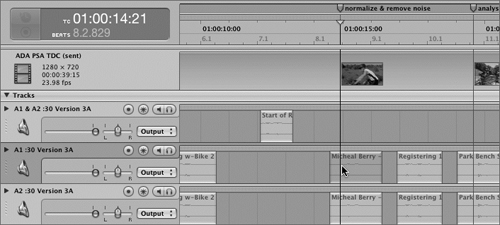
Click the 6-1 ADA PSA Start tab to make the multitrack project active in the Project window.
Notice that the voiceover clips on the fifth track are duplicates of the clips on the fourth track. The clips on the second and third tracks were also doubled to increase the volume. These clips contain production sound dialog, which you’ll be working with later in this lesson. For now, I just wanted you to see that there are different ways to double dialog tracks.
Find the first two voiceover clips on the fourth track from the top.

These two clips have not been doubled on a separate track. Instead, you’ll double them by converting them from mono to stereo. You’ll start with the first TAKE_6 TDC audio project, which is already open in the Waveform Editor.
Click the TAKE 6 TDC tab to make the audio file project active in the Project window.
Now you’ll apply a Convert To Stereo process to the entire waveform. Up to this point, you’ve always selected part of the waveform before applying an action. If no selection is present, the process will be applied to the entire waveform.
Click anywhere on the waveform display area to clear any selections that may be present.
Choose Process > Convert To Stereo.
The Convert To Stereo dialog appears with a warning that your actions will be flattened, rendering everything into one audio file. This is a necessary part of the process of converting to stereo, and since the waveform has been expertly silenced and normalized, you don’t have to worry about the fact that flattening is undoable once you’ve saved the project.
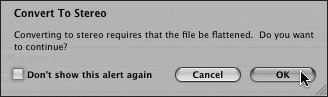
Click OK to flatten the actions and convert the waveform from mono to stereo.

Violá! The waveform has been doubled, which boosts the overall level for a stronger, richer sound.
Save and press Cmd-W to close the audio file project.
Play the beginning of the project in the Timeline and listen to the first three pieces of voiceover (around 12 seconds).
As you listen to the voiceover with the other tracks, compare the perceived volume levels between the first, second, and third voiceover clips.
Both the first and third were doubled and seem to be the same level. The first was doubled as an audio file project normalized and converted to stereo in the Waveform Editor, while the third was duplicated to a different track in the Timeline. The second voiceover clip seems less powerful because it is still only a single mono audio track. What a difference a doubled track makes!
Tip
Technically there’s nothing wrong with doubling tracks over and over to boost their levels in the Timeline, but the more tracks and files you play simultaneously, the more processor intensive the project becomes. By modifying the waveform in an audio file project and then flattening it, you will reduce processor demands in the long run.
Now that you know how to normalize and convert a file to stereo in the Waveform Editor, try it on your own with the second voiceover clip. First double-click the clip and open it as an audio file project. Save the project as Take_6 Stereo to the My Soundtrack Pro projects folder. Then normalize the entire waveform and convert it to stereo. Finally, save the finished project, close the audio file project, and listen to the revised voiceover clip in the Timeline. Enjoy.
Earlier in the lesson you worked with voiceover that was recorded in a controlled environment. A movie set is the next best thing to a sound booth, giving you a lot of control over things that could possibly contaminate sound recordings. But production sound recorded on location is at the mercy of everything from buzzing flies to airplanes passing overhead, car horns to people in the distance—even a good breeze can wreak audio havoc.
Nature happens on location, but luckily it’s no match for the power of the Waveform Editor. Not only can you isolate and silence unwanted sounds, but you can also reduce the overall noise level. For the remainder of the lesson you’ll work with production sound recorded on a set or on location. First you’ll open an audio file project containing a production sound recording on location. You’ll raise the overall level of the audio and use the Reduce Noise process to eliminate most of the background noise. Along the way you’ll also use the frequency spectrum view for a better look at the noise.
Move the playhead to the normalize & remove noise marker (second marker from the left).
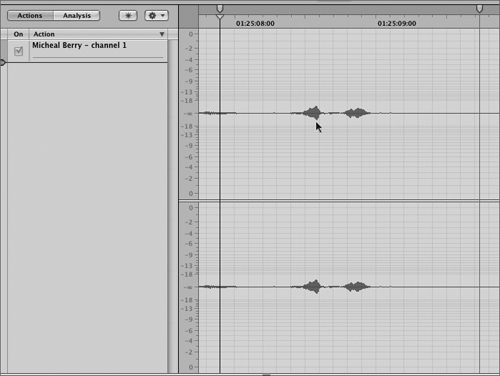
Double-click the Michael Berry – channel 1 clip below the marker on the second track to open it in the Waveform Editor.
Play the project in the Waveform Editor to hear the current levels.
Ctrl-click the Sample Value ruler and change the sample units to Decibels in the shortcut menu.
Notice the current decibel level of the waveform peaks at around –20, which is fairly low.
This signal may be doubled as a stereo track and is doubled again in the Timeline, but there is still no reason to leave the waveform low when it is so easy to modify it.
When an audio waveform is low in decibels, such as the one you’re working with now, it’s hard to tell how much ambient noise is in the recording until you boost the levels and take a look. Let’s normalize the waveform and see what’s there.
Click once to clear any selections that you may have created.
Choose Process > Normalize or press Cmd-L to open the Normalize dialog.
Click OK to normalize the file to 0 dB.

Yikes! The waveform is definitely amplified, and so is the ambient noise. Notice the thick band of noise between the lines of dialog. The rule in audio is that if you can see it, you can hear it, so the bigger the noise waveform, the more you’ll hear it.
Play the normalized waveform.
The dialog is much stronger and so is the noise level. Perhaps 0 dB is too much for this waveform.
Since voiceover is the most important audio in the project, it makes sense that it’s normalized to 0 dB. This dialog is also important, but should be less prominent in the overall project. Lowering the normalization level will also lower the level of the noise. You can modify most actions by simply double-clicking the action to reopen the dialog and changing the settings.
Double-click the Normalize action to reopen the dialog.
The current level displayed at the top of the dialog shows the peak levels of the original recording.
Type –6 in the Normalization Level field to normalize the highest and lowest peaks to –6 dB.
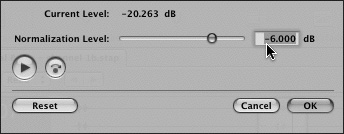
Click OK to apply the new normalization level.
Play the waveform to hear the dialog and noise normalized at –6 dB.
It’s still a bit noisy, but much better than it was at 0 dB. Some noise is expected, since the scene takes place outside at an active location, so this is what sound editors call motivated noise.
Unfortunately, sound that is recorded on location often contains a lot of background noise. As you just demonstrated, raising the level of the dialog also raises the level of the noise. If there’s too much noise, the dialog drowns in the roar of the background. Not enough and the dialog feels fake, like it was recorded in a sound booth instead of on location. Clearly this cyclist isn’t riding in a sound booth or deep space, so some ambient sound is expected. In fact, if it’s too quiet, you’ll likely need to add ambient sound to make it feel more realistic. Much of a sound engineer’s time is spent removing noise, only to add more later as ambience, making the scene sound real without compromising the integrity of the dialog.
It’s all part of the delicate audio balancing act. If hearing the dialog clearly means amplifying the embedded noise, you’ll likely need to use the Remove Noise process to clean up the noise a bit. First, however, let’s silence part of the waveform and take a look at the noise in the frequency spectrum view.
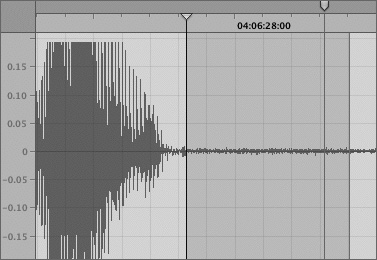
Move the playhead to the beginning of the dialog waveform (25:08:09).
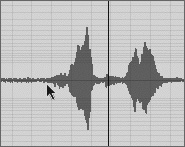
It’s difficult to see where the noise stops and the waveform begins. That’s partially because the noise never actually stops; it carries right on through the dialog and continues throughout the waveform.
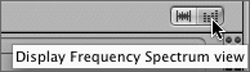
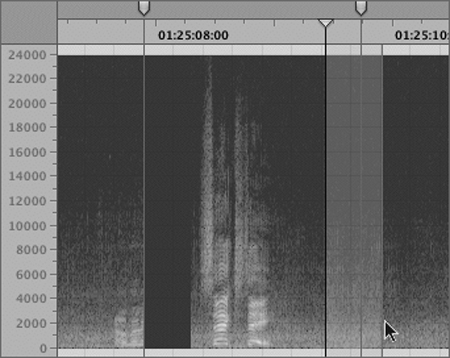
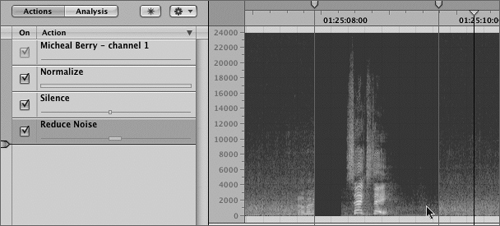
Click the Frequency Spectrum view button to change the display area to the spectrum view.
In frequency spectrum view, you can clearly see the noise that looks like snow flurries near the bottom of the waveform. Remember, the lower the frequency, the lower it appears on the frequency spectrum. The dialog is displayed as bars representing the vocal sounds of each word, and looks more like a vocal skyline.
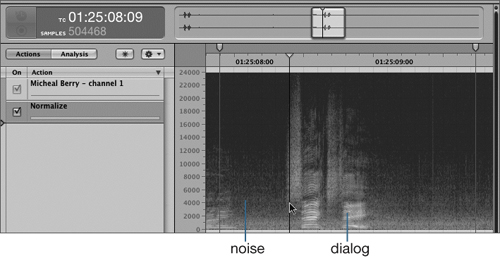
Looking at the frequency spectrum, you can clearly see that the playhead is actually over part of the dialog and should be moved before silencing any of the waveform.
Press Cmd–left arrow twice to move the playhead two frames earlier (25:08:07).
Now that your playhead is definitely before the dialog, you can select and silence the noise at the beginning of the clip.
Press Shift–left arrow until the selection includes the first gray marker.

Click anywhere in the display area to clear the selection, then look at the silence in the spectrum view.
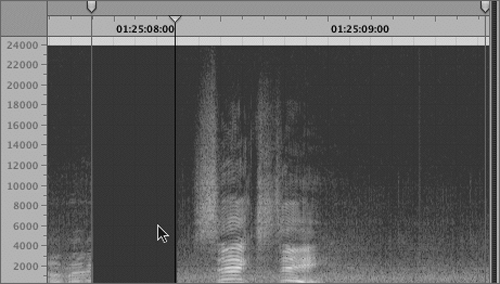
Sometimes you don’t appreciate how noisy an audio file is until you see it!
While you’re still in spectrum view, let’s take this opportunity to select some of the noise and create a noise print. The noise print provides a signature of the frequencies to reduce or remove from the file using the Reduce Noise command.
Zoom out one level until you can see the second gray marker on the right side of the display area.
The secret of getting a good noise print is to select a section of noise that is representative of the noise throughout the waveform. In this case, the noise is fairly consistent and there is plenty of noise without dialog around the gray marker that will work well for the noise print.
Create a selection around the gray marker.
The length of the selection won’t matter as long as the sound is representative of the noise throughout. Around 15 frames to 1 second will be fine.
Press the spacebar to play the selection and make sure it only includes noise.
If there is any dialog in the selection or sounds that aren’t part of the overall noise, click outside the selection and try again.
Choose Process > Set Noise Print.
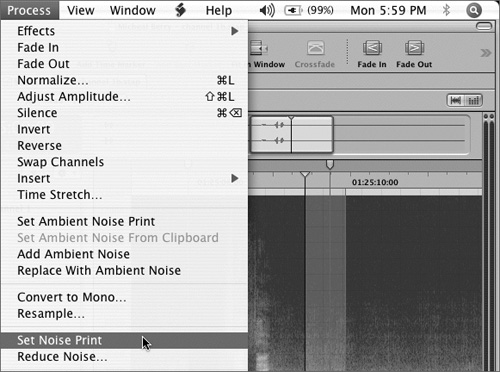
The selected noise is saved in memory and will be used to reduce the noise in the next exercise.
Note
You can remove noise from an audio file in the Soundtrack Pro Waveform Editor the same way as you remove color when keying a video image. If this was an image and you were trying to remove the blue screen, you would first select the blue color, and then remove it. The noise print is the same as the selected blue color.
Now you can use the Reduce Noise command to preview (listen to) the waveform as you adjust the noise. You can also hear only what is being removed, similar to looking at the matte of a color key. Let’s apply the Reduce Noise command and then make adjustments as needed to clean up the noise. First, you’ll need to select the portion of the waveform where you’d like to reduce the noise, or else you’ll only be reducing noise from the current selection.
Double-click between the gray markers to select that portion of the waveform.
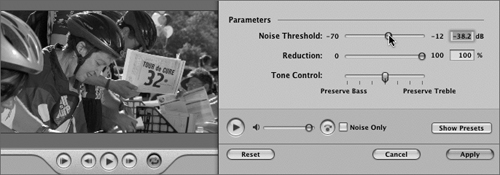
Choose Process > Reduce Noise to open the Reduce Noise dialog.
The Reduce Noise dialog appears, giving you a chance to preview the noise selection.
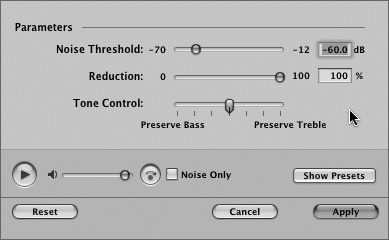
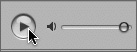
Click the Preview Play/Pause button to listen to the waveform with the noise print applied.
Drag the Noise Threshold slider to the left to lower the threshold (amount of noise frequencies removed).

The noise threshold determines the level below which audio in the noise print is considered to be noise. Lowering the threshold results in only very low signals being reduced, while raising it results in more high signals being reduced. When you reduce noise, some of the frequencies are also present in the dialog. Raising the threshold too high will remove the frequencies shared by the dialog and the noise.
Drag the Noise Threshold slider all the way to the right to hear the highest threshold level.
As expected, the noise frequencies are greatly reduced, but the dialog sounds awful because it was altered in the process. Any frequencies the dialog shared with the noise have been stripped away, making it sound like you were better off with the noise. If solving one audio problem only creates another, try adjusting your threshold levels.
Another option is to preview only the noise as you adjust the threshold. That way you can hear exactly what is being reduced, and you’ll know if the vocals are included in the frequency threshold.
Select the Noise Only checkbox.

Click the Preview button to continue previewing, if it’s not still playing.
Now, all that you hear are the parts of the waveform that will be removed, so you can clearly hear the cyclist’s voice along with the noise.
Drag the Threshold slider to the left until you can barely hear any of his voice amid the noise (38.2 dB).
Click Apply to apply the action.
Clear the current selection to see the area between the gray markers with the reduced noise.
You can see a big difference in the spectrum view where the noise has been removed. Let’s take a look at the difference in waveform view.
Click the Waveform View button and play the revised waveform.
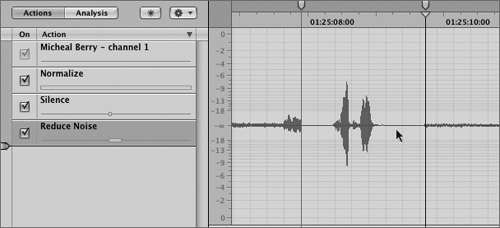
The noise is much less evident and the dialog is louder and clearer. What a difference! Wouldn’t it be nice if you could easily hear the waveform before and after the actions so that you could evaluate the improvement?
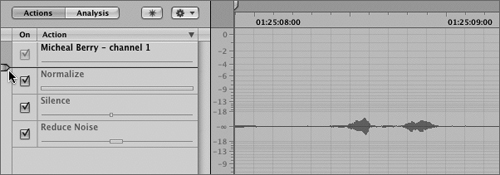
Now that you’ve normalized, silenced, and reduced the noise on this audio file project, you can compare and evaluate the file before and after the actions. Actions are extremely flexible and allow you to turn them on and off, reorder, and even preview their results one at a time by moving the Action insert bar. In the next series of steps you’ll experiment with these features.
Double-click the display area between the gray markers to select that section of the waveform.
Press the spacebar to begin playback of the selection.
Click the Actions menu in the top-right corner of the Action list and choose Play without actions.
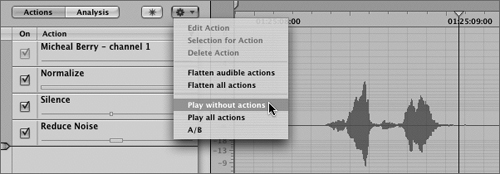
The actions all become disabled, and the waveform sounds the way it did when you first started.
The actions weren’t deleted or even turned off, so how were they disabled? The answer is the in the horizontal purple Action Insert Bar.
Locate the horizontal purple marker just below the Michael Berry – channel 1 file in the Action list.
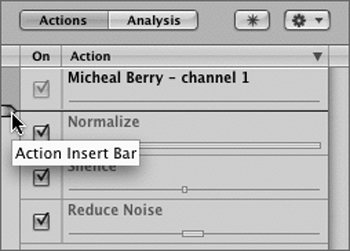
The Action Insert Bar can be moved up and down the Action list between the different actions. Any actions below the bar are disabled; actions above the bar are enabled.
Drag the Action Insert Bar down below the Normalize action.
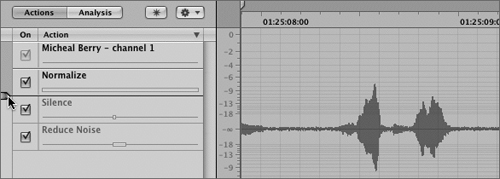
The waveform transforms instantly from before to after the Normalize action.
Pause playback, and then drag the Action Insert Bar to the bottom of the Action list below the Reduce Noise action.
All of the actions are now enabled. Each action also includes a checkbox so that you can selectively turn actions on or off.
Deselect the Normalize checkbox to turn off that action in the list.
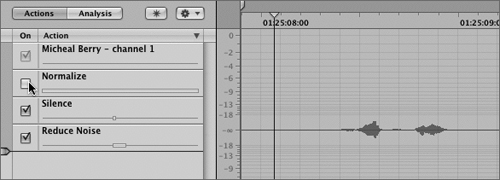
The other actions are still applied to the waveform, but it is no longer normalized.
Play the selection without the Normalize action.
Save and close the audio file project.
Play the modified file in the Timeline.
Not only did you improve the file, but it also sounds better than some of the other production sound clips that were simply doubled on two different tracks.
The techniques that you’ve learned so far will help you modify and repair sound levels. The Waveform editor can also analyze files for a range of common audio problems, including clicks and pops, hum, and phase issues. Better yet, it can automatically fix them.

The Waveform Editor can perform six types of audio analysis:
Clicks and pops are sudden, short peaks in the audio file that can result from variety of causes, including Timeline editing in a video application or mechanical defects in analog recordings. You can set the threshold above the level at which Soundtrack Pro considers peaks to be clicks or pops.
Power Line Hum includes power lines and other electrical equipment that can produce a steady hum, often at 50 or 60 Hz.
DC Offset is a shift in the audio that causes the positive (upper) and negative (lower) parts of the signal to average above or below zero. DC offset can limit the dynamic range of an audio file.
Phase Issues can result from a distorted or inaccurate stereo image caused by poor microphone placement and other issues. When converting a stereo file to mono, the presence of phase issues can cause the left and right channels to partially or completely cancel each other out.
Clipped Signal or overloaded signal above the digital volume limits can result from several causes, including poor gain staging in a preamp during recording, bad electrical cables, or surface damage to an analog recording.
Silence detects parts of the audio file where the audio signal falls to zero (0). You can set the threshold below the level at which Soundtrack Pro considers the signal to be silence.
In this exercise, you’ll open a clip at the analysis clicks & pops marker, which contains a nasty click. Next you’ll run a Clicks and Pops analysis on the waveform to find the click and fix it—all in a matter of seconds. This may sound too good to be true, but it’s not. Really.
Move the playhead to the analysis clicks & pops marker in the Timeline (19;14).
Double-click the upper Park Bench Stretching clip on the second track below the marker to open the audio file project in the Waveform Editor.
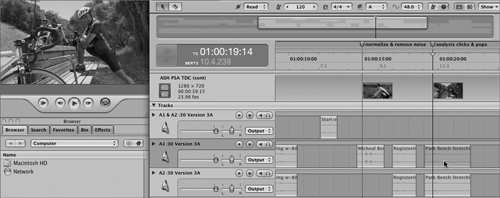
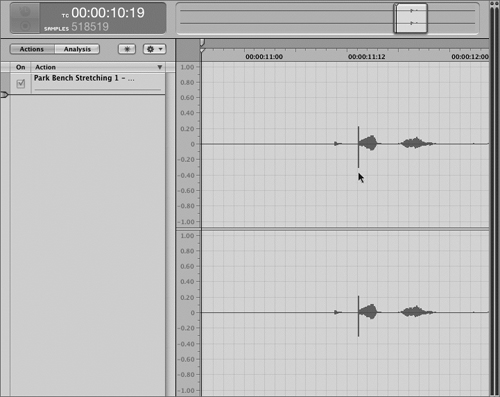
Play the waveform between the gray markers and listen to the click at the beginning of the dialog.
There are actually two sounds right before the cyclist says “Fifty.” The first is a pedaling sound from a cyclist riding through the background of the shot, which is part of the production sound that goes with the scene. The second sound is the nasty click that you’re hoping to eliminate. The analysis tool is sensitive enough that it can detect the difference based on the severity of the change in sound. The pedal sound is quick, but not loud, and doesn’t spike in the waveform the way the click does.
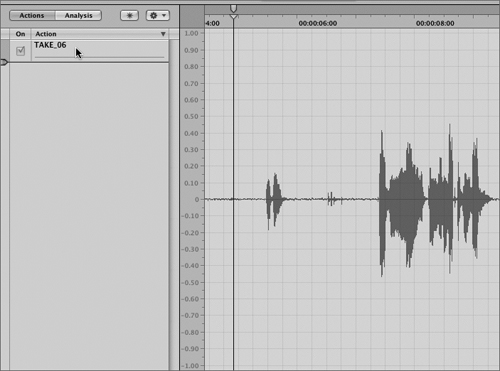
Move the playhead close to the click that looks like a vertical spike in the waveform.
Press the up arrow key several times to zoom in for a closer look.
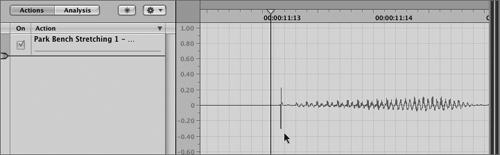
The click is right on the edge of the first word and might be difficult to remove manually without inadvertently trimming the dialog too. This is definitely a job for analysis.
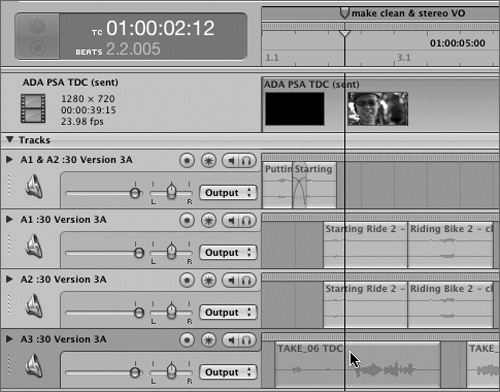
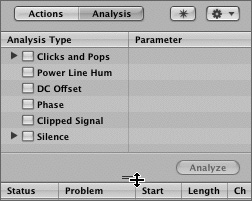
Click the Analysis button to access the Analysis pane.
The Analysis Type list, Parameter list, and Analysis Results list replace the Action list in the window.
Drag the handle that looks like an equal sign at the bottom of the Analysis Type list to view all six tools in the Analysis Type list.
Press the down arrow key several times to zoom back out of the waveform until you can see both gray markers in the display area.
Select the Clicks and Pops checkbox in the Analysis Type list.
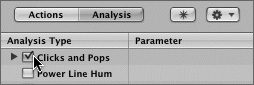
Click the Analyze button to begin the Clicks and Pops analysis.
Note
The analysis tools will analyze a selection or the entire file. The time it takes depends upon the length of the file. Since you’re working on a short clip, the analysis will be over in seconds.
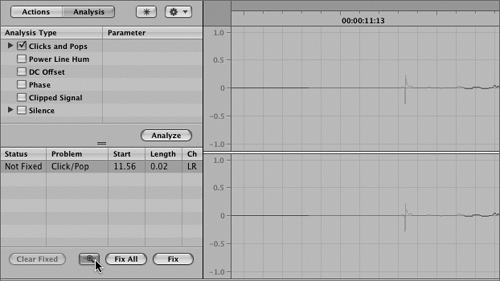
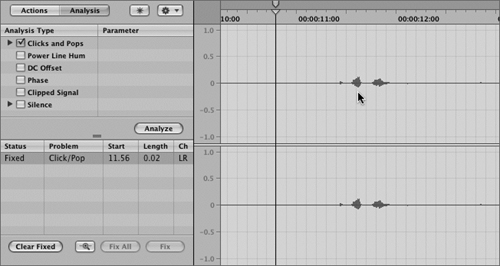
Soundtrack Pro finds the click and marks the problem area in red in the Waveform display area.

Two things happened when you performed the analysis. A problem was detected and added to the Results list, and the problem was marked in red in the waveform. If the analysis had detected multiple problems, the problem areas would all be red in the waveform and would all appear in the results list in the order in which they were detected.
The Results list includes five columns of information:
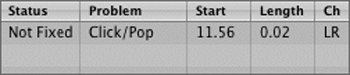
Status shows whether the problem is fixed or not.
Problem shows to which type of analysis the problem belongs. This is especially useful if you were performing multiple types of analyses at the same time.
Start shows where the problem begins.
Length shows the duration of the problem.
Channel shows whether the problem occurs in the left channel (L), right channel (R), or left and right (LR).
Only one problem was detected when you performed the analysis. If you select the item in the Results list, the part of the audio file around the problem becomes selected. Then you can zoom in to inspect the problem closer.
Click the problem in the Results list to select that area in the waveform.
Click and hold the Zoom button at the bottom of the Analysis pane to zoom in to the selected problem.
The Zoom button gives you a focused view on the exact problem.
Release the Zoom button to return the waveform to the previous zoom level.
Click the Fix button to fix the selected problem.
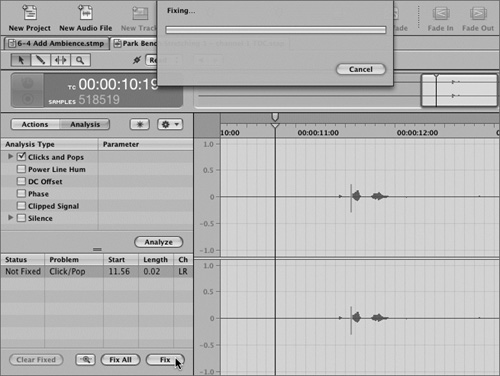
A fixing status window appears to show that the problem is in the process of being fixed.
Once the problem is fixed, it is marked as fixed in the results list, and the red part of the waveform disappears, along with the audible click. Amazing! Especially if you consider the effort it would take to try to eradicate that click manually.
Save the fixed audio file project and close the tab for the audio file project.
Play the fixed audio file project in the Timeline to hear it with the other tracks.
The final series of exercises in this lesson are devoted to working with ambience in the Waveform Editor. In Lessons 3 and 4 you learned about adding ambient sound effects to a project to enhance the realism of the space, such as crickets or traffic. Now you’ll focus on ambience recorded in production sound. Voiceover is supposed to be clean dialog and generally doesn’t include any ambience. Production sound, especially when it’s recorded outdoors, will almost always contain some form of background ambience.
Motivated ambience is okay as long as it is expected in that location or there is a reference to what is making the noise. For example, watching an interview with a surfer next to the beach, you expect to hear the waves in the background. That’s fine, as long as the waves don’t overpower the spoken dialog.
It’s always better to have some sort of ambience running throughout a scene. Without consistent ambience, you’ll hear every cut from shot to shot because each has a slightly different ambient background. A general rule for recording production sound is to record thirty seconds or so of ambient sound or “room tone” that can be added to the mix in a separate track to mask any gaps in ambience from shot to shot. Music can be used to do the same thing. Let’s look at the ambience clips that were added to the multitrack project, then work with ambience within a clip in an audio file project.
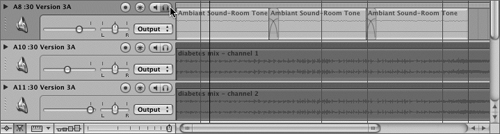
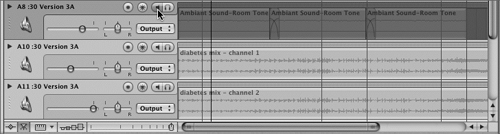
Click the Solo button on the third track from the bottom of the Timeline to isolate the Ambient Sound – Room Tone clips in the track.
Play the project and listen to it with only the ambient sound audible.
The ambient sound is the same clip repeated three times with crossfades in between to smooth the overlap. The room tone ambient sound doesn’t need to be anything dramatic, just a constant overall presence that will be consistent for the entire scene. If the scene changed to cyclists at the ocean, the room tone would also change to include ambience that would be more representative of that location.
Unsolo the track and click the Mute button so that the ambient clips will not be audible.
Play the project and listen to it without the added Ambient Sound – Room Tone clips.
Now mute the two music tracks and play the project again without music or ambience.
Ack! Why does it sound so bad? Well, the quality of the recordings didn’t change. Nor did the levels of each clip. Instead, you’re hearing, painfully clearly, every time the ambience changes between the different location shots. Not to mention the obvious gaps in ambient sound whenever there isn’t ambient noise present. This was virtually unperceivable before because the ambience clips were filling the void and giving the audible illusion of consistency between shots. Music helps to mask the change in ambience, but can’t mask everything.
Unmute the tracks and play the project again once with the Ambient Sound – Room Tone clips in the mix.
You can still hear slight changes in ambience from shot to shot, but they are much less apparent. Now that you’ve focused your attention on ambient sound, you’ll be more sensitive to hearing it in this and future projects.
Earlier you set a noise print to hold the noise frequencies in memory so that they could be reduced from the waveform. You can also set an ambient noise print, which saves a copy of the ambient noise that can then be added when needed to an audio file project. This method is very useful for adding ambience to silenced portions of a waveform.
In this exercise you’ll open an audio file project at the clean up & add ambience marker, then select a portion of the file to set as an ambient noise print.
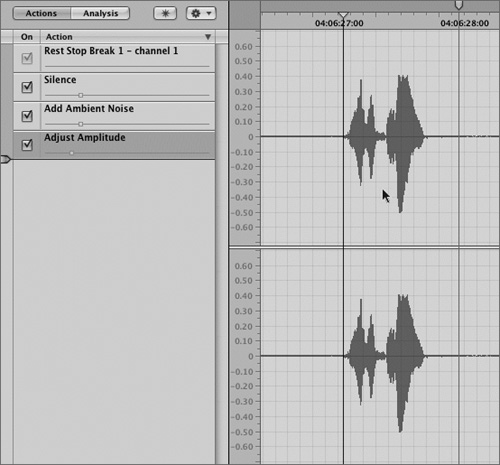
Move the playhead to the clean up & add ambience marker and double-click the Rest Stop Break 1 clip on the second track from the top below the marker.
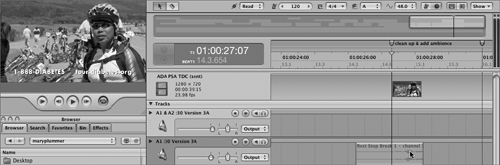
The audio file project opens in the Waveform Editor.
Press the down arrow key to zoom out until you can see both gray markers.
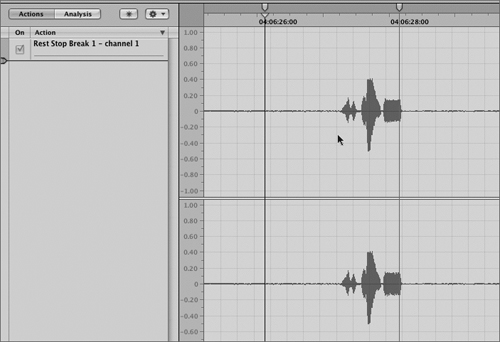
Select the waveform between the two gray markers and play the selection.
What do you think? Pretty good. The ambient sound is consistent throughout the file, without being distracting. However, the motorcycle horn honking at the end is a distraction, and needs to be silenced. Also, the word twenty is much lower in amplitude (volume) than the word five. Since you know that you’ll be silencing the honking sound, let’s set an ambient noise print that can be used to fill the silence later.
Move the playhead to the first gray marker and drag it toward the right to create a selection about one second long.
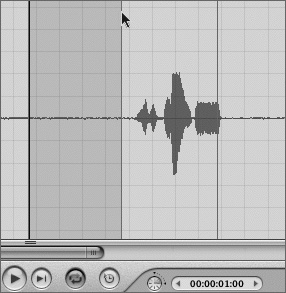
The Selection Length value slider in the bottom-right corner of the Project window will display the length of your selection.
Choose Process > Set Ambient Noise Print.
That’s it. The ambient noise print has been created so that you can use it later. First, let’s take a few minutes to put your new skills to work and adjust the problems you’ve already identified.
The next series of exercises will allow you to utilize many of your new skills as you modify the project to fix the problems. Along the way you’ll also learn how to use the Zoom tool and adjust your selections to the zero point crossings for more precision and cleaner editing.
Let’s start by using the Zoom tool to select the horn honking sound at the end of the dialog in the waveform. Previously, you’ve always created selections by dragging the Selection tool, then used the up or down arrows keys to zoom in and out. The Zoom tool allows you to create a selection and instantly zooms that selection to fit the display area.
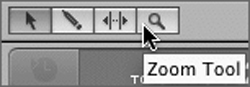
Click the Zoom tool, which looks like a magnifying glass, to select the tool.
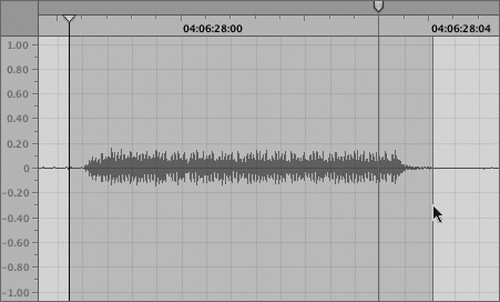
Click-drag the Zoom tool over the horn honk portion of the waveform to create a selection.
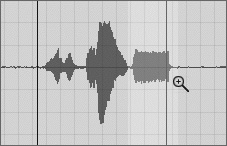
The Zoom tool creates a light shaded area to show what is being selected for zoom, rather than a dark blue selection such as the one created by the Selection tool.
Release the mouse button, and the zoom selection will instantly fit the display area.
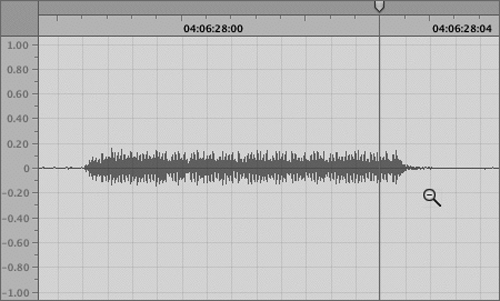
There you have it, instant zoom.
Press A to return to the Selection (arrow) tool.
Now that you have a clear view of the horn sound, you can select it.
Click-drag the Selection tool from the beginning to the end of the horn waveform to select it.
It’s almost ready to silence. First, let’s check to see if the selection starts and ends at the zero crossing point.
A sound wave begins at zero (dead center) and then begins a wave pattern with equal parts above and below the zero point. Selecting the waveform where it crosses the zero point will allow the cleanest edit. Creating random selections or slicing up audio files with the Blade tool doesn’t always cut the waveform at the zero point, so you might hear audio remnants, or pop at the edit point. To see how the waveform crosses the zero point, let’s zoom in further to the beginning of your selection.
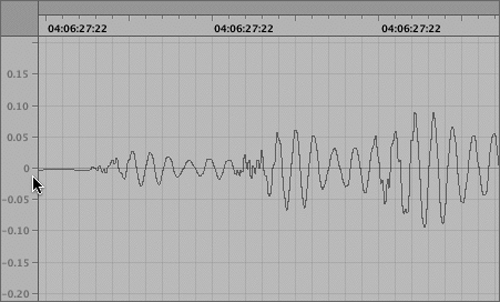
Press Shift-Cmd-+ several times to zoom in to the waveform vertically.
Press the up arrow key several times to zoom in to the waveform horizontally.
Note
You may need to use the zoom scroll bar at the bottom of the window to keep the waveform in view as you zoom horizontally. The amount of adjusting you’ll need to make depends on your screen size, resolution, and zoom level.
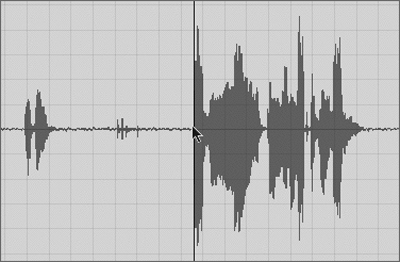
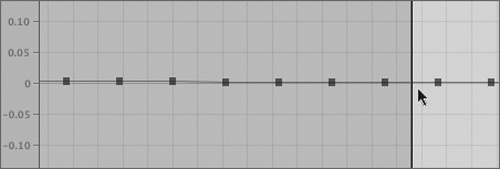
As you zoom in, notice that the sound waves become more defined. The horizontal line passing through the center of the sound waves is the zero point. The height of the sound wave is the amplitude, and the length of the wave from zero point to zero point is the frequency. Now that you know what the zero point is, let’s see if your selection In point is at a zero crossing point. You can see this by looking at the waveform at the sample level.
Press Home to move the playhead to the In point of your selection, if it is not already in that position.
Press Z to zoom all the way in to In point of the selection at the sample level.
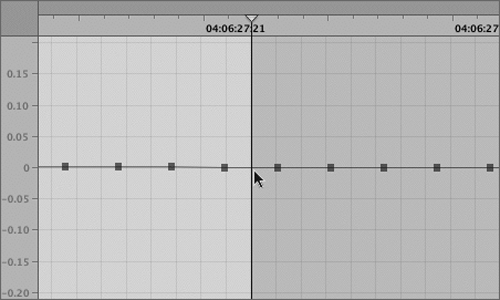
My selection looks like it is at the zero crossing point. Is yours? Don’t worry if it is not, because Soundtrack Pro includes a handy set of shortcuts and menu items to help.
Choose Edit > Adjust Selection to Zero Crossing > Outward.
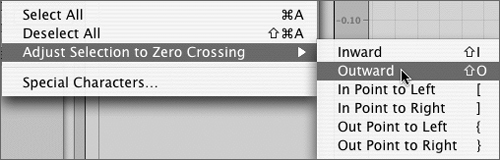
The selection extends outward so that the In point and Out point are both at a zero crossing point.
Press End to move the playhead to the selection Out point.
The selection should end exactly at a point where the waveform crosses the zero position. There you have it. Your selection is now precisely within zero crossing points.
Note
The shortcuts for adjusting selections to the zero crossing points are: Shift-I to trim the In and Out points inward, Shift-O to trim both In and Out points outward, [ (left bracket) to trim the In point to the left, ] (right bracket) to trim the In point to the right, Shift-[ (left bracket) to trim the Out point to the Left, and Shift-] (right bracket) to trim the Out point to the right.
Click anywhere on the display area to clear the selection, then press the down arrow key to zoom out until you can see the full horn honk part of the waveform again.
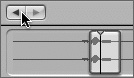
Wait—you just cleared the selection! All that zero crossing work… gone! Or is it? Remember Soundtrack Pro’s Waveform Editor has a long selection history, so you can simply click the previous selection button to get your precise selection back again. Whew! (I just threw that in for review because you haven’t used it in a while.)
Click the Previous Selection button to reactivate the previous selection.
Press Cmd-Delete to silence the selection.
Click the previous selection button again until the entire waveform between the gray markers is selected.
Play the selection and listen to it without the horn honk.
It sounds much better without the horn. Of course, now you’ve created a silent gap in the ambience. No problem.
Remember the ambient noise print that you created a few minutes ago? Well it’s time to put it to work. Sure, you could have waited until now to set the ambient noise print. It doesn’t matter when you set it; as long as you don’t quit Soundtrack Pro or set a different ambient noise print, it will be retained in memory.
Click the forward selection button to return to the selection that you used to create the silence.
Choose Process > Add Ambient Noise to add the ambient noise print to the selection.

Ambient sound is added to the selection.
Save your progress, clear the selection, and play the edited project.
Note
The Process menu offers several choices for pasting ambient sound. You can choose Add Ambient Noise to add ambience to the waveform in the selection without replacing it. You can also choose Replace With Ambient Noise to replace the waveform in a selection with the ambient noise print. You could have used the Replace With Ambient Noise process to replace the horn sound with ambience without ever needing to silence it first. In the previous exercise, you performed the extra step of silencing in order to learn how to use the Add Ambient Noise option and make zero crossing point selections.
Now it’s your turn to select the waveform representing the word “twenty” and raise the amplitude until it matches the amplitude of “five.” Press Shift-Cmd-- (minus) to zoom out vertically from the waveform. Feel free to use the Zoom tool to zoom horizontally for easy access to that part of the waveform, and don’t forget to adjust the selection to the nearest zero crossing points. Once you’ve selected the word, press Shift-Cmd-L, or choose Process > Adjust Amplitude to raise the amplitude by around 7 dB. Save the audio file project, close the Waveform Editor, and watch the finished multitrack project.
Congratulations! You now have a valuable set of dialog-fixing skills that you can apply to your own projects.
Answers
Cmd-L | Normalize | |
Cmd-Delete | Silence | |
Z | zoom in to Sample Level, or back to previous zoom level | |
Adjust Selection to Zero Crossing Points | ||
Shift-I | trim the In and Out points inward | |
Shift-O | trim the In and Out points outward | |
[ | trim the In point to the left | |
] | trim the In point to the right | |
{ (Shift-[) | trim the Out point to the left | |
} (Shift-]) | trim the In point to the right | |
Tools | ||
A | Selection tool | |