
Lesson 8: Using Web Fonts
Dreamweaver CC offers improved support for web fonts, including the addition of the free Adobe Edge Web Fonts service. Web fonts offer a way to enhance your page by embedding custom fonts, even if visitors to your site do not have the font on their system.

What you’ll learn in this lesson:
- • Web fonts in Dreamweaver CC
- • Using Adobe Edge Web Fonts
- • Creating custom font stacks
- • Using local web fonts
Starting up
Before you begin, reset your workspace to ensure your tools and panels are consistent. For more information, see “Resetting the Dreamweaver workspace” in the Starting up section of this book.
In this lesson, you will work with several files from the dw08lessons folder. Make sure that you have loaded the dwlessons folder onto your hard-drive from www.digitalclassroombooks.com/epub/dreamweavercc. For more information, see “Loading lesson files” in the Starting up section of this book.
Before you can proceed with the exercises in this section, you need to create site settings that point to the dw08lessons folder. Go to Site > New Site, or for details on creating a site, refer to Lesson 2, “Setting Up a New Site.”
The basics of web fonts
The limited choice of fonts for the Web has been a problem for many years. (The way fonts work on the Web was outlined in Lesson 3, “Adding Text and Images.”) The core issue is that if you define a specific font in your CSS and a visitor to your site does not have that font, a substitute font is used. Unfortunately, the list of fonts that are guaranteed to be installed on all users’ computers is very small. Over the years designers have looked for alternatives and workarounds to this limitation. These workarounds ranged from using decorative fonts saved in images to font-replacement technologies such as Cufon, sIFR, FLIR and @font-face.
Of these technologies, web fonts have emerged as the accepted technique using the @font-face property in CSS3. The use of web fonts has gained industry support from designers and developers, and more importantly, from companies that make and license fonts. Simply put, web fonts allow you to embed any font within a page by declaring the font you want to display and placing this font on your web server. When a user visits your site, their browser renders the page using this font wherever specified. Adding web fonts is a straight-forward process in Dreamweaver; however, there are some details (technical and legal) that you need to be aware of.
Web Fonts in Dreamweaver CC
Previously, Dreamweaver only supported @font-face allowing you to embed local web fonts in your web pages. This method had a few drawbacks for web designers. First, you had to make sure the fonts you used were properly licensed for web use (see the Font Licensing sidebar in the @font-face exercise later in this lesson). Second, the varied support for @font-face across browsers meant that web designers needed to provide multiple files for font formats, font weights and styles (see the Browser Font Support sidebar in the @font-face exercise later in this lesson). Finally, the fonts were downloaded from the site, increasing bandwidth use and potentially download speeds.
Dreamweaver CC improves upon web font support by including the free Adobe Edge Web Font service giving you access to a vast web font library through the Creative Cloud (http://html.adobe.com/edge/webfonts/). Powered by TypeKit, this free service is made possible by contributions from Adobe, Google and designers around the world. It provides web fonts functionality as an integrated workflow directly within Dreamweaver. You will explore both methods of using web fonts throughout the following exercises.
Using Adobe Edge Web Fonts
In this exercise, you will explore the new Web Font Manager and the Adobe Edge Web Fonts workflow available within Dreamweaver CC.
1 Open the 08_edgefonts.html file by double-clicking it in the Files panel. This file includes several paragraphs that are styled with a different set of fonts, called a font stack.

Each paragraph is styled with a different font stack.
2 In the Design view, click anywhere in the first line of text. If you look at the tag selector you will notice this paragraph is styled using a class called .baskerville. Click <style> from the Sources pane.
3 Click .baskerville in the Selectors pane and view the font-family property in the Properties pane. It might be helpful to check the Show Set check box list to properties that are set for the current selector. The only property set is font-family: Baskerville, Palatino Linotype, Palatino, Century Schoolbook L, Times New Roman, serif.
This font-stack is comprised of web-safe fonts, which are fonts that are generally available on most users’ computers. Dreamweaver CC includes an entirely new font stack selection to take advantage of more web-safe fonts than ever before.

The first paragraph is styled using the web-safe font stack including Baskerville, Palatino, Century Schoolbook L, Times New Roman, and serif.
4 You will now add a web font from the Adobe Edge Web Font collection and use it to style the last paragraph in the document. Choose Modify > Manage Fonts to bring up the new Manage Fonts dialog box. This window is comprised of three tabs to manage Adobe Edge Web Fonts, Local Web Fonts and Custom Font Stacks.

The Manage Fonts dialog box provides a new interface to simplify using web fonts.
The Adobe Edge Web Fonts tab of the font manager allows you to search for and view the many web fonts available from the service. You can search for fonts by name or use the buttons to the left to filter fonts appropriate for headings, paragraphs, typeface properties or a combination of settings.
5 Choose the Acme font from the list; Dreamweaver will display a checkmark on the font indicating it is selected, then click Done. The font will now be available for use on any website you create through Dreamweaver.
6 Select the last line of text in the document, click <style> in the Sources pane, and then click the Add Selector button in the Selectors pane. Dreamweaver will add a new selector in the Selectors pane. Select the text Dreamweaver added and type .custom in the selector name text box. Press Enter (Windows) or Return (Mac OS).
7 Click the Text button in the Properties panel to display the available text properties. Locate the font-family property and click the text ‘default font’ in the Set font-family text box. The Acme font now shows up in the popup menu as a valid font choice. Click Acme to select this font for our property.

The Acme web font is available in the font list for any website you create with Dreamweaver.
8 Make sure the last paragraph of the document is still selected. Using the Property Inspector, select custom from the Class drop-down menu to apply this class to the last paragraph. You will not notice the change immediately because some web fonts do not display in Design view. Click Live from the document toolbar to go into Live view to see the new web font applied.
When Dreamweaver adds a web font to your page it also adds a script tag to instruct the browser to download the font from another location. We will now take a look at the added script to better understand it. We will not need to make any changes as Dreamweaver handles inserting and managing this code for you.
9 Click the Live button to exit Live view. Next, click the Code button to view the source code of your page. Scroll down to the HTML comment that begins '<!--The following script tag…' you will see a line of JavaScript that points to the Adobe Edge Web Fonts server requesting the Acme font added earlier.
10 Click the Design view button to return to Design view, then click File > Save as and type 08_edgefonts_work.html to save your progress.
Creating a custom font stack using web fonts
1 Choose Modify > Manage Fonts to bring up the Manage Fonts dialog box. You will now add two additional Adobe Edge Web Fonts and create a new font stack to apply to the last paragraph in 08_edgefonts_work.html. Choose Acme (if its not already checked), Allerta, and Bubblegum Sans from the list of available fonts.
2 Click the Custom Font Stacks tab to bring up the font stack manager. This window displays the current font stacks and allows you to create custom stacks from both locally installed and remotely served web fonts.
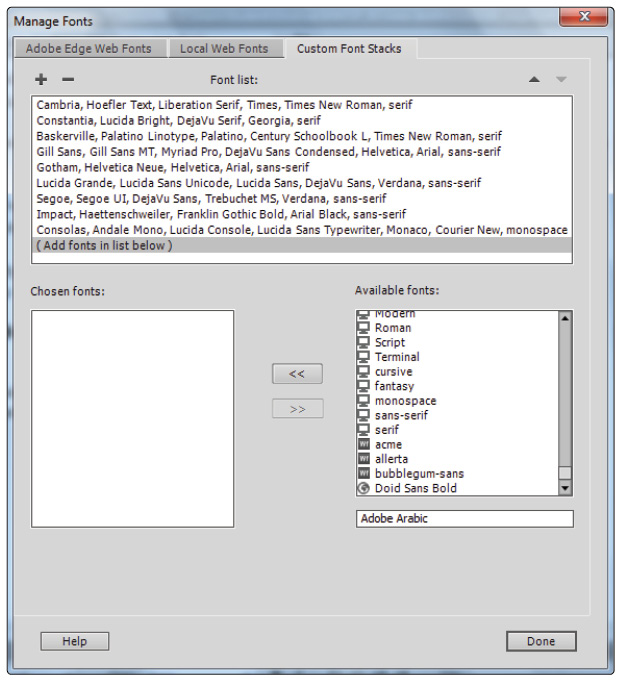
Create your own custom font stacks to ensure viewers see the page the way you intended it to display.
3 Scroll down to the bottom of the list of Available Fonts where you will find the three Adobe Edge Web Fonts you added; Acme, Allerta and Bubblegum Sans. Click Acme in the list and click the << button to move this font to the Chosen fonts list. Repeat this step with Allerta, Bubblegum Sans and sans-serif. Finally, click Done to create the new font stack.
4 You will now modify the .custom class to use this new font stack to style the last paragraph. Click <style> in the Sources pane of the CSS Designer, and then click .custom in the Selectors pane.
5 Click the Show Set button in the Properties pane to display the font-family property you set earlier and click Acme to display the font selection pop-up menu. You will now see a new font stack entry listed in the web fonts area. Click the newly created font stack to apply it to the .custom font-family.

Select the new font stack from the font lists.
6 Click the Live view button to see the changes. Since you are using web fonts directly from the Adobe Edge Web Fonts server, the font displayed will still be Acme but you have provided a font stack that will enable the browser to default to other fonts including sans-serif in case the font cannot be loaded.
7 Press Ctrl+S (Windows) or Command+S (Mac OS) to save your work. Choose File > Close All to close the open files. Next, you will apply a web font to the Organic Utopia project.
Styling your content with Adobe Edge Web Fonts
In this exercise you will apply an Adobe Edge Web Font to your Organic Utopia home page.
1 Open the 08_edgeutopia.html document by double-clicking it in the Files panel.
2 Choose Modify > Manage Fonts and click the first button in the top left of the Manage Fonts dialog box; List of fonts recommended for Headings. Choose League Gothic from the list of heading fonts displayed and click Done.
3 Place your cursor within the first heading in the sidebar, December 20, 2012 and then click styles.css in the Sources pane of the CSS Designer panel.
4 Click the Add Selector button in the Selectors pane and change the selector name so it reads #sidebar dl dt. Press Enter (Windows) or Return (Mac OS).
5 Uncheck the Show Set box in the Properties panel if it is checked. Click the Text button to display the text properties. Click the text default font in the Set font family field and choose league-gothic from the list of fonts.
6 Locate the text-transform property and click the Uppercase button to transform the definition term items to uppercase.
7 Choose File > Save As and save the file as 08_edgeutopia_work.html. Click File > Preview in Browser to view the changes. You have now applied an Adobe Edge Web Font to your page layout.

The Organic Utopia sidebar formatted with League Gothic Adobe Edge Web Font.
8 Close the browser and return to Dreamweaver for the next exercise. Choose File > Close All to close the open files.
Adding local web fonts with @font-face
In this exercise, you will add the web font Droid Sans Bold (which is licensed for web use) to your website, embed that font so that it is available for use on a page, and then style a heading with the new web font.
1 Open the 08_fontface.html document by double-clicking it in the Files panel.
There are a few steps you should take before adding a web font. In this example, you will style the first heading, “Welcome to organic utopia.” You should first understand where the current style comes from.
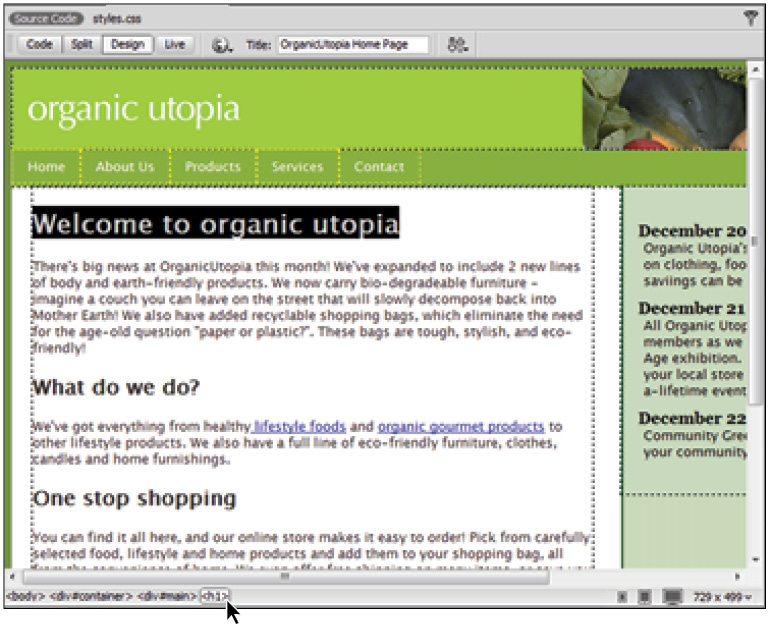
2 In the Design view, click anywhere inside the heading, “Welcome to organic utopia.” You can easily determine this is a Heading 1 element in two ways: 1) The tag selector indicates this is an <h1>; and 2) In the HTML section of the Property Inspector at the bottom of your page, you can see that Heading 1 is the value of the Format.
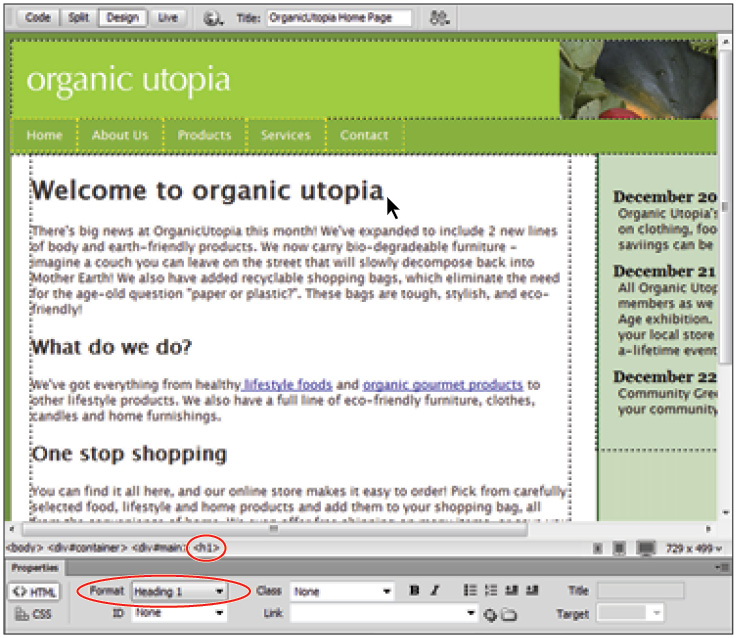
You can identify this element as a Heading 1 using either the Tag Selector or the Property Inspector.
You should also determine the style that is currently used for the heading.
3 Click the <h1> tag in the tag selector to highlight the tag. In the CSS Designer panel, adjust the height of the Rules and Properties panes as needed to show the COMPUTED style.
You are looking for the rules or selectors used to style this heading, and there are three: body, #container, and #main. You can see that there is no CSS style for an h1 on this page. Click the body rule.

Identifying the styles applied to the h1.
The body rule indicates that the following properties are used: a color of #333; the font-family Lucida Grande, Lucida Sans Unicode, Lucida Sans, DejaVu Sans, Verdana, sans-serif; and the font-size small. Remember that the word cascading is part of Cascading Style Sheets, and you are seeing that effect here. The font Lucida Sans Unicode is defined in the body, and because there are no other styles for h1, the cascade is in effect, so it inherits the color and font-family styles.
Lucida Sans Unicode is a font that is extremely common on most users’ computer systems; you’ll now add a web font that is not so common.
4 Choose Modify > Manage Fonts; the Manage Fonts dialog box opens. This dialog box will allow you to embed fonts that are located in your system.
5 Click the Local Web Fonts tab to display the fields to add a local web font.
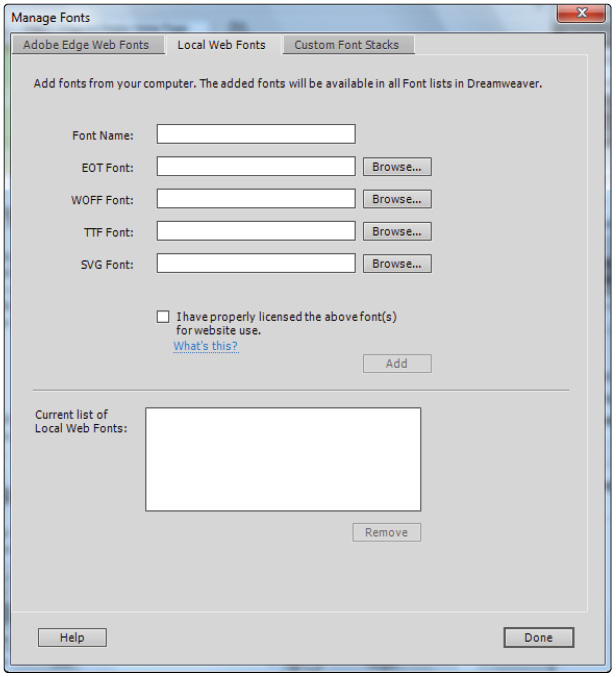
The Local Web Fonts tab of the Manage Fonts dialog box allows you to point to web fonts on your system.
6 Click inside the Font Name text field and type Droid Sans Bold. This typeface was created specifically as an open-source font for screen use and we have provided it for you in your lesson folder.
7 Click the Browse button immediately to the right of the field labeled EOT Font; the Open window appears. Navigate within your dw08lessons folder to the webfonts folder and locate the file DroidSans-Bold-webfont.eot. The only files you are allowed to select are .eot files.
8 Choose DroidSans-Bold-webfont.eot and click Open; the EOT font is selected as well as the other three options: WOFF, TTF, and SVG. All four of these fonts should be used to ensure maximum compatibility across all web browsers.
9 Click the check box labeled, I have properly licensed the above font(s) for website use. This is a required step and will be explained in more detail at the end of this lesson.
10 Click the Add button. You will now see Droid Sans Bold listed in your Available Web Fonts.
11 Click the Done button in the Manage Fonts dialog box.
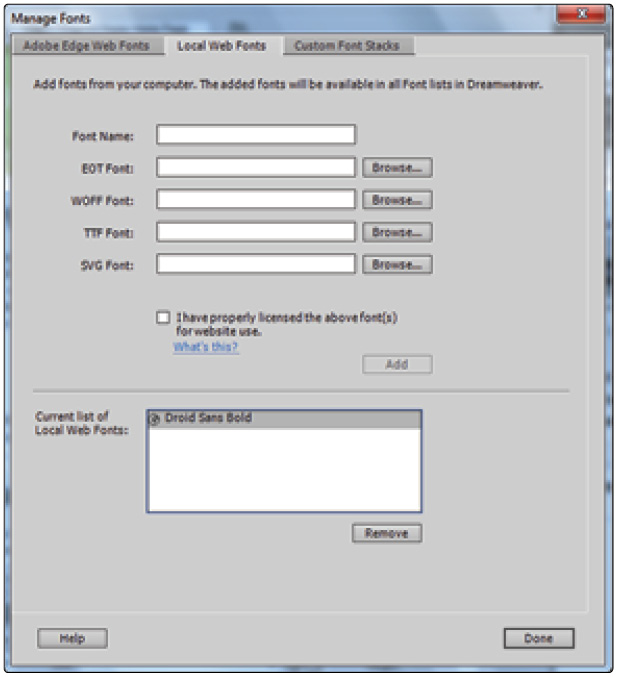
The Manage Web Fonts dialog lists the available fonts for your current site.
At this point, your new web font, Droid Sans Bold, has been made available to all existing pages and any new pages in the current site. Additionally, this web font will be available to any document in Dreamweaver, even if it is part of another site.
Styling your heading with a local web font
In addition to the legal licensing limitations involved with web fonts, there is also an aesthetic consideration. Not all fonts are designed to be rendered on the screen. The creators of a typical font are often more concerned with how the font renders in print or how the font looks at small sizes versus large sizes (or vice-versa). The web font you are using, Droid Sans Bold, was specifically designed to render well on small and large screens alike. Many designers felt the majority of web fonts worked best as headings rather than as large blocks of body text in paragraphs. This opinion has changed as many more fonts have been released for web use.
In this exercise, you will style your main heading with your new web font option.
1 Make sure you have clicked inside the Heading 1 labeled, Welcome to organic utopia. In the tag selector, make sure you click the <h1> tag.
This highlights your Heading 1 and makes it easier for Dreamweaver to understand that you want to target this style.
Click the <h1> tag in the Tag Selector to select the top heading.
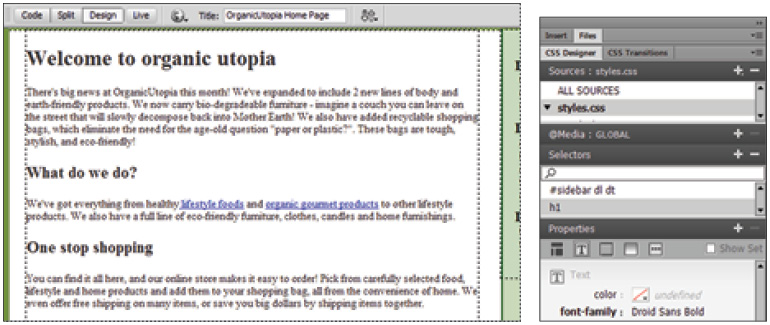
2 Click style.css in the Sources pane of the CSS Designer panel, then click the Add Selector button in the Selectors pane. Type h1 in the Selector Name text box and press Enter (Windows) or Return (Mac OS).
3 Click the Text button in the Properties panel and uncheck the Show Set box if it is checked. Click the shaded text default font in the Set font family text box to display the font list and choose Droid Sans Bold.
Although you have applied the web font style, it might not be reflected in the Design view.
You have just applied the font style to your heading, but you might not see this change in your Design view. This is a limitation for some web fonts; you will only see an accurate view in the browser or in Dreamweaver’s Live View.
5 Click Dreamweaver’s Live View; you will see your heading set in Droid Sans Bold. You might not notice the difference immediately because Droid Sans and Lucida Sans are fairly similar; however, if you compare the letter “g” in the word organic to the letter “g” in the heading further down the page (One stop shopping), you will see the difference.
You can still use certain CSS formatting to make the web font-styled heading more distinctive. You’ll now add a style to make the heading uppercase.
6 In the CSS Designer panel, choose stylesheet.css from the Sources pane, and then click @font-face in the Selectors pane. Click the Show Set check box in the Properties panel to see the properties that have been set to enable the Droid Sans Bold web font. You will likely never modify this style—it is simply worth pointing out that Dreamweaver created this file and the @font-face style when you applied the web font to your h1 heading.
7 Choose styles.css from the Sources panel, and then click the h1 selector in the Selectors pane. Next, clear the Show Set check box in the Properties panel and click the Text button to display the available text properties. Locate the text-transform property and click the uppercase button.

Your web font-styled heading now has an uppercase style.
8 Exit Live View by clicking the Live button. Choose File > Save All, and then preview your page in the browser. If your browser supports web fonts, you should see your style.
9 Close your browser and choose File > Close All to close the open files.
Self study
To practice working with web fonts, add the other set of fonts we provided in the lesson folder for the Droid-Sans font. Try applying this font to your paragraph styles and headings to see the effect.
To practice working with Adobe Edge Web Fonts, add another font from the Edge Fonts collection. Apply this font to the text in the sidebar to see the effect.
Review
Questions
1 Name at least one benefit and one drawback of web fonts in Dreamweaver CC.
2 What is the easiest way to avoid the drawbacks of using web fonts in Dreamweaver CC?
3 What is the purpose of creating a font-stack when formatting text on your web page?
Answers
1 Some benefits of web fonts in Dreamweaver include the variety of choices available for use in your designs, the ease of adding multiple fonts using the Web Manager, and the fact that web fonts will work in virtually all modern browsers. Drawbacks to web fonts include the need to use fonts with a specific web license (which means your favorite font might not be available for web use), the fact that Dreamweaver does not display them reliably in the Design view, and the fact that even if a font is licensed for web use, it might not be optimized for the computer screen.
2 These drawbacks of using web fonts are eliminated when using the free Adobe Edge Web Fonts service on Creative Cloud, powered by TypeKit. An added benefit of using this font service is that you no longer have to manage your own web fonts or have them downloaded from your server.
3 A font-stack ensures that the text on your page will display appropriately. The browser will try to apply the fonts in successive order from left to right, from the closest match you specified in the stack to the least specific default font at the end of the stack.