Photographs are important drawing references, but there always seems to be one or two things “wrong” with every photo—or, at the very least, things about the picture that could be improved. Feel free to use artistic license to make changes that improve a drawing from a photo that has an awkward pose or anything you don’t like. If the changes are simple, you can draw from your imagination—but for complex body parts like faces, hands, and feet, you may need to choose a new photo or partial photo in which those parts are shown in the correct pose or lighting. As you incorporate the elements from the supplemental photo into your drawing, be sure to keep the proportions the same as they were in the original photo for a lifelike depiction of your subject.

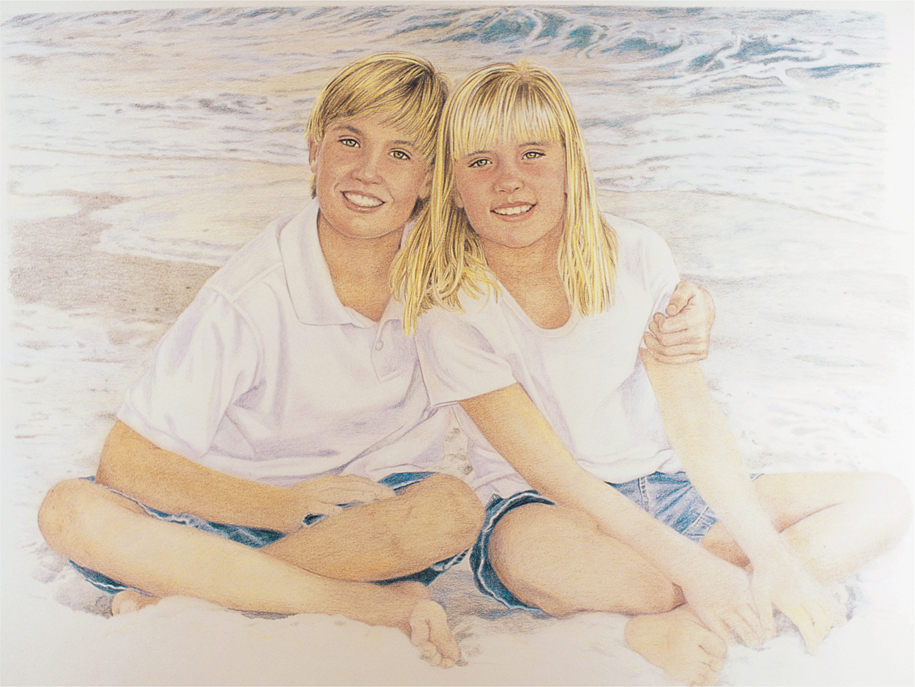
PRINCIPAL PHOTO This photo was taken at the beach on an overcast day. With white shirts, the light sand, and the children’s blond hair, the muted light gives the portrait subtle colors. Unfortunately, the children’s hands and feet are partially cropped in this photo, so a supplemental photo was taken to achieve the final pose (see additional photo below). The drawing is rendered on a white, fine, smooth-surfaced, 100% rag paper, which is slightly mottled like vellum.

1 Using an HB pencil, begin lightly sketching the basic shapes of the children’s bodies on a piece of sketch paper. (You’ll transfer to more expensive rag paper after the basic sketch is established.) Pay attention to the differing angles of the faces and the bodies to draw their poses accurately. Carefully add the horizontal guidelines for correct placement of the facial features.
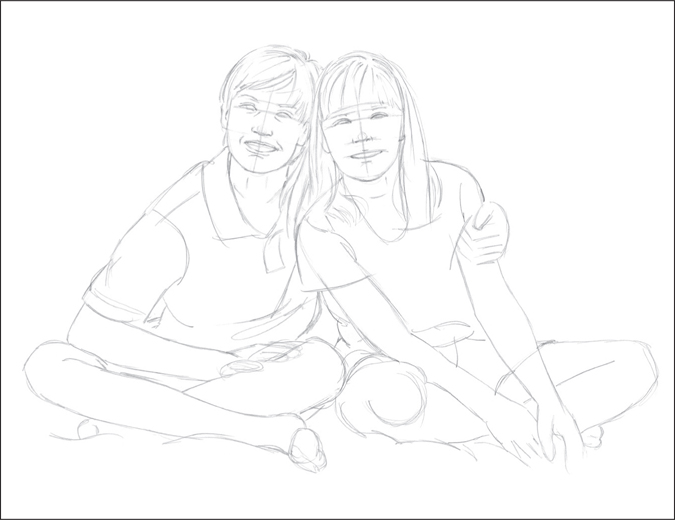
2 Continue using the HB pencil to place the facial features on the horizontal guidelines, and sketch in each child’s hair. Using the supplemental photo below, draw a rough shape of the boy’s right hand on his knee, comparing the proportion with his left hand. Draw the shapes of the girl’s feet and fingers that were cropped out of the original photo. The boy’s shirt is a little big, so trim just a little off the sides and at his waist.

In the original reference, the children’s hands and feet are cropped out of the picture plane, but showing them will make a better drawing. It’s not necessary to retake the photo on the beach; here the children are posed indoors for a better reference for their hands and feet. You can use a supplemental photo like this one to supply extra detail—here it’s used to carefully draw the parts that do not appear in the original reference photo. It is important to make sure that the proportions are correct when making changes using a second photo reference. Size the hands and feet, comparing them with the partial hands and feet that appear in the original photo. Lighting also must remain consistent; if the lighting in the supplemental photo varies too much from the original photo, use the original as a guide for shading.

3 Switch to a B pencil to refine the faces, drawing more details in the eyes and mouths. Add the details of the hair, indicating the sections of hair when possible. Refine the shapes of the hands and feet, and add more wrinkles and folds in the clothing. Lightly sketch the beach scene in the background. Using a cool gray 90% colored pencil, begin laying in some of the darker areas of the hair and eyebrows using medium-to-light pressure. Apply white over some of the lightest strands of hair to protect them from other colors. Use indigo blue to outline the eyes and color in the pupils, leaving white paper for the highlights. Lay in the darkest areas of the denim shorts with indigo blue.
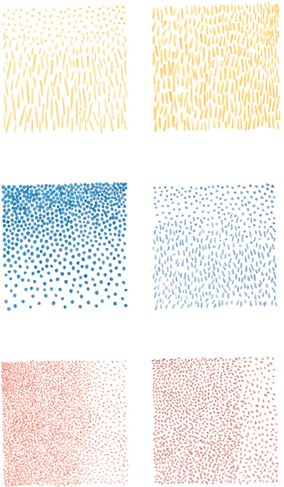
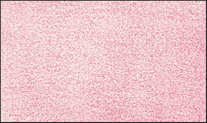
You can imitate a number of different textures by creating patterns of dots and dashes on the paper. To create dense, even dots, try twisting the point of your pencil on the paper.
Light pressure
Medium pressure
Heavy pressure
Varying the amount of pressure you apply on the pencil is an easy way to transition between values. Because colored pencils are translucent, the color of the paper underneath will show through. With light pressure, the color is almost transparent. Medium pressure creates a good foundation for layering. Heavy pressure flattens the paper texture, and the color appears almost solid.

4 With light pressure, apply lilac to the shadowed areas of the shirts to show the folds and wrinkles in the fabric. Begin adding a little muted turquoise to the boy’s shoulder to show color reflected from the sky and water. Add dark brown to the darker sections of the hair. Using very light pressure, apply a thin layer of jasmine over their arms, legs, necks, and faces, including the teeth and the whites of the eyes, but not the irises. This layer of color is the base on which the flesh color is built; it needs to be even, so the next layers will look smooth. Use a B pencil and a kneaded eraser to refine the shapes of the hands and feet. Apply French gray 50% to the sand in the middle ground and the water using light pressure in small, circular motions. For the children’s shadows, use cool gray 70%; make small sections of darker areas where their feet have made impressions in the sand. Using a very sharp Tuscan red and light pressure, put the darks in the corners of their mouths and a line under their eyelids. Add henna to shape their tear ducts. Switch to cool gray 90% at the upper eyelids to indicate eyelashes.

5 Add ginger root to some of the sand behind the children, leaving some areas white for another color to be applied later. Slate gray indicates the waves; use harder pressure for the larger waves and light pressure for the areas of smooth water. Erase unnecessary pencil lines as each area is filled with color. Apply a light layer of henna to their faces, necks, arms, and legs; also add a bit of henna to the part in the girl’s hair and within the bangs. Layer some true blue over the gray shadows under the children. Color the irises of their eyes with kelp green. Use ultramarine to add some more color to the denim shorts, layering it over the previously applied indigo blue. Add more lilac to shadowed areas of the shirts.

6 Add yellow ochre to most of the hair, leaving some strands white in the girl’s hair; then add a bit of raw sienna, as well. Very lightly apply French gray 50% to the bottom teeth on the boy and to the back teeth on both children. Layer true blue over the slate gray on some of the bigger waves; with light pressure, add another layer of slate gray to a few areas of the smooth water. Lightly and evenly layer yellow oxide over all the skin. Add details to the hair with dark brown, using medium pressure. Layer putty beige over most of the smooth water, and apply a layer of powder blue over the lightest water. Add a very light layer of shadow to the left sides of both faces with slate gray. Using a very sharp-pointed henna, add more detail to the lips of both children and to the shapes of their noses. Use more dark brown to distinguish the strands of hair, and then use raw sienna over the girl’s hair, leaving the highlight on the bangs to show form. Lightly go over some of the skin with terra cotta to warm the skin tone. Apply powder blue over all remaining light areas in the water behind the children. No white paper should be left uncolored in the background. The whitest area should be the children’s white shirts; the water will appropriately recede into the background if the lightest area is in the foreground. Add some 70% cool gray to the middle and lower background. Use more slate gray to darken a few areas here and there in the background, to shade the legs, and to further deepen the color of the sand and indentations in the foreground under the children. Apply black cherry to sharpen some edges around their necklines.
7 Using heavy pressure, add indigo blue to the shorts, inside the legs, and on other shadowed areas. Go over the darkest of these areas with Tuscan red, pressing hard to darken the indigo blue (instead of using black). To finish the shorts, add a little more indigo blue over most of the denim, and apply a small amount of violet in a few areas for extra color. Add a light layer of burnt ochre on some areas of their faces and limbs. Continue using slate gray to darken some areas of the water. Apply more powder blue to the water, going over the edges of dark colored pencil to blend the colors. Add some jade green to the darker waves. Apply yellow oxide to a few areas of the middle ground, as well as the foreground sand; this warm color helps make the sand advance toward the viewer. With a very sharp burnt ochre pencil, add the stitching to the shorts. Layer some pumpkin orange on the darker shadows of the skin tone, and add a light layer of burnt ochre to their necks and limbs. Color the center of their irises with yellow oxide. Use chestnut colored pencil to darken the shadowed sides of their arms, legs, and necks. Add some color to their cheeks and lips with geranium lake. Add a soft line of powder blue to the boy’s nose and some periwinkle to the girl’s left cheek to show reflected color. Then use celadon green to deepen the color of the ocean.

8 For the final step, stand back from the drawing to see where colors need darkening or shapes need defining. Layer more indigo blue on the shorts. The arms and legs need more shape, so add more chestnut and henna to the darker shadowed areas. Use a kneaded eraser to “lift out” some areas of color on the boy’s face for highlights—gently rub and dab an area to pick up the color. Add more lilac and cool gray 70% to some shadowed areas of their shirts. Cover any remaining white paper in the background with a light layer of gray, allowing some white paper in the foreground beneath the children to show; the contrast of the white paper against the colors of the sand helps bring this area forward. Now your drawing is complete!