
Transform flat shapes into lifelike forms using shading techniques like those below. Make soft strokes for lighter tones, or put more pressure on your pencil to make heavy strokes for darker tones. These contrasts in value (the relative lightness or darkness of black or a color) are what give depth and form to your drawings. First establish the simple, basic shape of your subject, and then try these techniques to see your subjects come to life on paper!
CREATING DEPTH Indicating the shadows and highlights of your subject using value helps produce a sense of depth and volume in your drawing. As you shade, note the direction of the light source and how it creates variations in value on your subject. Apply fewer strokes and less pressure for lighter values (highlights), and use more strokes and heavier pressure for darker values (shadows). For extreme highlights, leave the paper free of tone, or pull out tone using a kneaded eraser.

SEEING VALUES This value scale shows the gradation from black—the darkest value—through various shades of gray, ending with white—the lightest value.


SHADING TO CREATE FORM When objects are drawn, shading must be added to create the illusion of depth. The plain circle (at top) is simply a flat disk, but adding shading gives it form, creating a three-dimensional sphere (at bottom).
PRACTICING BASIC TECHNIQUES With just the basic shading techniques below, you can render everything from a smooth complexion to a simple background. Whatever techniques you use, though, remember to shade evenly. Shading in a mechanical side-to-side direction, with each stroke ending below the last, can create unwanted bands of tone throughout the shaded area. Instead try shading evenly, in a back-and-forth motion over the same area, varying the spot where the pencil point changes direction.

HATCHING A shading technique in which you make many parallel strokes close together is called “hatching.”
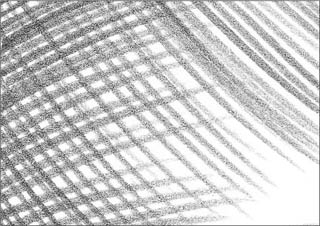
CROSSHATCHING The addition of another layer of hatching, at an angle, is called “crosshatching.”

GRADATING To create graduated values (from dark to light), apply heavy pressure with the side of your pencil; then gradually lessen the pressure as you stroke.
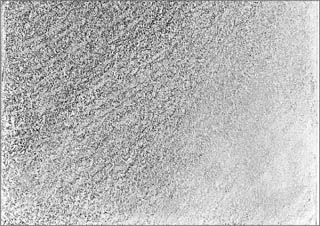
BLENDING To smooth out the transitions between strokes and create a dark, solid tone, gently rub the lines with a blending stump or tissue.
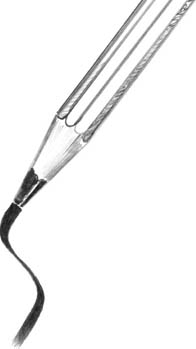
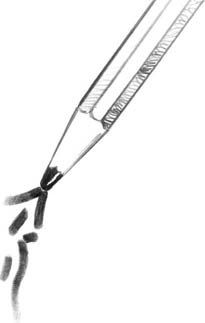
Learning to draw requires a certain amount of control and precision, so get used to the feel of a pencil in your hand and the kinds of strokes you can achieve. Before you begin sketching, experiment with different pencil grips to see how they affect the lines you produce. Fine detail work is more easily accomplished with a sharp pencil held as though you were writing, whereas broad shading is best done with the side of your pencil, holding it in an underhand position. Practice holding the pencil underhand, overhand, and in a writing position to see the different lines you can create.
You also can vary your strokes by experimenting with the sharpness or dullness of your pencil points. A sharp point is good for keeping your drawings detailed and refined; the harder the lead, the longer your pencil point remains sharp and clean. A flat point or chisel point is helpful for creating a wider stroke, which can quickly fill larger areas. Create a flat or chisel point by rubbing the sides of a pencil on a sandpaper block or even on a separate sheet of paper.

Flat sketch
Round sharpened to flat tip

Tip of sharp round

Side of round
Blunt round