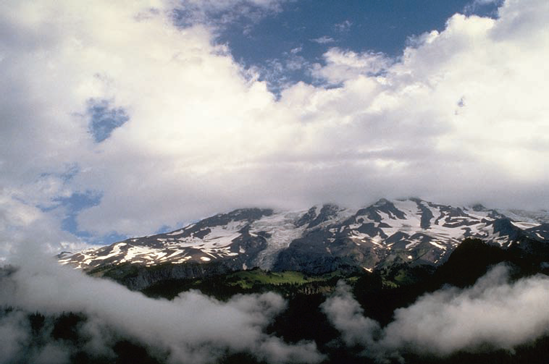
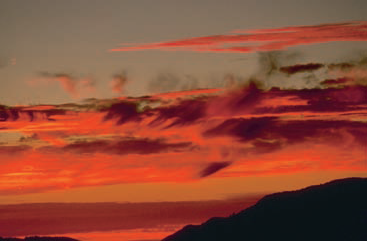
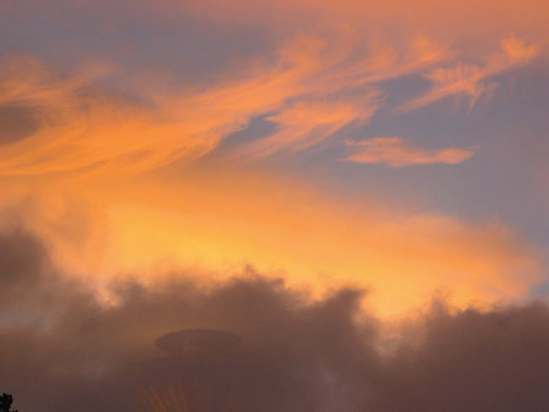
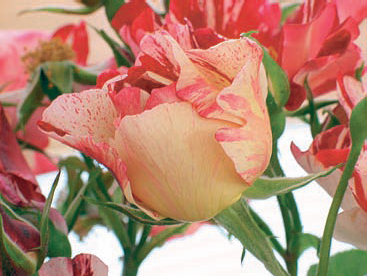
Abstract photography
Action photography
Animal and wildlife photography
Architectural photography
Cityscape photography
Cloud photography
Flower photography
Landscape photography
Macro and close-up photography
Mountain photography
Night photography
Panoramic photography
People: baby and child photography
Pet photography
Still-life photography
Sunset and sunrise photography
Water photography
Weather photography
There's no formula anyone can give for taking perfect pictures all the time. Making great photos is a little like cooking: If you understand general cooking techniques, and can follow a recipe, you can come up with passable dishes. But to be really great, you need to add a bit of inspiration and practice.
When you want to take a specific kind of photograph, you can start with:
The inspiration and rationale behind how and why the specific kind of photograph is made
The basics of digital photographic technique related to the type of photograph
Some ideas about how to practice taking the kind of photograph in question
This chapter provides this information for many of the kinds of photographs you are likely to encounter with your digital camera in the field. In addition, you'll find tips and techniques that will help you bridge the gap between following a recipe and taking great photographs.
The appeal of the abstract photo rises from the human desire to impose order on natural human activities, and reverse the process of entropy. Entropy, or natural decay, simply means that things fall apart. A photograph that creates an abstraction that imposes order on an apparently abstract subject has succeeded in reversing the process of entropy, for however short a time, and may win plaudits from those looking at the photograph.
The best abstract photos give the viewer an"aha" moment. For example, if you look at the abstract colorful swirl of paint shown in figure 6.1, you may not be sure what you are looking at. But pretty quickly you will realize that you are seeing a mixing area for colors, probably the palette of a painter. The revelation comes because the painting is supposed to be the subject of the photo, not the palette.
Scrap work that people inadvertently create—artist's palettes, peeling billboards, fading murals, and so on—makes great potential subjects for photographic abstracts.
At the heart of things, the same forces that inspire abstract painters inspire abstract photographers.
As a photographer, you are trying to show people who look at your photographs new ways to see things. Your photographs should make the commonplace vibrant and magical.
There are many kinds of abstract painters. Some make paintings that are full of drips and swirls (called abstract expressionism). Others make patterned paintings (often called op art).
You can find these styles in abstract photography. A crumbling side of a building, or a swirl of found color, is abstract expressionism. A found pattern, like that shown in figure 6.2, is closer to op art.
Also, like many painters, abstract photographers find inspiration in nature. An image of a common vegetable, like an artichoke, like that shown in figure 6.3, becomes highly abstract when it is brought in close.
Table 6.1. Taking Abstract Pictures
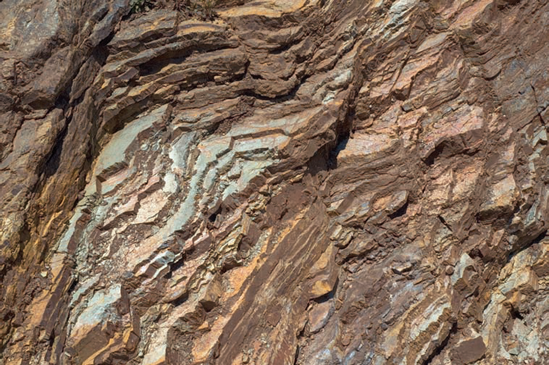
Practice Picture: The copper oxide in the striations of the cliff shown in figure 6.4 makes the pattern that is this basis for the interest of this picture. On Your Own: Look for unusual colors in landscapes and cityscapes, and then get close enough so you can abstract the image—make the viewer initially unsure about what they are seeing. Try to flatten the image—most abstract photographs are fairly two-dimensional. | |
Practice Picture: Natural light was oblique and from behind — classic backlighting. This might not be the best lighting for many subjects, but with an abstraction, it has the advantage of being unobtrusive. On Your Own: The lighting of an abstract subject should not be the subject of the photograph; you want your abstract subject to be the center of attention. Avoid flash. Look for uniform lighting, unless the contrast between bright and shadow areas is part of the abstraction. | |
Practice Picture: Nikon D70, AF-S Nikkor 18–70mm 3.5-4.5G ED at 70mm (105mm 35mm equivalence). On Your Own: You should avoid lenses with noticeable lens-related optical distortion (extreme wide angle and telephoto lenses). Unless you are photographing an up-close abstraction, a slightly longer-than-normal focal length works well (because of its shallow (less) depth of field). | |
Practice Picture: RAW capture, Automatic mode, f/8, 1/250 second. On Your Own: You'll often want to control the depth of field, so use an Aperture-Preferred mode with the f-stop set for high depth of field. If the shutter speed is less than 1/125 second, use a tripod. Experiment with Macro mode. | |
Practice Picture: ISO 200, f/8, 1/250 second. On Your Own: If your subject has depth, you'll probably want maximum depth of field, so stop the lens down (perhaps to f/22). | |
Use a tripod for most abstract photographs. Even if you don't need a tripod to increase the depth of field, using one enables you to take the time to survey the composition carefully. If your abstract involves a small subject that is dimly lit, you should plan on lighting the subject, possibly with a mirror or silver reflector card. |
Abstract photographs are about composition. Carefully check the composition of your abstraction. If the composition is less than interesting, your photograph may be as well. Be sensitive to where the boundaries of your abstraction begin and end, and do not cut the photograph off arbitrarily—particularly if cutting off the edges of the photograph works badly with a pattern in the composition.
Make sure you are as perpendicular as possible to the subject. If the camera isn't pointing squarely at the subject of an abstract, the angles in the composition may likely start to look very peculiar in the finished photograph—distracting from the abstract effect.
Abstract photographs should be abstract, at least at first glance. Being abstract doesn't mean that a careful viewer can't recognize parts of the image and what they represent in the real world. It does mean that the overall subject should not be obvious at the first glance. An abstract is a photograph about colors, texture, and composition, not about a specific object.
Look carefully at the colors in an abstract photograph. Colors are very important in an abstract photograph. Make sure that the colors in your photograph work well together. Aim for areas of complementary colors—blue hues next to yellow hues, and red hues next to green hues—to give your abstract pizzazz.
Plan to use a tripod. It's easier to compose an abstract photograph using a tripod. Even if you don't need the tripod to keep the camera steady when you slow the exposure down to getter more depth of field, using a tripod helps you compose accurately without moving the camera too quickly from one proposed composition to the next.
Turn off the flash. For the most part, you should photograph abstract compositions without a flash.
From the viewpoint of the photographer, an action scene usually involves people and sports in the outdoors. For example, if your photographic subject is kayaking, sailing, skiing, or surfing, then the scene is one of action. Figure 6.5 shows a typical action scene, a kayaker getting wet in the Colorado River rapids of the Grand Canyon.
The trick with action photography is to stop the motion. The interest here is not so much glorious color or gorgeous composition — although no one has ever complained about a photograph that has wonderful colors and great composition. Instead, the emphasis is the activity that people are accomplishing in collaboration with—or in spite of—nature.
The idea is to show what the action's protagonists are doing. Your photograph should also convey enough background so that someone looking at it will understand the context. For example, it's clear what the kayaker shown in figure 6.6 is up against—massive and rapid white water!
Some people like to view action photographs of people in nature for vicarious thrills. If you look at a photo of people in a challenging action scene with nature at its wildest, you can imagine you are there with the wind and water whipping through your hair. You don't have to experience the discipline, physical pain, and tedium that the real athletes actually experience. If your photographs can convey with immediacy the idea of"you are there with the subject," then they are successful action scenes.
Table 6.2. Taking Abstract Pictures
Practice Picture: In figure 6.7, the focus is on the kayaker and the motion of the kayak, not the setting. On Your Own: Try to get close enough so you can really experience the action. | |
Practice Picture: High midday lighting was unobtrusive but strong enough for a fast shutter speed. On Your Own: Look for strong, bright, natural lighting. Action photographs are rarely successful in low light conditions. | |
Lens | Practice Picture: Nikon D70, AF-S Nikkor 18–70mm 3.5-4.5G ED at 70mm (105mm 35mm equivalence). On Your Own: Although it's good to be close enough to really get a feeling for the action, you may want to experiment with longer lenses to bring the action even closer. It's realistic to consider handholding cameras with 35mm equivalent focal lengths of up to about 200mm at high shutter speeds. |
Practice Picture: RAW capture, Sports mode, f/4, 1/2000 second. On Your Own: Because a fast shutter speed is necessary, you should use a shutter-preferred exposure mode (or a sports exposure mode, if it is available on your camera). | |
Exposure | Practice Picture: ISO 400, f/4, 1/2000 second. On Your Own: Boost the ISO if necessary to get a really fast shutter speed (faster than 1/1000 of second) to stop motion. Don't worry too much about depth of field as long as your primary subject is in focus. |
If you are using a lens with a 35mm equivalence of 200mm or greater, you should consider using a tripod, although this may not be practical in all field conditions. Care must be taken to protect equipment when photographing action scenes in the field. Use waterproof containers for transporting your cameras and lenses if you are near water. |
Be ready. Action scenes move quickly. If you're not ready to take the picture as it happens, you'll miss it forever. Prepare your camera and exposure in advance, and then don't hesitate.
Pick your position carefully. You want to be close enough to get a feel for the action, and to have a good view. You don't want to endanger yourself or your equipment, or get in the way. Choosing the right location for action photography is crucial.
Action photography is still about people. The people who view your action photographs will care most about how the people in the photographs are performing. Make sure your photographs tell this story.
Look for bright light. Action scenes are almost always shot in broad daylight with bright light.
Action means a fast shutter speed. You'll always want to photograph action scenes using a fast shutter speed.
Protect your equipment. Nothing can ruin expensive digital photographic equipment faster than a dunk in the river or ocean. Take care to protect your equipment, both during transport and when you are using the equipment to photograph action scenes.
The key thing to remember about wild animals is that they are, well, the only word for it is wild. Animals don't pose for you. They don't hold still. They are unpredictable and sometimes dangerous. You should learn about the habits and characteristics of wild animals you'd like to photograph, respect them, and follow all the rules of the park or wildlife management district you are in.
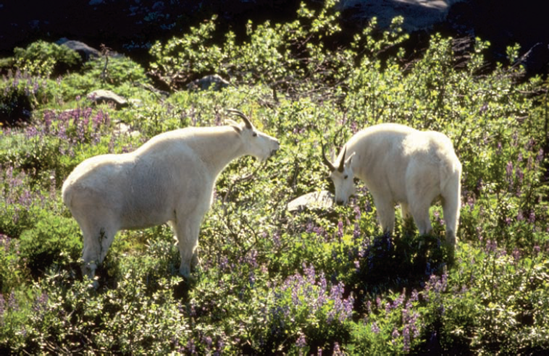
Expecting the unexpected and taking advantage of it is the watchword of wild animal photography. For example, consider the photograph of wild mountain goats shown in figure 6.8.
I was cooking my supper at a campsite high in the mountains in Olympic National Park when these goats came along. I think they thought I was invading their territory. Fortunately, I was able to make my peace with them while taking a quick animal portrait.
Animals are exciting. Animals are fun. Animals are part of what makes the wilderness wild.
It's good to practice your wildlife photography under controlled conditions. You'd be surprised how many good pictures can be taken at a zoo. And, it's easier to relax and concentrate on your photography when you know you won't get eaten or mauled by a lion, tiger, or bear!
A portrait of an animal can be a window into the soul of a world that is very different than ours. Birds and smaller animals can be just as wonderful as larger animals. If you take the time to wait for the animals, like the birds shown in figure 6.9, your photographs will be worth the effort.
Wild animals are about the hardest thing to photograph because they are in constant motion, hard to communicate with, hard to find, and possibly dangerous. If you thrive on challenges in the field, go after big game with your digital camera—and bring back some pictures that will amaze your friends.

Figure 6.10. can take surprisingly good pictures of wildlife in a zoo, like this portrait of a lion.
Table 6.3. Taking Animal Pictures
Practice Picture: The lion in figure 6.10 stayed still just long enough for a portrait. On Your Own: At the zoo, try to frame your pictures to avoid showing they are taken in a zoo. In other words, avoid bars, cages, and spectators. Regardless of where you take the photograph, remember that it is a portrait of the animal. Frame the picture to reveal the character of the animal, and to tell the story of why it is special. | |
Practice Picture: Subdued but bright light fell from behind the camera, and across the lion's face. On Your Own: You'll need light that is bright, but not overwhelming, to take successful animal photographs. | |
Lens | Practice Picture: Canon PowerShot G3, Canon Zoom Lens 7.2-28.8mm 1:2.0-3.0 at 28mm (135mm 35mm equivalence). On Your Own: You'll need a longer lens to bring your animal subjects closer for portraits (because you will have to keep your distance). |
Practice Picture: RAW capture, Automatic mode, f/8, 1/200 second. On Your Own: Generally, you can shoot animal pictures in a zoo using auto exposure modes. | |
Exposure | Practice Picture: ISO 100, f/8, 1/200 second. On Your Own: If the animal is in motion, boost the shutter speed to capture the motion, raising the ISO if necessary. |
Accessories | You can use a normal or telephoto focal length to successfully photograph animals in a zoo or in the wild. If you are using a longer focal length lens, consider using a tripod. If you are photographing animals in the wild, you may need to follow some of the techniques employed by hunters, such as using a blind so that you are not seen. |
Be ready. Animals are in constant motion. You must be ready to capture the photograph when the perfect moment comes along.
Don't endanger yourself. Wild animals can be dangerous. Learn about the animals and their habitats. Don't get too close. Don't stick your camera through the bars in a zoo in pursuit of the perfect photo.
Don't feed the animals. Don't bribe animals to sit for a portrait using food (unless it's OK with a zoo or wildlife manager). Feeding wild animals can be dangerous to you, and can also put the animals at risk.
Look for bright light. Because animals move and are unpredictable, you'll want bright but not harsh lighting.
Try for character. The best photographs of animals tell something about the animal's character.
Architectural photography means taking pictures of buildings and other man-made structures. There are a variety of commercial applications for architectural photography, but it can also be simply fun and interesting. Some photographers like to photograph mountains, and others like to photograph buildings. In many ways, the photographic challenges are similar: Mountains and buildings are both massive three-dimensional geometries that don't move, and they are both subject to ambient light.
Architectural photography can be about the grand shapes presented by buildings, bridges, and so on, but good architectural photographs can also concentrate on architectural details, such as the exterior decorative sculpture on a New York tenement shown in figure 6.11.
One of the reasons that photographers like buildings, bridges, and other structures is that they offer interesting stationary subjects that can change drastically with minimal shifts in light. You can photograph a structure to try to give an idea of the entirety of its architecture or of the detailed materials used to build it. You can also use architectural photography to convey something about architecture in general rather than a specific building, like in the photograph shown in figure 6.12.
Note
Many kinds of photography overlap. Depending on how you look at things, this could be called an abstract or a pattern photograph.
Architecture can be a metaphor for human accomplishment. It's hard to look at the soaring span of the Golden Gate Bridge (shown in figure 6.13) and not think of the miracle of modern civilization.
Table 6.4. Taking Architectural Pictures
Practice Picture: With the camera on a tripod, and using a slow exposure, the interesting effect in figure 6.14 was created by moving the zoom lens through its range. On Your Own: It's fun to experiment with architectural photography. One thing you can try, as in the practice photo, is mounting your camera on a tripod, and experimenting with the effects you can create by moving the zoom during exposure. But also think about what you can do to make the architecture special. Perhaps a unique angle, or a little camera motion will make an extraordinary image. | |
Practice Picture: Natural light of early evening. On Your Own: The zoom-in-motion effect only works when the ambient light is less intense than the light produced by the buildings in your photo. | |
Practice Picture: Nikon D70, AF-S Nikkor 18–70mm 3.5-4.5G ED at 18mm through 70mm (28mm through 105mm 35mm equivalence). On Your Own: Any zoom lens. | |
Practice Picture: RAW capture, Manual mode, f/22, 1/2 second. On Your Own: To set the shutter speed slower than any automatic mode would allow, you must use Shutter-Preferred or Manual exposure. | |
Exposure | Practice Picture: ISO 200, f/22, 1/2 second. On Your Own: Make sure the shutter speed is long enough so that your zoom effect can be seen in the final picture. |
A tripod is required for this zoom effect and for almost all architectural photography. A polarizer can help make architecture that includes windows or reflective water ponds more dramatically colored. |
Consider the composition as abstract shapes. Forget for a moment that you are photographing buildings, and think about how your photograph looks as a two-dimensional rendition of a three-dimensional sculpture.
Watch perspective lines carefully. Nothing looks weirder than pictures of a building in which the lines of the building are not parallel to the photographic planes. Check this issue out carefully when you compose your architectural photograph.
Watch shadows carefully. In architectural photography, shadows tend to define the shapes of the structure. Observe the shadows created by current lighting conditions, and determine the optimal shadow direction. Come back if necessary at another time of day for more exciting shadows.
Watch the details. Architectural details can be as interesting as the overall architecture. Consider photographing the details in addition to, or instead of, a structure as a whole.
Plan for high depth of field. Buildings don't move. For the most part, when you are photographing architecture, you can expect a static subject. This means that you can take longer exposures, and take advantage of higher depth of field.
Plan to use a tripod. A tripod is a must for many architectural photographs. Even if you don't absolutely need a tripod, you are more likely to compose architectural photographs carefully if you use one.
If you live in a city or have ever visited a city, chances are that you have tried your hand at photographing a cityscape. Cityscapes are architecture writ large: Your photograph of a cityscape captures multiple structures, not one or two buildings. In this way, photographing a cityscape is like photographing a mountain range rather than a single mountain.
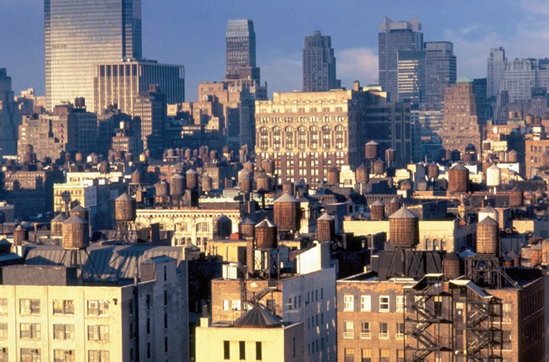
Like the subject matter of architectural photography in general, cityscapes are essentially sculptural, but they are not static. They change. They grow. The best photographs of cityscapes show idiosyncratic features of a particular city, such as a photograph of New York's rooftop water towers shown in figure 6.15.
The most well-known cityscape views have been photographed often. As a photographer, part of your job is to take a well-known city vista and transform it into a unique photograph, a view perhaps no one has considered before.
Table 6.5. Taking Cityscape Pictures
Practice Picture: The unusual viewpoint in figure 6.16 shows the Golden Gate Bridge and the San Francisco cityscape with a freighter in the foreground. On Your Own: Plan to create an unusual photograph using a famous landmark. Take time to scout the best viewpoints. | |
Practice Picture: Unusually clear and crisp spring day with little smog or fog. On Your Own: Wait for a clear day. | |
Practice Picture: Nikon D70, AF-S Nikkor 18–70mm 3.5-4.5G ED at 30mm (45mm 35mm equivalence). On Your Own: Normal focal length or slightly wide-angle lenses are best for cityscapes with an expansive vista. | |
Practice Picture: RAW capture, Automatic mode, f/10, 1/400 second. On Your Own: Provided there is plenty of light, you can use an automatic exposure. | |
Exposure | Practice Picture: ISO 200, f/10, 1/400 second. On Your Own: Exposure is not a huge issue for this kind of cityscape, so you can leave the camera on automatic. |
A polarizing filter can help to make skies appear vivid. |
There are three secrets of cityscape photography. Location, location, and location. Scout around for the best location. It's worth spending some time really looking around without taking any pictures.
Don't photograph into the sun. If you photograph a cityscape while facing directly into the sun, you are unlikely to get a vibrant photograph.
Look for items of interest. Can you find something interesting in your cityscape that other people haven't seen?
Combine foreground interest with background cityscape. Compositionally, it often works to combine a feature of architectural interest in the foreground with a cityscape in the background.
Landscapes or cityscapes without clouds tend to be boring. The best way to introduce interest and excitement into a landscape photograph is to add clouds. For example, the photograph shown in figure 6.17, taken in Arches National Park, has interest largely because of clouds. And, clouds can be very dramatic, as in figure 6.18.
Why photograph clouds? Clouds are ephemeral, lacy, full of life but made of vapor, ever changing, sometimes white, sometimes colorful beyond imagination, castles in the sky, transient. If you've ever dozed off in a mountain meadow and awakened in the late afternoon to watch the clouds chasing each other into an alpine evening (as in figure 6.19), you'll know that clouds can be all these things, and more.
The greatest challenge you'll face as a photographer of clouds is their formlessness. If you are going to photograph only clouds (meaning no landscape or other objects in the image), make sure that the light on the cloud is so compelling that the photograph works despite the lack of other compositional elements.
Table 6.6. Taking Cloud Pictures
Practice Picture: At sunset this cloud in figure 6.20 was briefly and gloriously lit. On Your Own: Waiting for sunset on a day with intermittent clouds is often a very successful approach to photographing clouds. More generally, study the direction of cloud movement, and the move- ment of the sun. How do these two forces interact? There are likely one or two dramatic moments when clouds and sun combine to make the most striking image. If you are ready for it, you can take a very dramatic photo. | |
Practice Picture: Light from the sun was underneath and behind this cloud. On Your Own: There's usually one perfect moment to photograph a cloud when the sun is setting. Wait for it. | |
Lens | Practice Picture: 1 Canon PowerShot G3, Canon Zoom Lens 7.2-28.8mm 1:2.0-3.0 at 28mm (135mm 35mm equivalence). On Your Own: For a photograph that emphasizes a single cloud, a moderate telephoto is best. |
Practice Picture: RAW capture, Landscape mode, f/4.5, 1/60 second. | |
Exposure | Practice Picture: ISO 100, f/4.5, 1/60 second. On Your Own: Automatic exposure should work. |
Accessories | A polarizing filter can help to make skies appear vivid depending on the direction of light. Tripods can be helpful, but you may not be able to maneuver as quickly as needed if you are using one. |
Wait for the special moment. There's usually a unique moment in which the lighting on a cloud is just right. Clouds move quickly, so if a cloud isn't perfect one moment, it might be the next. That said, if you see a great picture, don't hesitate.
Use a telephoto focal length for a single cloud. A moderate telephoto lens works best to photograph a single cloud.
Use a wide-angle lens for landscapes with clouds. Use a moderate wide-angle lens to photograph landscapes and cityscapes where clouds contribute to the photographic interest.
There's nothing like a flower to kindle romance or set the pulse of the photographer racing. Flowers are beautiful, subtle, sensuous, and endlessly varied. There are so many varieties of flowers, and so many ways to photograph them, that some professional photographers have specialized and only take pictures of them.
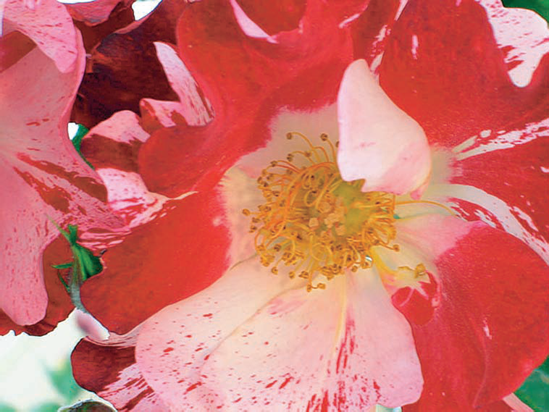
Do you love roses the best? Then you may enjoy creating close-up views of these masterpieces of the floral world, like the photograph of the Fourth of July variety shown in figure 6.21.
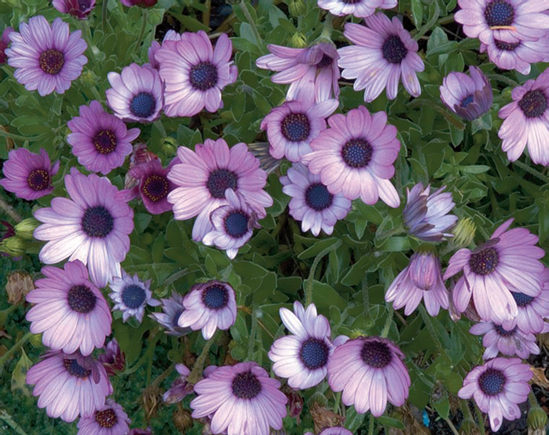
Do the vibrant colors turn you on with their inimitable display of flower power? In that case you should look for bright flowers in the morning or evening, lit by subdued light, such as the South African gazanias shown in figure 6.22.
You'd think it would be hard to miss with flowers because they are so beautiful. But in fact there's a great difference between mediocre flower pictures and those taken by a digital photographer at the top of his or her game.
Flowers are flowers, or, as Gertrude Stein famously and fatuously remarked,"A rose is a rose is a rose." It's hard not to feel compelled by the beauty, strangeness, and sensuousness of a flower. Who wouldn't be inspired?
If beauty and grace are not enough, consider rarity. Many times, getting truly great field photographs of flowers requires following the seasons. Desert flowers bloom during certain, brief times of year (and only then if the year has had a good rainy season). Mountain wildflowers are gorgeous in their prime, but they are preceded by bogs and mosquitoes and followed by autumn snow. The tree peony flower shown in figure 6.23 blooms only one day a year, so if you catch it, you are lucky.
Catching the perfect flowers in bloom and recognizing that perfection can include imperfections are the two biggest challenges for the photographer of flowers.
Table 6.7. Taking Flower Pictures
Practice Picture: The rose in figure 6.24 was found early in the season in a public rose garden. On Your Own: This flower was one of the first of the year, and in general early blooming flowers make better photos than ones later in the season. Whatever time of year you look for a flower to photograph, you should be aware that imperfections in a flower can mar flower photography. So inspect your buds carefully! | |
Practice Picture: The rose was lit both in front and from behind, in the middle of a darker area, making for a picture with dramatic contrasts. On Your Own: Look for dramatic lighting to enhance your flower pictures. | |
Lens | Practice Picture: Nikon D70, AF-S Nikkor 18–70mm 3.5-4.5G ED at 70mm (105mm 35mm equivalence). On Your Own: A moderate telephoto focal length helps you get closer to flowers that might otherwise be hard to reach. |
Practice Picture: RAW capture, Automatic mode, f/5.6, 1/125 second. On Your Own: Automatic exposure, Macro mode, or select an appropriate exposure. | |
Exposure | Practice Picture: ISO 200, f/5.6, 1/125 second. On Your Own: Automatic exposure should work. If your camera provides a Close-Up or Macro exposure mode, use it. |
Accessories | A tripod is often essential to taking good pictures of flowers if high depth of field and/or a slow shutter speed are required. A polarizer can help create dramatic color effects. |
Strong composition helps floral pictures. Flower photographs are not just about the flowers. They are also about how the flowers work in a two-dimensional design. Pay attention to the design aspects of your flower photographs.
Flowers are about color. If the colors in your flower photo are not striking, you don't have anything. Move on to another flower.
Take care with surrounding colors. Observe the colors that are not central to your composition, and make sure they help you. Use depth of field to emphasize or de-emphasize areas in your photograph, depending on how they work with the overall composition.
Plan to use a tripod. You may need a tripod to photograph flowers if the light is dim, or if you'd like high depth of field and must therefore use a slow shutter speed. Even if you don't need it, using a tripod should help you take your time with composition.
Turn off the flash. For the most part, you should photograph flowers without a flash.
A landscape photograph can be many things. When you think of landscape photographs, you perhaps first think of stunning black-and-white Ansel Adams imagery or lush Sierra Club–style portraits of the vanishing wilderness.
Other landscapes are quieter, intimate affairs. The best photographs of this kind of landscape show an everyday setting that is somehow magical.
Yet other landscapes incorporate artifacts of humanity. Suburban, gated communities comprised of nearly identical McMansions can form a landscape, as can"farms" where the crop consists of tailfins of old Cadillacs.
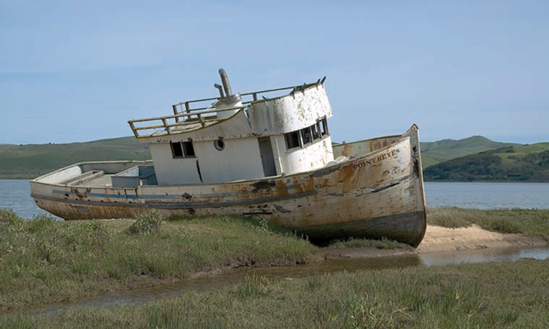
Without going to these extremes, the fairly placid landscape shown in figure 6.25 is only interesting because of the boat reclining on the mud bank.
Landscapes inspire for their grandeur and, paradoxically, their intimacy. Some landscapes make you want to go to the place photographed; others make you afraid.
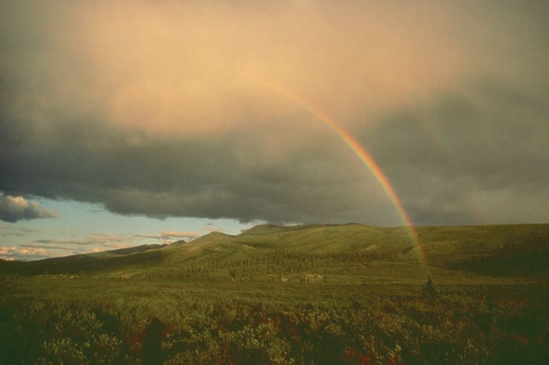
You can photograph a landscape in the middle of the day, lit from above, and get dusty, vapid imagery that says nothing to your viewers. Or else you can wait for wild weather, clouds, and a rainbow like that captured in the photograph shown in figure 6.26. Regardless of your situation (you can't always order up a rainbow), try to find the best angles and the most interesting subjects. With careful observation, even the mundane can be interesting.
Another approach is to create photographs of landscapes that are largely graphic in impact. This kind of landscape photograph has as one of its antecedents Chinese brush landscapes. The ancient tradition of Chinese landscape painting continues to this day, and you won't find much realism in these paintings. But you will recognize the brush strokes as symbolic of a landscape, and perhaps be moved by the simple graphic designs used.
Landscape photographs that go down this path tend to have few details and rely on overall shapes and colors, like the photograph of Mirror Lake in Yosemite Valley shown in figure 6.27.

Figure 6.28. Flowers in the foreground add to the interest of this picture of the Big Sur landscape.
Table 6.8. Taking Landscape Pictures
Practice Picture: Foreground flowers make the photograph in figure 6.28 more interesting than it would be as just a distant landscape. On Your Own: See if you can find a landscape that combines foreground interest with background excitement. Try to get close to the foreground element while still capturing the landscape. | |
Practice Picture: Side lighting lit the Big Sur landscape. On Your Own: Look for dramatic lighting to enhance your landscapes. | |
Practice Picture: Canon PowerShot G3, Canon Zoom Lens 7.2-28.8mm 1:2.0-3.0 at 7.2mm (35mm 35mm equivalence). On Your Own: A moderate wide-angle lens brings the foreground and background into one picture. | |
Practice Picture: RAW capture, Aperture-Preferred mode, f/16, 1/125 second. On Your Own: If your landscape combines a foreground element with a background, use Aperture-Preferred metering to make sure you have enough depth of field for the foreground and background to be in focus. | |
Practice Picture: ISO 100, f/16, 1/125 second. On Your Own: Set the aperture first, using Aperture-Preferred metering. | |
If you need high depth of field to bring foreground and background into focus, you'll often need to use a tripod because of slow shutter speeds. A polarizer can bring out colors in the skies in a landscape, depending on the lighting condition. |
Consider the point of your photo. Is your landscape photo about clouds, mountains, shapes and colors, or the wrecked and rusty tractor in the field? Be conscious of the most important element of your photograph, and emphasize it.
Composition counts. Landscape photographs can be boring if they are not well composed.
Observe how the landscape is lit, and follow the light. Landscape lighting varies from one spot to another, and from one moment in time to the next. Changing light, and changing photographic viewpoint, can make the difference between a throwaway shot and a great landscape photograph. So observe light and weather carefully, and go where the action is best.
Plan to use a tripod. It's the rare landscape that won't benefit from the use of a tripod. If your landscape combines foreground and background elements, you almost certainly should use a tripod to achieve higher depth of field.
Turn off the flash. There's nothing sillier than the photographers who aim a flash at the Grand Canyon. (Note to these shutterbugs: Your flash doesn't have that kind of range.) So don't use a flash with most landscapes. The sole exception: You may want to consider using fill flash to light a foreground subject that is in the shadows when the background landscape is brightly lit.
How do you best get to know something or someone? By getting close to them. That's why macro and close-up photography is so important and fun.
You can probably do some close-up work with the lens that came with your camera. However, for really close precision work, you may need to buy a macro lens or close-up filters.
Note
Less-expensive digital cameras that come equipped with an LCD viewfinder may actually have better macro capabilities than the lens that comes with a through-the-lens digital SLR, although you can always get a special macro lens for your SLR.
Macro photography can reveal the hidden magic of nature. For example, the close-up of the desert wildflower in the spring shown in figure 6.29 reveals the beauty of the desert.
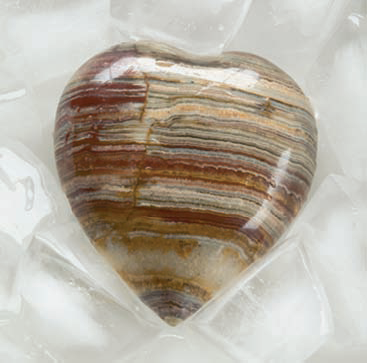
You may also want to use macro photography in a more basic way: to get close to objects. For example, the picture of the stone heart shown in figure 6.30 lets the viewer have a good close look at the rock from which this heart was carved.
In the 1950s movie The Incredible Shrinking Man, the protagonist realizes by the end of the movie that if you get small enough, a new world opens. This is what happens with macro photography.
Becoming good at macro and close-up photography enables photographers to enter the brave new world of the tiny and the fine detail. If you didn't see it in your camera viewfinder, or in the final image, would you ever have thought the center of a rose looked as it does in figure 6.31?
Getting close is also a good way to visually understand the details of a mechanism, like the watch shown in figure 6.32.

Figure 6.32. You need to get really close to capture the beautiful details of small objects like this watch.
When you use photo composition techniques to combine images created using a digital camera's macro facility with broader views of landscapes and skies, you can get some very inspiring pictures. For example, the image shown in figure 6.33 combines a macro photograph of a painting of hearts with an image of distant clouds and a sunset.
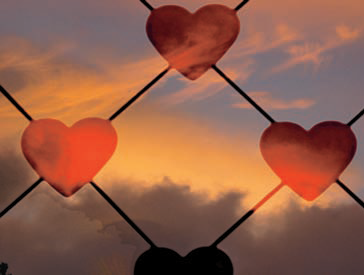
Figure 6.33. This photo composition uses a close-up photograph of painted hearts as one of its elements.
You can transform macro photographs of mundane objects like the printer's slug (an antique typesetting tool) shown in figure 6.34 so that the viewer no longer knows what the image represents.
Using digital photo composition techniques, you can then take the macro photograph one step further, creating effects like the one shown in figure 6.35—a whole new world from a simple macro photograph of a very small object.
Table 6.9. Taking Close-Up Pictures
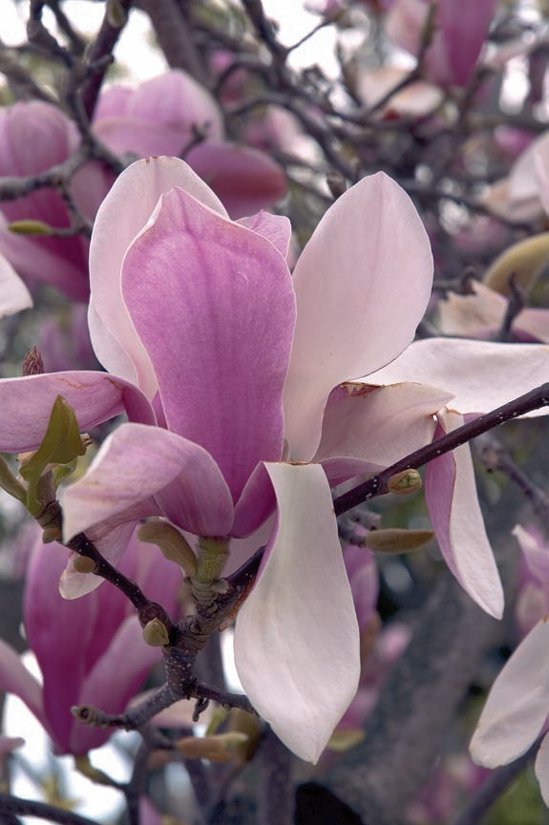
Practice Picture: A moderate telephoto focal length brought the magnolia blossom in figure 6.36 close. On Your Own: Flowering trees and bushes can present a compositional challenge because without a central point of interest, compositions can be boring. So try to arrange your close-up photograph around a feature of special interest. | |
Practice Picture: Bright overcast lighting works well for moderate close-ups. On Your Own: Look for overall bright lighting for close-ups. | |
Lens | Practice Picture: Nikon D70, AF-S Nikkor 18–70mm 3.5-4.5G ED at 70mm (105mm 35mm equivalence). On Your Own: A moderate telephoto focal length lets you get visually close to subjects that are otherwise out of range for close-ups. |
Practice Picture: RAW capture, Automatic mode, f/8, 1/160 second. On Your Own: Consider your depth of field requirements carefully, and use Aperture-Preferred metering if you need to stop the lens down. | |
Practice Picture: ISO 200, f/8, 1/160 second. On Your Own: If you are not looking for high depth of field, you can use Automatic exposure mode, or Macro exposure mode if available. | |
Accessories | A tripod will help you compose better macro and close-up photographs, and is required much of the time. |
See the details. Macro and close-up photographs are about revealing details. Make sure that the details your photograph reveals are the secrets you want viewers to see—and not ugly or irrelevant details.
Center the composition. Macro and close-up photographs can be boring unless they feature a central item of interest.
Consider your depth of field requirements. Think carefully about what level of depth of field would be best for your image. If everything needs to be in focus, set the aperture accordingly. Otherwise, having unimportant portions of the image appear out of focus may work best. That's fine–just create the effect intentionally, not by accident.
Get the right equipment. If you'll be doing a great deal of close-up work, invest in a good macro lens, perhaps with a moderate telephoto focal length.
Use the right mode. If you are shooting close, use your camera's close-up setting or Macro mode.
Plan to use a tripod. It's the rare close-up that won't benefit from the use of a tripod.
Famous California mountaineer and naturalist John Muir wrote"Climb the mountains and get their good tidings. Nature's peace will flow into you as sunshine flows into trees. The winds will blow their own freshness into you and the storms their energy, while care will drop off like autumn leaves."
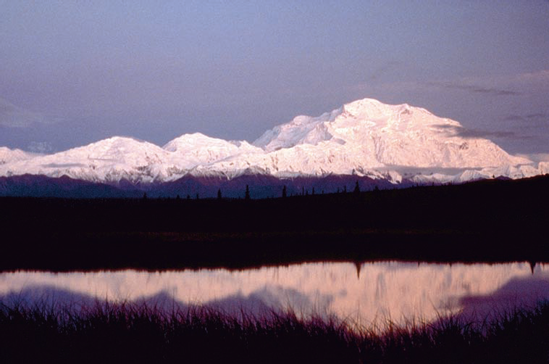
As Muir knew, mountains are very special places, and special places can make for interesting photographs. If you are looking to take a striking photograph of a mountain, you should consider waiting for the flattering light of late afternoon or sunrise. You should also see if there are interesting topographic features (like Wonder Lake in the foreground of the photo in figure 6.37) that can improve your mountain composition.
Mountain views are the quintessential landscape vista. A mountain summit speaks of inspiration and grandeur.
You should realize that to take great mountain photographs, you'll have to get up the mountains—at least most of the time! The key trick with mountain photography is being there. (If you are involved in any serious climbing, the other trick is getting yourself and your pictures home safely.)
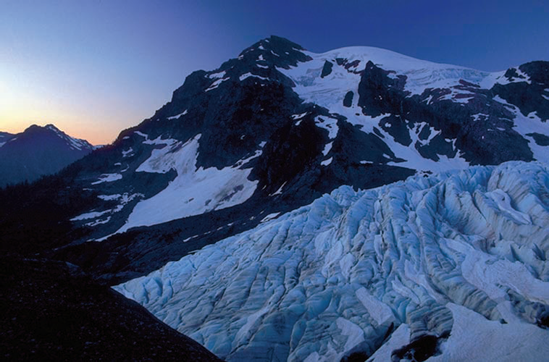
Of course, great light and high depth of field can help, as in the photograph of a mountain and glacier shown in figure 6.38.
Table 6.10. Taking Mountain Pictures
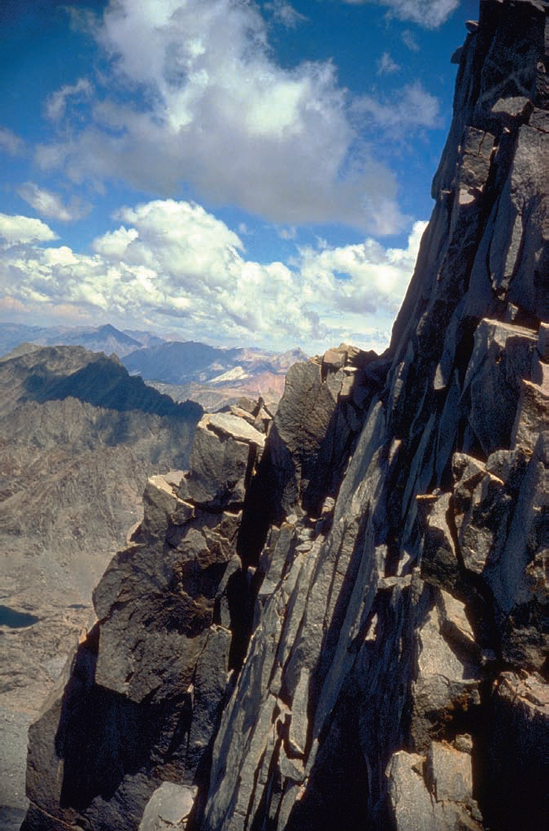
Practice Picture: Approaching the summit of Mt. Sills in figure 6.39, I made sure of my footing before snapping this photo. On Your Own: If you are going to climb mountains and take pictures, it's key to get back safely. Practice full safety precautions, and make sure that your own footing is secure before taking pictures. Even roadside vistas in the mountains tend to be perched above steep drops. | |
Lighting | Practice Picture: I thought this summit photo more interesting than the view from the summit. On Your Own: Look for dramatic views of the summit. |
Lens | Practice Picture: Canon PowerShot G3, Canon Zoom Lens 7.2-28.8mm 1:2.0-3.0 at 7.2mm (35mm 35mm equivalence). On Your Own: A moderate wide-angle lens helps make the summit look more dramatic. |
Practice Picture: RAW capture, Automatic mode, f/11, 1/400 second. On Your Own: Automatic exposure should work fine. | |
Exposure | Practice Picture: ISO 100, f/11, 1/400 second. On Your Own: Automatic exposure should work fine. |
Accessories | Keep photographic equipment lightweight–bring only the absolute essentials. |
Think about the summit. A mountain summit may be more interesting than the view from the mountain. Photograph accordingly.
Wait for the light. Mountain photographs are landscape photographs. Like other landscape photographs, the lighting is crucial. Wait for the right light.
Be there. There's usually nothing particularly fancy about photographing mountains, but you have to be there to do it.
Be safe. Don't get so distracted by photography and photographic equipment that you neglect safety precautions.
Night photography can be problematic for photographers because on a dark night there is very little light. And without light, there are no photographs.
So, really, when photographers speak of photographing at night, mostly what they really mean is in the evening, or at dawn, or in situations in which there is plenty of non-solar ambient light (such as the evening cityscape shown in figure 6.40).
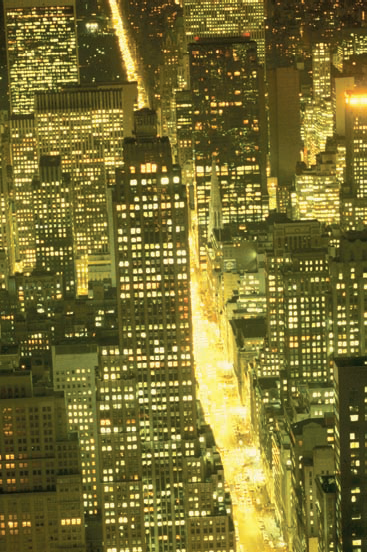
One of the neatest things about photographing in nighttime conditions, which usually involves a mixture of evening (or early morning) solar light and artificial light, is that the blending light often creates cool effects that the photographer could not have anticipated. For example, the street and building lights come together in the photograph shown in figure 6.41 to create an effect that makes the streets appear to be paved with gold.
Table 6.11. Taking Night Pictures
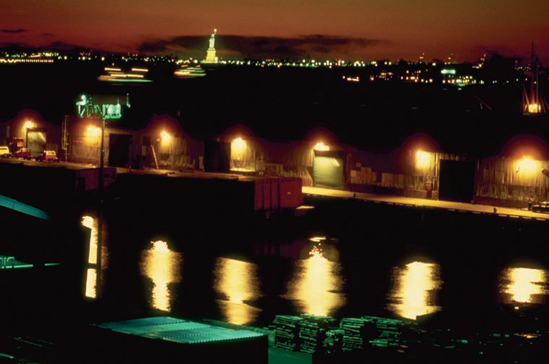
Practice Picture: The unusual photograph in figure 6.42 shows a shipyard with the Statue of Liberty behind it, and many kinds of light, from sunset to fluorescent. On Your Own: Find a good nighttime spot where you can set up a tripod, and where the scene will be illuminated by different kinds of light. | |
Lighting | Practice Picture: White balance was set for daylight, so foreground lighting created an unusual effect by throwing the light off balance. On Your Own: See what happens if you set your white balance for daylight and shoot a variety of nighttime photos. |
Lens | Practice Picture: Nikon D70, AF-S Nikkor 18–70mm 3.5-4.5G ED at 18mm (27mm 35mm equivalence). On Your Own: Normal focal length or slightly wide-angle lenses are best for night scenes with an expansive vista. |
Practice Picture: RAW capture, Manual mode, f/16, 4 seconds. On Your Own: Provided there is plenty of light, you can use an automatic exposure. If there's not a lot of light, experiment. | |
Practice Picture: ISO 800, f/16, 4 seconds. On Your Own: You'll need to experiment with exposures for nighttime pictures, probably setting exposure manually. | |
Accessories | A tripod is required for most night photographs. Also bring plenty of warm clothing, and gloves if it isn't a balmy summer night. |
Check the white balance. Review the coloration of your photos, and reset the white balance accordingly.
Night photography takes time. Getting the hang of nighttime photography takes a while, both in terms of understanding how light is rendered, and the time taken to set up and wait. Don't expect instant results.
Bracket exposures. If you are in doubt about the exposure, bracket like crazy (your digital camera may have a feature that helps you to automatically bracket).
Use a tripod. You'll want to photograph most nighttime scenes using a tripod.
From the very earliest days of photography, the ability to create panoramas—views with a scope of more than 180 degrees either vertically or horizontally—has been a passion for many photographers.
But until the advent of digital photography, specialized and expensive equipment was required to create panoramic photographs.
Now you can take contiguous photographs with almost any camera, and your digital darkroom software–Photoshop and Photoshop Elements in particular–can arrange the photographs into a continuous panorama (although Photoshop does the better job of this).
It's great to see a panorama because panoramic photos are usually presented in interesting shapes – tall and skinny (vertical panorama) or wide and narrow (horizontal panorama). In addition, panoramas as photographs are closer to a normal field of view than most photographs. In other words, as humans we see in panoramas rather than in the cut-off view presented by a normal photograph.
You can create panoramic photos in a couple of ways. Perhaps the most common way is to create a panorama in your editing software, such as Photoshop Elements or Photoshop. To do this, start by taking a number of contiguous pictures. After you get them in the software, place these pictures together to create the panorama.
To create a panorama using Photoshop, open Photoshop and choose File
The Photomerge dialog box, shown in figure 6.43, opens with the photographic pieces arranged in a panorama. Dang, that software is smart!
Note
I've created a vertical panorama for this book, because it makes the most sense in relationship to the size proportions of the book's pages. For your own use, you may want to create horizontal panoramas instead of, or in addition to, vertical panoramas.

Figure 6.44. This vertical panorama gives more angle of view without distortion than you could get using normal photographic techniques.
Table 6.12. Taking Panoramas
Practice Picture: Four horizontal frames stack to create a vertical panorama in figure 6.44. On Your Own: Find a scene, either horizontal or vertical, you would like to run into a panorama. Shoot contiguous frames with a slight overlap. | |
Lighting | Practice Picture: Normal bright sunny day. On Your Own: You can take digital panoramas in almost any lighting. |
Lens | Practice Picture: Nikon D70, AF-S Nikkor 18–70mm 3.5-4.5G ED at 34mm (50mm 35mm equivalence). On Your Own: Normal focal length or slightly wide-angle lenses are best for creating panoramas that don't appear to be distorted. |
Practice Picture: RAW capture, Automatic mode, f/10, 1/320 seconds. On Your Own: Provided there is plenty of light, you can use an automatic exposure. | |
Exposure | Practice Picture: ISO 200, f/10, 1/320 second. On Your Own: No special exposure issues for panoramas. |
Accessories | No accessories are necessary (except a digital camera and a computer equipped with Photoshop). |
How about that David Hockney effect? If you don't want to create a Hockney-like collage effect, work in Photoshop to square edges. (However, the Hockney effect is also pretty cool.)
Plan your panorama. Panoramas work best if you plan them in advance. Try to visualize what your panorama will look like when it is done so you can take the pictures to support your goal.
Play and experiment. Panoramas, photo collages, and photo merges are great fun. So have fun playing and experimenting!
Keep track of the boundaries. You want a slight overlap between each photo that comprises a piece of your collage. Make sure to keep track of the boundaries so that there are no gaps in coverage.
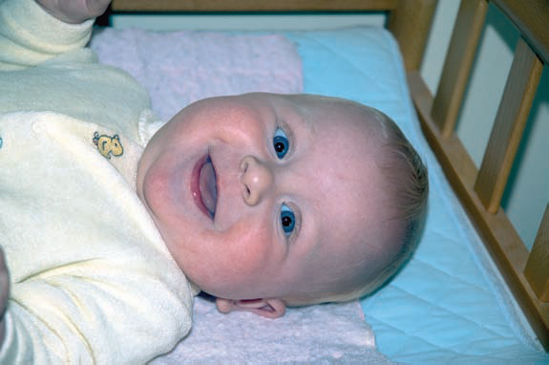
Photographing babies and children is wonderful because they don't have the inhibitions of adults and are very natural and playful. Kids let it all hang out! But, because photographing kids is so much fun, you should make sure to take some great pictures of them, not just off-the-cuff snapshots. A little preparation goes a long way.
Photography of babies has unique challenges and joys. It's not unreasonable for a photographer to think of babies as small animals. But, if you are a parent, don't take this the wrong way. All I mean is that babies move around a lot and cannot easily be directed by a photographer. So the photographic challenges are essentially the same whether it is a pet or a baby.
There's nothing as special as a baby's relationship with its parent, particularly its mother. So why not start your photography of babies – whether it's your baby or someone else's – in the same way, by photographing the baby in his or her mother's arms (see figure 6.45).
If you have a baby, you want to photograph it. If you are a photographer and your friends have a baby, they likely want you to photograph their baby. To a new parent, nothing is more special than a baby! It's as simple as that.
Babies are tiny compared to adults. So, it's important to provide a sense of scale in your photographs of babies by placing them near (or in) recognizable objects, like the photo of a baby in a laundry basket shown in figure 6.46
Table 6.13. Taking Baby Pictures
Practice Picture: The baby in figure 6.47 was playing with a toy and looking at Mom. On Your Own: Find a way to get the baby to look in the right direction and have a happy, or at least peaceful, expression. | |
|---|---|
Practice Picture: Direct-camera strobe (flash) with red-eye reduction. On Your Own: A flash is good for stopping the motion of the baby, but it may upset him or her. If in-camera red-eye reduction doesn't eliminate red eye, you can take care of this in post-processing. | |
Lens | Practice Picture: Nikon D70, AF-S Nikkor 18–70mm 3.5-4.5G ED at 70mm (105mm 35mm equivalence). On Your Own: A moderate telephoto helps bring a baby closer without the baby feeling overwhelmed. |
Practice Picture: RAW capture, Portrait mode, f/4.5, 1/60 second, on-camera strobe, red-eye reduction. | |
Exposure | Practice Picture: ISO 200, f/4.5, 1/60 second. On Your Own: Expect to use high natural light levels or on-camera strobe. |
Accessories | Having plenty of toys on hand helps to make photographing babies easy and fun. |
Babies like toys. Make a baby happy, and distract them, with age-appropriate toys.
Use a parent. If you position Mom or Dad, the baby will look towards them. You can take advantage of the position of the parent to direct the baby.
Scale your pictures. When possible, include objects in your photos that provide a sense of scale so the size of the baby is evident.
Red eye can be cured. If your baby pictures show red eye, even after in-camera red-eye reduction, don't worry: You can pretty much eliminate red eye in digital postproduction.
The best baby pictures have a sense of wonder. Your pictures should show it.
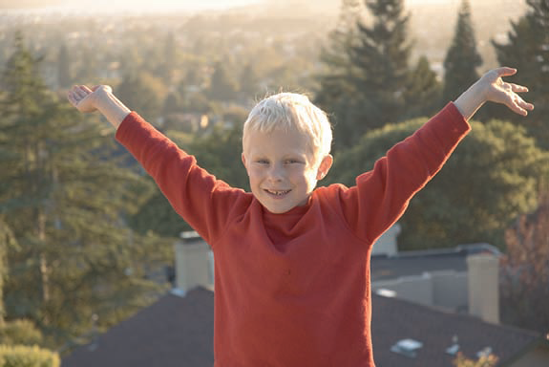
Kids! Kids! Kids! Who doesn't want to photograph their kids? Or, if your friends have kids, they probably like to see good pictures of their little darlings.
Unlike babies, to some degree you can ask kids to pose or give them other directions. Whether they will follow the directions is, as all parents know, debatable. Kids seem to be constantly in motion, so a neatly posed picture may not always be a realistic option—but if you are lucky and patient, you can get a great photo (see figure 6.48)
Some of the best photographs of kids are portraits. A portrait tells something about the personality or the character of the subject, as seen in figure 6.49.
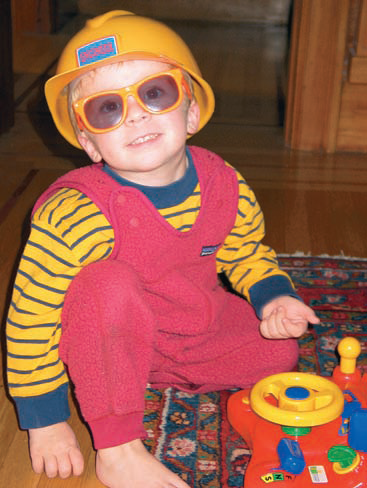
One reason for photographing kids is to play. Children love to play. They live to play. As an adult photographer, you can enter this play for a while.
For example, in figure 6.50, it is not entirely clear whether the boy is a construction worker or a firefighter, but whatever he is, he is having fun. (And so did the photographer taking the picture.)
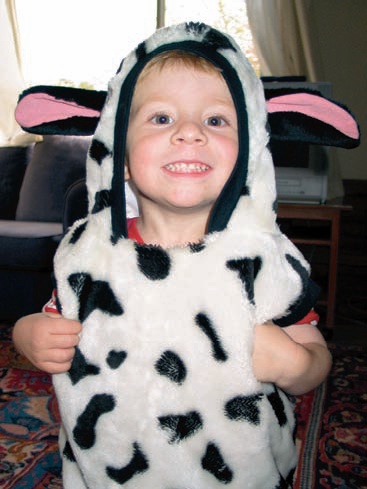
Holidays that give an opportunity for dress-up and fantasy are a great time for photographers. Children get caught up in the excitement of the moment, and forget to be self-conscious. They also may be wearing really cute costumes (see figure 6.51).
Table 6.14. Taking Pictures of Children
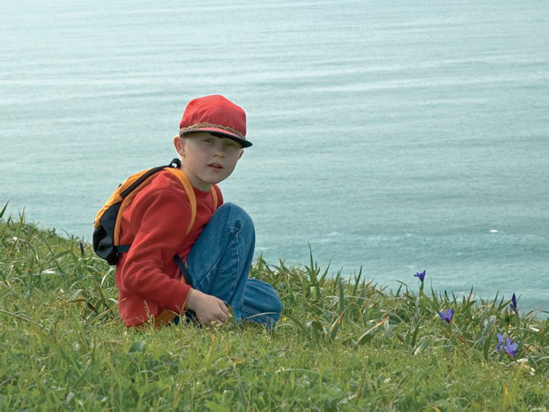
Practice Picture: Julian was having a great time looking for photo opportunities with me, when I decided that he was the photo, as seen in figure 6.52. On Your Own: Take a child (yours or someone else's) on a photography field trip. When you get bored with photographing flowers, take some pictures of the little companion instead. | |
|---|---|
Practice Picture: Bright overhead but cloudy light, good for moody portraits. On Your Own: Don't try to take portraits in strong, harsh light. | |
Lens | Practice Picture: Nikon D70, AF-S Nikkor 18–70mm 3.5-4.5G ED at 70mm (105mm 35mm equivalence). A moderate telephoto helped bring my subject closer. On Your Own: A moderate telephoto lens will bring kids closer and make it easier to take portraits. |
Practice Picture: RAW capture, Automatic mode, f/8, 1/250 second. | |
Exposure | Practice Picture: ISO 200, f/8, 1/250 second. On Your Own: Use a portrait exposure mode if it is available on your camera. |
Accessories | Bring a sense of wonder, fun, and play. |
Children like toys. If you have age-appropriate toys around, kids won't get bored and will be easier to photograph.
Use a parent. It's important that kids feel safe and comfortable. You can facilitate this by having a parent present when you photograph.
Familiar locations mean safety. Children are likely to feel safer on their home ground. Consider photographing them at home, or someplace else they know well.
Kids are the ultimate action subject. Get ready for action. If you hesitate, you may lose a good photograph. Use fast shutter speeds. Consider using a flash to stop motion.
Red eye can be cured. If you use a flash and your pictures show red eye, even after in-camera red-eye reduction, don't worry: You can pretty much eliminate red eye in digital postproduction.
Get down on the child's level. Pictures of children can be much more effective if they are taken from the level of the child rather than from above looking down.
Have fun! Kids are about fun! If you have fun along with the kids you are photographing, your pictures are likely to come out better.
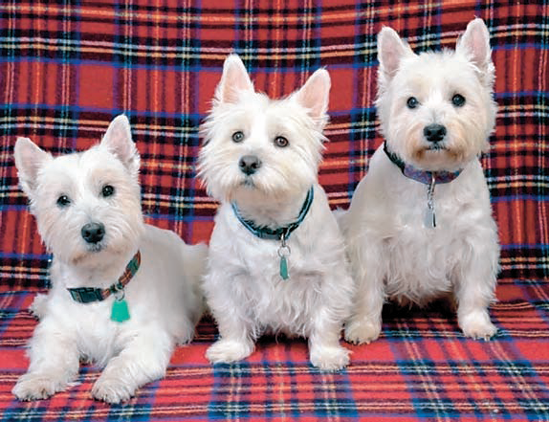
People love their pets and photograph them often. There are professional photographers who photograph nothing but pets. All this says that photographing pets is a serious specialization.
Good pet photography is irresistible to those who love animals (see figure 6.53).
By photographing your pets, you get to combine two passionate interests into one: pets and photography. Although pets are not easy photographic subjects – they move around a lot and don't usually take direction – your photographs can convey the essence of your favorite pet, how well they interact with others, and what you enjoy most about your pet.
Table 6.15. Taking Pet Pictures
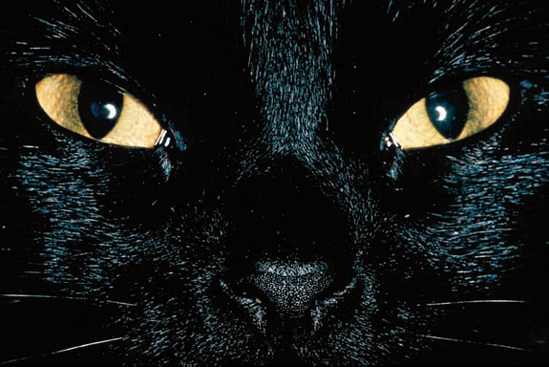
Practice Picture: Close-ups of pets can be more interesting than full or distant views, as shown in figure 6.54. On Your Own: As with pictures of people, photos of animals are portraits. The best of these reveal the character of the animal. This can often be achieved by taking a close-up portrait of your favorite pet. Even if you don't move in close, think about taking pictures that reveal details of the characters of the pet. | |
Lighting | Practice Picture: Flash will likely scare your pet, so try for bright but subdued lighting. On Your Own: Don't try to take pet portraits in strong, harsh light. |
Lens | Practice Picture: Nikon D70, AF-S Nikkor 18–70mm 3.5-4.5G ED at 70mm (105mm 35mm equivalence). On Your Own: A moderate telephoto helps bring the cat's face, or other pet, closer. |
Practice Picture: RAW capture, Automatic mode, f/8, 1/125 second. On Your Own: Automatic exposure mode is probably okay, but you may have to compensate for the pet's color. | |
Exposure | Practice Picture: ISO 200, f/8, 1/125 second. On Your Own: Sports exposure mode may be a good choice for photographing pets, if it is available on your camera. |
Accessories | Treats for your pet are likely to make photography sessions more enjoyable. |
Pets like toys. If you provide a cat or dog toy, you may get better pictures.
Reinforce with treats. It's important to reinforce the photographic experience with treats. If a pet gets used to associating photography with treats, your photography is likely to go better.
Portraits can reveal more. Consider moving in close for a
Literally, the term still life means anything that is still and doesn't move. But usually a still life is comprised of a visual arrangement of some sort that is pleasing to the eye, whether outdoors or in, and whether found or styled.
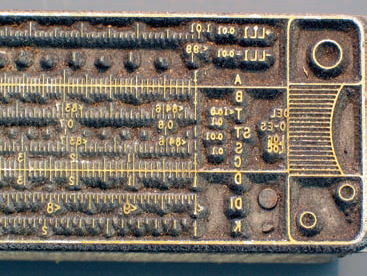
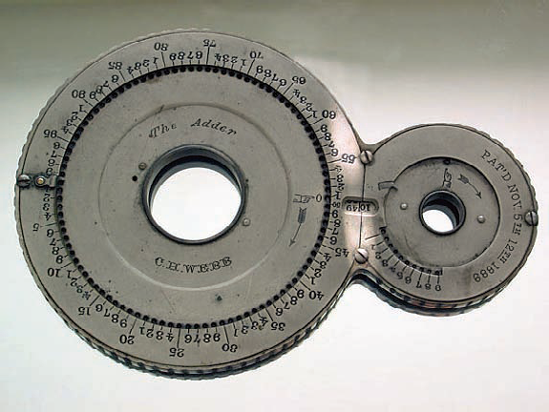
Like ikebana, the Japanese art of flower arrangement, still-life photography is probably more about arranging and creating your still-life subject than about photography per se. There's great variety in the kinds of subject matter that are appropriate for still-life photography, ranging from flowers indoors (figure 6.55) and a single bud in water (figure 6.56) to mechanisms like the antique calculator shown in figure 6.57.
If you've found something wonderful, like the white window and flowers shown in figure 6.58, then you've found a still life.
Whether you find a still life or arrange one like a fine example of ikebana, photographing a still life is an act of Zen (as in figure 6.59). Great still lifes are seamless. You don't know who created what or whether it was arranged or found – and it probably doesn't matter.
Table 6.16. Taking Still-Life Pictures
Practice Picture: A few buds were taken from a garden and arranged for the shot in figure 6.60. On Your Own: Take a few things that you like and arrange them pleasantly, or look for an opportunity to do so when you are out and about. | |
Lighting | Practice Picture: Bright overcast lighting works well for still-life photography. On Your Own: Look for bright but overcast light outdoors, or bring your still life inside where you can control the lighting. |
Lens | Practice Picture: Nikon D70, AF-S Nikkor 18–70mm 3.5-4.5G ED at 60mm (90mm 35mm equivalence). On Your Own: A moderate telephoto focal length lets you get visually close to subjects and provides an impression of optical flatness. |
Practice Picture: RAW capture, Aperture-Preferred mode, f/22, 1/25 second. On Your Own: Consider your depth-of-field requirements carefully, and use aperture-preferred metering if you need to stop the lens down. | |
Exposure | Practice Picture: ISO 200, f/22, 1/25 second. On Your Own: Generally, you will want to take still-life photographs with high depth of field, so use aperture-preferred metering and stop the lens down. |
Accessories | A tripod is pretty much required for effective still-life photography. |
Watch your arrangement unfold. Still-life photographs are about special worlds you've created or uncovered. Make sure your photograph shows these worlds: There should be more than one way to look at a successful still-life photo.
Composition matters. Just as your arrangement of objects should be pleasing, so should your composition.
Details count. You may have had a teacher who said that neatness counts. Neatness – and details – definitely counts in still-life photography. One misplaced detail can spoil an entire, otherwise wonderful still-life arrangement.
Use high depth of field. Most still-life photographs benefit from high depth of field.
Plan to use a tripod. Unless you don't want high depth of field (unlikely with a still life) use a tripod. Even if you don't need the tripod because of shutter-speed issues, a tripod will help you make better still-life compositions by enabling you to look more carefully.
There's not much difference between photographing sunsets and sunrises, except that you are more likely to be wide awake at sunset. Technically, sunsets do last a little longer than sunrises, but the light from sunrise and sunset has virtually the same qualities.
Photographs of sunsets can be banal because they are clichés. That said, sunset and sunrise are glorious times of day for the photographer. The wonderful light at the beginning and end of the day cannot be replicated any other time. So the trick for the photographer is to create interesting or unusual imagery of sunsets and sunrises.
When all is said and done, there's nothing more wonderful for the photographer than to stand on a high place at sunset, camera on tripod, and photograph the silhouette of ridge after ridge, as in figure 6.61.
It's darkest, as they say, just before dawn, and it can be the coldest too. If you've been holding a cold vigil in the early hours before the sun comes up, maybe your photographs can express the joy that the dawn of a new day brings, as shown in figure 6.62.
Table 6.17. Taking Sunset Pictures
Practice Picture: In figure 6.63, a sunset in the woods made an interesting contrast with the sky and clouds at sunset. On Your Own: In the practice photo, there's contrast between a stark foreground and the sunset. This is pretty typical of sunset and sunrise photography in general. You should look for photographic opportunities where the drama of the stark contrast between the sunset and the darkening world lessens the need to show details in shadow (because mostly these won't be very visible). | |
Lighting | Practice Picture: The clouds were photographed and the trees allowed to go black. On Your Own: Find a foreground subject of interest to combine with your sunset. |
Lens | Practice Picture: Canon PowerShot G3, Canon Zoom Lens 7.2-28.8mm 1:2.0-3.0 at 7.2mm (35mm 35mm equivalence). On Your Own: Use a moderate wide-angle focal length to combine foreground with sunset. |
Practice Picture: RAW capture, Automatic mode, f/4.5, 1/60 second. On Your Own: Expose for the sky, not the trees. Automatic exposure should work. It's always a better idea to expose for the darker area (trees, rocks, etc) rather than the bright setting sun. | |
Exposure | Practice Picture: ISO 100, f/4.5, 1/60 second. On Your Own: Let the foreground go black. Expose for clouds and sunset. |
Accessories | A polarizing filter can help to make sunset skies vivid depending on the direction of light. Tripods can be helpful, depending on light and field conditions. |
Wait for the special moment. There's usually a special moment in which the sunset is just right. That said, if you see a great picture, don't hesitate.
Use a wide-angle lens for landscapes with clouds. Use a moderate wide-angle lens to photograph landscapes with foreground interest and sunset clouds.
Use an alarm for sunrise. If you are going to photograph a sunrise, don't forget to set the alarm.
Sunrise is the opposite of sunset. Because the sun is setting opposite to where it rises, you have two whacks at the apple. You can choose which light direction works best for your photo.
Know your timing. Local papers or the Web will tell you the time for sunset and sunrise, no matter where you are. Use this information to keep your date with the sun.
Water is one of the most powerful forces of nature. Over time, streams and rivers carve canyons. Storms and moisture create landscapes and determine whether a location is a desert or a verdant jungle, oceans carve coastlines, and so on.
Without water, there is no life. It's not surprising that people are fascinated with water, and that water tends to play an important role in photography.
The key technical issue to understand about water photography is that there's a direct relationship between the camera's shutter speed and the appearance of water. With long exposures – slow shutter speeds – moving water appears solid, frozen in place, like something flowing slowly, as in figure 6.64.
With shutter speeds in the intermediate range (between 1/30 second and 1/125 second) moving water appears partially frozen, and partially blurred as in figure 6.65.
A fast shutter speed appears to stop moving water, as in figure 6.66, although viewers don't perceive the water as motionless. Interestingly, the human eye never sees moving water as stopped (as it appears when photographed with a fast shutter speed), although that's the way it is most usually photographed.
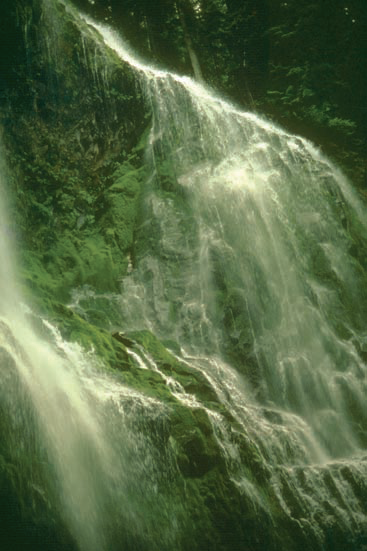
Figure 6.65. This photograph of Proxy Falls in Oregon was fast enough to stop some, but not all, water motion.
Water is a wonderful and challenging photographic subject. It's constantly moving, changing, and reshaping itself. If you stand in the same place and take two pictures of a waterfall, each photograph will be different.
It's possible to create attractive photographs that appear to"solidify," partially stop, or fully stop moving water. The challenge to the photographer is to pre-visualize the effect you'd like and select the corresponding shutter speed.
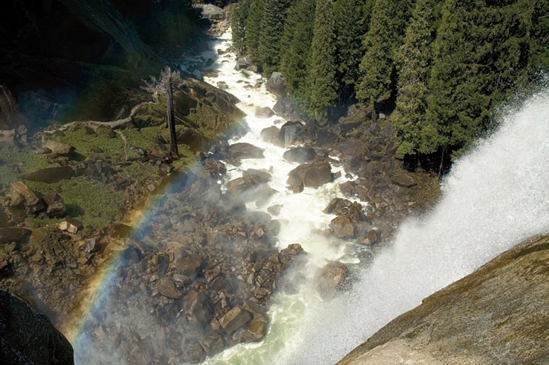
Figure 6.67. The rainbow created by the spray from the waterfall helps to add another dimension to this image.
Table 6.18. Taking Water Pictures
Practice Picture: Leaning over the edge of Vernal Falls in Yosemite created this interesting view with the rainbow and Mist Trail in the background (see figure 6.67). I made sure to hold on to the camera and to the ledge! On Your Own: In your own photos of waterfalls, try to capture the motion of water by photographing details and aiming to partially stop the motion of the water. When photographing other bodies of water, look for reflections and interesting light or other unique features. | |
Lighting | Practice Picture: Natural overcast lighting. On Your Own: It's tough to photograph moving water in bright light because of the harsh contrasts. Wait for bright but overcast days. |
Practice Picture: Nikon D70, AF-S Nikkor 18–70mm 3.5-4.5G ED at 25mm (37.5mm 35mm equivalence). On Your Own: A moderate telephoto focal length helps you close in on waterfalls, rain, and other moving water without getting you or your camera wet. | |
Practice Picture: RAW capture, Automatic mode, f/10, 1/320 second. On Your Own: To partially stop water, you need a shutter speed in the 1/30 to 1/125 second range. | |
Exposure | Practice Picture: ISO 200, f/10, 1/320 second. On Your Own: Automatic exposure should work if light conditions are dim enough to force the shutter speed you'd like. Otherwise, you should use shutter'preferred metering to pre-select a shutter speed in the 1/30 to 1/125 second range. |
Accessories | You need a tripod for long exposures that freeze the motion of water. A polarizing filter may produce a pleasing effect, and certainly should be tried if you are photographing still water. |
Be careful not to get your camera wet. Waterfalls can shift when the wind shifts. Take care to position yourself so that you and your camera are safe.
Previsualize. Try to determine in advance what water effect you'd like.
Experiment with a polarizer. Try a polarizer on water to see what it does (the impact will depend on the light direction and how fast the water is flowing).
Use a tripod to freeze the motion of water. If you are freezing the motion of water with a slow shutter speed, you'll need to use a tripod.
Use shutter-preferred metering. Use shutter-preferred metering to select the shutter speed that provides the effect you like.
Slow shutter speeds solidify water. To create the effect of solid, molten water, use a shutter speed of 1/4 second or slower.
Intermediate shutter speeds create a mixed effect. To create an effect in which some water motion is stopped, and some is blurred, choose a shutter speed between 1/30 and 1/125 second.
Fast shutter speeds freeze motion. To freeze the motion of water, use a shutter speed of 1/500 second or faster.
Water shapes the landscape, but weather shapes our view of the landscape. Weather adds drama and poetry to your photographs, as evident in figure 6.68.
Without adverse weather conditions, outdoor photographs can be boring and placid. With the effects of adverse weather showing, even mundane landscapes can look special, as shown in figure 6.69.
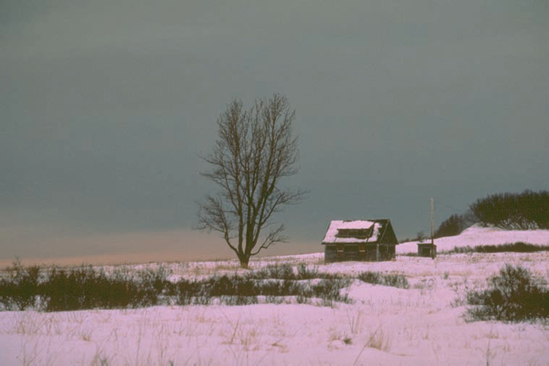
Figure 6.68. The gray clouds of approaching snow make this image of a lonely cabin in winter feel cold.
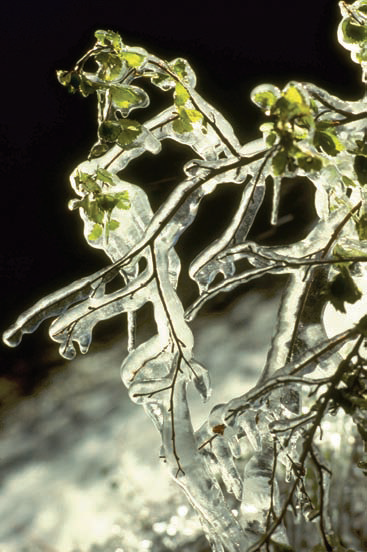
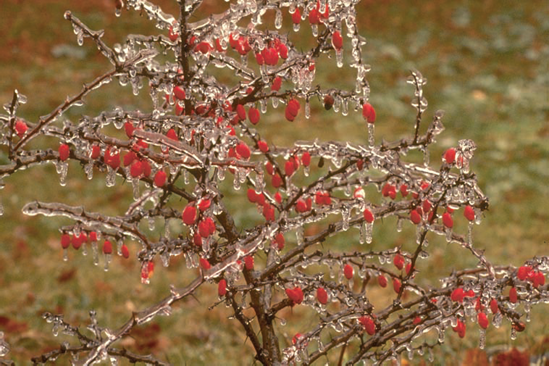
One of the most special finds of all in the field is a plant or tree encased in snow or ice, creating an lovely natural sculpture as in figures 6.70 and 6.71.
Unless the weather cooperates, you don't usually get to see the ice sculptures that nature creates – but when you do it is inspiration for any photographer.
Inspiration for you might be found in the light just before or after a storm, or perhaps a stand of trees covered with a fresh, wet snow. Even a sunny morning can be inspiring if your subject is compelling, so pay attention to your surroundings. You never know when a great opportunity to capture a weather-inspired image will present itself.
Table 6.19. Taking Weather Pictures
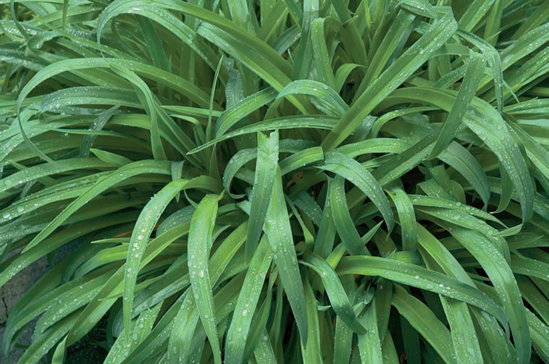
Practice Picture: After a rain shower ended, the plant shown in figure 6.72 was decorated with water droplets. On Your Own: It's difficult to photograph during a storm because weather and atmospheric conditions make for murky photos and wind keeps subjects in motion. However, before a storm begins, you can often find moments of dramatic weather that make great photos. And, as soon as the storm is over, get out your camera and try to photograph the traces the storm left behind, such as water on leaves, and wind-swept vistas. | |
Lighting | Practice Picture: Natural overcast lighting. On Your Own: Lighting conditions following rain are usually very favorable for close-ups. |
Lens | Practice Picture: Nikon D70, AF-S Nikkor 18–70mm 3.5-4.5G ED at 46mm (69mm 35mm equivalence). On Your Own: Almost any focal length is appropriate for photographing the aftermath of a storm. Try for a natural effect with a more-or-less-normal focal length. |
Practice Picture: RAW capture, Macro mode, f/4.5, 1/80 second. On Your Own: Automatic exposure should be okay if there is enough light. | |
Exposure | Practice Picture: ISO 200, f/4.5, 1/80 second. On Your Own: Experiment with setting the camera for greater depth of field using aperture-preferred metering and a small f-stop. |
Accessories | If you use a small f-stop and the corresponding slow shutter speed, you'll need a tripod. A good camera case or bag is a must for inclement weather. Plastic bags and plastic shower caps can help keep cameras dry in the rain, particularly if the cameras are mounted on tripods. |
Protect your camera in storms. Storms of any kind can be devastating to electronic instruments. Take good care of your digital camera so that it will continue to take good pictures for you.
Put your camera in its case if things get too wet. If the weather is too wet and wild, or if a sandstorm is blowing, make sure your camera is put away in a secure location. Often, conditions for good pictures occur just before or after the storm has passed.
Use plastic bags. Plastic bags and shower caps can help keep your camera dry if you must have it out.
Storms and rainy weather bring out the colors. After a storm, look for saturated colors to delight the eye.
