
As we did earlier, we will set up a Ceph client machine using Vagrant and VirtualBox. We will use the same Vagrantfile that we cloned in the last chapter i.e. Chapter 1, Ceph - Introduction and Beyond. Vagrant will then launch a CentOS 7.3 virtual machine that we will configure as a Ceph client:
- From the directory where we cloned the Ceph-Designing-and-Implementing-Scalable-Storage-Systems GitHub repository, launch the client virtual machine using Vagrant:
         $ vagrant status client-node1
         $ vagrant up client-node1
- Log in to client-node1 and update the node:
      $ vagrant ssh client-node1
      $ sudo yum update -y
The username and password that Vagrant uses to configure virtual machines is vagrant, and Vagrant has sudo rights. The default password for the root user is vagrant.
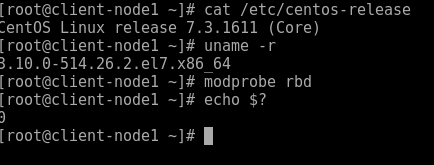
- Check OS and kernel release (this is optional):
        # cat /etc/centos-release
        # uname -r
- Check for RBD support in the kernel:
# sudo modprobe rbd
- Allow ceph-node1 monitor machine to access client-node1 over SSH. To do this, copy root SSH keys from ceph-node1 to client-node1 Vagrant user. Execute the following commands from ceph-node1 machine until otherwise specified:
        ## Log in to the ceph-node1 machine
        $ vagrant ssh ceph-node1
        $ sudo su -
        # ssh-copy-id vagrant@client-node1
Provide a one-time Vagrant user password, that is, vagrant, for client-node1. Once the SSH keys are copied from ceph-node1 to client-node1, you should able to log in to client-node1 without a password.
- Using Ansible, we will create the ceph-client role which will copy the Ceph configuration file and administration keyring to the client node. On our Ansible administration node, ceph-node1, add a new section [clients] to the /etc/ansible/hosts file:

- Go to the /etc/ansible/group_vars directory on ceph-node1 and create a copy of clients.yml from the clients.yml.sample:
# cp clients.yml.sample clients.yml
You can instruct the ceph-client to create pools and clients by updating the clients.yml file. By uncommenting the user_config and setting to true you have the ability to define customer pools and client names altogether with Cephx capabilities.
- Run the Ansible playbook from ceph-node1:
root@ceph-node1 ceph-ansible # ansible-playbook site.yml

- On client-node1 check and validate that the keyring and ceph.conf file were populated into the /etc/ceph directory by Ansible:

- On client-node1 you can validate that the Ceph client packages were installed by Ansible:

- The client machine will require Ceph keys to access the Ceph cluster. Ceph creates a default user, client.admin, which has full access to the Ceph cluster and Ansible copies the client.admin key to client nodes. It's not recommended to share client.admin keys with client nodes. A better approach is to create a new Ceph user with separate keys and allow access to specific Ceph pools.
In our case, we will create a Ceph user, client.rbd, with access to the RBD pool. By default, Ceph Block Devices are created on the RBD pool:

- Add the key to client-node1 machine for client.rbd user:

- By this step, client-node1 should be ready to act as a Ceph client. Check the cluster status from the client-node1 machine by providing the username and secret key:
        # cat /etc/ceph/ceph.client.rbd.keyring >> /etc/ceph/keyring
        ### Since we are not using the default user client.admin we
        need to supply username that will connect to the Ceph cluster
        # ceph -s --name client.rbd
