
15
Wearable Computing and More Programming Environments
In the previous chapter, we explored and demonstrated the hardware features of the Micro:bit. We also demonstrated the functionality of many onboard sensors. Now, we will develop some new applications using the Micro:bit where we will carry the Micro:bit with us. Initially, we will discuss how to make a simple pedometer using a Micro:bit. We will also learn how to detect a falling movement using similar concepts. Then, we explore an interesting topic known as sewable computing. This includes attaching or sewing computing devices to our clothes and carrying them with us.
The following list of topics will be explored in this chapter:
- Programming a pedometer using a Micro:bit
- Fall detector
- Sewable and wearable computing
- More programming frameworks
Let us get started with wearable computing.
Technical requirements
For this chapter, we will need a Micro:bit device with the following components:
- Conductive thread
- An embroidery hoop and a cotton cloth
- Sewable electrical components such as LEDs, switches, push buttons, and so on
Programming a pedometer using a Micro:bit
A pedometer is a device that measures the number of steps taken by a person while walking or running. These devices are in high demand in the modern world as many people monitor their daily physical activities with electronic devices. These observations help them manage their calorie intake. In a Micro:bit, we have an accelerometer to monitor various physical motions.
The concept of measuring the number of steps taken by the user is based on the physical motion detected by the Micro:bit. We can attach the Micro:bit to the foot or shoe of the user. A battery pack is attached to the Micro:bit. The Micro:bit will detect the shake movement whenever a person takes their next step. For every such movement that’s detected, we can increase the count of the number of steps taken. Their current step count is displayed on the LED matrix. We can reset the count to 0 by pressing button A. Figure 15.1 shows a Micro:bit attached to a shoe, which specifies the current count of steps:
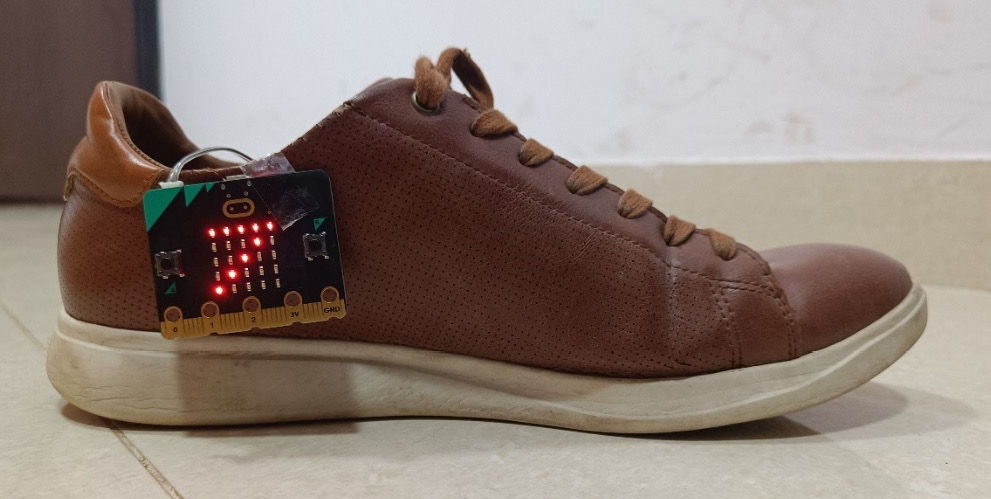
Figure 15.1 – A Micro:bit mounted on a shoe to count the number of steps the user takes
The code for this program is as follows:
from microbit import *
steps_count=0
while True:
    if button_a.is_pressed():
        steps_count =0
        display.show(steps_count)
    if accelerometer.was_gesture('shake'):
        steps_count += 1
        display.show(steps_count)
Sometimes, we can also get shaky movements due to non-walking activities, such as standing, a leg being shaken, or similar activities. In that case, the value of steps_count can increase even without taking a step. We can also design this pedometer with the help of the y axis data of the accelerometer. If the Micro:bit is attached to the shoe in such a way that the vertical movements of the foot cause the y axis value to change, then we will only consider a step has been taken if the change in the y axis value is more than a certain threshold. We will consider a change of more than 1000 in the y axis as one step that’s been taken. This change can be observed when a person takes one stride. Let us have a look at the code now:
from microbit import *
steps_count=0
while True:
    if button_a.is_pressed():
        steps_count =0
        display.show(steps_count)
    if accelerometer.get_y() > 1000:
        steps_count += 1
        display.show(steps_count)
In this section, we talked about a very simple application of wearable computing: a pedometer. This system can measure the distance traveled by the user. We designed a pedometer to calculate the number of steps the user takes. This design was based on the accelerometer, which is built into the Micro:bit. The vertical stride of a step will bring a change in the y axis value. Based on this change, we count the number of steps.
Fall detector
Now, let us design another helpful device using the Micro:bit. Elderly people, children, and people with balancing issues are prone to falling while doing their daily activities. Such people require extra attention or a permanent attendee to monitor their movement. This person should monitor their movements and help them in case they fall. Due to a variety of reasons, the presence of an additional person might not be possible 24/7. We can design a fall detector using the Micro:bit that will generate a signal for the other person if the user has fallen. This device can also be used to detect accidents on bicycles or any other fall. In such cases, the device can call for help.
For this experiment, we need to check the range of accelerometer data from the Micro:bit for different movements. We will use the Mu editor and write a simple program to print and plot the accelerometer values for analysis purposes:
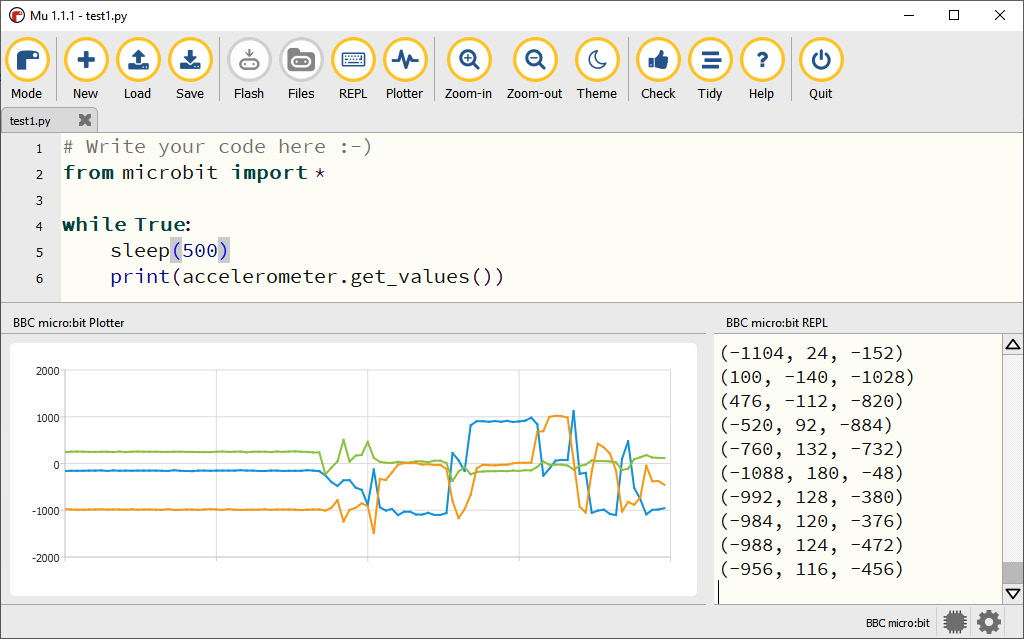
Figure 15.2 – Accelerometer data from the Micro:bit plotted using the Mu editor
Figure 15.2 shows the numerical and graphical representations of the x, y, and z axes for the accelerometer data. In the Mu editor, we will write the code, then click the Flash button to transfer the code to the Micro:bit. Then, we will click the REPL and Plotter buttons to visualize the accelerometer data in the form of numbers and graphs.
The code to generate this data is as follows:
from microbit import *
while True:
    sleep(500)
    print(accelerometer.get_values())
Now, let us develop the fall detector system using this concept. We should connect our Micro:bit to the body of the person. Now, when the user falls, which axis values change the most? This will depend on the orientation of the Micro:bit when it is attached to the user’s body. To detect this fall, we should generate an alarm sound. Assuming that the z axis changes the most, we can write the following code:
from microbit import *
import music
while True:
    if accelerometer.get_z() > 800:
        music.play(music.DADADADUM)
        sleep(100)
In this section, we designed a helpful system for elderly people. The Micro:bit is attached to the body of the user in such a way that if they fall, the accelerometer’s z axis value will change. Depending on the detection of the fall, the alarm can be raised for others.
Sewable and wearable computing
There is a whole world of sewable and wearable projects out there. Wearable projects can be worn on the body (in the form of lighting and sensors; it is so cool to see them in action!). To make this happen, we have to use sewable components. Sewable components can be sewn into fabrics using special materials. That is why they are known as sewable components. In this section, we will provide a brief overview of sewable components and prototyping.
Let us start with the base. We can use any fabric made of non-conductive material such as cotton, felt, or worsted wool. We can even use an embroidery hoop, as follows:
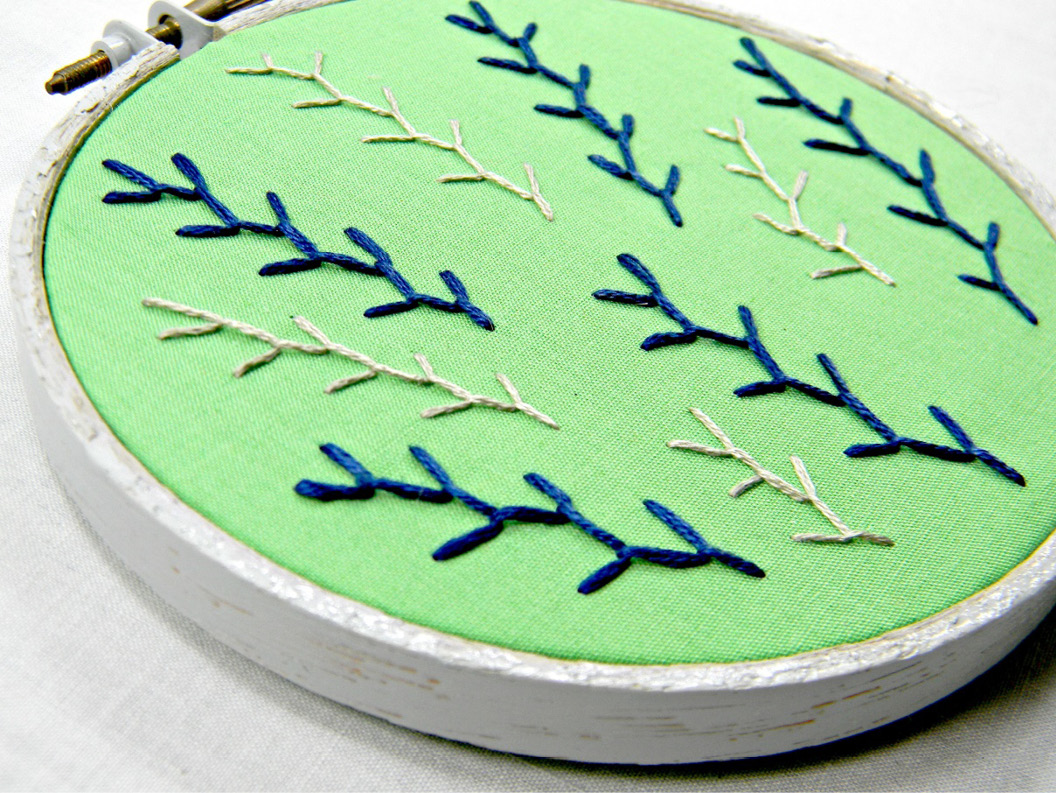
Figure 15.3 – Embroidery hoop with art in progress (courtesy: https://www.flickr.com/photos/hey__paul/8355465843/ by Hey Paul Studios at https://www.flickr.com/people/45257015@N03, made available under the CC BY license at https://creativecommons.org/licenses/by/2.0/deed.en)
Another essential thing we need is a conductive thread. As its name suggests, it’s a sewing thread made of conductive and flexible material. It carries power and signal to the components sewn on the non-conductive fabric. The following figure shows a bundle of conductive thread:
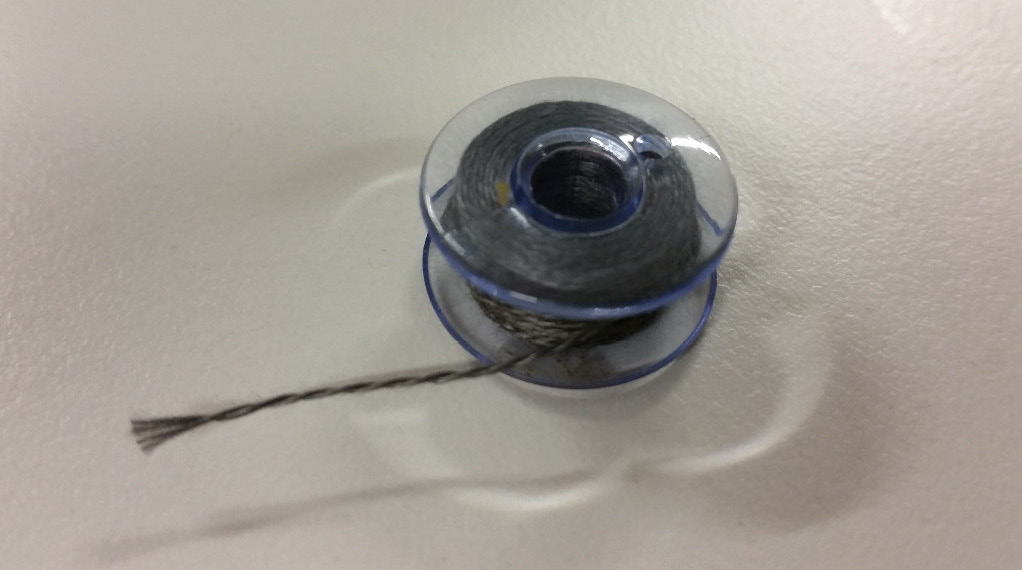
Figure 15.4 – Conductive thread (courtesy: https://upload.wikimedia.org/wikipedia/commons/e/ee/Conductive_thread.jpg)
We also have an assortment of electrical components, such as LEDs, RGB LEDs, WS2812, push buttons, and switches in sewable form, as shown here:
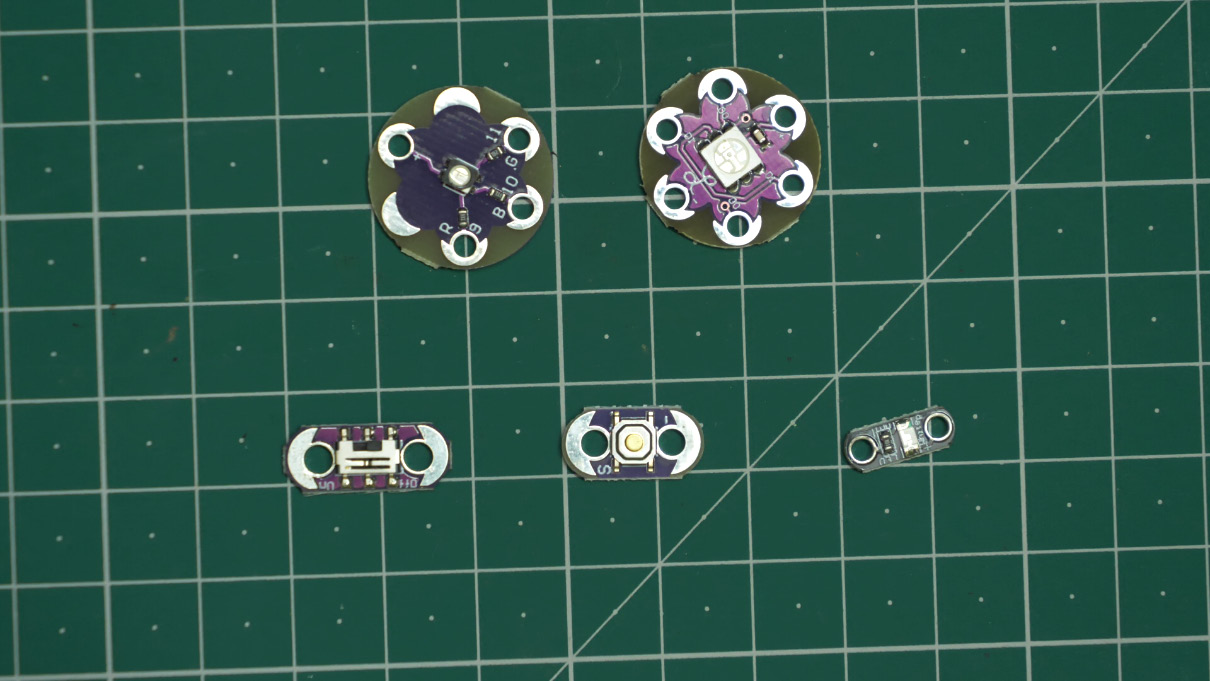
Figure 15.5 – Sewable components
BBC’s Micro:bit may not be the best platform for sewable and wearable computing. However, we can use it for wearable projects with a little effort and ingenuity. The following figure shows a wearable project in progress:
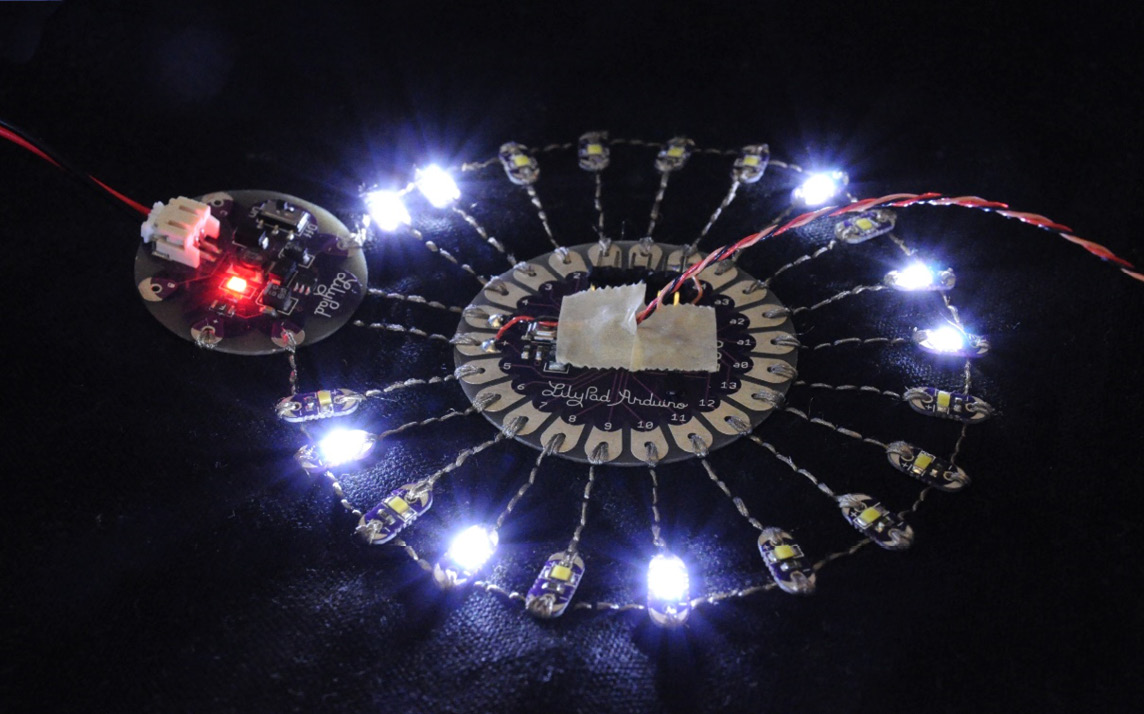
Figure 15.6 – Wearable project using an Arduino Lilypad (courtesy: https://upload.wikimedia.org/wikipedia/commons/e/ea/Lilypad_Arduino_with_fading_LEDs.jpg)
In Figure 15.6, we can see the Arduino Lilypad (a retired product) and LEDs in action. We can use the 0, 1, 2, GND, and 3V pins of the Micro:bit for the sewable project directly. Here, we have to power the Micro:bit with a portable battery pack or a coin cell. Also, as mentioned earlier, with a little bit of ingenuity, we can use the rest of the pins of the Micro:bit to suit our purpose. We can tape the conductive thread with a jumper cable that has a female header, as shown in the following figure:
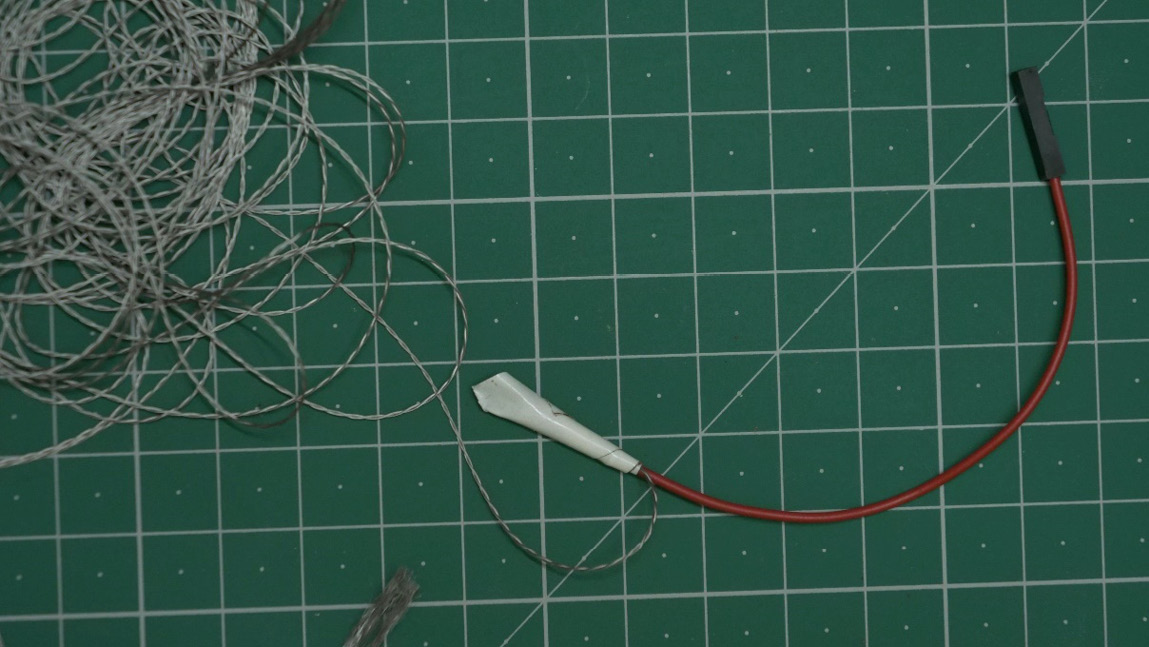
Figure 15.7 – Modified jumper
We can use these modified jumper cables with the combination of Micro:bit and edge connector to use all the possible pins of Micro:bit for our creative project. The conductive thread part of such modified cables will be used for sewing, and the female jumper header part will be used to connect the circuit of our creative sewing project with the edge connector.
Before you start sewing with the conductive thread, you may wish to build a prototype of the circuit using crocodile clips as shown in the following figure:

Figure 15.8 – Prototyping with crocodile clips
Figure 15.8 shows the green-colored section of an RGB LED (in sewable form) powered by the 3V and GND pins of the Micro:bit.
Important note
Use crocodile clips to build prototypes, not for the project itself; the clips don’t work very well in wearable projects. For actual wearable projects, use conductive thread.
Companies such as Adafruit and SparkFun produce all the components that are required for wearable computing. You can get clones of these components from online marketplaces.
With that, we’ve learned how to use a Micro:bit with sewable components to create prototypes and actual wearable projects. As an exercise for this chapter, try building a few simple wearable projects such as a purse or a jacket, and add the RGB LEDs powered by the Micro:bit to add life to the projects.
More programming frameworks
This book is dedicated to learning MicroPython. However, MicroPython is not the only supported programming platform for programming a Micro:bit. We can use many other platforms. The following is a list of programming frameworks that support the Micro:bit:
- Microsoft MakeCode
- Scratch
- C++
- JavaScript
Now, let’s summarize this chapter.
Summary
In this chapter, we explored a unique feature of the Micro:bit. Initially, we explored how can we use the Micro:bit’s accelerometer and develop some real-world applications such as a step counter or a program that detects if a person has fallen. Then, we learned about sewable computing. Sewable computing includes attaching computing nodes and sensors to our clothes with the help of electrically conductive threads so that we can wear them all the time and the relevant data is transmitted to other devices. These devices are very useful for health monitoring and related purposes.
Conclusion
We are pleased that you have reached the end of this book. This book taught you about a very vibrant and compact computing board called the Micro:bit. The BBC develops the board, and it is widely used across the globe for education and development purposes. In this book, we learned how to use this board by implementing its input-output pins, LED buttons, and various sensors. This board is feature rich. A variety of sensors are already available on the board, which reduces the need to depend on other peripheral devices for simple computing purposes. We also learned how to attach external displays. A Micro:bit is capable of listening to our voice commands and even generating speech signals, and we developed interesting applications by implementing these components. We hope that the learning experience in this book has opened the doors for your imagination to be converted into real projects. This book is just the start, and we are sure that you will be developing even more interesting applications using the Micro:bit board.
Further reading
An extensive list of the programming frameworks supported by the Micro:bit and links to the necessary resources has been compiled by Carlos Pereira Atencio. It can be found at https://github.com/carlosperate/awesome-microbit.