
Visual C++ Project
(Note: If you are using Dev-C++, you may skip this section.) Now we’ll create the Visual C++ project for the game engine. I am using Visual C++ 2005 SP1, so that is the format of the projects on the CD. If you are using Visual C++ 2008, the projects will open after they are automatically upgraded to the new project format. Open the File menu and select New, Project to open the New Project dialog shown in Figure 1.7. If you are using an Express edition, you will see fewer items in the list of project templates.

Creating the New Engine Project
This dialog can be pretty convoluted if you aren’t familiar with it. I recommend minimizing everything in the tree besides Visual C++. Locate the Win32 section and choose Win32 Project. The project name should be either Advanced2D or Engine. Let’s first create a new folder to contain the engine project. I have called the folder Engine, but you may use any name you wish (as long as you note the difference when referring to figures in this tutorial). The Visual C++ 2005 (that is, MSVC8) project will be stored in a folder called Enginemsvc8. (If you skipped the previous section, note that we created the Dev-C++ project in Enginedevcpp.)
The source code files will be stored in Engine, but the solution and project files will be stored in Enginemsvc8. Why? The main reason is to keep the project clean. If you store your project file in the same folder with your sources, then the sources will be cluttered with all of the output files generated by the compiler, not to mention the output folders (Debug or Release). Then there are the program database files (.pdb), object files (.obj), IntelliSense file (.ncb), and so forth. Let’s try to keep the project organized, and it will have a more professional feel to it.
AdviceWhen the project wizard appears, you will want to choose Static Library for the project type and uncheck the Precompiled Header option. In addition, be sure to uncheck the Create Directory for Solution option. If you forget to disable this option, Visual C++ will create an additional directory inside .Enginemsvc8, which will not work the way we want. |
Now you’re going to create six new files in the Engine project. You can create a new file using the Project, Add New menu option, and then choose the type of file you want to have added to the project. When you create a new file in Visual C++, it lets you begin writing code and save it later. (The new file will be called something like Source1.cpp by default.) You must save the source files in the main engine folder, Engine. The source files should be saved in Engine, not in Enginemsvc8. Why? It’s a matter of logistics, which we discussed earlier. The source code files will be shared by all of the compilers, and each compiler will have its own dedicated folder, where it will output all object files and other intermediate files generated during compilation. This keeps the engine project clean. Just save each of these files to Engine as you create them:
Advanced2D.h
Timer.h
winmain.h
Advanced2D.cpp
Timer.cpp
winmain.cpp
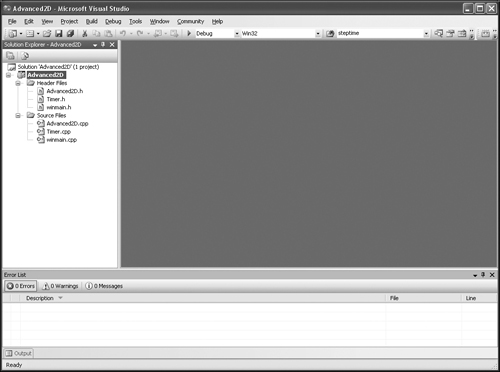
We’ll go over the source code for these files in the upcoming section titled “Engine Source Code.” We’ll leave the new files empty for a while. The project should look something like Figure 1.8 at this point. By default, Visual C++ will also create a new Resources filter in your project file listing, which you may remove or leave as is. (It’s irrelevant.)
Configuring the New Project
Although the source code files are still empty, we’ll just go ahead and configure the project now because the section with the source code (coming up shortly) is applicable to all compilers. Remember: Single source code set, multiple compilers.
Select the project name in the project manager, then right-click and choose Project Properties. (Or you may open the Project menu in Visual C++ and select Properties.) Visual C++ automatically configures new projects to output intermediate files to a folder called either Debug or Release, depending on the configuration currently in use, so we don’t need to specify the object folder as we did for Dev-C++. But we do need to tell Visual C++ where to output the library file.
Open the Configuration Properties item in the tree view and change the Output File field to $(ProjectDir)..lib$(ProjectName).lib, as shown in Figure 1.9. This tells the compiler to send the output file up one folder from the project file (which should be Engine), and from there go into a folder called lib. The entire folder path should be Enginelib. This is the same folder where we configured Dev-C++ to output its library file. Note the difference in filenames, though: Advanced2D.lib versus libAdvanced2D.a for Dev-C++ (which I will explain later).
Figure 1.9. Setting the output file for the Visual C++ static library project.

AdviceYou will need to make the same configuration changes for both Debug and Release builds; otherwise, the Release build will not be configured properly and will not build when you are ready to create the faster version of the engine. In the settings dialog, make the changes as noted and click Apply, then choose Release in the Configuration drop-down list and do the same. |
AdviceI recommend disabling the precompiled header option. Open the Project Settings dialog, choose Configuration Properties, then C/C++, then Precompiled Headers. Set the Create/Use Precompiled Headers option as appropriate. |