11. Working with Styles
Introduction
A style is a group of format settings that you can create or modify to get the exact look you want. In InDesign, you can create two types of styles, character and paragraph. Character styles apply formatting to only character attributes, while paragraph styles apply formatting for both characters and paragraphs attributes.
The styles panels for paragraphs, characters, objects, tables, and cells are centralized places to work with the different types of styles in InDesign. The panels display the current styles in the InDesign document. You can use buttons on the bottom of the panel to quickly create a new style group, clear overrides in a selection, create a new style, and delete styles. If you have styles in one InDesign document that you want to use in another, you can transfer them from one document into another. If you have styles in a word processing document, such as Microsoft Word, you can import them into an InDesign document, too.
After you create styles, you can use any of the style panels or keyboard shortcuts to apply them. However, you can also use the Quick Apply button. The Quick Apply button provides an easy way to apply any style in your InDesign document. You can even use keyboard shortcuts to speed up the process. After you apply a style, you can still apply additional formatting, known as local or override formatting, by using the Control, Paragraph, or Character panels. Instead of applying individual character styles for a line of text, you can create and apply a nested style to do it for you. A nested style is useful for a list of predictable elements on a line, such as a name, address, and phone number.
Using the Paragraph Styles or Character Styles Panel
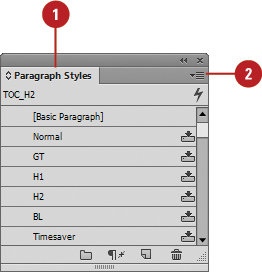
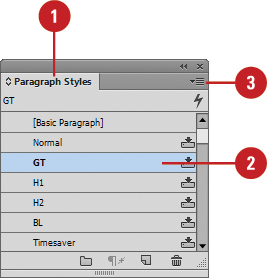
The Paragraph Styles and Character Styles panels are centralized places to work with paragraph and character styles in InDesign. The panels display the current paragraph and character styles in the InDesign document. You can use buttons on the bottom of the panel to quickly create a new style group, clear overrides in a selection (Paragraph only), create a new style, and delete styles. You can also use the Options menu to duplicate and edit styles, as well as sort styles in the panel by name.
Use the Paragraph Styles or Character Styles Panel
![]() Select the Paragraph Styles or Character Styles panel.
Select the Paragraph Styles or Character Styles panel.

♦ Click the Type menu, and then click Paragraph Styles or Character Styles.
![]() Use any of the following buttons or commands to perform an operation:
Use any of the following buttons or commands to perform an operation:
♦ Create a New Style Group. Click the Create New Style Group button to create a folder to organize styles. Double-click the style group, enter a name, and then click OK.
♦ Clear Style Overrides. Select the style, and then click the Clear Overrides button.
♦ Create a New Style. Click the Options button, click New Paragraph or Character Style, make changes to the style, and then click OK.
♦ Delete a Style or Group. Select the style or group, and then click the Delete Selected Style/Groups button.
♦ Edit a Style. Select the style, click the Options button, click Style Options, make changes to the style, and then click OK.
♦ Duplicate a Style. Select the style, click the Options button, click Duplicate Style, enter a name, and then click OK.

Changing the Basic Paragraph Style
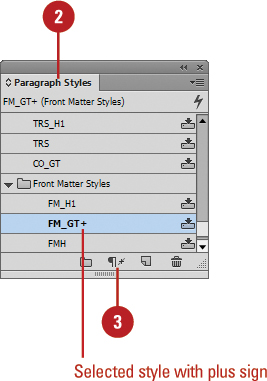
The Basic Paragraph style is the default style for the document and all new text uses this style. You can modify the Basic Paragraph style, or create a new style. To modify the Basic Paragraph style or any style for that matter, adjust the formatting settings for the existing style. When you see a plus (+) sign after the name, it means that the text with the applied style also contains other formatting, which you can redefine.
Redefine the Basic Paragraph Style
![]() Select the Type tool on the Tools panel, and then select text that uses the Basic Paragraph style.
Select the Type tool on the Tools panel, and then select text that uses the Basic Paragraph style.

♦ You can use the same method to redefine any style.
![]() Use the Control, Character, and Paragraph panels to change text attributes.
Use the Control, Character, and Paragraph panels to change text attributes.
![]() Select the Paragraph Styles panel.
Select the Paragraph Styles panel.
♦ Click the Type menu, and then click Paragraph Styles.
A plus (+) sign appears next to the style name.
![]() Click the Options button, and then click Redefine Style.
Click the Options button, and then click Redefine Style.
The plus (+) sign disappears.
![]() To manually change style attributes, select the Basic Paragraph style, and then do the following:
To manually change style attributes, select the Basic Paragraph style, and then do the following:
♦ Click the Options button, and then click Style Options.
♦ View the current settings and make any changes that you want.
♦ Click OK.

Creating Paragraph Styles
A paragraph style is a group of paragraph and character format settings that can be applied to text. You can create a new paragraph style from the formatting of existing text or use the New Paragraph Styles dialog box to specify the formatting and other attributes you want. When you create a new paragraph style with the New Paragraph Styles dialog box, you can create a new style from scratch or base the new style on an existing style and then modify it. You can also select a style for the next paragraph. When you press Enter (Win) or Return (Mac), InDesign automatically switches from the current style to the next style. If you like using keyboard shortcuts, you can attach a shortcut to the style to make it easy to apply.
Create a Paragraph Style from Existing Text
![]() Select the Type tool on the Tools panel, and then select the text that you want to use as the style.
Select the Type tool on the Tools panel, and then select the text that you want to use as the style.

♦ You can use the Control, Character, and Paragraph panels to change text attributes.
![]() Select the Paragraph Styles panel.
Select the Paragraph Styles panel.
♦ Click the Type menu, and then click Paragraph Styles.
![]() Click the Create New Style button on the panel.
Click the Create New Style button on the panel.
![]() To rename the style, double-click the style, enter a name, and then click OK.
To rename the style, double-click the style, enter a name, and then click OK.

Did You Know?
You can delete paragraph styles. Select the Paragraph Styles panel, select the styles you want to delete, and then click the Delete Selected Style button on the panel. If the style is in use, select a replacement style, and then click OK. To select all unused styles to delete, click the Options button, and then click Select All Unused.
♦ Click the Type menu, and then click Paragraph Styles.
![]() Click the Options button, and then click New Paragraph Style.
Click the Options button, and then click New Paragraph Style.
![]() Enter a name for the style.
Enter a name for the style.
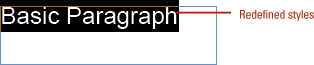
![]() Select the General category, and then specify the following:
Select the General category, and then specify the following:
♦ Based On. Select a style to use as the base for the new style.
♦ Next Style. Select a style to use as the style for the next paragraph when you press Enter (Win) or Return (Mac).
♦ Shortcut. Press a keyboard combination to create a shortcut for the style.
![]() Select each category to set text attributes.
Select each category to set text attributes.
♦ Basic Character Formats.
♦ Advanced Character Formats.
♦ Indents and Spacing.
♦ Tabs.
♦ Paragraph Rules.
♦ Keep Options.
♦ Hyphenation.
♦ Justification.
♦ Span Columns.
♦ Drop Caps and Nested Styles.
♦ GREP Style.
♦ Bullets and Numbering.
♦ Character Color.
♦ OpenType Features.
♦ Underline Options.
♦ Strikethrough Options.
♦ Export Tagging.
![]() View the current settings and make any changes that you want.
View the current settings and make any changes that you want.
![]() Click OK.
Click OK.
Creating Character Styles
A character style is a group of format settings that is applied to any block of text. Rather than formatting text from the Control or Character panels, using the character styles features allows you to quickly make changes later. You can create a new character style from the formatting of existing text or use the New Character Style dialog box to specify the formatting and other attributes you want. When you create a new character style with the New Character Style dialog box, you can create a new style from scratch or base the new style on an existing style and then modify it. If you like using keyboard shortcuts, you can attach a shortcut to the style to make it easy to apply.
Create a Character Style
![]() Select the Type tool on the Tools panel, and then select the text that you want to use as the style.
Select the Type tool on the Tools panel, and then select the text that you want to use as the style.

♦ You can use the Control, Character, and Paragraph panels to change text attributes.
![]() Select the Character Styles panel.
Select the Character Styles panel.
♦ Click the Type menu, and then click Character Styles.
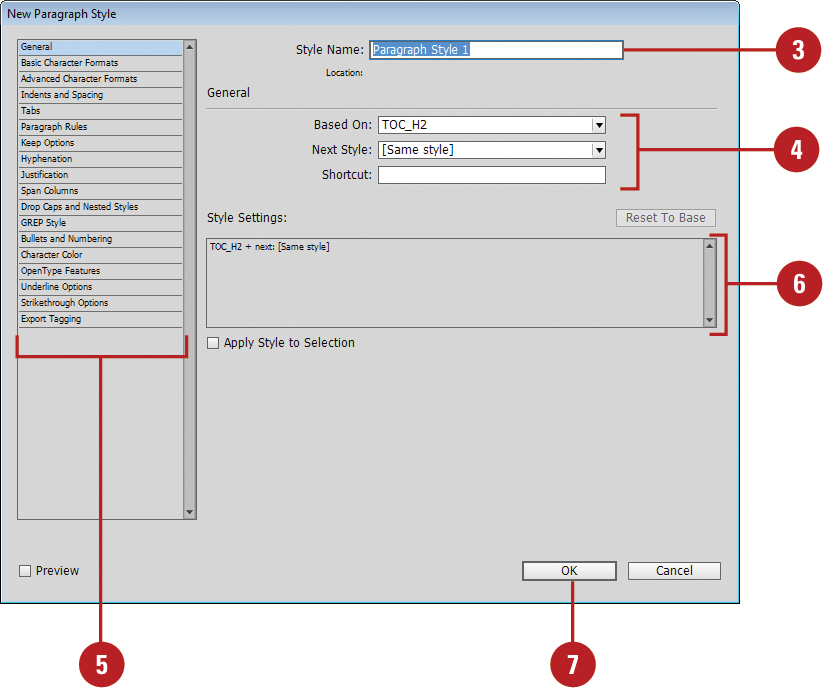
![]() Click the Create New Style button on the panel.
Click the Create New Style button on the panel.
![]() To rename the style, double-click the style, enter a name, and then click OK.
To rename the style, double-click the style, enter a name, and then click OK.
Did You Know?
You can delete character styles. Select the Characters Styles panel, select the styles you want to delete, and then click the Delete Selected Style button on the panel. If the style is in use, select a replacement style, select the Preserve Formatting check box to convert the style into local formatting, and then click OK. To select all unused styles to delete, click the Options button, and then click Select All Unused.
♦ Click the Type menu, and then click Character Styles.
![]() Click the Options button, and then click New Character Style.
Click the Options button, and then click New Character Style.
![]() Enter a name for the style.
Enter a name for the style.
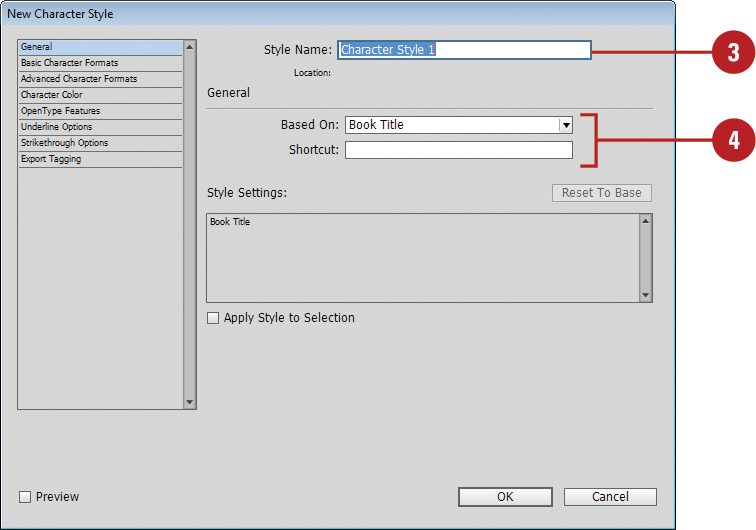
![]() Select the General category, and then specify the following:
Select the General category, and then specify the following:
♦ Based On. Select a style to use as the base for the new style.
♦ Shortcut. Press a keyboard combination to create a shortcut for the style.
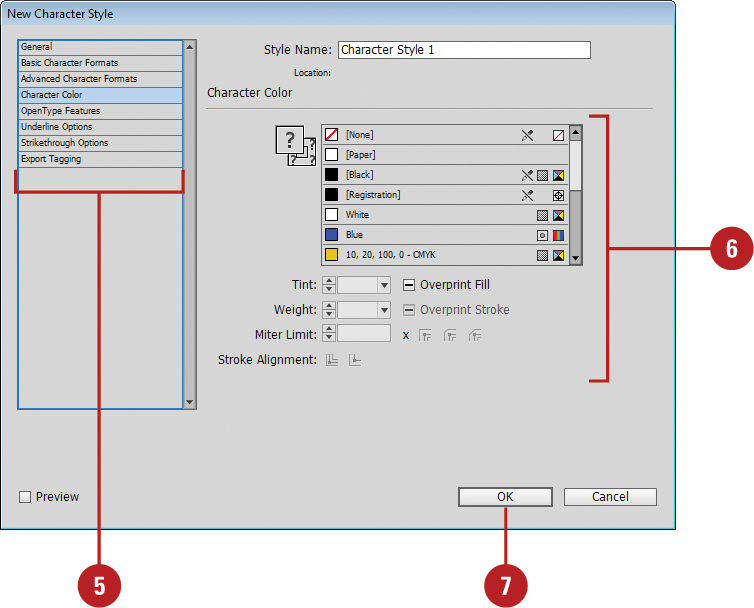
![]() Select each category to set text attributes.
Select each category to set text attributes.
♦ Basic Character Formats.
♦ Advanced Character Formats.
♦ Character Color.
♦ OpenType Features.
♦ Underline Options.
♦ Strikethrough Options.
♦ Export Tagging.
![]() View the current settings and make any changes that you want.
View the current settings and make any changes that you want.
![]() Click OK.
Click OK.
See Also
See “Mapping Styles to Export Tags” on page 322 for more information on ways to map styles.
Creating GREP Styles
A GREP expression is an advanced method for locating text and special characters in a document. GREP (Global Regular Expression Print) is used by the Find/Change dialog box to find and replace text and special characters, such as tabs, ends of paragraphs, white space, variables, and wildcards. You can create a style to apply a character style to text that conforms to a GREP expression. A GREP style is a Character style with a GREP expression. When text matches the GREP expression, the character style is applied to the text. In the GREP Styles and Find/Change dialog boxes (where you can select a character or paragraph style), you can create a style without having to exit the dialog box.
Create a GREP Style
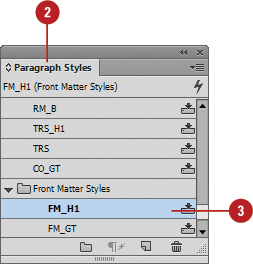
![]() Select the Paragraph Styles panel.
Select the Paragraph Styles panel.
♦ Click the Type menu, and then click Paragraph Styles.
![]() Click the Options button, and then click New Paragraph Style.
Click the Options button, and then click New Paragraph Style.

♦ To add a GREP expression to an existing style, select the style, click the Options button, and then click Style Options.
![]() Enter a name for the style.
Enter a name for the style.
![]() Select each category to set text attributes.
Select each category to set text attributes.
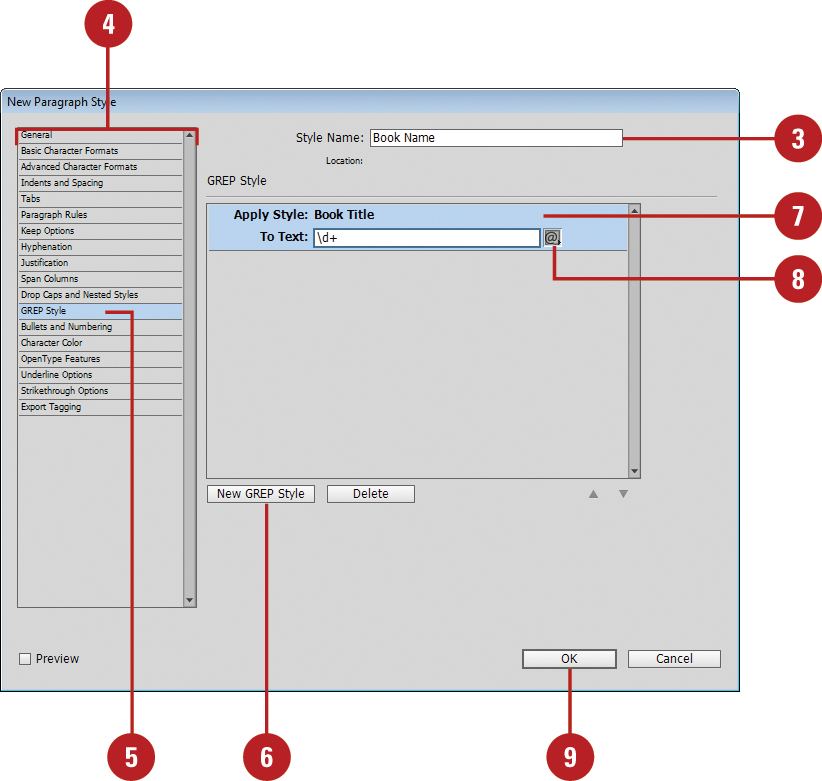
![]() Select the GREP Style category.
Select the GREP Style category.
![]() Click New GREP Style.
Click New GREP Style.
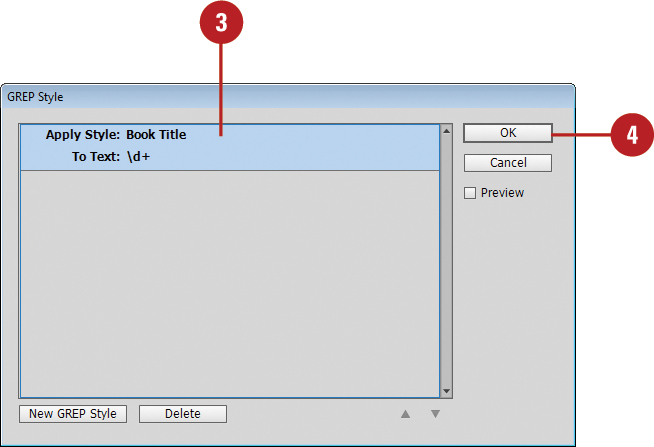
![]() Click to the right of Apply Style, and then select a character style or click New Character Style to create one.
Click to the right of Apply Style, and then select a character style or click New Character Style to create one.
![]() Click to the right of To Text, and then enter a search expression or click the Special Character For Search icon to the right to display a menu. Choose options from the Locations, Repeat, Match, Modifiers, and Posix submenus to help construct the GREP expression.
Click to the right of To Text, and then enter a search expression or click the Special Character For Search icon to the right to display a menu. Choose options from the Locations, Repeat, Match, Modifiers, and Posix submenus to help construct the GREP expression.
![]() Click OK.
Click OK.
Creating Style Groups
As you continue to create styles, the list in the Paragraph and Character panels can become long and difficult to use. A style group is a folder you can use to organize styles in the Paragraph or Character panels. This can help you reduce the clutter in the panels and make it easier to find and work with the styles you want. After you create a style group, you can drag styles into it, just like you drag files into a folder in Windows Explorer (Win) or Finder (Mac).
Create a Style Group and Move Styles into the Group
![]() Select the Paragraph Styles or Character Styles panel.
Select the Paragraph Styles or Character Styles panel.
♦ Click the Type menu, and then click Paragraph Styles or Character Styles.
![]() Click the Create New Style Group button on the panel.
Click the Create New Style Group button on the panel.
♦ You can also select styles, click the Options button, and then click New Group from Styles.
♦ You can also Alt+click (Win) or Option+click (Mac) the Create New Style Group to display the New Style Group dialog box.
![]() Double-click the new style group.
Double-click the new style group.
♦ You can also click the style group name to select it, click it again to edit it, and then press Enter (Win) or Return (Mac).
![]() Enter a name for the style group.
Enter a name for the style group.
![]() Click OK.
Click OK.

![]() To move styles into the group, select a style, and then drag it into the new style group.
To move styles into the group, select a style, and then drag it into the new style group.
![]() To copy styles into the group, select a style, click the Options button, click Copy to Group, select the group, and then click OK.
To copy styles into the group, select a style, click the Options button, click Copy to Group, select the group, and then click OK.

Loading and Importing Styles
If you have styles in one InDesign document that you want to use in another, you can transfer (or load) them from one document into another. If you have styles in a word processing document, such as a Microsoft Word file, you can import them into an InDesign document, too. When you place text from a word processing document, the styles associated with the text are added to the Paragraph or Character panels in the InDesign document. When you add styles to an InDesign document, there may be times when style names are the same. In this case, you need to resolve the conflict between the styles. Style names are case-sensitive, so the name Header text is different than header text. If you want text with an imported style to be used by a current style, you can map the incoming style to the current style. This way, you don’t have to reapply the text style.
Load Styles from an InDesign Document
![]() Select the Paragraph Styles or Character Styles panel.
Select the Paragraph Styles or Character Styles panel.
♦ Click the Type menu, and then click Paragraph Styles or Character Styles.
![]() Click the Options button, and then click Load Character Styles, Load Paragraph Styles, or Load All Text Styles.
Click the Options button, and then click Load Character Styles, Load Paragraph Styles, or Load All Text Styles.

![]() Navigate to the document with text styles that you want to open.
Navigate to the document with text styles that you want to open.
![]() Click the file you want to open.
Click the file you want to open.
![]() Click Open. If a conflict occurs, the Load Styles dialog box appears.
Click Open. If a conflict occurs, the Load Styles dialog box appears.
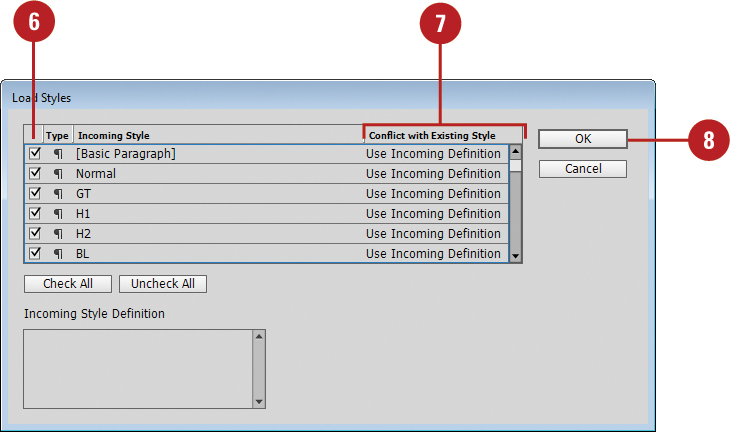
![]() Select the check boxes for the styles you want to load and deselect the check boxes for the styles you don’t want to load.
Select the check boxes for the styles you want to load and deselect the check boxes for the styles you don’t want to load.
![]() For each checked style, click the Conflict With Existing Style list arrow, and then select an option:
For each checked style, click the Conflict With Existing Style list arrow, and then select an option:
♦ Auto-Rename. Add a suffix to create a new style name.
♦ Use Incoming Definition. Changes the existing style to match the imported style.
![]() Click OK.
Click OK.
![]() Navigate to the document with text styles that you want to open.
Navigate to the document with text styles that you want to open.
![]() Click the file you want to open.
Click the file you want to open.
![]() Select the Show Import Options check box.
Select the Show Import Options check box.
![]() Click Open.
Click Open.

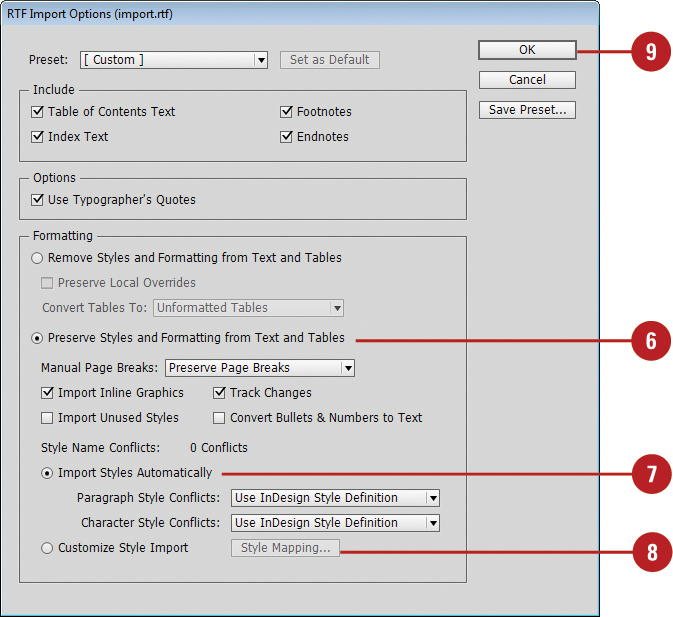
![]() Click the Preserve Styles and Formatting from Text and Tables option.
Click the Preserve Styles and Formatting from Text and Tables option.
![]() To resolve style conflicts automatically, click the Import Styles Automatically option, and then select conflict options:
To resolve style conflicts automatically, click the Import Styles Automatically option, and then select conflict options:
♦ Use InDesign Style Definition. Select to have InDesign styles override incoming styles.
♦ Redefine InDesign Style. Select to have incoming styles override InDesign styles.
♦ Auto Rename. Select to add incoming styles to the list of InDesign styles.
![]() To map styles, click the Customize Style Import option, click Style Mapping, select a style under the InDesign Style column for each incoming Word style, and then click OK.
To map styles, click the Customize Style Import option, click Style Mapping, select a style under the InDesign Style column for each incoming Word style, and then click OK.
![]() Click OK.
Click OK.
Applying and Overriding Styles
After you create paragraph and character styles, you can use the Paragraph Styles and Character Styles panels or keyboard shortcuts to apply styles to text. For a GREP style, you can use the GREP styles dialog box to apply styles to selected paragraphs. After you apply a style, you can still apply additional formatting, known as local or override formatting, by using the Control, Paragraph, or Character panels. When the applied style also contains other formatting, a plus sign (+) appears after the style name, which you can remove to redefine the style. You can use the Clear Override button on the Paragraph Styles panel to remove formatting overrides in a text selection.
Apply Styles
![]() Select the Type tool on the Tools panel, and then select the text that you want to change.
Select the Type tool on the Tools panel, and then select the text that you want to change.

For paragraph styling, select a text frame or select paragraphs. For character styling, select specific text, not a text frame.
♦ You can also select the Selection tool, and then click the text frame to change all text in the frame.
![]() Select the Character Styles or Paragraph Styles panel.
Select the Character Styles or Paragraph Styles panel.
![]() Click a style name in one of the panels, or press the keyboard shortcut defined for the style.
Click a style name in one of the panels, or press the keyboard shortcut defined for the style.

Did You Know?
You can apply the next style. Select the text to which you want to apply the next style, select the Paragraph Styles panel, right-click (Win) or Control-click (Mac) the next style, click Apply name of style then Next Style.
You can break the link to a style. Click to place an insertion point in the paragraph in which you want to break, click the Options button in the Paragraph Styles or Character Styles panel, and then click Break Link To Style.
Apply GREP Styles
![]() Select the Type tool on the Tools panel, and then select the paragraphs for which you want to change styles.
Select the Type tool on the Tools panel, and then select the paragraphs for which you want to change styles.
For paragraph styling, select a text frame or select paragraphs.
![]() Click the Control panel menu, and then click GREP Styles.
Click the Control panel menu, and then click GREP Styles.
![]() Select a GREP style.
Select a GREP style.
![]() Click OK to apply the style.
Click OK to apply the style.
Clear Style Overrides
![]() Select the Type tool on the Tools panel, and then select the text that you want to clear.
Select the Type tool on the Tools panel, and then select the text that you want to clear.

![]() Select the Paragraph Styles panel.
Select the Paragraph Styles panel.
![]() Use any of the following:
Use any of the following:
♦ Clear Local Formatting in a Selection. Click the Clear Overrides button on the panel.
♦ Clear Local Character Formatting in a Selection. Ctrl+click (Win) or ![]() +click (Mac) the Clear Overrides button on the panel.
+click (Mac) the Clear Overrides button on the panel.
♦ Clear Local Paragraph Formatting in a Selection. Ctrl+Shift+click (Win) or ![]() +Shift+click (Mac) the Clear Overrides button on the panel.
+Shift+click (Mac) the Clear Overrides button on the panel.

Creating Nested Styles
Instead of applying individual character styles for a line of text, you can create and apply a nested style to do it for you. A nested style is useful for a list of predictable elements, such as a name, address, and phone number, on a line. You can also create and use nested inline styles to apply complex character formatting through the end of a line. Before you create a nested style, you need to create the individual characters that you want to make up the nested style. If you want a nested style to end at a certain place in the text, you can insert the End Nested Style Here special character.
Create a Nested Line Style
![]() Select the Paragraph Styles panel.
Select the Paragraph Styles panel.
♦ Click the Type menu, and then click Paragraph Styles.
![]() Click the Options button, and then click New Paragraph Style.
Click the Options button, and then click New Paragraph Style.
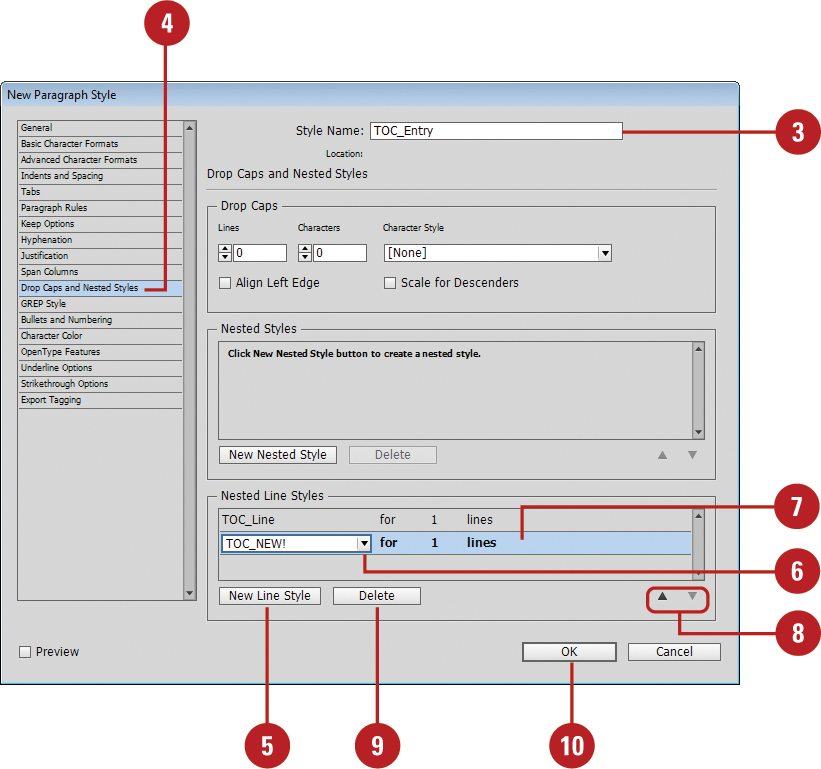
![]() Enter a name for the style.
Enter a name for the style.
![]() Select the Drop Caps and Nested Styles category.
Select the Drop Caps and Nested Styles category.
![]() Click New Line Style.
Click New Line Style.
![]() Click the Nested Line Styles list arrow for each line style, and then select a line style or click New Line Style to create one.
Click the Nested Line Styles list arrow for each line style, and then select a line style or click New Line Style to create one.
♦ To loop two or more nested styles, select Repeat from the list arrow.
![]() Enter a value for the number of repeating lines for each line style.
Enter a value for the number of repeating lines for each line style.
![]() To move a style up or down the list, click the Up or Down arrow.
To move a style up or down the list, click the Up or Down arrow.
![]() To remove a style, select it, and then click Delete.
To remove a style, select it, and then click Delete.
![]() Click OK.
Click OK.
♦ Click the Type menu, and then click Paragraph Styles.
![]() Click the Options button, and then click New Paragraph Style.
Click the Options button, and then click New Paragraph Style.
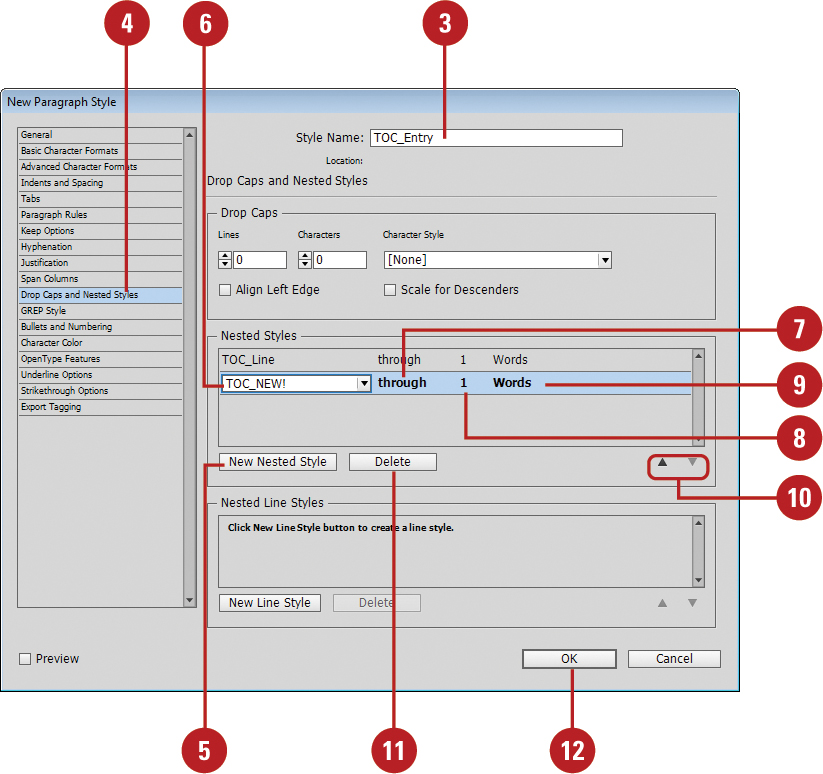
![]() Enter a name for the style.
Enter a name for the style.
![]() Select the Drop Caps and Nested Styles category.
Select the Drop Caps and Nested Styles category.
![]() Click New Nested Style.
Click New Nested Style.
![]() Click the Nested Styles list arrow for each nested style, and then select a nested style or click New Nested Style to create one.
Click the Nested Styles list arrow for each nested style, and then select a nested style or click New Nested Style to create one.
♦ To loop two or more nested styles, select Repeat from the list arrow.
![]() Click the Duration list arrow for each nested style, and then click Through to include the repeating elements or Up to to not include the repeating elements.
Click the Duration list arrow for each nested style, and then click Through to include the repeating elements or Up to to not include the repeating elements.
![]() Enter a value for the number of repeating elements for each nested style.
Enter a value for the number of repeating elements for each nested style.
![]() Click the Repeating Element list arrow for each nested style, and then select which element controls the nested style.
Click the Repeating Element list arrow for each nested style, and then select which element controls the nested style.
![]() To move a style up or down the list, click the Up or Down arrow.
To move a style up or down the list, click the Up or Down arrow.
![]() To remove a style, select it, and then click Delete.
To remove a style, select it, and then click Delete.
![]() Click OK.
Click OK.
Creating Object Styles
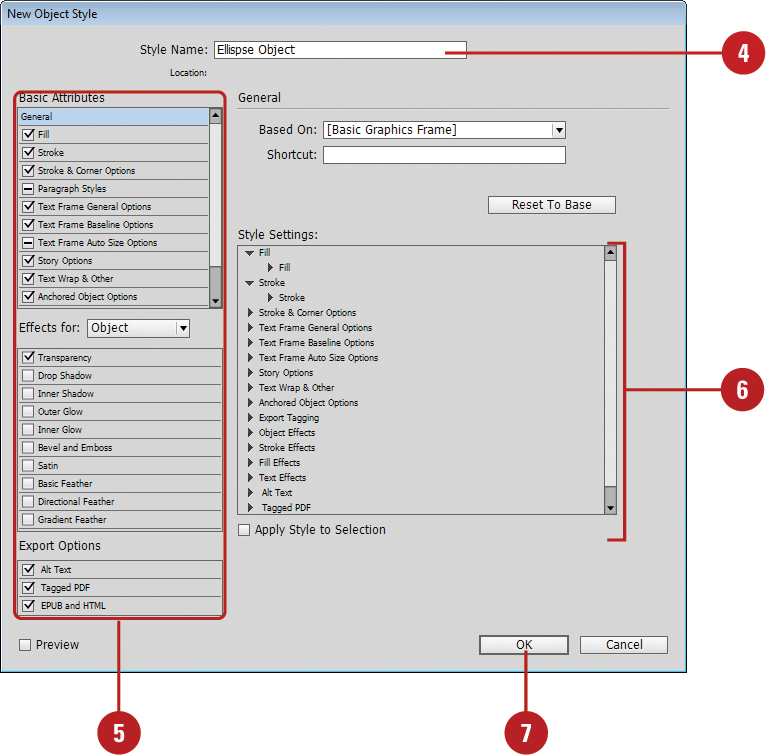
In the same way you create paragraph and character styles, you can also create and modify styles for objects. InDesign comes with two default objects styles, one for a graphics frame and another for a text frame. There is also a style for None, which removes all formatting from an object. You can create and modify object styles in the Object Styles panel and Object Style Option dialog box, which includes exporting options (New!) for alt text, tagging, and EPUB and HTML; for option details, see the topic on page 452. Just as when using text styles, when the applied style also contains other formatting, a plus sign (+) appears after the style name, which you can remove, redefine, or clear.
View and Apply Object Styles
![]() Select the object to which you want to apply a style.
Select the object to which you want to apply a style.
![]() Select the Object Styles panel.
Select the Object Styles panel.
♦ Click the Window menu, point to Styles, and then click Object Styles.
![]() Click one of the built-in styles: [Basic Graphics Frame], [Basic Text Frame], or [None] or a custom style.
Click one of the built-in styles: [Basic Graphics Frame], [Basic Text Frame], or [None] or a custom style.

Modify the Default Object Styles
![]() Select the object to which you want to apply a style.
Select the object to which you want to apply a style.
![]() Select the Object Styles panel.
Select the Object Styles panel.
♦ Click the Window menu, point to Styles, and then click Object Styles.
![]() Double-click [Basic Graphics Frame] or [Basic Text Frame].
Double-click [Basic Graphics Frame] or [Basic Text Frame].
![]() Select each main category (New!) to set individual object style options.
Select each main category (New!) to set individual object style options.
![]() Select the General category, and then view Style Settings to see a description of the completed style.
Select the General category, and then view Style Settings to see a description of the completed style.
![]() Click OK.
Click OK.

![]() Select the Object Styles panel.
Select the Object Styles panel.
♦ Click the Window menu, point to Styles, and then click Object Styles.
![]() Click the Options button, and then click New Object Style.
Click the Options button, and then click New Object Style.
♦ You can also Alt+click (Win) or Option+click (Mac) the New Object Style button on the panel.
![]() Enter a name for the style.
Enter a name for the style.
![]() If you didn’t select an object or if you want add more options, select each main category (New!) to set individual object style options.
If you didn’t select an object or if you want add more options, select each main category (New!) to set individual object style options.
![]() Select the General category, and then view Style Settings to see a description of the completed style.
Select the General category, and then view Style Settings to see a description of the completed style.
![]() Click OK.
Click OK.
Clear Object Style Overrides
![]() Select the object that local formatting applied.
Select the object that local formatting applied.

![]() Select the Object Styles panel.
Select the Object Styles panel.
♦ Click the Window menu, point to Styles, and then click Object Styles.
![]() Use any of the following:
Use any of the following:
♦ Clear Local Formatting Not Defined in the Style. Click the Clear Attributes Not Defined by Style button on the panel.
♦ Clear Local Formatting in a Selection. Click the Clear Overrides button on the panel.

Creating Table and Cell Styles
You can use the Table Styles or Cell Styles panels to create, apply, import, modify, and organize table and cell styles. In the Table Styles and Cell Styles panels, you can perform the same operations as in other style panels, including creating a style group, clearing overrides, creating a new style, and deleting styles. You can also use the Options menu to duplicate and edit styles, select all unused styles, as well as sort styles in the panel by name. When you create a table style, you can use cell styles, so you should create your cell styles before you create table styles.
Create Cell Styles
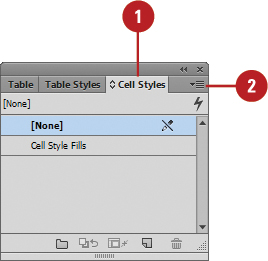
![]() Select the Cell Styles panel.
Select the Cell Styles panel.
♦ Click the Window menu, point to Styles, and then click Cell Styles.
![]() Click the Options button, and then click New Cell Style.
Click the Options button, and then click New Cell Style.
♦ You can also Alt+click (Win) or Option+click (Mac) the Create New Style button on the panel.
![]() Enter a name for the style.
Enter a name for the style.
![]() Select the General category, and then specify the following:
Select the General category, and then specify the following:
♦ Based On. Select a style to use as the base for the new style.
♦ Shortcut. Press a keyboard combination to create a shortcut for the style.
♦ Paragraph Styles. Select a default paragraph style for the table cells.
![]() Select each main category (Text, Strokes and Fills, and Diagonal Lines) to set individual cell attributes.
Select each main category (Text, Strokes and Fills, and Diagonal Lines) to set individual cell attributes.
![]() Select the General category, and then view Style Settings to see a description of the completed style.
Select the General category, and then view Style Settings to see a description of the completed style.
![]() Click OK.
Click OK.

♦ Click the Window menu, point to Styles, and then click Table Styles.
![]() Click the Options button, and then click New Table Style.
Click the Options button, and then click New Table Style.

♦ You can also Alt+click (Win) or Option+click (Mac) the Create New Style button on the panel.
![]() Enter a name for the style.
Enter a name for the style.
![]() Select the General category, and then specify the following:
Select the General category, and then specify the following:
♦ Based On. Select a style to use as the base for the new style.
♦ Shortcut. Press a keyboard combination to create a shortcut for the style.
♦ Cell Styles. Select a default cell style for the table cells.
![]() Select each main category (Table Setup, Row Strokes, Column Strokes, and Fills) to set individual table attributes.
Select each main category (Table Setup, Row Strokes, Column Strokes, and Fills) to set individual table attributes.

![]() Select the General category, and then view Style Settings to see a description of the completed style.
Select the General category, and then view Style Settings to see a description of the completed style.
![]() Click OK.
Click OK.

Did You Know?
You can delete and clear table and cell styles. In the Table Styles or Cell Styles panel, select the styles, and then click the Delete Selected Style/Groups or Clear Overrides button on the panel.
Using Quick Apply
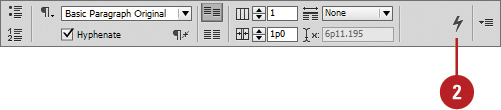
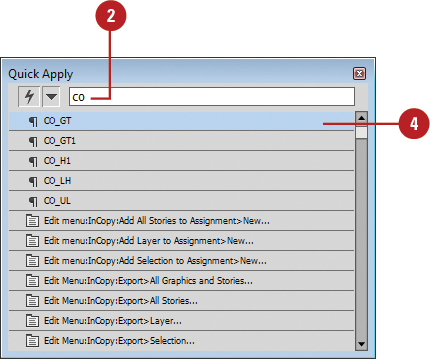
The Quick Apply button that is available on the right side of the Control panel and any of the style panels provides an easy way to apply any style in your InDesign document. You can use all available keyboard shortcuts to speed up the process. If you want to edit a style, you can access the style dialog box to make changes. If the list of styles is so long it is hard to find the one you want, you can use the Search box to help you find a style by name or style prefix. The prefixes are internally set by InDesign. The prefixes include p: for paragraph styles, c: for character styles, and o: for object styles, to name a few. In addition to styles, you can also use Quick Apply to apply menu commands, text variables, and scripts.
Use Quick Apply
![]() Select the text, table, or object to which you want to apply the style.
Select the text, table, or object to which you want to apply the style.
![]() Click the Quick Apply button on the Control panel or any of the style panels.
Click the Quick Apply button on the Control panel or any of the style panels.
Timesaver
Press Ctrl (Win) or ![]() (Mac), and then press Enter (Win) or Return (Mac).
(Mac), and then press Enter (Win) or Return (Mac).
♦ Quick Apply remembers your last selected style, so you can simply press Enter (Win) or Return (Mac) to apply it.
![]() To narrow down the list of styles, type the first letters in the style name.
To narrow down the list of styles, type the first letters in the style name.
![]() Use the Up and Down arrow keys to move up and down the list of styles to find the one you want.
Use the Up and Down arrow keys to move up and down the list of styles to find the one you want.
![]() Click the style you want to apply or press Enter (Win) or Return (Mac) to apply the selected style.
Click the style you want to apply or press Enter (Win) or Return (Mac) to apply the selected style.

The Quick Apply dialog box closes.
![]() To apply a style without closing the Quick Apply dialog box, press Shift+Enter (Win) or Shift+Return (Mac).
To apply a style without closing the Quick Apply dialog box, press Shift+Enter (Win) or Shift+Return (Mac).
Edit Styles with Quick Apply
![]() Click the Quick Apply button on the Control panel or any of the style panels.
Click the Quick Apply button on the Control panel or any of the style panels.
![]() To narrow down the list of styles, type the first letters in the style name.
To narrow down the list of styles, type the first letters in the style name.
![]() Use the Up and Down arrow keys to move up and down the list of styles to find the one you want.
Use the Up and Down arrow keys to move up and down the list of styles to find the one you want.
![]() Press Ctrl+Enter (Win) or
Press Ctrl+Enter (Win) or ![]() +Return (Mac) to open the dialog box for the selected style.
+Return (Mac) to open the dialog box for the selected style.
![]() Make the changes you want, and then click OK.
Make the changes you want, and then click OK.
Use Letter Commands with Quick Apply
![]() Click the Quick Apply button on the Control panel or any of the style panels.
Click the Quick Apply button on the Control panel or any of the style panels.
![]() To narrow down the list of styles, click the Down Arrow, and then select (check) or deselect (uncheck) the styles you want to view in the list.
To narrow down the list of styles, click the Down Arrow, and then select (check) or deselect (uncheck) the styles you want to view in the list.
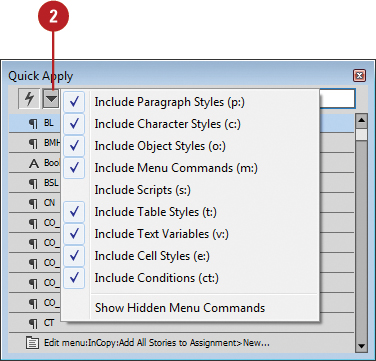
![]() Type the prefix for the style type (see illustration for prefixes) and then continue to type the first letters in the style name.
Type the prefix for the style type (see illustration for prefixes) and then continue to type the first letters in the style name.
![]() Use the Up and Down arrow keys to move up and down the list of styles to find the one you want.
Use the Up and Down arrow keys to move up and down the list of styles to find the one you want.
![]() Press Enter (Win) or Return (Mac) to apply the selected style.
Press Enter (Win) or Return (Mac) to apply the selected style.
Mapping Styles to Export Tags
In order to prepare your document styles for export in EPUB, HTML, or PDF output, you need to map styles to export tags. Mapping styles to export tags specifies how you want to translate your paragraph, character and object (New!) styles into HTML or PDF tags. By mapping styles to tags, you’ll ensure the best export results. For EPUB and HTML, you can specify CSS (Cascading Style Sheets) class names (optional) to differentiate between variations in styling. For example, you can map an InDesign body text style to an HTML <p> tag, and then add a class named paragraph1 to differentiate between a typical paragraph and the first paragraph. You can define individual mapping styles using the paragraph, character or object Style Options dialog box or all mapping styles (not object) in one place using the Edit All Export Tags dialog box.
Map Styles to Export Tags
![]() Select the Object Styles (New!), Paragraph Styles, or Character Styles panel.
Select the Object Styles (New!), Paragraph Styles, or Character Styles panel.
♦ Click the Type menu, and then click Object Styles, Paragraph Styles, or Character Styles.
![]() Select the style you want to map.
Select the style you want to map.
![]() Click the Options button, and then click Style Options.
Click the Options button, and then click Style Options.
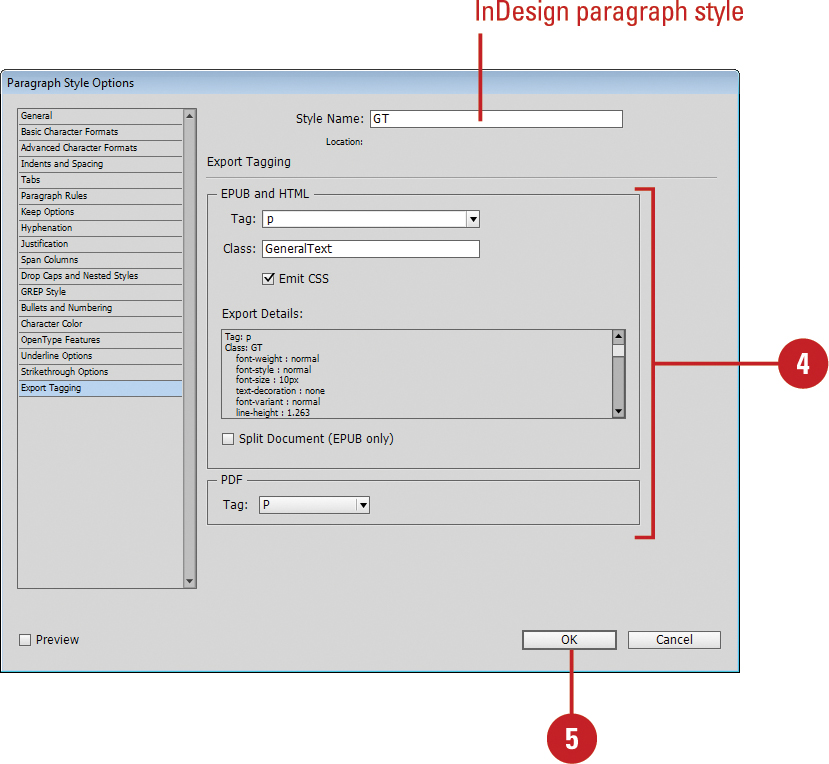
![]() Select the Export Tagging category, and then specify the following:
Select the Export Tagging category, and then specify the following:
♦ Tag (EPUB and HTML). Select a tag for EPUB and HTML output.
♦ Class (EPUB and HTML). Specify a class to generate style definitions for tags (optional).
♦ Emit CSS (EPUB and HTML). Select to use the set class name if a conflict occurs (New!).
♦ Split Document (EPUB). Adds a break after the style.
♦ Tag (PDF) Select a tag for PDF output; paragraph styles only.
![]() Click OK.
Click OK.
See Also
See “Exporting Tags for EPUB and HTML” on page 451 for details on using the Edit All Export Tags dialog box.